
As a part of Elegant Themes’ Divi Design Initiative, Kenny and the design team have been spoiling us with brand new FREE Divi layout packs every week. The layout packs can be downloaded from the blog post featuring the layout pack every Monday. Many of you have used the layout packs to build brand new websites in a very small fraction of the time it would normally take you.
In today’s post, I’m going to show you how to get the most out of these layouts by offering 10 key steps to follow when using a new Divi Layout pack for your next project. I’ve also included some not-so-well-known tips to handle these layouts like a pro.
Enjoy!
Note: Like all steps, these are meant to be done in the order that they are listed. For example if you don’t set your default color palette first, it won’t be available when you go to change your default accent color.
10 Steps to Using a New Divi Layout Pack for your Next Project
Subscribe To Our Youtube Channel
#1 Import the layouts to your Divi Library First
The best way to add new layouts to your Divi Theme is to import them into the Divi Library first. Then, when creating a new page, you can add the new layout from your library.
Before you add the layouts to your website, you need to make sure and download the layout pack from the blog post and unzip the file.
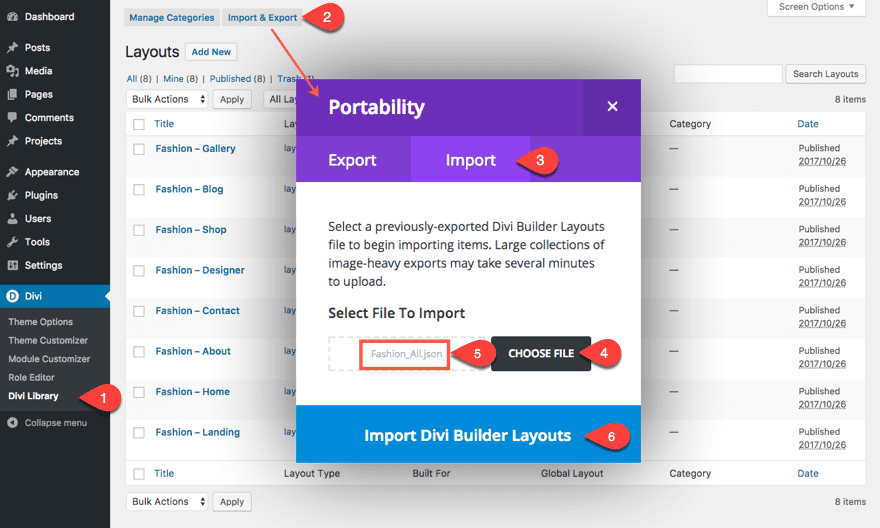
From your WordPress Dashboard, go to Divi > Divi Library and click the Import & Export button at the top left of the page. In the portability modal that pops up, select the import tab and click choose file. Find the unzipped layout pack folder and select the json file with “All” in the filename. This will upload all of the layouts to your library at once, instead of having to do each of them individually. For example, if you are wanting to upload the fashion layout pack, you would choose the file named Fashion_All.json from the layout folder. Then click Import Divi Builder Layouts.
#2 Add Layouts to New Pages
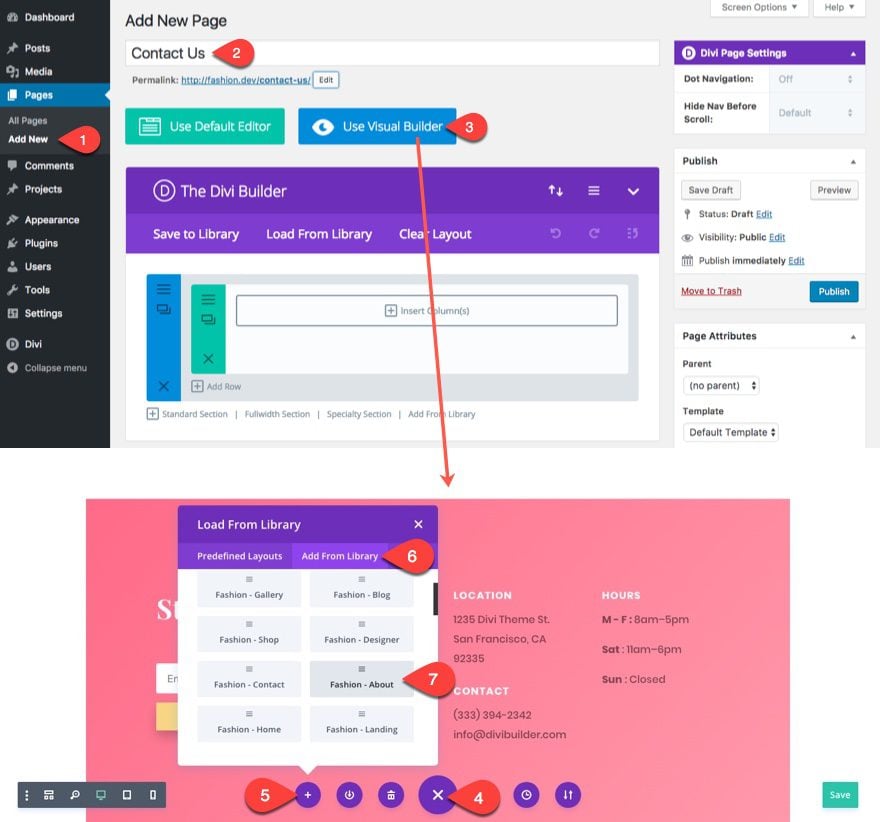
This process is pretty straightforward. From your WordPress Dashboard, go to Pages > Add New. Enter the Title of the page you need to create. Click to use the Divi Builder and deploy the Visual Builder. Open the settings menu at the bottom of the page and click the “Load From Library” plus icon on the left. In the Load from Library modal that pops up, click the “Add From Library” tab and select the new layout from the list to load the new layout.
Repeat this process for each new page, adding a new layout to each one.
#3 Create your primary menu
If this is a new install, you will start to see these new pages in your primary menu bar in the top header. This is because you don’t have a primary menu created yet so by default your menu will get populated by all pages and posts you add to your site.
To create your primary menu, go to the WordPress dashboard do the following:
1. Navigate to Appearance > Menus.
2. Select the “Create a new menu” link at the top of the page.
3. Enter a menu name.
4. Select your menu items in the left toggle under Pages.
5. Click Add to Menu
6. Organize your menu items by dragging them into place.
7. Under menu Settings at the bottom of the page, select “primary menu” as the display location.
8. Save menu

#4 Set your Default Color Palette
I often forget to do this step and regret it everytime. Setting you default color palette makes it really convenient to edit colors using the Divi builder. I can’t tell you how many times I have to go back to another module to find a color code, or inspect an item using developer tools, or use my eye dropper browser extension just find the same color I’ve been using over and over again. Don’t do this to yourself!
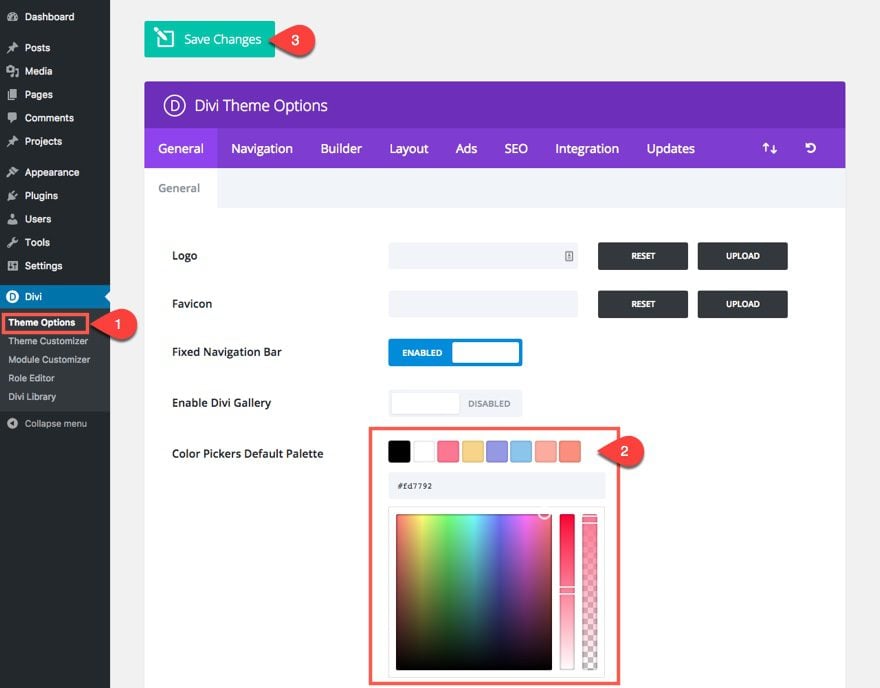
You can set the default color palette by going to your WordPress Dashboard and navigating to Divi > Theme Options. And right there in the general tab you will find the option listed. Add the colors your need there. It is always a good idea to keep the color white (#ffffff) and a couple of dark colors (like #333333 or whatever you have set for your dark font color) to be used for styling backgrounds and text easily.
#5 Set your Global Accent Color
You will probably find your way to the Theme Customizer fairly early in your process of customizing your new site. When you do, you should change the global accent color first.
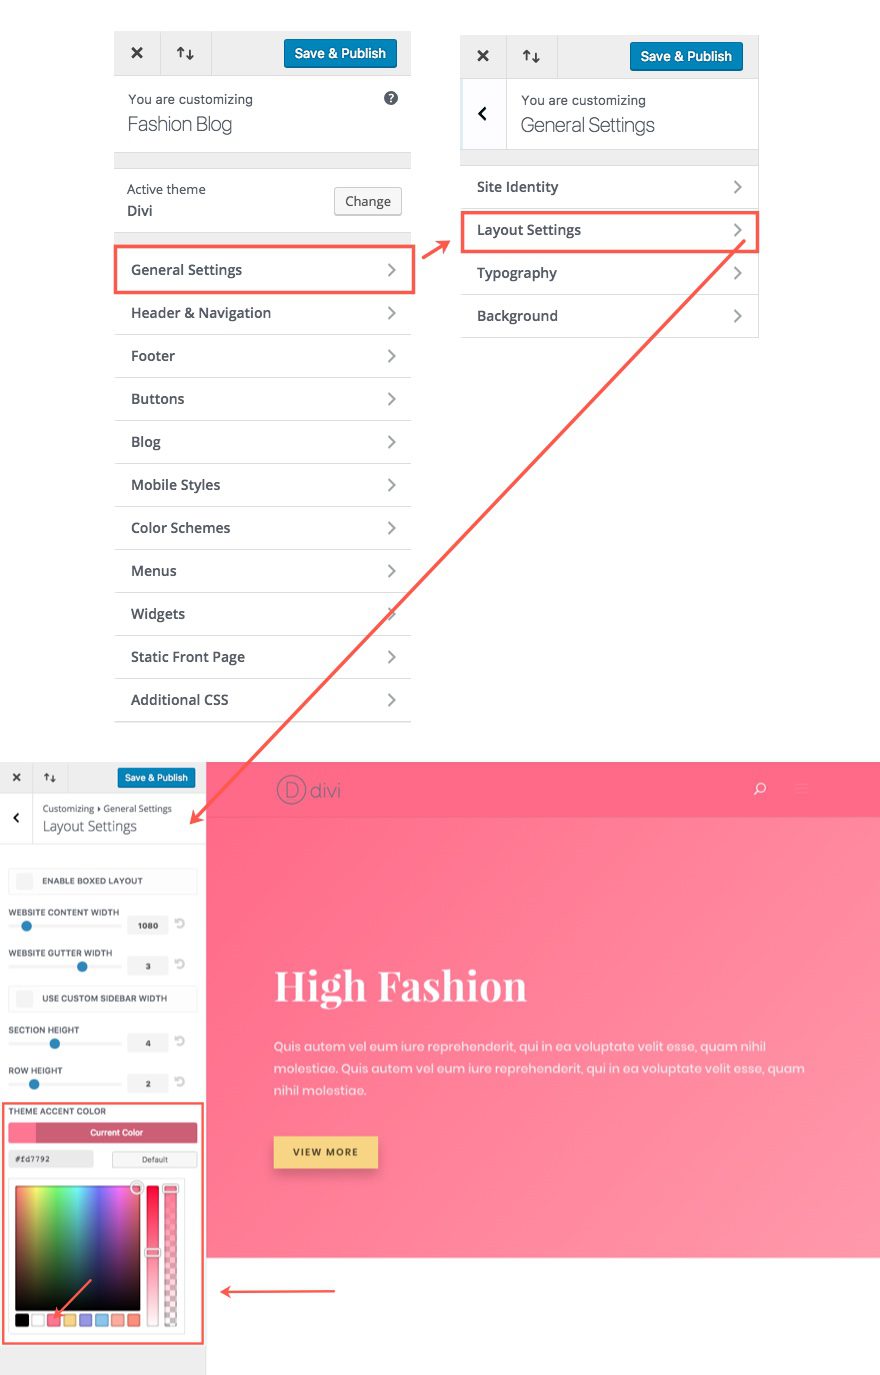
To change you Global Accent Color, go to the Theme Customizer and navigate to General Settings > Layout Settings and find the Theme Accent Color option at the bottom.
Notice the new colors available to you in the color palette since you updated the default color palette in your Theme Options.
Then, once you change it, save & publish your settings and refresh your page.
The updated Theme Accent Color will be applied to about 20 other elements automatically which is why it is important to update this first.
Some of the elements that are automatically updated include:
Body Link Color
Widget Header Color
Widget Bullet Color
Footer Social Icons Hover color
Default color for icons
Footer Menu Active Link Color
Secondary menu background color
Slide In and Fullscreen Header Style background color
Hamburger Menu Icon for mobile menu color
Primary Menu Active Link Color
Dropdown Menu Line Color
Secondary Menu Background Color
Secondary Dropdown Menu Background Color
Secondary Menu Background Color
Active Primary Menu Link Color
Footer Menu Active Link Color
If you don’t see the changes take effect on these elements immediately, you may have to save and exit the customizer, refresh the page, and go back in to the customizer.
#6 Style your Header
You can style your header from the Theme Customizer. Simply go to your WordPress Dashboard and navigate to Divi > Theme Customizer > Header & Navigation.
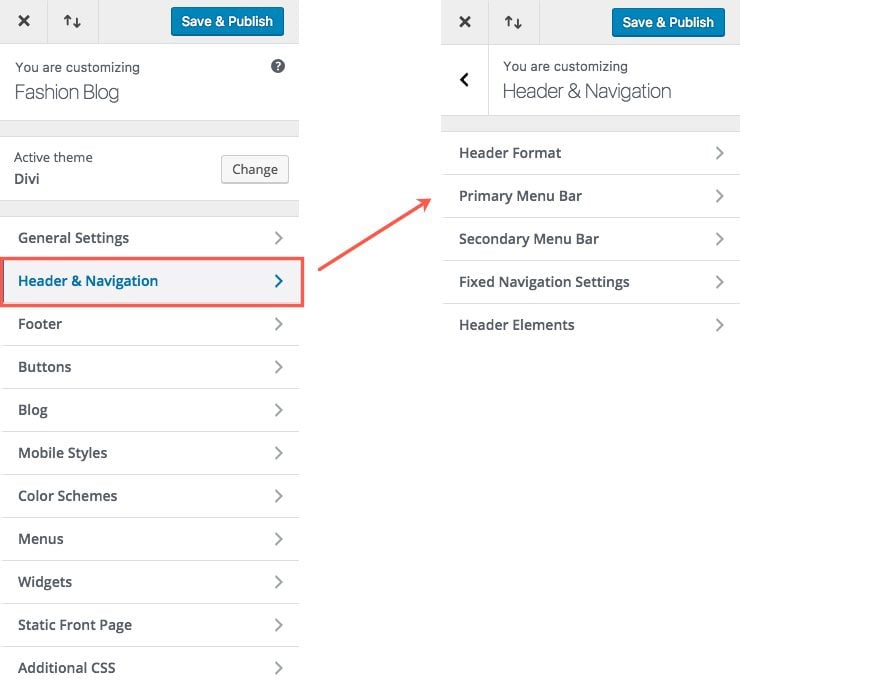
You will definitely need to style your header to match your new layouts. First I would decide on the header style you want first (default, fullwidth, centered, etc…), but whatever you choose, make sure to match the style of your header with your new layouts. And, make sure the items in your menu are easy to read and navigate.
You have options for your primary, secondary, and fixed navigation menus. Take the time to style all that apply to your site.
If you set your global accent color, some of the header color settings will be changed for you. That’s why it is important to set that color first.
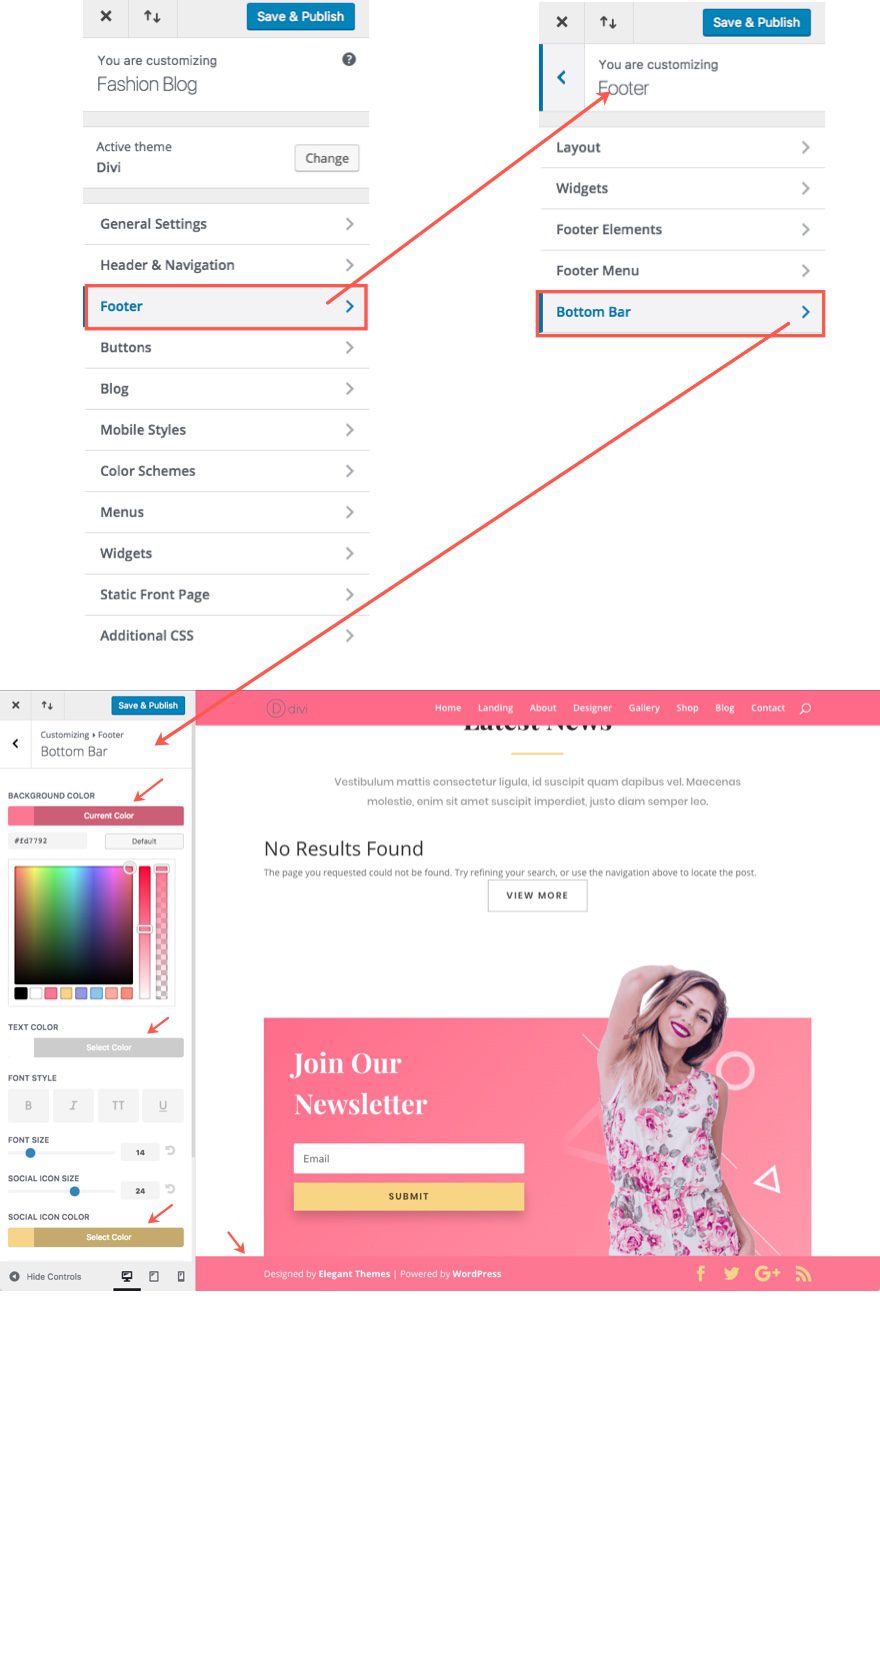
#7 Style your Bottom Bar
You can style your bottom bar also from the Theme Customizer. Simply go to your WordPress Dashboard and navigate to Divi > Theme Customizer > Footer > Bottom Bar.
The bottom bar shouldn’t be neglected. Combined with the Navigation bar a the top of your page, it becomes a necessary bookend that frames the entire page. Sure, the default black background can pretty much “work” on any site, but I would experiment with it a bit more. Sometimes I like to give the bottom bar a background color that is a slightly darker shade of the footer section’s background color sitting directly on top of it.
#8 Use shortcuts to Make Design Changes to your Page Layout
Because your layouts come with design settings built in to your modules, making changes to your design settings on a global scale (sitewide) can be a little tedious. But there are a few tricks to speed up the process. For starters, I would make changes to one page layout first. That way you can save elements from the edited page to add to your other pages that need design changes. Here are some tricks to speed up the process of making design changes to a certain layout.
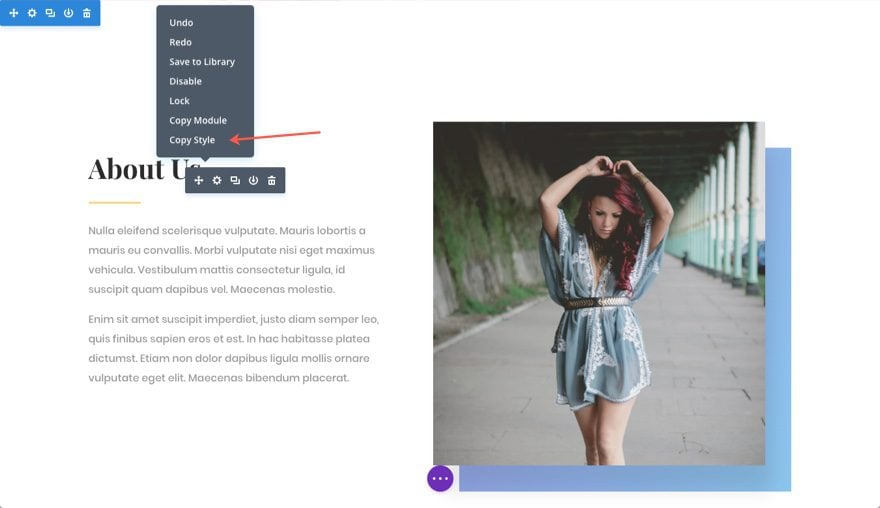
Using Right Click Options
Don’t forget that you can use the right click options to copy and paste module styles from one module to the next as long it is the same module type.
Restore Defaults so you can Control them using the Theme Customizer
Currently there are certain settings available for modules that aren’t customizable by the theme customizer (like box shadow for example). As a general rule, the Theme Customizer will change whatever is left to the default setting within a module, if that setting is available in the customizer. But for some modules, it may make sense for you to go ahead a restore certain design settings to their defaults so that you can control the style from the theme customizer.
A good use case for this would be body text and header text settings. So, for example, if you have a text module in your layout that has a custom font, text color, and text size, you wouldn’t be able to change those elements from the theme customizer until you restore them to their default status.
Use search box to locate settings you want to change
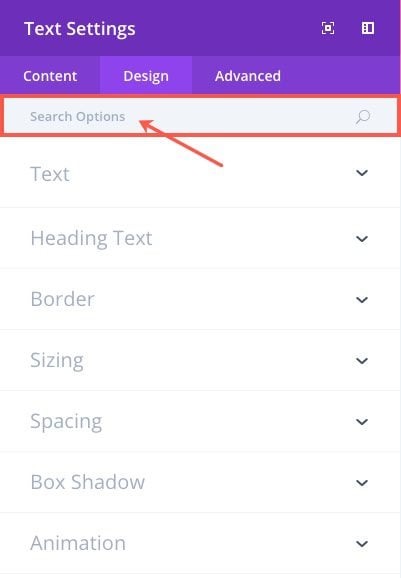
Easily identify what is set to default
As you search for the options you want to change, you will notice that some options have a “restore default” icon next to it. This means that it has been changed from the default.
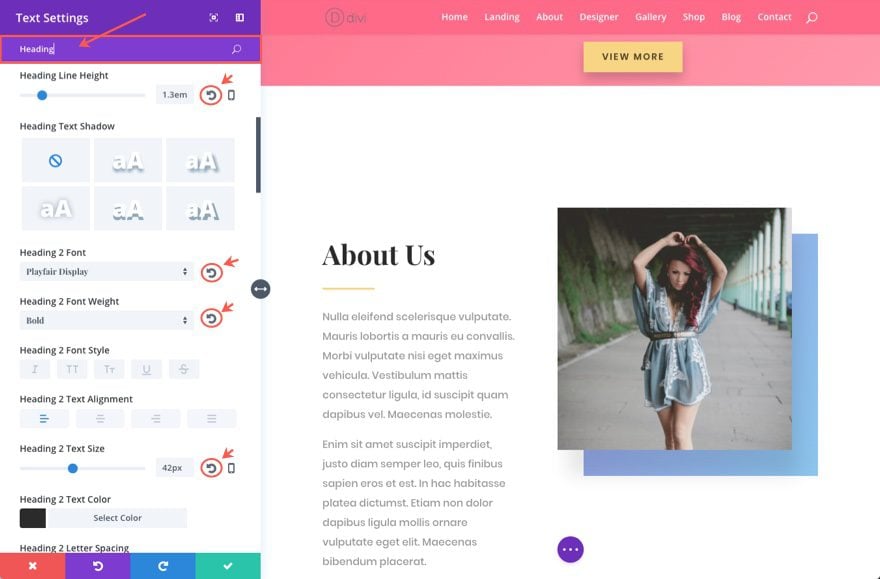
Restore all design settings to default in one click
For those of you who love the visual builder as much as I do, you probably have yet to discover this helpful trick. If you are in the backend builder, click to edit a module’s settings, and then select the design tab. Notice anything? It is a little “Restore to Default” icon/button located within the tab.
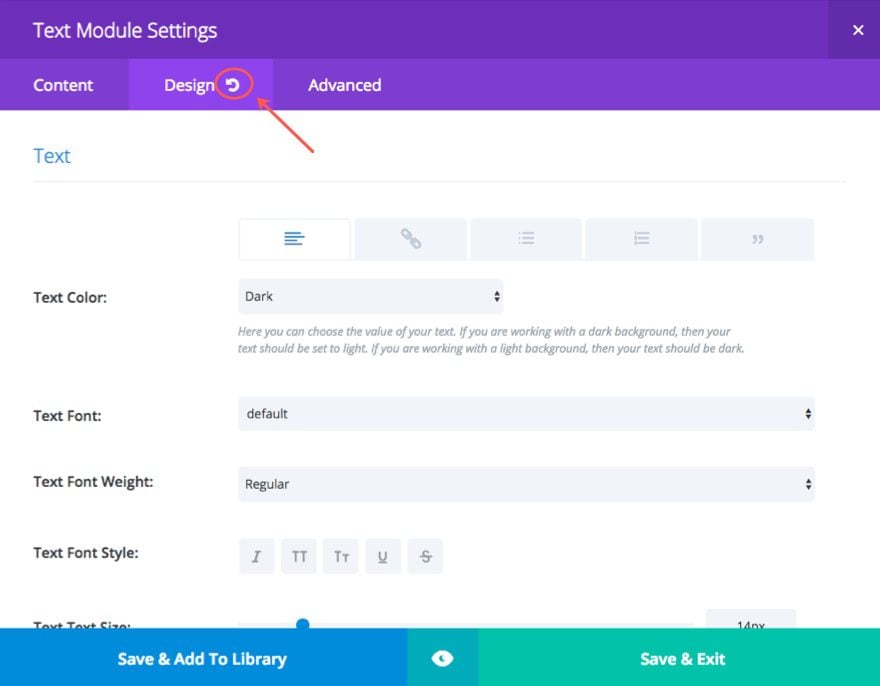
Clicking that will prompt you to confirm you want lose those settings. If you select yes, all of your design tab settings will go back to their default state. This will, of course, be added to the visual builder in the future.
#9 Save Key Elements to Build New Pages or Posts
Sometimes you will need to create additional pages or posts that require a different layout. Maybe you want a more general page layout with a header, content section, and footer section. Or maybe you want to create a more elaborate landing page. You may even create a custom post layout for your blog posts. The easiest way to accomplish this is to use elements of the layouts you already have to build new ones. And, it is the most effecient way to keep your design consistent accross the entire site. Let’s go over a few of the basic elements you should consider using to build additional page layouts.
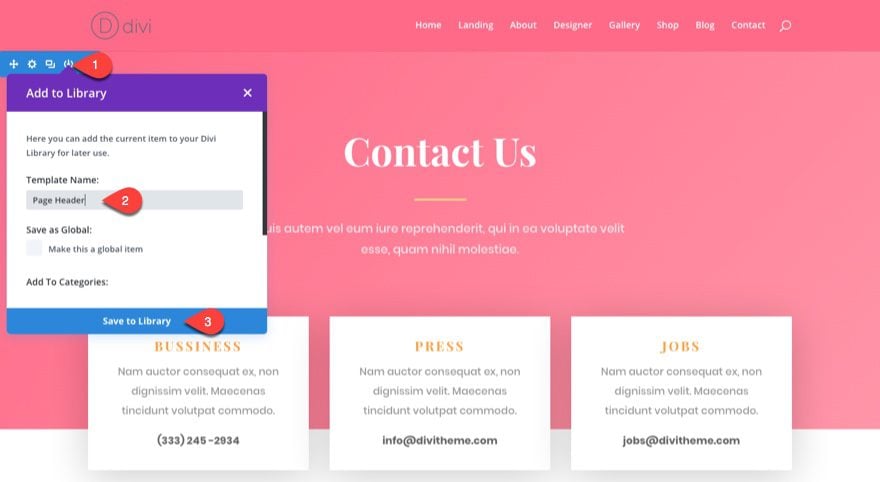
Page Header
This is a no-brainer. Every page needs a header. I would definitely save a header section for your library. I would suggest find a more generic version of your headers so it will fit with any page type. Usually the contact page layout is a good candidate for this because it usually has a basic centered title, subtitle, and a background color.
Section Headers
It is also a good idea to save a version of your section headers. That way when you are adding more content to your new pages, you will have a new header styled and ready to go.

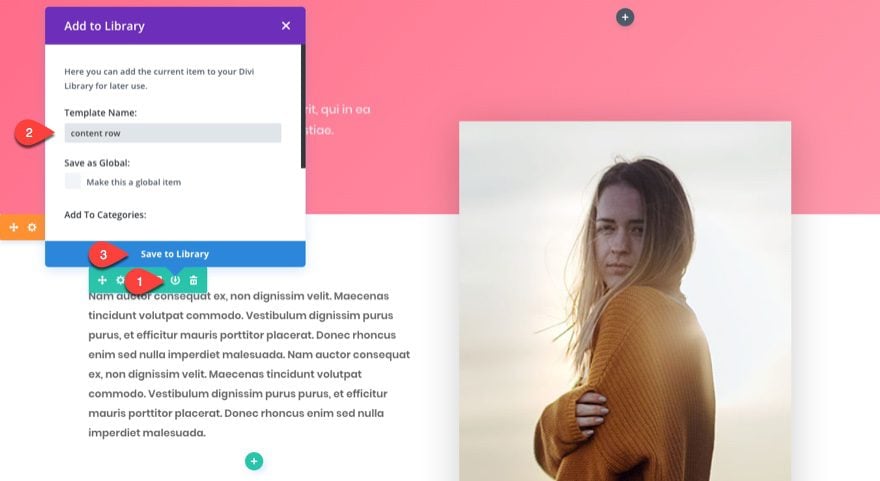
Content Section
In many cases, a simple text module with a white background is all you need for this, but sometimes your new layouts have unique content sections. This may be a text module with box shadow or multiple blurb modules styled in a unique way. In order to keep the consistency, save what you need to the libary for future use.
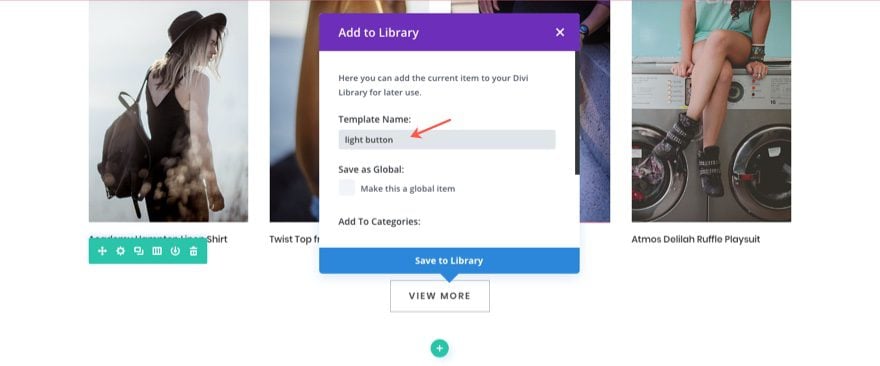
Buttons (both light and dark)
You will probably need to add more buttons as you create new pages. Having a dark and light version of your button available in your library is extremely convenient. I suggest saving a button module for both dark and light versions.
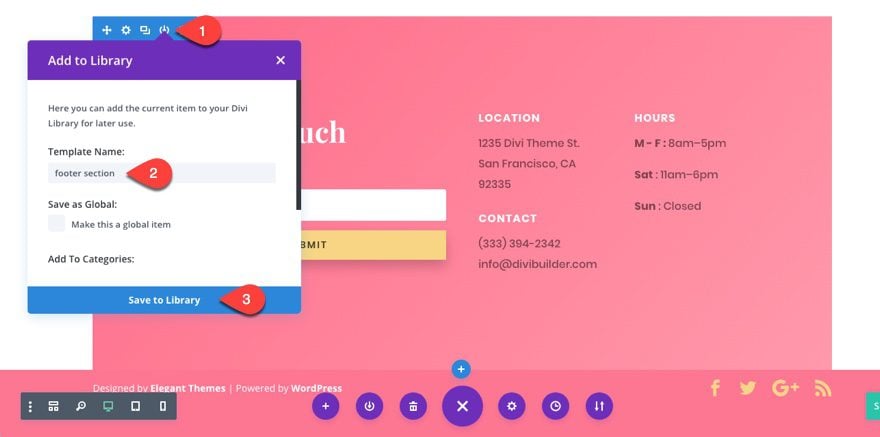
Footer Section
Each layout usually comes with a nice footer section that sits right above the bottom bar of your page. Some layouts have different versions of this footer section. These sections usually include contact info, email optins, and other important info. Find one that you want to use and save it to your library for future use.
Now whenever you want to build a new page you will have these sections, rows, and modules to choose from.
#10 Set Global Items
Global can be a great time saver when making future edits to your site, but it takes a little foresight. You need to identify which elements of your layouts will be used frequently throughout your site and will require more uniform updates. Good candidates for Global items would be Footer sections, Call to Action Modules, Button Modules, and Email Optins since they need to be dispersed throughout your site but require the same uniform style and content. This way updating one will update all.
Final Thoughts
I hope that you found these steps to be helpful. My goal for this post was to provide some general guidelines or best practices when importing these layouts on a new install for the purpose of creating a new website. Following these steps in order will keep you from wasting time and set you up with a good foundation to build upon.
The post 10 Steps to Using a New Divi Layout Pack for your Next Project appeared first on Elegant Themes Blog.