
Out of all your WordPress core files, few are as versatile as functions.php. If you know how to interact with it, this file will enable you to add all sorts of functionality to your site with just a few lines of code.
In this article, we’ll tell you everything you need to know about the WordPress functions file and how to use it to your advantage. We’ll discuss what it does, why you should use it, and when not to. Plus, we’ll introduce you to 17 useful file hacks to extend your site’s functionality without having to install a plugin.
Let’s get this show on the road!
An Introduction to the WordPress Functions File
The functions.php file is one of WordPress’ core files. In other words, it’s one that helps to power the entire platform, and it’s behind many of the features on your site.
You can also use the functions.php file as a makeshift way to implement new features to your website, such as adding new widgets to your dashboard or custom image sizes for your installation. It’s the perfect alternative to WordPress plugins for simple or temporary features.
It’s also worth noting there’s a ‘parent’ functions.php file that influences your entire site, but each theme comes with its own child version (much like your style.css file). This effectively enables you to implement functions only for specific themes without affecting your site globally.
17 File Hacks for Your WordPress Functions.php File
As we mentioned earlier, each theme comes with its own functions.php file. If you’re going to make extensive modifications to yours, the best course of action is to set up a child theme so your changes don’t disappear during updates. You’ll also want to backup your site before making any changes, just in case things go wrong and you need to roll back your changes.
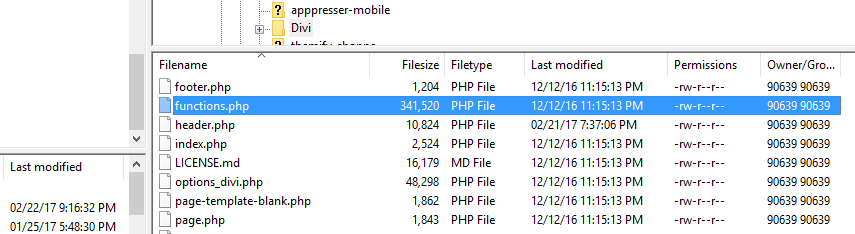
Moving on, you’ll need to access your functions.php file using an FTP (File Transfer Protocol) client – such as FileZilla – to navigate to the wp-content/themes/ directory. Inside, you’ll find a folder for each of your themes, all of which should have their own functions.php files within:
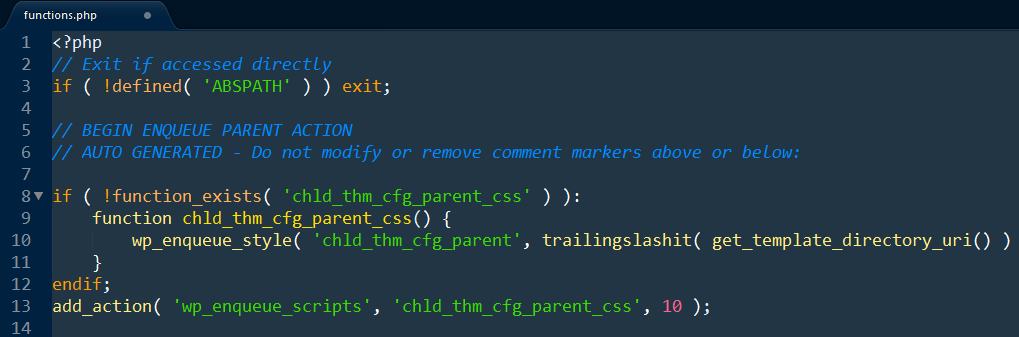
Just right-click on it and pick the option that says Edit, which will open your default text editor. With that out of the way, let’s get on to business!
1. Add a New Admin User to WordPress
There are some occasions where you could get locked out of your admin account, and be unable to either change your password or access your site. With this tweak, you’ll have an additional way of regaining access via FTP.
As with all of these hacks and snippets, simply copy the following code, paste it at the end of your theme’s functions.php file, and save the changes.
function wpb_admin_account(){
$user = 'username';
$pass = 'password';
$email = 'email@mywordpresssite.com';
if ( !username_exists( $user )  && !email_exists( $email ) ) {
$user_id = wp_create_user( $user, $pass, $email );
$user = new WP_User( $user_id );
$user->set_role( 'administrator' );
} }
add_action('init','wpb_admin_account');
You’ll need to replace the values where it says username, password, and email with your own, and you’re all set!
2. Display the Total Number of Registered Users
If you’ve ever wanted to brag to the world about how many users your site has, this tweak enables you to add a simple count to your front end. This hack also has uses beyond just bragging rights. For example, people might be more willing to trust your site if they know it has a strong user base. Here’s the snippet:
function wpb_user_count() {
$usercount = count_users();
$result = $usercount['total_users'];
return $result;
}
add_shortcode('user_count', 'wpb_user_count');
This is a bit advanced, as we’ve actually registered the [user_count] custom shortcode to display the total registered users on your site. While this can be a complex topic, our implementation is simple!
3. Remove Your Dashboard’s ‘Welcome Panel’
Your welcome panel is the section of your dashboard that appears as soon as you log into WordPress, and it usually contains a few tips and checklists to get you started. With this code snippet, you’ll be able to remove it permanently:
remove_action('welcome_panel', 'wp_welcome_panel'); Sure, the welcome panel isn’t invasive at all, but it can get a bit old if you’ve been using the platform for a while and don’t need the tips anymore. Plus, since all it takes is a line of code, there’s literally no downside to this hack.
4. Hide Your WordPress Version Number
As you probably know, depending on the theme you’re using, WordPress tends to display its version number in your site’s footer. It’s a tiny detail that you can remove easily with this code:
function wpb_remove_version() {
return '';
}
add_filter('the_generator', 'wpb_remove_version');
If you’re running an old version of WordPress (which of course, you shouldn’t be), this tweak can come in handy to make you a less tempting target.
5. Modify Your Dashboard Footer
Your WordPress dashboard probably includes a bit of text at the footer, often stating a credit of some kind (usually WordPress itself). It’s something you may have become blind to, but this hack does offer you a good opportunity to customize or brand your site with a simple hack. Let’s check out the corresponding code:
function remove_footer_admin () {
echo 'Hello world!';
}
add_filter('admin_footer_text', 'remove_footer_admin');
For this hack, you should replace the Hello world! text with your own, including any links you’d like to include.
6. Add a Simple Text Widget to Your Dashboard
If you decided to clear up some room on your dashboard by removing the welcome widget, you might want to replace it with one of your own. Using this code, you’ll be able to set up a simple text widget:
add_action('wp_dashboard_setup', 'my_custom_dashboard_widgets');
function my_custom_dashboard_widgets() {
global $wp_meta_boxes;
wp_add_dashboard_widget('custom_widget', 'More Information', 'custom_dashboard_information');
}
function custom_dashboard_information() {
echo 'If you need help making changes to your site, you can always contact me via email at...';
}
This snippet will add a widget called More Information to your dashboard, including the text within the custom_dashboard_information function. For this example, we chose to create a contact widget of sorts, which you can use to white label client websites and remind them to stay in touch if needed.
7. Add Custom Image Sizes to Your Installations
WordPress enables you to resize your images to specific dimensions after uploading them, and provides some presets by default. With this code, you’ll be able to add new presets to avoid having to set custom dimensions:
add_image_size( 'sidebar-thumbnail', 120, 120 );
Keep in mind you can add as many new sizes as you want, and they can come in particularly handy if there’s a specific resolution you use throughout your site.
8. Add Featured Images to Your RSS Feed
A lot of people don’t know this, but WordPress generates RSS feeds for your sites automatically. If you intend on using yours, you’ll want to set up a featured image for your posts, which you can do with this code:
function rss_post_thumbnail($content) {
global $post;
if(has_post_thumbnail($post->ID)) {
$content = '

' . get_the_post_thumbnail($post->ID) .
'

' . get_the_content();
}
return $content;
}
add_filter('the_excerpt_rss', 'rss_post_thumbnail');
add_filter('the_content_feed', 'rss_post_thumbnail');
Featured images can go a long way towards making your RSS feed look more attractive, which is crucial for any type of content that relies on click-throughs.
9. Exclude Categories From Your RSS Feed
One of the best things about WordPress RSS feed’s feature is how customizable it is. With this code, you’ll be able to hide specific categories from your feed, so you can pick and choose which content is added:
function exclude_category($query) {
if ( $query->is_feed ) {
$query->set('cat', -2, -3');
}
return $query;
}
add_filter('pre_get_posts', 'exclude_category');
Keep in mind WordPress identifies categories according to ID numbers (i.e. -2 and -3) in the code above. So you’ll need to identify the IDs for the categories you want to remove before implementing this hack.
10. Disable Your RSS Feed
Although its a great WordPress feature, if you aren’t interested in using RSS at all, you can disable it altogether using this code snippet:
function fb_disable_feed() {
wp_die( __('Sorry, we don't use RSS!') );
}
add_action('do_feed', 'fb_disable_feed', 1);
add_action('do_feed_rdf', 'fb_disable_feed', 1);
add_action('do_feed_rss', 'fb_disable_feed', 1);
add_action('do_feed_rss2', 'fb_disable_feed', 1);
add_action('do_feed_atom', 'fb_disable_feed', 1);
You’ll notice the code includes a little message for users who attempt to access your feed after you’ve disabled it. There’s no downside to keeping it active, but if you’re sure you’re not going to use it, this enables you to turn it off altogether and potentially save a cycle or two.
11. Hide Your WordPress Login Error Details
Login errors that are too detailed can give undesirables the information they need to help gain access to your site. With this code, WordPress won’t specify where you made an error when attempting to log in:
function no_wordpress_errors(){
return 'Something is wrong!';
}
add_filter( 'login_errors', 'no_wordpress_errors' );
By using this hack, it makes it harder for attackers to attempt to gain access to your site, while real users should have no problem figuring out where they’ve made a mistake. A win-win all around!
12. Force Users to Login With Their Usernames
A lot of people tend to sign up for every service using the same email, which means that attackers can attempt to gain access just by knowing their email addresses. With this code, you’ll force users to log in using usernames exclusively:
remove_filter( 'authenticate', 'wp_authenticate_email_password', 20 );
To be fair, usernames also tend to get reused a lot, but this small tweak can still help improve your security and minimize attacks.
13. Change the Length of Your Post Excerpts
WordPress blog indexes usually display brief excerpts of your posts to give readers an idea of what they’re in for. If you’ve ever wanted to change the default length of these excerpts, here’s an opportunity to do so.
functionnew_excerpt_length($length) {
return 75;
}
add_filter('excerpt_length', 'new_excerpt_length');
The default length is 55 but in the code above, we raised it to 75 to give us a little more wiggle room.
14. Enable WordPress to Upload Any File Type You Want
By default, WordPress only enables you to upload a very limited range of file types, including common media formats such as .png and .jpg. With this code, you’ll be able to force your installation to allow more types:
function my_myme_types($mime_types){
$mime_types['svg'] = 'image/svg+xml';
return $mime_types;
}
add_filter('upload_mimes', 'my_myme_types', 1, 1);
Take .svg, for example, which is a file type we’ve discussed in the past. With this snippet, you’ll be able to add support for it without the need for a plugin.
15. Disable Automatic Image Linking
Out of the box, WordPress will add links to each image you include in your content that points to its full version. By using this code, you’ll disable this functionality:
function wpb_imagelink_setup() {
$image_set = get_option( 'image_default_link_type' );
if ($image_set !== 'none') {
update_option('image_default_link_type', 'none');
}
}
add_action('admin_init', 'wpb_imagelink_setup', 10);
Keep in mind, though, you can still access this feature by editing each individual image – all this does is prevent it from working automatically.
16. Add a Widget Ready Area
WordPress already includes multiple widget-ready areas for you to use, but you can always add new ones using a little functions.php magic. As with our earlier shortcodes hack, you’re beginning to get into the realm of developer here. However, this is a simple implementation that could help you immensely:
function custom_sidebars() {
	$args = array(
		'id'            => 'custom_sidebar',
		'name'          => __( 'Custom Widget', 'text_domain' ),
		'description'   => __( 'A custom widget, 'text_domain' ),
		'before_title'  => '


<h3 class="widget-title">',
		'after_title'   => '</h3>


',
		'before_widget' => '


<aside id="%1$s" class="widget %2$s">',
		'after_widget'  => '</aside>


',
	);
	register_sidebar( $args );
}
add_action( 'widgets_init', 'custom_sidebars' );
Keep in mind this code merely ‘registers’ your new widget area. You’ll still need to call it for specific theme sections, such as your footer, by editing their respective files.
17. Disable the WordPress Search Feature
Almost every site needs a search feature to help users find their way around. However, if you’re going to build a single-page site, you may not need it. Here’s the code that will enable you to turn if off:
function fb_filter_query( $query, $error = true ) {
if ( is_search() ) {
$query->is_search = false;
$query->query_vars[s] = false;
$query->query[s] = false;
// to error
if ( $error == true )
$query->is_404 = true;
}
}
add_action( 'parse_query', 'fb_filter_query' );
add_filter( 'get_search_form', create_function( '$a', "return null;" ) );
Before disabling this feature, you need to be 100% sure you won’t need it since it can heavily impact your site’s usability. Of course, you can always remove the code to reinstate search on your site, but if you’re not sure, err on the side of caution and don’t turn it off!
Conclusion
Your functions.php file is one of the most powerful assets in your WordPress toolbox. Not only does it enable you to add all sort of features with a few lines of code, but it’s also critical for your site to function (see what we did there?).
If you’re a Divi user, the functions.php file can help you add several complementary features to your site without having to set up additional plugins, which is always a win.
Do you have any questions about these WordPress functions file hacks? If so, ask away in the comments section below!
Article thumbnail image by MchlSkhrv / shutterstock.com
The post 17 WordPress Functions.php File Hacks appeared first on Elegant Themes Blog.