
With Divi’s latest background mask and background pattern feature release, you can create some unique hero sections for your website. A hero section is the first section of your website and is the first thing your visitors see before scrolling through your website, so it’s important to be eye-catching! Combining Divi’s background image, background mask, and background pattern options allows us to create compelling hero sections so that your website makes a great first impression.
This post will show you how to create five unique background mask and pattern overlays that you can apply to a background image to create truly stunning hero sections. This tutorial will cover the essential steps needed to create each hero section and give you the tools you need to create a striking hero section for your website in minutes.
We’ll be using free photos from the Online Course Layout Pack in this example. To use the same images, scroll all the way to the bottom of this post to download the full-res images.
Let’s get started!
What We’ Creating
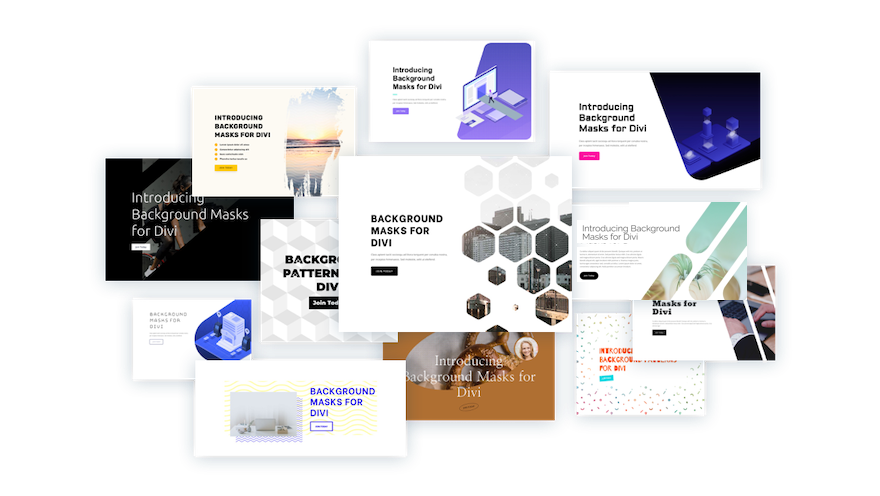
Here is a quick look at the five hero sections we’ll create in this post today.
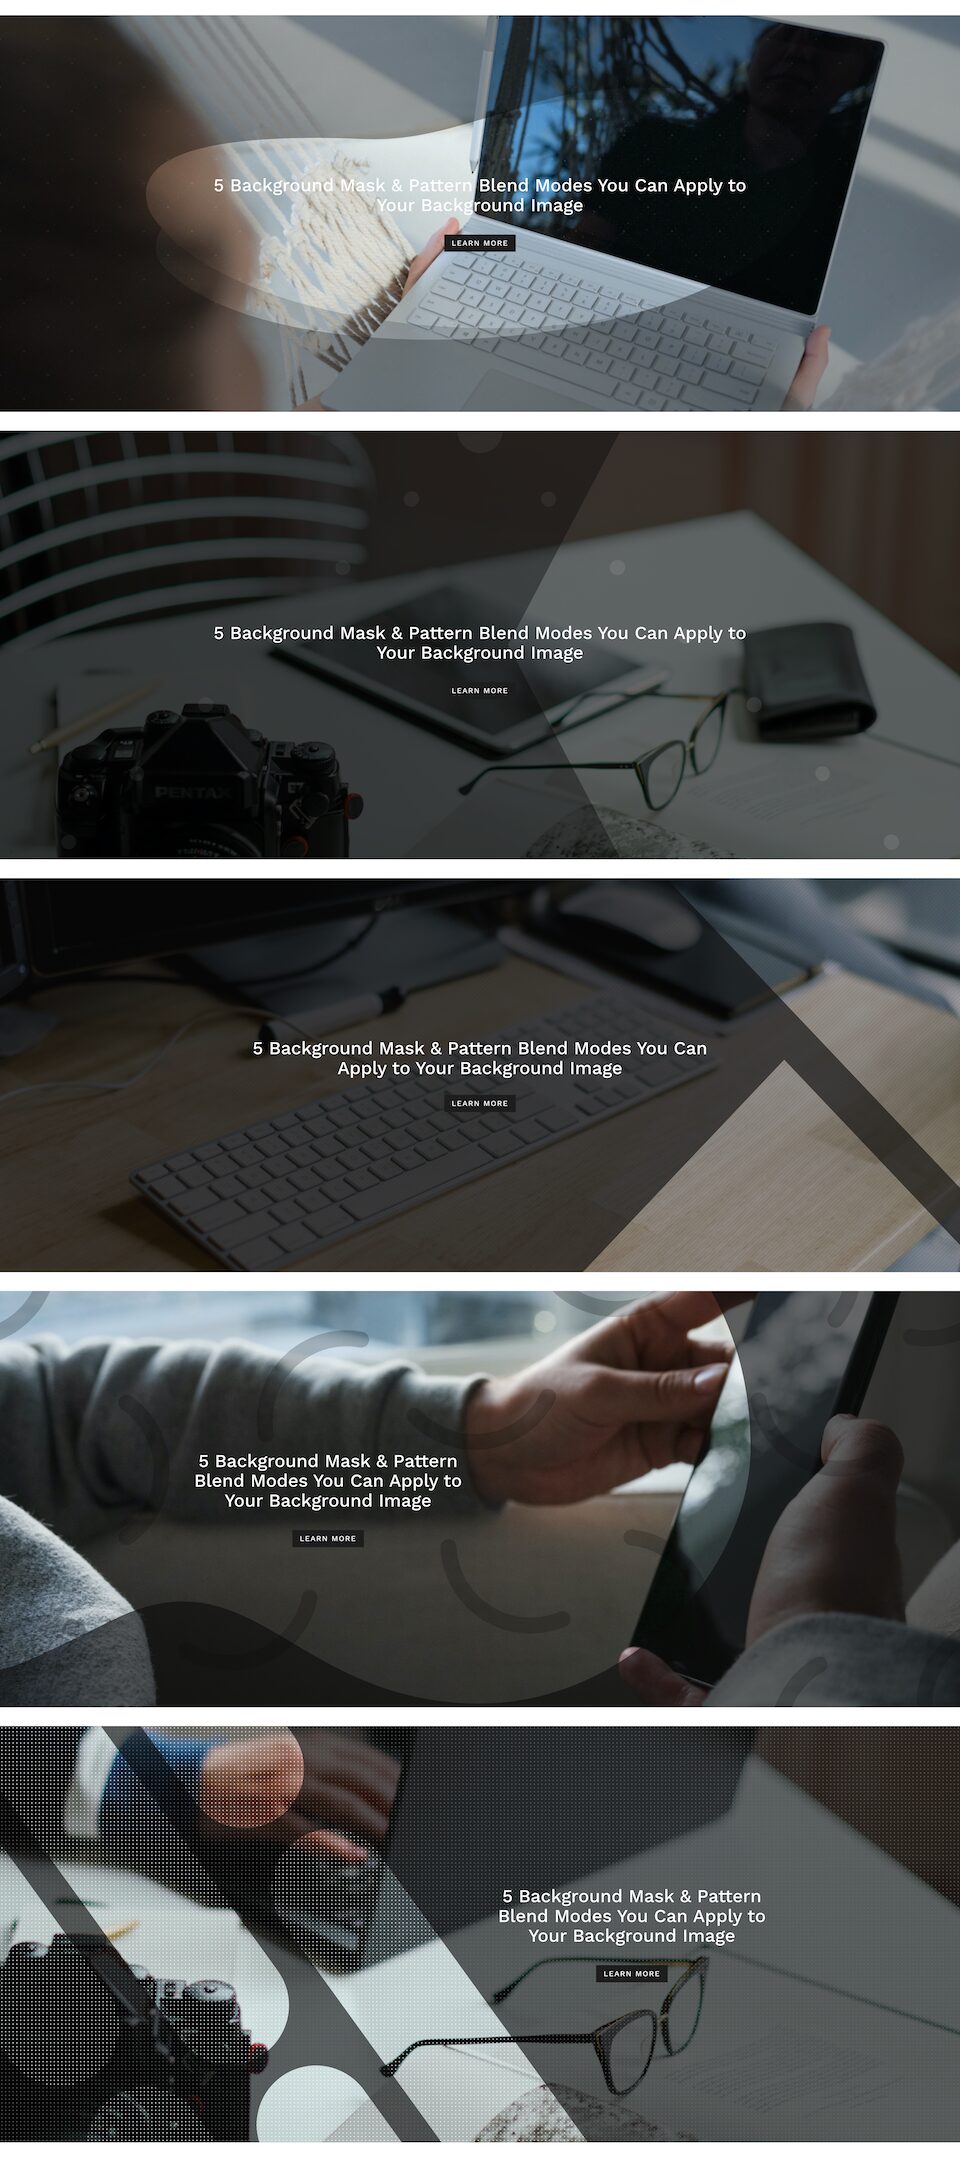
The designs are subtle, simple, and yet impactful.
Download the Layout for FREE
If you’d like to download the pre-designed layout design from this tutorial, you will first need to download it using the button below. To gain access to the download, you will need to subscribe to our Divi Daily email list by using the form below. As a new subscriber, you will receive even more Divi goodness and a free Divi Layout pack every Monday! If you’re already on the list, simply enter your email address below and click download. You will not be “resubscribed” or receive extra emails.

How to Download and Use the Layouts
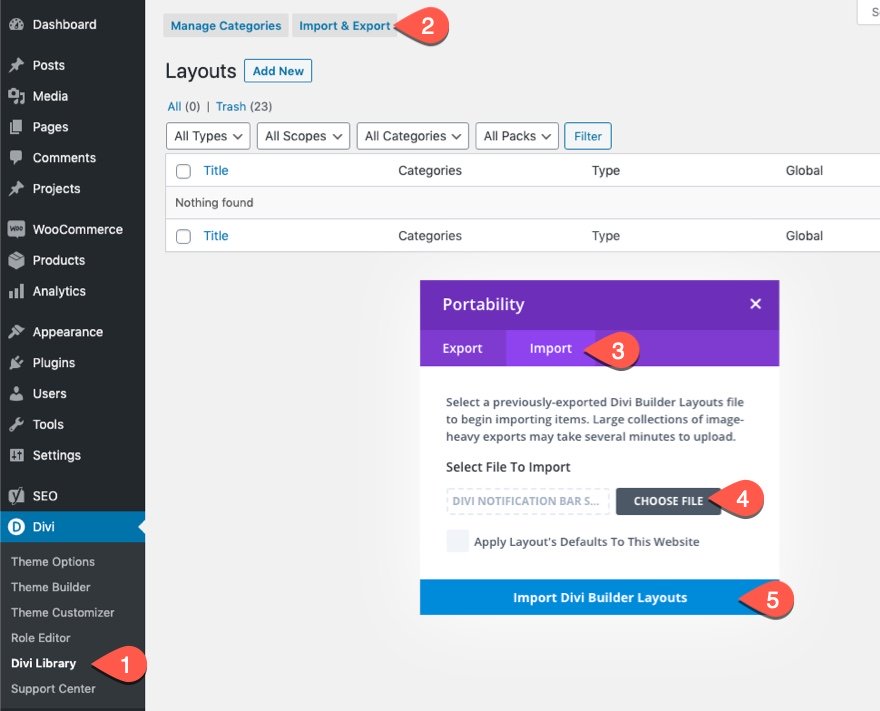
To import the section layout to your Divi Library, do the following:
- Navigate to the Divi Library.
- Click the Import button at the top of the page.
- In the portability popup, select the import tab.
- Choose the download file from your computer (make sure to unzip the file first and use the JSON file).
- Then click the import button.
Once you’ve successfully imported the layouts, they’ll be seen in your Divi Library and will be available for use in the Divi Builder.
Now, let’s get to the tutorial!
What You Need To Get Started
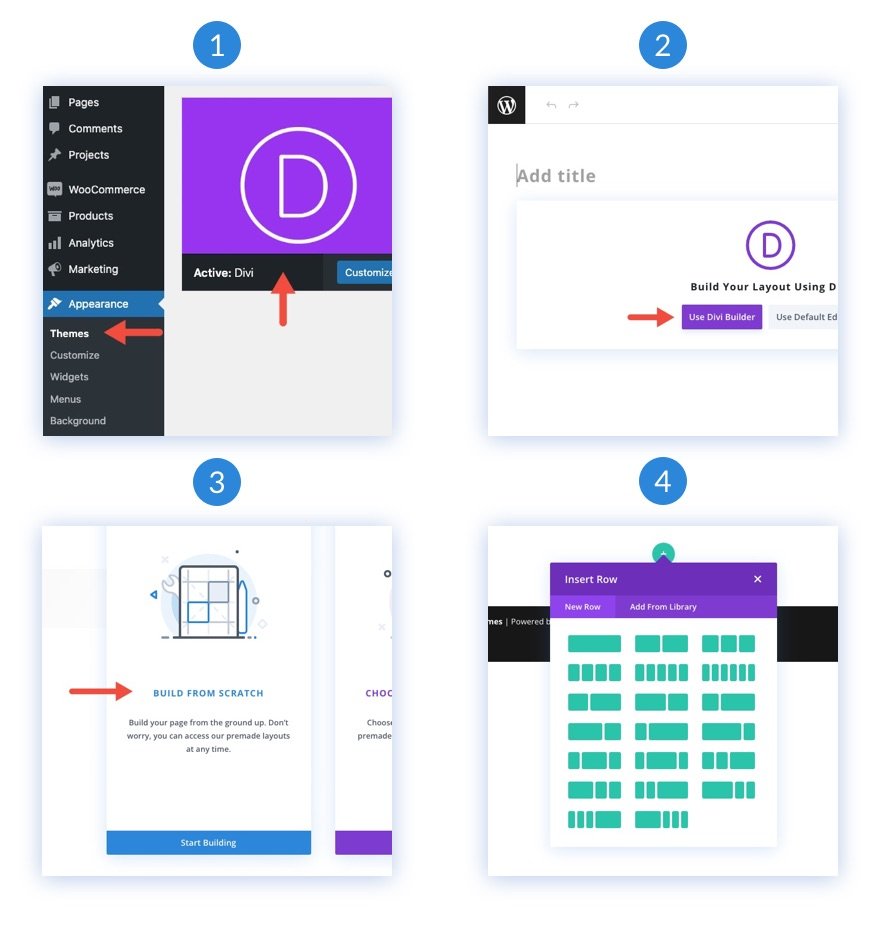
Before we can begin, you’ll need to:
- Install and activate the Divi Theme.
- Create a new page, publish it, and click the “Use The Divi Builder” button to edit the page on the front end using the Visual Builder.
- Choose the option “Build From Scratch.”
Now we have a blank canvas to start designing!
How to Create 5 Background Mask & Pattern Overlays to Apply to a Background Image
First, Let’s Create the Hero Section
All our design examples use the same section, row, and column structure, so let’s set those up now.
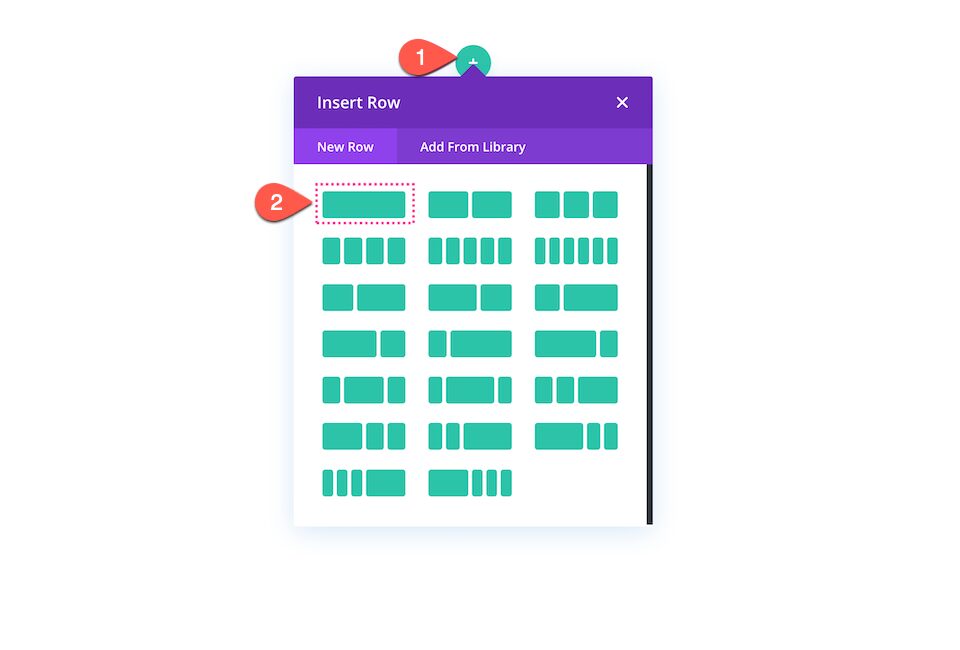
1. Create Layout Structure
Add a row to your page and then click the green “+” icon to bring up the column structure and select the first column, the one fullwidth column.
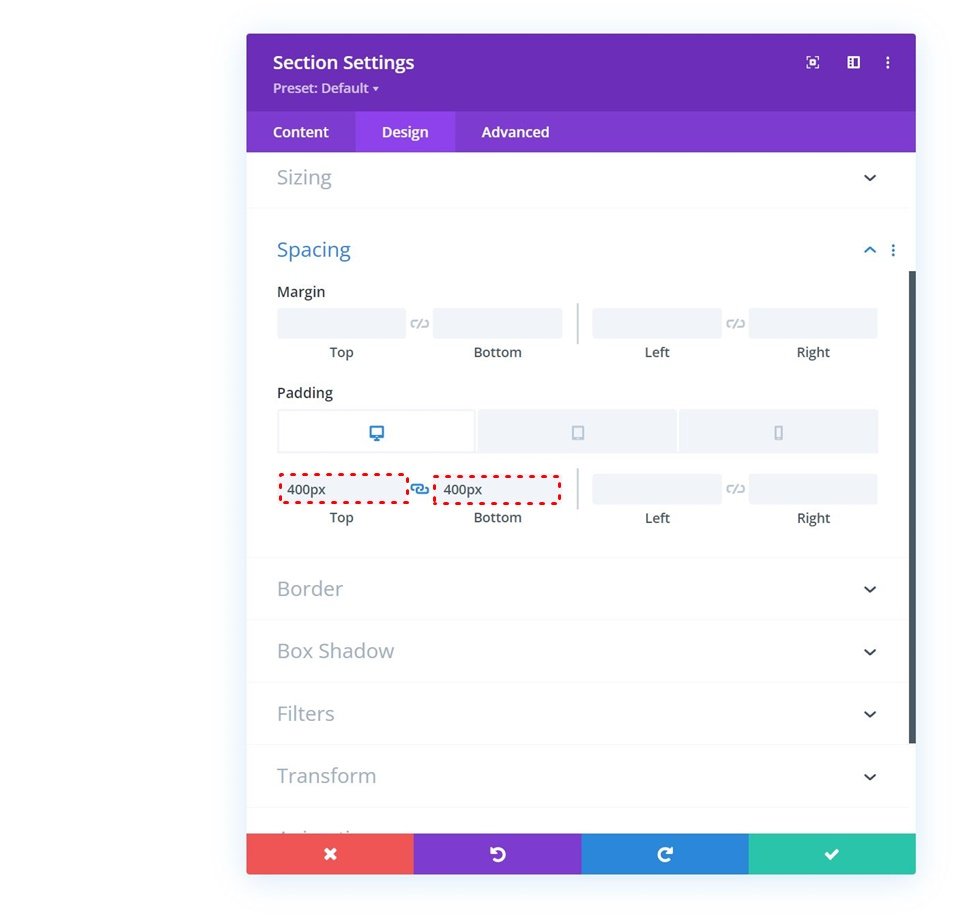
2. Add Section Spacing
Now that we have our row and column set it, it’s time to add spacing to the section.
Under the Spacing tab, update the following:
- Desktop: 400px top and 400px bottom
- Tablet: 200px top and 200px bottom; 25px left and right
- Phone: 50px top and 50px bottom; 25px left and right
How to Design Hero Section #1
Let’s design the first hero section.
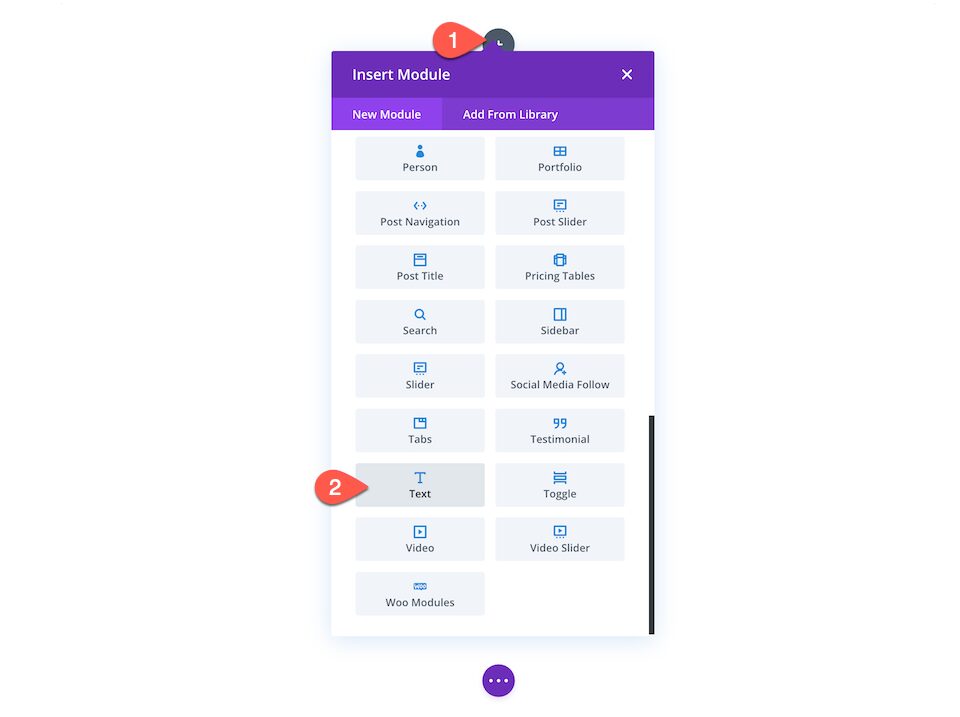
1. Add Heading Text
Click on the grey “+” icon to bring up the module library. Scroll to text and click to load.
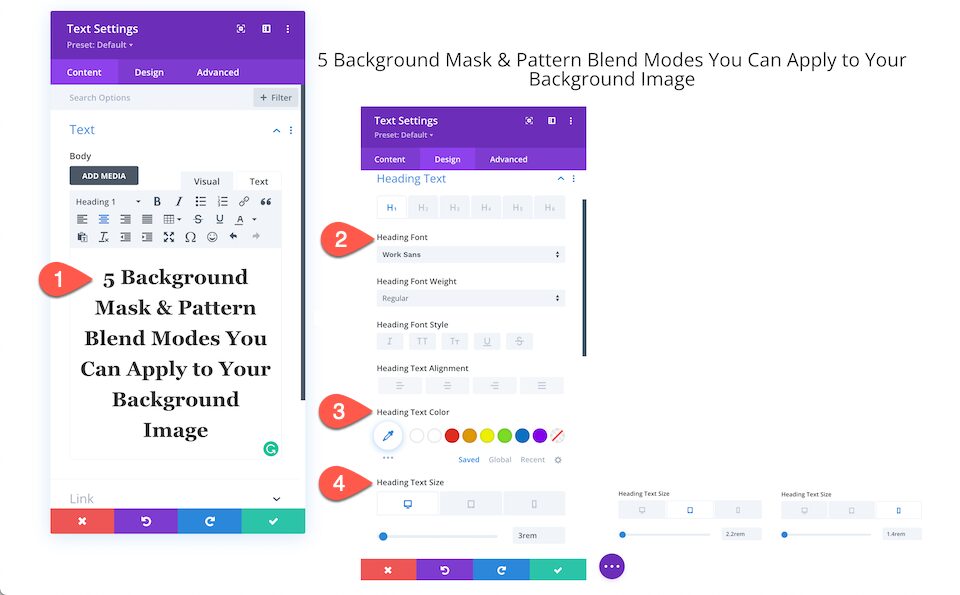
Type in the heading text and then under the Heading Text tab, configure these settings:
- Font Family: Work Sans
- Font color: White #ffffff
- Font Size:
- Desktop: 3rem
- Tablet: 2.2rem
- Phone: 1.4rem
2. Add Button Module
Add a button and configure these settings:
- Under the Text Tab type: Learn More
- Under the Alignment Tab Choose: Center
- Click Use Custom Styles and then configure:
- Button Text Size:
- Desktop: 20px
- Tablet: 16px
- Phone: 14px
- Button Text Color: White #ffffff
- Button Background Color: Black #1d1d1d
- Button Border Width: 0
- Button Border Radius: 0
- Button Letter Spacing: 3pt
- Button Font: Work Sans
- Button Font Style: Uppercase
- Button Text Size:
3. Add Background Image
Now that we have our content set up, it’s time to start designing the section background.
- Navigate to the Background toggle and click the 3rd tab, the picture tab, and then click “Add Background Image.”
- This will bring up your media library, where you can select a photo or upload a new one.
- Once your photo is selected, click the “Upload an Image” button in the bottom right corner.
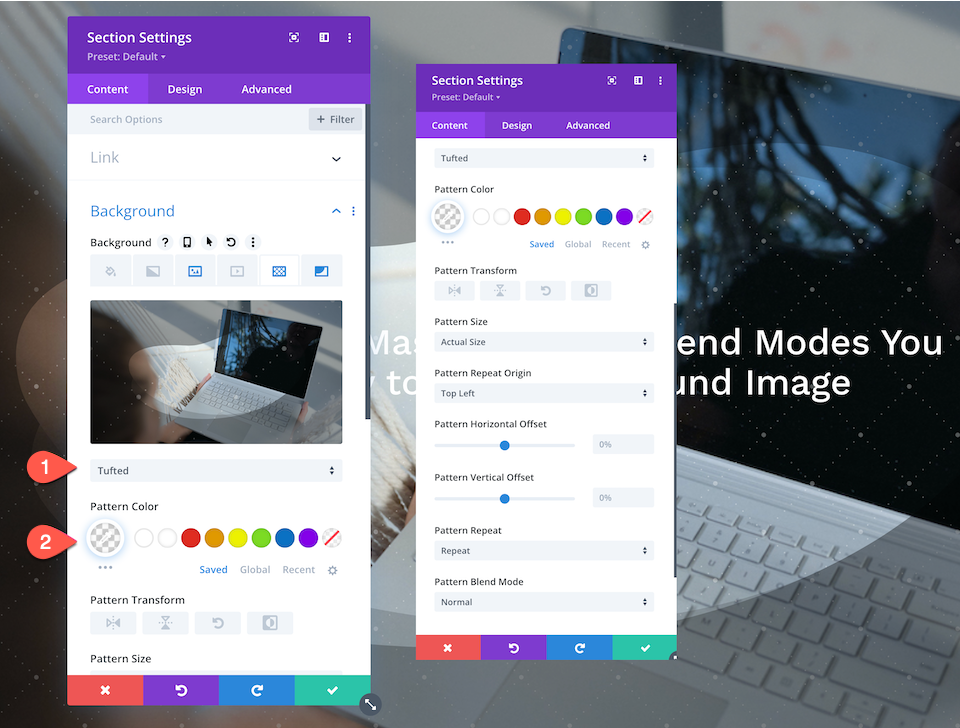
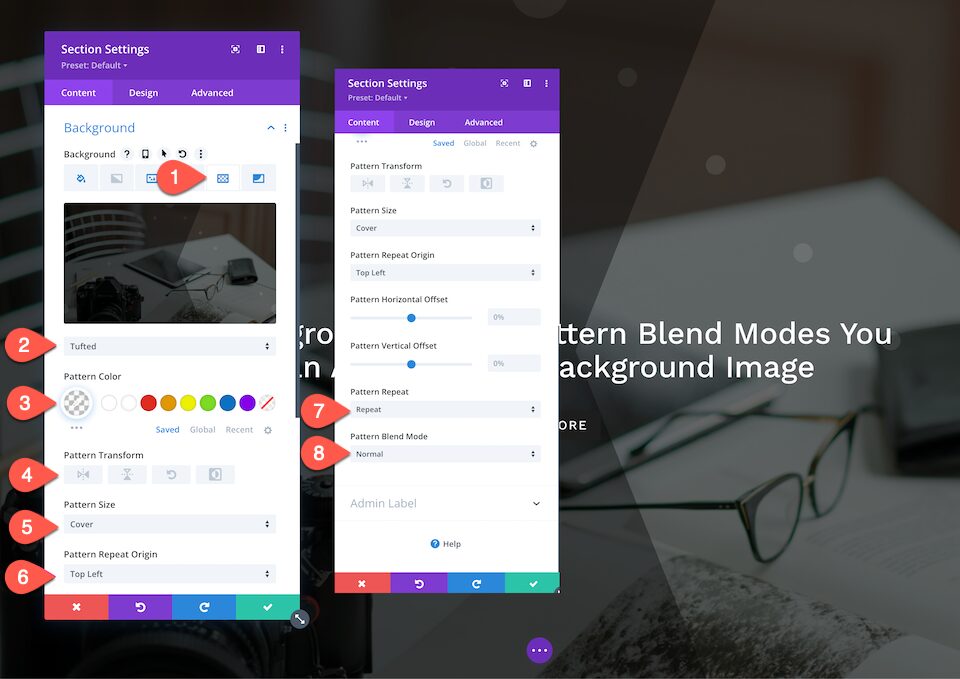
4. Add Background Pattern
Now that we have our background image set up, let’s add a pattern.
- Inside the Background tab, navigate to the 5th tab, the patterns tab, and then click “Add Background Pattern.”
- Select Tufted from the dropdown menu and configure these settings:
- Pattern Color – rgba(255,255,255,0.31)
- Pattern Transform: none
- Pattern Size: Actual Size
- Pattern Repeat Origin: Top Left
- Pattern Repeat: Repeat
- Blend Mode: Normal
5. Add background Mask
Now that we have our background image and pattern set up, let’s add a background mask.
- Inside the Background tab, navigate to the 6th tab, the mask tab, and click “Add Background Mask.”
- Select Bean from the dropdown menu and configure these settings:
- Mask Color: rgba(0,0,0,0.36)
- Mask Aspect Ration: horizontal rectangle
- Mask Size: Stretch to fill
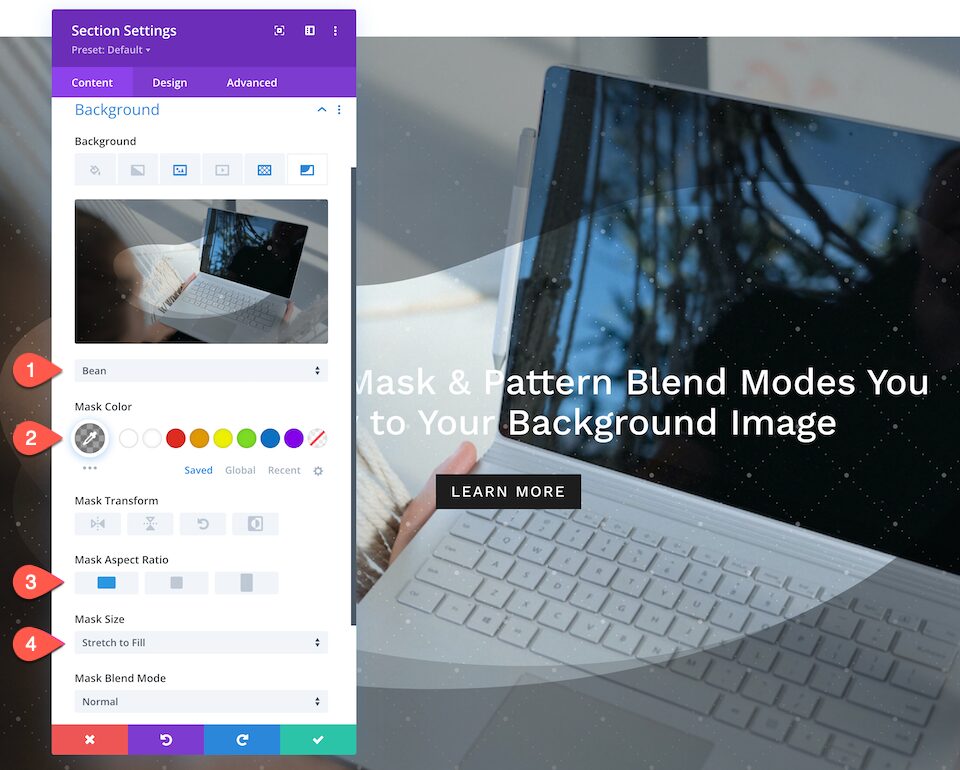
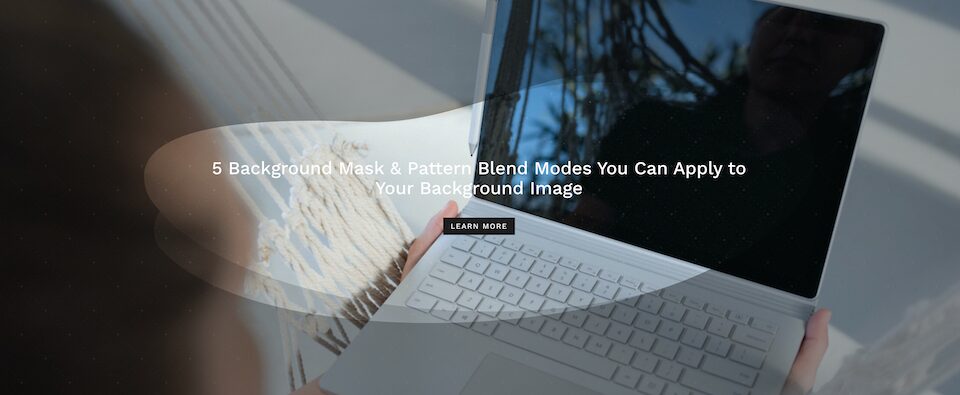
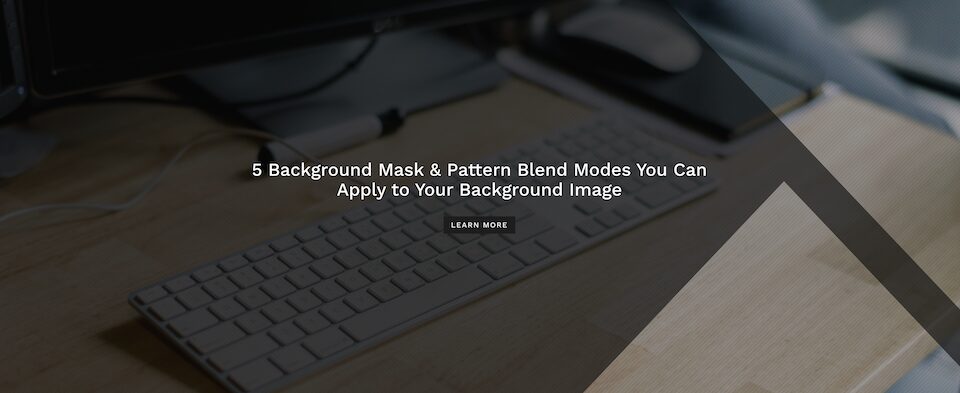
Voila! Now you have a beautifully designed hero section.
How to Design Hero Section #2
Now, let’s design the second hero section.
1. Add a Background Image and Set Blend Mode to Overlay
Select your background image, set the blend mode to Overlay, and add an overlay color of rgba(10,10,10,0.64).
2. Add Background Pattern
Now that we have the background image set up, let’s add a background pattern.
- Inside the Background tab, navigate to the 5th tab, the patterns tab, and click “Add Background Pattern.”
- Select Tufted from the dropdown and configure these settings:
- Pattern Color – rgba(255,255,255,0.09)
- Pattern Transform: none
- Pattern Size: Cover
- Pattern Repeat Origin: Top Left
- Pattern Repeat: Repeat
- Blend Mode: Normal
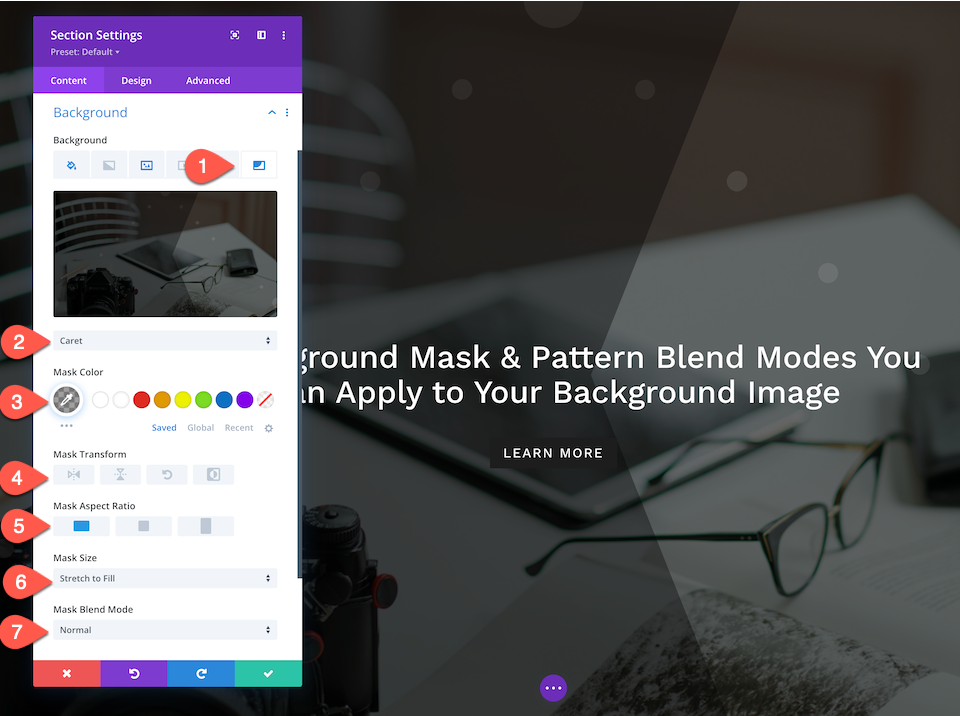
3. Add Background Mask
Now that we have our background image and pattern set up, let’s add a background mask.
- Inside the Background tab, navigate to the 6th tab, the mask tab, and click “Add Background Mask.”
- Select Caret from the dropdown menu and configure these settings:
- Mask Color: rgba(0,0,0,0.36)
- Mask Transform: None
- Mask Aspect Ration: horizontal rectangle
- Mask Size: Stretch to fill
- Mask Blend Mode: Normal
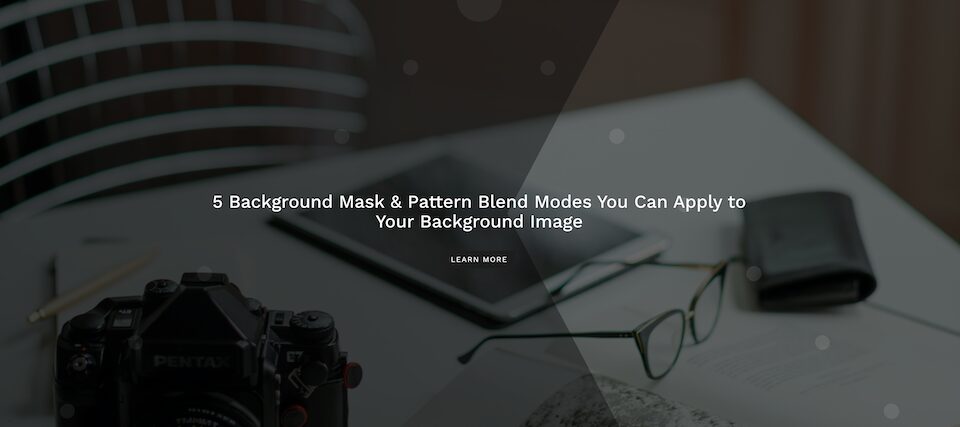
How to Design Hero Section #3
Now, let’s design the third hero section.
1. Add a Background Image and Set Blend Mode to Overlay
Select your background image, set the blend mode to Overlay, and add an overlay color of rgba(10,10,10,0.39).
2. Add Background Pattern
Now that we have our background image set up, let’s add a background pattern.
- Inside the Background tab, navigate to the 5th tab, the patterns tab, and click “Add Background Pattern”.
- Select Diagonal Stripes 2 from the dropdown and configure these settings:
- Pattern Color – rgba(0,0,0,0.06)
- Pattern Transform: none
- Pattern Size: Actual Size
- Pattern Repeat Origin: Top Left
- Pattern Repeat: Repeat
- Blend Mode: Normal
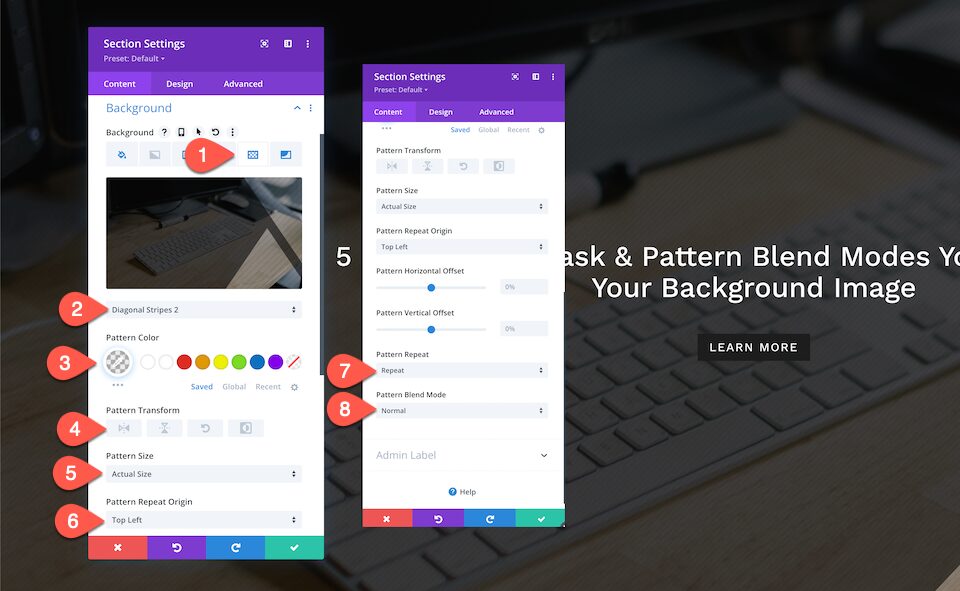
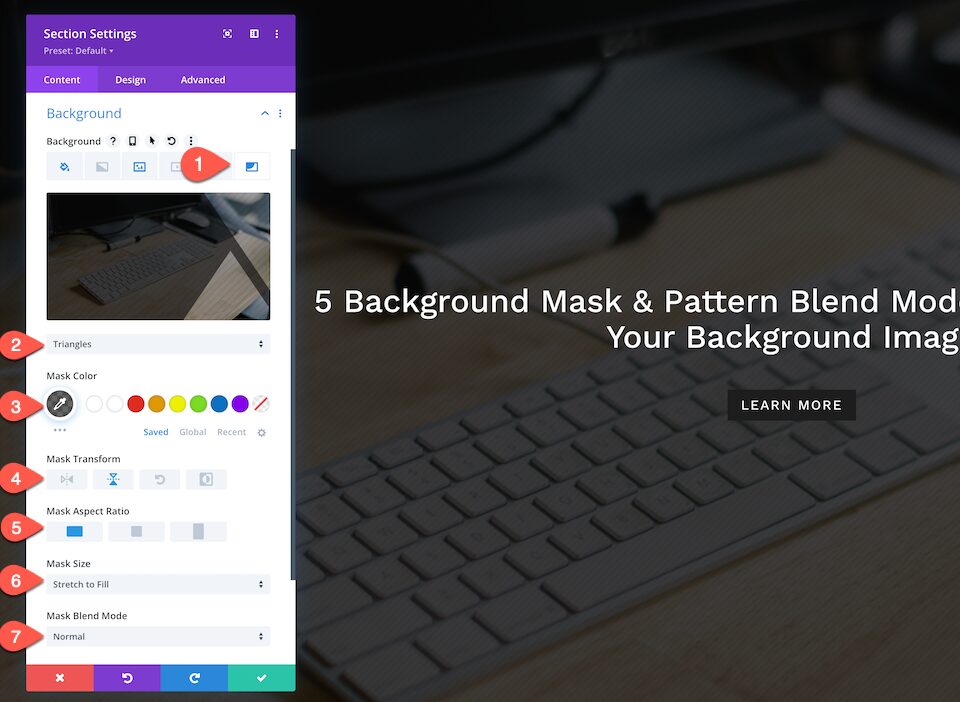
3. Add Background Mask
Now that we have a background image and pattern added, let’s add a background mask.
- Inside the Background tab, navigate to the 6th tab, the mask tab, and click “Add Background Mask.”
- Select Triangles from the dropdown menu and configure these settings:
- Mask Color: rgba(10,10,10,0.61)
- Pattern Transform: none
- Mask Aspect Ration: horizontal rectangle
- Mask Size: Stretch to fill
- Mask Blend Mode: Normal
How to Design Hero Section #4
Now, let’s design the fourth hero section.
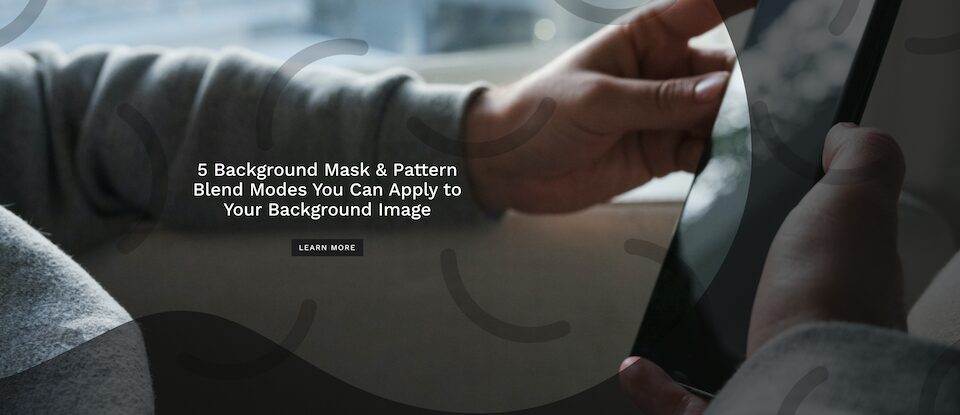
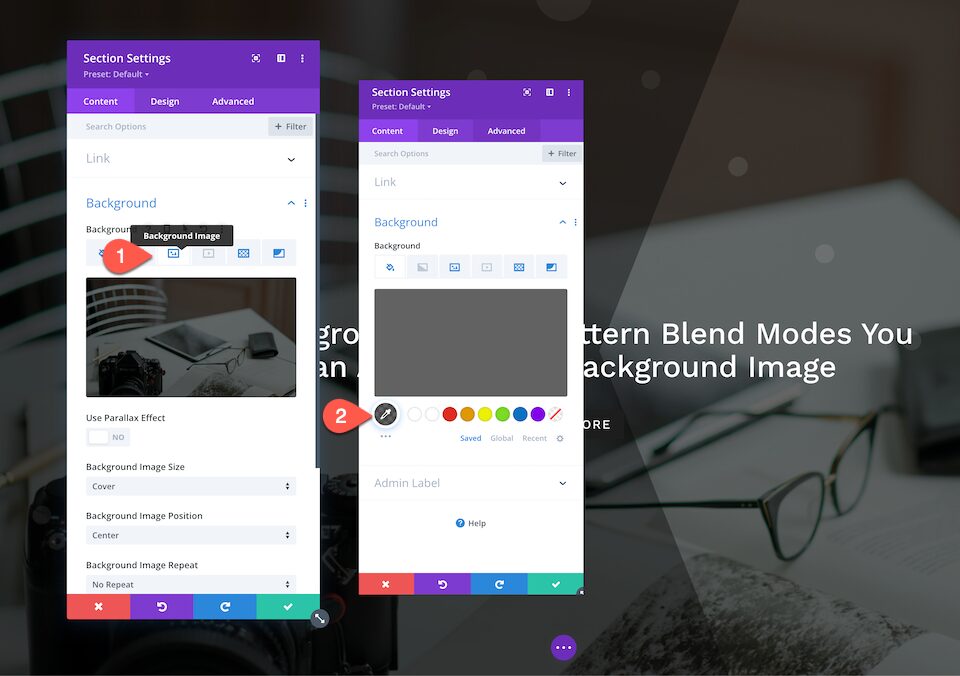
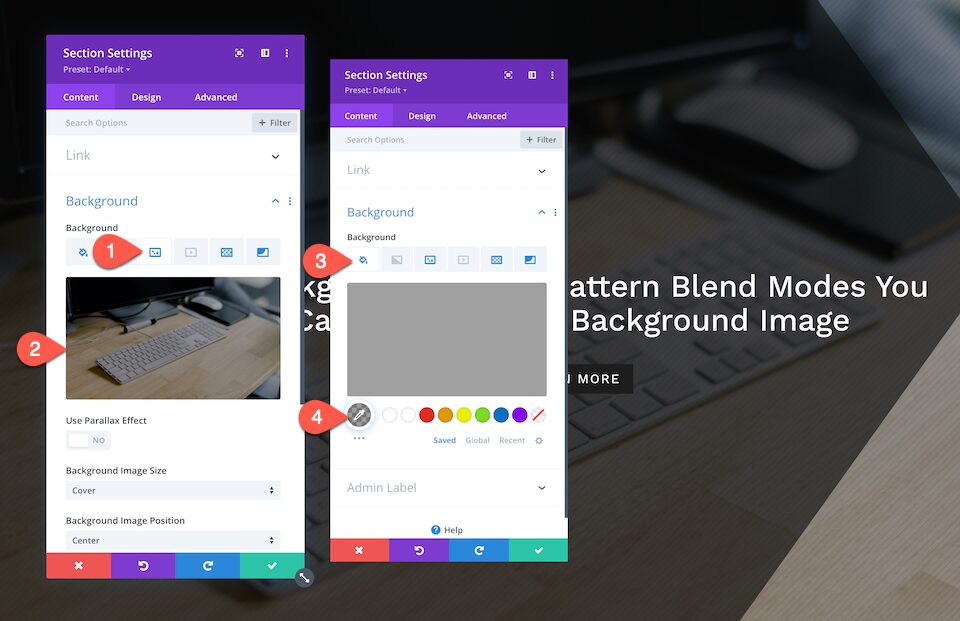
1. Add a Background Image
Select your background image.
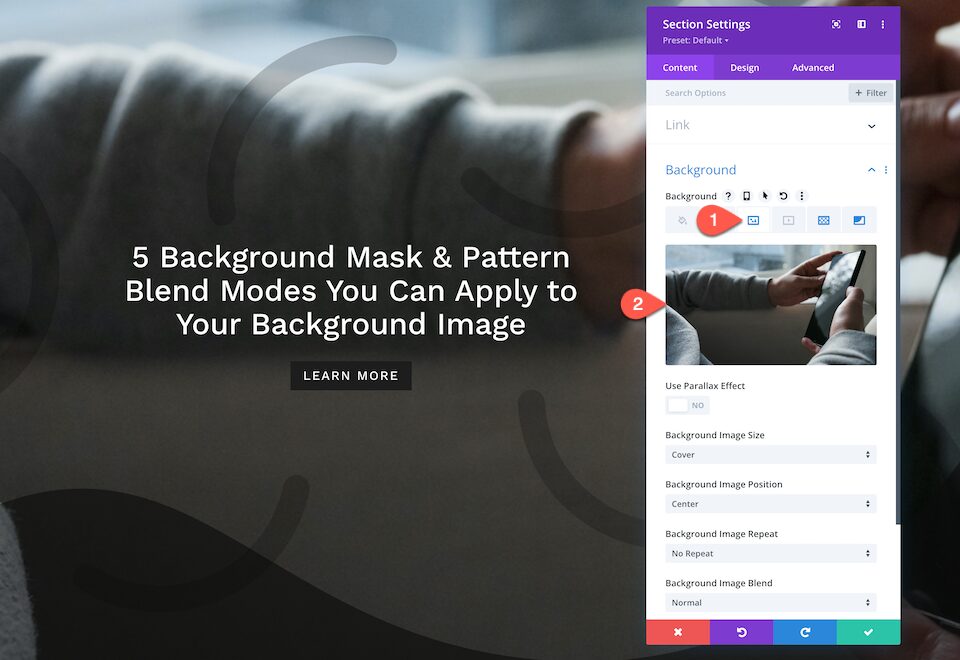
2. Add Background Pattern
Now that we have our background image added, let’s add a background pattern.
- Inside the Background tab, navigate to the 5th tab, the patterns tab, and click “Add Background Pattern.”
- Select Smiles from the dropdown and configure these settings:
- Pattern Color – rgba(0,0,0,0.2)
- Pattern Transform: none
- Pattern Size: Cover
- Pattern Repeat Origin: Top Left
- Pattern Repeat: Repeat
- Blend Mode: Normal

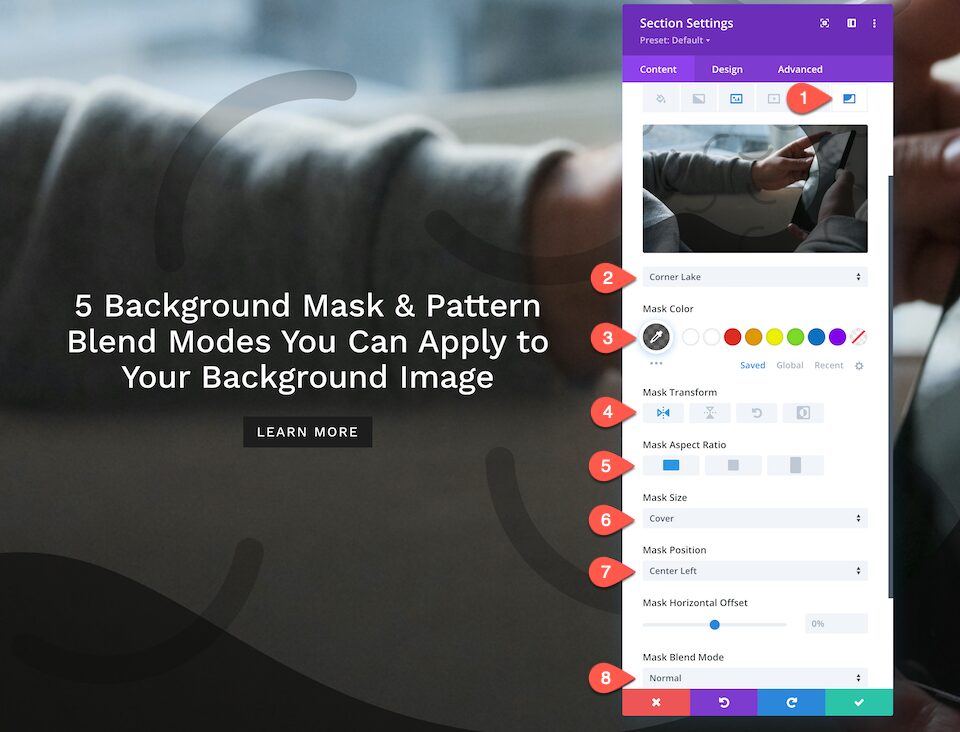
3. Add Background Mask
Now that we have our background image and pattern applied, let’s add a background mask.
- Inside the Background tab, navigate to the 6th tab, the mask tab, and click “Add Background Mask.”
- Select Corner Lake from the dropdown menu and configure these settings:
- Mask Color: rgba(10,10,10,0.61)
- Mask Transform: Horizontal
- Mask Aspect Ration: Horizontal rectangle
- Mask Size: Cover
- Mask Position: Center Left
- Mask Blend Mode: Normal
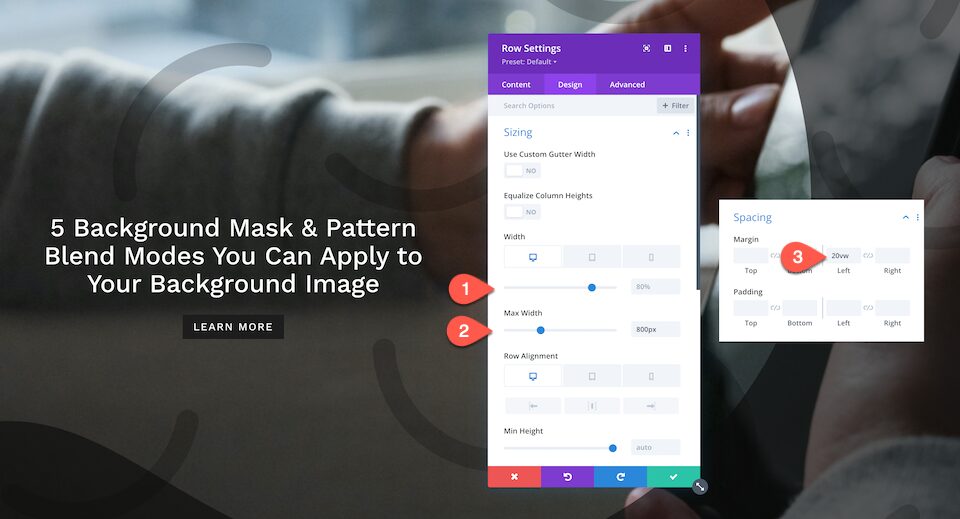
3. Configure Row Settings
Before we go, this hero section has unique row styles. Let’s set that up.
- Sizing:
- Width: 80%
- Max Width: 800px
- Row Alignment:
- Desktop: Default
- Tablet: Center
- Phone: Center
- Spacing:
- Left: 20vw
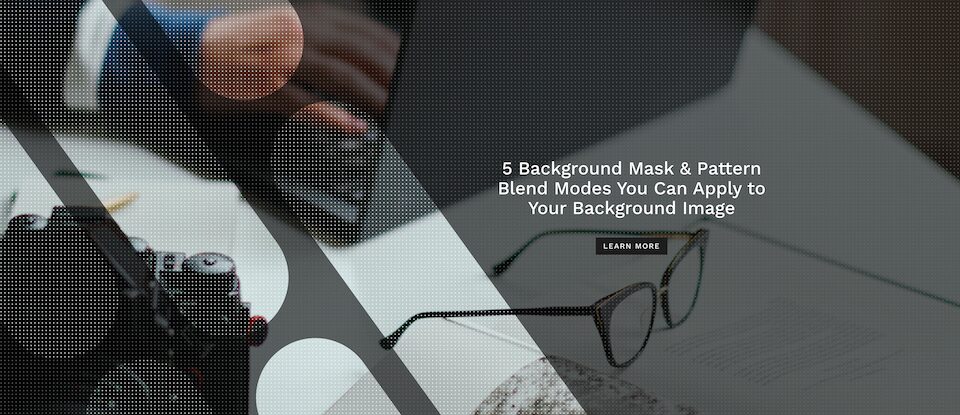
How to Design Hero Section #5
Now, let’s design the fifth hero section.
1. Add a Background Image
Select your background image.
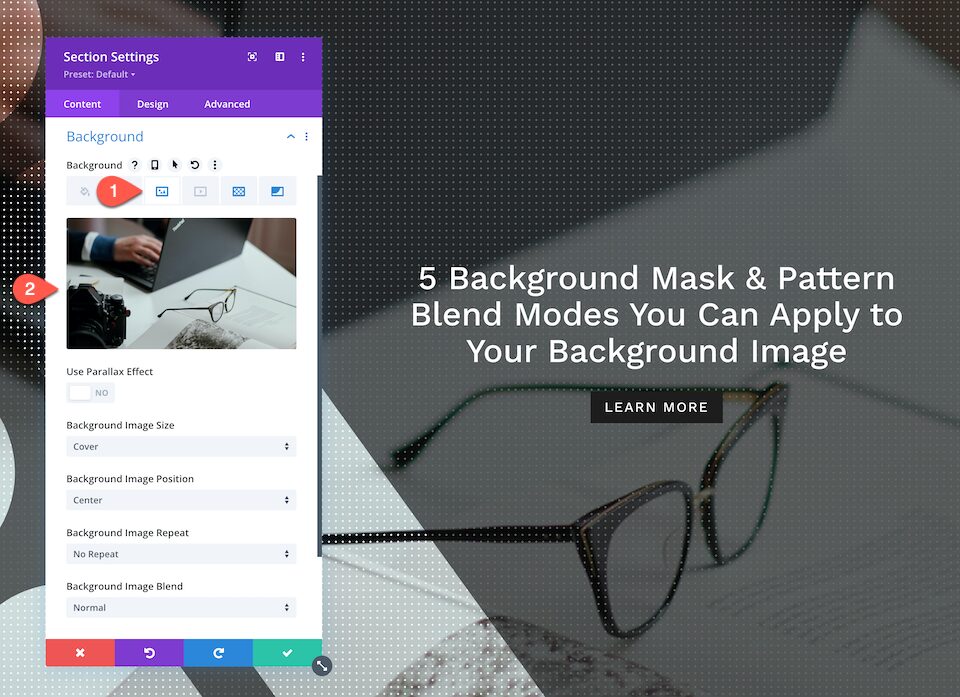
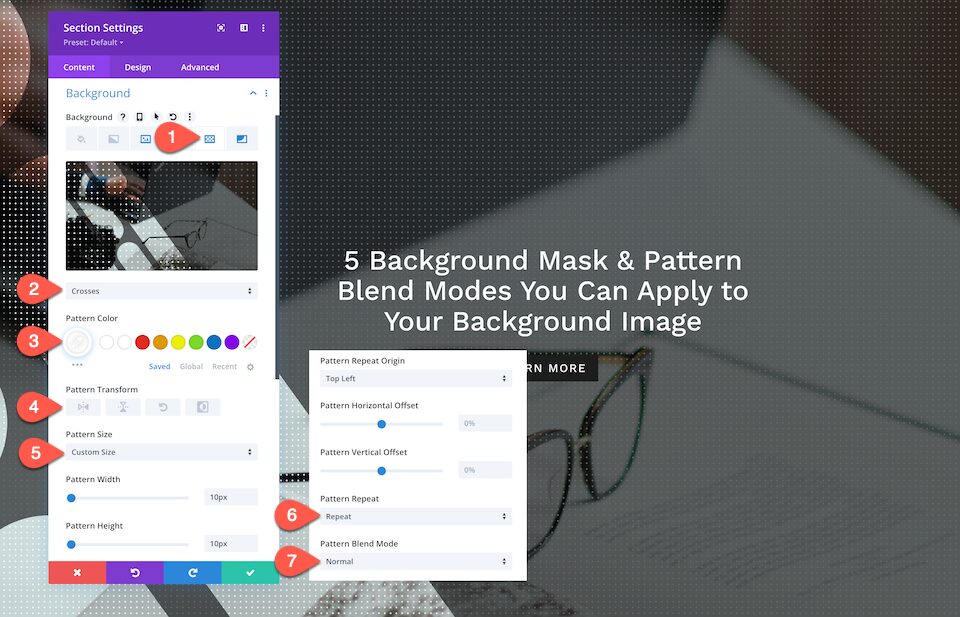
2. Add Background Pattern
Now that we have our background image set up, let’s apply a background pattern.
- Inside the Background tab, navigate to the 5th tab, the patterns tab, and click “Add Background Pattern.”
- Select Crosses from the dropdown and configure these settings:
- Pattern Color – #ffffff
- Pattern Transform: none
- Pattern Size: Custom Size
- Pattern Width: 10px
- Pattern Height: 10px
- Pattern Repeat Origin: Top Left
- Pattern Repeat: Repeat
- Blend Mode: Normal
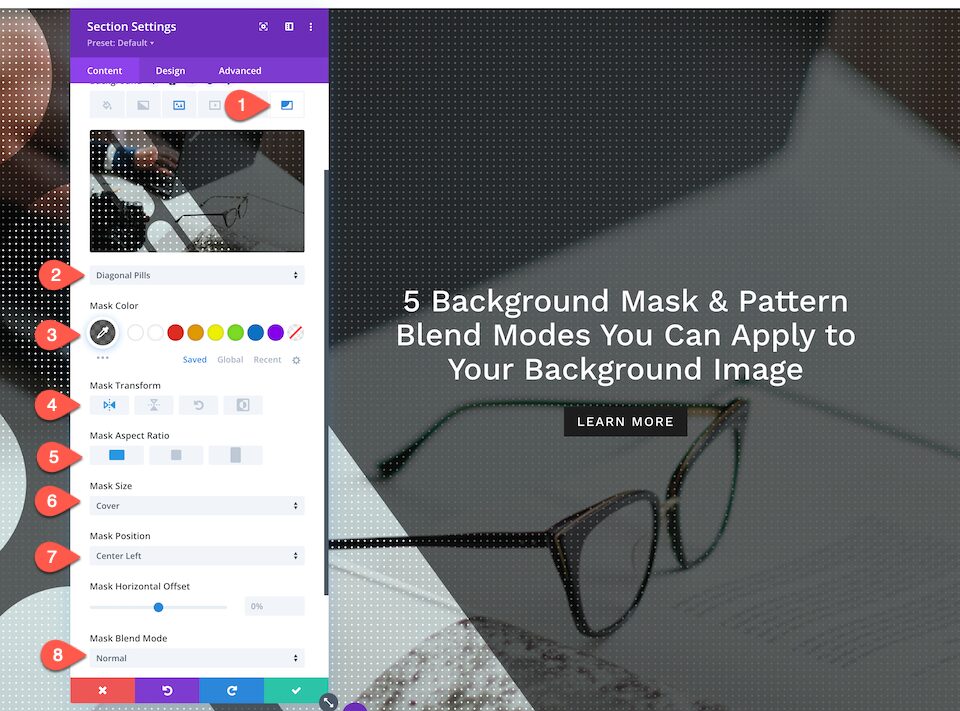
3. Add Background Mask
Now that we have a background image and pattern applied, let’s add a background mask.
- Inside the Background tab, navigate to the 6th tab, the mask tab, and click “Add Background Mask.”
- Select Diagonal Pills from the dropdown menu and configure these settings:
- Mask Color: rgba(10,10,10,0.61)
- Mask Transform: Horizontal
- Mask Aspect Ration: Horizontal rectangle
- Mask Size: Cover
- Mask Position: Center Left
- Mask Blend Mode: Normal
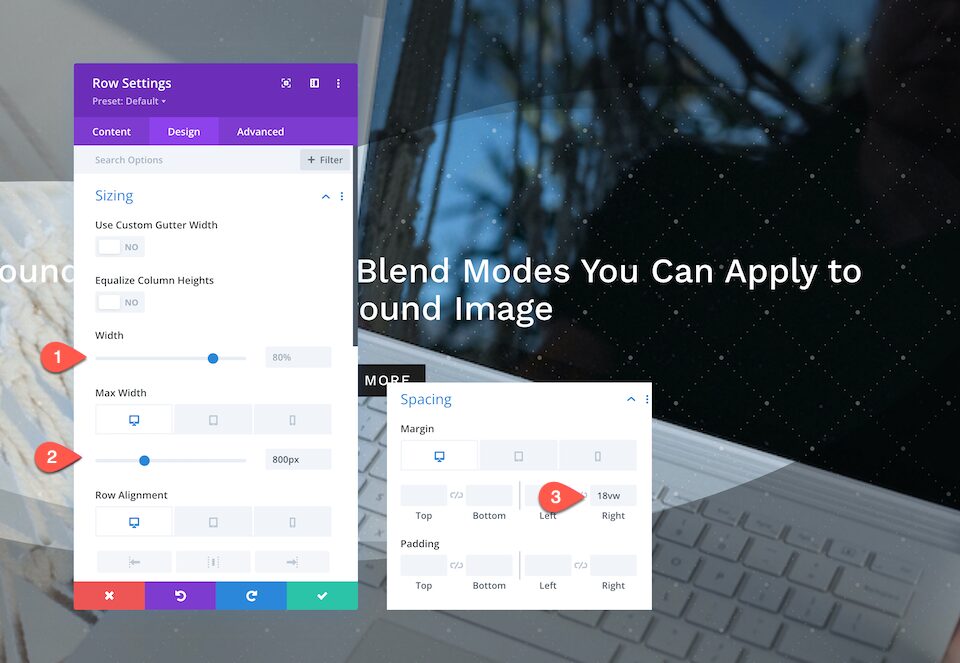
3. Configure Row Settings
Before we go, this hero section has unique row styles. Let’s set that up.
- Sizing:
- Width: 80%
- Max Width: 800px
- Row Alignment:
- Desktop: Default
- Tablet: Center
- Phone: Center
- Spacing:
- Right: 18vw
Get More Background Mask and Pattern Designs!
If you want more designs like this one, check out these 12 background mask and pattern designs free for download.
Final Thoughts
Designing a unique and eyecatching hero section for your website is easy with Divi’s new background mask and pattern options. Each feature has many options that allow you to create truly creative background designs. Plus, you can add background patterns and masks to any Divi Builder element! The design options are endless.
The post 5 Background Mask & Pattern Overlays You Can Apply To Your Background Image appeared first on Elegant Themes Blog.