
Animated GIFs and HTML5 videos can be great for animating how a product works on your website. These short animations communicate valuable information to the visitor in a way that is more readily digested than a regular video. Adding these type of GIFs and HTML5 videos can be done pretty easily with Divi. And with a little creativity, you can add 3D effects for unique product animations.
In this tutorial, I’m going to show you how to add 3D effects to GIFs and HTML5 videos to display unique product animations in Divi. This design works really well for those looking for a creative layout to showcase a featured product or service. To do this, we’ll first need to understand how to add GIFs and HTML5 video embeds to your page using Divi. Then we’ll be able to use Divi’s transform options to position and rotate the GIF (or video) in 3d space. To finish things off, we’ll be using a few Divi design techniques to create a beautiful section layout to go with those 3D GIFs and Videos.
Let’s get started.
Sneak Peek
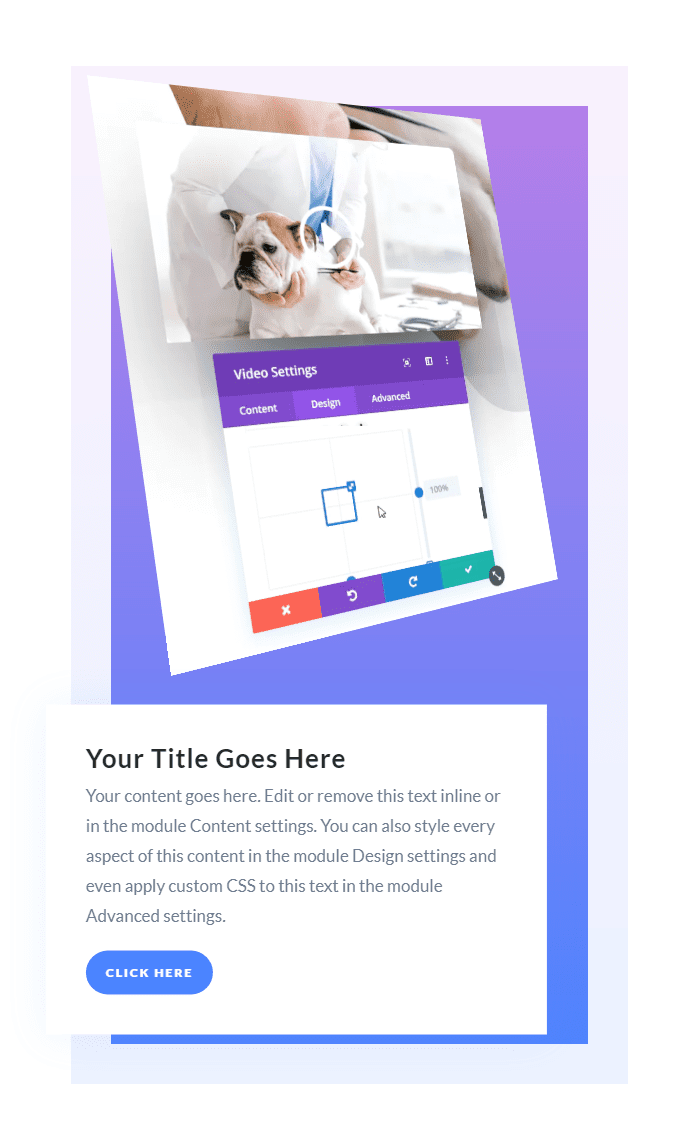
Here is a sneak peek at the design we will build in this tutorial. The design looks similar when using a GIF and a HTML5 video to create the product animations.

Download the 3D Effects for GIF and HTML5 video Product Animations Divi Layout for FREE
To lay your hands on the designs from this tutorial, you will first need to download it using the button below. To gain access to the download you will need to subscribe to our Divi Daily email list by using the form below. As a new subscriber, you will receive even more Divi goodness and a free Divi Layout pack every Monday! If you’re already on the list, simply enter your email address below and click download. You will not be “resubscribed” or receive extra emails.
@media only screen and ( max-width: 767px ) {.et_bloom .et_bloom_optin_1 .carrot_edge.et_bloom_form_right .et_bloom_form_content:before, .et_bloom .et_bloom_optin_1 .carrot_edge.et_bloom_form_left .et_bloom_form_content:before { border-top-color: #ffffff !important; border-left-color: transparent !important; }
}.et_bloom .et_bloom_optin_1 .et_bloom_form_content button { background-color: #f92c8b !important; } .et_bloom .et_bloom_optin_1 .et_bloom_form_content .et_bloom_fields i { color: #f92c8b !important; } .et_bloom .et_bloom_optin_1 .et_bloom_form_content .et_bloom_custom_field_radio i:before { background: #f92c8b !important; } .et_bloom .et_bloom_optin_1 .et_bloom_border_solid { border-color: #f7f9fb !important } .et_bloom .et_bloom_optin_1 .et_bloom_form_content button { background-color: #f92c8b !important; } .et_bloom .et_bloom_optin_1 .et_bloom_form_container h2, .et_bloom .et_bloom_optin_1 .et_bloom_form_container h2 span, .et_bloom .et_bloom_optin_1 .et_bloom_form_container h2 strong { font-family: “Open Sans”, Helvetica, Arial, Lucida, sans-serif; }.et_bloom .et_bloom_optin_1 .et_bloom_form_container p, .et_bloom .et_bloom_optin_1 .et_bloom_form_container p span, .et_bloom .et_bloom_optin_1 .et_bloom_form_container p strong, .et_bloom .et_bloom_optin_1 .et_bloom_form_container form input, .et_bloom .et_bloom_optin_1 .et_bloom_form_container form button span { font-family: “Open Sans”, Helvetica, Arial, Lucida, sans-serif; } p.et_bloom_popup_input { padding-bottom: 0 !important;}

Download For Free
Join the Divi Newlsetter and we will email you a copy of the ultimate Divi Landing Page Layout Pack, plus tons of other amazing and free Divi resources, tips and tricks. Follow along and you will be a Divi master in no time. If you are already subscribed simply type in your email address below and click download to access the layout pack.
You have successfully subscribed. Please check your email address to confirm your subscription and get access to free weekly Divi layout packs!
To import the layout to your page, simply extract the zip file and drag the json file into the Divi Builder.
Let’s get to the tutorial shall we?
Using GIFs for Short Product Animations
GIFs have been around for a long time. This is probably because GIFs are easy to make and widely supported across browsers. And they can work well for really short product animations. Because a GIF is an image, you can use it in a Divi Image module just like you would any other jpg or png. This allows you to style the GIF with the full power of Divi’s built-in settings. But be warned, GIFs with a longer duration and higher frame rate can result in really large file sizes. So it is best to keep your GIFs short and as small as possible.
Using HTML5 Video as a GIF Replacement
HTML5 videos are becoming a popular GIF replacement, especially for longer product animations. You may have noticed them being used on the new Elegant Themes website design. They are significantly smaller in size compared to GIFs and therefore take less time to load. And adding an HTML5 video to your Divi site is simple. All you need to do is add the HTML5 video element to embed the video to your page (similar to how you would add a video shortcode in WordPress). You can also customize the video with hidden controls, looping, and autoplay which results in a high quality animation that functions just like a GIF. Plus, when adding the embed to a Divi Module, you can also use Divi builder to style the Video in creative ways.
Check out this post for more info on why you should consider using HTML5 Video over regular GIFs.
Now that we understand a bit more about using GIFs and HTML5 videos, we are ready to start using them in Divi.
What You Need for this Tutorial
To get started, you will need the following:
- A GIF image
- An MP4 Video File (and the URL to that video file) to be used in the HTML5 video Element embed. For maximum browser support, you can also include the same video in webm format as well (more on this later).
- The Divi Theme installed and active
- A new page created to build from scratch on the front end (visual builder)
After that, you will have a blank canvas to start designing in Divi.
Adding a 3D Effect to an Animated GIF or HTML5 video
Before we get too far into designing the complete section layout for this tutorial, I thought it would be best to show you how to add the 3D effect to both a GIF and an HTML5 video. Once we are done, we will polish off the rest of the section layout with a nice modern design.
For now, let’s start with adding the 3D effect to a GIF in Divi.
Creating a GIF
There are a lot of ways to create a GIF on the web. Since this tutorial is about creating a GIF to animate how a product works, you will want to record a section of your screen (using a screen recorder) and then convert the video file into a GIF file. Remember to create the GIF as small as possible to limit the file size and load time. Once the GIF is created you will be able to use it like you would any other image in Divi.
If you want to learn how to create a GIF using Snagit, check out our post on How to Switch a Background Image with an Animated Gif on Hover.
Adding a 3D Effect to a GIF in Divi
Now it’s time to add the GIF to Divi so we can style it with a cool 3D effect.
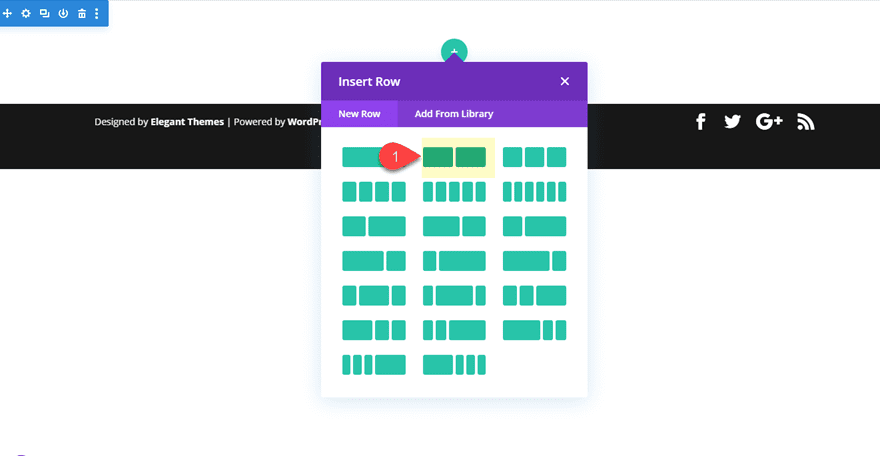
To get things started, add a new regular section with a two-column row.
Before you add a module, we need to add the perspective property to the column that will contain our GIF. To do this, open the row settings and add the following snippet of CSS to the Column 1 Main Element:
perspective: 1000px;
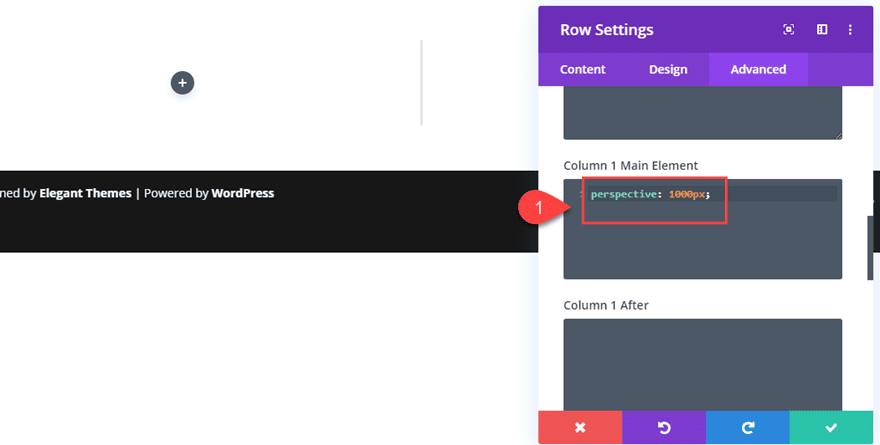
This perspective property is necessary to add perspective to the element within the column. An element needs perspective so we can get a 3D effect when using Divi’s transform options. For a better understanding, check out our post on how to use perspective with transform options to design 3D photo walls.
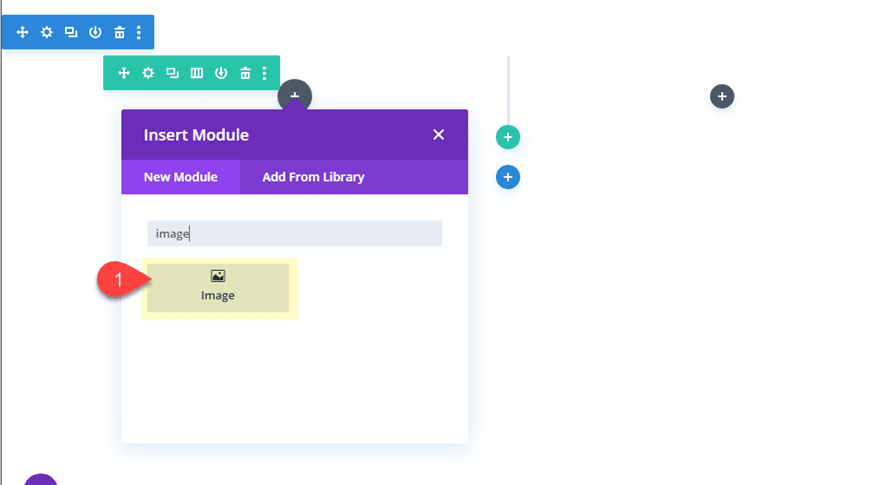
Now add an image module to column 1.
Upload the GIF to the image module. For this design, the GIF should be around 600px by 700px.
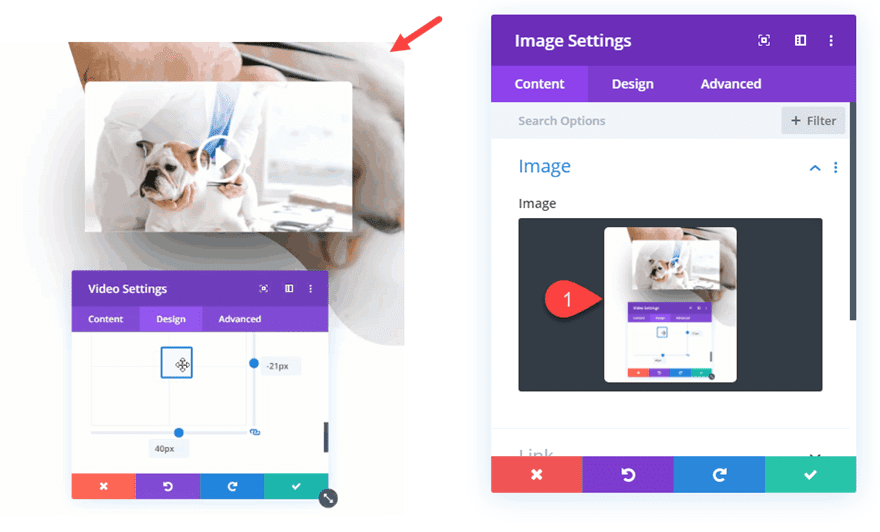
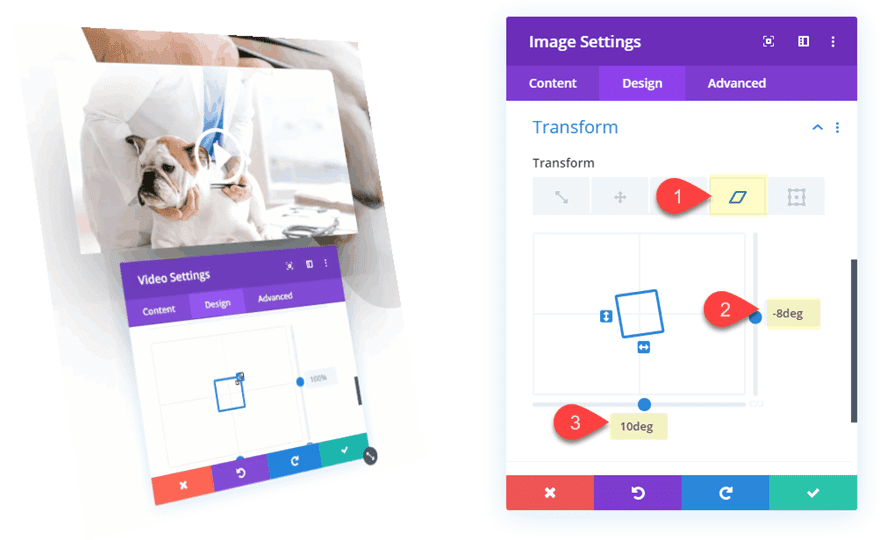
Then use the transform options to scale, rotate and skew the GIF in 3D space.
Transform Rotate Y Axis: 8deg
Transform Rotate X Axis: 28deg
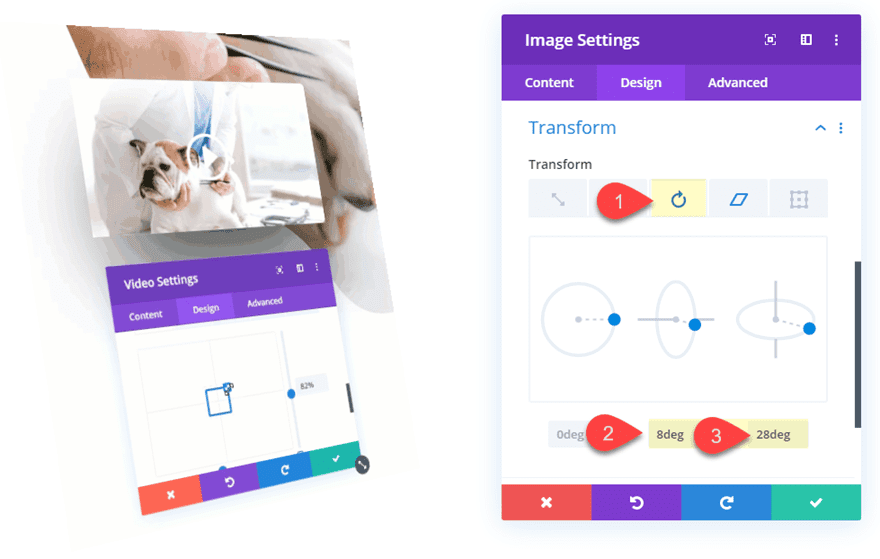
Transform Skew Y Axis: 10deg
Transform Skew X Axis: -8deg
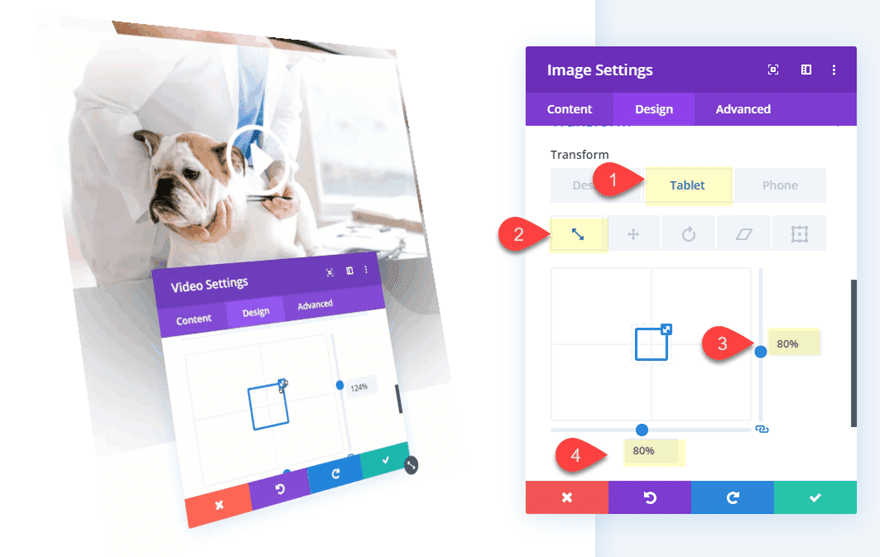
Transform Scale (tablet): 80%
Now let’s look at the result.
Adding a 3D Effect to an HTML5 Video in Divi
Before we add the 3D effect, we first need to create our HTML5 Video. We will go over the steps on how to do this below. But if you want a more complete explaination, check out our post on How to Use HTML5 Video to Create Animated Gifs at Smaller File Sizes.
Creating the HTML5 Video Embed Code
The HTML5 video Element has the following basic structure.
You don’t have to know much about HTML to see what this code is doing. Inside the element, you have two elements that holds the path/url to the video files you want to display. Each source element has a video in a different file format (webm and mp4). Both are necessary for maximum browser support. The order is important as well. The webm video is placed above the mp4 video in the code because it is a higher quality video format but is less supported by browsers. So if a browser supports webm video, it will display it. But if the browser doesn’t support webm video, it will use mp4 video format below it. It isn’t necessary to include both video formats, but it is best practice. And if you are going to use only one, use the mp4 format because it is more widely supported.
In fact, whenever you use Divi’s video module to display self-hosted videos, Divi creates this same HTML5 video Element to display videos. Which is why the Video module allows you to add both an mp4 and a webm video file.
To use the code for your own video, you simply need to add the video url inside the parentheses after the src attribute.
If you upload the video files to your WordPress site, you can grab the urls from the media library.
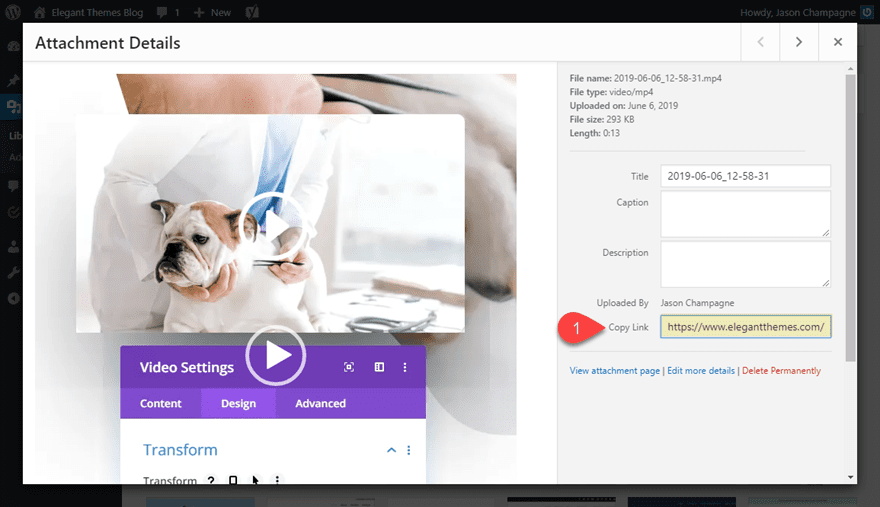
Then paste the video urls inside the parentheses after the src attribute.
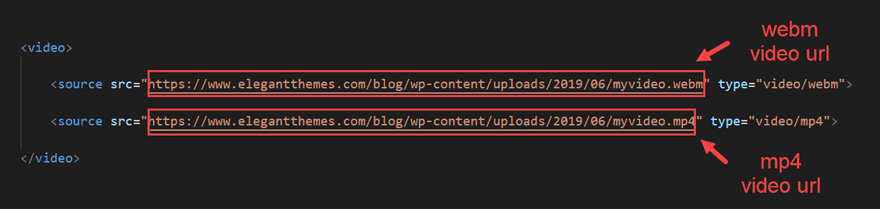
It should look something like this when you are done.
Next, we are going to add four attributes to control the display and functionality of the video. This type of control is the primary reason for inserting the HTML5 video manually instead of using the Divi Video Module. These attributes include autoplay (so the video starts automatically), loop (so the video repeats), muted (so the video doesn’t play audio), and playsinline (so the video plays within the element’s playback area). To apply these attributes to the video, add each of the attributes inside the brackets of the beginning tag.
Now the code will look like this.
Note: Normally, you would apply the controls attribute for HTML5 videos, but in this case we will leave it out so the video will function like a GIF.
Now you are ready to embed the code.
Embedding the HTML5 Video
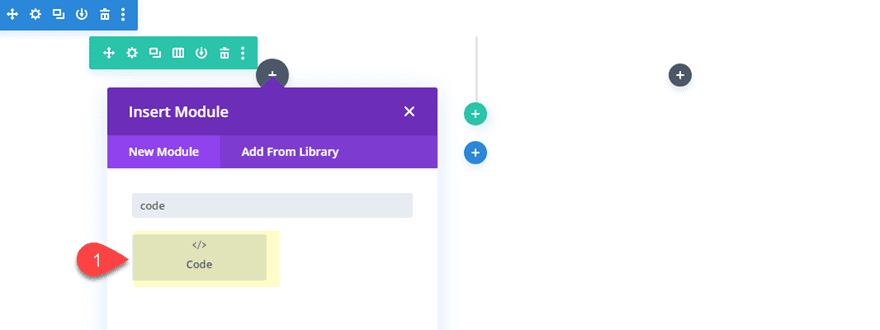
To embed an HTML5 video to your page, we can use the code module.
Before we replace the GIF image module with our code module, let’s go ahead and duplicate the entire section so we can keep our GIF example. In the duplicated section, delete the image module and add a text module in its place.
Then paste the HTML5 video embed code into the code input box.
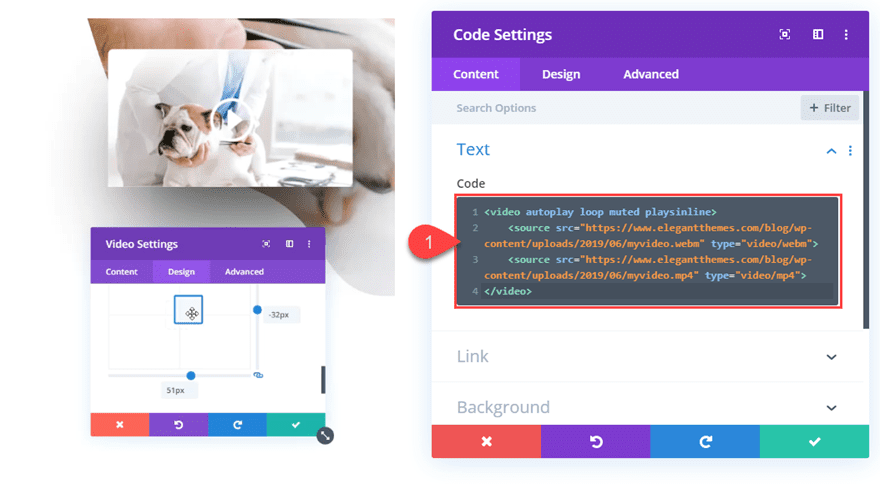
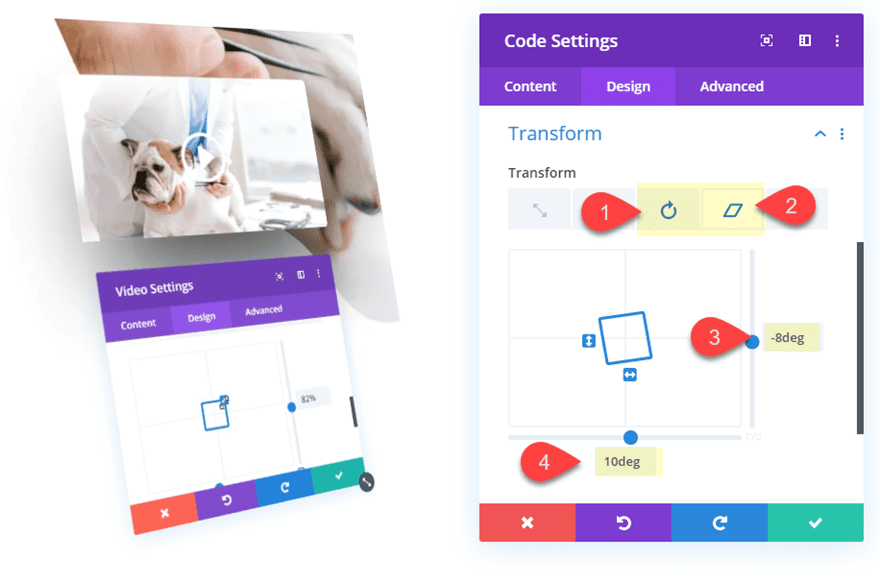
Then copy the transform styles from the image module and paste the transform styles to the code module. Or you can update the transform styles as follows:
Transform Rotate Y Axis: 8deg
Transform Rotate X Axis: 28deg
Transform Skew Y Axis: 10deg
Transform Skew X Axis: -8deg
Transform Scale (tablet): 80%
Since I’m using the same video I used to create the GIF, the design will look very similar. However, the size of the video is significantly smaller than the size of the GIF. Here is the result.
Completing the Design of the Section Layout
Now that we have the 3D GIF (or HTML5 video) in place. We can finish the design of our section layout. For this design, I’m going to use the section with the HTML5 video in column 1.
Customizing the Section and Row
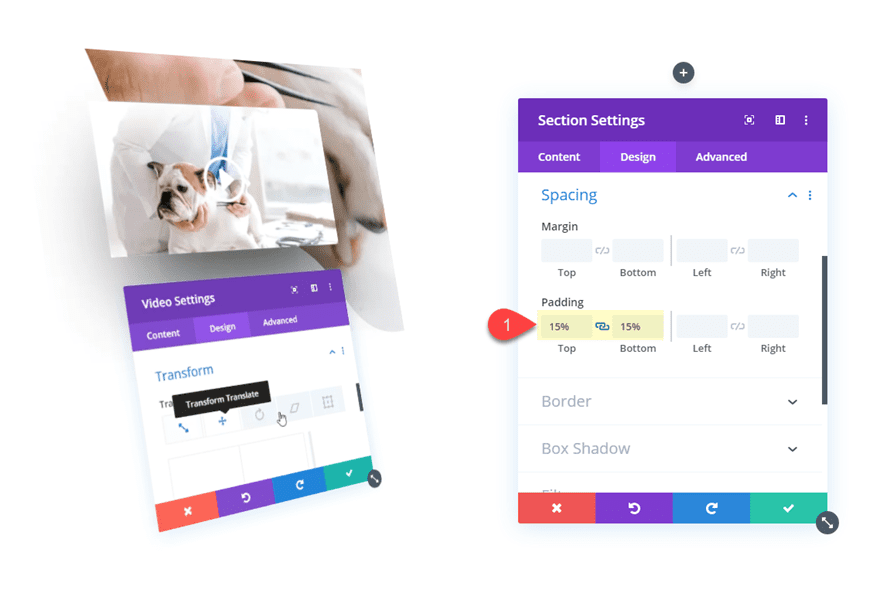
Open up the section settings and update the following.
Padding: 15% top, 15% bottom
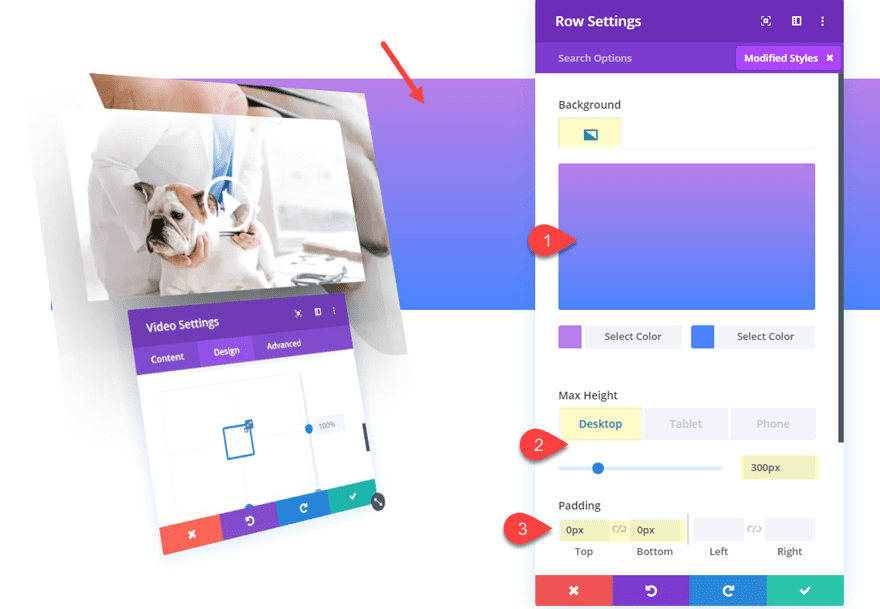
Then open the row settings and update the following:
Background Gradient Left Color: #ba7fe8
Background Gradient Right Color: #4b84ff
Max Height: 300px (desktop), none (tablet and phone)
Padding: 0px top, 0px bottom
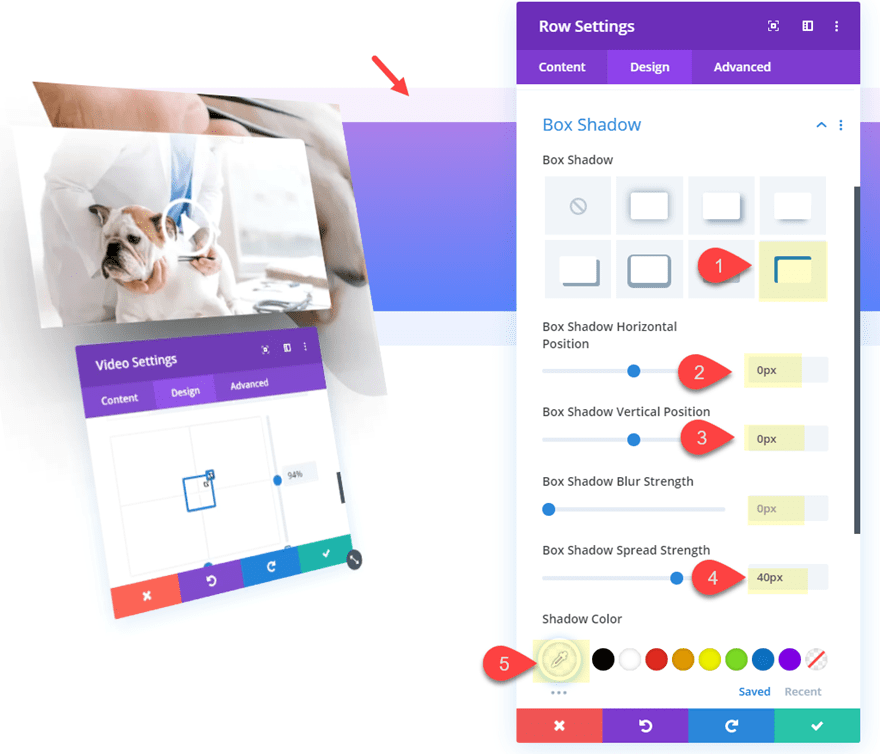
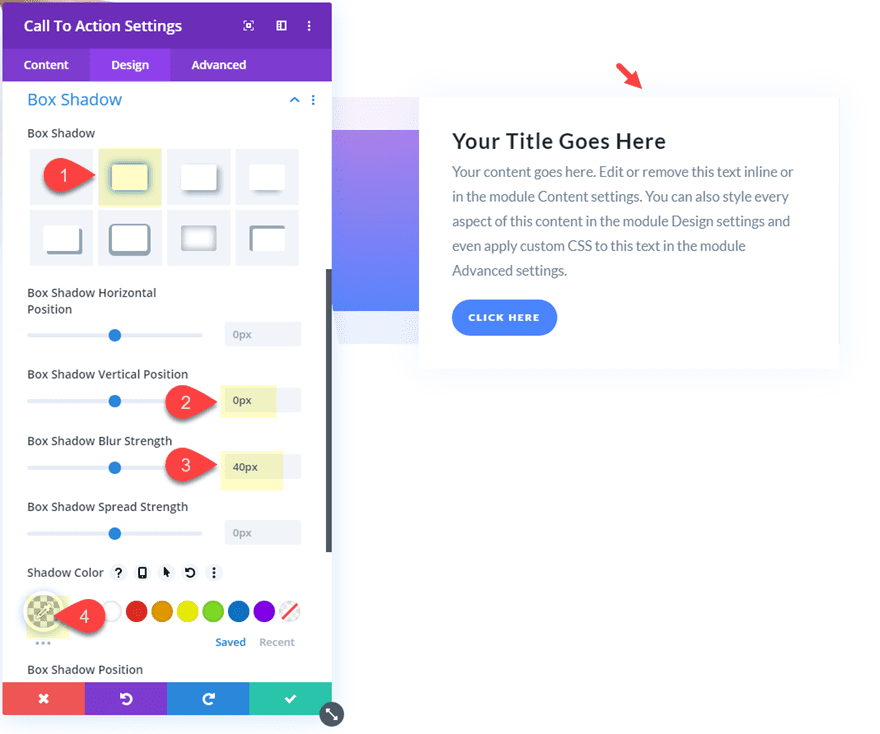
Next we can give the row a semi transparent inner box shadow for a unique design element.
Box Shadow: see screenshot
Box Shadow Horizontal Position: 0px
Box Shadow Vertical Position: 0px
Box Shadow Spread Strength: 40px
Shadow Color: rgba(255,255,255,0.89)
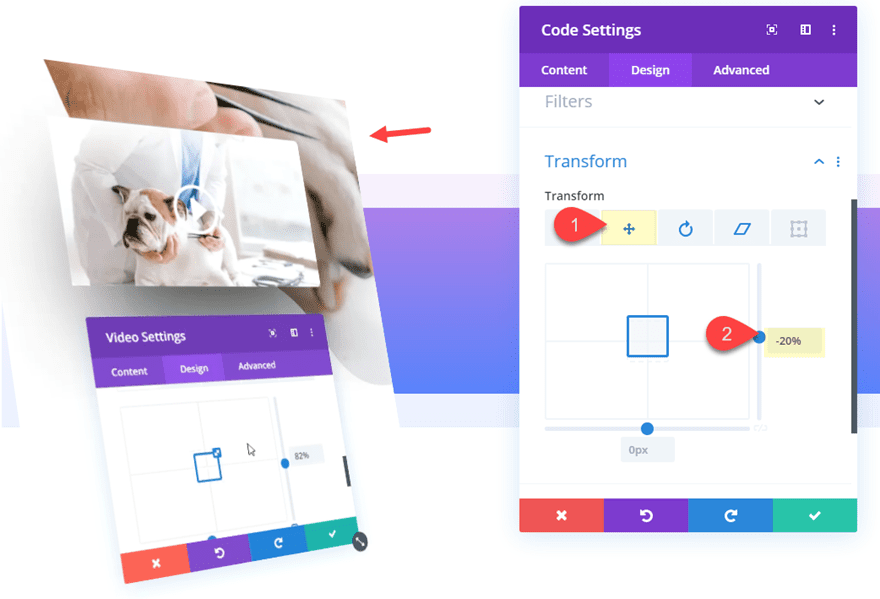
Positioning the Code Module
Now let’s bring the code module with the video up a little by adjusting the transform translate property as follows:
Transform Translate Y Axis: -20% (desktop), -7% (phone)
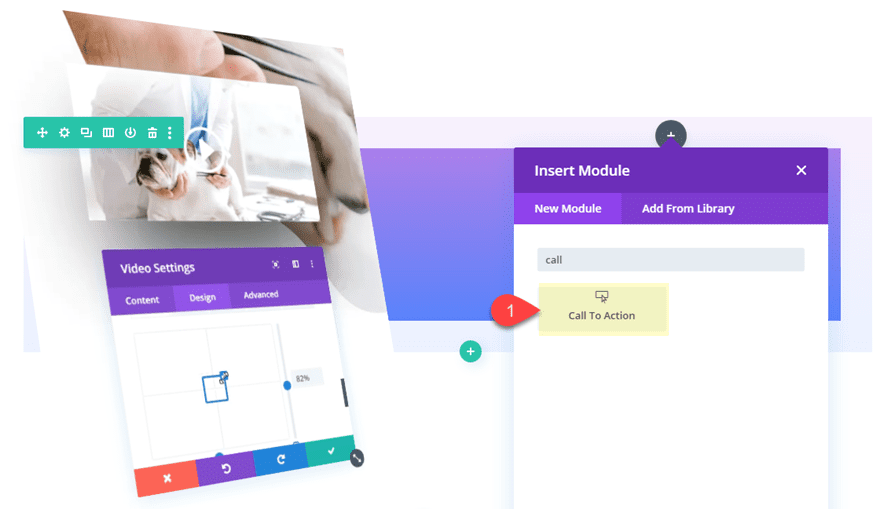
Adding a Call to Action Module
To complete the design, let’s add a call to action module to column 2. This will be a great place to add a description of the featured product with a button.
Add a Button Link URL to make the button appear.
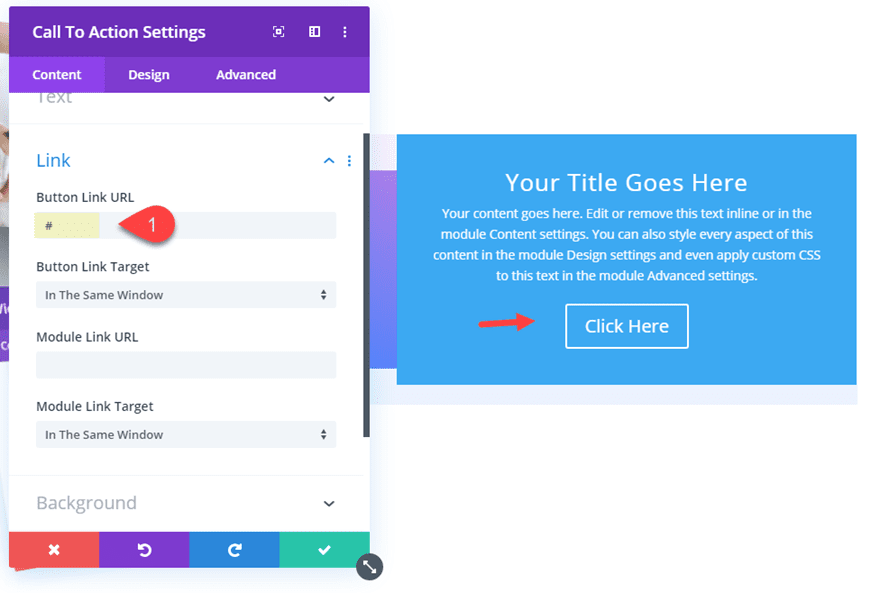
Continue to update the settings as follows:
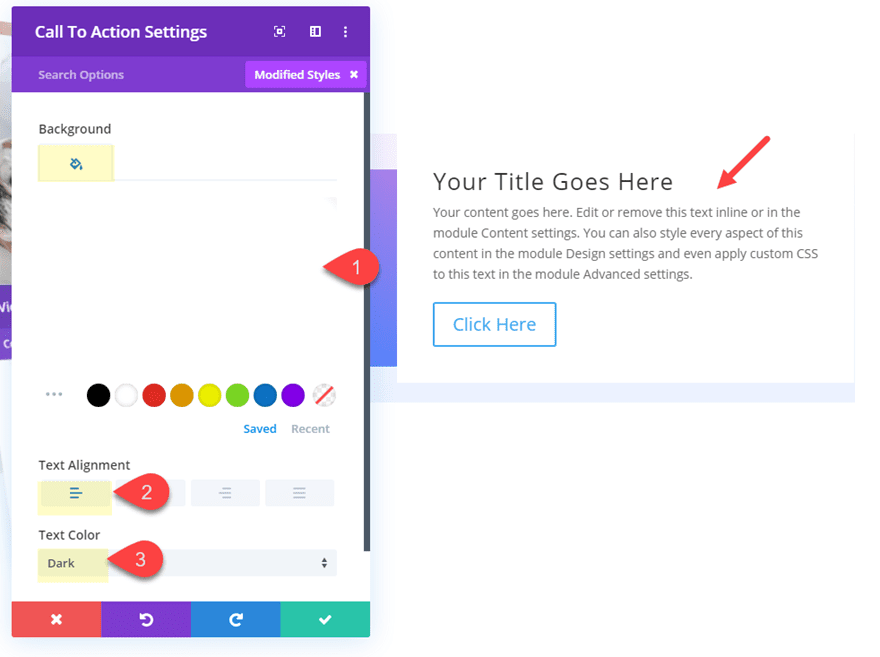
Background Color: #ffffff
Text Alignment: Left
Text Color: Dark
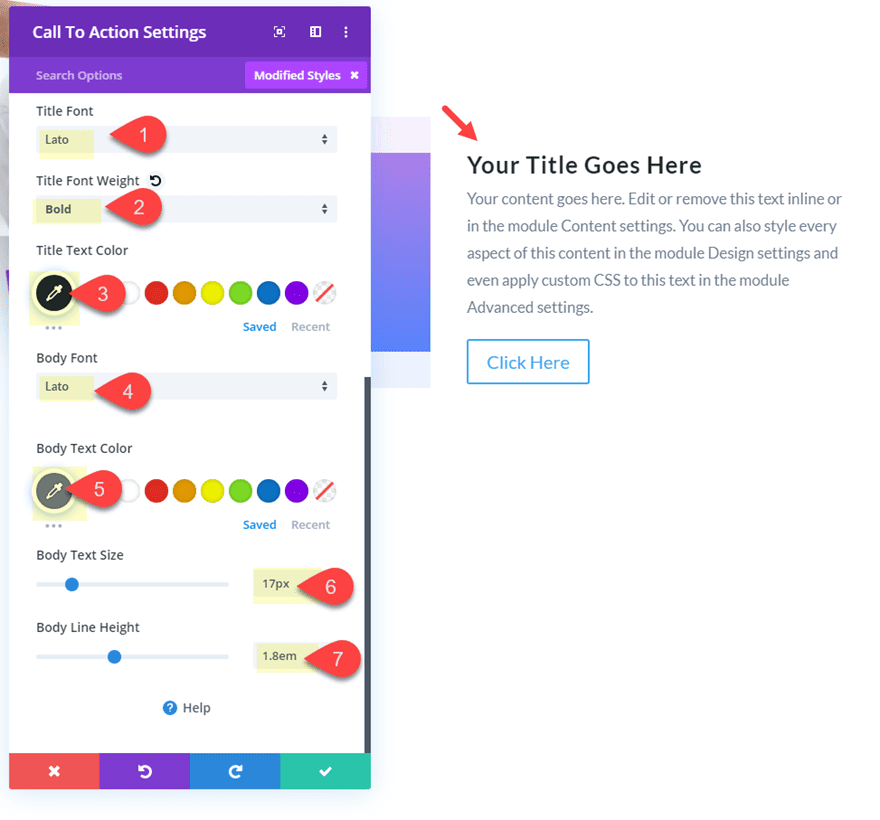
Title Font: Lato
Title Font Weight: Bold
Title Text Color: #20292f
Body Font: Lato
Body Text Color: #6d7c90
Body Text Size: 17px
Body Line Height: 1.8em
Button Text Size: 12px
Button Text Color: #ffffff
Button Background Color: #4b84ff
Button Border Width: 0px
Button Border Radius: 100px
Button Letter Spacing: 2px
Button Font: Lato
Button Font Weight: Heavy
Button Font Style: TT
Button Padding: 12px top, 12px bottom, 20px left, 20px right

Box Shadow: see screenshot
Box Shadow Vertical Position: 0px
Box Shadow Spread Strength: 40px
Shadow Color: rgba(103,151,255,0.11)
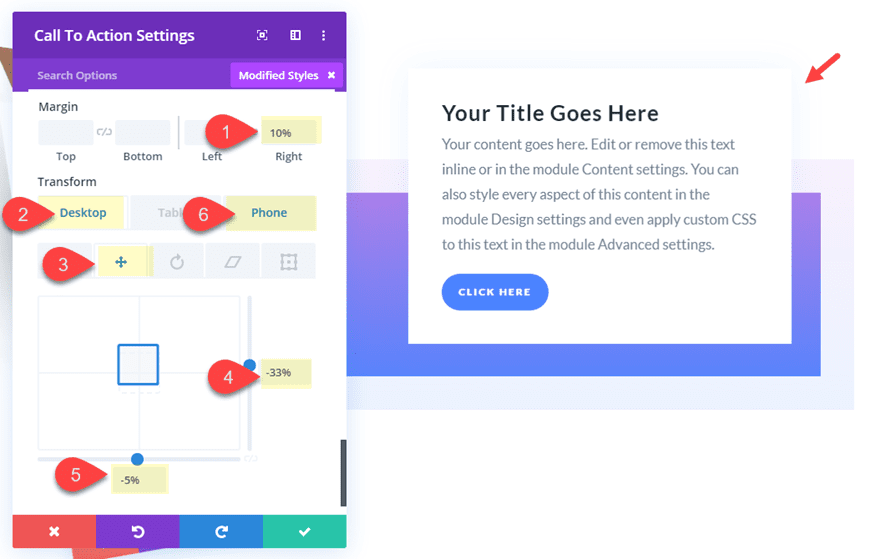
Margin: 10% right
Transform Translate Y Axis: -33% (desktop), -15% (phone)
Transform Translate X Axis: -5%
Final Result
Desktop
Tablet
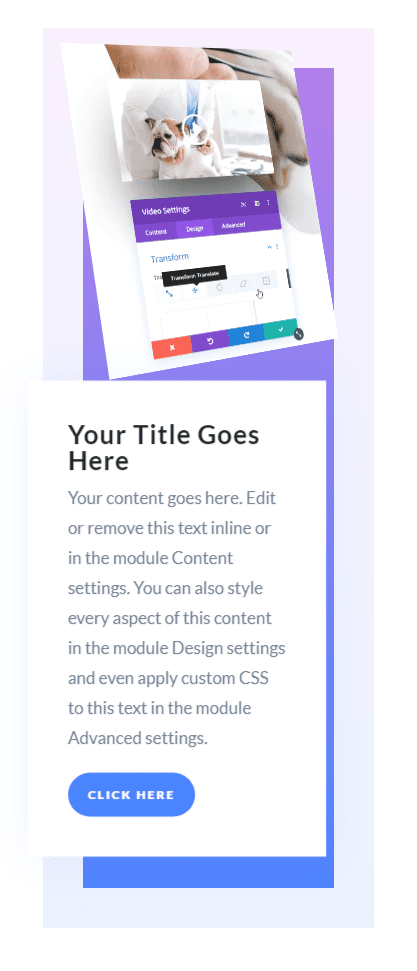
Phone
Final Thoughts
Adding the 3D effect to GIFs and HTML5 videos really does give a unique display for those product animations. Divi’s transform options (combined with the perspective property) make it easy to add the 3D effects to your GIFs and Videos.
And, hopefully, you’ve learned a few things about how to use GIFs and HTML5 videos with Divi. GIFs are simple to use but harder to keep the file size web friendly. HTML5 videos require using an embed code but can work extremely well as a GIF replacement for longer animations.
Feel free to explore new and exciting ways to use this design for showcasing animations for products and services in your next project.
I look forward to hearing from you in the comments.
Cheers!
.inline-code{padding: 0px 4px; color: crimson; font-family: Monaco,consolas,bitstream vera sans mono,courier new,Courier,monospace!important}
The post Adding 3D Effects to GIFs and HTML5 Videos to Display Unique Product Animations in Divi appeared first on Elegant Themes Blog.