
In a previous post, I touched on the importance of understanding Web Host Manager (WHM) if you’re considering taking the leap and being a hosting reseller.
WHM provides a powerful way not only to create and manage your clients hosting accounts, but also to brand each individual cPanel with your own business logo and color scheme.
In this post, we’ll walk through using WHM to create hosting packages and individual accounts, and branding your clients’ cPanel accounts.
WHM: A Quick Breakdown Before We Dive In
Understanding the architecture of WHM is helpful before diving in and creating your first hosting account. For our purposes, we’ll start at the lowest level (cPanel) and work our way up the hierarchy. We’ll walk through setting up each of these in more detail further on in the post.
- cPanel – If you’re a web designer, you’ve almost certainly worked with cPanel before. cPanel is the portal that allows you (and, if you choose to allow access, your clients), to access things like File Manager, FTP accounts, One-Click Installs, databases, etc…
- Individual Hosting Accounts – With WHM, you will create each new hosting account for your clients. Each hosting account has its own individual instance of cPanel, and it’s at this level that you can adjust bandwidth allotment, disk space, email accounts allowed, etc…
- Hosting Packages – Hosting packages allow you to create “levels” of hosting for you to offer your clients. In the same way most hosts offer different tiers to customers when they sign up, you can create different levels for your own hosting clients.
First things First – Branding Your Clients’ cPanels
If you don’t plan on offering your clients access to cPanel (and many, many clients have no need of ever logging in), you can skip this section and move on.
WHM allows you to brand your clients cPanel accounts with your own logo and company name, support contact info, etc…
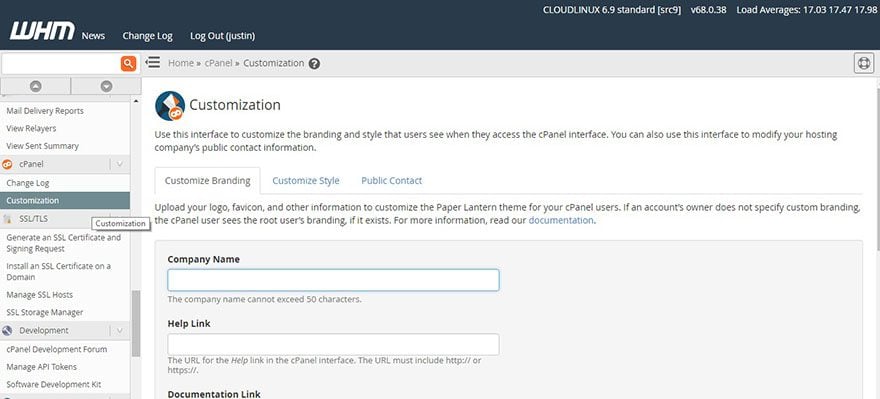
To do this, log in to WHM and look for the “cPanel” section in the left hand menu pane. You should see a “Customization” option.
Clicking this brings you to a page with three different tabs: “Customize Branding”, “Customize Style”, and “Public Contact”.
We’ll start with “Customize Branding”. Here, you’re given the chance to upload your logo, favicon, enter your business name, etc… Fill out as much as you can (you may not have your own “documentation” or “help” links – if not you can leave these blank).
Click Save, and then move on to the “Customize Style” tab. This one is easy. Just choose the style that’s most appealing to you, and that you think will be most appealing to your clients. “Basic” is usually your best bet.
Click save, and move on to the “Public Contact” tab. Fill out with your name and a link to your website, then save.
That’s it! You’ve just created a branded cPanel style for your existing or future hosting clients!
Creating an Account Package
In WHM, account packages allow you to set up bandwidth, disk space, and other limits on hosting accounts.
As I mentioned in A Handy Guide to Reseller Hosting, for my reseller hosting business, I try to keep things as simple as possible. So instead of offering multiple “Packages” (or “Tiers”) to my clients, I offer only one “basic” package, and adjust individual accounts as needed.
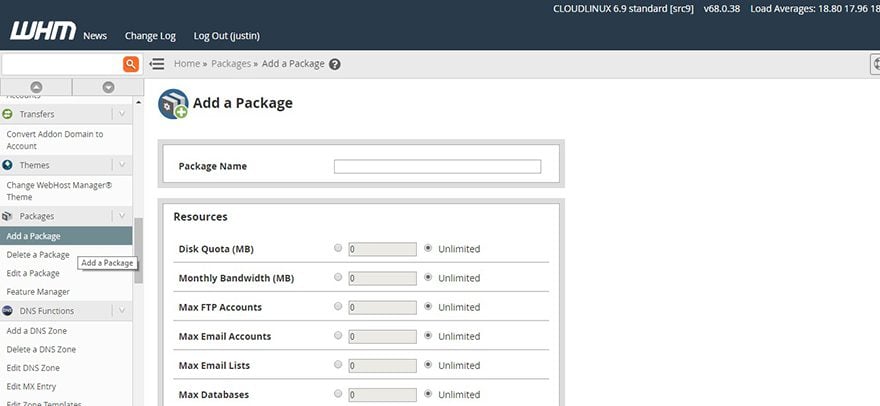
Whether you want to create multiple packages or only one, we’ll start the process by finding the “Packages” area in the left hand menu of WHM, and selecting “Add a Package”.
Here, you’ll see a list of options that will apply to all future accounts that are set up under this “package”.
- Package Name: I would recommend choosing something simple, such as “Basic”, “Premium”, or “Business”, depending on the package tier.
- Disk Quota: This is the amount of disk space each account is allowed. I set mine at 1000mb as a starting point.
- Monthly Bandwidth: This is the amount of data allowed to be transferred to and from the server. I set mine at 5000mb.
- Max FTP Accounts: I leave this as “unlimited”.
- Max Email Accounts: This setting may depend on whether you will allow your clients access to cPanel. If you will, you may want to set a limit for the number of email accounts allowed here – that way they will not be able to add additional email accounts on their own. If your clients will not have access to cPanel, you can leave this set at unlimited.
- Max Databases: I leave this as unlimited.
- Max Subdomains and Max Parked Domains: I set these to “0”.
- Maximum Hourly Email by Domain Relayed: I leave this set to “0”.
- Maximum percentage of failed or deferred messages a domain may send per hour: I leave this set to “0”.
In the next section, “Settings”, I leave everything as the default, though you may need to change “Location” to the language of your client, if your clients are not based in English-speaking countries.
You can also leave “LVE Settings” unchecked, unless you want to delve into more advanced settings.
Finally, click “Add”, and your new hosting package will be created. If you plan on offering tiered packages to your clients, you can repeat the process, adjusting the settings higher for packages you plan to charge more for.
Creating Your First Account
We’re getting close! We’ve branded cPanel and created an Account Package. The next step will be repeated each time you add a new hosting client.
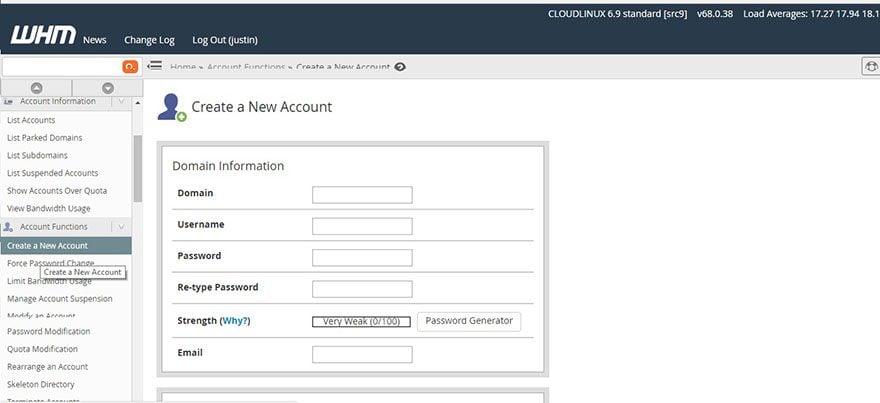
On the left hand menu, look for the “Account Functions” section, and click “Create a New Account”.
As we did above, let’s walk through the options one at a time:
- Domain: enter the domain in www.yourdomain.com format. Do not include “https://” or “https://”.
- Username: This will be the username your client uses to log into cPanel.
- Password: This will be the password your client uses to log into cPanel.
- Email: I set this to my own email address, generally.
- Choose a Package: This is where we’ll assign the package we created to our new hosting account. The settings/limits you chose will apply to this hosting account.
- DNS Settings: I leave these as the default. Your nameservers should be listed in this section. Make note of them, so that you can change them in the Domain DNS settings later on.
- Mail Routing Settings: Select “Automatically Detect Configuration (recommended)”.
After you’ve made these selections, click “Create”. You’ll get confirmation that the new account has been created!
You’re almost done! If your client already has a domain purchased, get the login info for their domain registrar, and in the domain dns settings, change nameservers to the ones you took note of when creating the new hosting account (Step 6 above).
Once saved, the domain will begin pointing to the new hosting account over the next 24 hours.
Ongoing Management with WHM
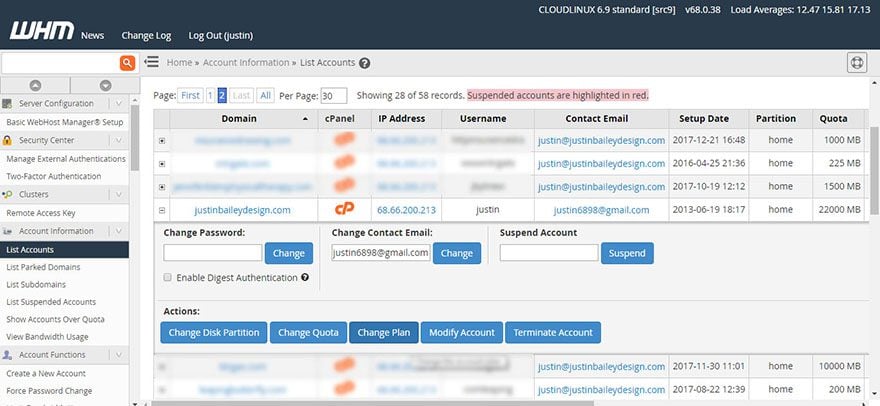
Going forward, you can keep an eye on all of your accounts by looking for the “Account Information” section in the left hand menu, and clicking “List Accounts”. Here, you’ll see some of the basic information for each hosting account, including a cPanel icon you can click to gain “Super Admin” access to each account’s cPanel.
Assigning a New Hosting Package to An Existing Account
Occasionally, you may have an account that is outgrowing their assigned hosting package. If you’ve created a tiered package system, this is when you’ll want to contact them about upgrading their account to your next highest package.
To do this, navigate to the “List Accounts” page, and click the “+” symbol next to the account you want to adjust. This will display a few more options, and you’ll want to click the “Change Plan” button. This will take you to a page in which you will see a list of the Account Packages you’ve created on the left. Select the new package you want to apply, and click the “Upgrade/Downgrade” button. That’s it! The new package’s settings will now apply to this account.
Adjusting Disk Space on a Case by Case Basis
In my case, where I only have one account package and don’t charge more for accounts that are using more disk space or bandwidth, I adjust the accounts on an as-needed basis.
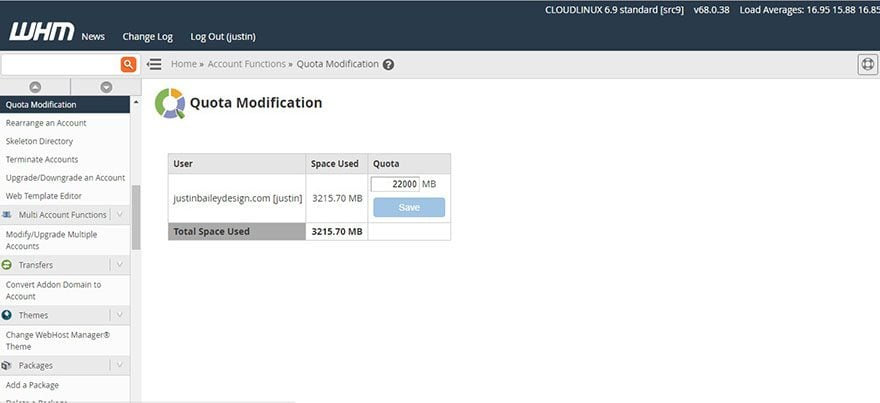
To increase disk space on an account level, click the little “+” symbol to the left of the account name, on the Account Listings page. Click the “Change Quota” button.
Here, you’ll see the amount of disk space used by the account, and you’ll see an input field in which you can set the new limit.
Click “Save”, and the account will now be allotted the new amount of disk space you specified.
Adjusting Bandwidth Quota on a Case by Case Basis
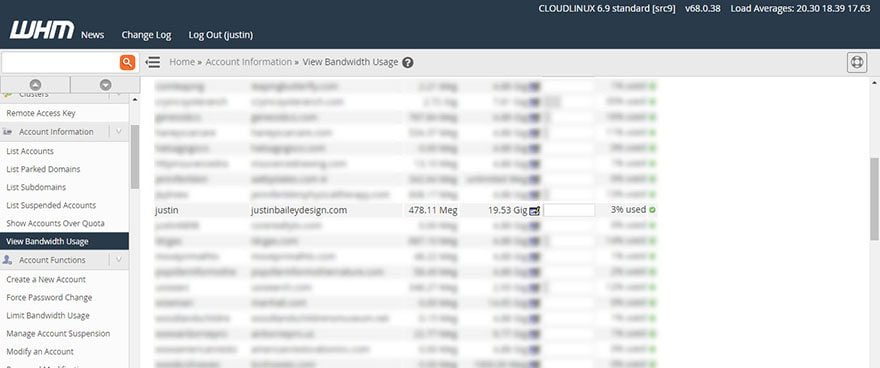
If you’re not using tiered packages, you may also need to increase a hosting account’s bandwidth quota occasionally. To do so, look for the “Account Information” section in the left hand menu, and click “View Bandwidth Usage”. You’ll be shown a list of all existing accounts with the basic info about their bandwidth use.
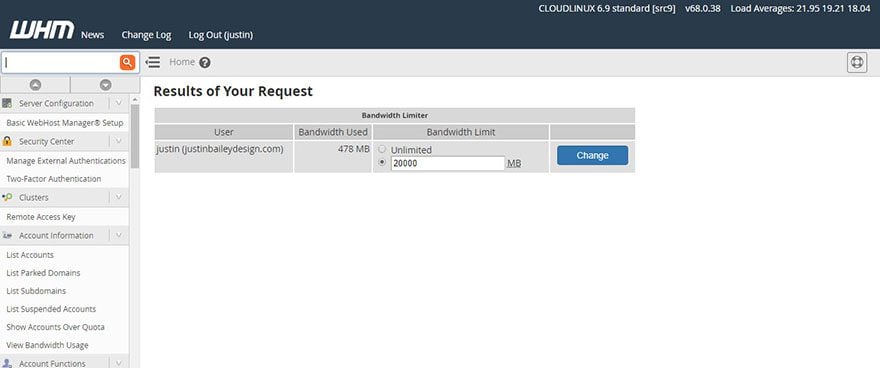
If any accounts are approaching 100%, you can adjust their bandwidth by clicking the icon to the right of the “Limit” column. On the page that comes up next, you can fill in the input field with a larger bandwidth quota, and click “Change”.
In Closing
There are, literally, hundreds of options to explore in WHM. But by following the steps above, you’ll have a great foundational understanding of how to use WHM to manage your Hosting Reseller business. In time, using WHM will become second nature: creating new accounts will take only a minute or two, and adjusting the settings of each account will take only seconds.
And remember: your Hosting company should always be able to help if you run into any issues with WHM, and there are countless other resources that will walk you through the many more advanced features online.
Happy Hosting!
Featured image via supercaps / Shutterstock.com
The post A Beginner’s Guide to Web Host Manager (WHM) appeared first on Elegant Themes Blog.