
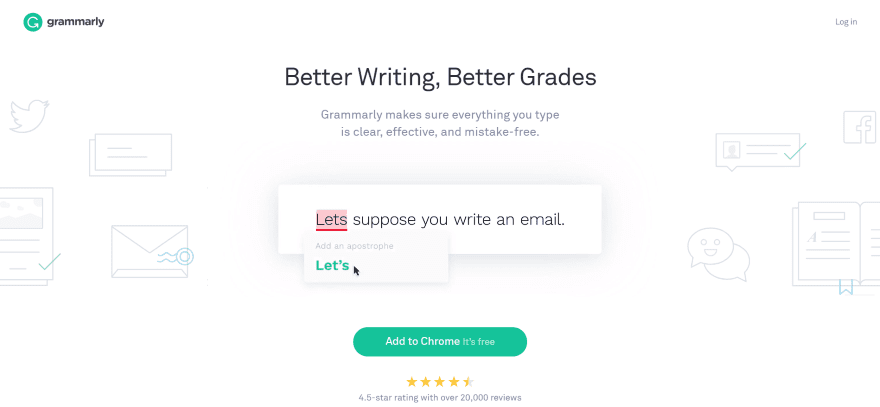
Writing with good grammar is important in business. Bad grammar can not only change the meaning of a sentence and cause miscommunication, it can also reduce credibility. Many text editors and browsers have tools to help, but there are a lot of things they don’t look for. It’s easy to make mistakes that word processors don’t catch. One of the best tools to check your grammar is Grammarly.
Grammarly is an app for writers that suggests edits in real time for spelling, grammar, and writing style. It can even suggest edits based on types of writing, such as academic, business, technical, and creative writing. Grammarly is available for free in a limited edition or as a premium edition. I’m reviewing the free edition.
Four ways to Use Grammarly
There are four ways to use Grammarly:
- Chrome Extension
- Online Dashboard
- Microsoft Office Extension
- Windows App
Let’s look at each method.
Installing the Grammarly Chrome Extension
Google Chrome can also check your spelling and make suggestions. This same tool works with any text editor that appears in the browser such as Facebook and MailChimp. It’s still very basic. Grammarly replaces that with its own tools (unless you disable Grammarly for a particular website).

To add the Chrome extension, in the upper right corner click the three vertical dots to open Chrome’s settings. Hover over More Tools and select Extensions.

Click the Hamburger menu in the upper left corner. At the bottom of that menu click Open Chrome Web Store.

Search for Grammarly. Click the blue button labeled Add to Chrome.
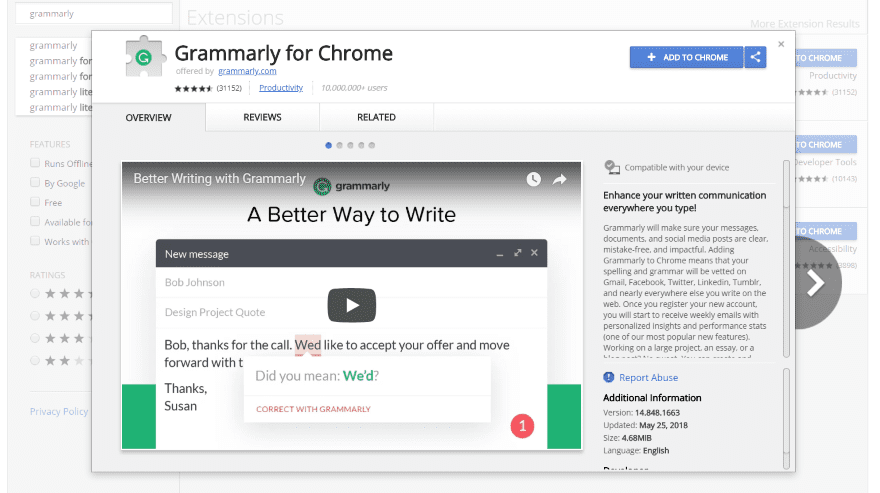
Clicking the image or title opens a modal that provides an overview with a video, reviews, and related extensions.

Clicking Add Extension opens one final modal asking for permission. Click Add Extension.

It will take a few seconds and then open a tab with a message and links for downloads. Here you can download it for Windows, Microsoft Office, and check an online document.
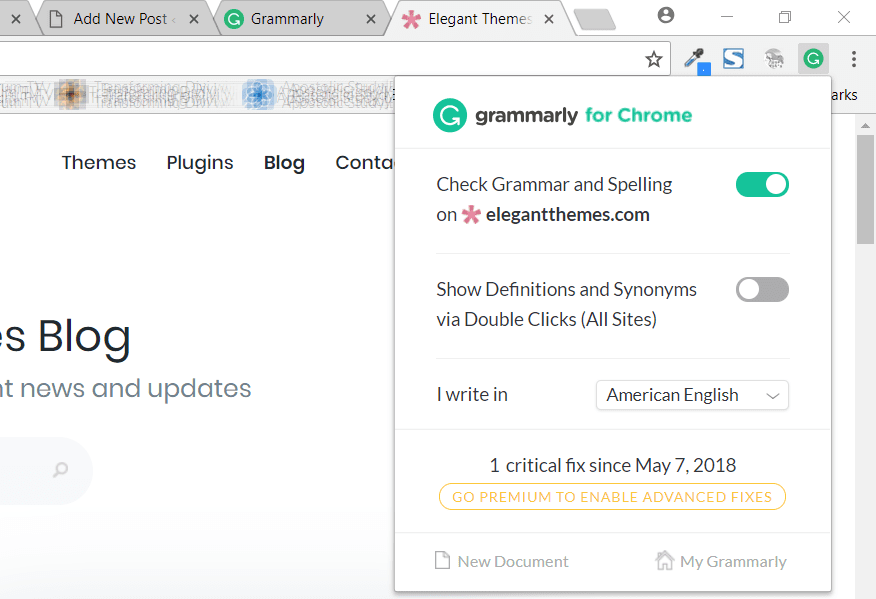
You’ll see the Grammarly logo in the upper right corner of your Chrome browser. Clicking the logo opens settings where you can disable the extension for the current website, show definitions and synonyms by double-clicking, choose your dialect of English, see the premium edition, create a new document, and go to your Grammarly dashboard.

Clicking My Grammarly opens a tab with a dashboard where you can upload documents and upgrade to the premium edition.
Personalizing Grammarly
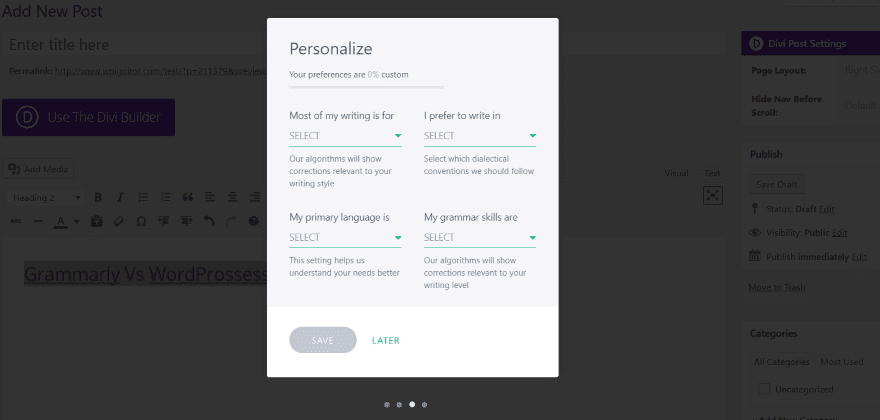
When you click on Grammarly the first time it lets you set up your personalized options. The algorithms will adapt to suit your needs based on your choices.
Select the type of writing between school, work, or other projects, choose the dialect of English (American, British, Australian, or Canadian), your primary language (choose between English and non-English), and your grammar skill level (beginner, intermediate, and advanced).
Personalizing Your Grammarly Dictionary
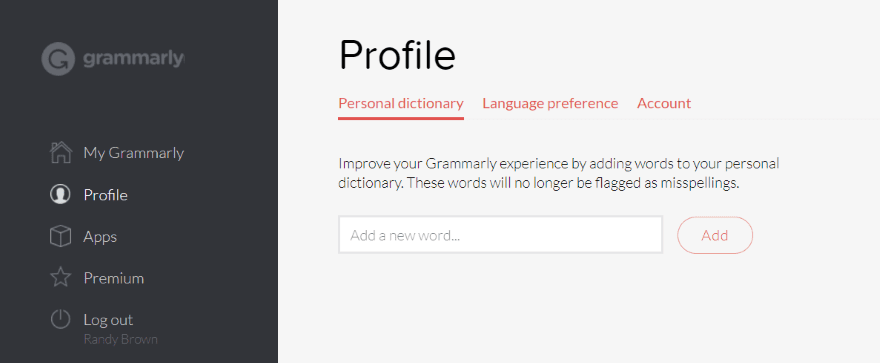
Personalize your dictionary from your profile page in the dashboard. Add as many words as you want and Grammarly will no longer flag those words. This is helpful for writers in specialized fields and fiction writers that create their own unusual names.
Using the Grammarly Chrome Extension
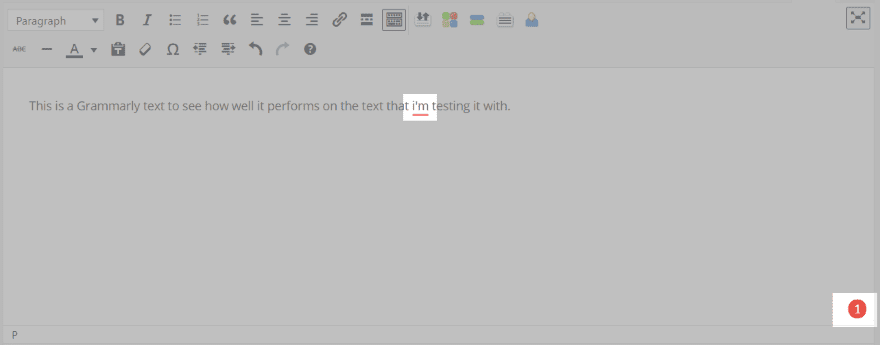
The Grammarly icon, a G in a green circle, automatically appears on anything that Grammarly can check.
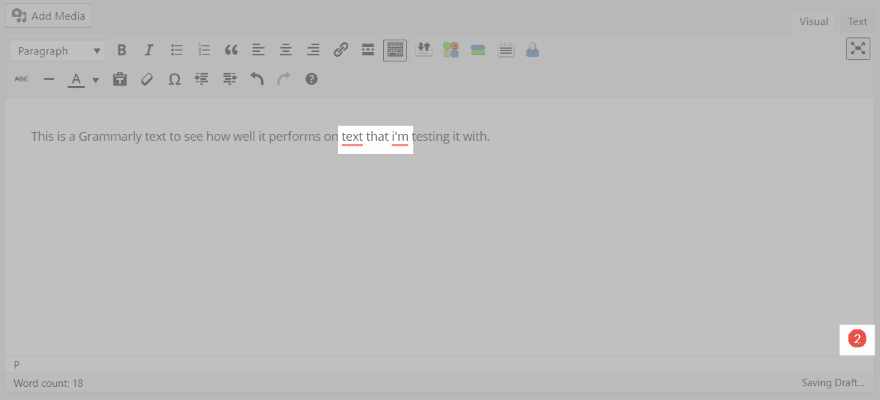
It underlines the text that it doesn’t like and the icon changes to show that there are errors. This example shows two issues. The logo has changed to a red circle with a number to indicate the number of issues.
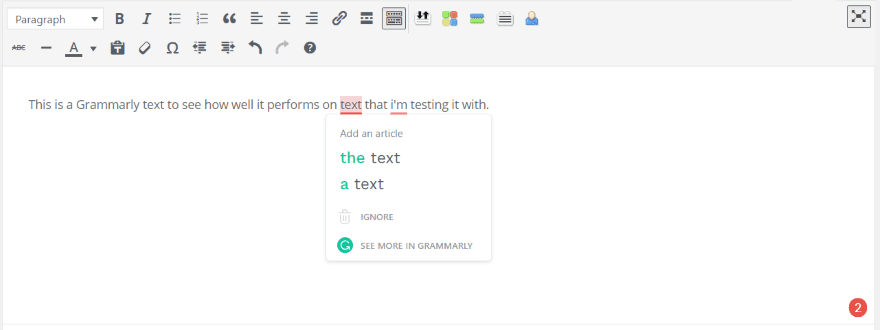
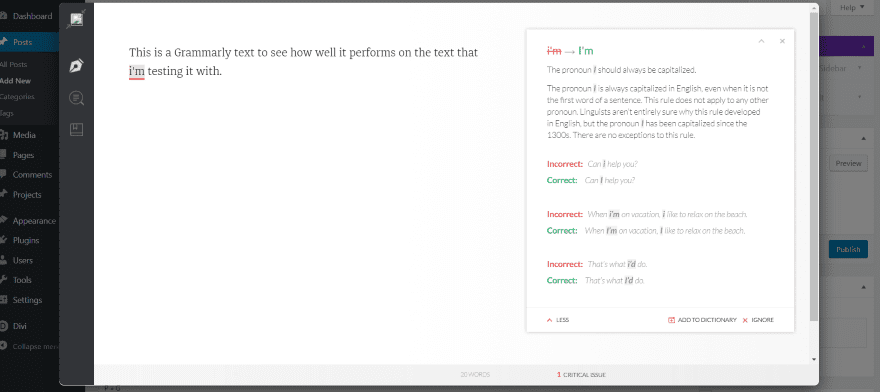
Hovering over the text opens a box with suggestions. If I want one of the choices I just need to click on it. It indicates the type of error it is, which can help me improve my writing.
The change is automatically made when you click on one of the choices and it now indicates that I now only have one error.

Hovering on the circle opens it to show a few options. Click the red circle with arrows to open the document editor. The yellow circle shows the number of advanced corrections are available in the premium edition. The power button turns Grammarly off for this website.
Grammarly Document Editor
The document editor opens in a modal over your content where you can focus on your writing and see a few tools and options. Using this is optional.
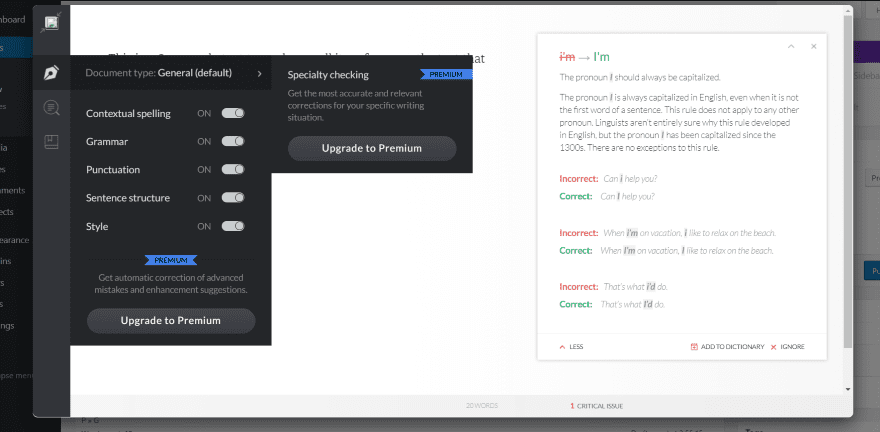
Each of the tools on the left of the modal open on hover, identifying what they do. Here you can make selections of what to check. When you’re finished, click the back icon in the upper left corner or click anywhere outside of the modal.
Grammarly Online Dashboard Editor
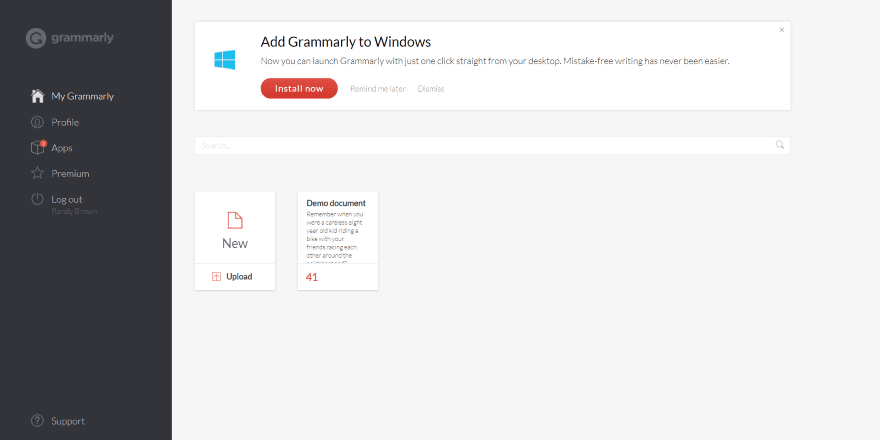
You can also use the online editor to write or check your documents. Once you login to the Grammarly website you’ll see the dashboard. To create or edit your document in the Grammarly dashboard, click New or Upload on the document icon.
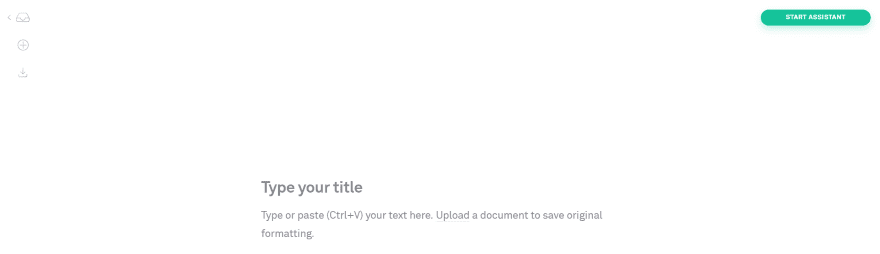
This opens the editor where you can type, paste, or upload your text. Clicking the logo in the upper corner opens a few tools to check your work.
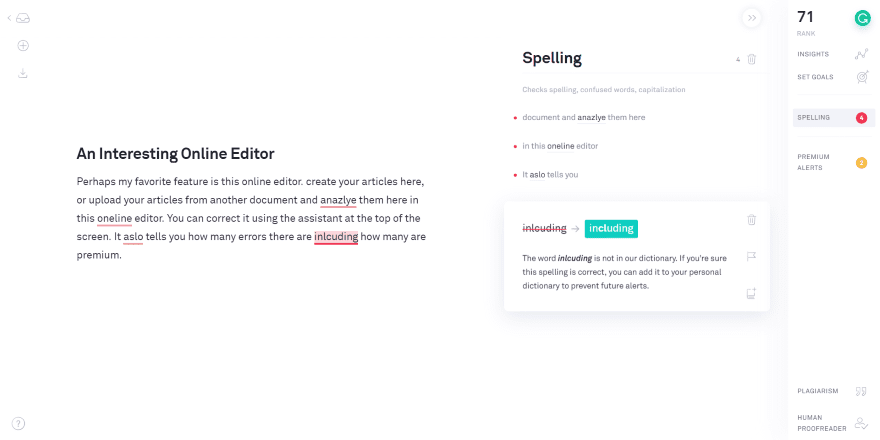
Problems will be underlined. Clicking on an underlined word displays options (just like it does in the browser). Click to see more information and it opens an analysis with word options, a rank based on the goals you’ve set, insights, goals, number of alerts, number of premium alerts, a plagiarism tool (premium edition), and a human proofreader (premium).
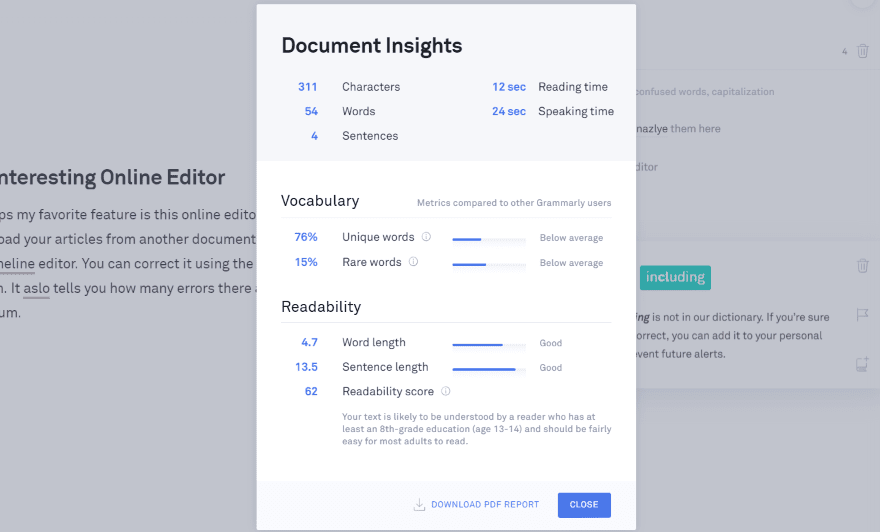
Insights show stats about your text. It also shows vocabulary (shows the number of unique and rare words) and readability (shows word length, sentence length, and readability score). These are helpful to improve your writing. I like the reading time and speaking time estimates.

Goals allow you to tell Grammarly about your intent, audience, style, emotion, and the domain (choose from general, academic, business, technical, creative, or casual).
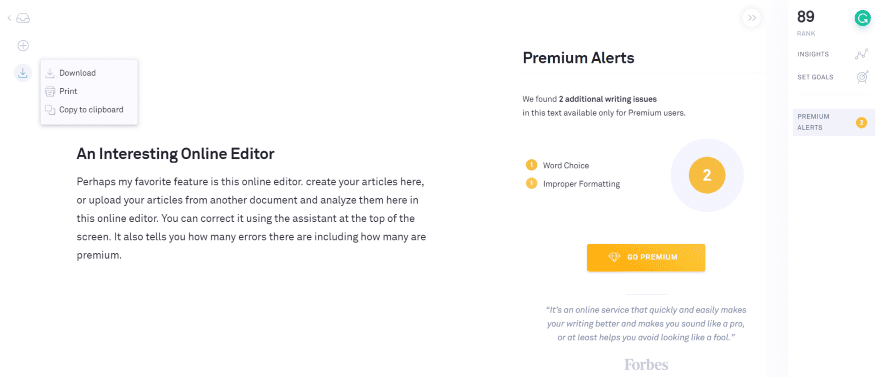
Once you’re done making edits you can download, print, or copy your text to the clipboard to be used anywhere you want.

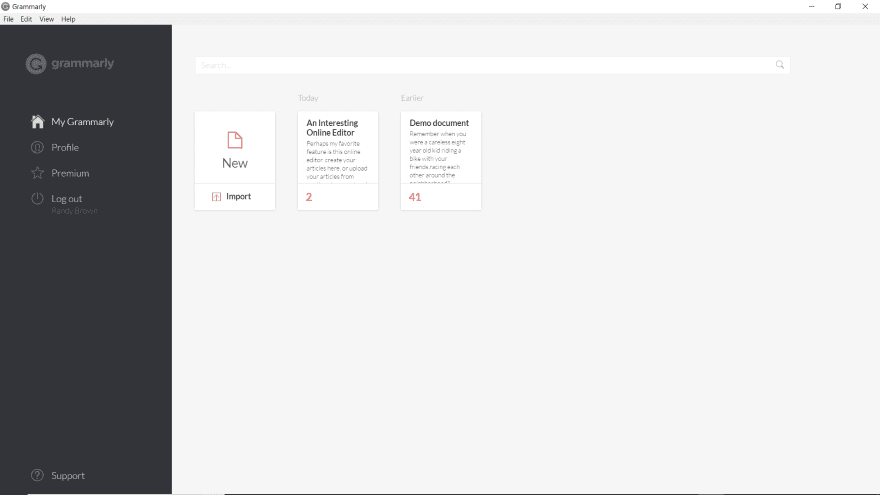
Your new document will now appear in the dashboard where you can edit, download, or delete it.
Installing the Grammarly Apps
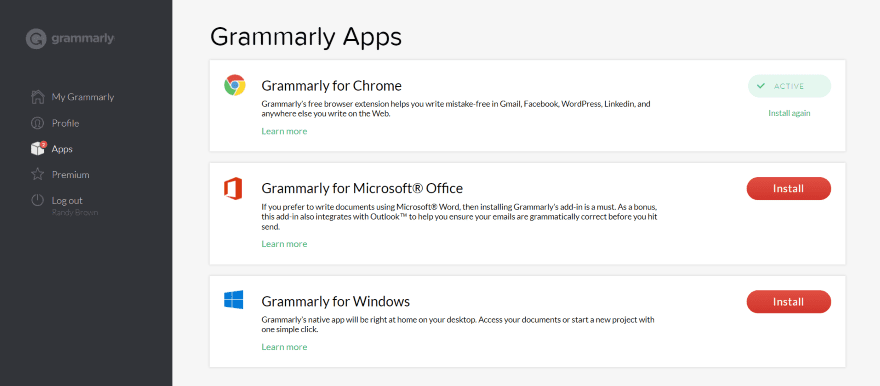
In the Grammarly dashboard click Apps to download Grammarly for Office or Windows. Once they’re downloaded, run them the same as any app.
Grammarly for Microsoft Office
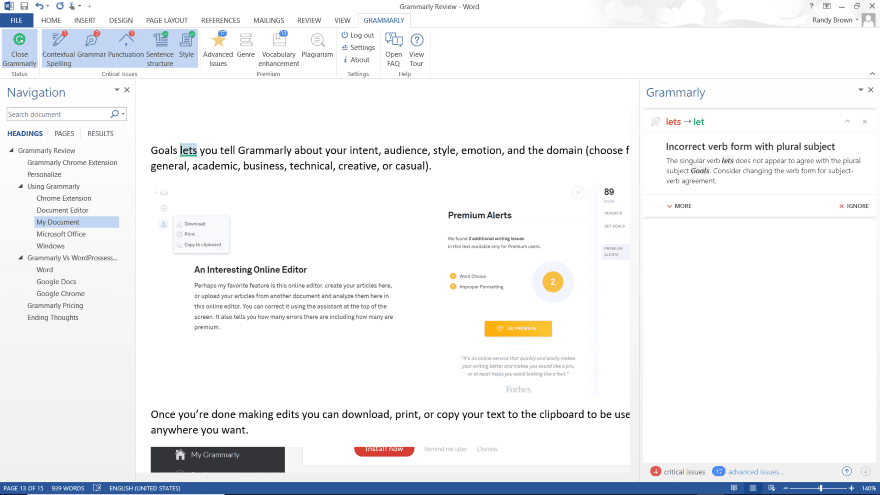
The Office app adds Grammarly to Word and/or Outlook. It adds new tools to the ribbon menu with contextual spelling, grammar, punctuation, sentence structure, style, and advanced features (which requires the premium edition).
When you click on the Grammarly icon the errors are highlighted in the text and issues are identified in detail on the right. I had no issues with general performance, but it can sometimes take a few seconds to check your document.
Grammarly for Windows
The Windows app looks and works the same as the online dashboard. It even connects to your account and brings in the documents from your dashboard. This is a great choice if you want to work offline.
Grammarly Pricing
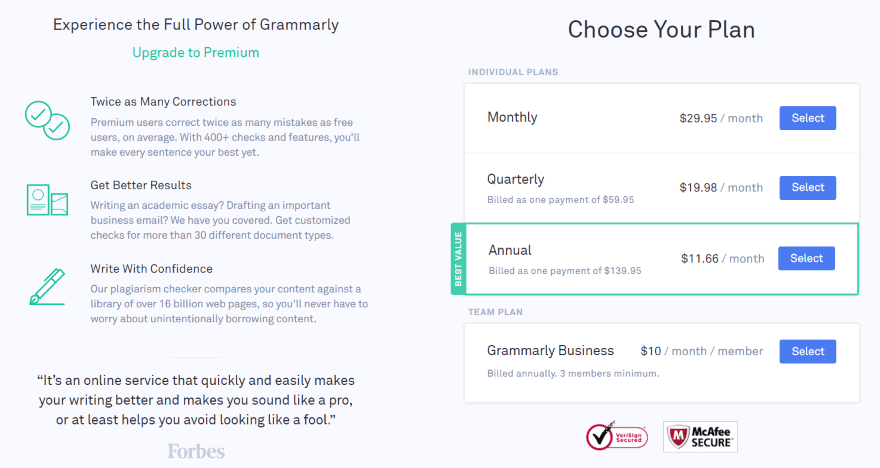
Aside from the free plan, there are four premium plans:
- Monthly – $29.95 per month
- Quarterly – $19.98 per month
- Annual – $11.66 per month
- Grammarly Business – $10 per month per member
The free plan is great for basic checking such as email, social media, and even blogging. The premium editions are better suited to writing that requires the most professional level of quality possible. The free version does have some good tools, but if you need a premium plan then I recommend the Annual option. Even the Quarterly option is a big savings over the Monthly option.
For more information, visit Grammarly.com.
Ending Thoughts
I use several word processors including Microsoft Word, Google Docs, and WordPress’s built-in editor. Word and Google Docs have tools that underline misspelled and misused words. Google Chrome has those tools and applies them to most editors. Grammarly goes further than that.
Grammarly is an excellent tool for improving your writing quality. It’s easy to make writing mistakes that you don’t notice during the editing process and Grammarly highlights those, drawing attention to them.
Grammarly works great but it’s not perfect. It doesn’t always understand how words are used in web design and development, for instance. And I’m sure there are other industries that it doesn’t understand perfectly. This means there might be times when you disagree with its choices, but it’s still a valuable tool that’s worth using. It can be personalized, which helps a lot too.
I was pleased with the types of errors Grammarly highlighted. It shows misspelled words, repeated words, punctuation, missing words, case, tense, pronoun agreement, etc. Some of these issues require a premium edition to highlight and explain them though.
At the very least, I recommend using the free Chrome extension. It works in your browser, so it applies to anything typed within an editor such as WordPress, newsletters, social media, email, etc. It doesn’t work everywhere though. For example, it doesn’t support Google Drive. The best way to analyze the Google Docs text is to paste it into the Grammarly dashboard editor and then paste it back into Google Docs when you’re done.
Grammarly’s designed for anyone wanting to improve their writing, but shouldn’t be used in place of knowing good grammar. It can’t take the place of a professional editor but it does help by identifying a lot of problems that can easily be missed.
We want to hear from you. Have you tried Grammarly? Let us know what you think about it in the comments.
Featured Image via VectorKnight / shutterstock.com
The post Grammarly: A Detailed Overview and Review appeared first on Elegant Themes Blog.