A video slider is a great way to show lots of video content in a small space. By default, the video slides show a snapshot of the video. There are times when you want to give the video slides a different look. In this article, we’ll see how to add image overlays to your Divi Video Slider module. We’ll also see how to customize the hover overlay and play icon.
Let’s get started.
About the Video Slider Module
The Video Slider module can display MP4 or Webm videos. You can upload them to your media library, or link to them using their URLs so they can be hosted somewhere else. The Video Slider module is great for tutorials, courses, product reviews, music videos, and more.
You can have the videos display their default screenshot or add your own image. Adding your own images allows you to create a consistent design across your website regardless of the video’s content.
Each slide is a submodule that’s added within the module itself. You can style the module to create default settings and you can style each submodule individually. If you don’t style the submodule, it will use the default styling that you’ve set up in the regular module settings. Options include arrows, image overlays, custom icons, and hover overlays.
Adding the Video Slider Module to a New Page
Now, let’s add the Video Slider module to a page and see how to use and style it. I’m using the About page from the free Consultant Layout Pack that’s available within Divi. I’ll add the module between two of the sections.

First, enable the Visual Builder and add a new single-column Row.
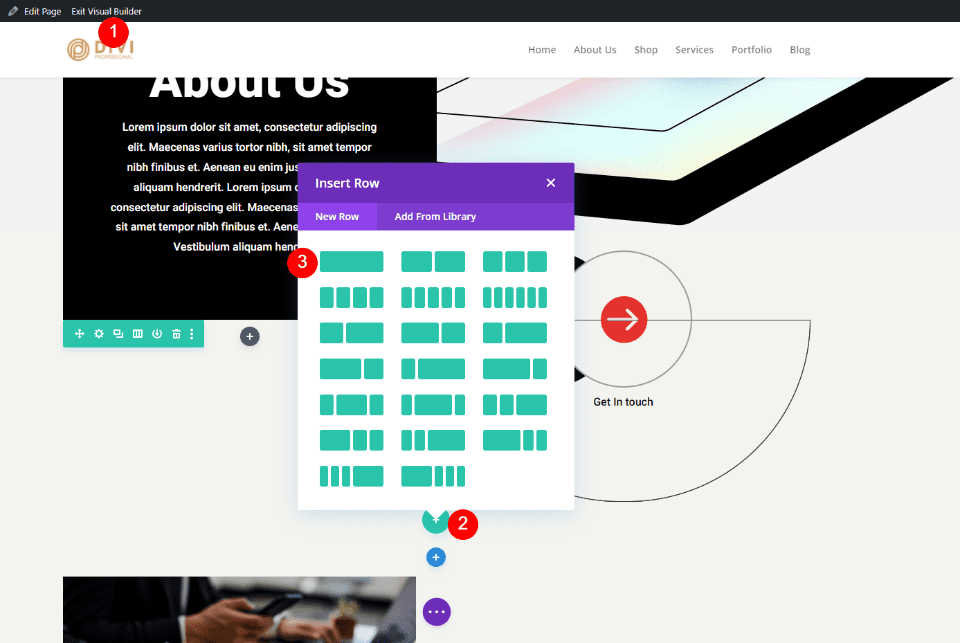
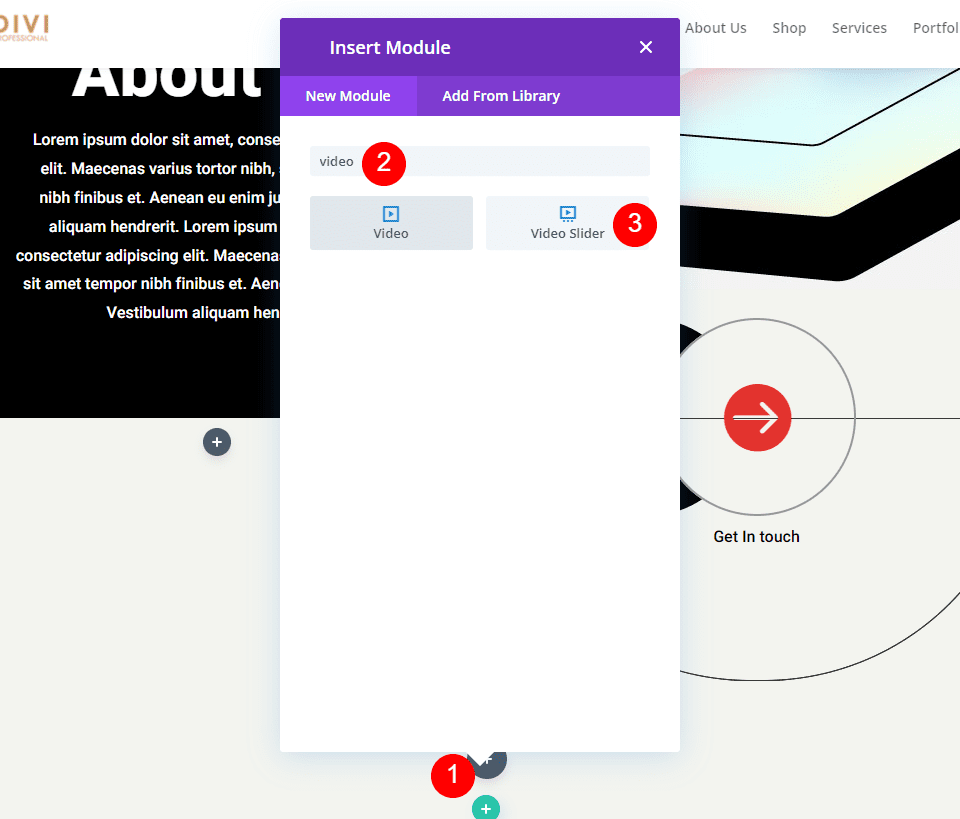
The background styling is in the section, so we can move on to the module. Next, search for Video and click the Divi Video Slider module.
Add your Videos to the Video Slider Module
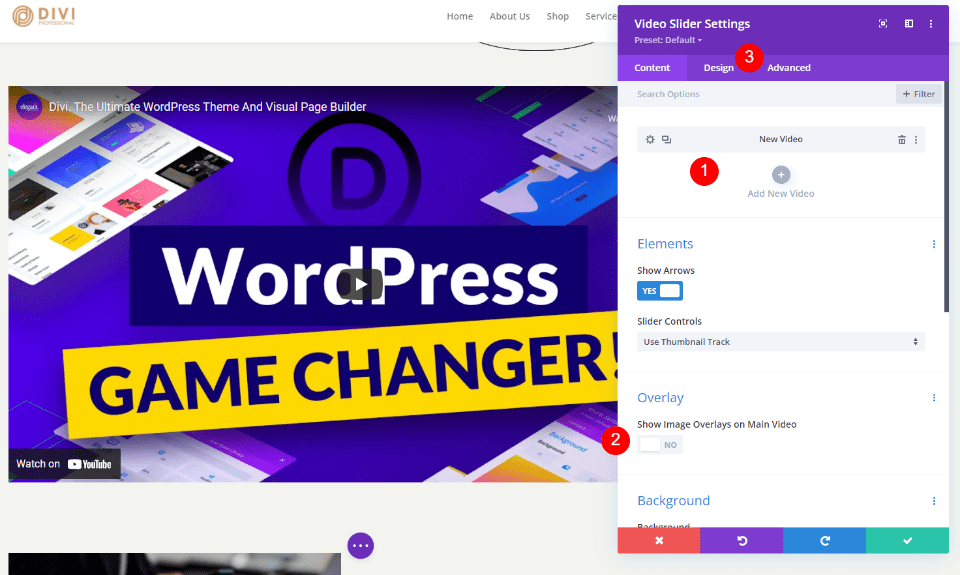
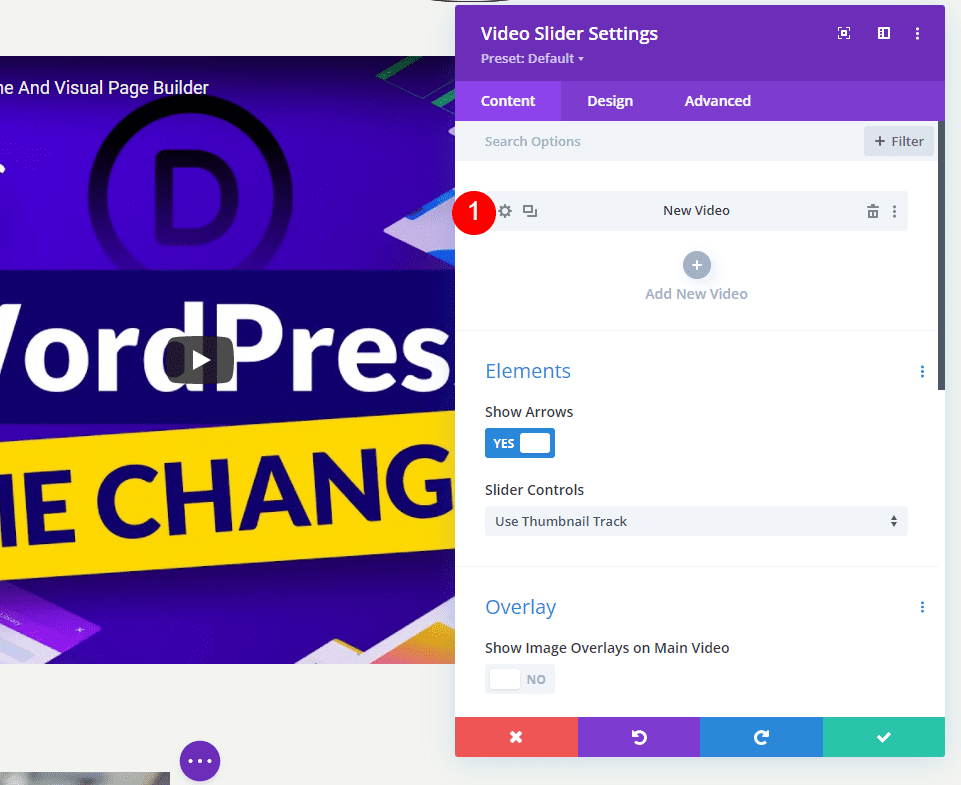
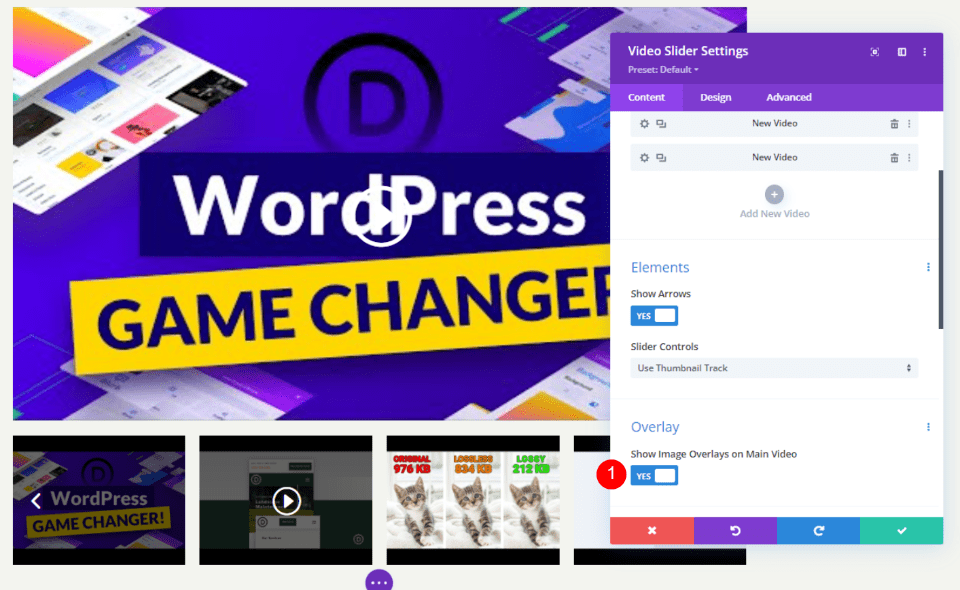
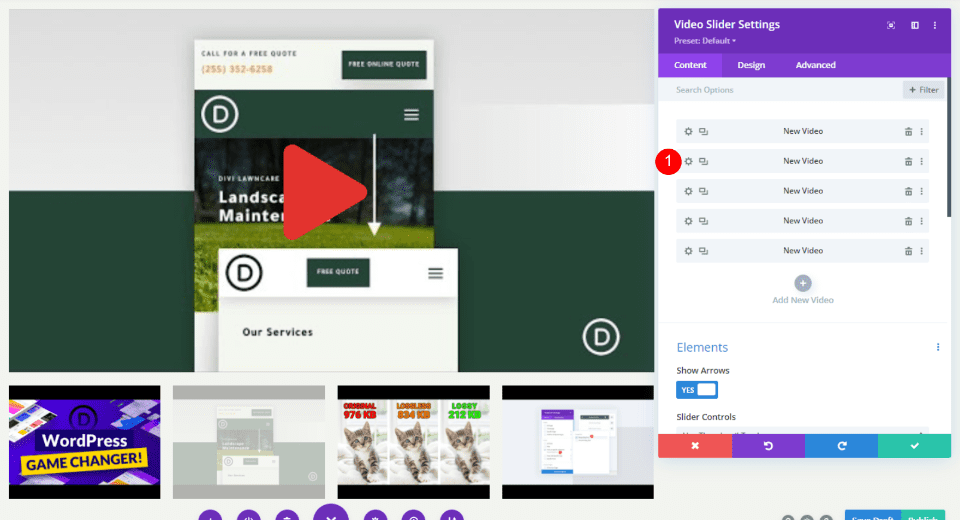
The Video Slider module adds a default video submodule to get you started. Click the gear icon to open its settings.
Next, delete the default video, or select the icon to change the video. Now, you can select to upload an MP4 or Webm video or enter a URL for a video that’s hosted somewhere else. Click Add Video for the type you want to add.
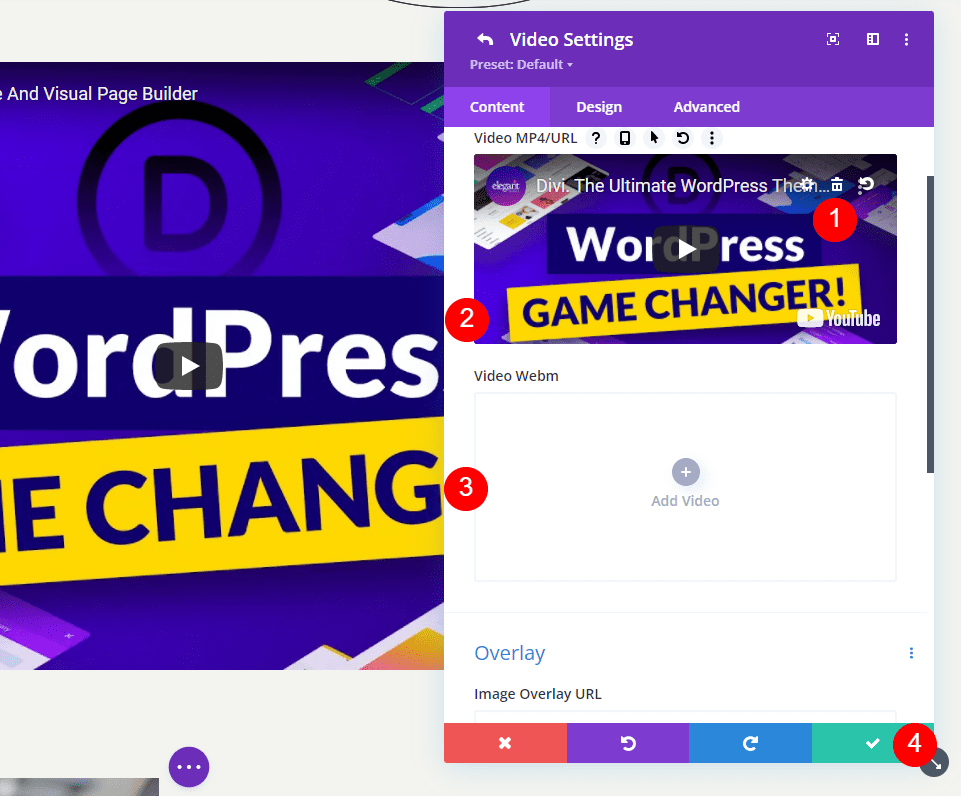
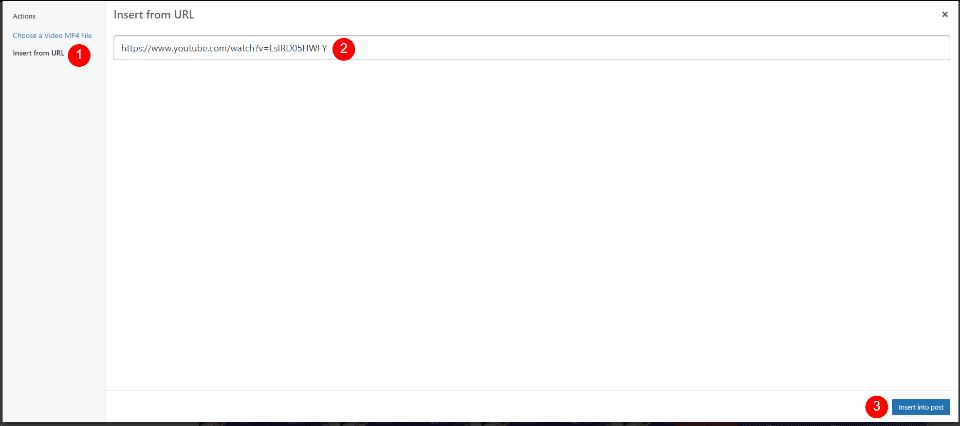
Next, either upload the video to your media library and select it or enter the URL for the video you want to display.
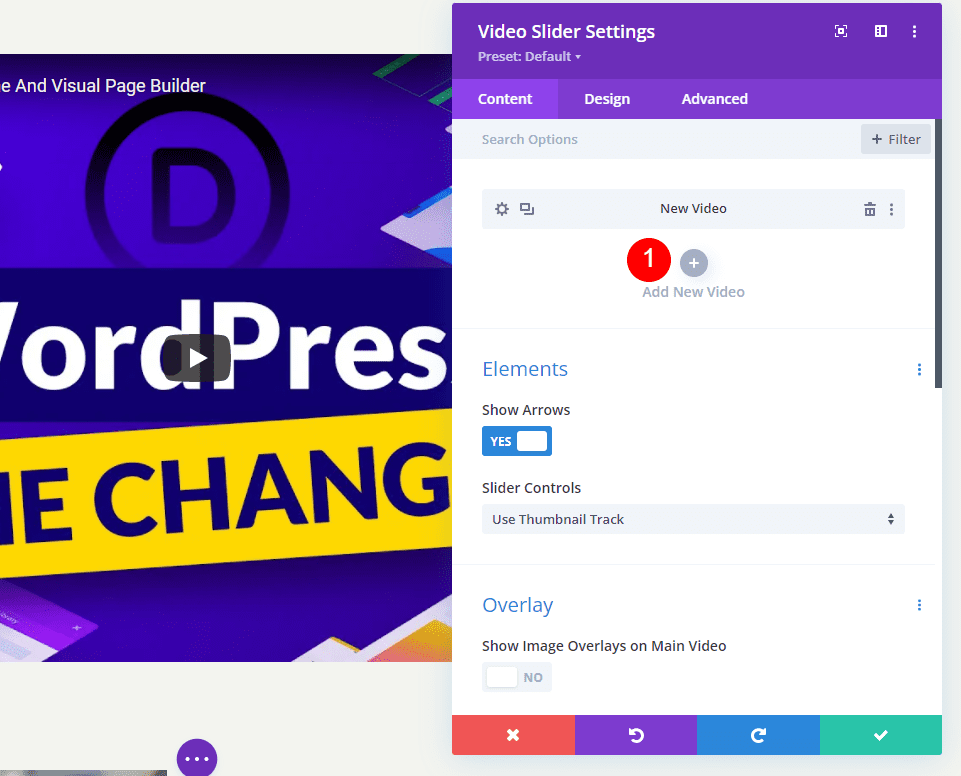
Click Add New Video and choose the video for that slider module.
Repeat this process until you’ve added all your videos. Each video is a new slide. You can also name them by adding an Admin Label under the video selection area in their settings.
Default Video Slider Image Overlays
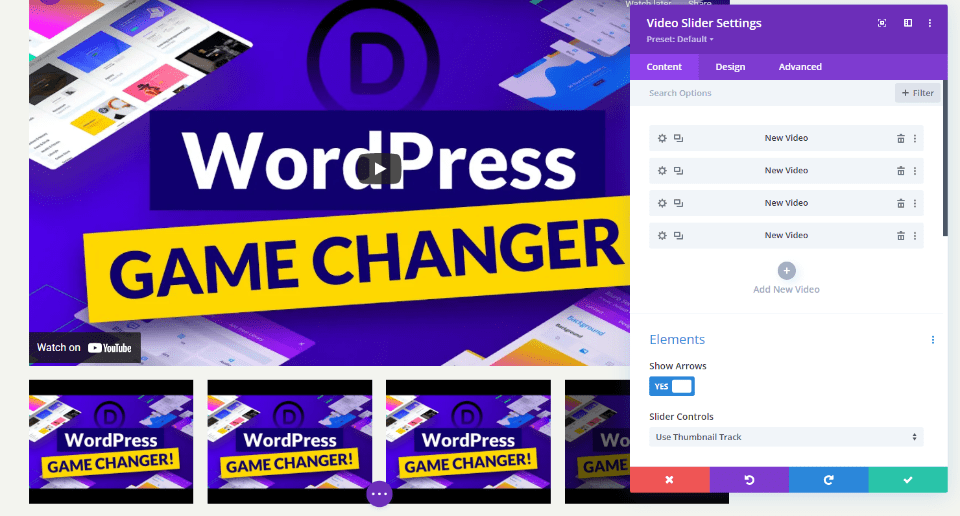
Next, let’s see how it works with the default overlay. This will help us see what the new overlay does when we add it. Since I added URLs from YouTube, my videos have YouTube controls, information, and links. The slides show under the current video. The current slide has a dark overlay.

Hovering over the main slide shows the navigation arrows and changes the play icon to red.

Hovering over a slide shows an overlay and a white play icon.

Add the Video Slider Image Overlays
Next, we’ll add an overlay to each video. First, we need to enable the overlay option. In the Slider Module’s Content settings, scroll down to Overlay and select Show Image Overlays on Main Video.
- Show Image Overlays on Main Video: Yes
Overlays are now enabled for every slide. You’ll notice that the player’s default settings have now been replaced with the Divi module’s settings for the current video. We can style each slide individually, or the module as a whole.
Styling the Video Slider
We can style each video individually or we can style the module. Videos will use their individual styling if it’s available. If not, then it will use the module styling. There are a few options that are only available in the module or video settings. I’ll show the styling options for both.
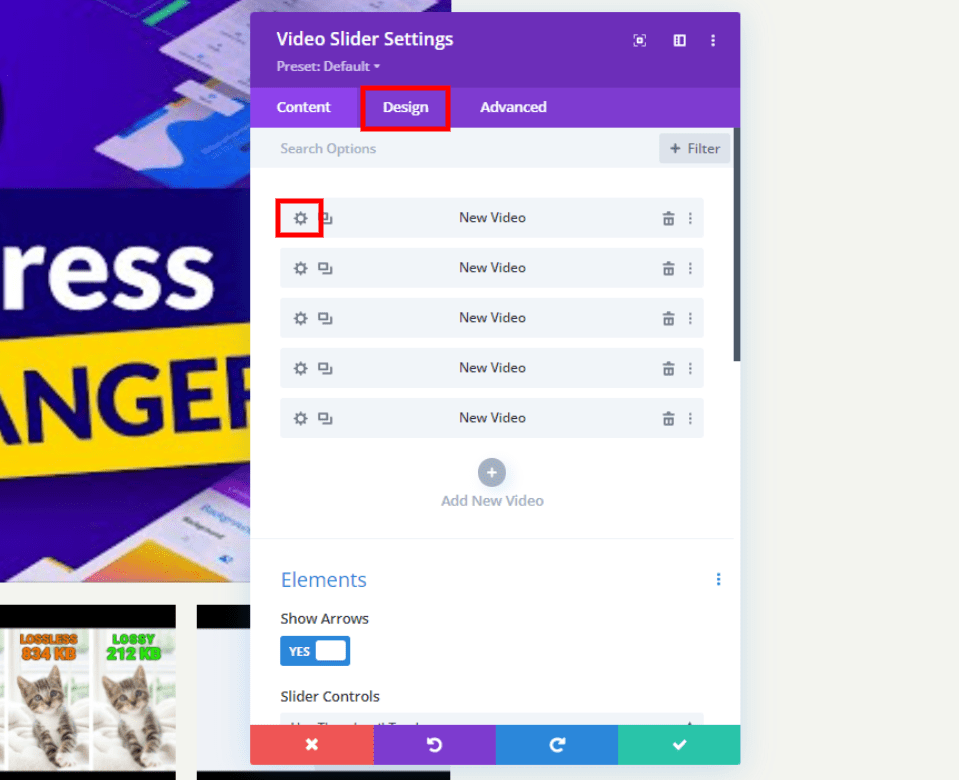
To style the module, select the Design tab. To style the slides individually, select their gear icons and then click on the Design tab. Repeat the process for each slide to customize each one.
Style the Video Slider Module Default Settings
We’ll start with the default Video Slider module settings. Every slide that isn’t styled individually will use these settings.
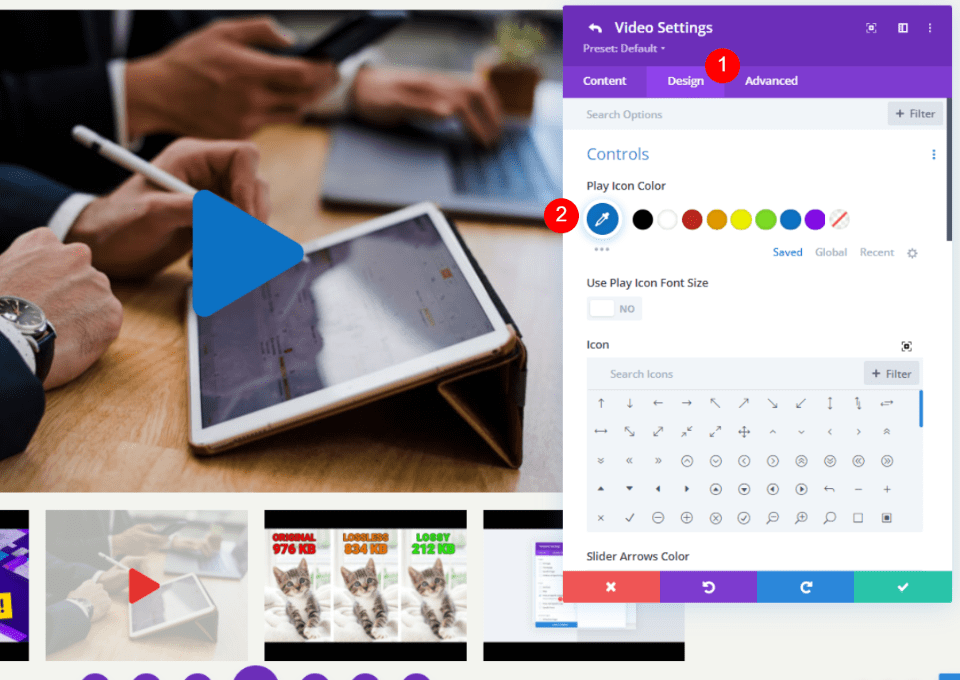
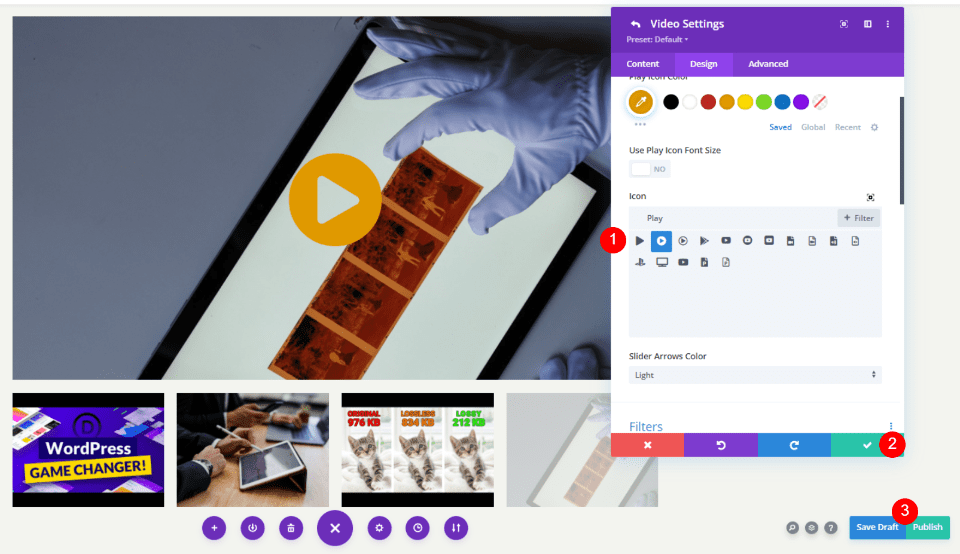
Play Icon Color
Select the Design tab. Under Controls, choose a custom color for the Play Icon. I’m using #e3332e. This is a shade of red that matches an icon that’s already used on this page template. The icon in the player and the thumbnails will use this color.
- Play Icon Color: #e3332e
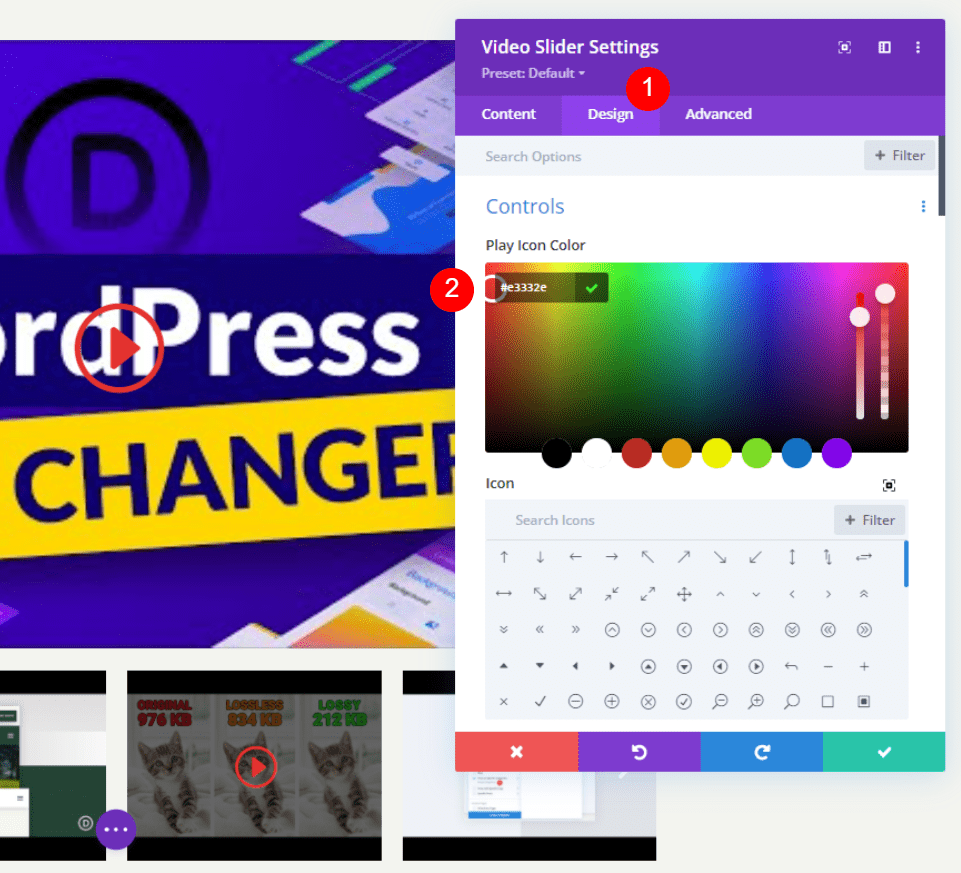
Icon
Next, select the Play Icon from the list. Search for Play and choose your favorite. I’ve selected the large triangle so it will stand out.
- Icon: Large Triangle
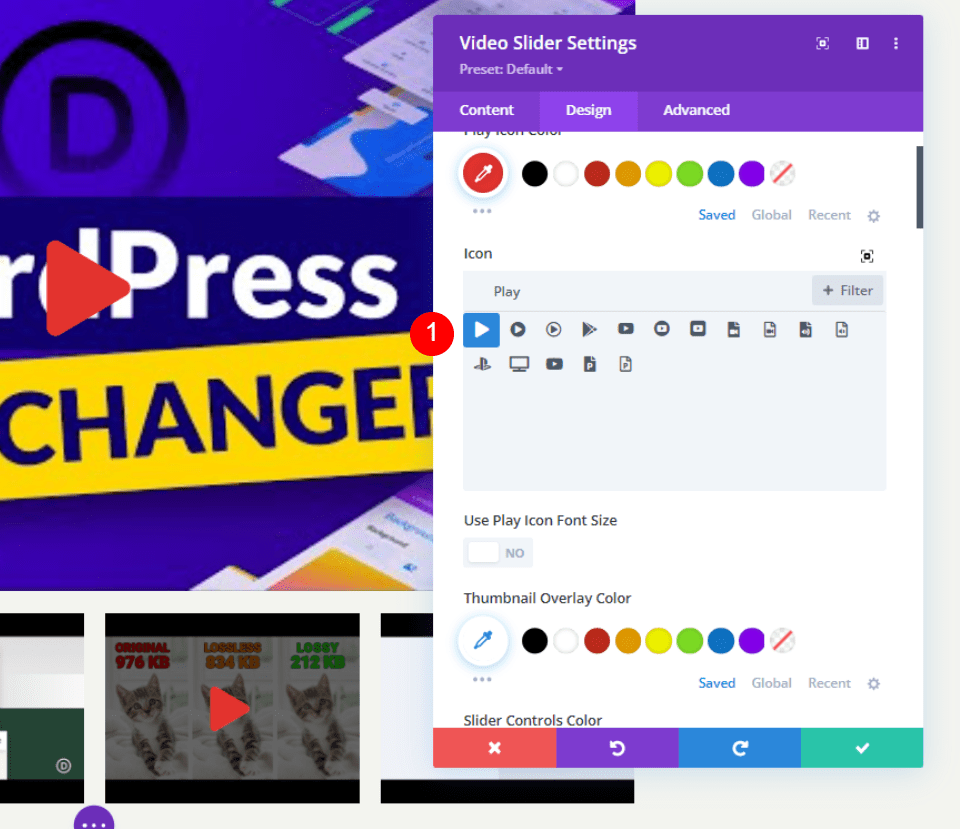
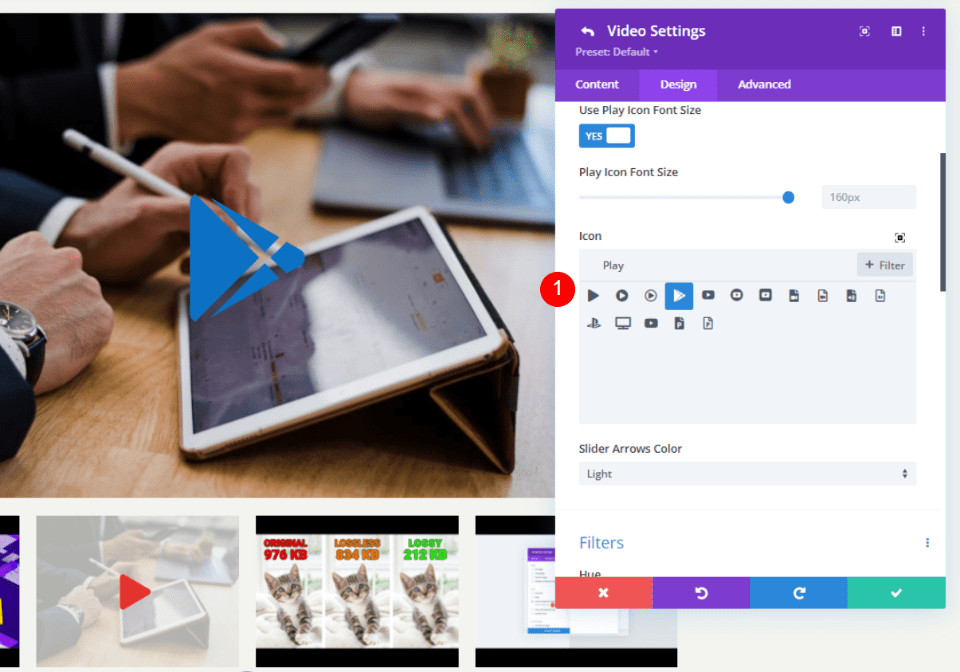
Play Icon Font Size
Next, let’s change the Icon’s Size. The default is 96px. I’ve changed it to 160px to make it stand out. This only affects the large slide. The thumbnails are not affected by this option.
- Use Play Icon Font Size: Yes
- Play Icon Font Size: 160px
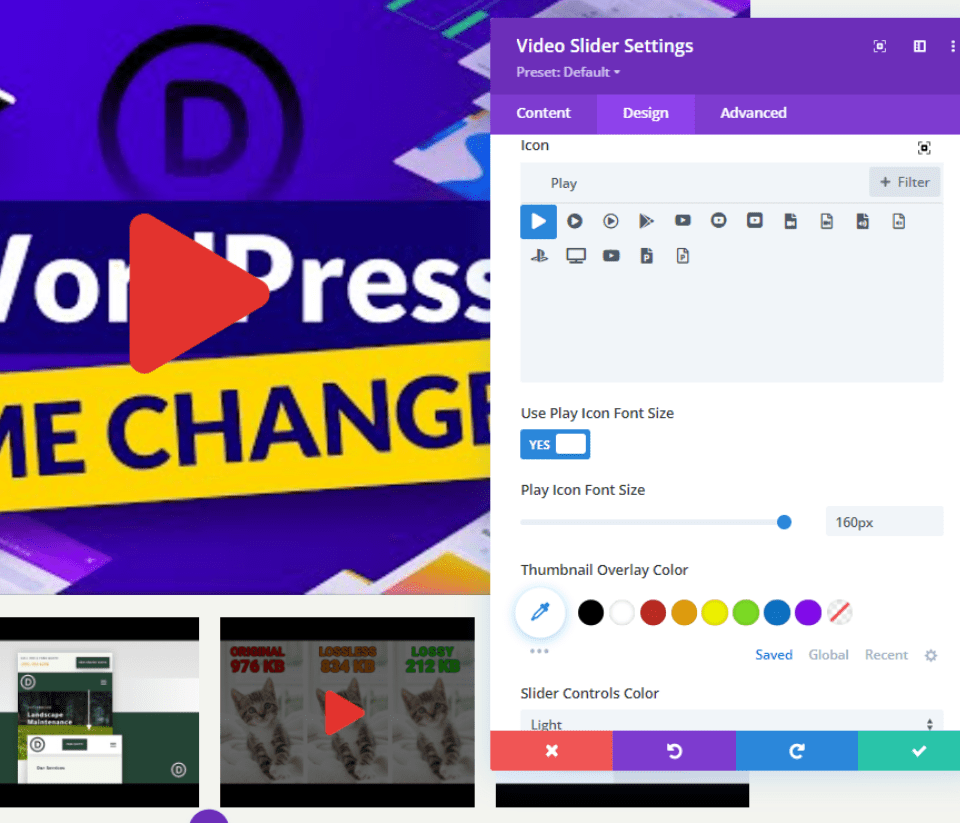
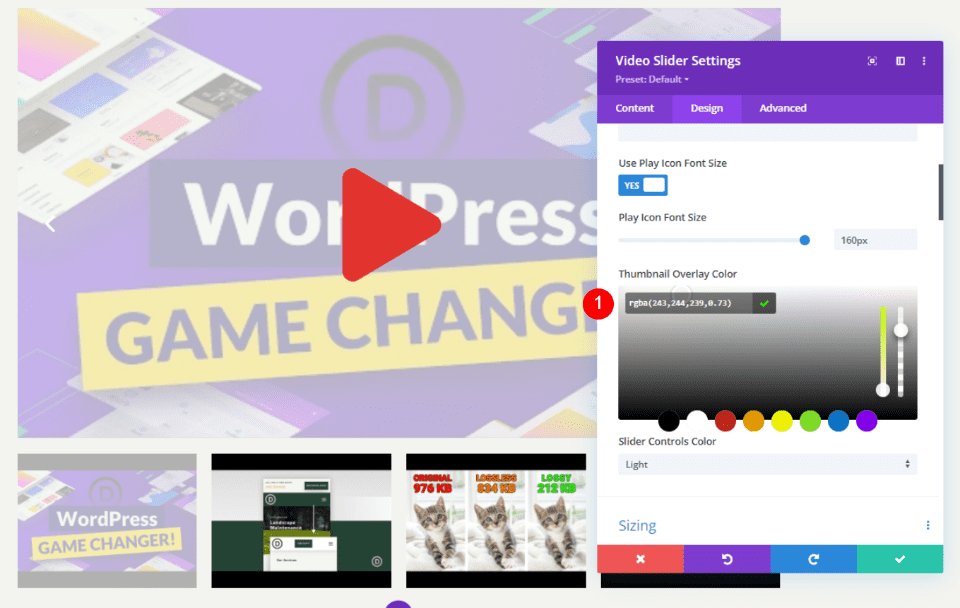
Thumbnail Overlay Color
Next, change the Thumbnail Overlay Color to rgba(243,244,239,0.73). This affects the hover overlay for both the main player and the slider thumbnails.
- Thumbnail Overlay Color: rgba(243,244,239,0.73)
Style the Video Slider Module Slides
Next, we’ll style each slide individually. I’ll leave two at the default settings and style the other two.
Style a Video Slide
Open the slide you want to style by selecting its gear icon.
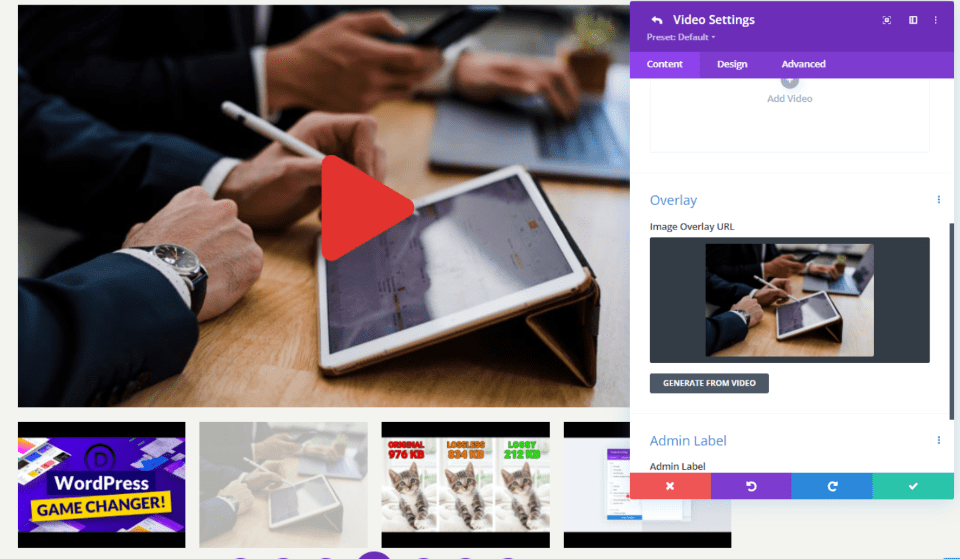
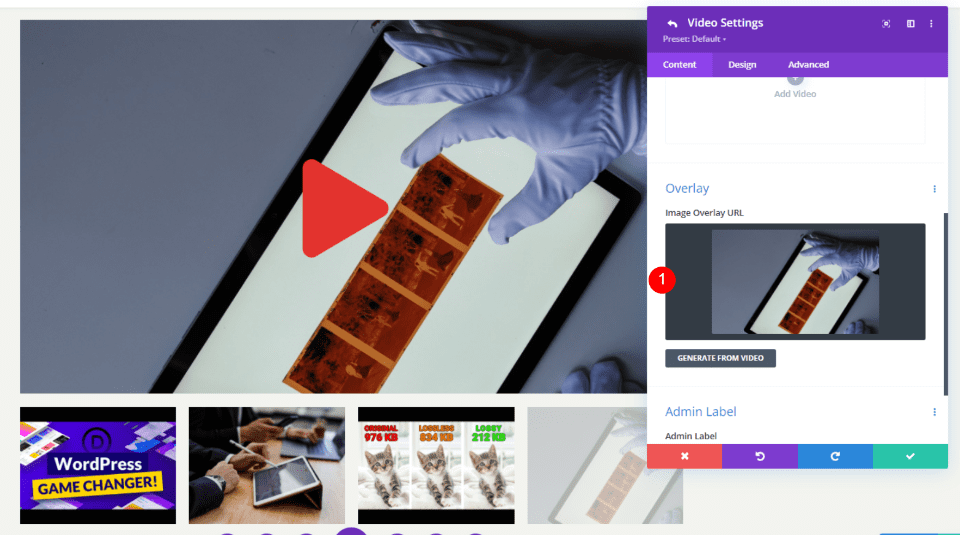
Overlay Image
Scroll down to Overlay and select Add Image.
- Overlay: Add Image
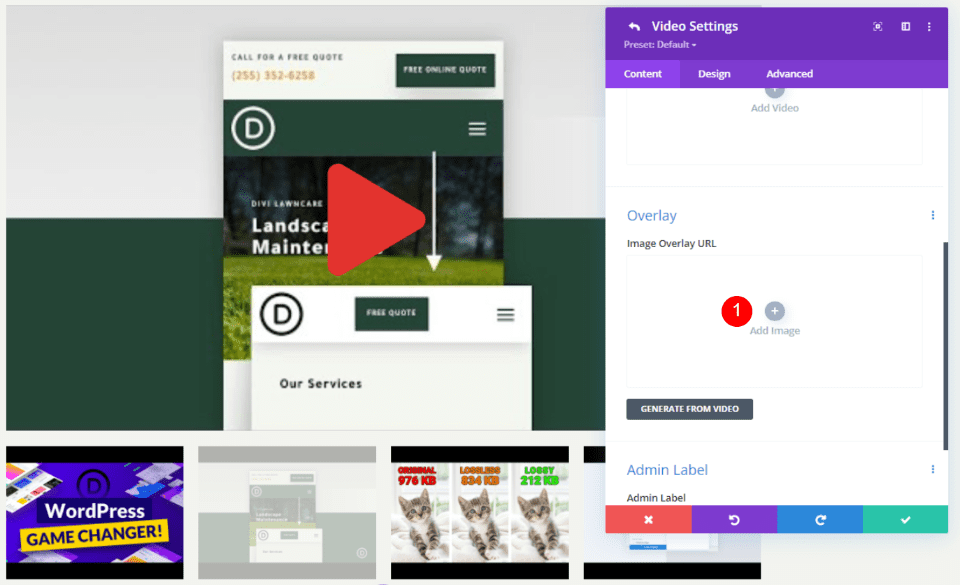
Upload or choose an image from your media library.
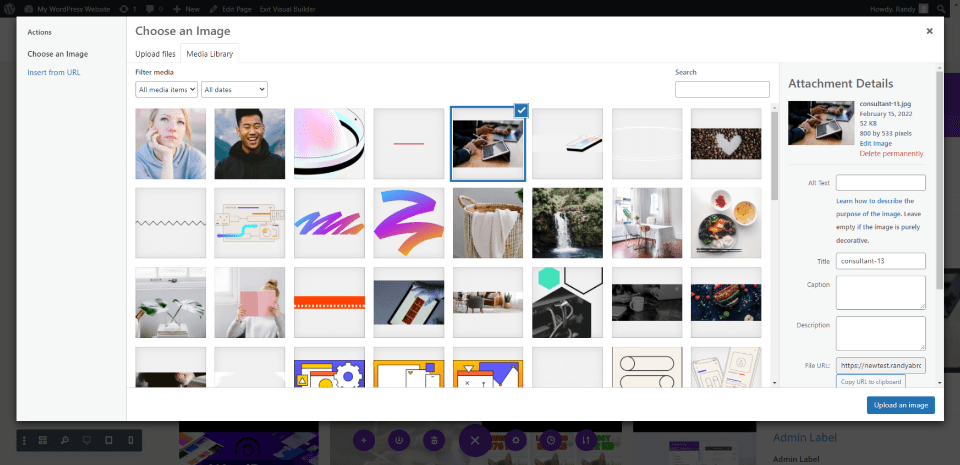
Your slide will now display the image you selected instead of an image from the video.
Play Icon Color
Go to the Design tab and select a new Play Icon color. I’ve selected blue. Notice, this only affects the slide, not the thumbnail.
- Play Icon Color: #0c71c3
Icon
Next, choose a new Icon for this slide. I’ve selected the broken arrow. This also only applies to the slide.
- Icon: Broken Arrow
Style the Next Video Slide
Continue the process for each slide. I’ve opened my fourth slide in this example.
Overlay Image
Scroll down to Overlay and select the image you want.
- Image Overlay: Add Image
Play Icon Color
Go to the Design tab and select the Icon Color you want this slide to display. I’ve selected orange.
- Icon Color: #e09900

Icon
Next, choose the Icon you want to display. I’ve selected the filled-in circled arrow. When you’re done with your slides, close the module and save your work.
- Icon: Filled-in Circled Arrow
Video Slider Image Overlay Results
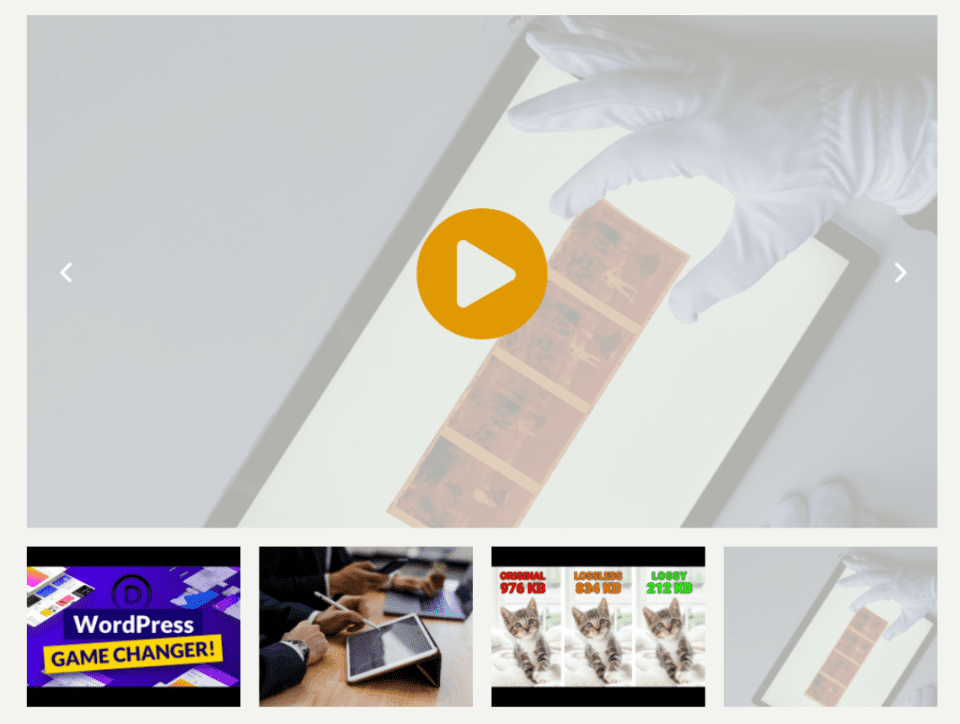
Here’s how the Divi Video Slider module looks on my page. I’ve created a few examples. This example shows the default settings with the play icon and hover overlay.
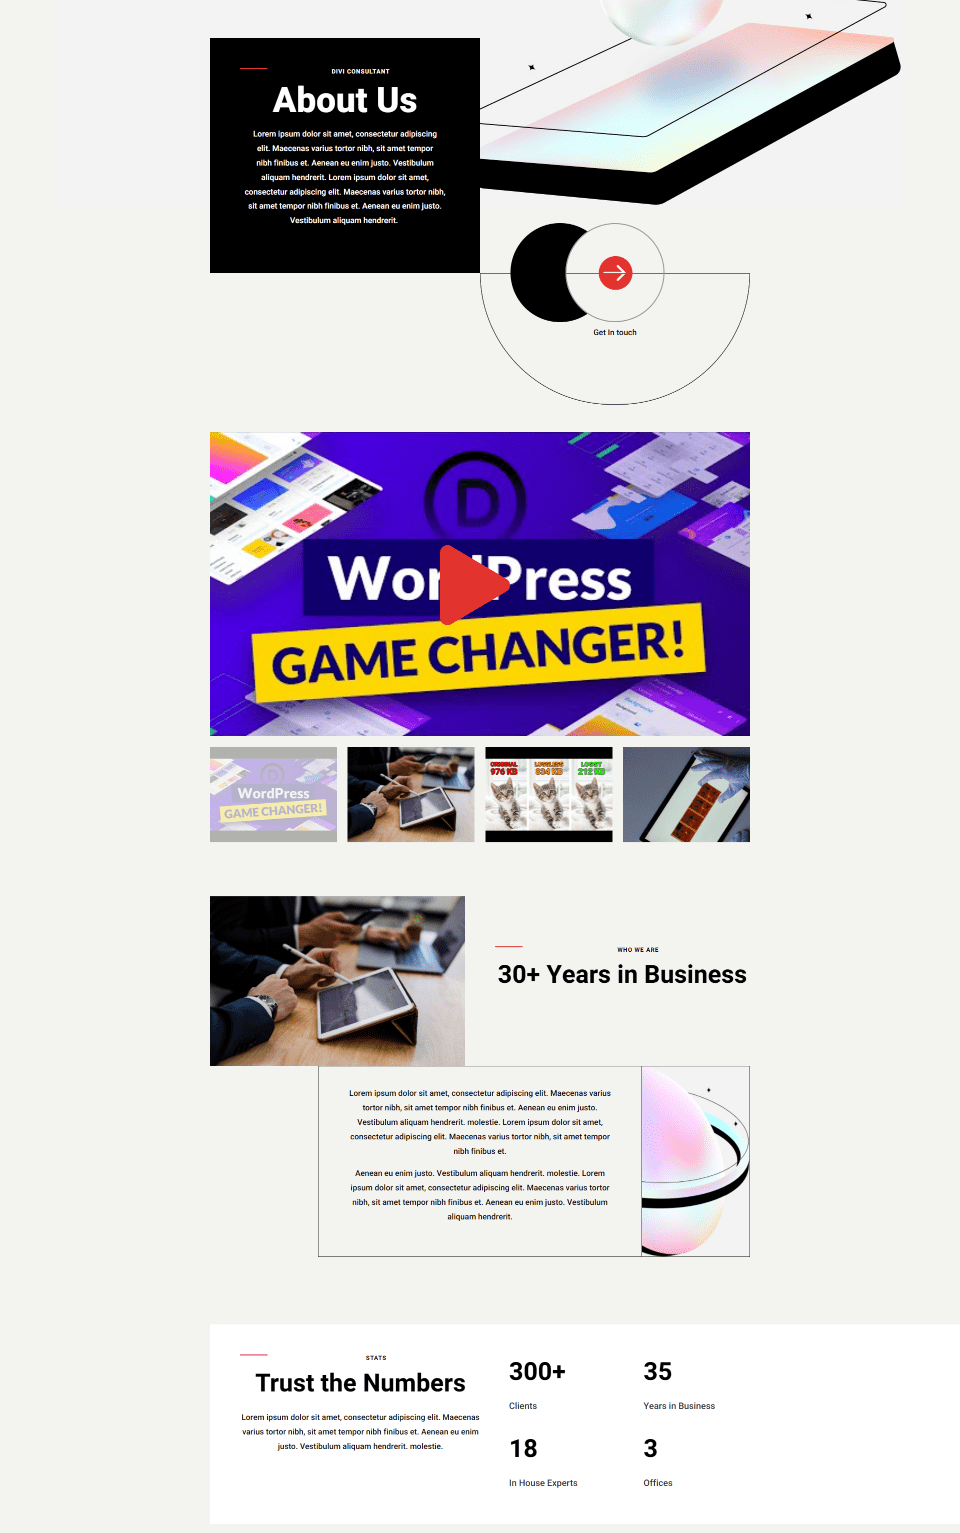
This example shows the custom image overlay with a custom play icon. I’m hovering over its thumbnail to show how its image and icon works separately from the slide.

This example shows the second slide with a custom image overlay and a play icon. I’m hovering over the slide to show the hover overlay as it appears over the custom image.
Here’s another example of how this can be used. Since you can add any image you want, you can use images to describe the content. This example would work for courses or tutorials. It just has a gradient background, but you could use any image you wanted to create featured images for your courses and tutorials.
Here’s another example. I’ve only changed the image overlays, but this gives the videos a completely different look and feel.
Ending Thoughts
That’s our look at how to add image overlays to your Divi Video Slider module. The Video Slider module is great for courses, tutorials, or any type of series you want to show within slides. Divi makes it easy to add custom image overlays to give each slide a different look than the video’s screenshot. You can style the slides independently, so they don’t have to look the same. You can also add a custom play icon and hover overlap to each slide or create a default icon and overlay for all the slides to use.
We want to hear from you. Do you add image overlays to your Divi Video Slider module? Let us know in the comments.
The post How to Add Image Overlays to Your Divi Video Slider Module appeared first on Elegant Themes Blog.