
In today’s Divi tutorial, we’re going to show you how to add social icons to the primary menu of your Divi website. By following this tutorial step by step, you’ll be able to add social icons to any website you create–whether it is for yourself or a client.
We already have the ability to add social icons directly into the header and footer of a website with the Divi theme customizer. But if that’s not what you’re looking for, this tutorial might help you out because in many cases; people prefer having the social icons in their primary menu instead of the header or footer of their website.
We’ll show you exactly how you can add them, how you can customize them and how to open them into a new tab. These are all the things you really need to know so that the social icons in your primary menu can bring added value to your whole website.
Why Add Social Icons to The Primary Menu?
Websites and social media channels are in a lot of cases complementary. Not all the content that’s being shared on a website appears on the social media channels and vice versa. That’s why promoting your website on your social media channels and your social media channels on your website are not uncommon and frankly; highly encouraged.
You want people to interact with your company or brand in the way they’re most familiar with. Your website is usually ‘unknown territory‘ for them. The barrier of contacting you directly through your website might therefore be bigger than for social media channels. Most people who visit your Facebook page or Twitter page are already integrated into the platforms and the comfortable feeling can influence their behavior positively.
That’s why, in overall, putting socials icons on your website is very recommendable. But why share them explicitly in your primary menu? We’ve listed two of the main reasons.
Easy To Find/Menu Follows Visitor During Their Visit
When you’re adding social icons to your website, you want them to be as visible as possible. People should not have to put in effort to find the social icons on your website. That’s where putting the social icons in the primary menu can make the difference. The primary menu follows a person throughout their whole stay on your website. There’s no need to go looking the icons, the icons come to you. The only thing the person has to do is click and they’ll get there.
The primary menu follows a person throughout their whole stay on your website. There’s no need to go looking for the icons, the icons come to you. The only thing a visitor has to do is click on them and they’ll get there.
Triggering Action
As mentioned before; social media channels and the websites are complementary. They work together and usually have the same goals such as informing potential leads and attracting them to the services or products that are being offered. The more they’re confronted with them, the more likely their curiosity will get triggered
To support the connection between the website and social media channels, it’s a good thing to confront the visitors with the social icons as often as possible. The more they’re faced with them, the more likely their curiosity will get triggered and the more likely they’ll eventually click on them.
Install Font Awesome
First of all, we need to install Font Awesome into our WordPress website. We’re going to do this by adding some CSS code into the Theme Options of Divi.
Open your WordPress website, go to Divi > Theme Options > Navigation and paste the following code in the <head> section:
<link rel="stylesheet" href="https://maxcdn.bootstrapcdn.com/font-awesome/4.6.3/css/font-awesome.min.css" />
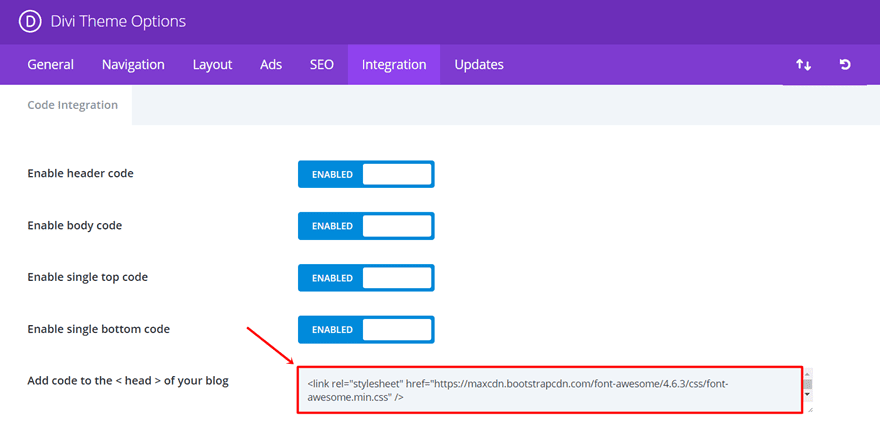
Font awesome should now be added to the fonts that are being used on your website. You can now add these icons to your primary menu by following the next part of our post step by step.
Start Creating Primary Menu
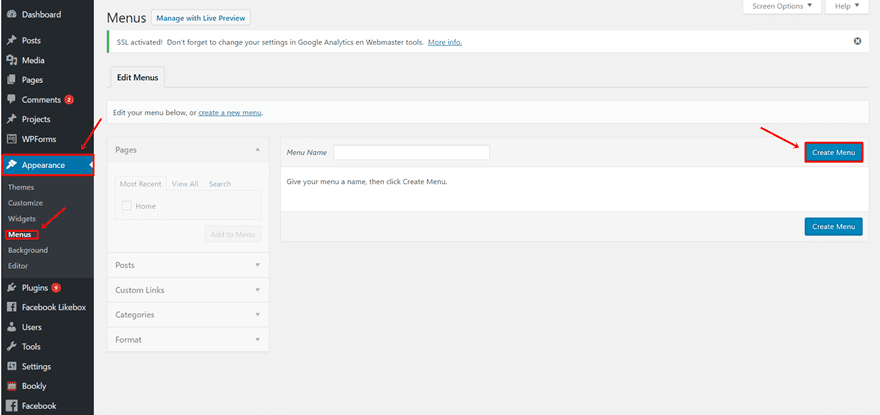
Most probably, you’ve already created your own customized primary menu where you have listed all the pages you want to appear in the primary menu of your website. If you haven’t done that yet, go to the ‘Menus’ page within Appearance and create a new menu.
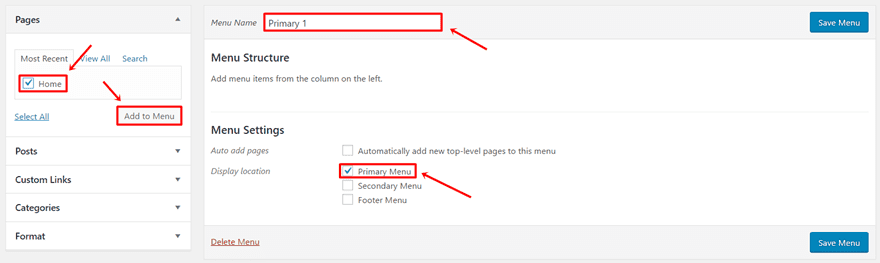
Next, name the menu, add the pages you’d like to appear in your primary menu and select the ‘Primary Menu’ option below.
Add Social Icons
Moving on, we want to add the social icons. When creating the primary menu, you can choose where you want your social icons to show up. In most cases, they’ll come right after the pages, but you can put them first as well. There are social media icons available for all the important and most popular websites out there; from Facebook to Twitter, Instagram, LinkedIn and more.
Start by opening the following link on the Font Awesome website. We’ll need this website for the next part of this post where we’ll be adding the icons manually.
Add Icons Manually
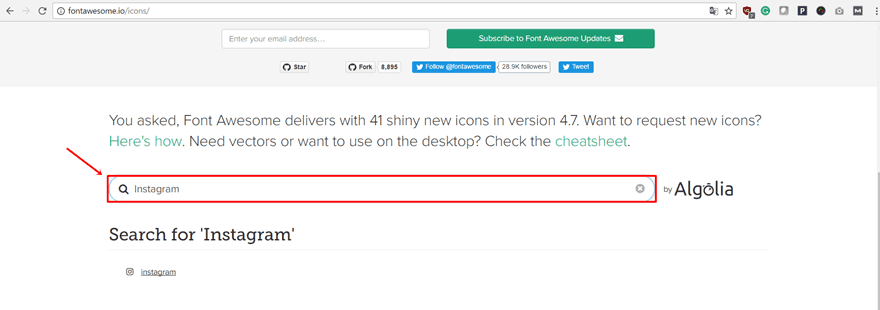
The same way of working applies for each social icon that you add to your primary menu. As an example, we’ll show you how to add the Instagram icon. For all the other icons you’d like to add as well; know that it’s the same way of working (only the icon, HTML code and URL differ accordingly).
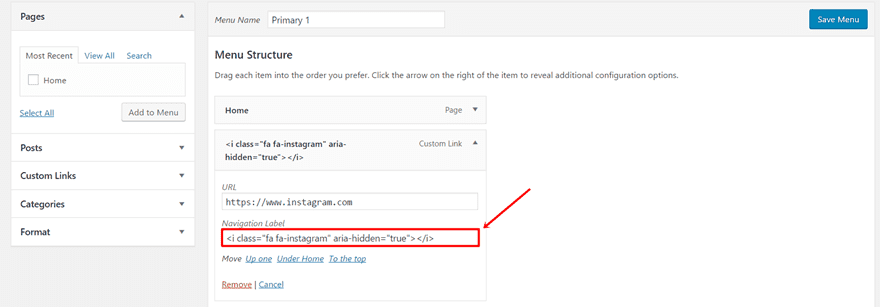
Open the ‘Custom Links’ option and you’ll see two fields appear: URL and Navigation Label. Obviously, the URL field is where you type down the URL that leads a visitor to one of the social media channels. In this example, we want to the icon to lead to Instagram, so just type down your Instagram URL.
Next, go to the Font Awesome website in your browser and look for the Instagram icon through the search bar. Likewise, you can search for the Facebook, LinkedIn and any other icon.
Once you’ve clicked on the Instagram icon, you’ll see that the website provides the following HTML code:
<i class="fa fa-instagram" aria-hidden="true"></i>
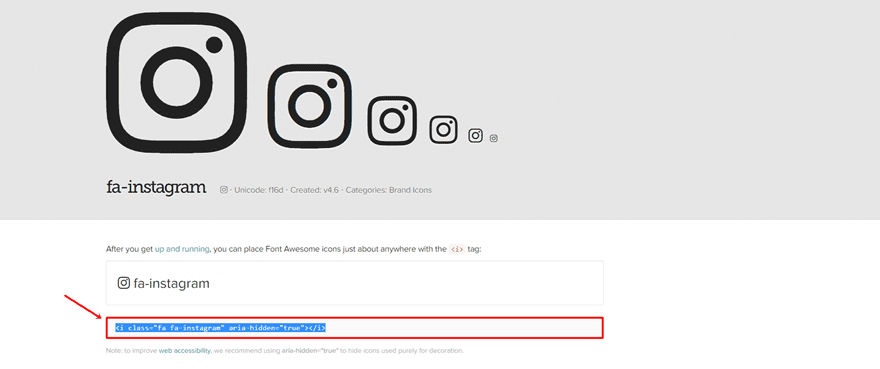
This is the exact code we need to use in the Navigation Label field, so go ahead and complete the custom link by copying and pasting the code into the field.
Repeat the same process for each one of the social icons you want to appear in your primary menu and take a look at how it looks like on the front end of your website.
Change Appearance of The Social Icons
Collective Changes to the Primary Menu (Including Social Icons)
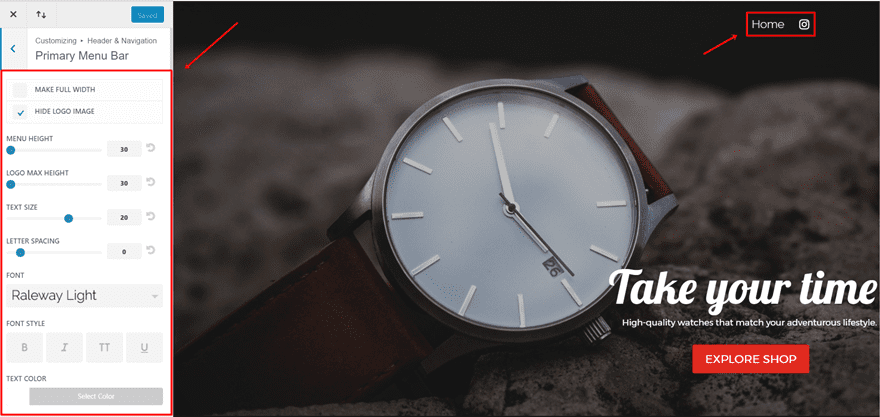
The Theme Customizer allows you to make all the appearance changes you’d like to make to your primary menu in one place.
The changes that you can make to the primary menu with the Divi options apply to the social icons as well. When you’re giving a certain color to your primary menu, for instance, the social icons will have the same color. That’s because we’re using a font instead of an image to make this work.
You can make all these changes you want to make to the appearance in the Theme Customizer by going to Header & Navigation > Primary Menu Bar. The changes that you make apply in real-time and give you a good perspective on how you want your primary menu to look like.
Open Social Icons in New Tab
This part of the post is something extra you can do with the social icons. You probably don’t want to send your visitors away from the website, even though they’re going to your social media channels. You want to keep both interactions alive for as long as possible by opening the social media links into a new tab everytime someone clicks on them.
We can easily make the ‘Open in New Tab’ option work on all the social media icons by going back to the menu we’ve created before. We need to make all the adjustments manually to each one of the icons. In this example, we’re going to make the changes to the Instagram icon.
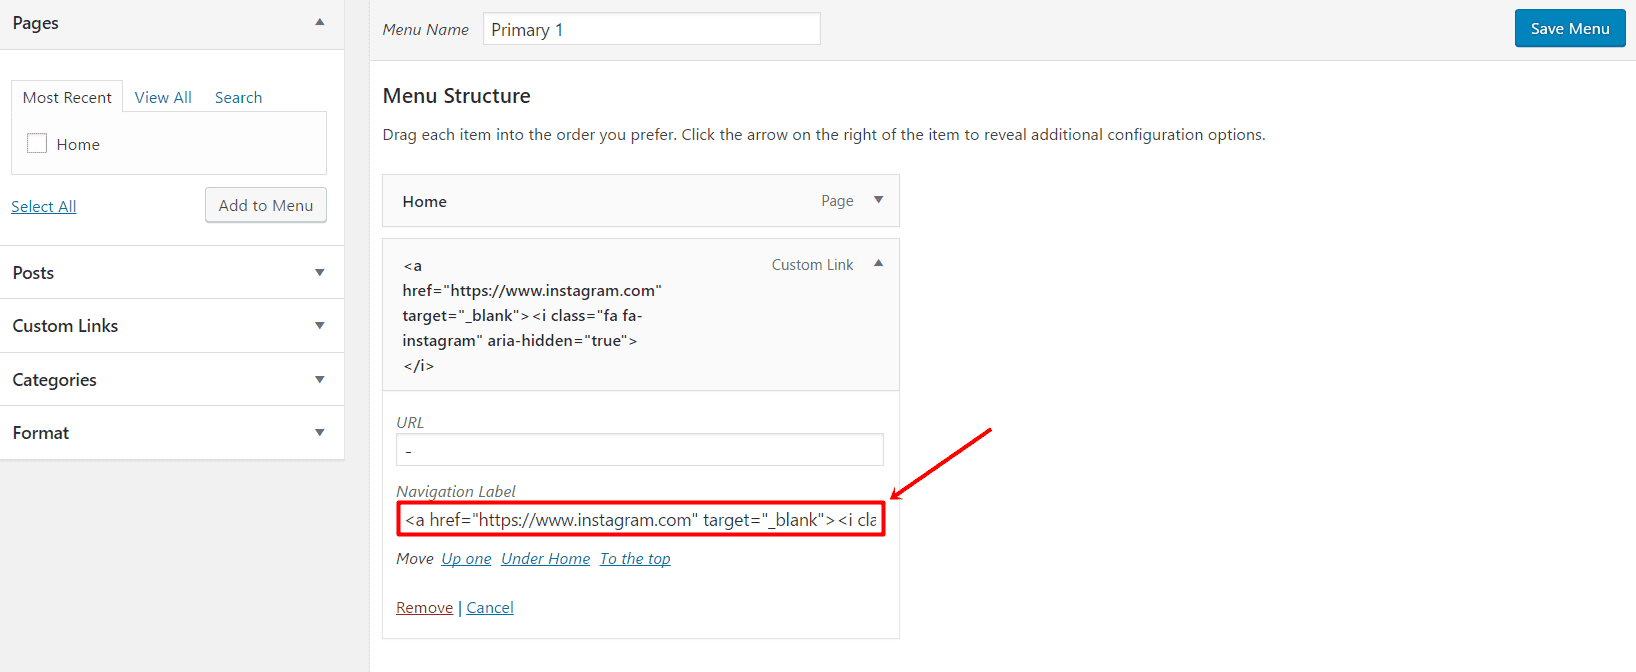
Go ahead and delete the URL you’ve provided in the URL field and paste the following code into the navigation URL instead:
<a href="https://www.instagram.com" target="_blank"><i class="fa fa-instagram" aria-hidden="true"></i></a>
Do the same thing for each one of the icons if you want them to open in a new tab. Each time a visitor clicks on them, they will open in a new tab which allows you to keep your visitors around as long as possible.
Final Thoughts
This tutorial will surely help you integrate social icons into your own Divi website in the way you want. You can customize them and make them fit with the rest of your primary menu. If you have any questions or suggestions; make sure you leave a comment in the comment section below. We’ll stay in touch and try to answer all the questions or suggestions you have.
Be sure to subscribe to our email newsletter and YouTube channel so that you never miss a big announcement, useful tip, or Divi freebie!
Featured Image via Oceans / shutterstock.com
The post How to Add Social Icons to Divi’s Primary Menu appeared first on Elegant Themes Blog.