
Themes are one of WordPress’ main selling points. However, they can sometimes break, cause issues with plugins, or with other elements on your website. In those cases, you might need to change your active theme, but it could be difficult to do so if you don’t have access to your dashboard due to an error.
The good news is there are workarounds for this problem. You can, for example, change themes through the database in a matter of minutes, if you know where to look. In this article, we’ll talk about some situations where you might need to do this, and then we’ll guide you through the process in three steps.
Let’s get to it!
Why You Might Need to Disable Your Active WordPress Theme
Under normal circumstances, changing your WordPress theme only takes seconds. All you need to do is choosing which theme to use and activating it.
These days, a lot of themes try to outdo each other when it comes to features, to attract as wide a user base as possible. In a lot of cases, they use JavaScript or jQuery, which can sometimes lead to conflicts with some of your plugins. These conflicts can cause specific functionality to stop working or, if you’re really unlucky, they may leave you unable to access your site or dashboard at all.
In these cases, you’ll likely need to change your theme. The problem is, if you use FTP to disable your theme, WordPress won’t let you choose which theme to use instead and will automatically set one of the default themes. That’s why it can make more sense to change themes through the database instead. With this process, you have full control over which theme to enable.
Before you try this, we recommend you try to troubleshoot your plugins first, be it via FTP or your database. In our experience, it’s often easier to replace one troublesome plugin or two instead of switching themes altogether. However, your mileage may vary, so it doesn’t hurt to have this trick up your sleeve, just in case.
How to Change Your Active WordPress Theme Through Your Database (In 3 Steps)
Since we’re going to be making changes to your database (albeit small ones), it would be wise to create a backup of it just in case. That way, if something goes wrong, you can restore it via phpMyAdmin.
Step #1: Access Your WordPress Database With phpMyAdmin
We’ve covered this process in the past, so let’s keep it quick. If you’re using shared hosting, chances are your provider uses cPanel for your plan. In that case, you can access your WordPress database via phpMyAdmin by logging into your cPanel and finding that option under the Databases section:

Once you’re in, look for the database that corresponds to the website you want to troubleshoot. If you’re only hosting a single site on your plan, there should only be one option to the left. In the example below, you can see several databases. However, the next steps won’t change regardless of which site’s database you access, as long as it uses WordPress.

If you’re not using a shared plan, take a look at your hosting provider’s control panel. Most platforms will provide you with a way to access and edit your database, even if you don’t have cPanel set up.
Step #2: Find Where WordPress Stores Your Active Theme’s Value
WordPress stores all your website’s information in a single database, including which theme you’re using. Your job then is to find where that value resides in your database and change it.
Once you choose the database you want to edit, you’ll see a list of all the tables WordPress uses to store its data. The one we’re interested in is usually called wp_options:
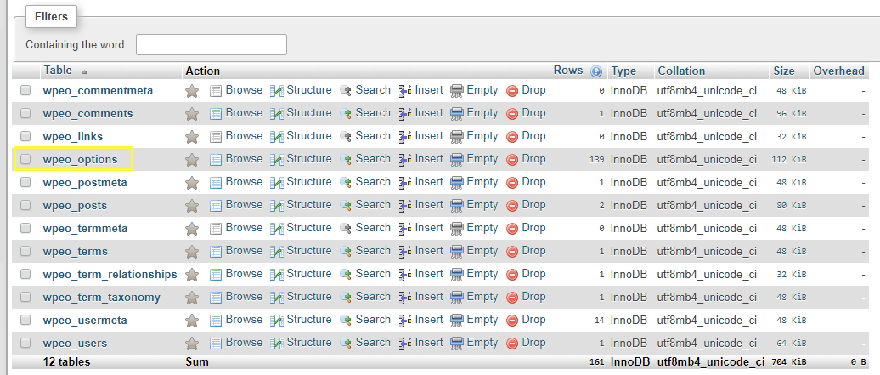
Keep in mind – some hosting providers change your database and table prefixes from the default wp for security purposes, as in the example above. In any case, these changes don’t affect the way your database works. Moving on – click on the wp_options table and on the next page, tick the box that says Show all at the top of the screen:
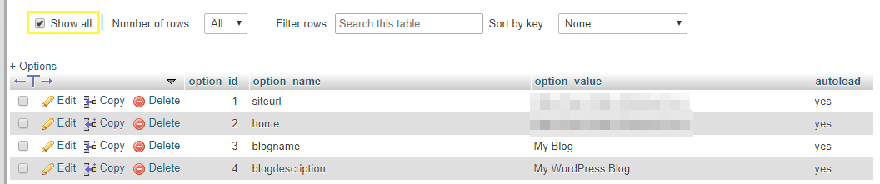
What this does is display all the wp_options rows in the same page, so you can find the ones you’re looking for without jumping back and forth. Now, use your browser’s search function to find the template value under the option_name column:

You’ll notice we highlighted two rows in the screenshot above, both of which show twentyseventeen under option_value. To change your theme, we need to edit both rows. However, before we do that, you need to know what value to replace your current theme with, which brings us to the next section.
Step #3: Change Your Active Theme
All you need to do now is edit the values we showed you earlier under both the template and stylesheet rows. The problem is, you can’t just type the name of the theme you want to use.
If you type the theme’s full name, WordPress won’t know what you’re talking about, and you’ll run into an error. For example, take the Twenty Seventeen theme, which shows up as a single word, twentyseventeen. This is often not a problem with themes that have single-word names, such as Divi.
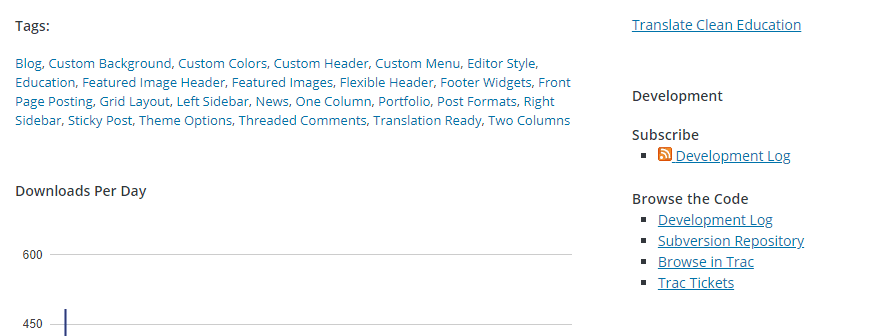
However, in some cases, you’ll need to do a little digging to find out which value to use on your database. There are a couple of ways to do this. If the theme you want to use is on the WordPress.org theme repository, you can find an option called Development Log under the Browse the Code section on its page:
If you click on this option, you’ll see a page showing the theme’s update record. At the top of the screen, you’ll see a subheading that says source, with the theme’s development name next to it:
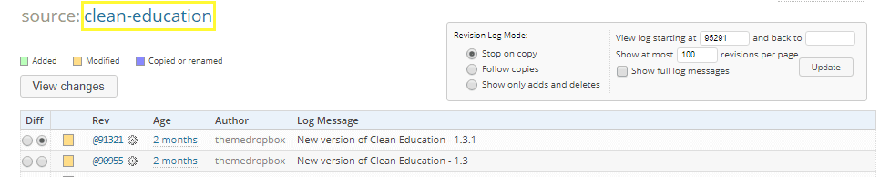
In the example above, we check out the Clean Education theme, and found out it goes by the clean-education name. The latter is the value you’d want to use to enable it from your database. You can also find out this information by accessing your website via FTP and navigating to the public_html/wp-content/themes directory. Inside, you’ll find folders for each theme installed on your website:
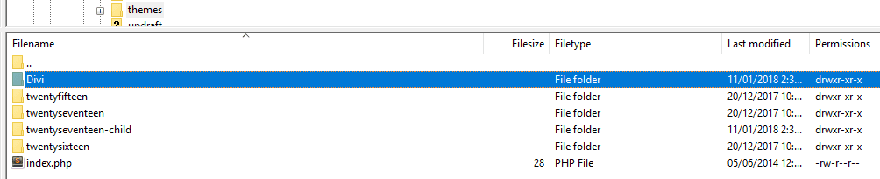
Each folder’s name reflects how WordPress recognizes those themes. For example, if you wanted to switch to Divi using your database, you’d need to enter ‘divi’ as the value. Let’s go ahead and do that now. Return to your database and click on the Edit button to the left of the template row:

On the next screen, look for the option_value field and replace its contents with divi:
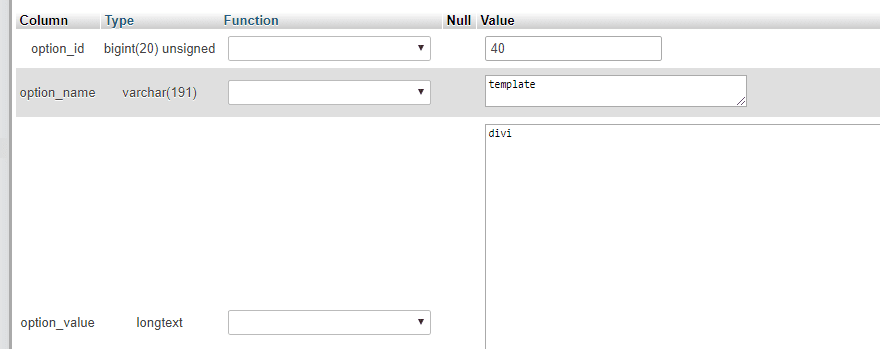
Now click on the Go button at the lower right of the page to save your changes. Repeat that exact same process for the stylesheet row within your wp_options table. Once you’ve updated both values, you can go ahead and access your website, which should now be using Divi.
Conclusion
If your WordPress theme is giving you problems, the easy fix is to temporarily disable it, which you’d usually do through your dashboard. If you can’t access the dashboard, you may need to use your database instead. This is a bit trickier, but it also enables you to specify which theme to use.
To use your database to change your active theme, you’ll need to follow these steps:
- Access your database using phpMyAdmin.
- Find where your database stores your theme’s value.
- Switch your active theme with another one of your choice.
Do you have any questions about how to change themes through the database? Let’s talk about them in the comments section below!
Article thumbnail image by ProStockStudio / shutterstock.com
The post How to Change Your Active WordPress Theme Through Your Database appeared first on Elegant Themes Blog.