
Every week, we provide you with new and free Divi layout packs which you can use for your next project. For one of the layout packs, we also share a use case that’ll help you take your website to the next level.
This week, as part of our ongoing Divi design initiative, we’re going to show you how to create a stunning open job position layout that matches Divi’s Digital Marketing Layout Pack. This layout is an addition to the careers layout that’s already included in the layout pack. Once you create the layout, you’ll be able to reuse it for each one of the open job vacancies and change the content accordingly. Don’t want to go through creating the layout from scratch? At the end of this post, you’ll be able to download the layout for FREE and upload it to your Divi Library.
Let’s get to it!
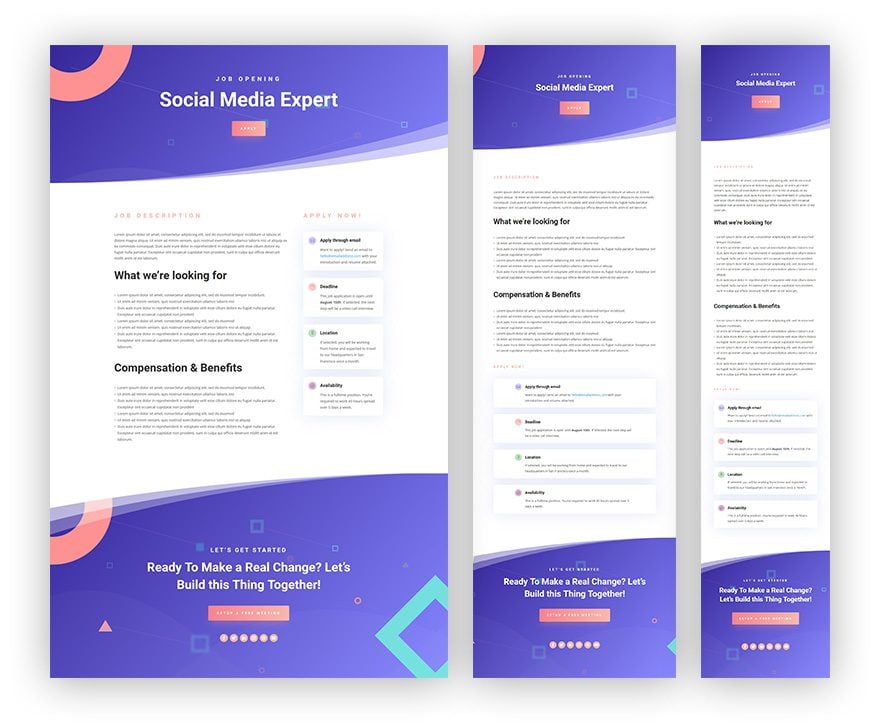
Preview
Before we dive into the tutorial, let’s take a look at the layout we’ll recreate (and which you’ll be able to download) on different screen sizes:
Create New Page with the Digital Marketing Homepage Layout
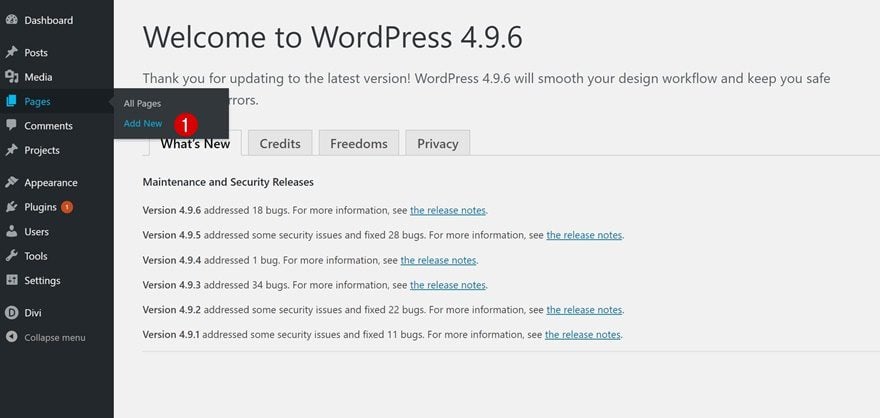
Add New Page & Open with Visual Builder
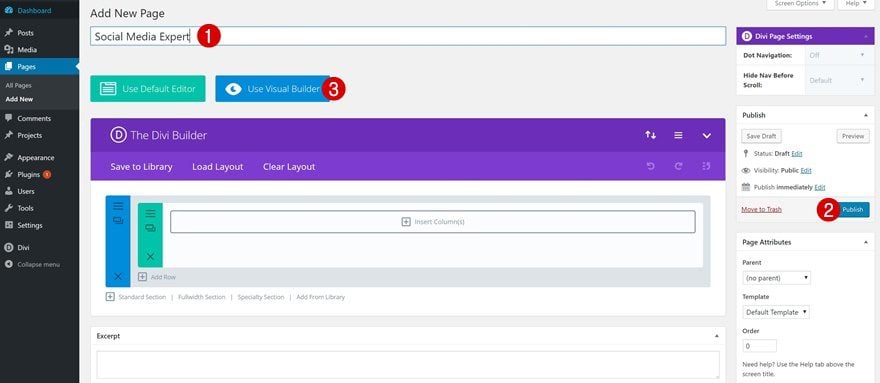
Start by adding a new page, giving your page a title, publishing it and switching over to Visual Builder right away.
Upload Digital Marketing Homepage Layout
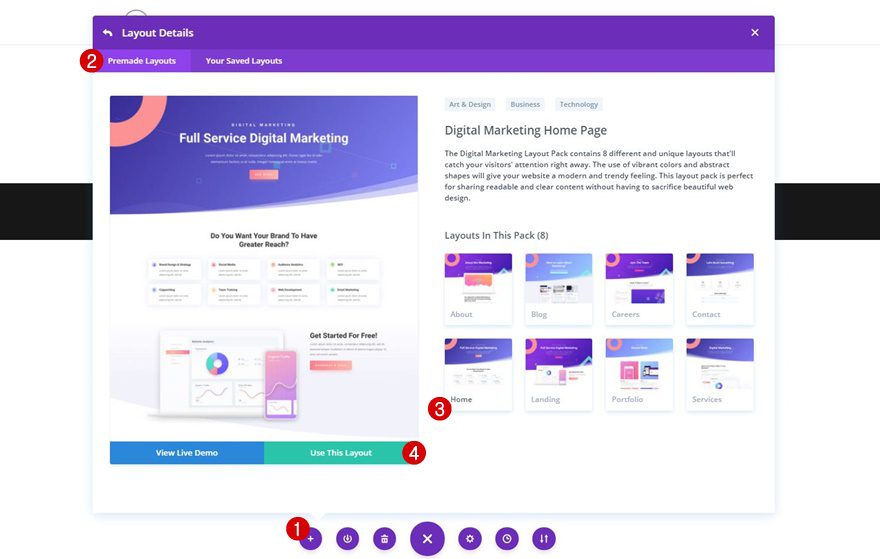
We’re going to reuse one of the layouts that are included in the Digital Marketing Layout Pack. This will make it easier to maintain the same style throughout the entire website. Go to your premade layouts, scroll down until you come across the Digital Marketing Layout Pack and use the homepage layout.
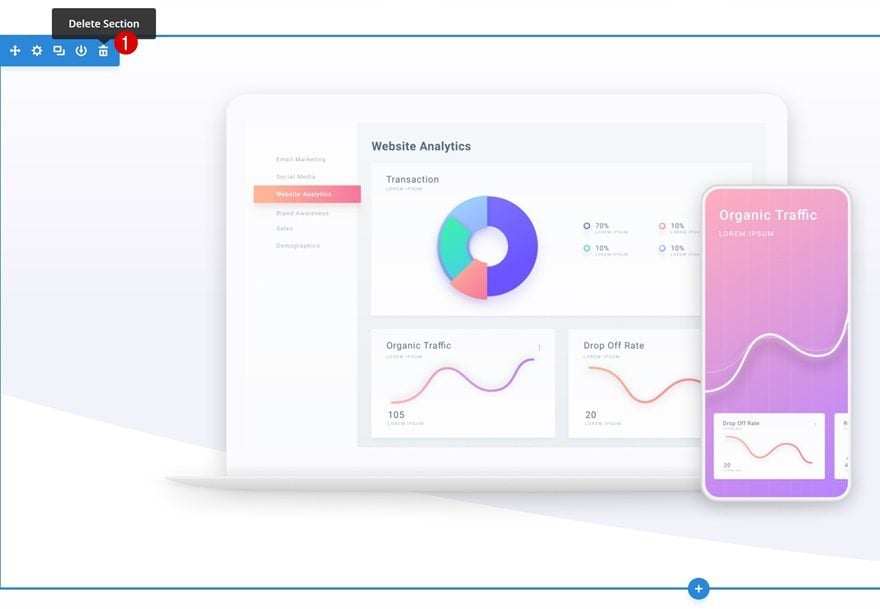
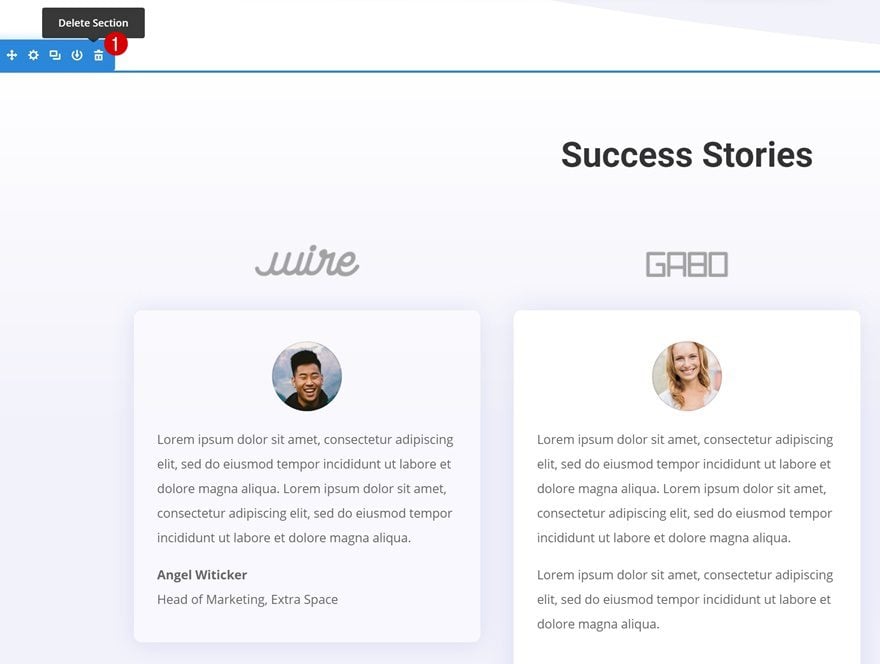
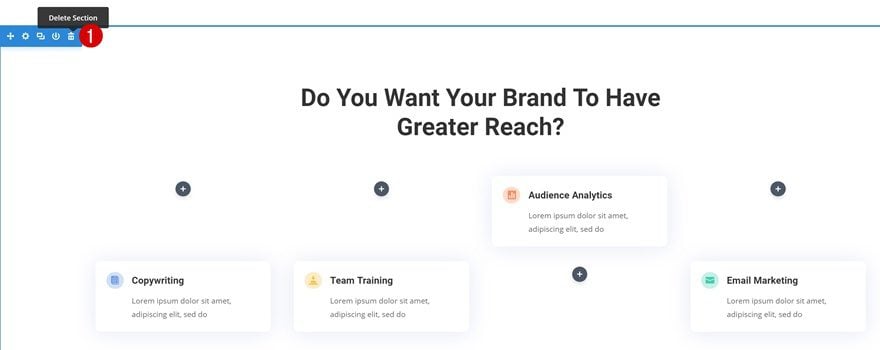
Remove Irrelevant Sections
The layout we’ve uploaded contains some sections that we don’t need for the open job position layout. That’s why we’ll remove them right away. These are the sections you won’t need:
Transform Page into Open Job Position Layout
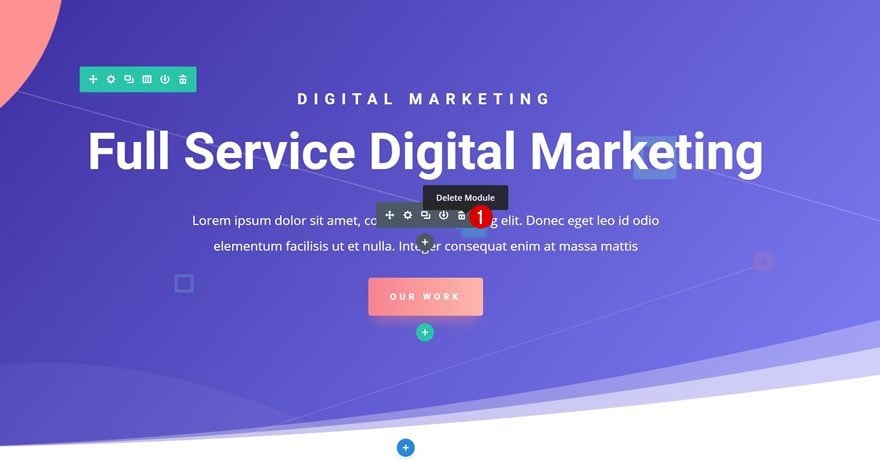
Remove a Hero Section Text Module
Now we can start transforming the page into an open job position layout! Start by removing the following description Text Module in the hero section:
Change Content in Hero Section
Change the copy of the remaining modules in your hero section as well.

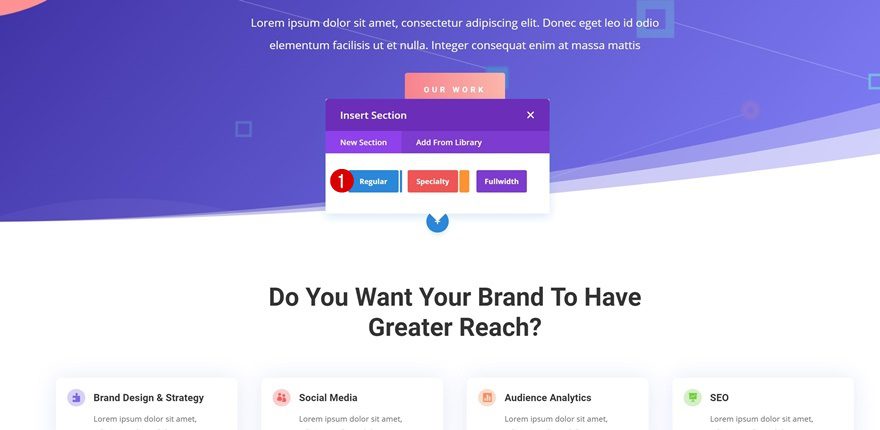
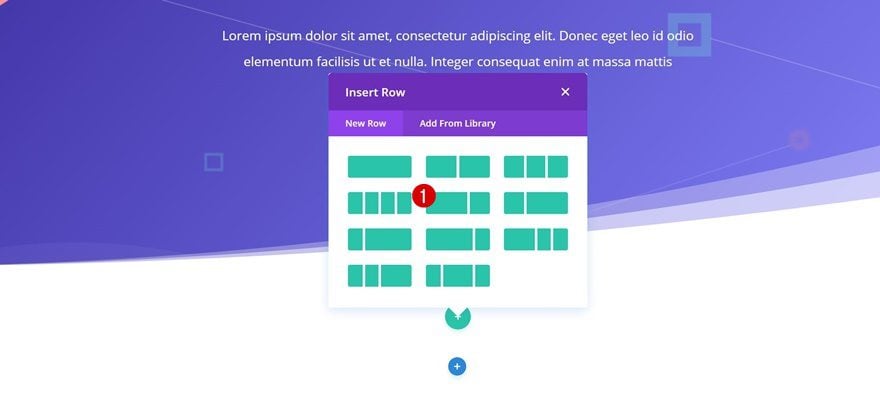
Add a New Section Below Hero Section
Then, right below the hero section, add a new standard section.
Add Row with Two-Columns
We’re going to add a row with the following column structure to it:
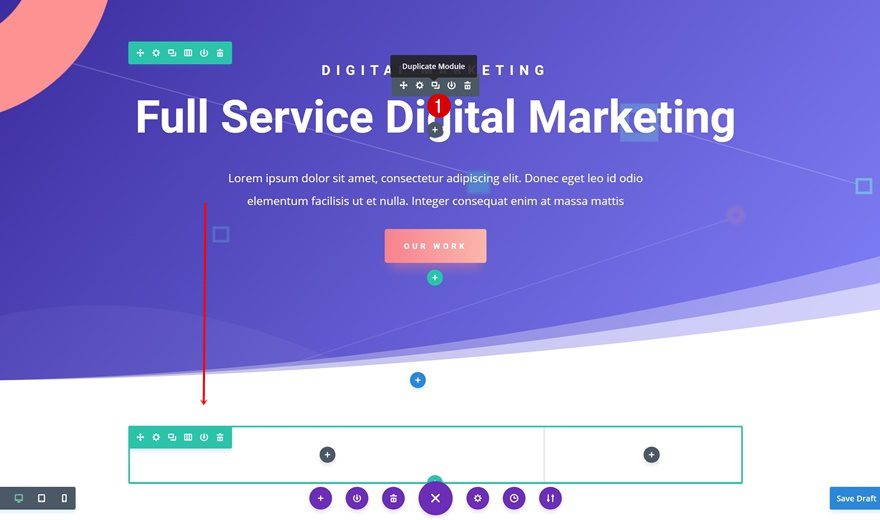
Clone Hero Section Text Module & Place in Column 1 of New Row
To make things easier, we’re going to reuse one of the Text Modules of our hero section and place it in the first column of our new row. This will save us time and will allow us to make changes according to our needs:
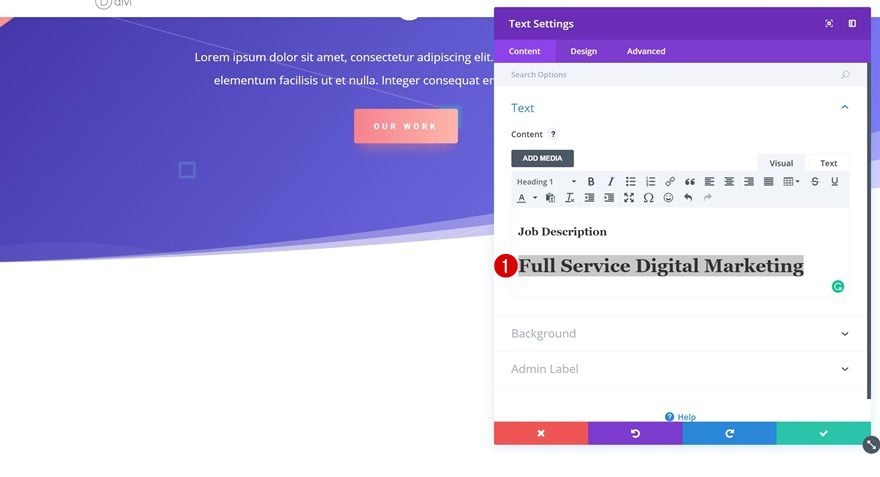
Remove H1 Text in Text Module
Open this Text Module and remove the H1 copy that is included. We’ll also change the H3 copy into ‘Job Description’.
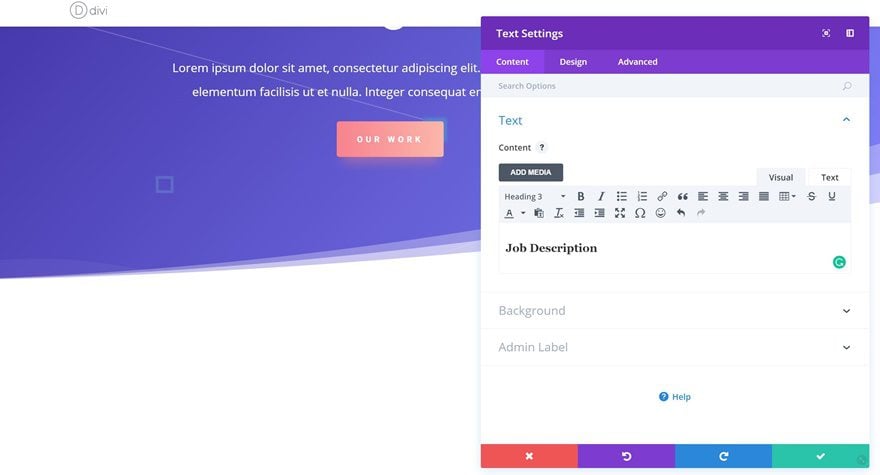
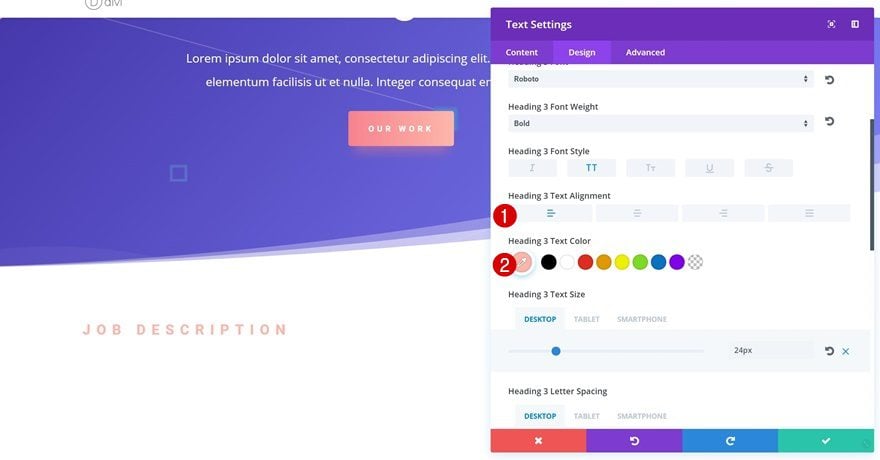
Change H3 Text Settings
The text color in our hero section is white so we’ll definitely need to change that into ‘#fcb6ab’, a color that matches the color palette of this layout pack. We’ll also use left Text Alignment.
Clone Text Module & Place in Column 2
Once you’ve applied the changes, clone your Text Module and place it in the second column. Make sure you change the copy here as well.

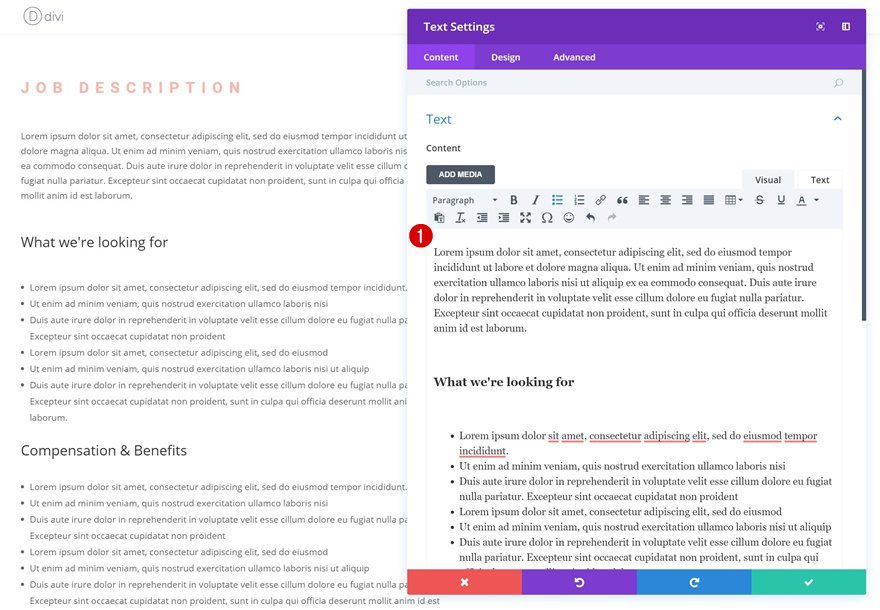
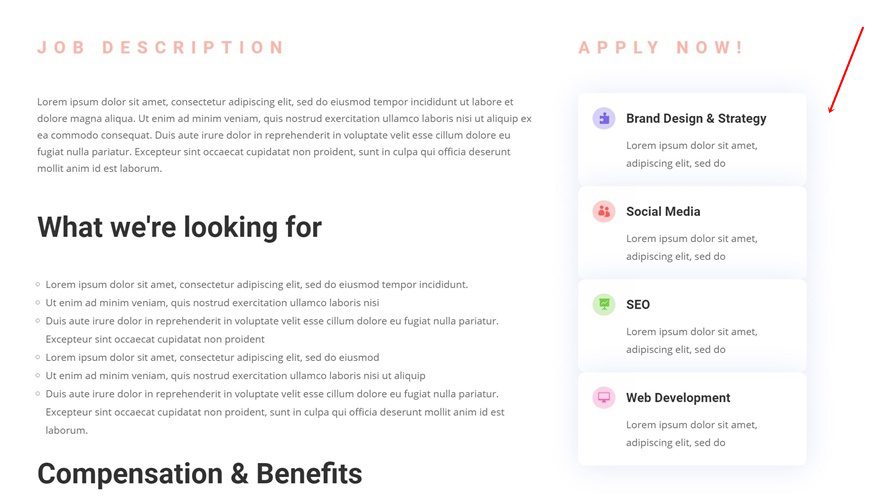
Add Job Description Text Module
Right below the previous Text Module in the first column, go ahead and add a new Text Module. You can use this Text Module to add the job description you need to show. We’re using a combination of paragraphs, H3 titles and lists. It isn’t necessary to create separate Text Modules for each one of these. We’re going to use only one Text Module and modify the settings of all three text types in the text settings.
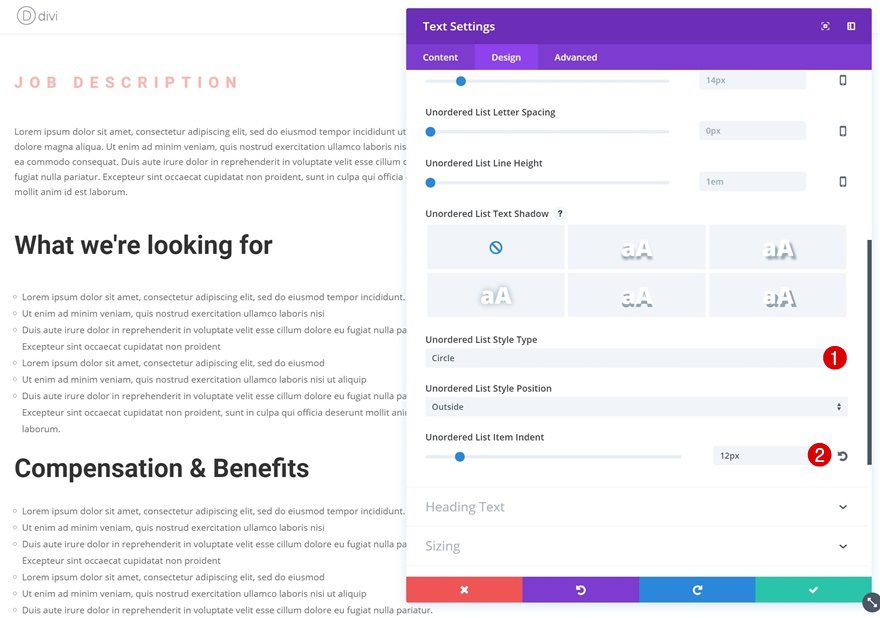
List Settings
We’re skipping the paragraph settings and moving on to the list settings right away. There, we’ll use the following settings:
- Unordered List Style Type: Circle
- Unordered List Item Ident: 12px (This will push the list items a bit to the right)
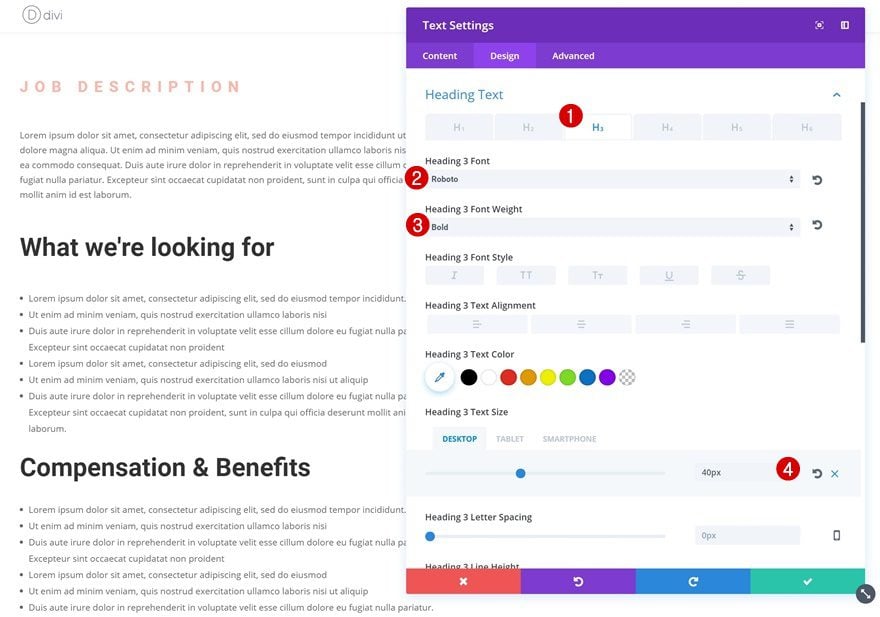
H3 Text Settings
Open your H3 text settings next and use the following settings:
- Heading 3 Font: Roboto
- Heading 3 Font Weight: Bold
- Heading 3 Text Size: 40px (Desktop), 35px (Tablet), 28px (Phone)
Place Blurb Modules in Column 2
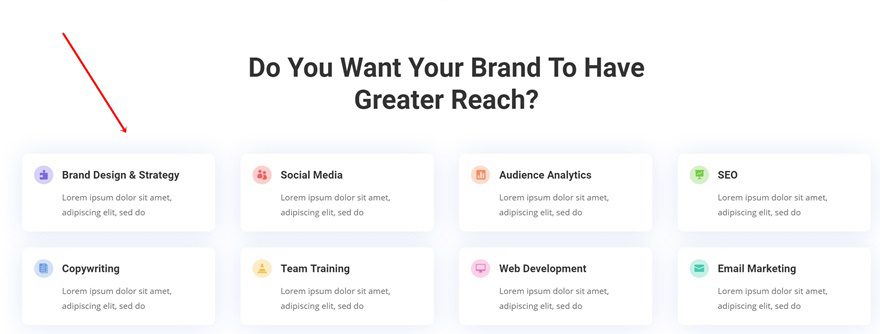
The homepage layout of the Digital Marketing Layout Pack contains many stunning design elements that we can simply reuse instead of creating something from scratch. The Blurb Modules in the next section, for instance, are great for sharing additional details such as information on how to apply, the deadline, location and availability. We’ll delete this section after we’re done so instead of cloning the Blurb Modules with the color palette of your choice, simply place them in the second column of the previous section.
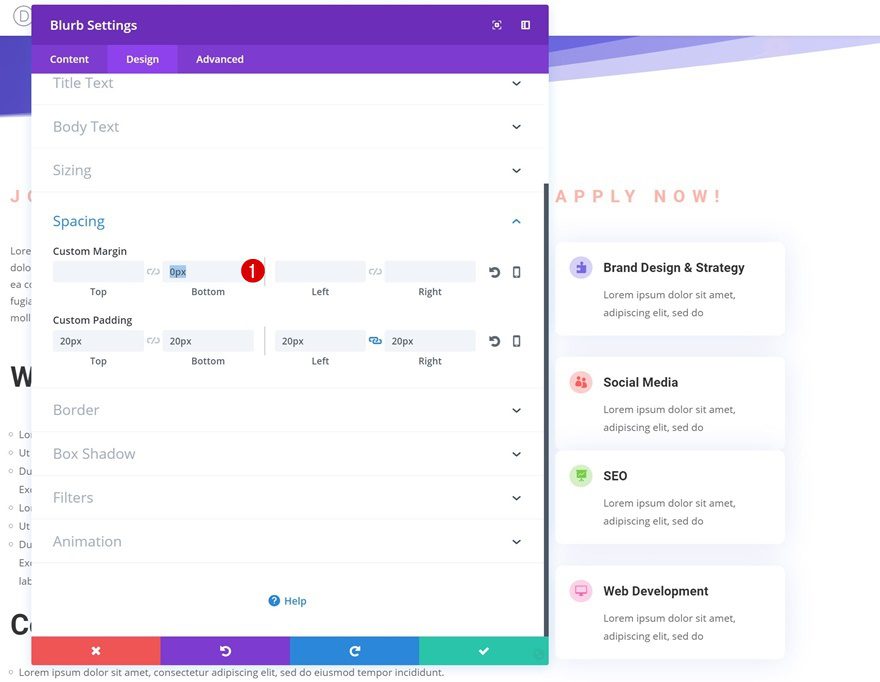
Remove Bottom Margin of Blurb Modules
These Blurb Modules are pushed together due to the zero bottom margin that was assigned to them. Go ahead and remove the ‘opx’ bottom padding of each one of the modules you’re using.
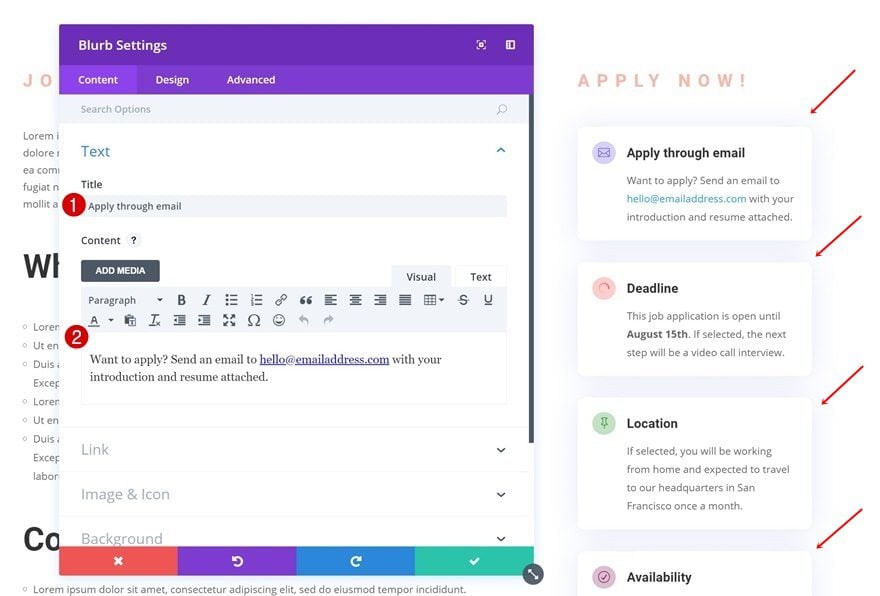
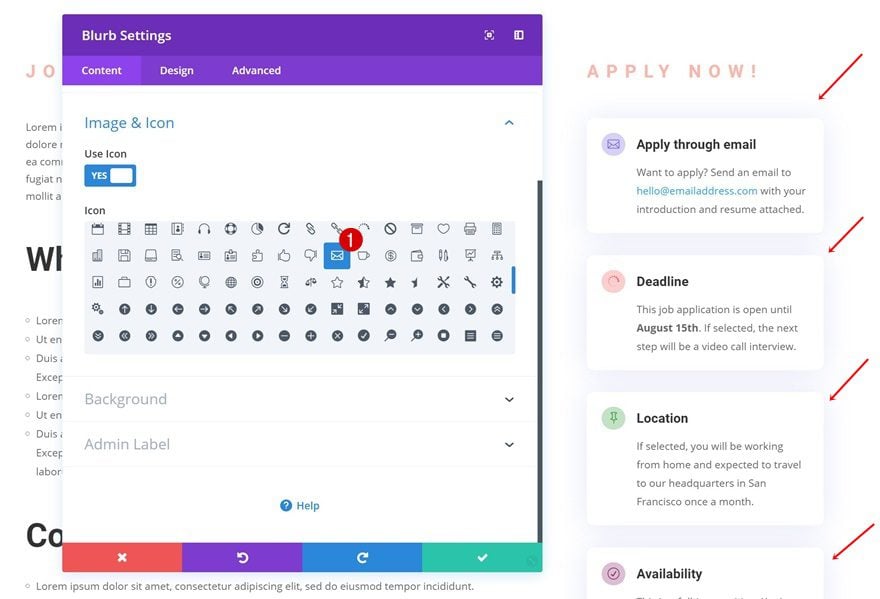
Change Blurb Content & Icons
Now, you can go ahead and change the content of these Blurb Modules one by one. Choose an icon that matches the content you’re sharing as well.
Remove Remaining Section
As mentioned before, we were only using the section with the Blurb Modules to ease our workflow. Once you’ve replaced the Blurb Modules you needed, you can go ahead and remove this section.
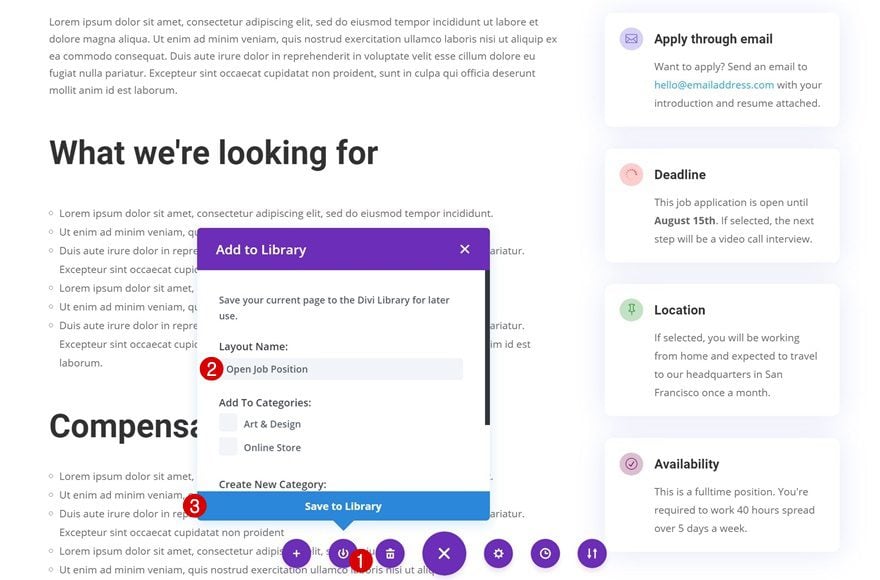
Save Layout to Divi Library & Reuse for Other Open Positions
Save Layout to Divi Library
And we’re done! We now have a stunning layout which we can easily reuse for all current and future open job positions. The only thing left to do is saving the layout to your Divi Library by clicking on the following icon, giving your layout a name and clicking on the ‘Save to Library’ button:
Download The Layout for FREE
To lay your hands on the free open job position layout, you will first need to download it using the button below. To gain access to the download you will need to subscribe to our Divi Daily email list by using the form below. As a new subscriber, you will receive even more Divi goodness and a free Divi Layout pack every Monday! If you’re already on the list, simply enter your email address below and click download. You will not be “resubscribed” or receive extra emails.

Preview
Now that we’ve gone through all the steps, let’s take a final look at the open job position layout on different screen sizes:
Final Thoughts
In this use case blog post, we’ve shown you how to create an elegant and stunning open job position page in addition to Divi’s Digital Marketing Layout Pack. We’ve created the layout from scratch using Divi’s Visual Builder and we’ve also shared the layout. You can download it for free and upload it to your Divi library. If you have any questions, make sure you leave a comment in the comment section below!
The post How to Create an Open Job Position Layout with Divi (Free Download!) appeared first on Elegant Themes Blog.