
Welcome to post 1 of 5 in our miniseries How to Create Stunning Grid Layouts with Divi’s Video Module. In this series we are going to walk you through how to create amazing grid layouts from scratch using the Divi Visual Builder. And if you are worried about this being too complicated, think again! All of these layouts can be created and styled using the Visual Builder without any additional code.
To begin this series, I’m going to show you how to create a grid layout for your videos much like a blog grid layout using a combination of video module stacked on top of a blurb module.
This tutorial will include both a dark and a light version of the grid design. The great thing about this layout design is that it is super easy to implement and I’ve tried to give you a lot of visuals to help along the way.
Let’s get started.
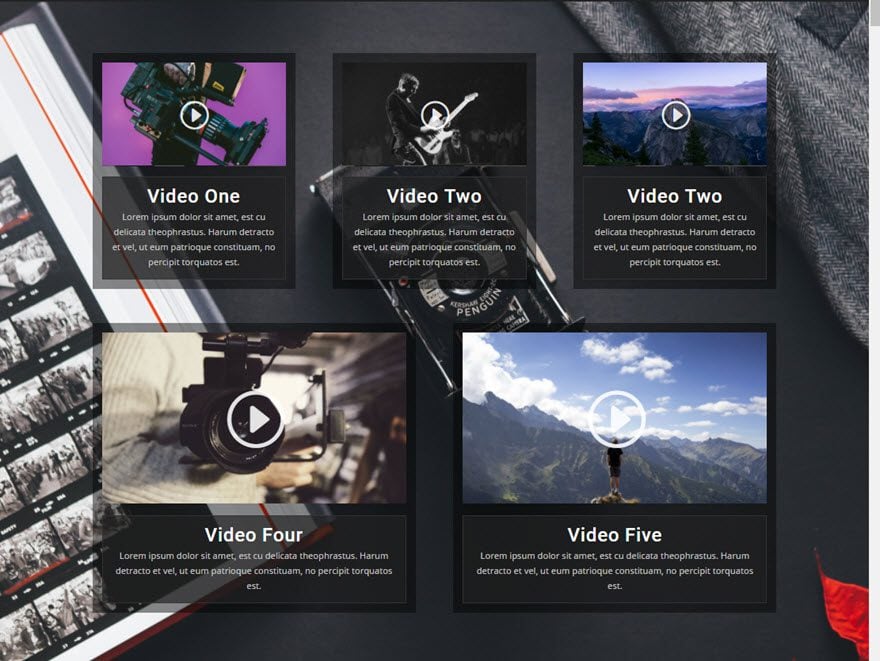
Sneak Peek at The Final Result

The Concept & Inspiration
When it comes to adding videos to a website, a lot of them seem to settle for a simple embed with little or no design. I mean, I get it. Less is more and all that. But, sometimes the way you organize the videos on a page or the way you frame them really can dramatically change the way a person engages with the content. That is why I wanted to do a series on creating great layouts for videos.
This is great for videographers, podcasters, and online courses. My hope is that you take advantage of these concepts for your own project or use them as a springboard for even greater layouts.
Implementing The Design With Divi
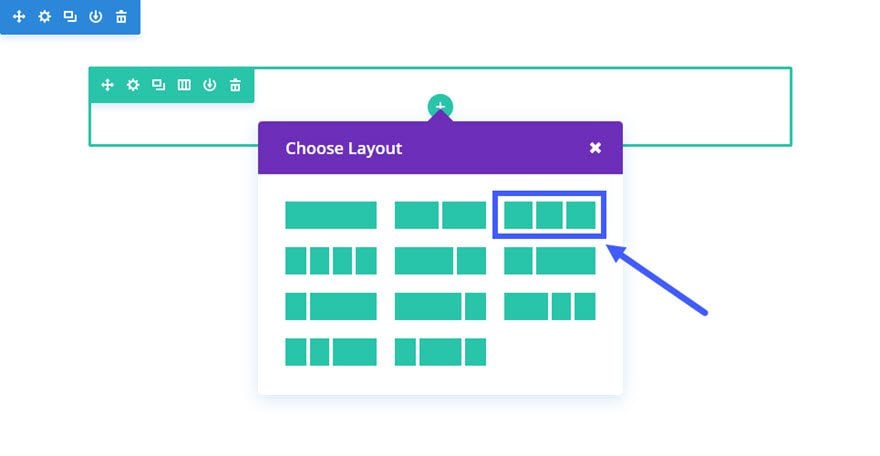
First, add a regular section with a ⅓ ⅓ ⅓ column structure.
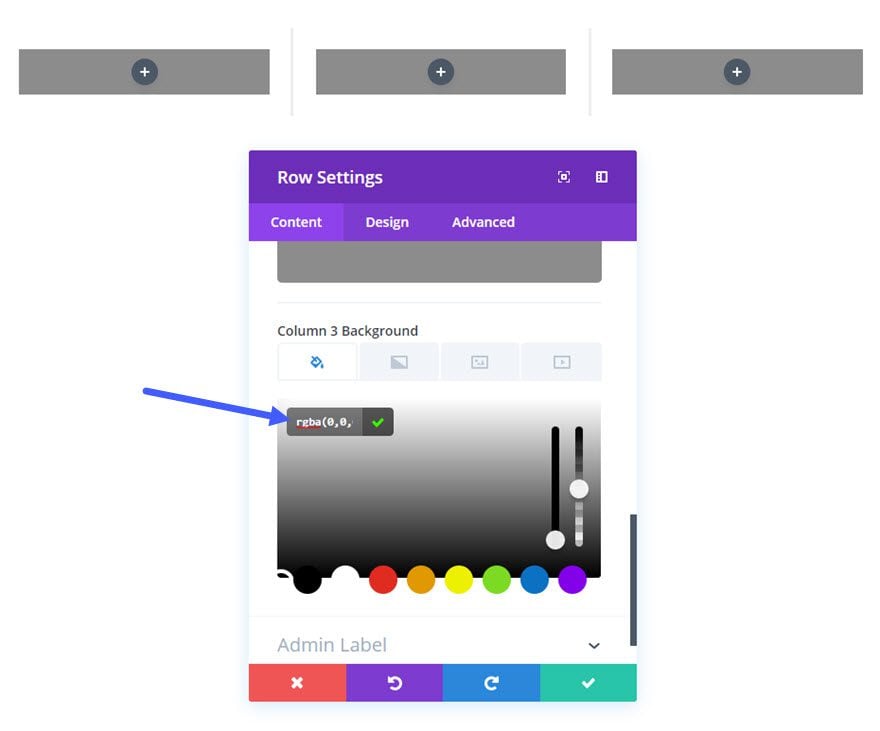
Next we are going to add a dark translucent background to each of the columns which will serve as a frame around each of our videos.
Edit the Row Settings and update the following:
Content Options
Column 1 Background Color: rgba(0,0,0,0.45)
Column 2 Background Color: rgba(0,0,0,0.45)
Column 3 Background Color: rgba(0,0,0,0.45)
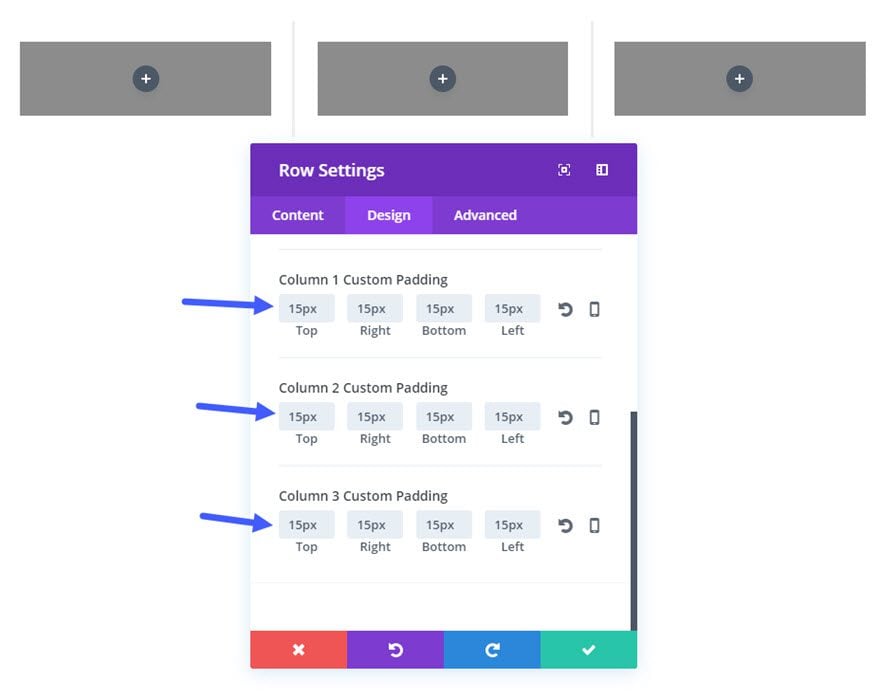
Design Options
Column 1 Custom Padding: 15px Top, 15px Right, 15px Bottom, 15px Left
Column 2 Custom Padding: 15px Top, 15px Right, 15px Bottom, 15px Left
Column 3 Custom Padding: 15px Top, 15px Right, 15px Bottom, 15px Left
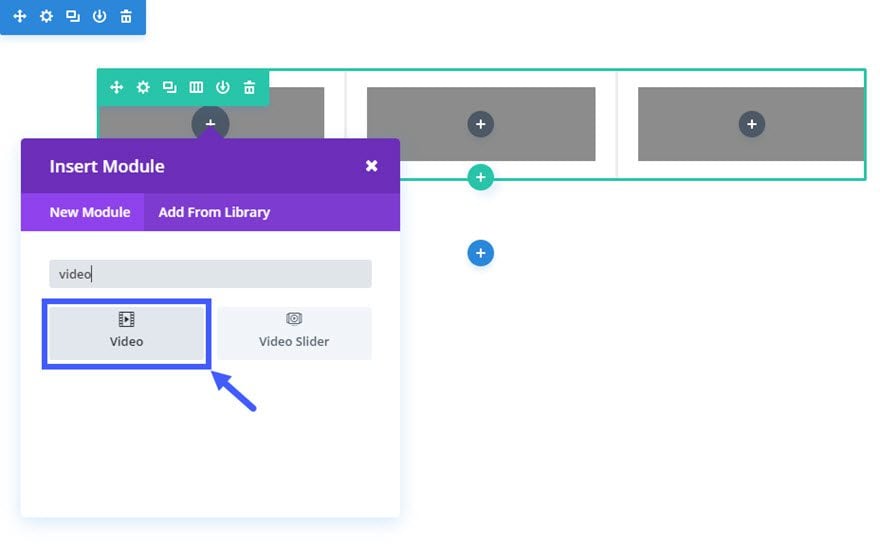
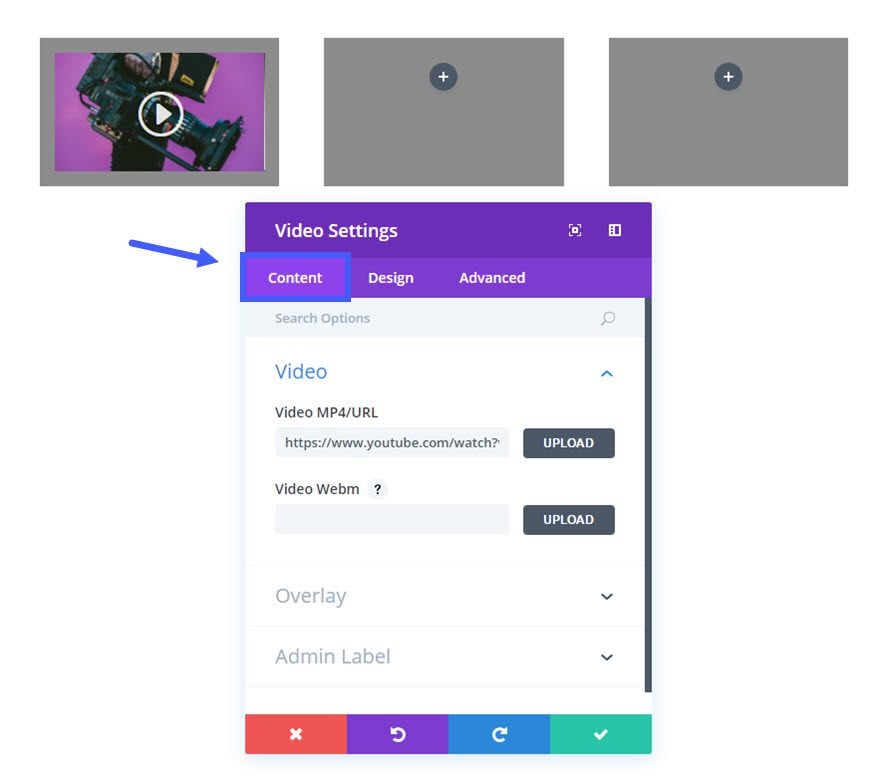
Next add the first Video Module to the first column.
Update the Video Settings as follows:
Content Options:
Video MP4/URL: [enter URL for video]
Image Overlay URL: [upload a custom image for your video or generate one automatically from the video]
Design Options:
Play Icon Color: rgba(255,255,255,0.87)
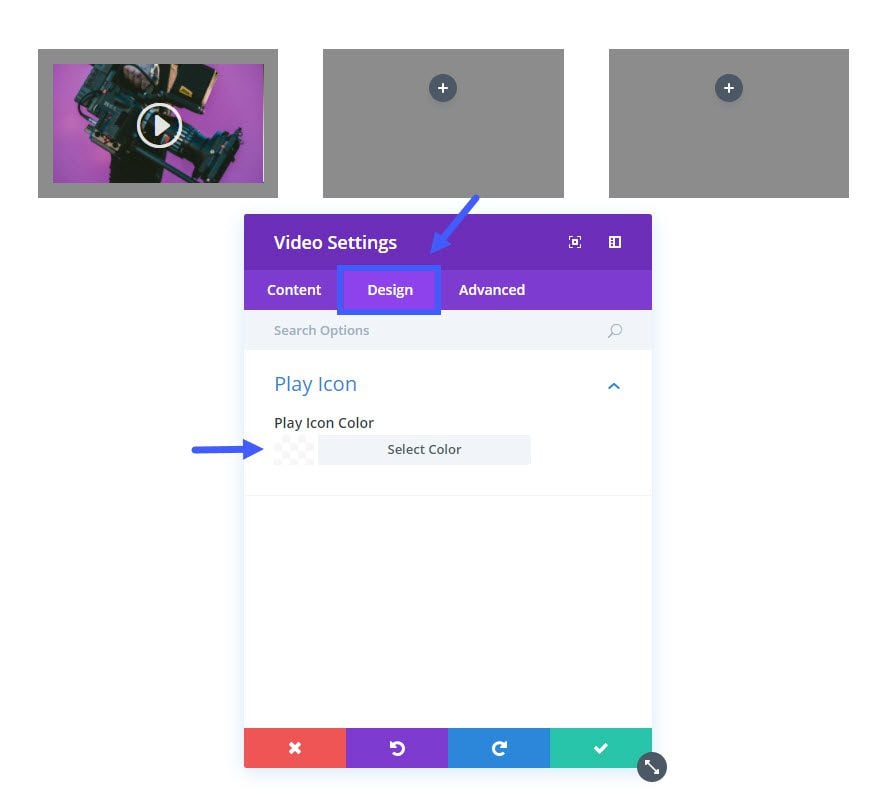
Save Settings
Next add a Blurb Module in the first column directly under the Video Module you just created.
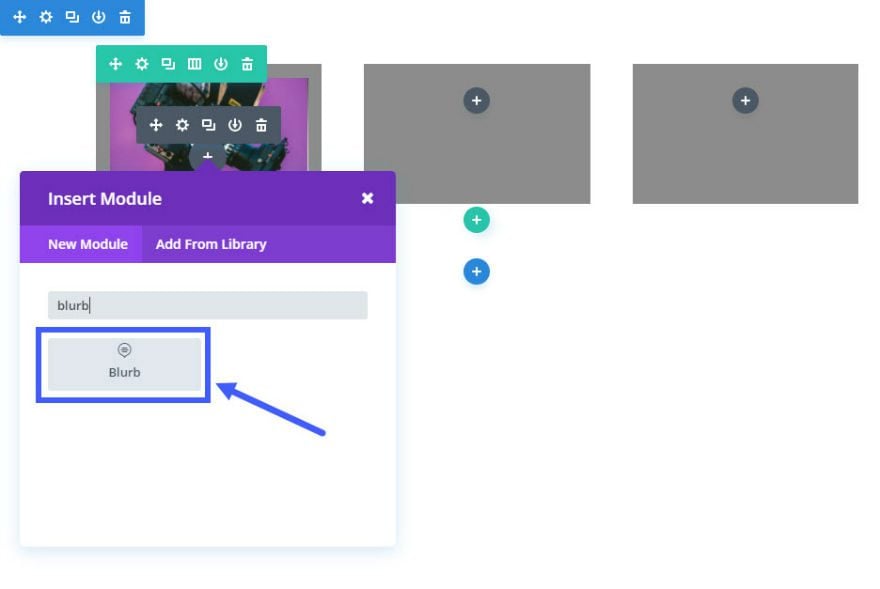
Update Blurb Settings as follows:
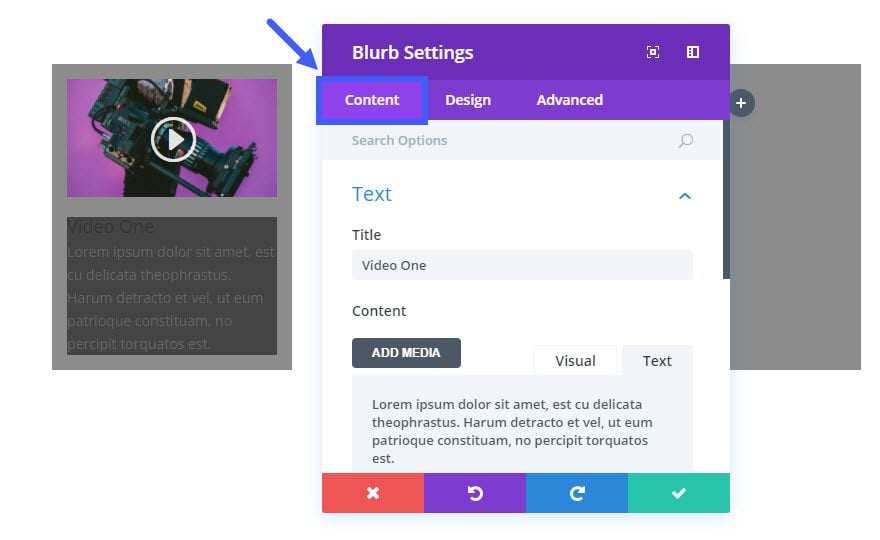
Content Options:
Title: [enter title of video]
Content: [enter description of video]
Background Color: rgba(34,34,34,0.68)
Design Options:
Text Color: Light
Text Orientation: Center
Header Font: Roboto
Header Font Size: 30px
Header Letter Spacing: 1px
Body Font: Open Sans
Body Font Size: 14px
Body Text Color: #cccccc
Use Border: YES
Border Color: #333333
Border Width: 1px
Custom Margin: -10px Top
Custom Padding: 15px Top, 15px Right, 15px Bottom, 15px Left
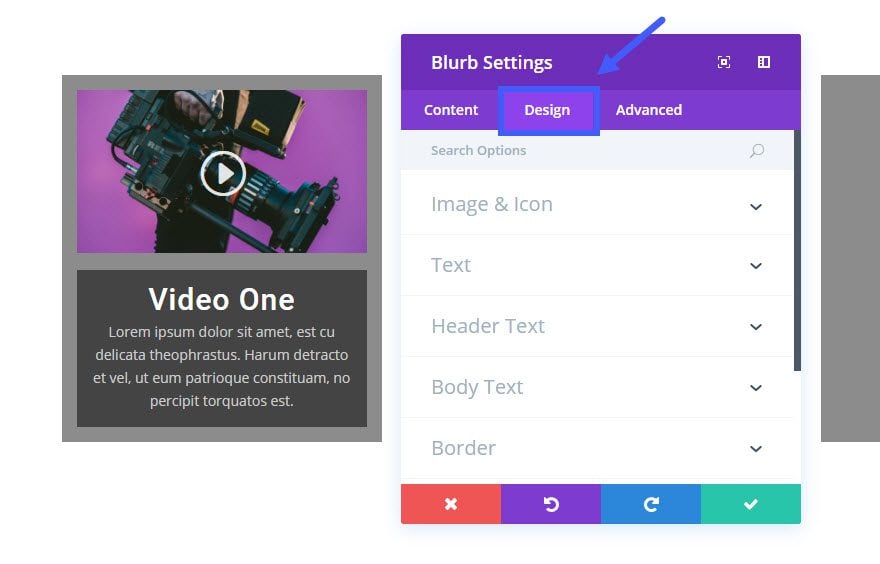
Save Settings
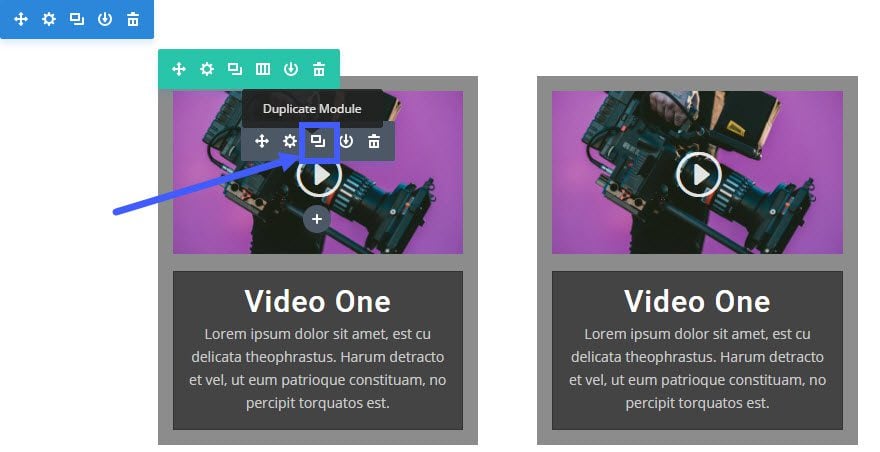
Now that you are finished with the first column content, you are ready to duplicate its contents. Click the duplicate icon on the video module twice and drag each of the duplicated modules to the second and third rows. Repeat this duplication process for the Blurb Module until all three columns are identical.
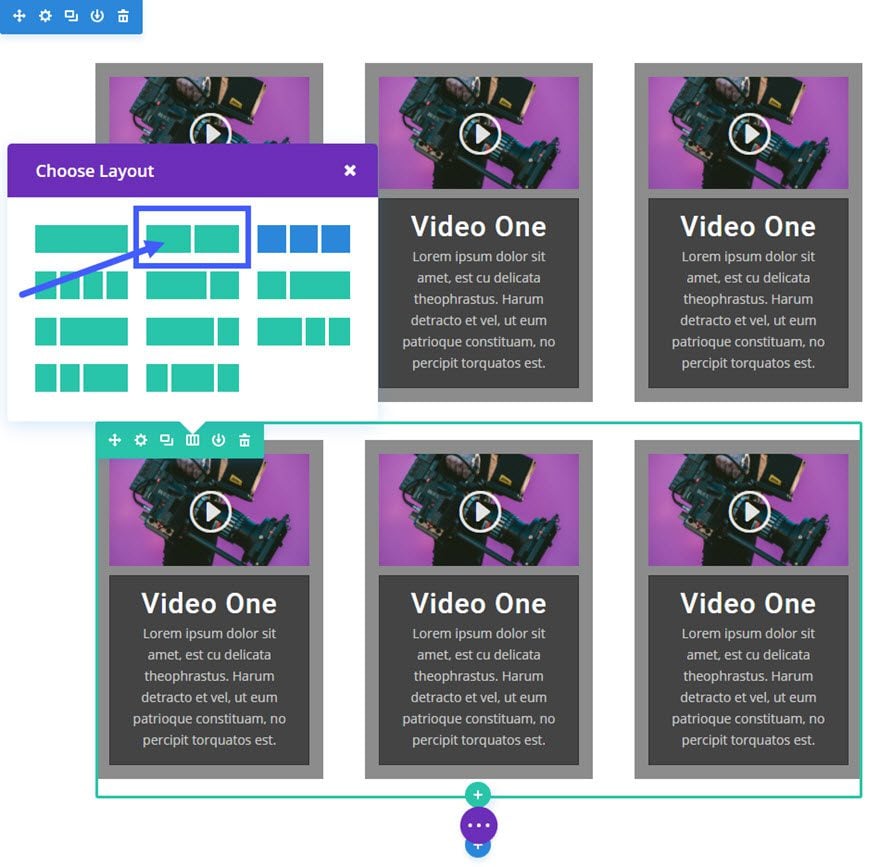
Now we need to add another row with a ½ ½ column structure directly under our current row. Since we are going to want to carry over our videos and blurbs into the new row, the easiest way to do this is to go ahead and duplicate the current 3 column row. After the row is duplicated, change the column to the ½ ½ column structure.
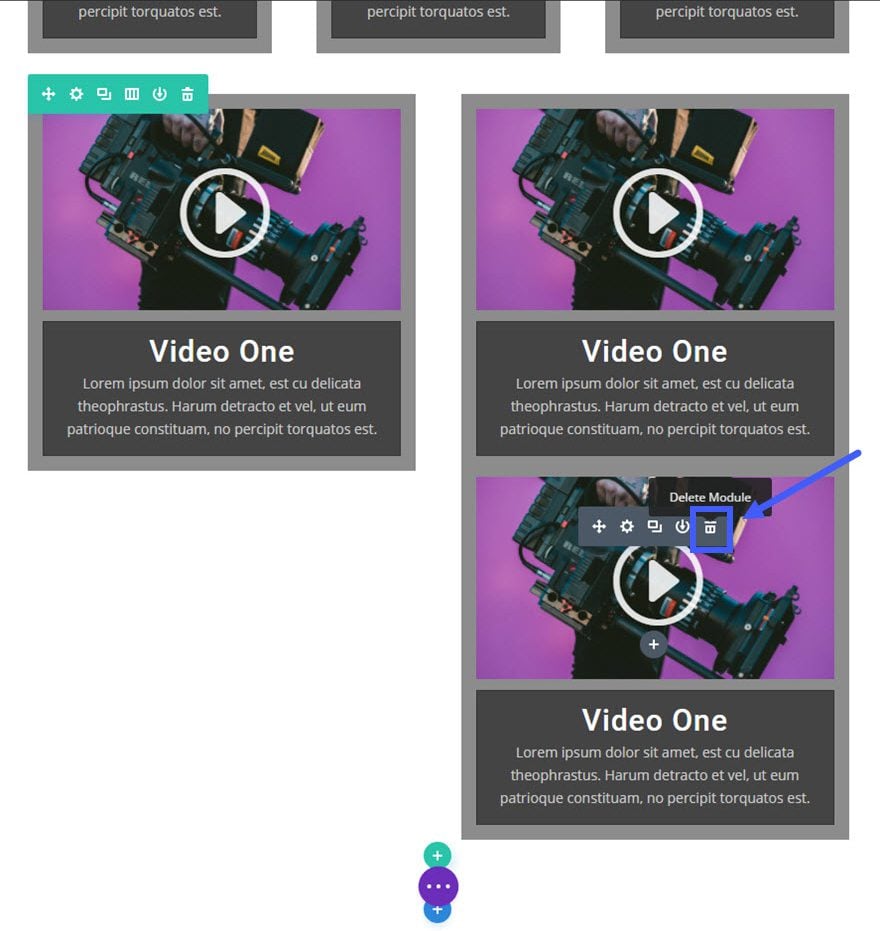
Delete the extra video card.
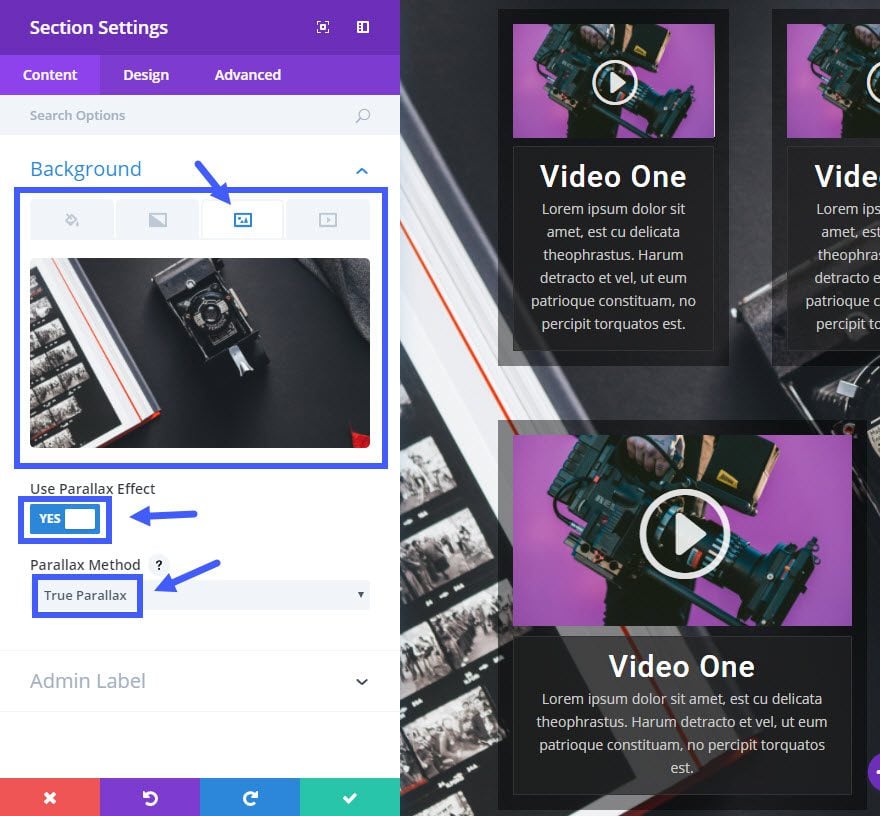
Now lets add a background to our section. Under the section settings update the following options under the Content tab:
Background Image: [upload image]
Use Parallax Effect: YES
Parallax Method: True Parallax
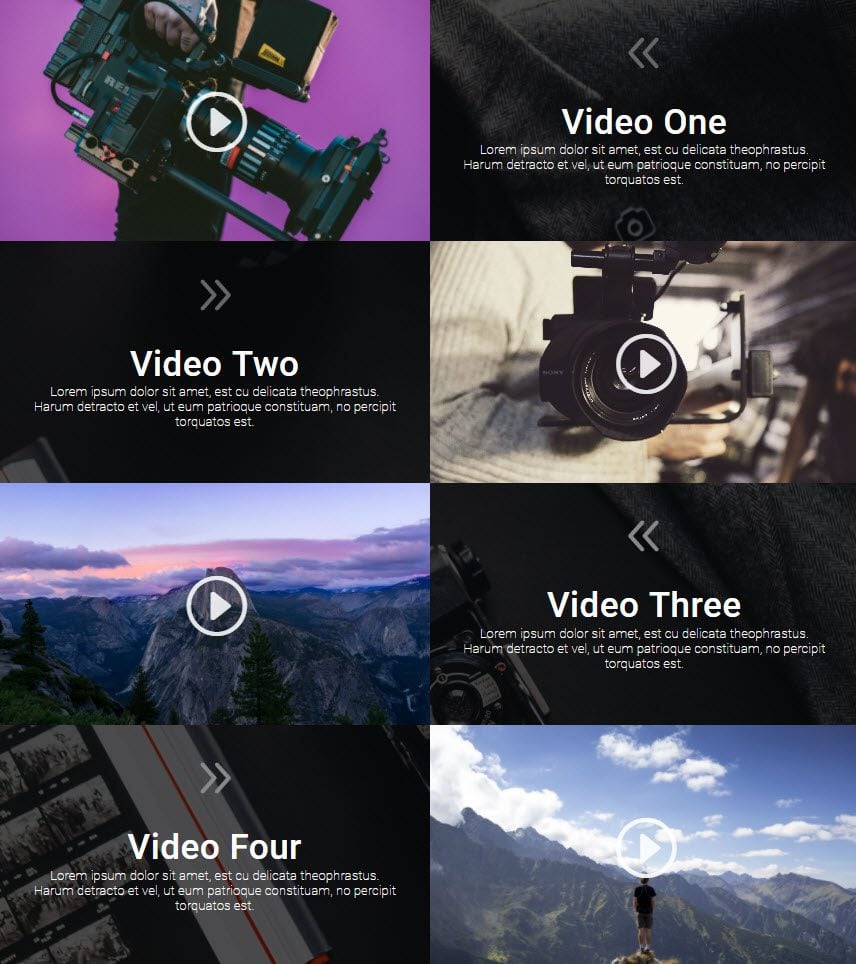
That’s it for the dark version of the first video grid design. Check out your results.
Next is the light version.
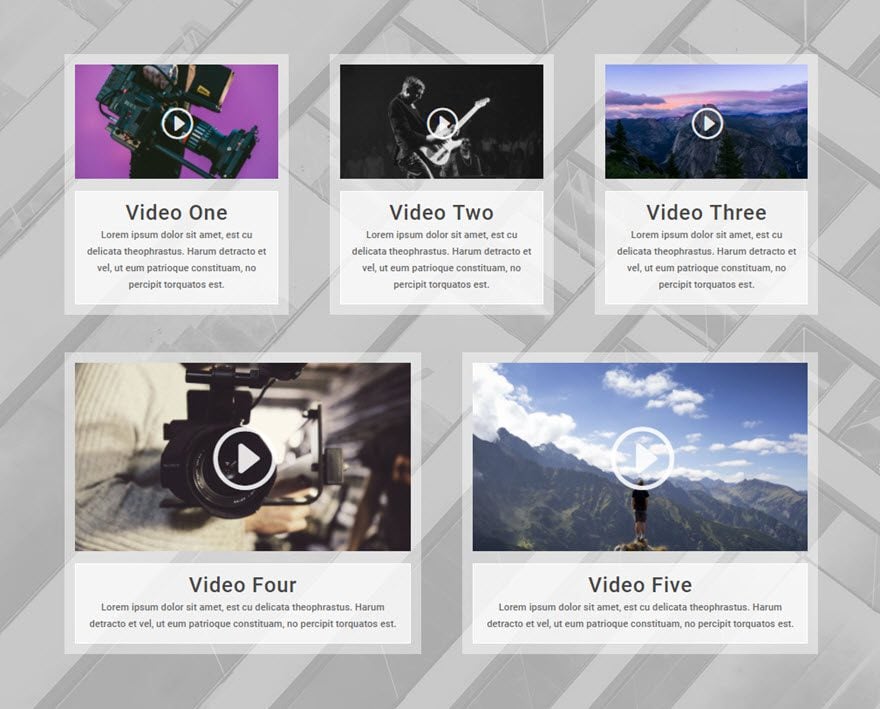
Creating the Light Version of the Video Grid Design
To change the previous dark video grid design into a light version, all you need to do is update a few of the design options.
Update Section Settings as follows:
Content Options:
Background Image: [enter a light background image]
Update Row Settings as follows:
Content Options
Column 1 Background Color: rgba(255,255,255,0.45)
Column 2 Background Color: rgba(255,255,255,0.45)
Column 3 Background Color: rgba(255,255,255,0.45)
Update Blurb Settings as follows:
Content Options
Background Color: rgba(255,255,255,0.68)
Design Options
Text Color: Dark
Header Text Color: #444444
Body Font: Roboto
Body Text Color: #666666
Border Color: #ffffff
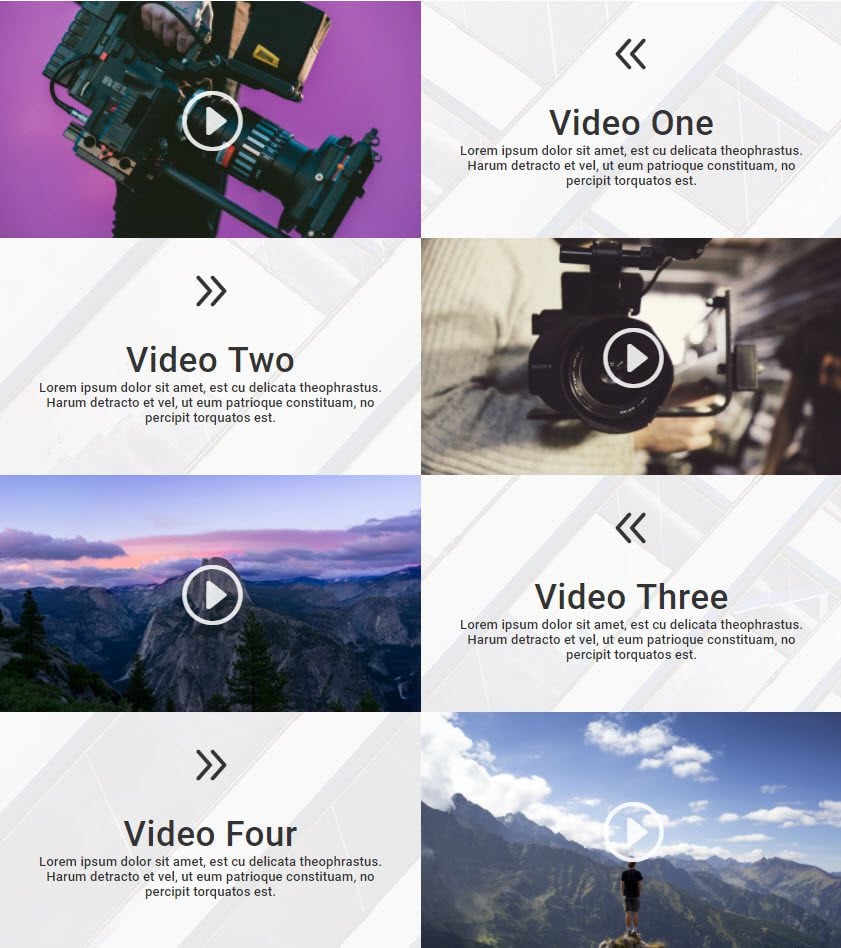
Here is what the light version looks like…
That’s it!
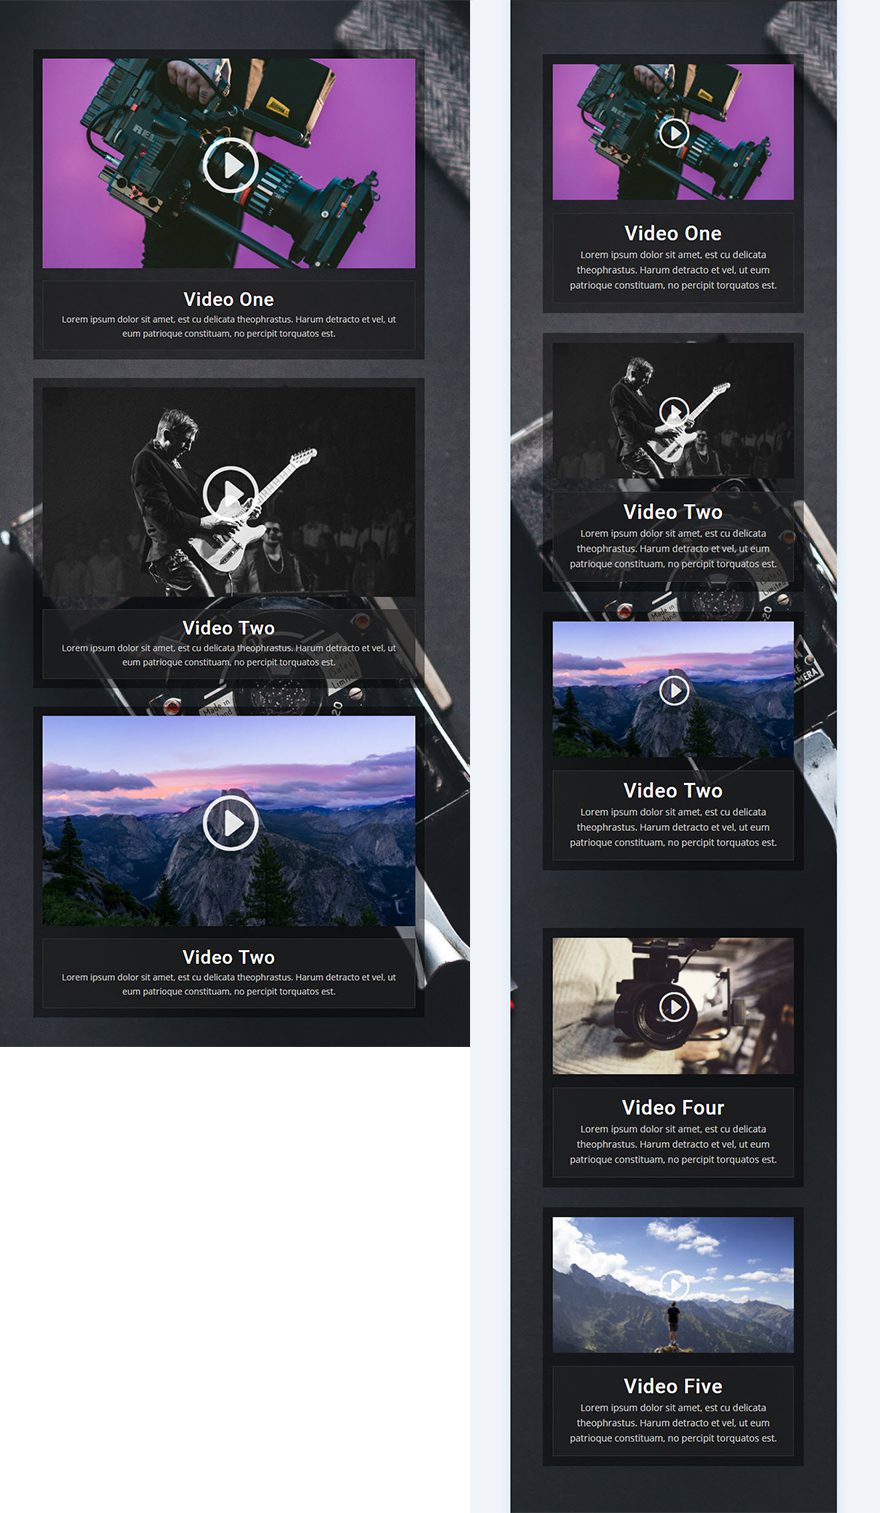
Responsive?
This layout works great on all devices and screen sizes. Here is a quick look at what this layout looks like on tablet and smartphone devices.
Coming Up
For the next post in this series, I’m going to show you how to create a unique fullwidth, 2-column grid layout for your videos . Here is a preview of what is to come.
The post How to Create Stunning Grid Layouts with Divi’s Video Module (Part 1) appeared first on Elegant Themes Blog.