
If you’re connected to the Internet, you have a unique identifying number known as an IP address. And it’s no different for your visitors – each and every person coming to your site similarly has their own unique IP address. With the right plugins and tools, you can work with these IP addresses to both add functionality and/or restrict access to your WordPress site.
In this post, I’m doing to dig into both of those topics. That is, by the time you finish reading, you’ll know how you can:
- Dynamically display each user’s IP address on the front-end of your WordPress site.
- Block users from commenting on or accessing your site based on their IP address.
Let’s get started…
How to Display a User’s IP Address in WordPress
I’ll get to blocking an IP address in a second, but let’s start with a use that’s a little more positive:
Using WordPress to a show a visitor their own IP address.
When might this come in useful? While you can always just use it as a fun widget, there are some practical uses as well.
For example, if you’re showing code snippets where a user needs to insert their own IP address in the code snippet, you could use this technique to show visitors their IP address to save them the trouble of figuring it out themselves.
Similarly, you might be giving instructions where visitors need to enter their IP address as part of the instructions. Again – this approach makes it easy for visitors to find their own IP address.
While the code to create your own shortcode is actually pretty simple, there’s already a lightweight plugin called Show IP address that does exactly what you need and nothing more.
Here’s how to use it:
Step 1: Install and Activate Show IP Address
To get started, search for Show IP Address in your dashboard and install the free plugin. You’re looking for the plugin from Keith Griffiths.
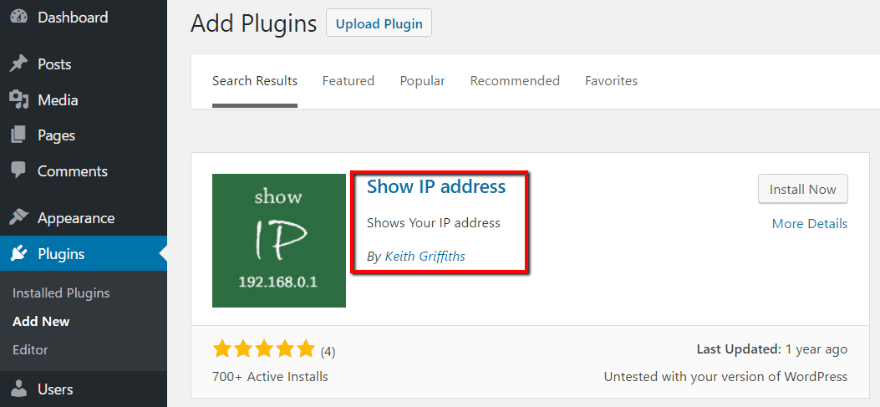
Once installed, there’s really nothing you need to configure. As I mentioned – the plugin is incredibly lightweight – we’re literally just talking a few lines of code.
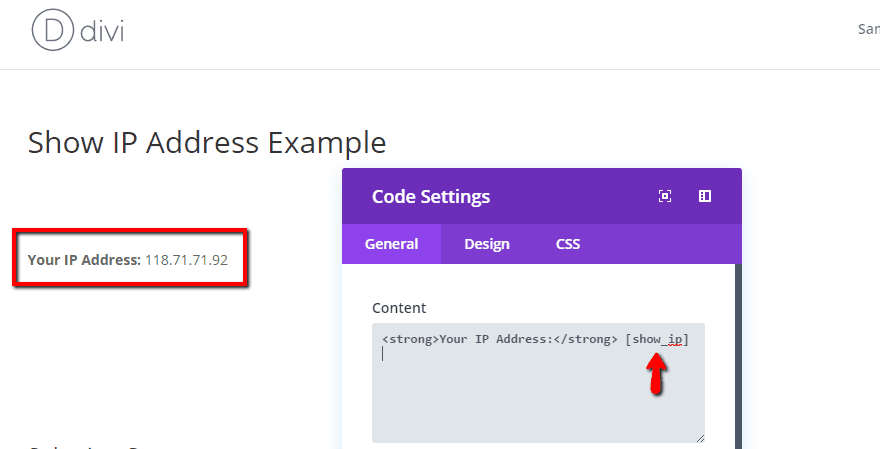
Step 2: Use Shortcode To Show Users Their IP Address
Once you activate the plugin, you can use the [show_ip] shortcode to display a user’s IP address. You can either insert this shortcode in the regular WordPress Editor or a code module in the Divi Builder.
I’ll show you how it looks using Divi – but the process is identical for the WordPress Editor:
Want to display a user’s IP address in your WordPress sidebar? Just add the shortcode to a text widget:
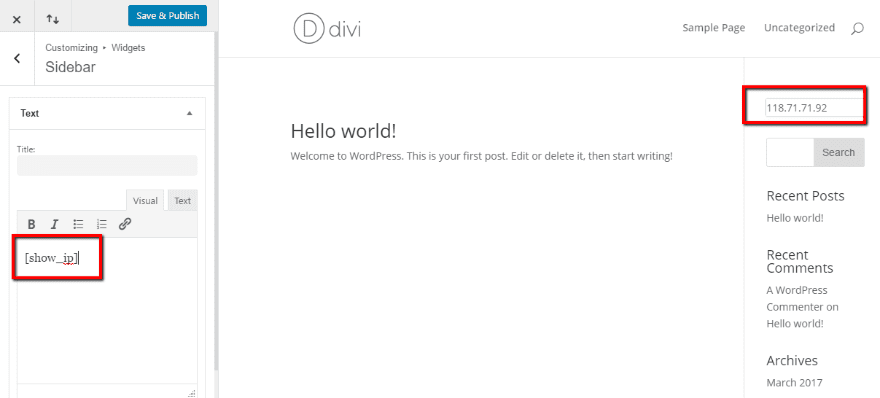
If the shortcode isn’t working, you may need to add this code snippet to your child theme’s functions.php file to enable shortcode use in text widgets:
// Enable shortcodes for text widgets

add_filter('widget_text','do_shortcode');
And that’s all there is to it!
But what if, rather than showing a user their IP address, you’d rather block specific users based on their IP address(es)?
How to Block Users by IP Address in WordPress
Sometimes you’re dealing with a very specific set of bad actors on your WordPress site. These could be:
- People spamming your comment sections
- DDoS attacks
- Malicious actions (e.g. visiting your wp-login page despite your site being private)
- Any other type of unwanted traffic
Part of dealing with these problems is installing a quality security plugin. Good security plugins have security measures and firewalls that will automatically block known bad IP addresses.
But you might also have a situation where you need to zero in and get rid of specific IP addresses. That’s what this section is about.
How to Find the IP Addresses of Malicious Actors
If you already have the IP address(es) you want to ban – you should feel free to skip ahead to the next section.
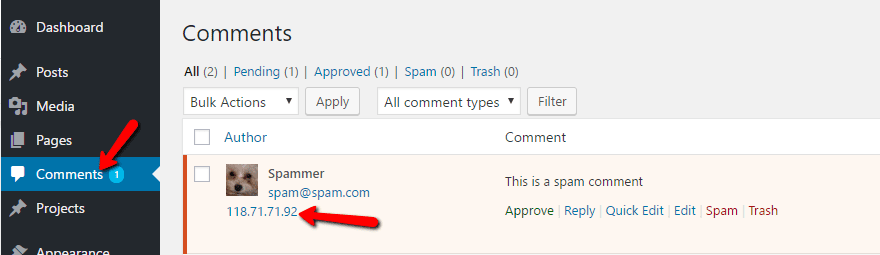
If you’re dealing with comment spam, finding the IP address of the spammer is trivial. That’s because WordPress actually gives you that information for every single comment. All you need to do is go to your Comments tab to find it:
Finding IP addresses for other bad actors is a little more tricky. Unless you have a specific activity monitoring plugin, your best bet is normally to dig into your host’s logs.
For example, if your host uses cPanel, you can download a log of all your site’s activity by going to the Raw Access Logs:
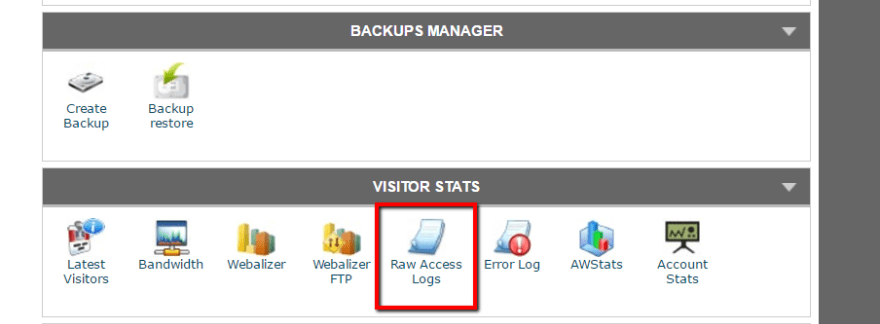
You can download a traffic log for each specific site that you host. Then, using something like Winzip, you can open the .gz log file. Then, open the file that’s inside the .gz file with Notepad or another text editor.
At that point, you can use CTRL + F to look for people who accessed specific pages on your site.
For example, you could check if anyone other than yourself has tried to access your site’s wp-admin area by looking for “wp-admin” or “wp-login”:
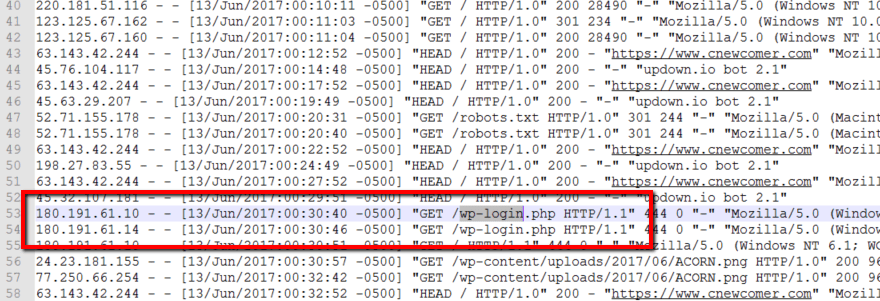
In the above screenshot, you can see that someone using Firefox tried to access my wp-login page. I should probably block them given that I use Google Chrome!
How to Ban Specific IP Addresses From Your WordPress Site
When it comes to blocking specific IP addresses from accessing your WordPress site, you have a few different ways to approach the problem. Here are some of the most common:
- Using the built-in Comment Blacklist tool. This is part of the core WordPress software.
- Using a plugin. As is normally the case, you can find a free WordPress plugin to help you get the job done.
- Taking advantage of cPanel’s IP Address Deny Manager. A server-side option for those who host WordPress sites on hosts using cPanel.
- Blocking specific IP addresses with .htaccess. Kevin covered how to do this in tip #6 of his .htaccess tips and tricks post.
Because Kevin already covered the .htaccess angle, I’ll exclusively focus on the first three methods.
How to Use the WordPress Comment Blacklist
If you just want to block specific IP addresses from being able to comment on your site, all you need to do is go to Settings → Discussion and scroll down to the Comment Blacklist box. Then, just paste in a list of IP addresses you want to block:
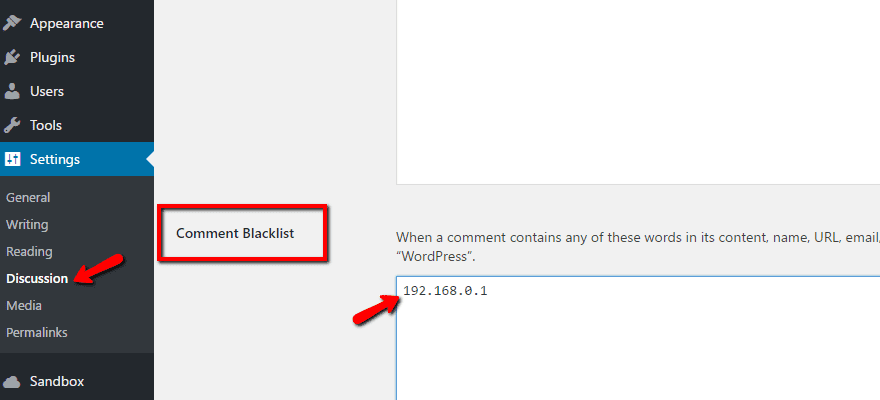
As I mentioned – this is a core WordPress feature. So you don’t need to install any external plugins to get access to this tool.
How to Block IP Addresses With a WordPress Plugin
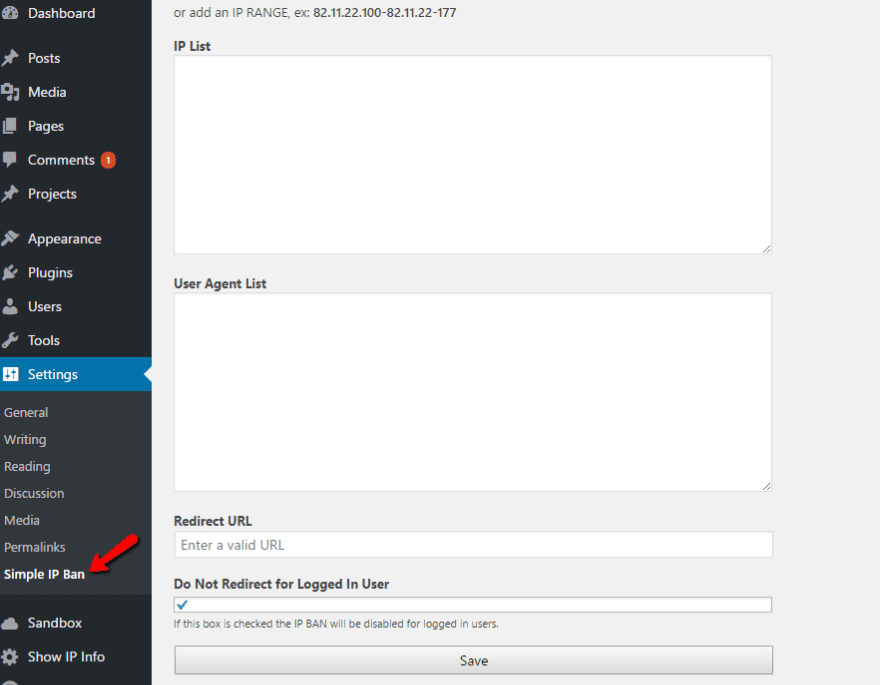
If you’d like to completely block certain IP addresses from your site, you’ll need to go a step further. One way is to use a free plugin called Simple IP Ban.
Once you install and activate the plugin, you can head to Settings → Simple IP Ban to configure it.
In the Settings, you can:
- Block specific IP addresses (one per line)
- Block a range of IP addresses
- Restrict specific User Agents (good for blocking bots)
And for all of these methods, you can also specify a redirect URL, as well as whether or not to exclude logged-in users from the IP ban:
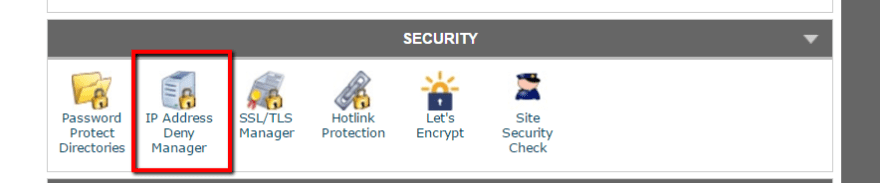
How to Block IP Addresses With cPanel
Finally, cPanel includes a built-in tool that lets you block any IP address from your site. While it’s not WordPress-specific, it gets the job done just fine. To access it, look for the IP Address Deny Manager in your cPanel dashboard:
Wrapping Things Up
Whether you need to show users their own IP address(es) or block the IP addresses of malicious actors trying to access your site, the preceding plugins and tools can help you out.
Just be aware that, on the blocking front, IP addresses don’t always stay the same. So even if you block someone once, they can come back with a new IP address. Sometimes the situation can feel a bit like a game of whack-a-mole!
For that reason, it might be easiest to stick with one of the options that’s available inside your WordPress dashboard so you can quickly add new problematic IP addresses as they pop up.
How do you handle displaying or blocking IP addresses on your WordPress site?
Article thumbnail image by IrishkaVasutina / shutterstock.com
The post How to Display or Block IP Addresses On Your WordPress Site appeared first on Elegant Themes Blog.