
Some WordPress posts are like milk. That is, they’re good when you first wrote them, but a week (let alone a month or a year) later, they become a little sour and aren’t quite as helpful. Posts like seasonal announcements, event details, contests that have ended, giveaways, etc. In those cases, you might wish that you could add a WordPress expiration date to let your readers know that your post’s content is past its expiration date.
Good news! You can add expiration dates to WordPress posts…with the right third-party plugin. In this post, I’ll give you a quick tutorial for both:
- Adding an expiration date to your post
- Changing the content of a post after its expiration date
And then I’ll also suggest a premium plugin that can get you even more functionality.
When It’s a Good Idea to Make a Post Expire
There are two main reasons you might want to consider adding a WordPress expiration date.
First off, if your content actually is time-sensitive, that’s a pretty good situation for adding an expiration date. For example, if you’re writing about a sale at another store that expires in one week, it doesn’t do your visitors much benefit to continue displaying your post once the sale ends.
Coupons, giveaways, events…all are good reasons to add an expiration date.
But you can also use an expiration date to create artificial scarcity, even if your post might not truly need an expiration date. Scarcity adds a sense of urgency to the content in your post.
If visitors don’t act soon…they might miss out. And no one likes to miss out! That’s why we invented an acronym for it: FOMO, or fear of missing out.
If you go the artificial scarcity route, you can actually apply two different types of expirations…
Regular vs. Evergreen Expirations
A regular expiration date is what first jumps to your mind when you think about giving a WordPress post an expiration. That is, you set a specific date and time when your post should expire and the post expires for EVERYONE at that time.
Evergreen expirations take a bit of a different approach. Instead of applying the same end date to every single visitor, evergreen expirations are different for each visitor depending on when that person first visits your site.
For example, if you set an evergreen expiration for 7 days from a visitor’s first visit, every single visitor will have their own unique 7-day countdown (based on cookies).
The plugin I’m going to use in the following tutorial can help you add the former. And if you need an evergreen expiration, I’ll suggest a premium plugin that can handle that in the next section.
How to Add A Simple WordPress Expiration Date
To add a basic WordPress expiration date, I suggest a free plugin called Simple Post Expiration. While there are a few plugins that purport to do the job, I like this one because it comes from Pippin Williamson (the same guy behind Restrict Content Pro and Easy Digital Downloads).
To properly set up post expirations using the plugins, you’ll need to complete two steps:
- Set an overall expiration date for your post
- Use a shortcode to tell the plugin what to do with your post’s content after the expiration date.
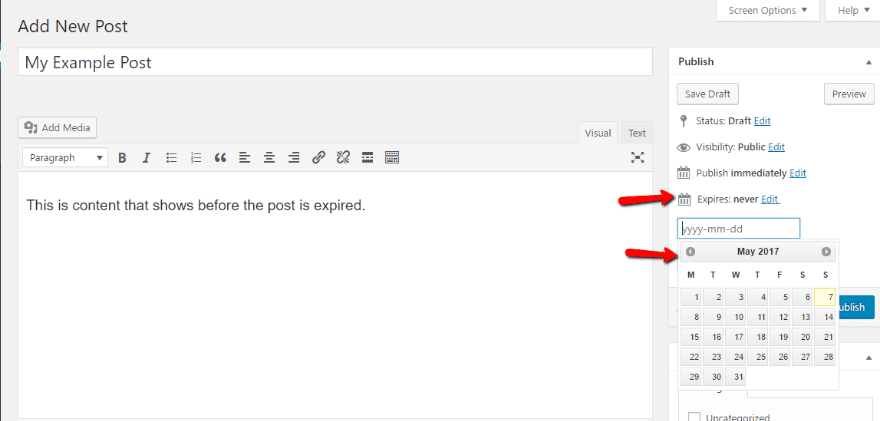
1. Set the Overall Expiration Date For Your Post
This first step is fairly simple. Whenever you go to add or edit a post, you’ll get a new Expires tab under the Publish option. All you need to do is select the day when you want your post to expire:
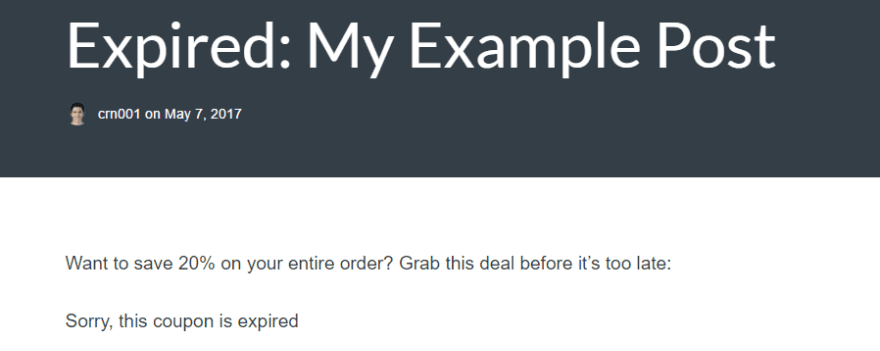
Then, when that date hits, the plugin will automatically add text before the post’s title indicating that it’s expired:
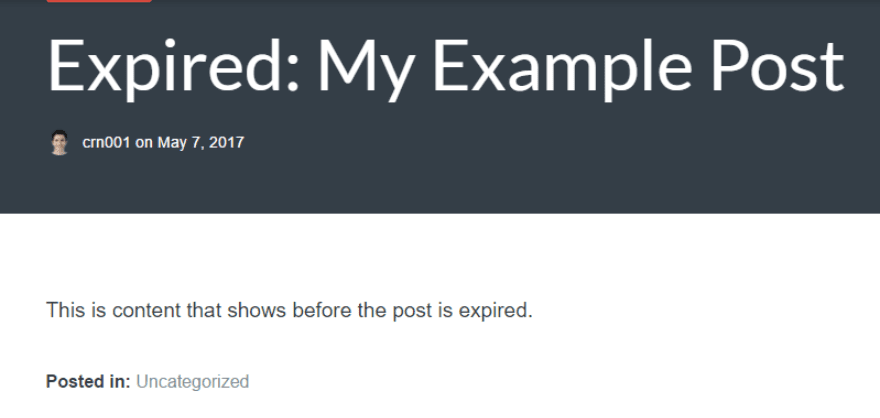
But while the plugin adds this text to your post’s title, it leaves your post’s content unchanged. At least so far.
To change your content once a post expires, you can wrap the content you want to change in a shortcode.
2. Wrap Expired Content in Shortcode
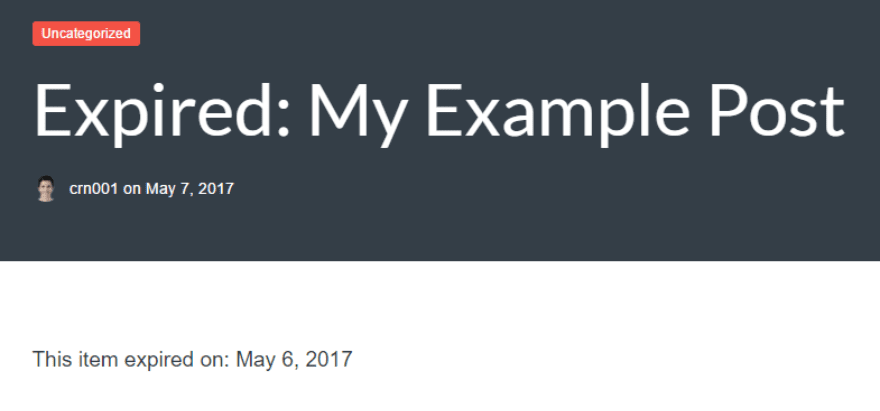
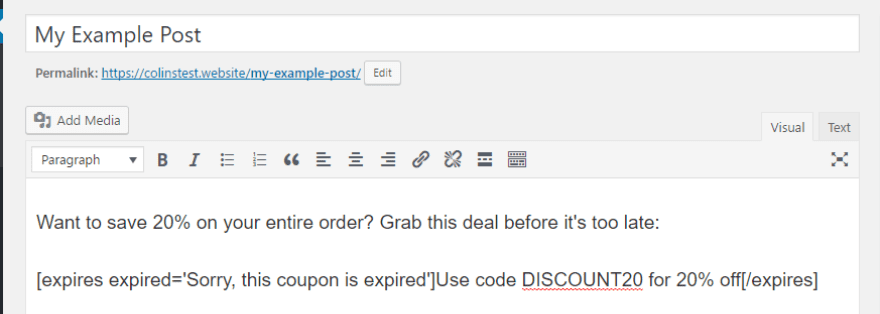
To indicate the content you want to expire, you can use the [expires] shortcode. For example, here’s how the default would work with my example above.
On the backend, it would look like this:

And that would render like this on the front-end:
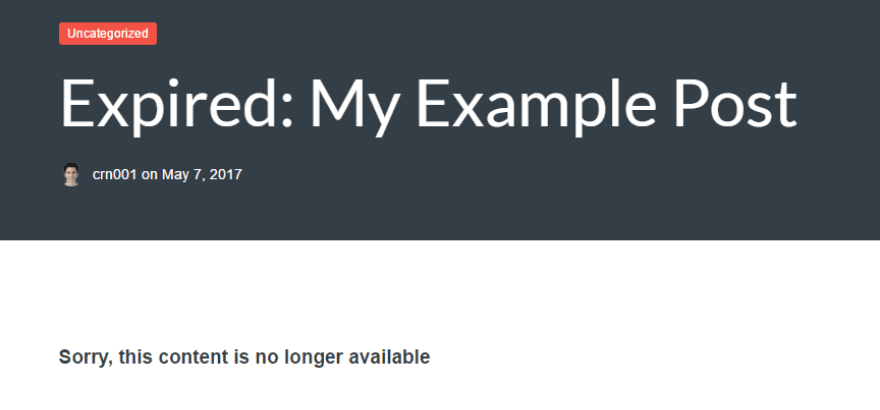
But the shortcode also lets you customize the message that displays once a post expires. By adding expired=’your message’ to the shortcode, you can make the message whatever you want.
For example, using the shortcode [expires expired=’Sorry, this content is no longer available’] would lead to this on the front-end:
And you can also just use the shortcode on part of your content. For example, if you wanted to display a limited time coupon, you could set it up something like this on the backend:
And then on the front-end, that would display like this:
Simple enough, right?
You can also use other shortcode parameters to:
- Customize the message displayed before a post expires
- Add custom CSS styling to expired content
- Change the date format
You can find a full list of shortcode parameters at the plugin’s WordPress.org listing page.
Does It Work With the Divi Builder?
Now, for the important question…does Simple Post Expiration work with the Divi Builder? To test it out, I created a module with some text and wrapped that text in the shortcode. I also created a module without the shortcode to make sure both worked. The result? Success!
Setting up my post with two text modules like this:
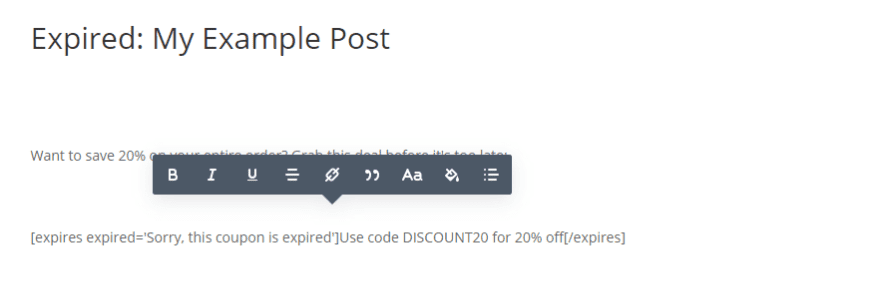
…looked exactly the same on the front-end as when I used the WordPress Editor:

So whether you’re using the WordPress Editor or the Divi Builder, Simple Post Expiration should work for you.
Other Options to Add WordPress Post Expirations
Simple Post Expiration is fairly flexible, but it doesn’t help you with the evergreen approach to WordPress post expirations that I discussed earlier.
Unfortunately, I couldn’t track down a free plugin that offered that functionality. But I did find a premium one called Page Expiration Robot.
It offers two cool features that you don’t get with Simple Post Expiration:
- Evergreen expiration dates that are unique for every single visitor
- The ability to redirect users to a different URL if the post they visit is expired.
This plugin actually used to be free, but it looks like the developers recently moved to a web app version that requires a monthly payment.
Wrapping Things Up
If you need evergreen expirations, as far as I’m aware you’ll need to pony up for Post Expiration Robot. Otherwise, I recommend sticking with Simple Post Expiration for a free, well-maintained option from a respected WordPress developer.
Now over to you – do you use expiring posts as a marketing tactic? If so, how do they perform?
Article thumbnail image by GN ILLUSTRATOR / shutterstock.com
The post How to Give Your WordPress Posts an Expiration Date appeared first on Elegant Themes Blog.