The website footer is a popular location to place an email optin form. Since Divi has an email optin module, this is an easy task with the Divi Theme builder. In this article, we’ll see how to add an email optin to the Divi footer. We’ll also see a few settings within the Divi email optin module that creates different layout options.
Preview
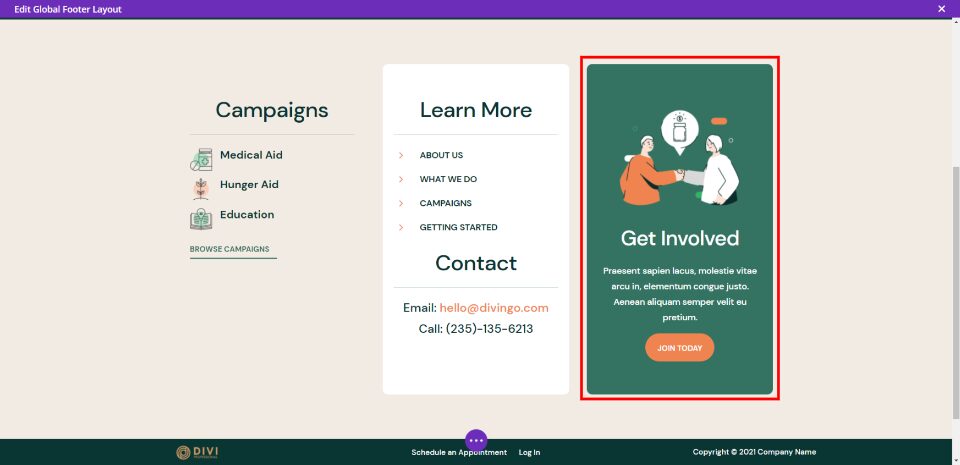
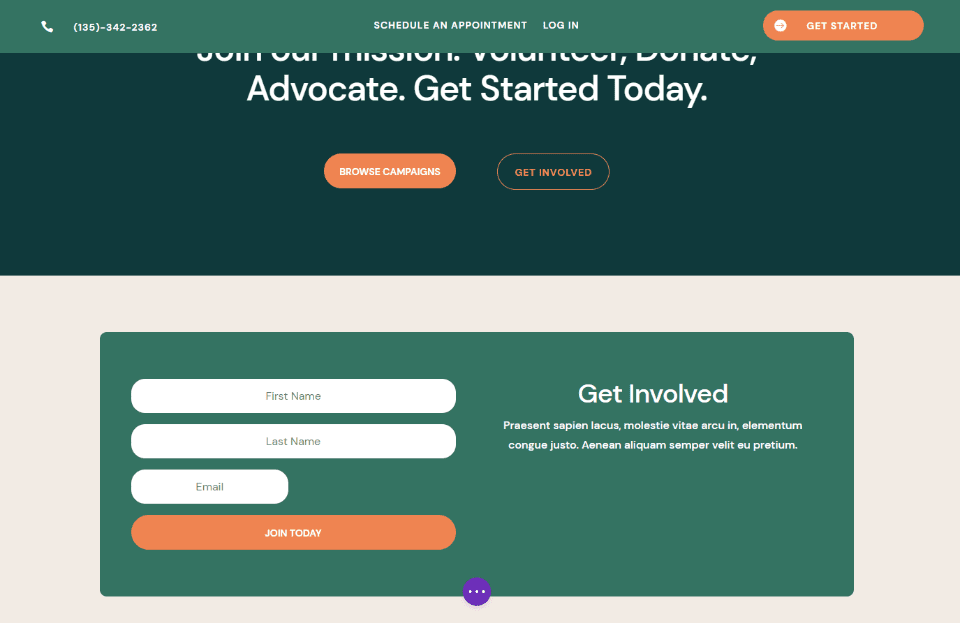
Here’s the footer we’ll build.
Email Optin Desktop
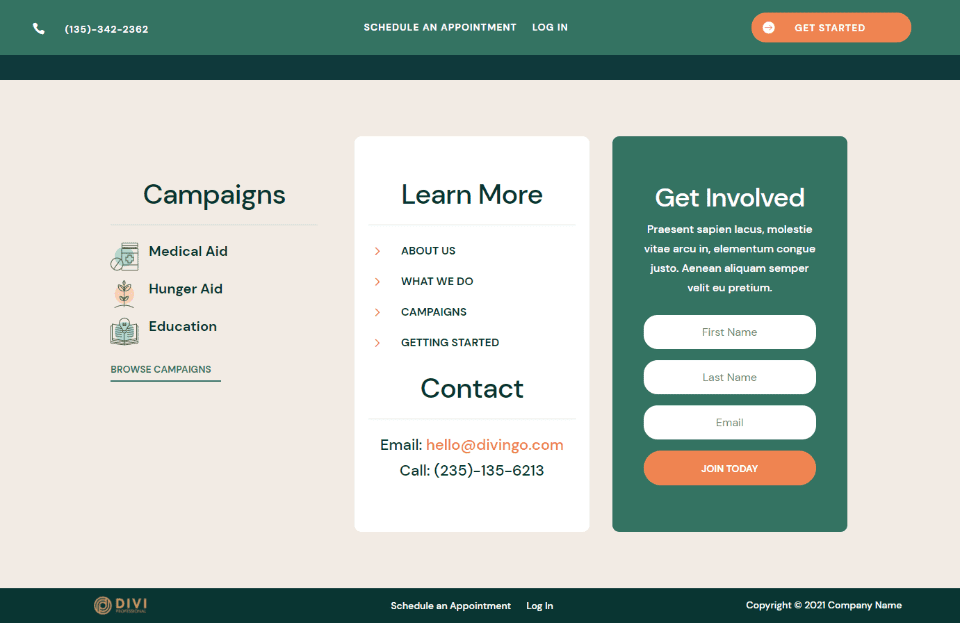
Here’s how our email optin form will look on a desktop. I’m replacing an existing element in this layout with the email option.
Email Optin Phone
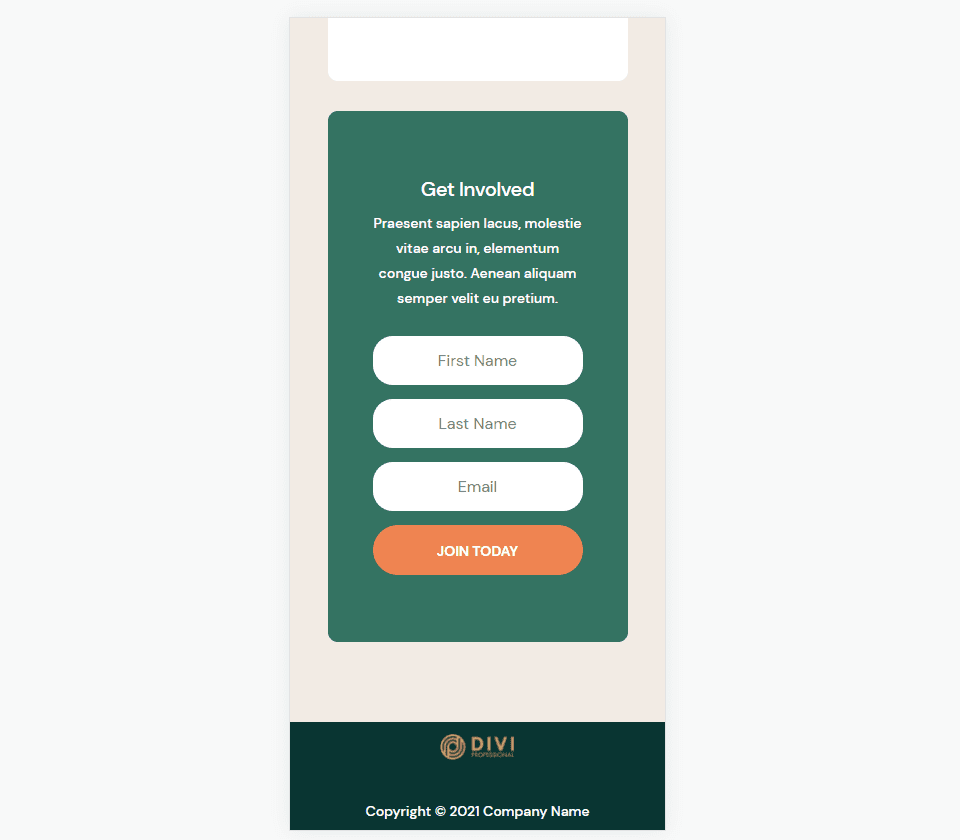
Here’s how our email optin form looks on a smartphone.
Divi Theme Builder Template
To add an email optin to the Divi footer, we’ll need a template to build our footer. You can build one from scratch or use one of the free templates that Elegant Themes provides. To find them, search the Elegant Themes blog for “free footer”.
I’m using the footer template from the FREE Header and Footer Template for Divi’s NGO Layout Pack. Download your footer and unzip the file. You’ll need to upload the JSON file to the Divi Theme Builder.
Upload and Prepare the Footer Template

To upload your Divi footer, go to Divi > Divi Theme Builder in the WordPress dashboard. Select Portability. In the modal that opens, choose the Import tab. Click to choose the file and navigate to the JSON file on your computer. Select the file and click Import Divi Theme Builder Templates.
Wait for the file to upload. You can delete the header template if you don’t want to use it. Click to save the changes in the upper left of the builder.

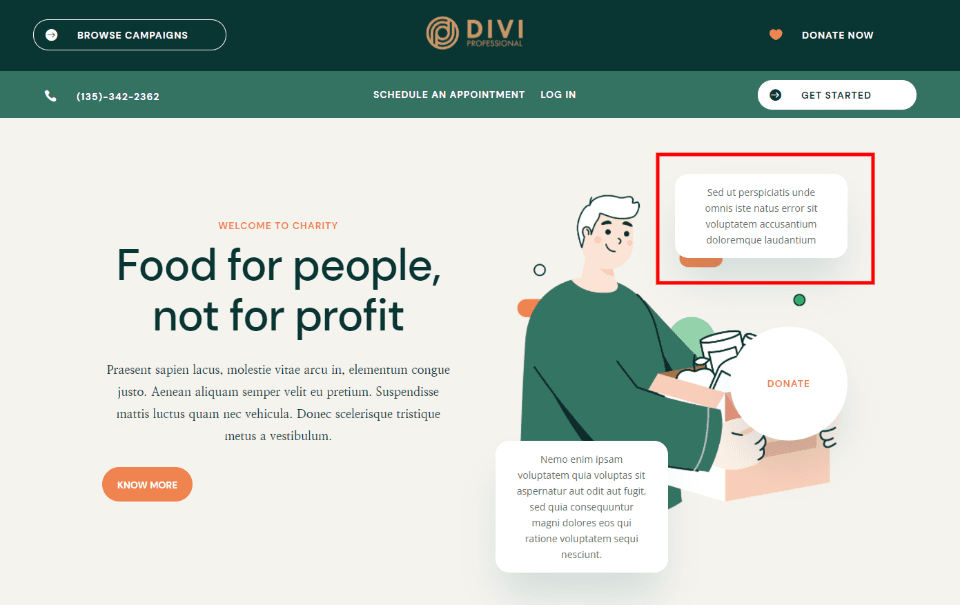
For this tutorial, I’ll replace the boxed area on the right with an email optin. I’ll use the same styling, so it will blend with the website.
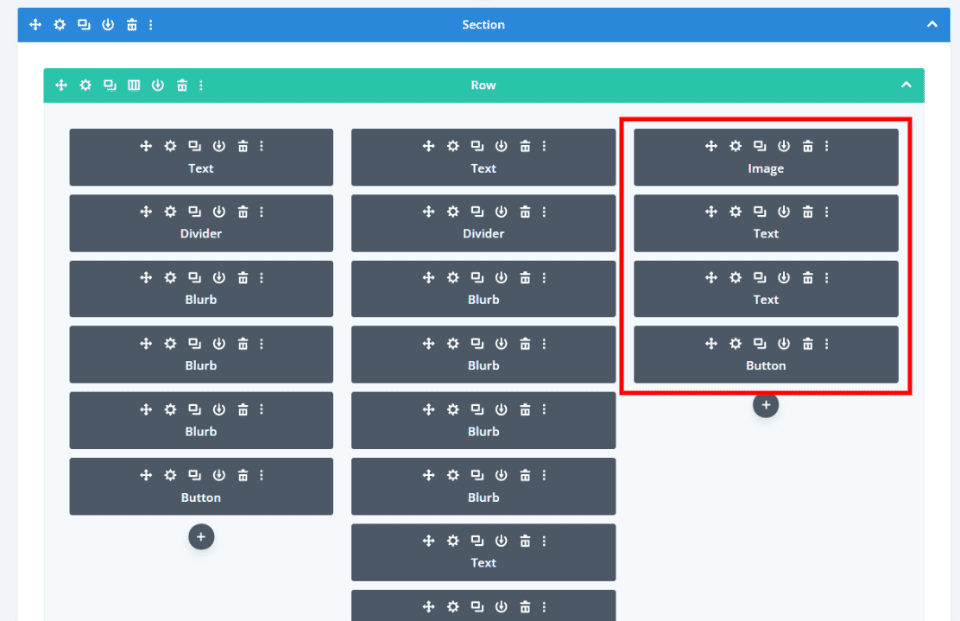
This element is made up of an image module, two text modules, and a button module. I’ll replace them with a single module. You can delete them now or leave them until you’re finished if you want to use them as design queues. You can work on the front end or back end.
Add Email Optin to Divi Footer with a Divi Module
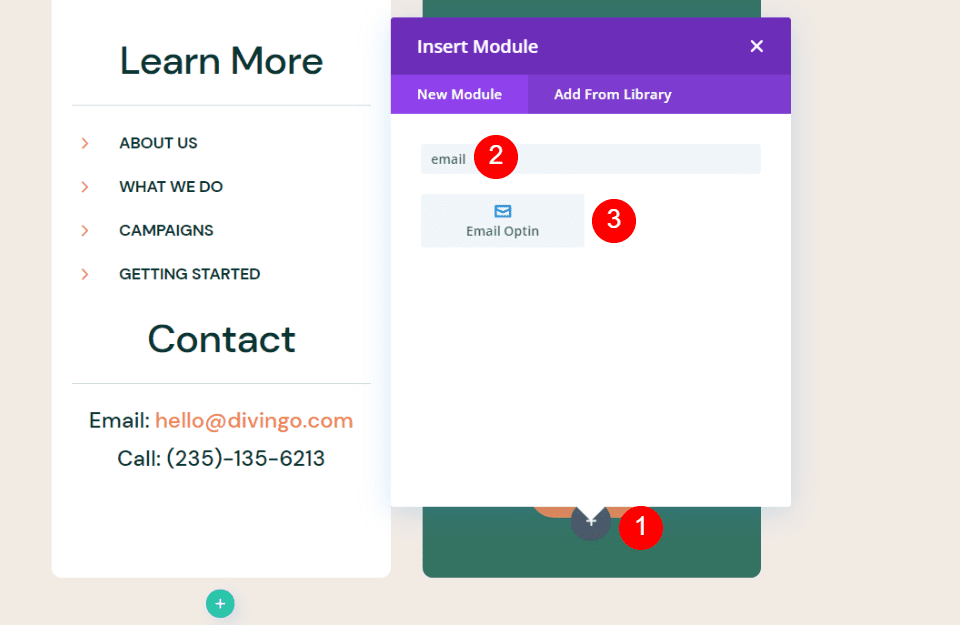
Next, we’ll add an email optin to the Divi footer. Hover under the last module in the row and click the dark gray plus icon. Search for email and select the Email Optin module.
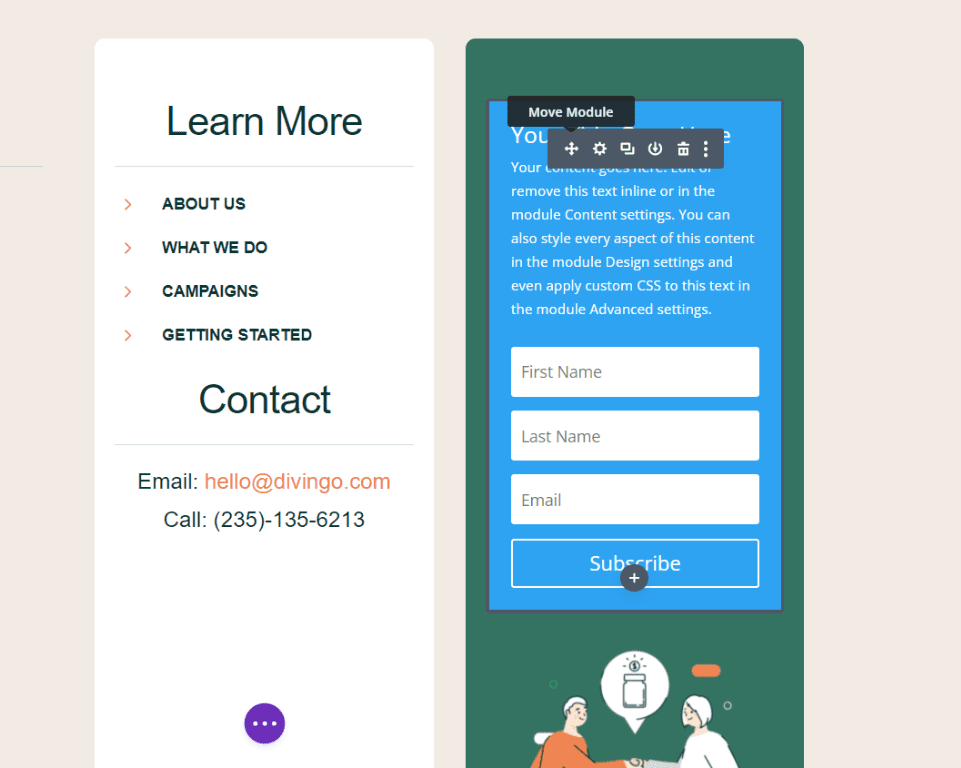
Close the settings for the module and move the module to the top of the column using the Move tool. This lets us see how it will look in its exact location and still use the original module until we’re finished styling.
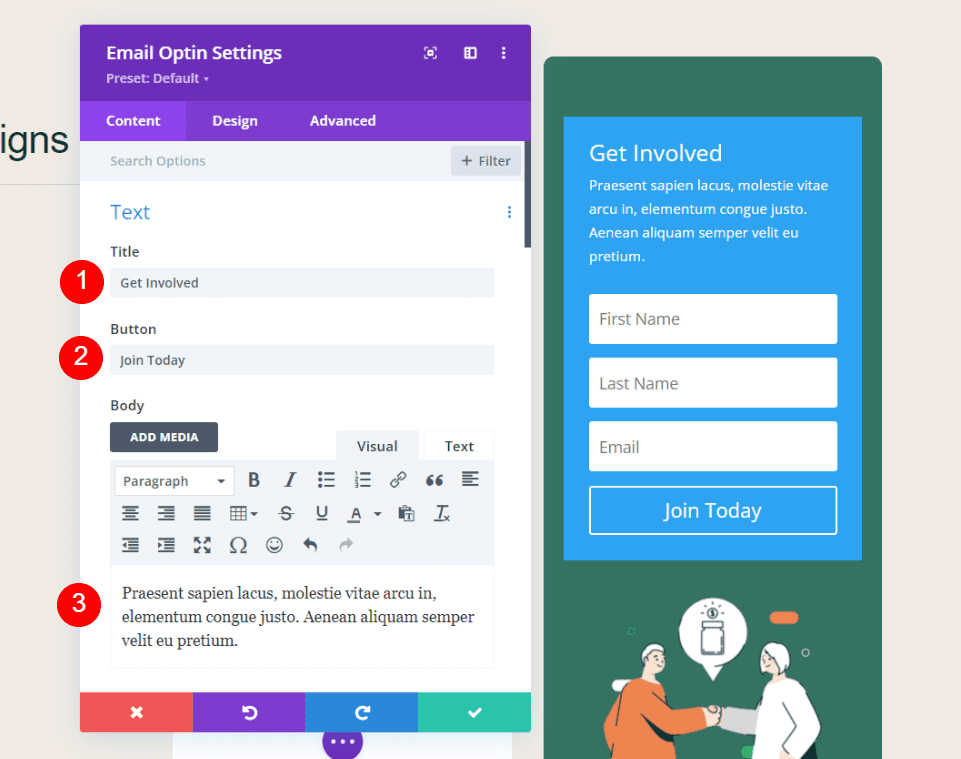
Open the module’s settings and add the Title, Button text, and Body text. I’m using the text from the original modules.
- Title: Get Involved
- Button: Join Today
- Body: your company’s message
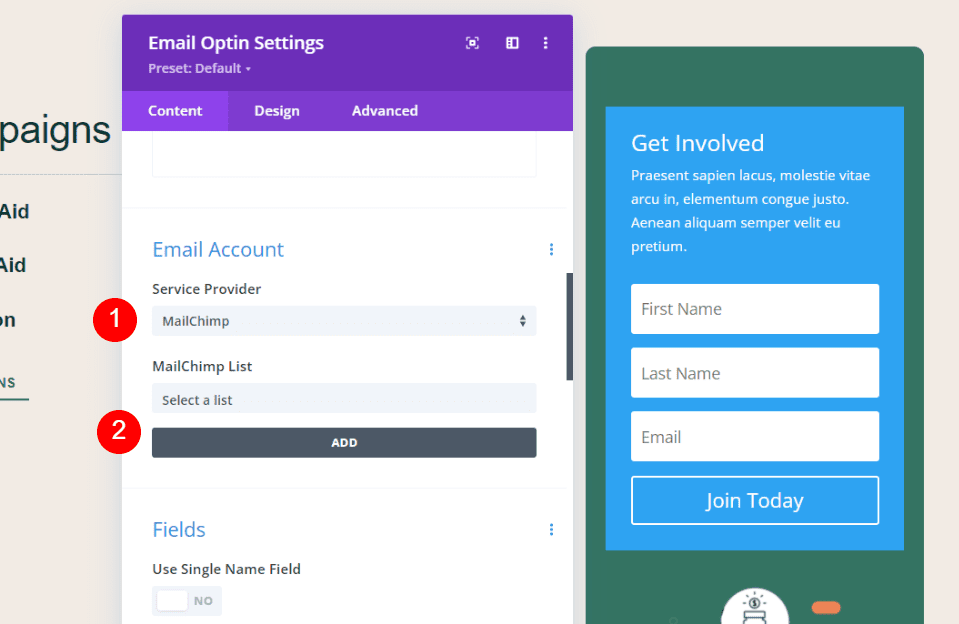
Scroll down to Email Account. Select your email service provider from the dropdown list. Click Add to connect to your service provider. You’ll need your account name and API key. Next, select the email list you want to use.
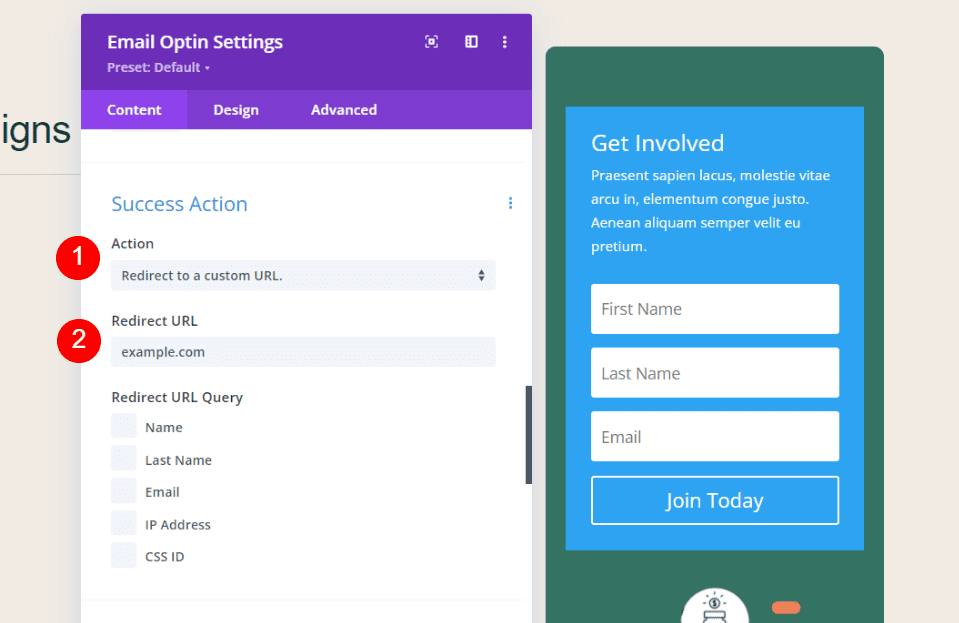
Scroll down to Success Action. Choose the action from the list. Select between showing a message or redirecting to a URL. I’ve selected to redirect to a URL. You can also select which data of the email form to include as query arguments if you want.
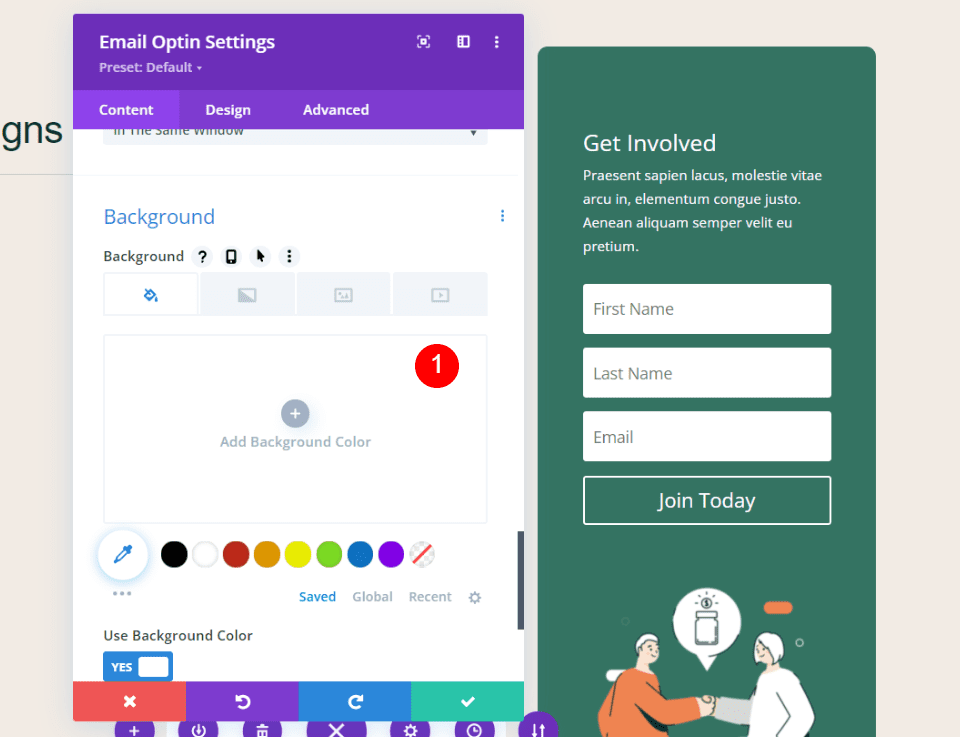
Scroll to Background and delete it. Notice the green background is still behind the email module. This background is in the Column settings for the Row. We’ll leave this as it is, but the Row Column Settings is where you can change it if you want.
Style the Divi Email Optin
To style the email optin module, I’m taking design queues from the NGO Layout Pack itself. This layout has several text modules with white backgrounds and rounded corners. We’ll reflect those design elements to the email optin form’s fields.
Field Options
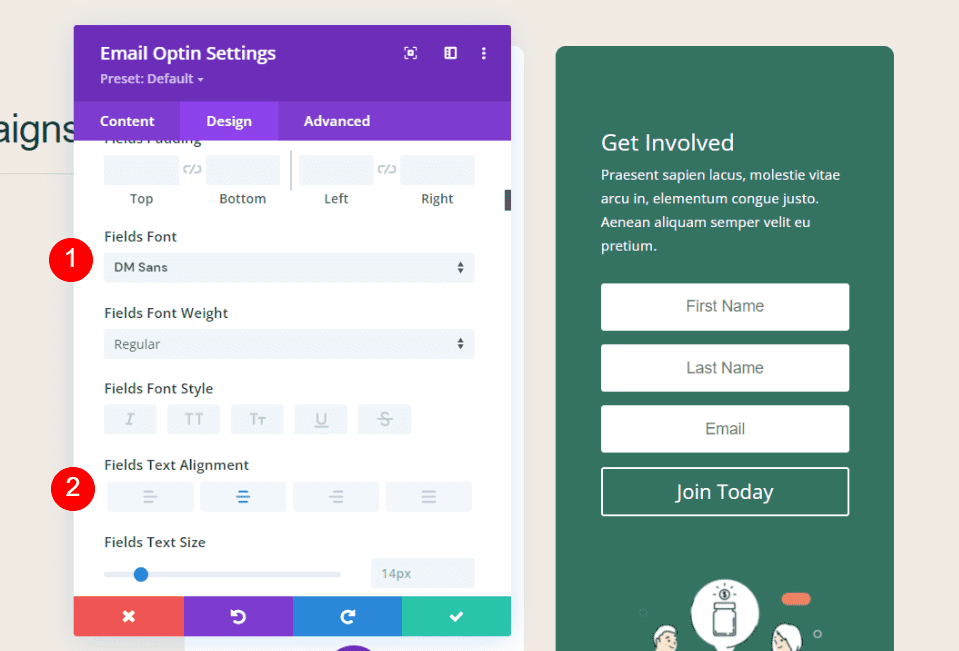
Under Fields, set the Fields Font to DM Sans. Set the alignment to Center.
- Fields Font: DM Sans
- Fields Text Alignment: Center
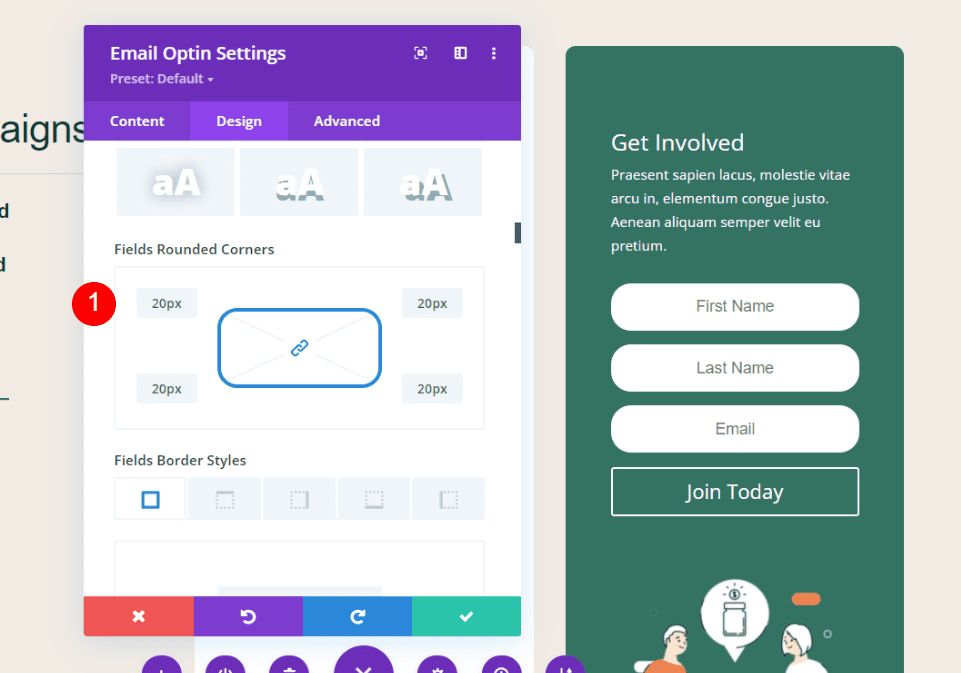
Scroll to the Fields border settings. Set the Fields Rounded Corners to 20px.
- Fields Rounded Corners: 20px
Title Text
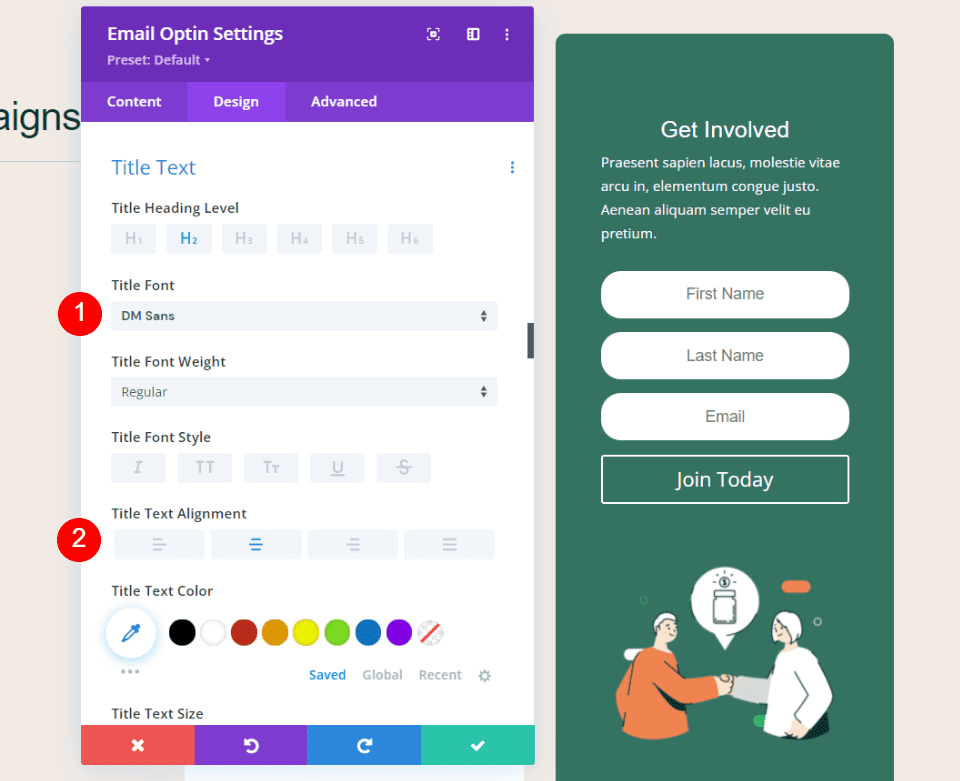
Scroll to Title Text. Select DM Sans for the Title Font and set it to Center Alignment.
- Header: DM Sans
- Alignment: Center

Set the Desktop Title Text Size to 38px and the Phone size to 20px. Adjust the Letter Spacing to -0.02em and the Line Height to 1.15em.
- Desktop Text Size: 38px
- Phone Text Size: 20px
- Letter Spacing: -0.02em
- Line Height: 1.15em
Body Text
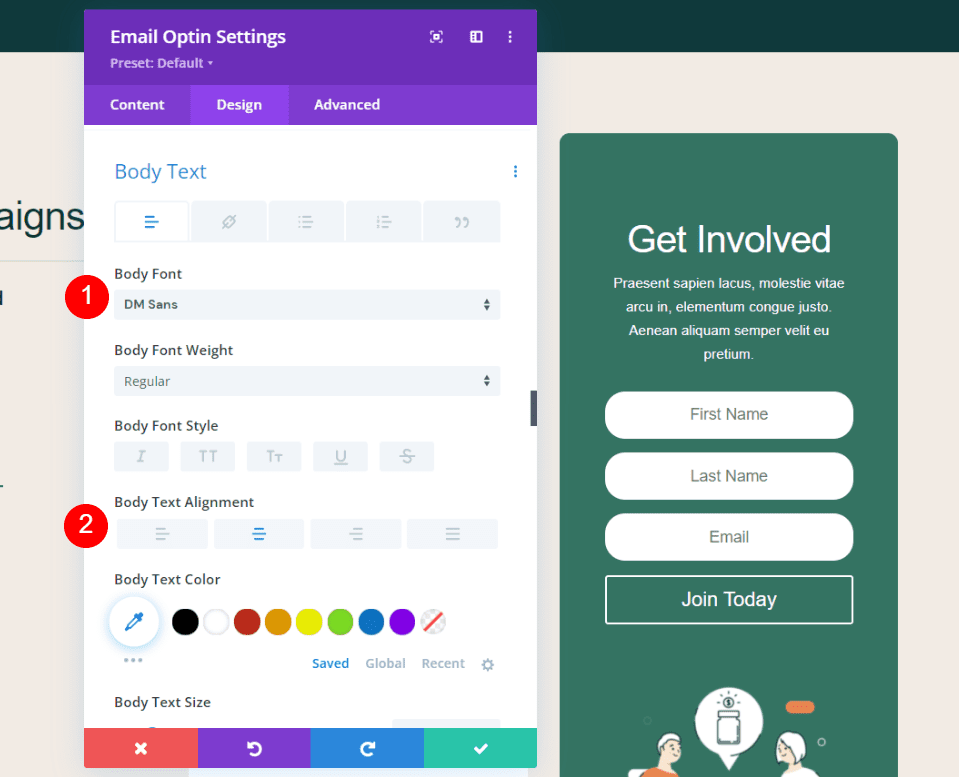
Scroll to Body Text. Select DM Sans for the Body Font and set it to Center Alignment.
- Header: DM Sans
- Alignment: Center
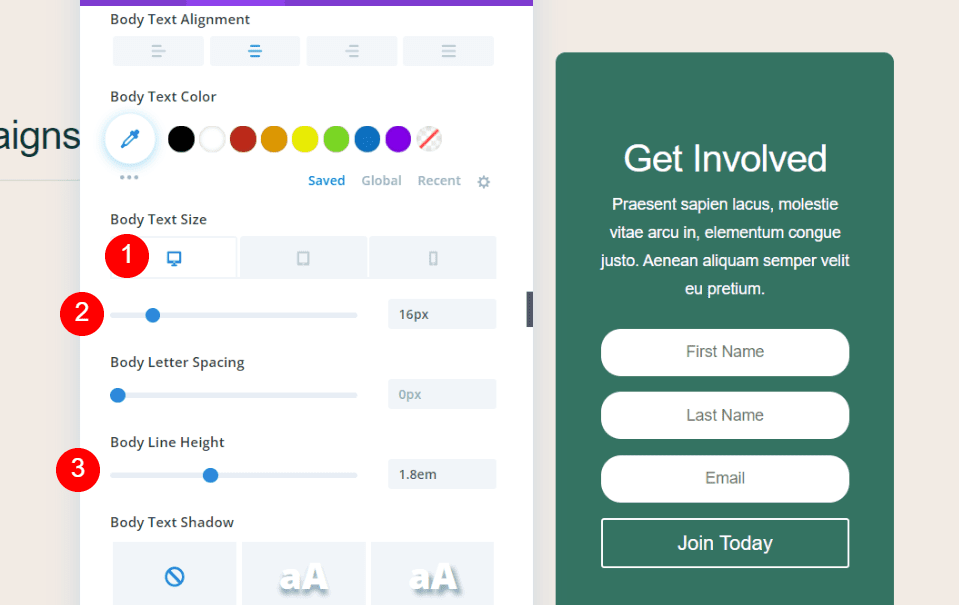
Set the Desktop Title Text Size to 16px and the Phone size to 14px. Adjust Line Height to 1.8em.
- Desktop Text Size: 16px
- Phone Text Size: 14px
- Line Height: 1.8em
Button Options
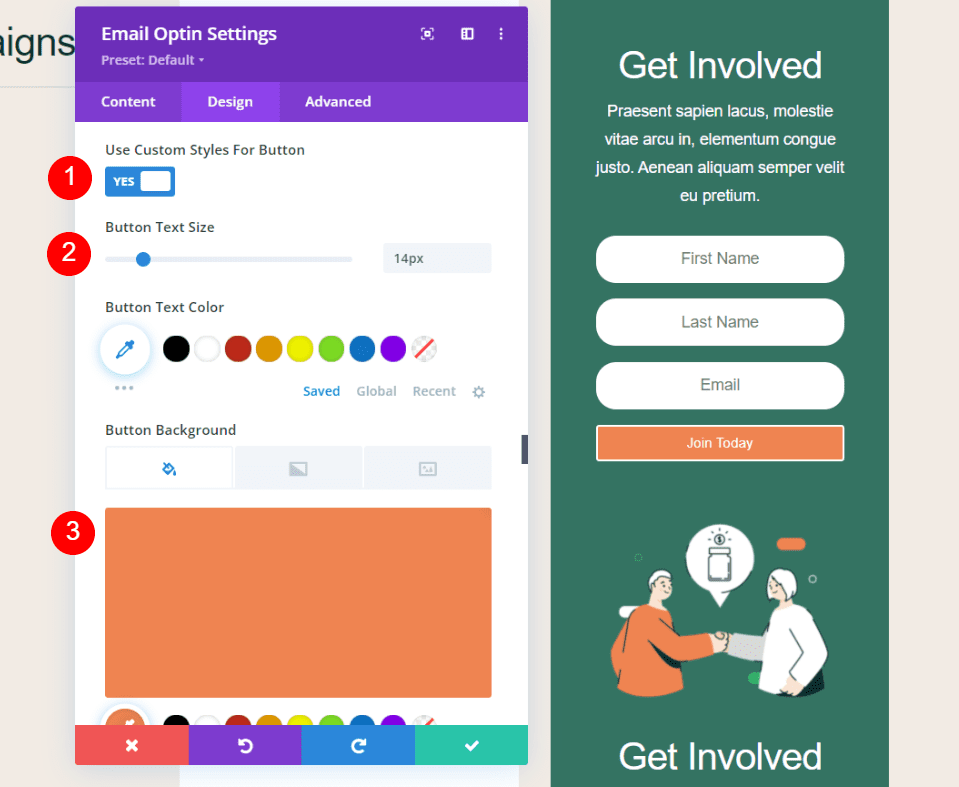
Scroll down to the Button Settings and select to use the custom styles. Set the Button Text Size to 14px and change the Background color to #ef8451.
- Use Custom Styles for Button: Yes
- Button Text Size: 14px
- Button Background: #ef8451
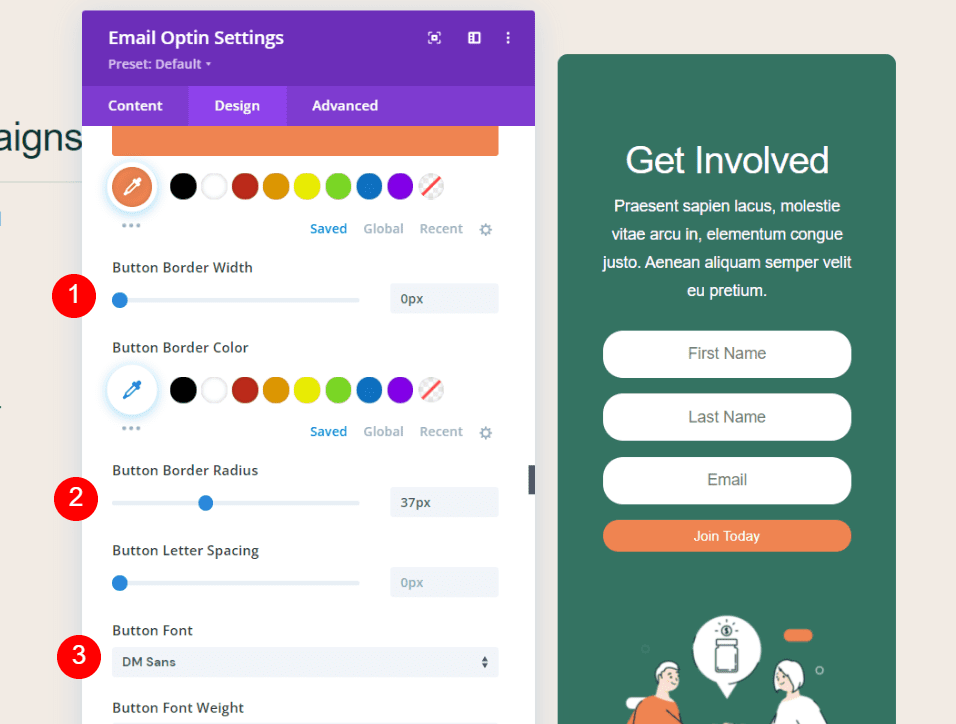
Set the Width to 0px, the Radius to 37px, and select DM Sans for the Font.
- Button Border Width: 0px
- Button Border Radius: 37px
- Button Font: DM Sans
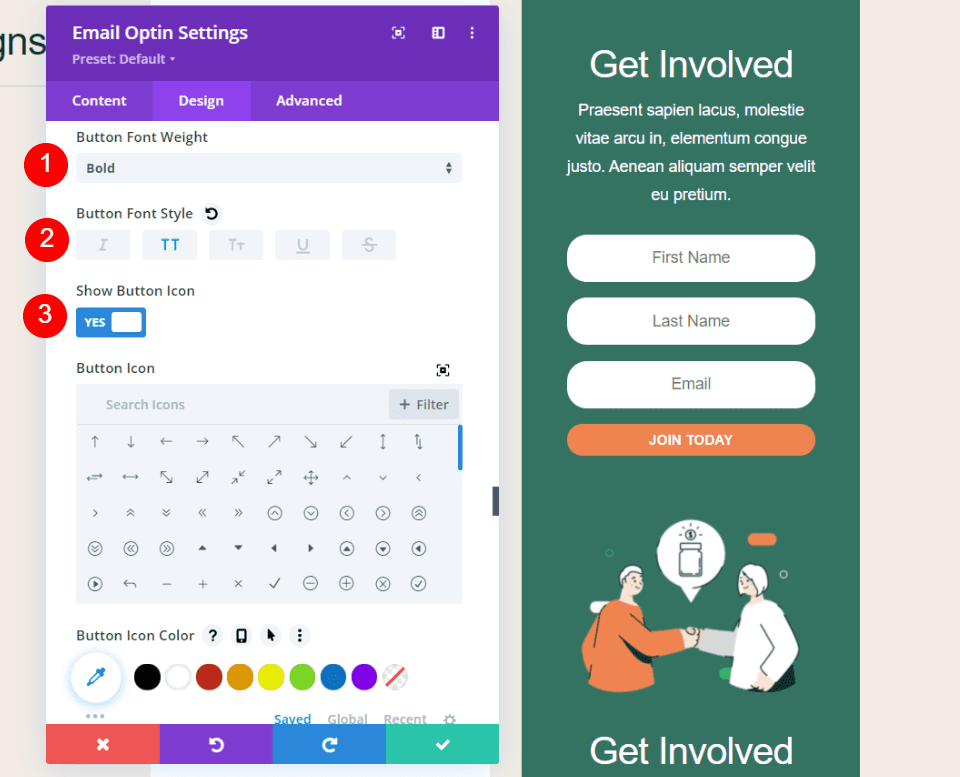
Set the Font Weight to Bold and choose All Caps for the Font Style. Enable the Button Icon, select an icon, and set it to show only on hover.
- Button Font Weight: Bold
- Button Font Style: All Caps
- Show Button Icon: Yes
- Button Icon: >
- Only Show Icon on Hover for Button: Yes

Add Padding to all four sides of the button.
- Button Padding: Top 15px, Bottom 12px, Left 22px, Right 22px
Row Column Settings
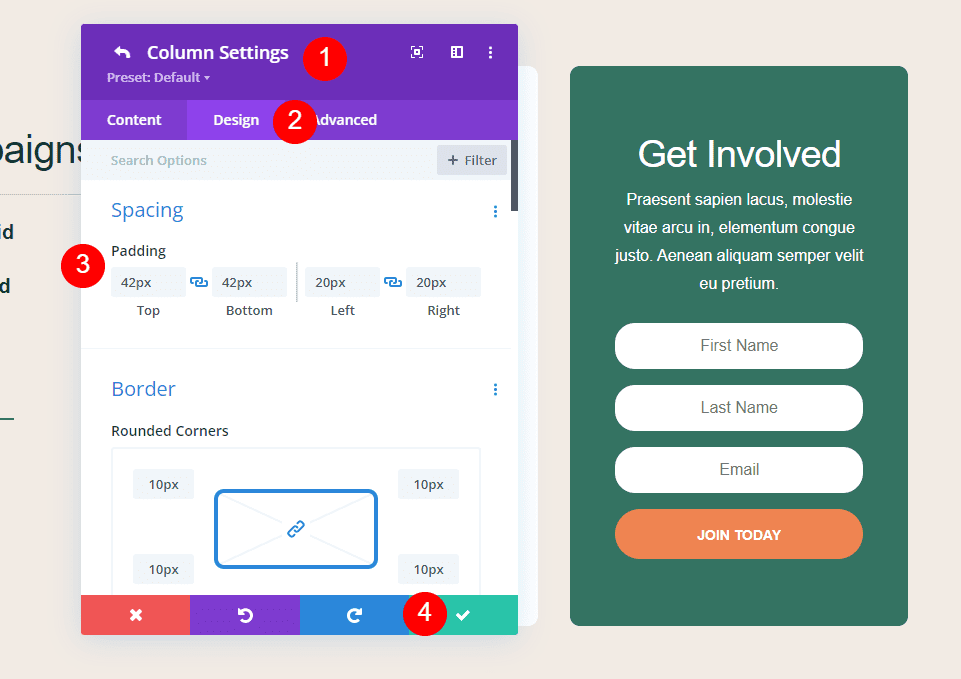
Finally, delete the original elements you’re not using. Open the column settings in this Row. Navigate to the Design tab and set the Padding to 42px for the top and bottom. Save your work.
- Padding: 42px Top and Bottom
Alternate Form Layout and Field Options
The Divi Email Optin module gives you several options for the form’s design and features. The Layout options include multiple layout choices. Choose from:
- Body on Left, Form on Right
- Body on Right, Form on Left
- Body on Top, Form on Bottom
- Body on Bottom, Form on Top
You can also set the width of the fields. They’re full width by default. Disabling Fullwidth gives you some interesting layout options. You can utilize multiple combinations.
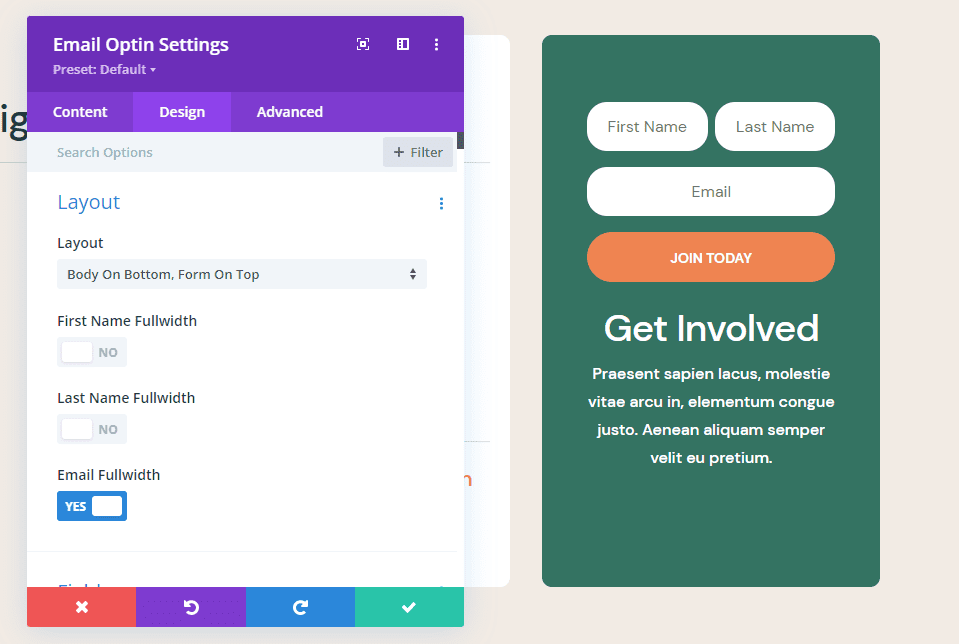
In the example above, I’ve selected Body on Bottom, Form on Top. I’ve also disabled Fullwidth for the First Name and Last Name fields. This places the form above the text and the first and last names on the same line.

I’ve placed this form in a single-column row. The layout shows the boy on the left and the form on the right. I’ve also disabled the full-width options for the first and last name fields.
This one places the form on the left and the body on the right. I’ve disabled the full-width option for the email field. The rest are at their default settings.
Results
Here are our results.
Email Optin Desktop
Here’s how our email optin form looks on a desktop.
Email Optin Phone
Here’s our email optin form on a smartphone.
Ending Thoughts on How to Add an Email Optin to the Divi Footer
That’s our look at how to add an email optin to the Divi footer. The email optin module makes this easy. Since it’s a Divi module, it can be styled to work with any Divi layout. The optin module includes several layout options so you can tailor the form to fit your website’s design needs.
We want to hear from you. Do you add an email optin to the Divi footer? Let us know about it in the comments.
The post How to Include an Email Optin in Your Divi Footer appeared first on Elegant Themes Blog.