
In this tutorial, we’ll show you exactly how to make the footer on your Divi website sticky. Using a sticky footer may be one of the requests you get when you’re designing a website for a client or a need you have when you’re creating a website of your own. We’ll show you two possibilities that will make your footer sticky. The first way is through CSS code and the second one through jQuery code. Both ways work but it all depends on which one you prefer using to create that sticky effect for your website.
Adding a sticky footer to your website is currently not something you can automatically do within the Divi builder. That’s why we’re going to show you how to reach the exact result you want without having to put in a lot of effort. The only thing you have to do is follow this post step by step, copy and paste some lines of code and put them in the right place.
Why Use a Sticky Footer?
A sticky footer is usually used for one main reason; if you have one page or multiple pages on your website that don’t have enough content available to fill a whole screen. You could, of course, make sure you have enough content on a page but if it doesn’t bring added value to the page; there’s no need to do it.
Now, in case there’s not enough content to fill the whole screen, the page will have a floating footer right after the content ends. That usually doesn’t look good and it’s not the result you want the get. Luckily, you can make use of a sticky footer to get rid of the floating footer. The sticky footer makes sure the footer stays on the bottom of the page without creating unnecessary space. The length of the page will thus remain the same and everytime you adjust the size of your window, the footer will modify itself to the screen.
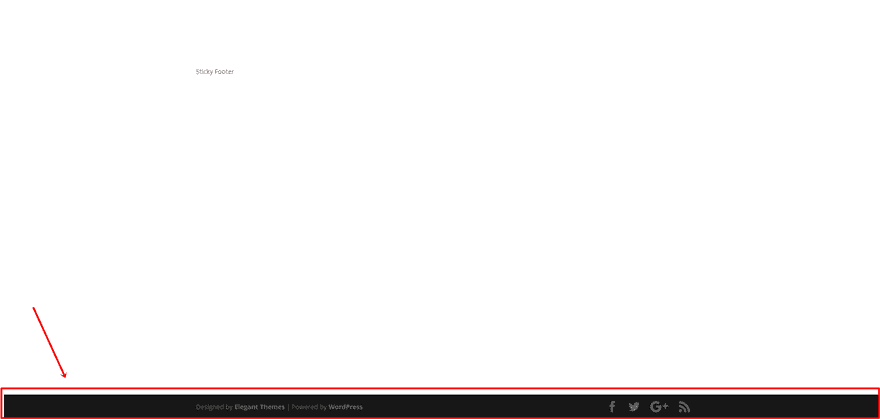
Here you have an image of a short page that doesn’t have a sticky footer:

And here’s the same image of that page after a sticky footer has been added:
Difference Between Sticky And Fixed Footer
Not everyone decides to use a footer on their website but when they do; there are plenty of ways to style it. It all depends on how the structure of your website is and if you want to include a ‘manual’ and differently styled footer that’s made with the Divi builder instead.
But if you are using a standard footer, you can choose how you like to style it and how you want it to be positioned on your website. The three main positions a footer can have on a website are the floating, fixed and sticky.
When comparing the sticky and the fixed footer to one another; they might look the same at first sight but they aren’t. The fixed footer is always visible when scrolling through a page on your website whereas the sticky footer specifically handles pages where the content is not long enough to reach the bottom of the screen. In that specific case where the content isn’t long enough; it’ll behave like a fixed footer and stay stuck to the bottom of your page; creating that ‘fixed footer effect’.
However, if the content is long enough, the sticky footer will behave as usual and the page will push the footer down to the bottom of the page to make sure it doesn’t continuously appear on the screen. In most cases, this method is rather preferred than having a fixed footer throughout the whole website because it gives more room on the window for the content to appear.
Create a Sticky Footer on Your Divi Website Through CSS
Without any further due, let’s start creating a sticky footer for your website. The code we’ll be using is really simple but gets the job done. You’ll quickly move on from a floating footer on your page to a page where the footer gets pushed down below if the content is not long enough.
Add CSS Code Through Page Settings (For One Page in Particular)
In certain cases, you want to make the footer sticky on one particular page only. In this part of the post, we’re going to show you how to do that exactly by adding the CSS code to the Custom CSS field of one page. By doing that, you make sure that the CSS code only applies to that one page on your website. Which also means that the CSS code will only be loaded when someone opens that particular page. This method usually is used in cases where there are only a few shorter pages on the website that you want to give the sticky footer to.
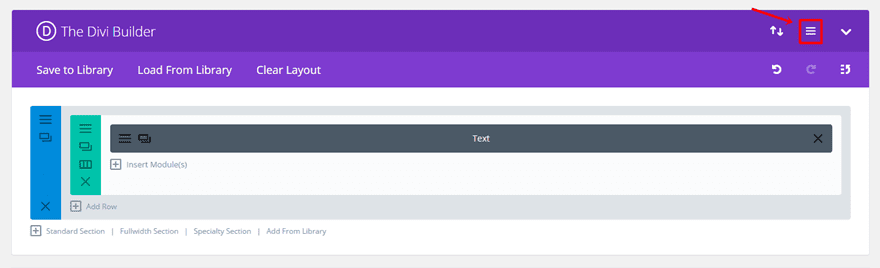
Start by opening the page you want the sticky footer to be active or by creating a new page where you want it to apply. Next, open the page settings by clicking on the following icon in your Divi builder:
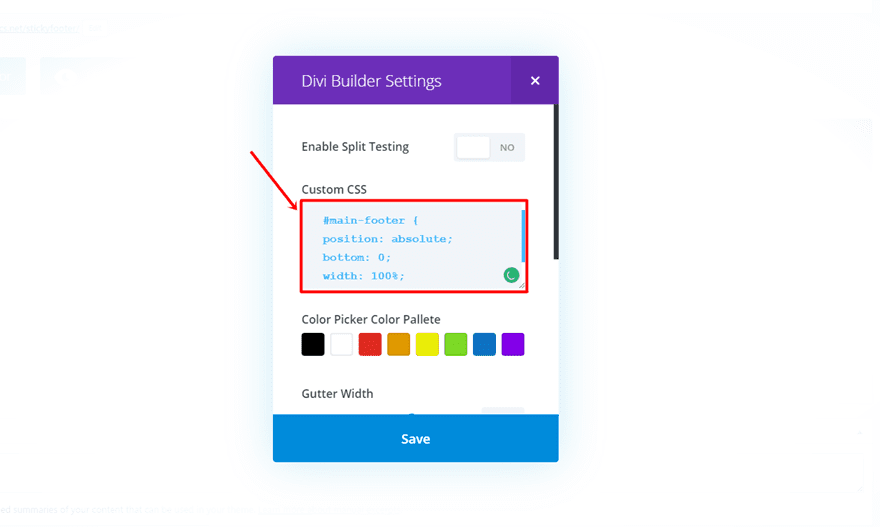
Moving on, add the following code to the Custom CSS field in the window that you just opened:
#main-footer {
position: absolute;
bottom: 0;
width: 100%;
} 
From the moment you preview your page, the CSS code should apply and make the footer sticky.
Add CSS Code Through Theme Customizer (Real-Time View)
Another way of adding the code is through the Theme Customizer. If you’re adding the CSS code through this way, it’ll automatically apply to the whole website. Every page will have this CSS code applied to it. By adding the code through the Theme Customizer, you can also directly see the changes happen to your website.
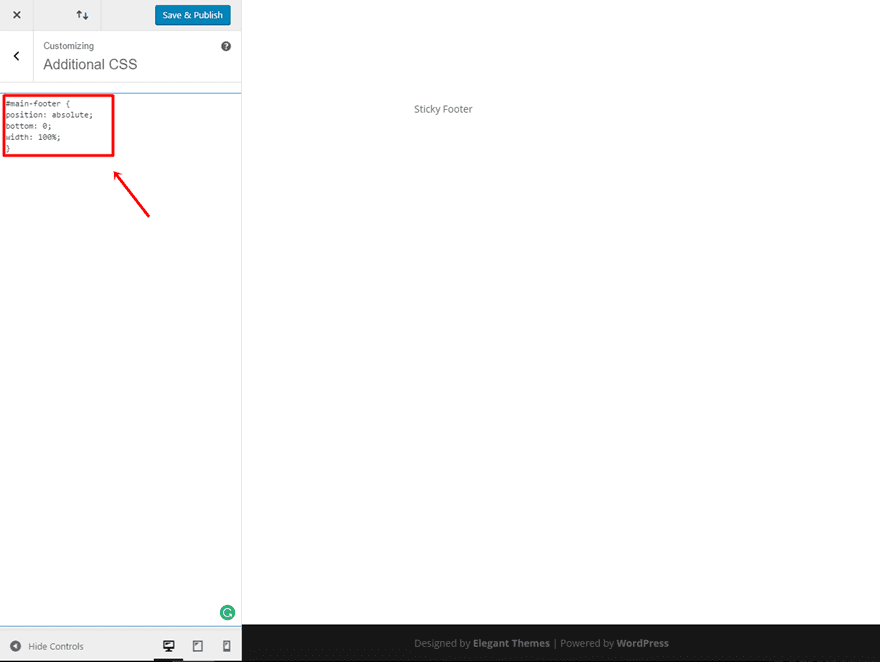
To add the CSS code to the Theme Customizer, click on the ‘Theme Customizer’ in the back end of your WordPress website. Next, scroll down the page and open the Additional CSS option. You’ll see all the custom CSS code you’ve used so far appear. Go ahead and add the following code to it:
#main-footer {
position: absolute;
bottom: 0;
width: 100%;
} 
Add CSS Code Through Divi Theme Options
Last but not least, you can also add the code through the Divi Theme Options. This is the most frequently used way of adding code to a website where you want the whole website to benefit from the code.
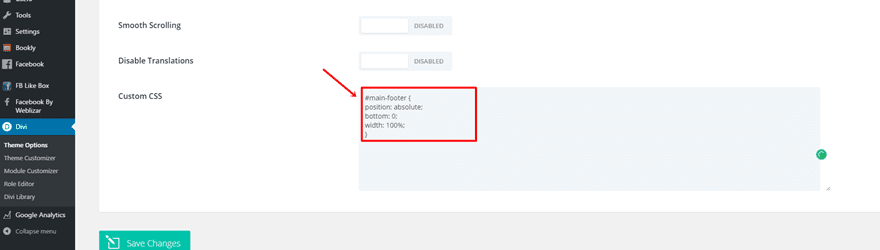
Go to Divi > Theme Options > Scroll down the page > Add the following CSS code to the Custom CSS box:
#main-footer {
position: absolute;
bottom: 0;
width: 100%;
} 
Create a Sticky Footer on Your Divi Website Through JQuery
Add jQuery Code Through Code Module (For One Page in Particular)
You can add the jQuery code by using the Code Module within the Divi builder. This, again, is mostly used when there are not a lot of pages with short content and if you don’t want to load the jQuery code for the whole website.
Add a section with a fullwidth row to the page you’re working on.
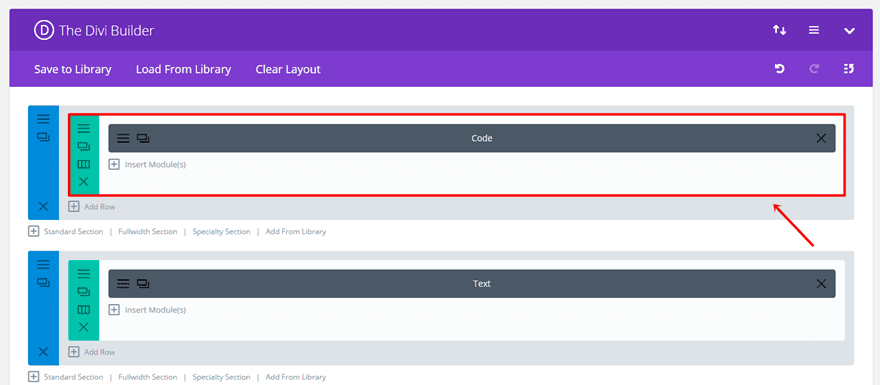
Continue by adding a code module to that fullwidth row and paste the following code into it:
<script text= "text/javascript">
jQuery(function($){
function stickyFooter(){
var footer = $("#main-footer");
var position = footer.position();
var height = $(window).height();
height = height - position.top;
height = height - footer.outerHeight();
if (height > 0) {
footer.css({'margin-top' : height+'px'});
}
}
stickyFooter();
$(window).resize(function(){
stickyFooter();
});
});
</script> 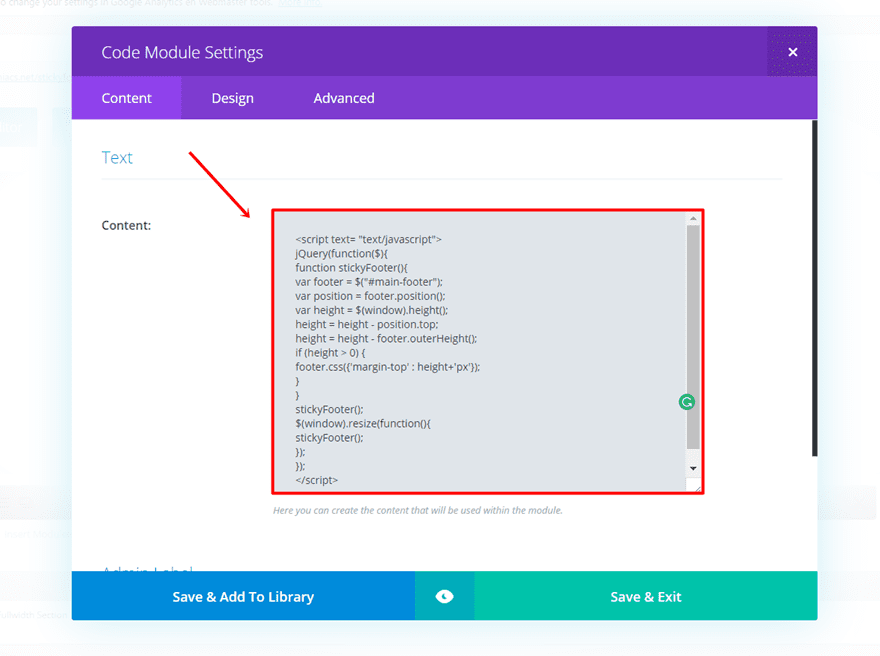
Add jQuery Code Through Divi Theme Options
Another possibility to add the jQuery code is through the Divi Theme Options. When adding jQuery code for the whole website, there is one specific place in the Divi Theme Options where we can do that; in the <head> field of the Integration tab. That’s exactly where we’re going to add the code right now.
Open your WordPress Website > Go to Divi > Open the Theme Options > Go to the Integration tab and add the following jQuery code to the <head> of your website:
<script text= "text/javascript">
jQuery(function($){
function stickyFooter(){
var footer = $("#main-footer");
var position = footer.position();
var height = $(window).height();
height = height - position.top;
height = height - footer.outerHeight();
if (height > 0) {
footer.css({'margin-top' : height+'px'});
}
}
stickyFooter();
$(window).resize(function(){
stickyFooter();
});
});
</script> 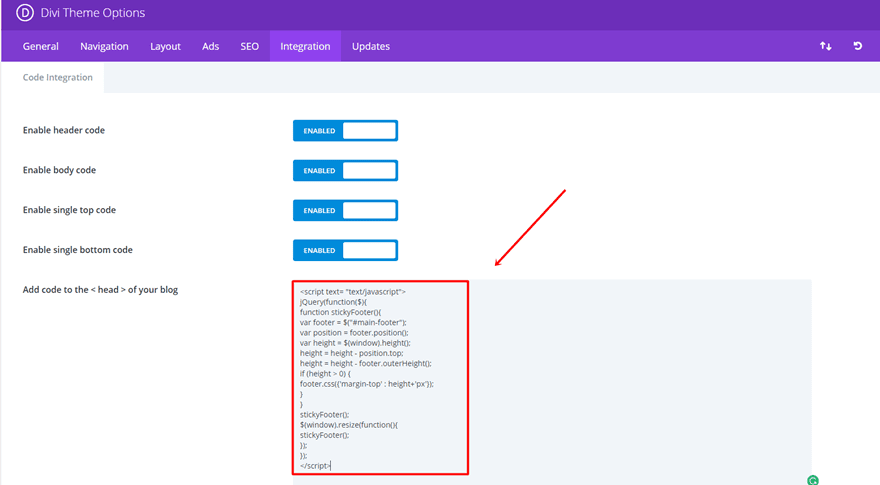
Final Thoughts
Adding a sticky footer is usually necessary in cases where you have a page with not a lot of content in it. You want to get rid of the floating footer in order for the page structure to feel more natural. If you have any comments or suggestions for future posts on our blog section; make sure you leave a comment in the comment section below so we can get in touch!
Be sure to subscribe to our email newsletter and YouTube channel so that you never miss a big announcement, useful tip, or Divi freebie!
Featured Image by Vintagio / shutterstock.com
The post How to Make Your Divi Footer Sticky appeared first on Elegant Themes Blog.