One of the options inside Divi’s email optin form redirects the user to a new page when they subscribe. This is a simple process and opens lots of possibilities for sales pages, welcome messages, and more. In this post, we’ll look at Divi’s email optin redirect URL option to see how to redirect after filling out an email optin form in Divi. We’ll also design a page to welcome them as a subscriber.
Let’s get started.
Redirect to a Custom URL
Let’s start by seeing how to perform the redirect within the Divi email optin module. For my examples, I’m using the free Print Shop layout that’s available within Divi.
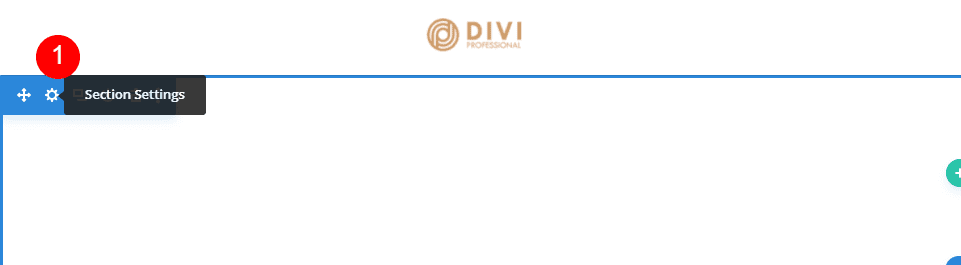
First, open the settings for the email optin module by clicking the gear icon that appears when you hover over the module.
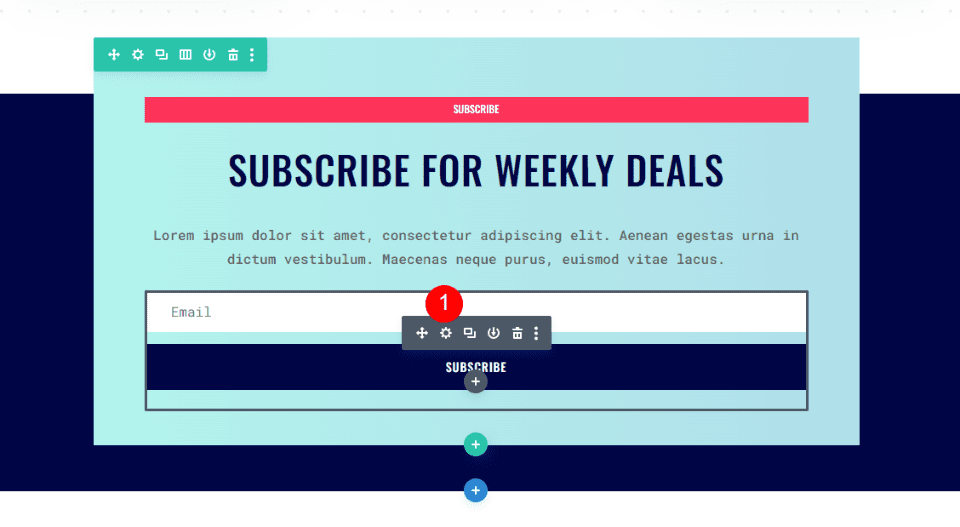
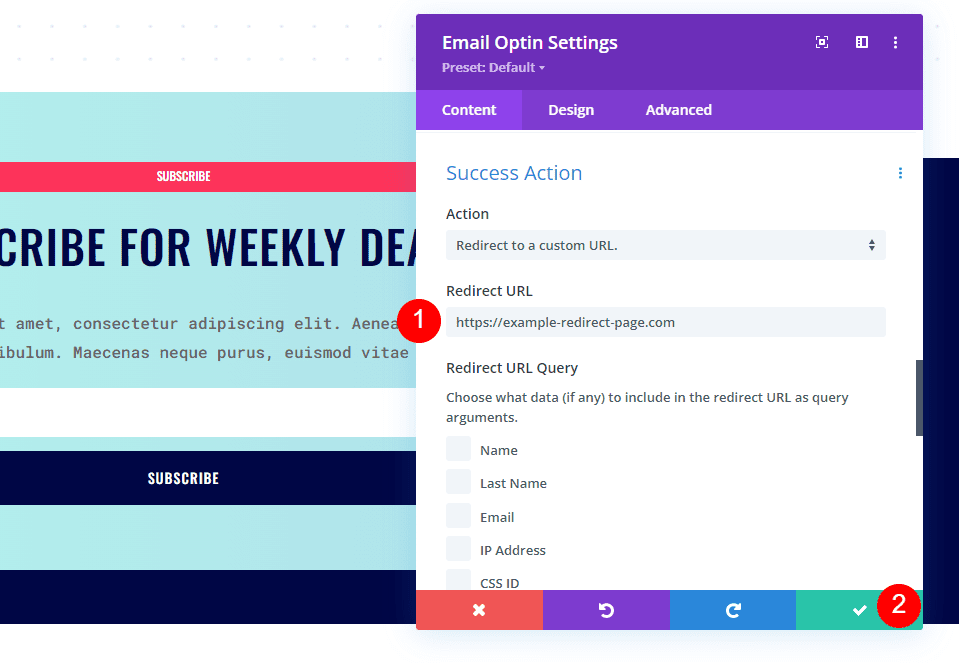
The Content tab has the settings we’ll need to adjust. This tab includes settings for Text, Email Account, Fields, Success Action, Spam Protection, Link, Background, and Admin Label.
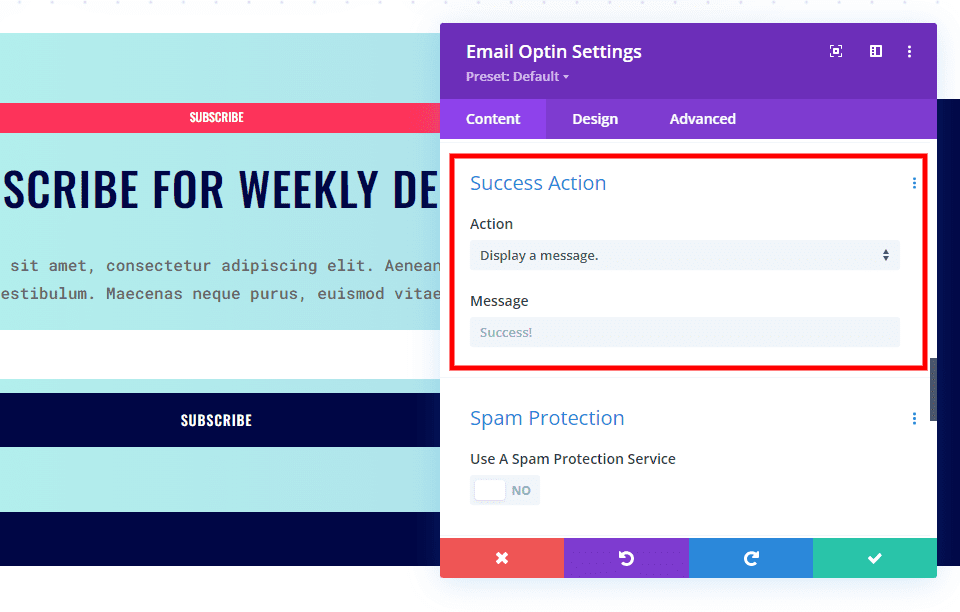
Scroll down to the section labeled Success Action. You’ll see a dropdown box under Action.
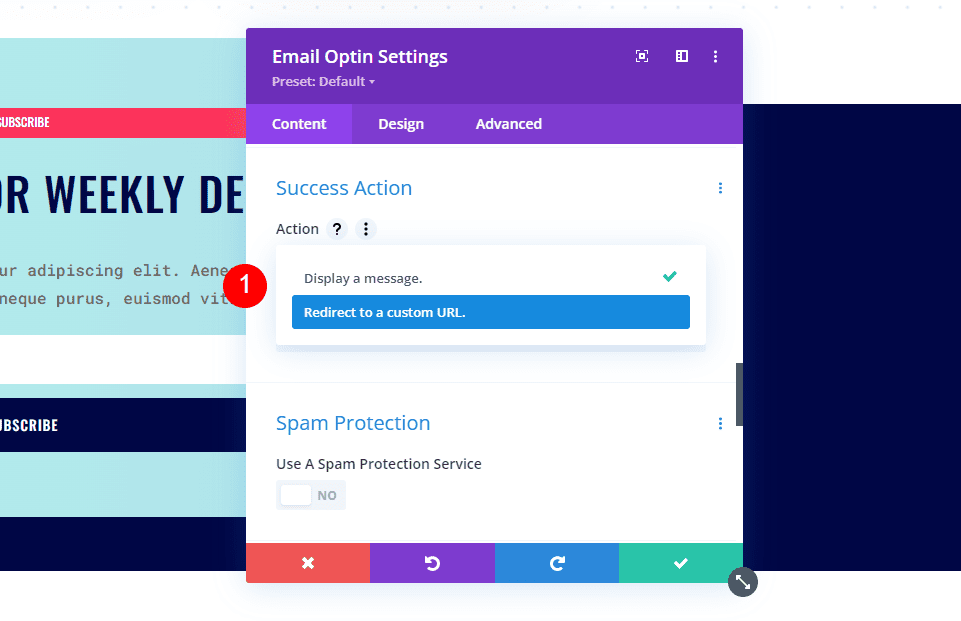
Click the box to see its options. Select Redirect to a Custom URL.
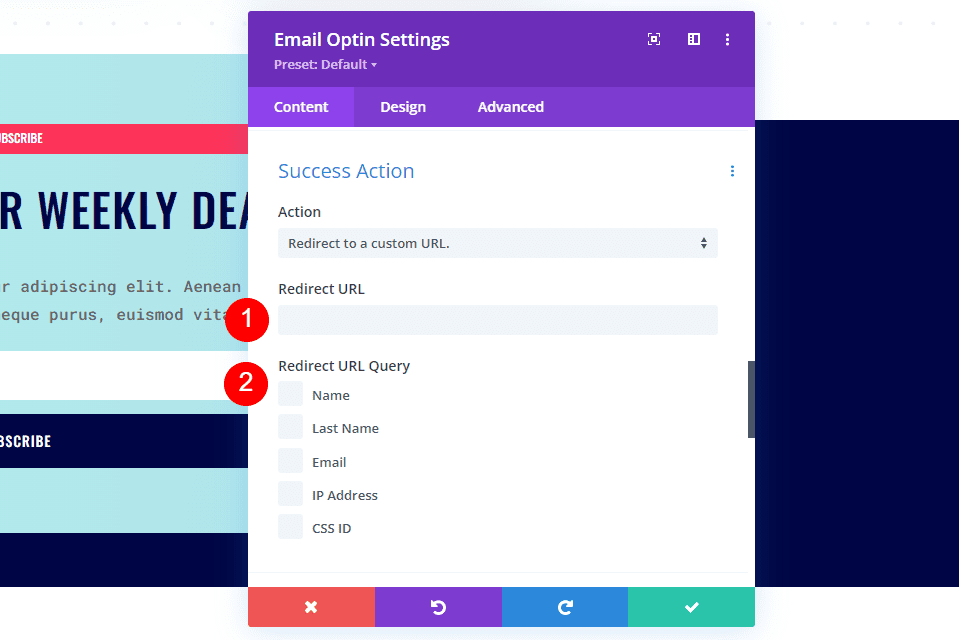
This opens a new set of options including a field for the URL and a list of queries that will add query arguments to the URL.
The URL that you add will be the location the user is redirected to when they submit the email form. The Redirect URL Query allows you to select data that you want to pass along to that page with the URL. This data can be used with other systems on that page that use the URL query argument.
Choosing Where to Redirect
Choosing where to redirect the user gives you lots of opportunities and options. You can redirect to any URL you want. It doesn’t have to be a page on your website. It can be a video on YouTube, a group page on Facebook, etc. If you do use a page on your website, it can be a sales page, a page with a free download, a page to thank them for subscribing and providing information, and more.
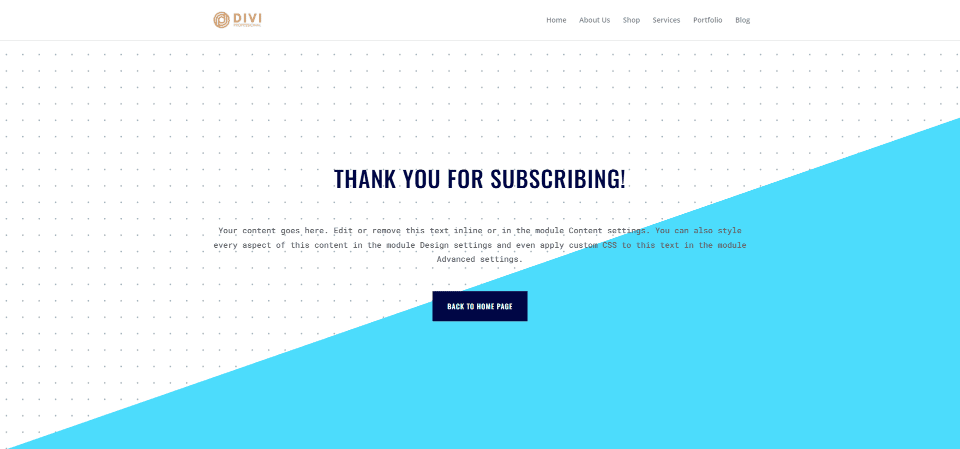
Creating the Redirect Page
Let’s create a redirect page that thanks the user for subscribing and provides them with information about what to expect next. This page will include a title, description, and a button that leads back to the home page. We’ll use the styling from the Print Shop Layout Pack.
To get started, create your page and enable the Visual Builder.
Style the Section
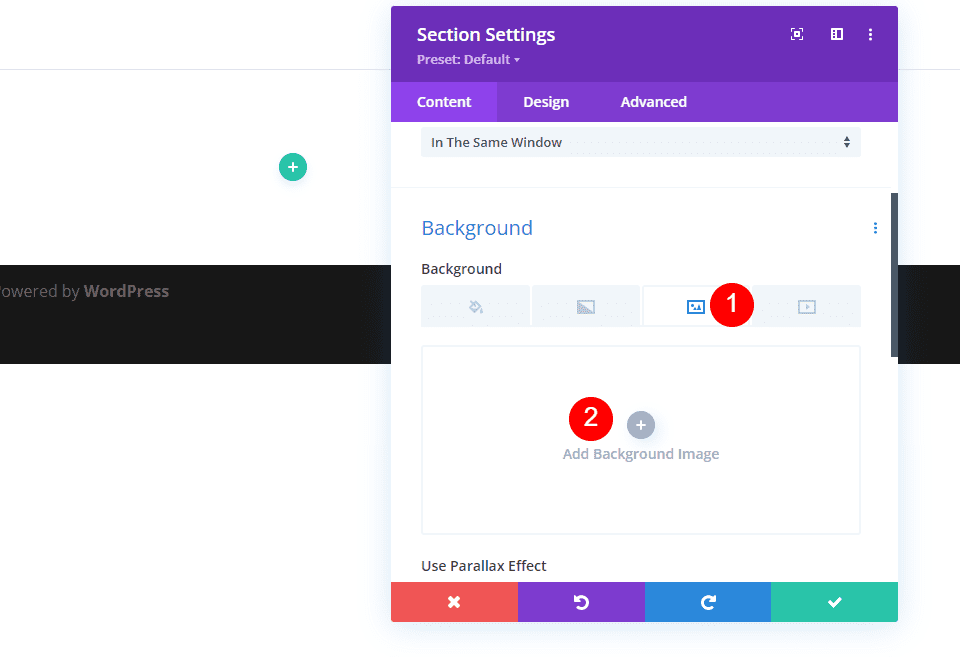
Hover over the section and click the gear icon to open its settings.
Scroll down to Background and select the Image tab. Click Add Background Image and choose your image from the media library. I’m adding the Print Shop Dots Pattern 1 background image from the Print Shop Home Page layout.
- Image: Print Shop Dots Pattern 1
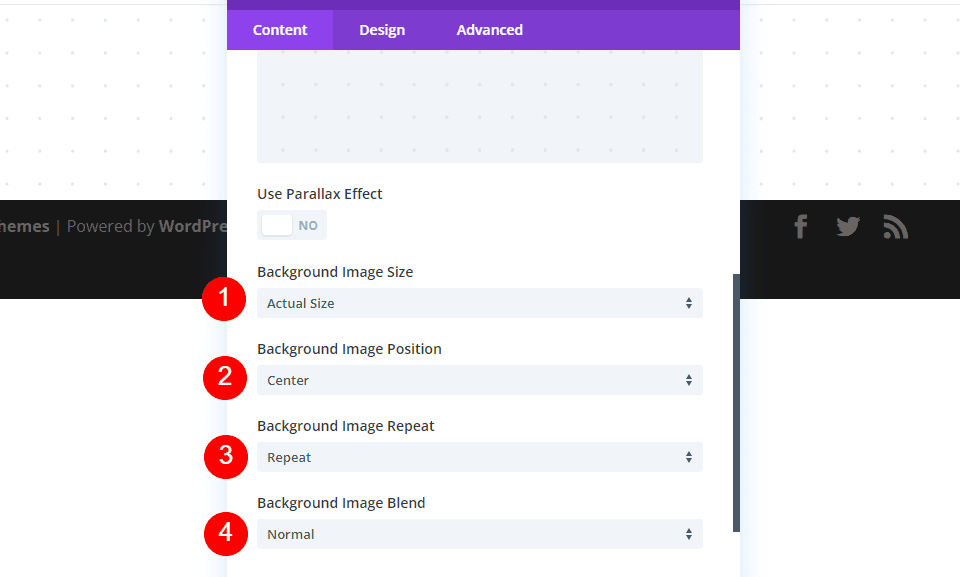
Set the Image Size to actual size, the Position to center, the Repeat to repeat, and the Image Blend to Normal.
- Size: Actual Size
- Position: Center
- Repeat: Repeat
- Image Blend: Normal
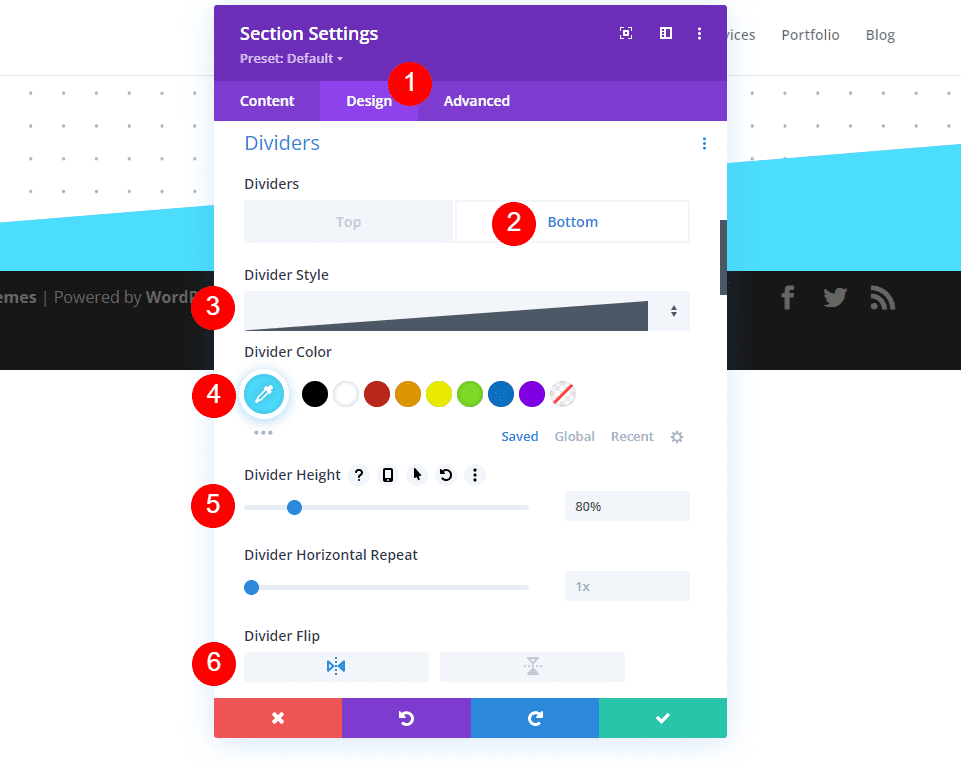
Next, select the Design tab. Select the Bottom divider and choose the first option under Divider Style. Change the color to #4cdcfc, the Height to 80%, and select the Horizontal icon for Divider Flip.
- Dividers: Bottom
- Style: angled
- Color: #4cdcfc
- Height: 80%
- Flip: Horizontal
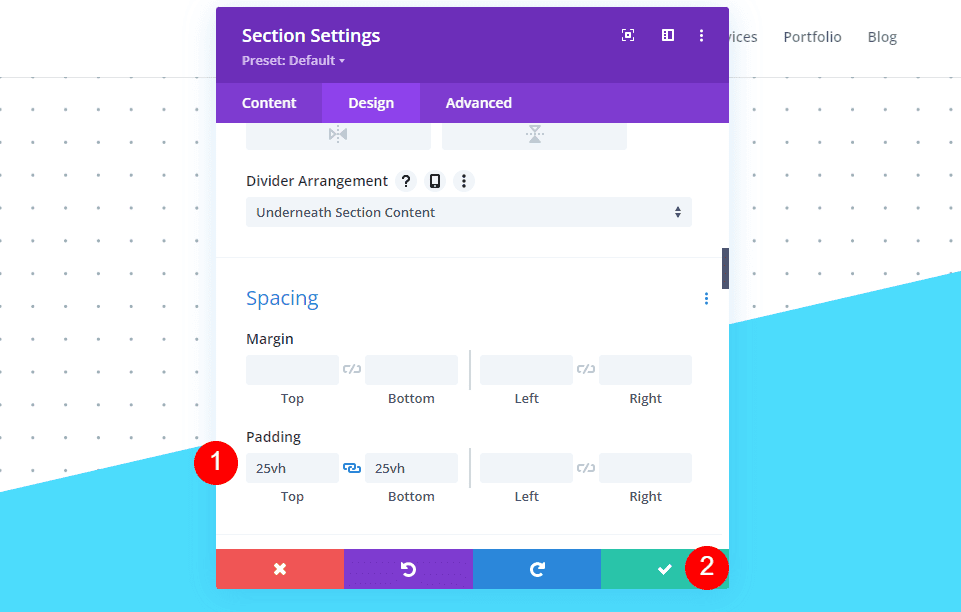
Scroll down to Spacing and add 25vh for the Top and Bottom Padding. Close the section’s settings.
- Padding: 25vh Top, Bottom
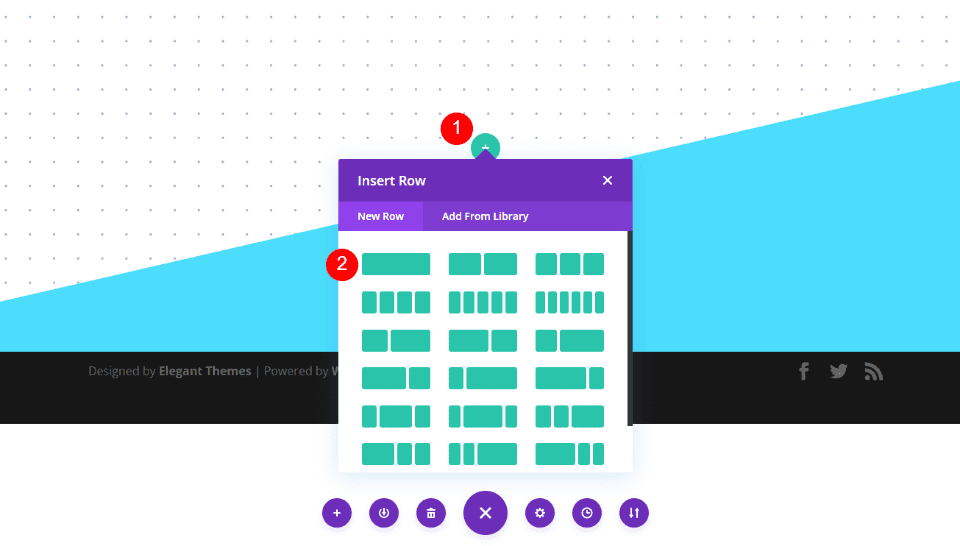
Add a Single Column Row
Next, select the green plus icon and add a single-column row. We won’t need to make adjustments to the row.
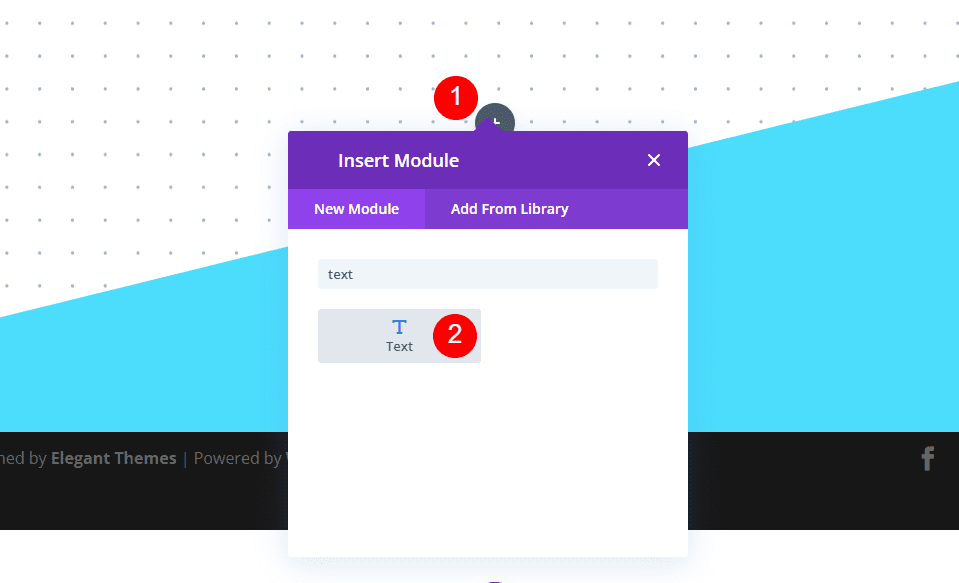
Add and Style the Title
Next, add a text module to the row.
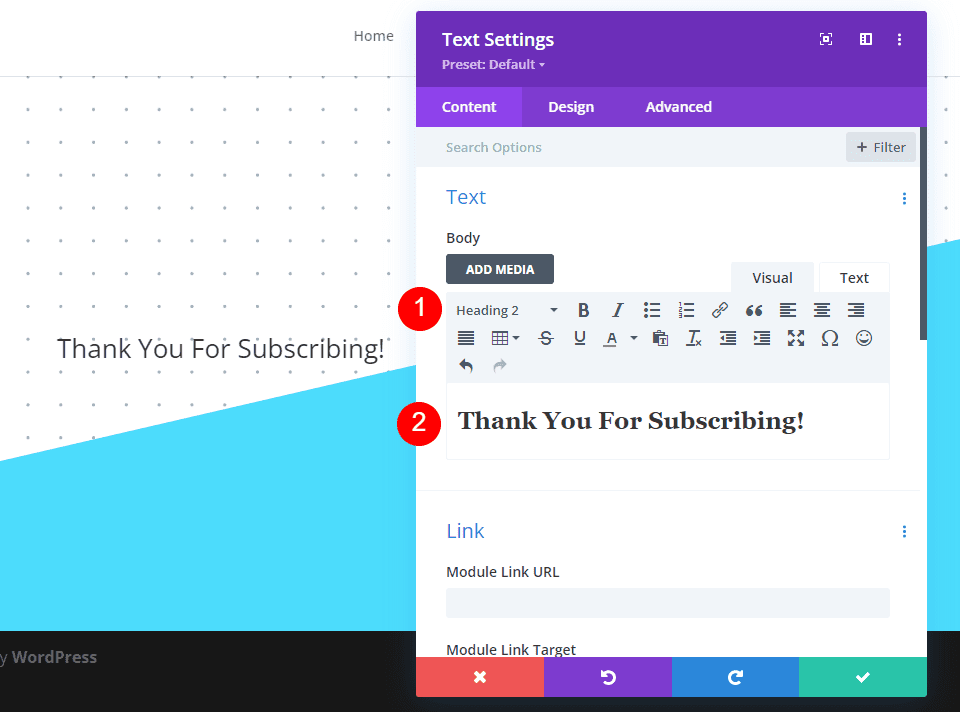
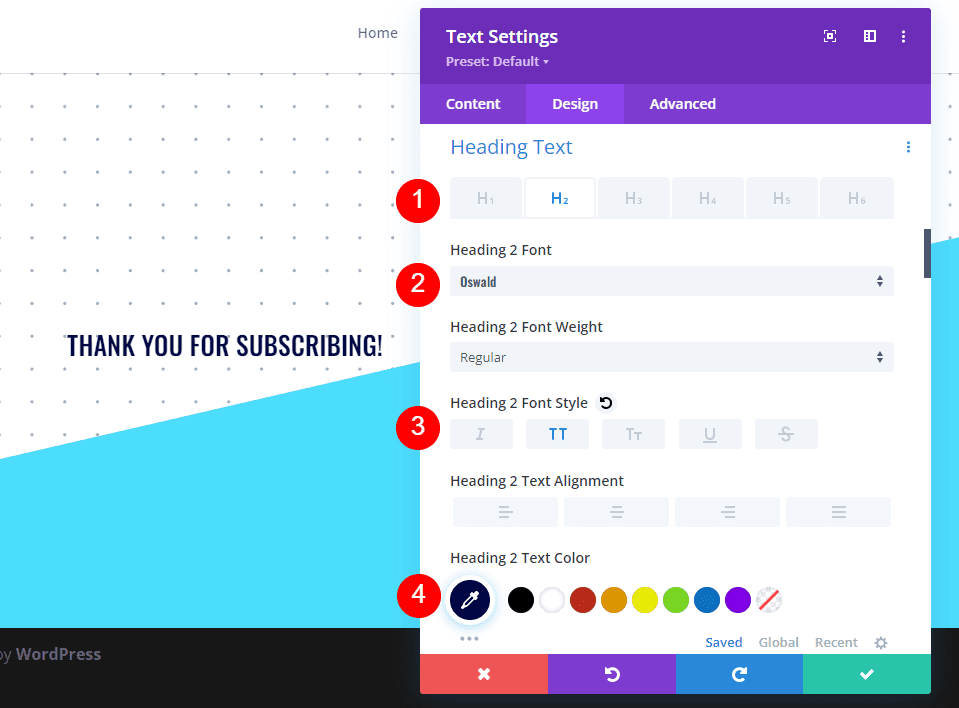
Open the text module’s settings and change the text to Heading 2. Add the title to the content area.
- Text: Heading 2
- Content: Thank You For Subscribing!
Next, select the Design tab and select H2 for the Heading Level. Change the Font to Oswald, the style to TT, and the color to #000645.
- Heading Level: H2
- Font: Oswald
- Style: TT
- Color: #000645
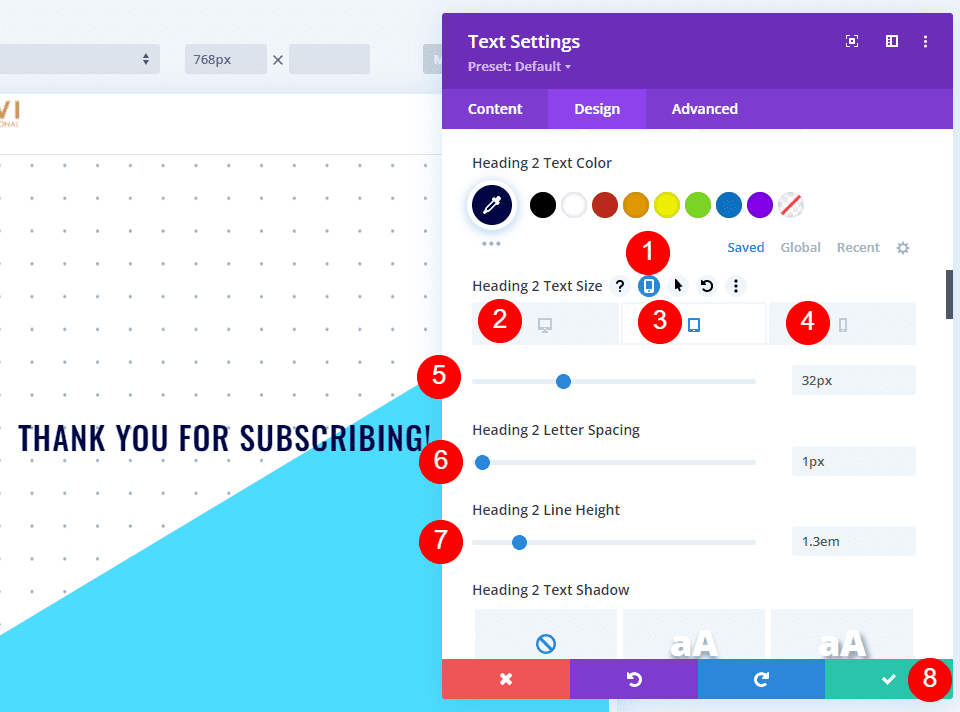
For the Size, select the phone icon and change the Desktop Size to 46px, Tablet to 32px, and Phone to 20px. Change the Line Spacing to 1px, the Line Height to 1.3em, and close the module’s settings.
- Size: 46px (Desktop), 32px (Tablet), 20px (Phone)
- Spacing: 1px
- Line Height: 1.3em
Add and Style the Description
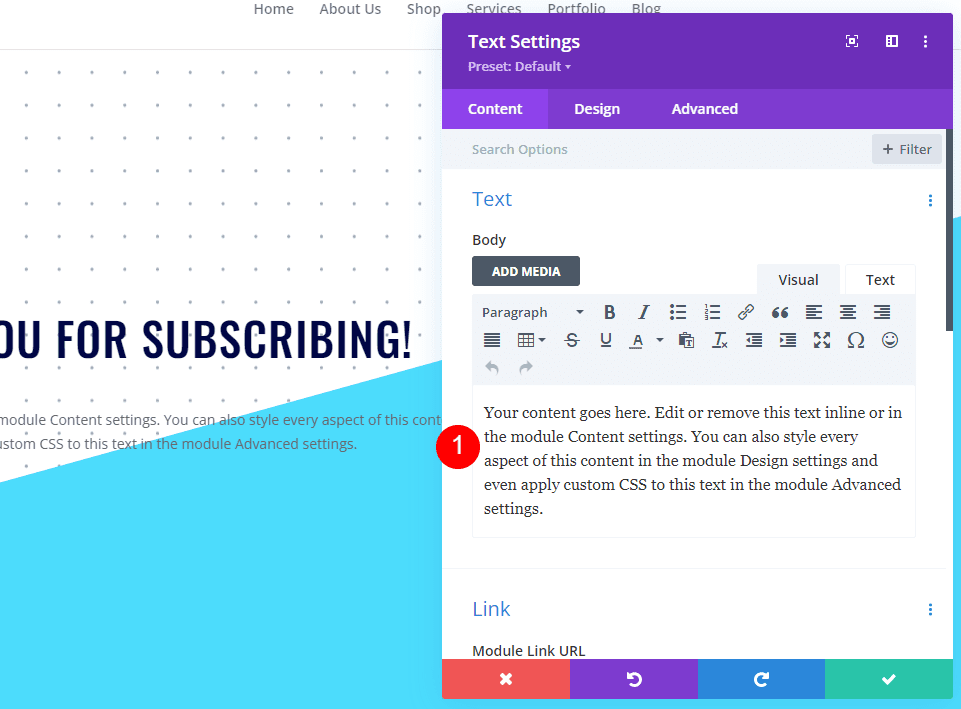
Next, click on the gray plus icon and add another text module. This one will include a description to inform the user what to expect next.
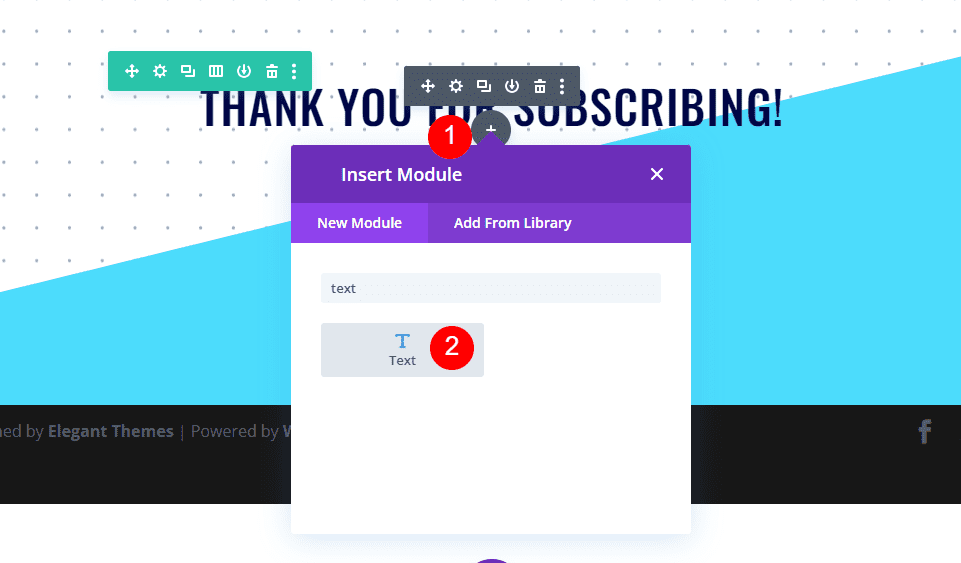
Add your description in the content area. This can include information such as checking their email, whitelisting the email, how often to expect an email, the types of emails you send, etc. For my example, I’ll leave the dummy text.
Next, select the Design tab. Select Roboto Mono for the Font. Change the Desktop Size to 16px, Tablet to 15px, and Phone to 14px. Set the Line Height to 1.8em.
- Font: Roboto Mono
- Size: 16px (Desktop), 15px (Tablet), 14px (Phone)
- Line Height: 1.8em
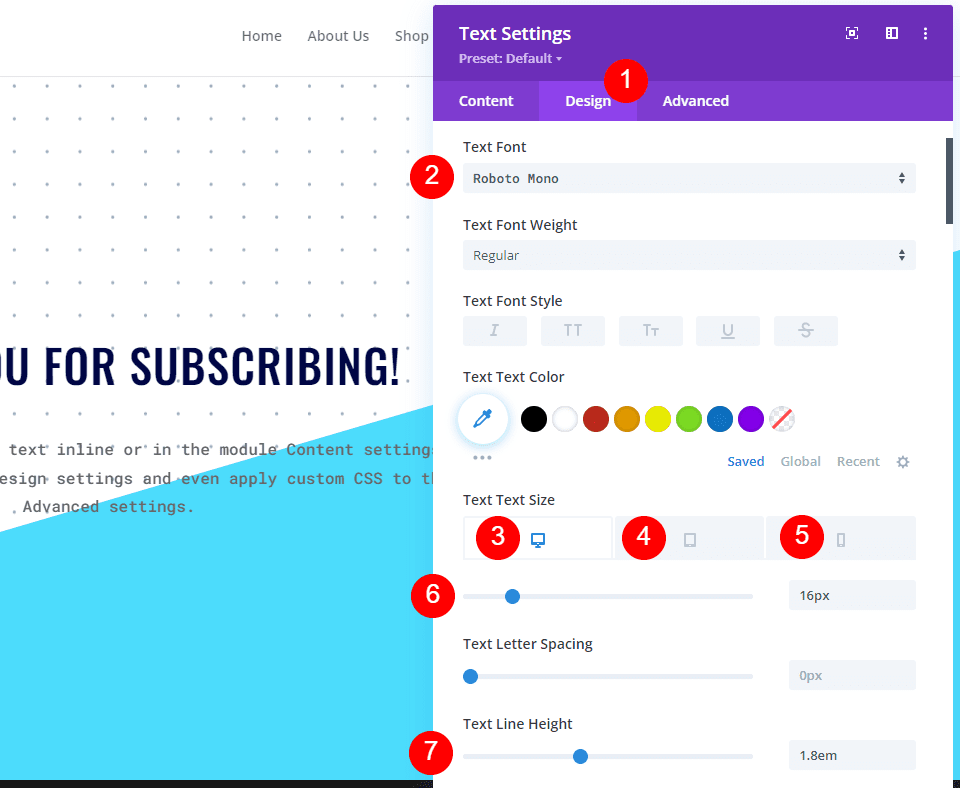
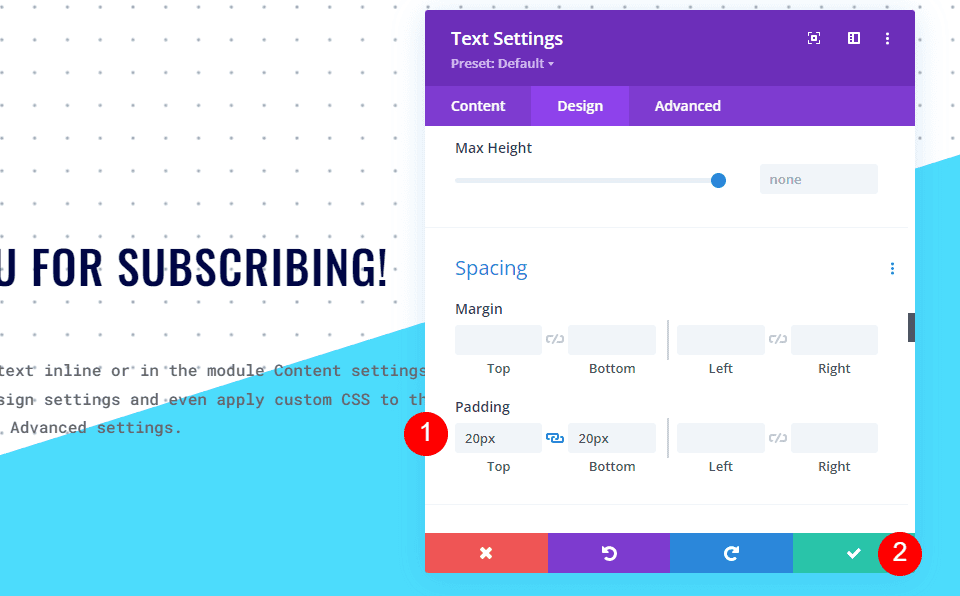
Finally, scroll down to Spacing and add 20px to the Top and Bottom Padding. Close the module.
- Padding: 20px Top, Bottom
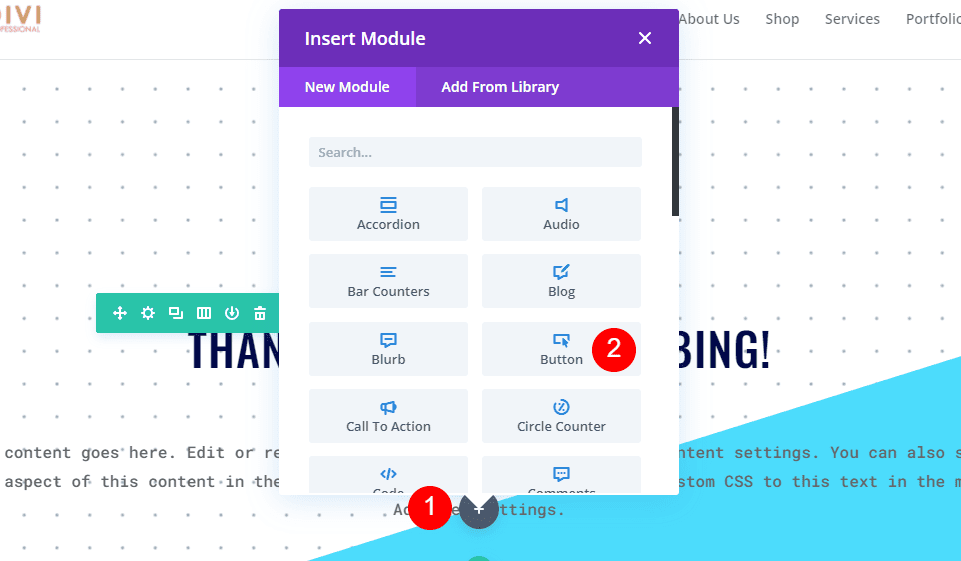
Add and Style the Home Page Button
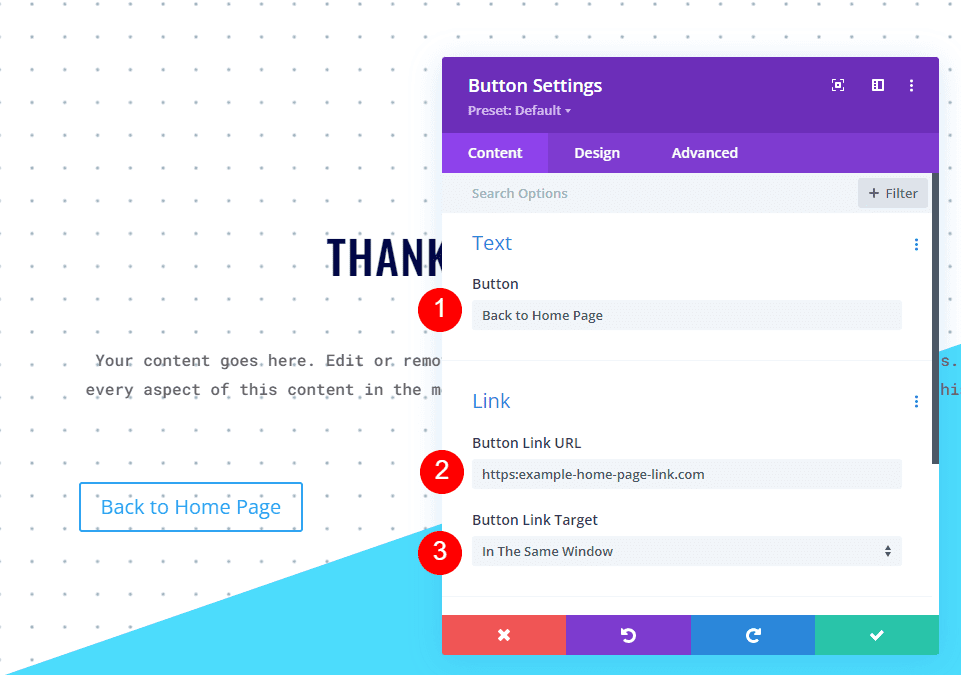
Now, let’s add a button to return the user to the home page. Click the gray icon under the second text module and add a button module.
Change the button text to Back to Home Page and add the home page URL to the button’s link. Leave the target at the default so it opens in the same window.
- Button: Back to Home Page
- Button Link URL: link
- Target: In the Same Window
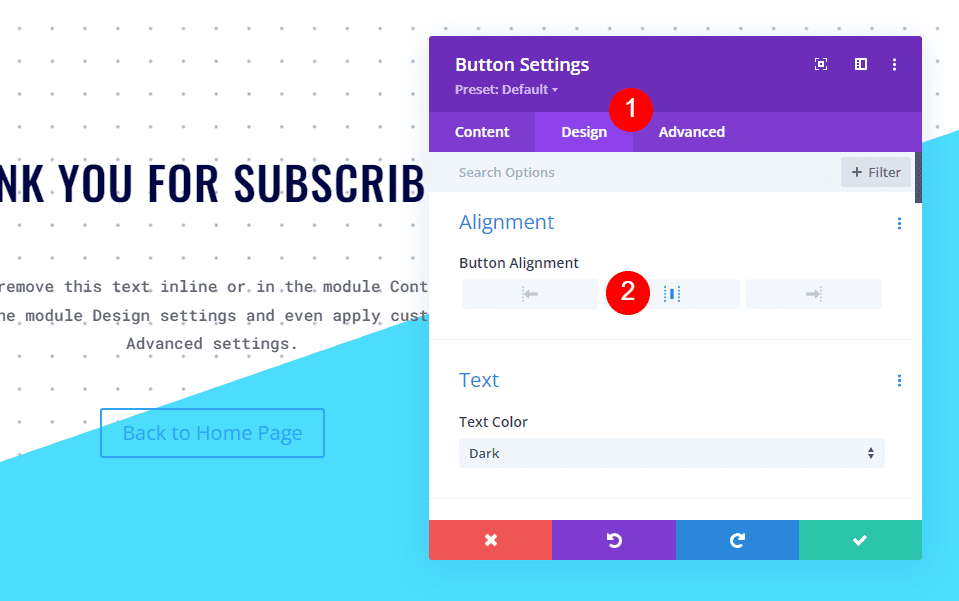
Select the Design tab and change the Button Alignment to Center.
- Button Alignment: Center
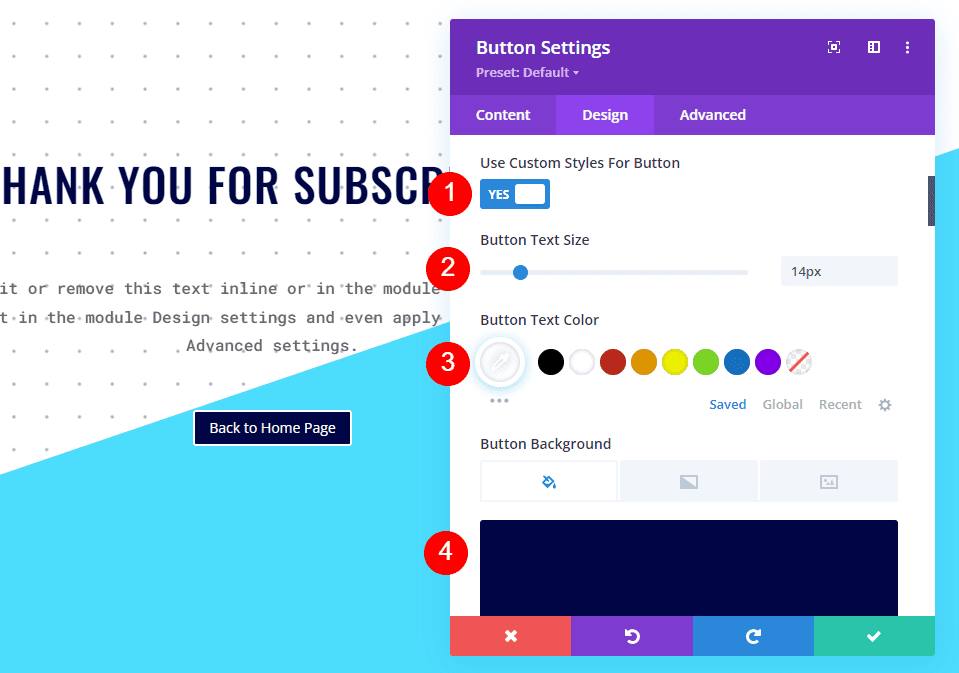
Next, enable Use Custom Styles for Button. Set the Text Size to 14px and select white for the Color. Change the Background Color to #000645.
- Use Custom Styles for Button: Yes
- Text Size: 14px
- Text Color: #ffffff
- Background Color: #000645
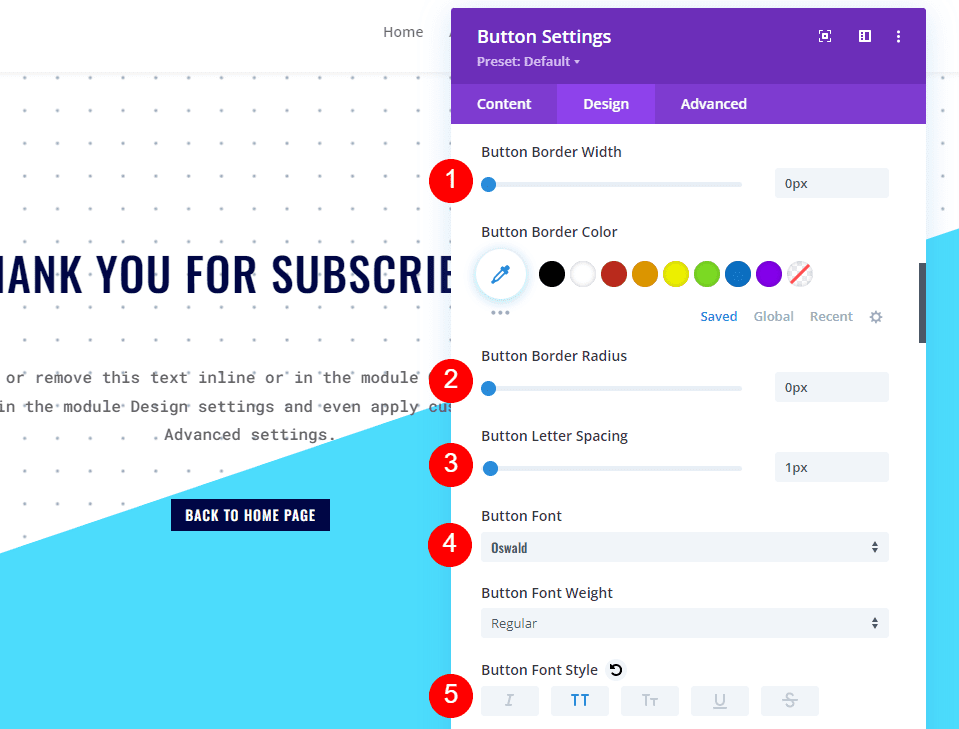
Change the Border Width to 0px, the Border Radius to 0px, and the Letter Spacing to 1px. Choose Oswald for the Font and set the Style to TT.
- Border Width: 0px
- Border Radius: 0px
- Letter Spacing: 1px
- Font: Oswald
- Style: TT
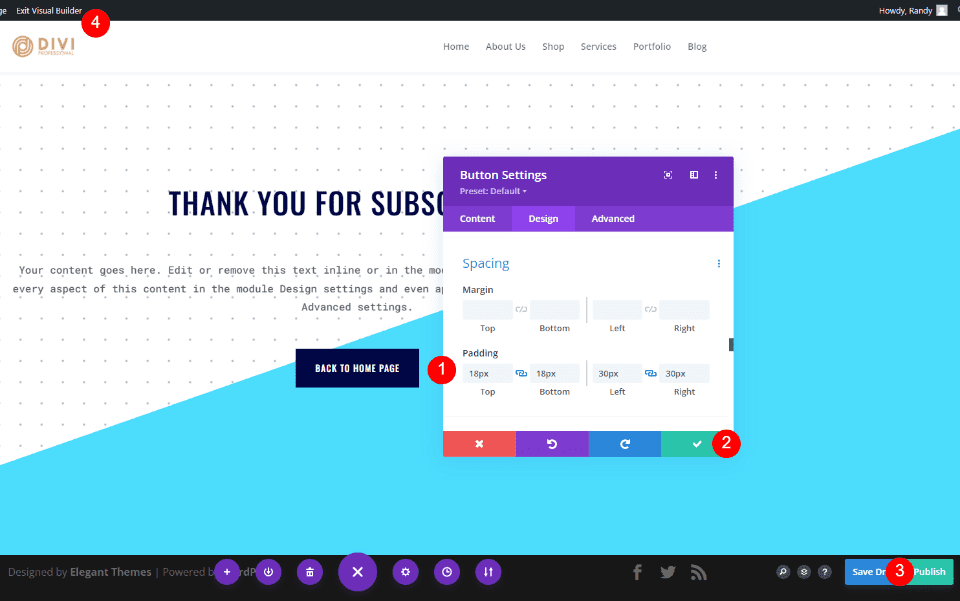
Finally, scroll down to Spacing and add 18px to the Top and Bottom Padding and 30px to the Left and Right Padding. Close the button module’s settings, publish the page, and exit the Visual Builder.
- Padding: 18px (Top, Bottom), 30px (Left, Right)
Paste the Redirect URL
Finally, copy and paste the URL for this page into the Redirect URL field in the email optin module.
Now, when someone signs up to the email and clicks the submit button, they’re automatically taken to the new page to see the welcome message.
Ending Thoughts
That’s our look at how to redirect after filling out an email optin form in Divi. Setting up the redirect within the module is simple. Even the URL arguments are just a matter of selecting them. The URL itself can be anything you want, including a welcome page, sales page, and more. One of the simplest options is to create a page like the one we created in this tutorial to welcome your subscribers and let them know what to expect next.
We want to hear from you. Do you use the URL redirect option for your Divi email optin form? Let us know about your experience in the comments.
The post How to Redirect After Filling Out an Email Optin Form in Divi appeared first on Elegant Themes Blog.