
Google Fonts is an amazing resource. Before it was so widespread, making websites that used unique fonts was a real pain. Now, though, with a few clicks and one snippet of code, your website moves from being Helvetic-eh to Helvetic-awesome. But what if the font you love isn’t a part of the Google Fonts family? You need to know how to use downloaded fonts because you’ve discovered a fantastic hipster font that speaks to your beard’s soul.
Using a downloaded font on your website is not quite as simple as clicky-clicky-paste-paste. It’s not a hard process, mind you, and I am gonna walk you through it so that you never, ever, ever have a Helvetic-eh website again.
Now, I want to point out that you can do this via a plugin. There are a handful available in the repo. But why would we want to do that? I am the kind of guy who prefers to avoid using a plugin when a few lines of code will do the same thing. Excess plugins cause tons of bloat, unnecessary HTTP requests, and slow down your site.
So we’re going to import these fonts by hand–like it’s the late ’90s again. Awww, yeah.
Choosing and Downloading a Font
I’m a big fan of font roundups. Elegant Themes has a ton you can scan through to see what you like. So hit some of these and see what you like.
For me, I am going with the Aventura font from the Hipster round-up.

Your first step is to find the download link for the font and save the file to your computer. It will likely be a .zip file containing various file formats. The most common ones you’ll find is .ttf (TrueType Font) or .otf (OpenType Font).
Making a Webfont (Kinda Optional, but Not Really)
FontSquirrel has a great tool you can use to make sure no one and no browser is left incompatible with your site’s splendor. Since most fonts you download will only be available in a single format, the FontSquirrel tool makes it so that you’re not limited by what the font author distributed. As long as you’ve got rights to use the font, you can make sure it works with your product/site.
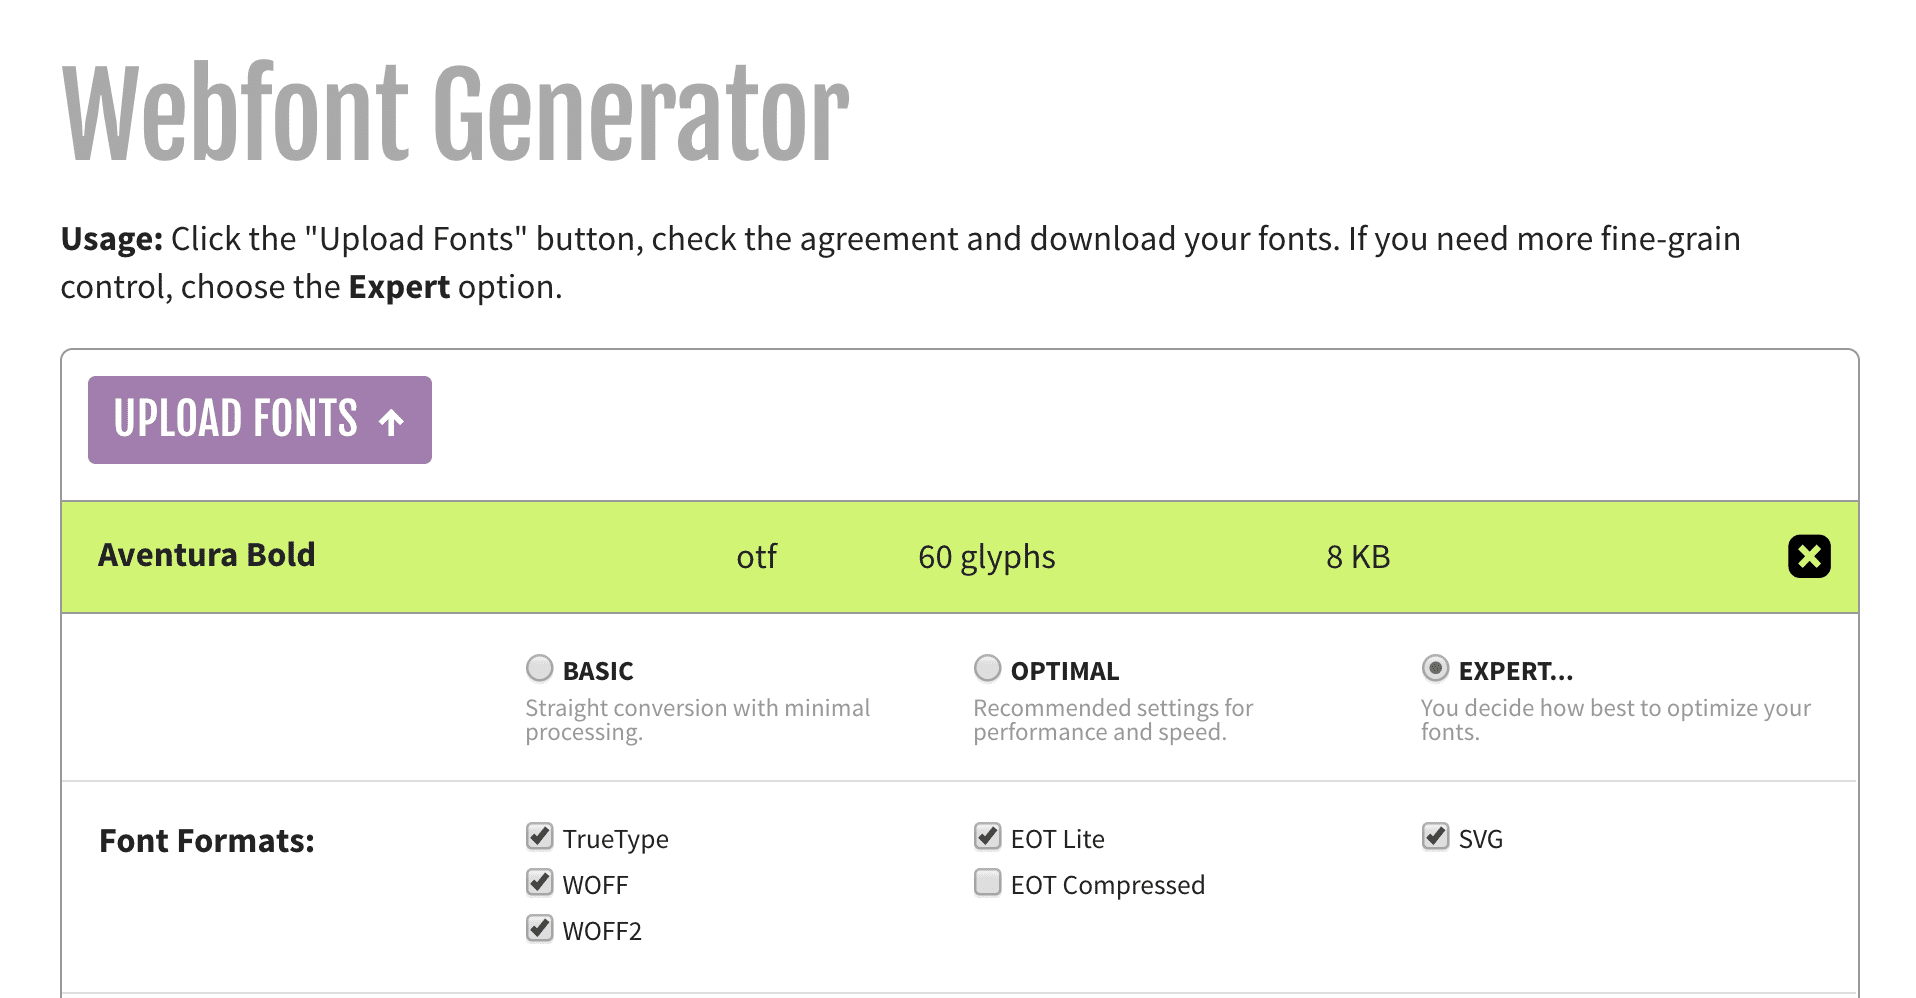
Just upload your recently downloaded font and pick your options. Personally, I use the Expert options, just to get all the font formats I can. The others work, but you don’t get as many file types, which is kind of the point of the whole thing.
FontSquirrel is also awesome that it provides you with the required CSS to import them to your site. How’s that for user-friendly? You’ll just copy and paste it in (which we deal with below).
Uploading Your Font to WordPress

With that done, you’ll need to upload the font to your hosting provider. I always do this via FTP (I use FileZilla, but you can use whatever client you want).
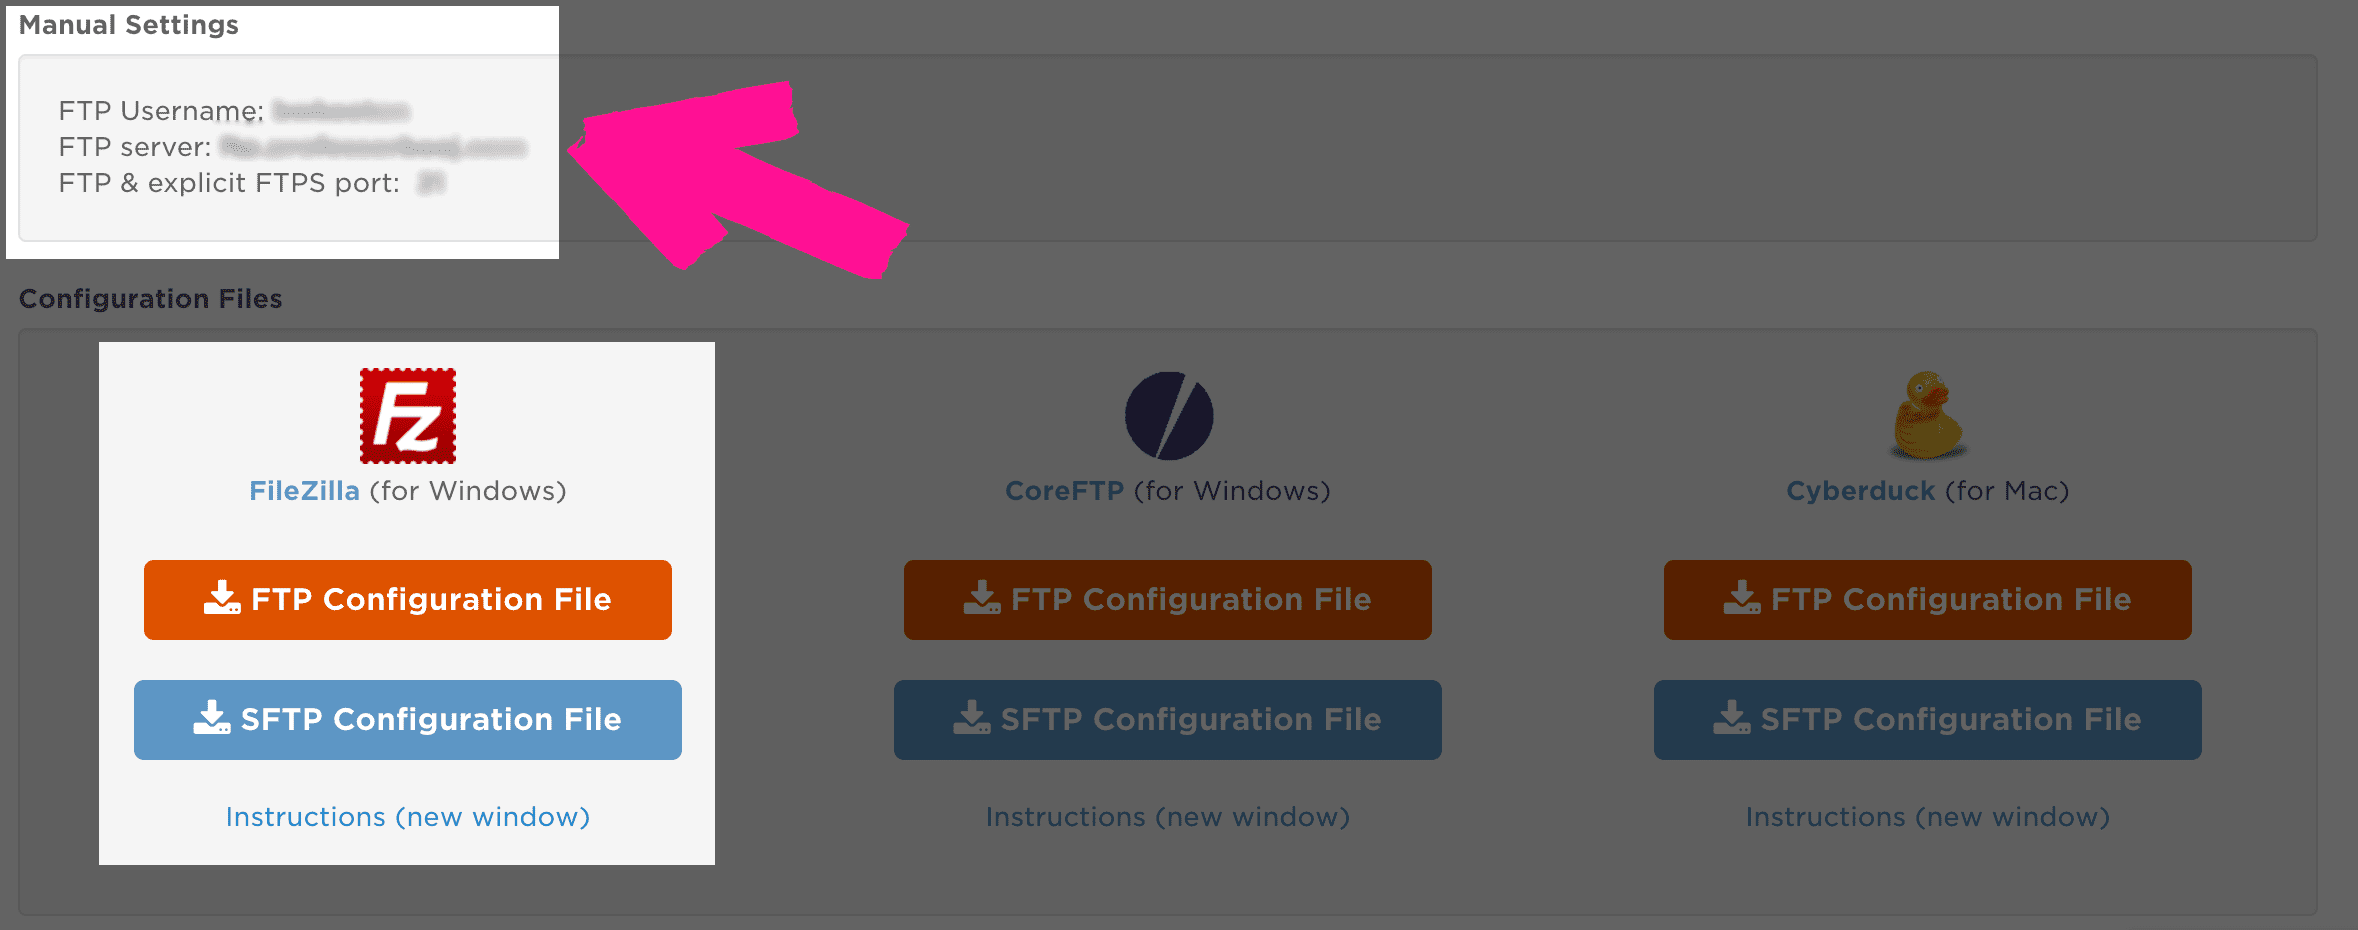
If you don’t know your host’s FTP information, head into your cPanel and look under Files -> FTP Accounts.
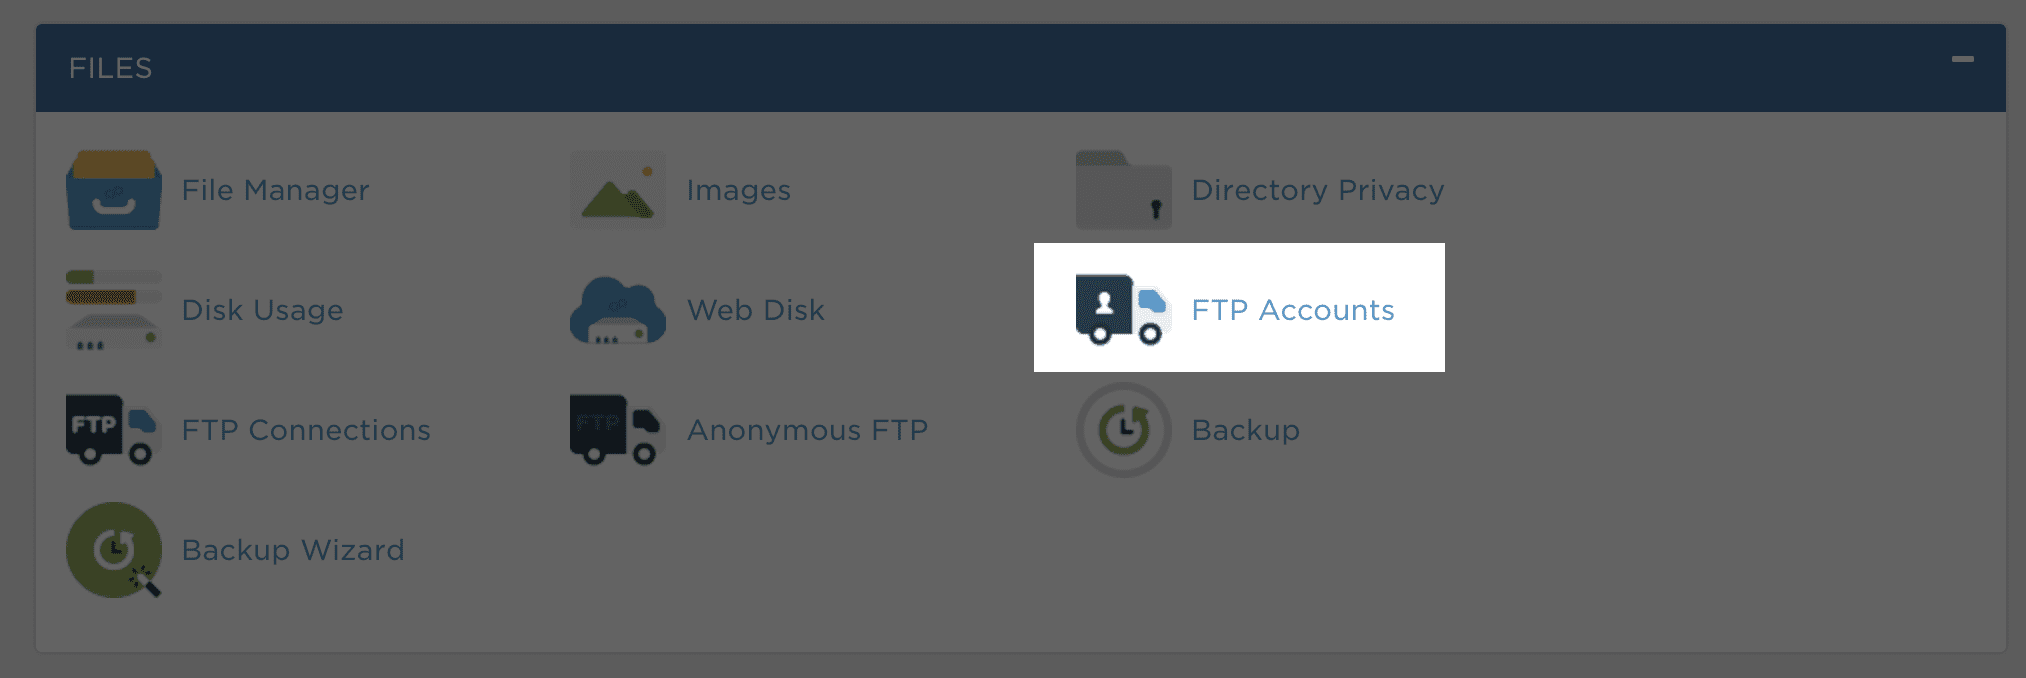
You will see every FTP account for the host there, and you should also see a Configure FTP Client link beside each one.
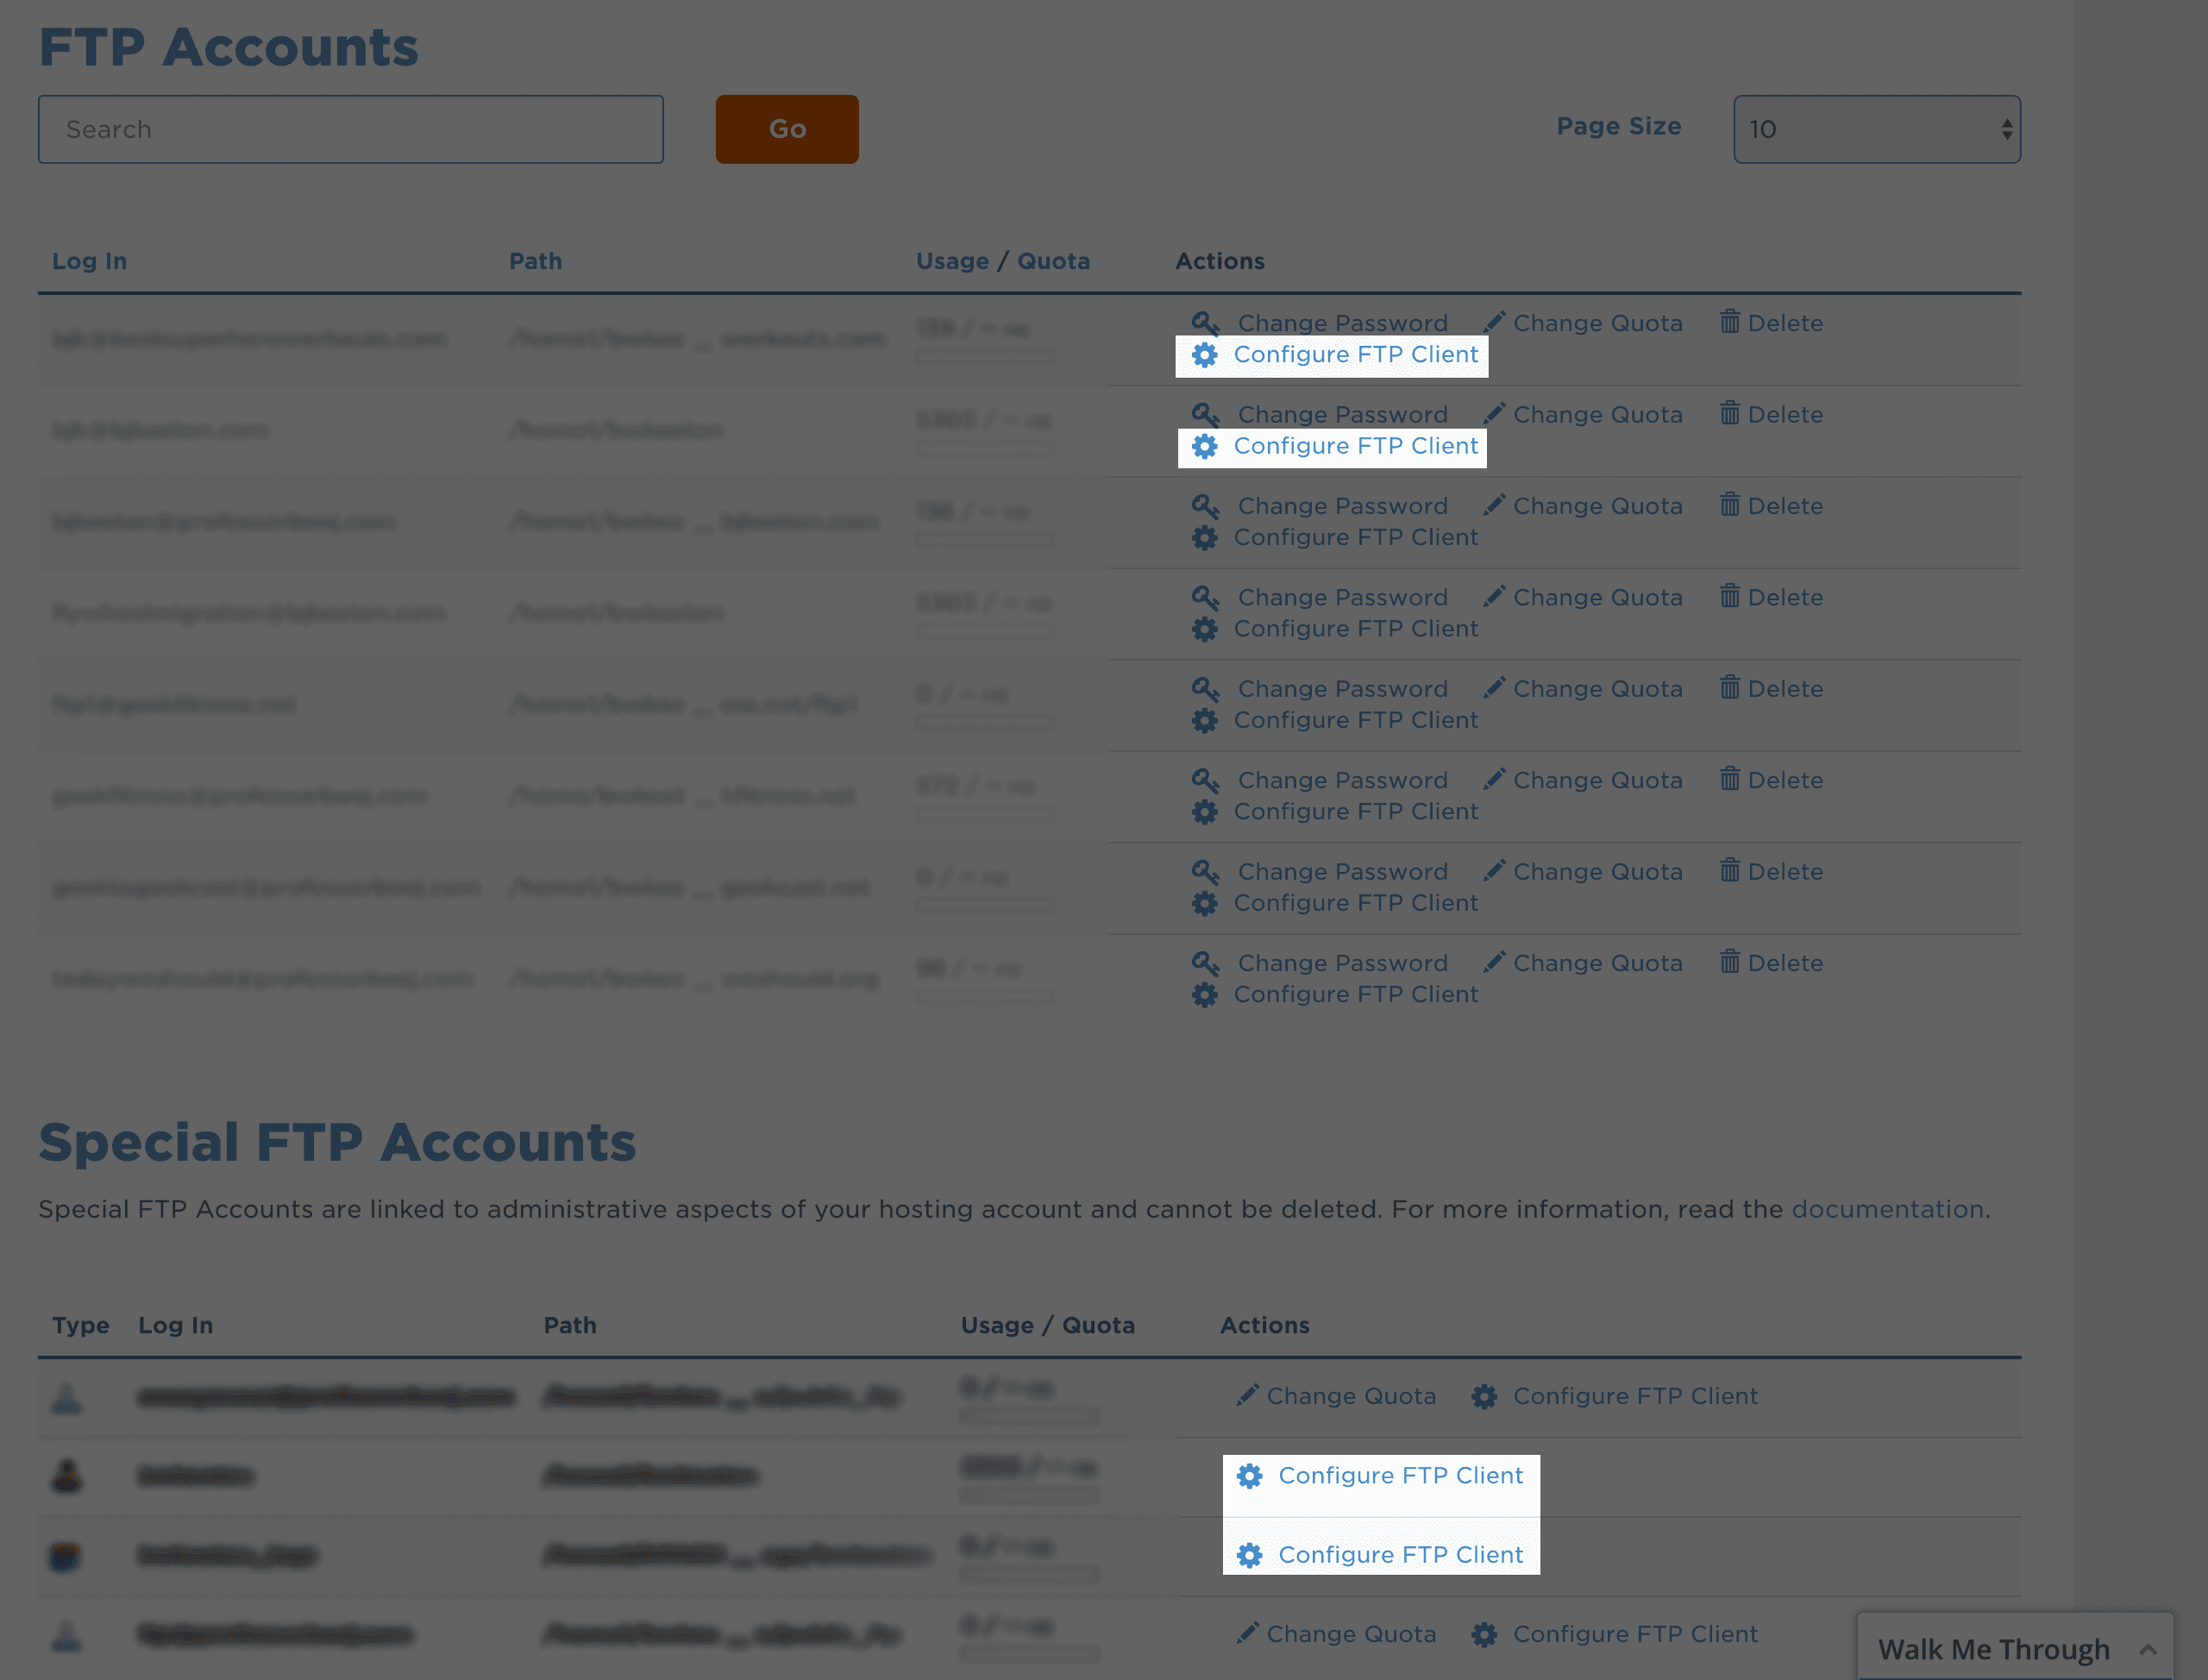
When you go in there, cPanel gives you server information or a FileZilla (and others) file you can import to get your credentials set. I go for manual, personally, but you do what you like. Even if you use the file, you’ll need the password to login, so both methods are safe and secure.
Now that you’re logged into your host via FTP, navigate to your /wp-content folder for your site. Because this is content for your WordPress site, why wouldn’t you put it there? Feel free to put it wherever, even in /wp-content/uploads. You do you.
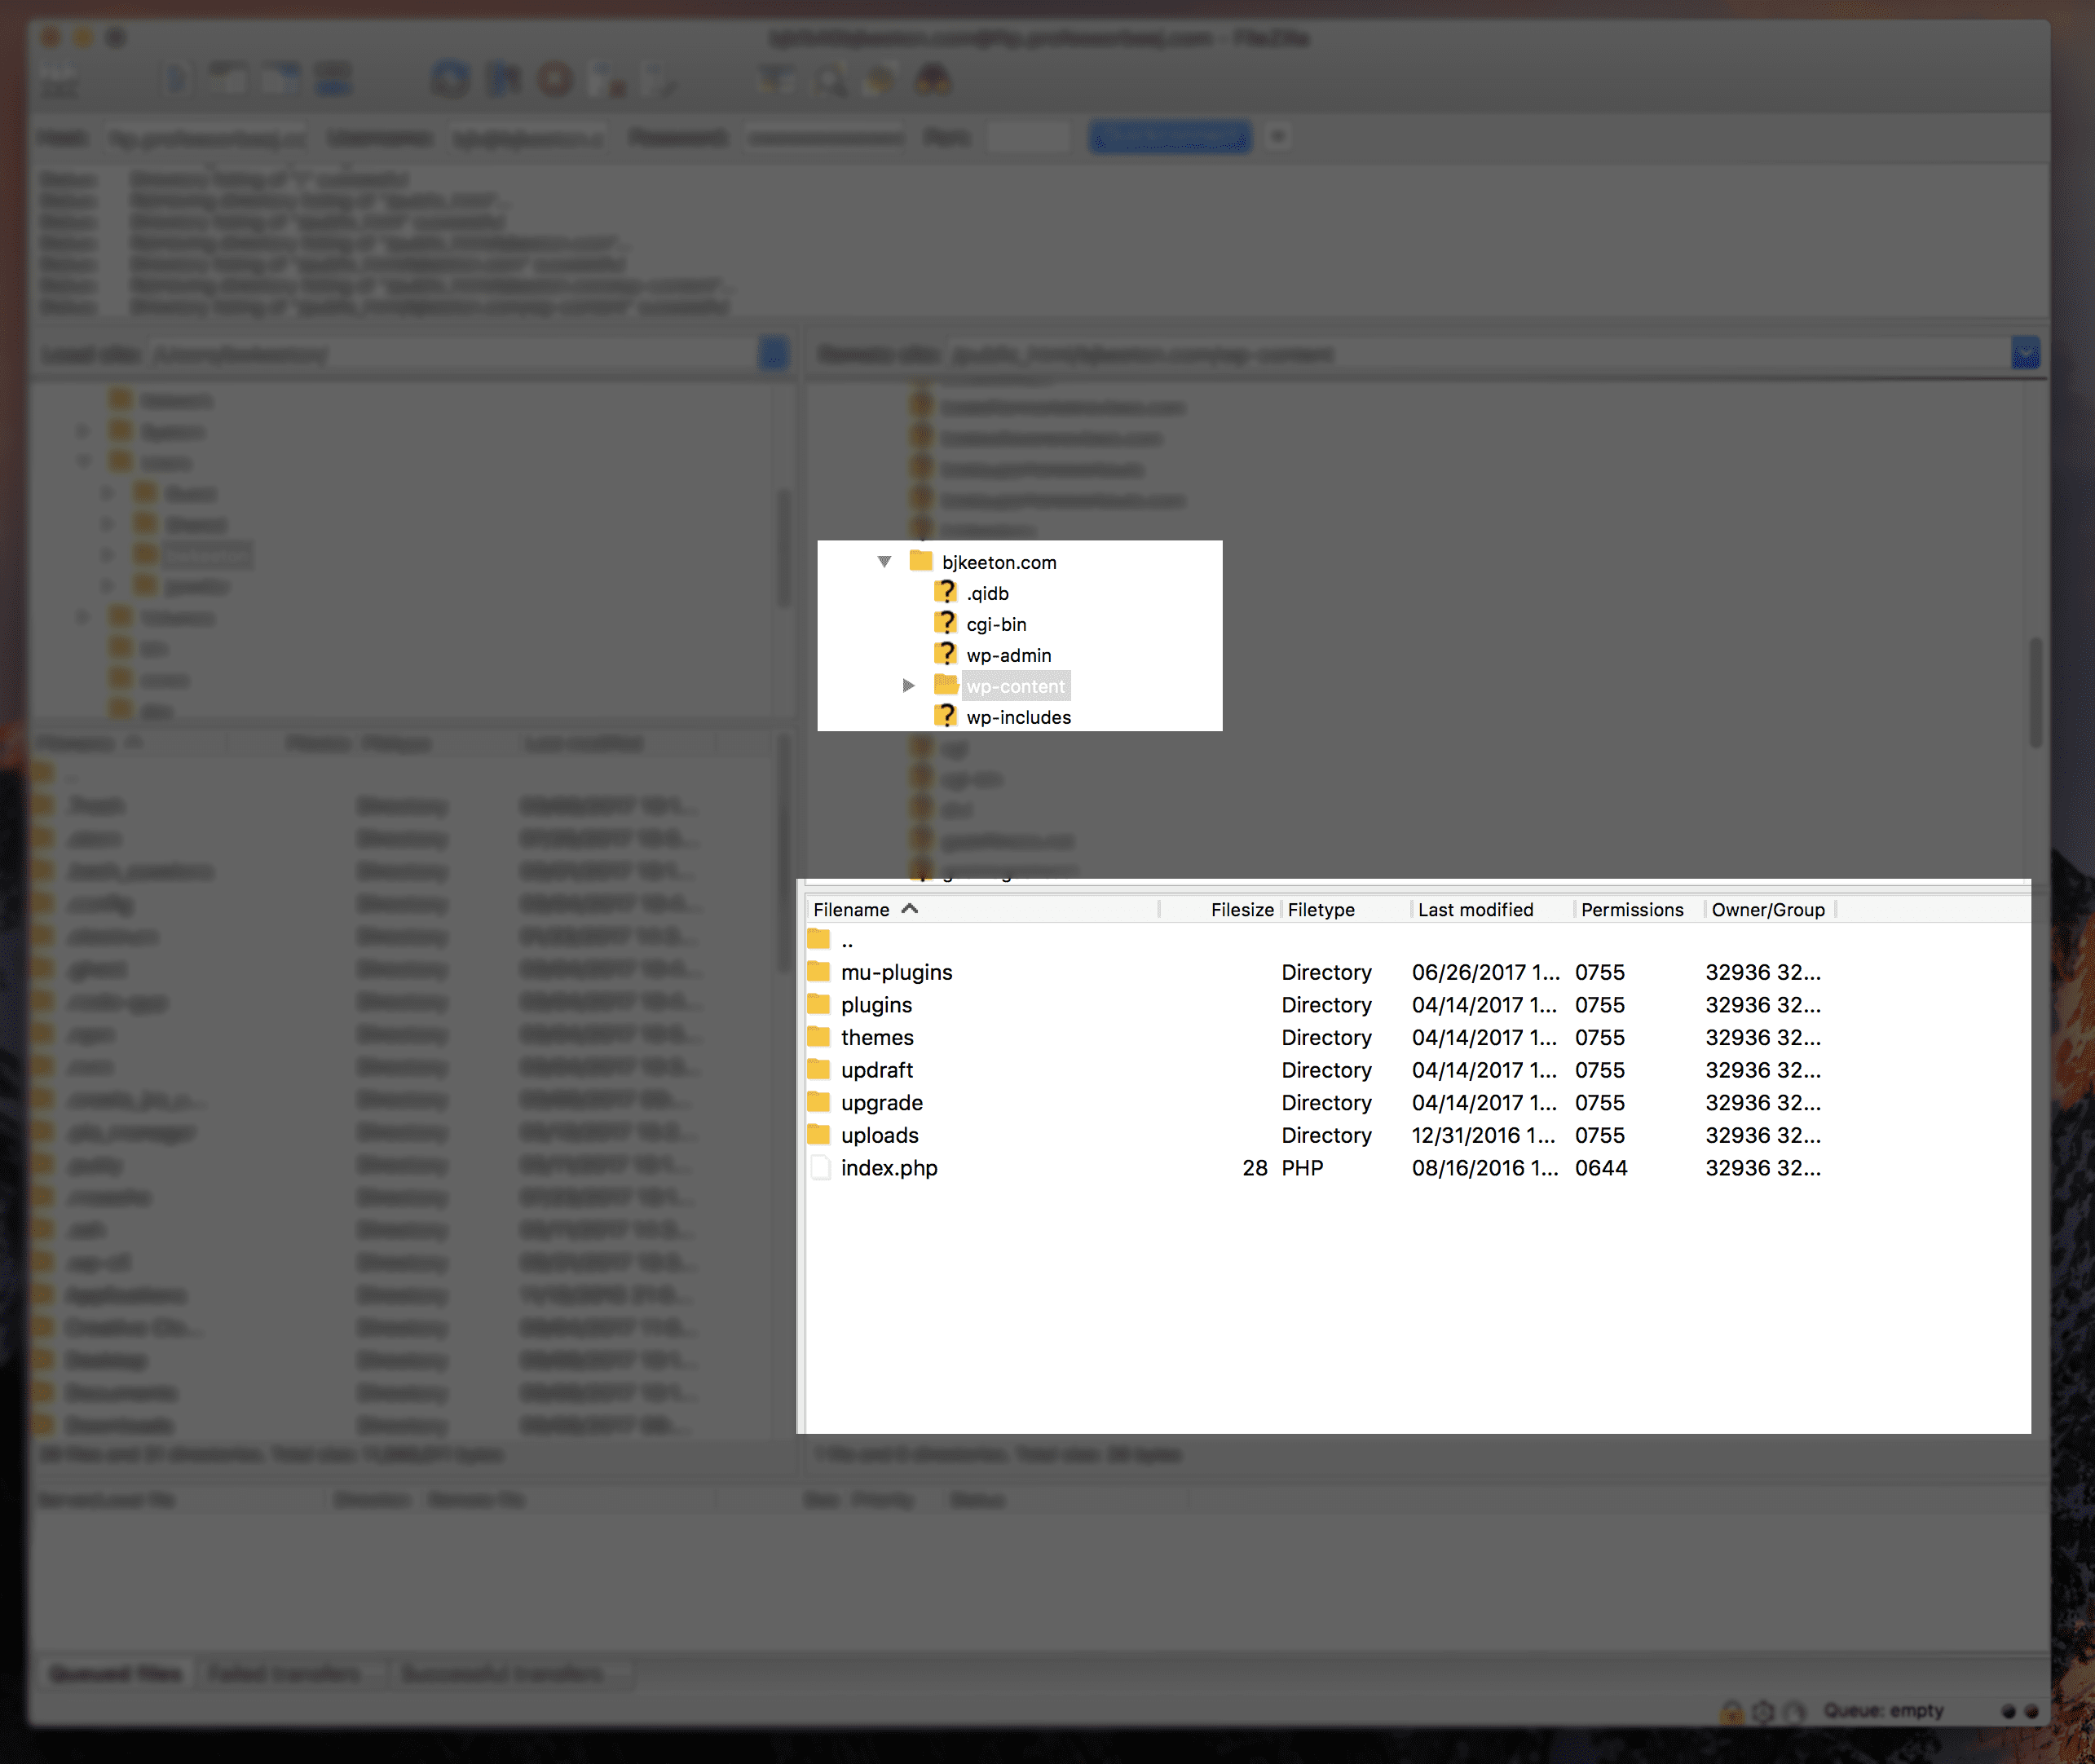
FTP is super easy to upload your file. Just find the font file you downloaded and drag it into the bottom-right pane in FileZilla. That will start the upload. It won’t take more than a second or so for you to see it in the directory.
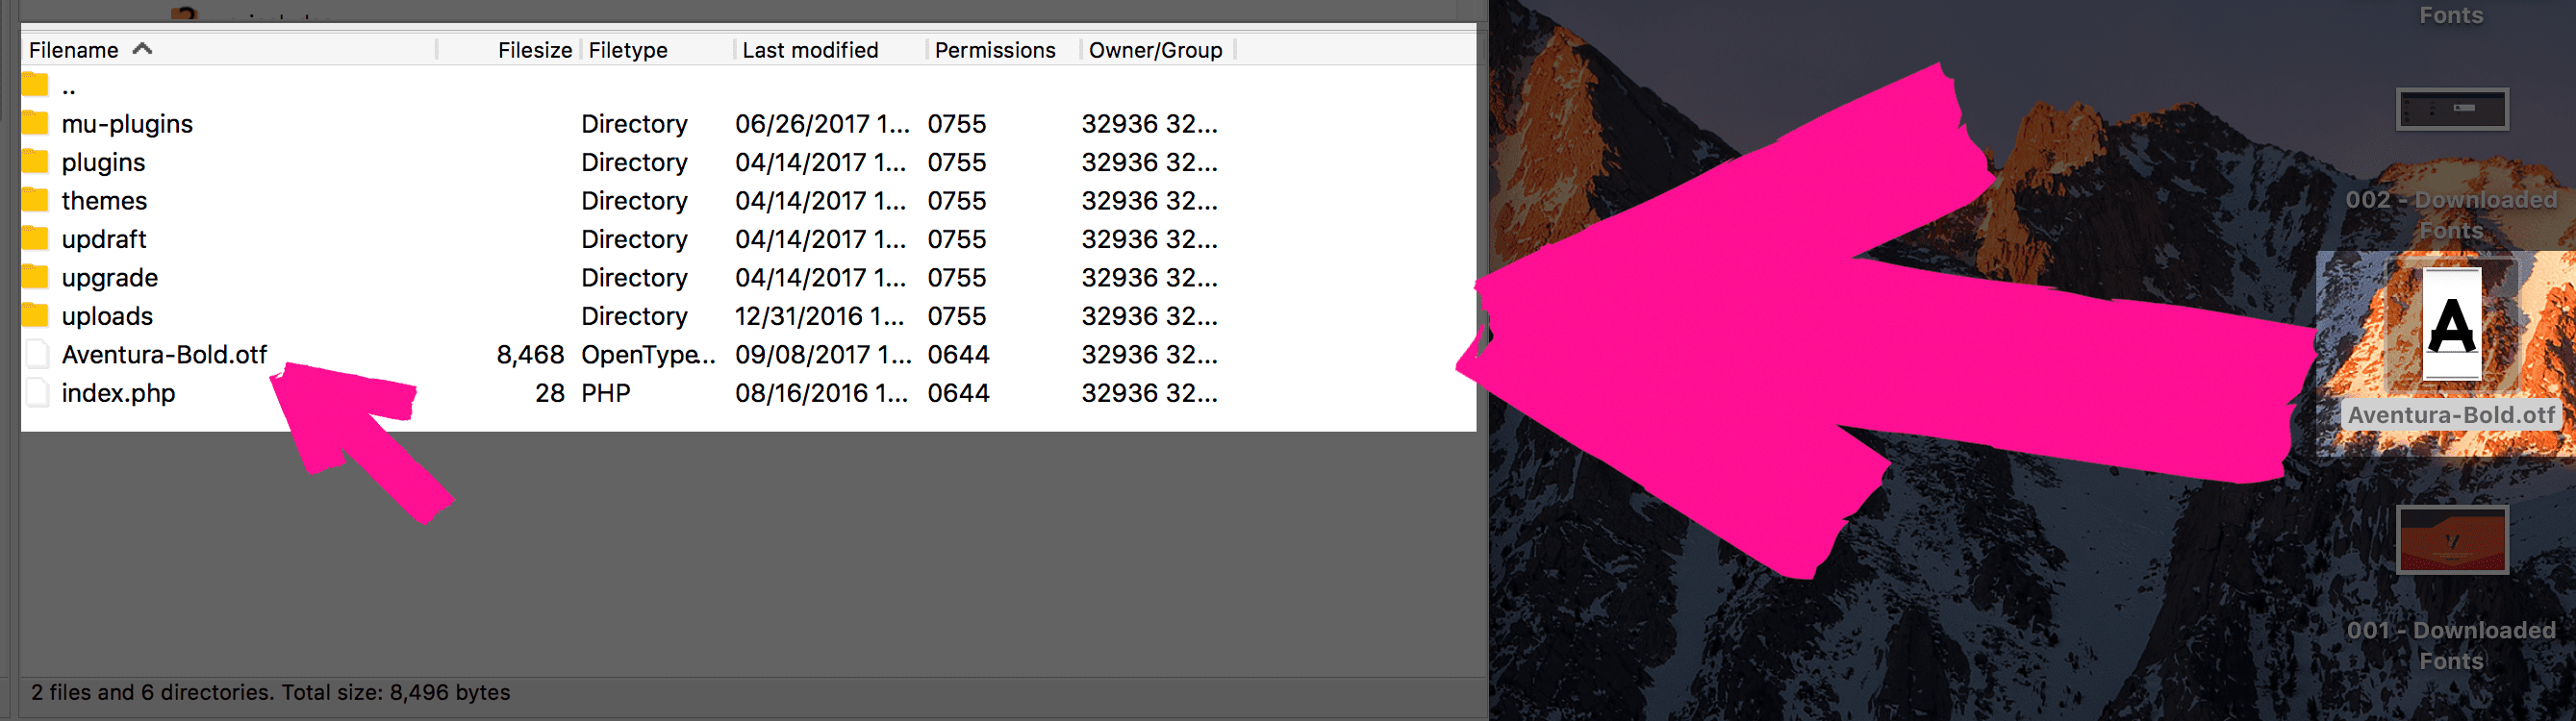
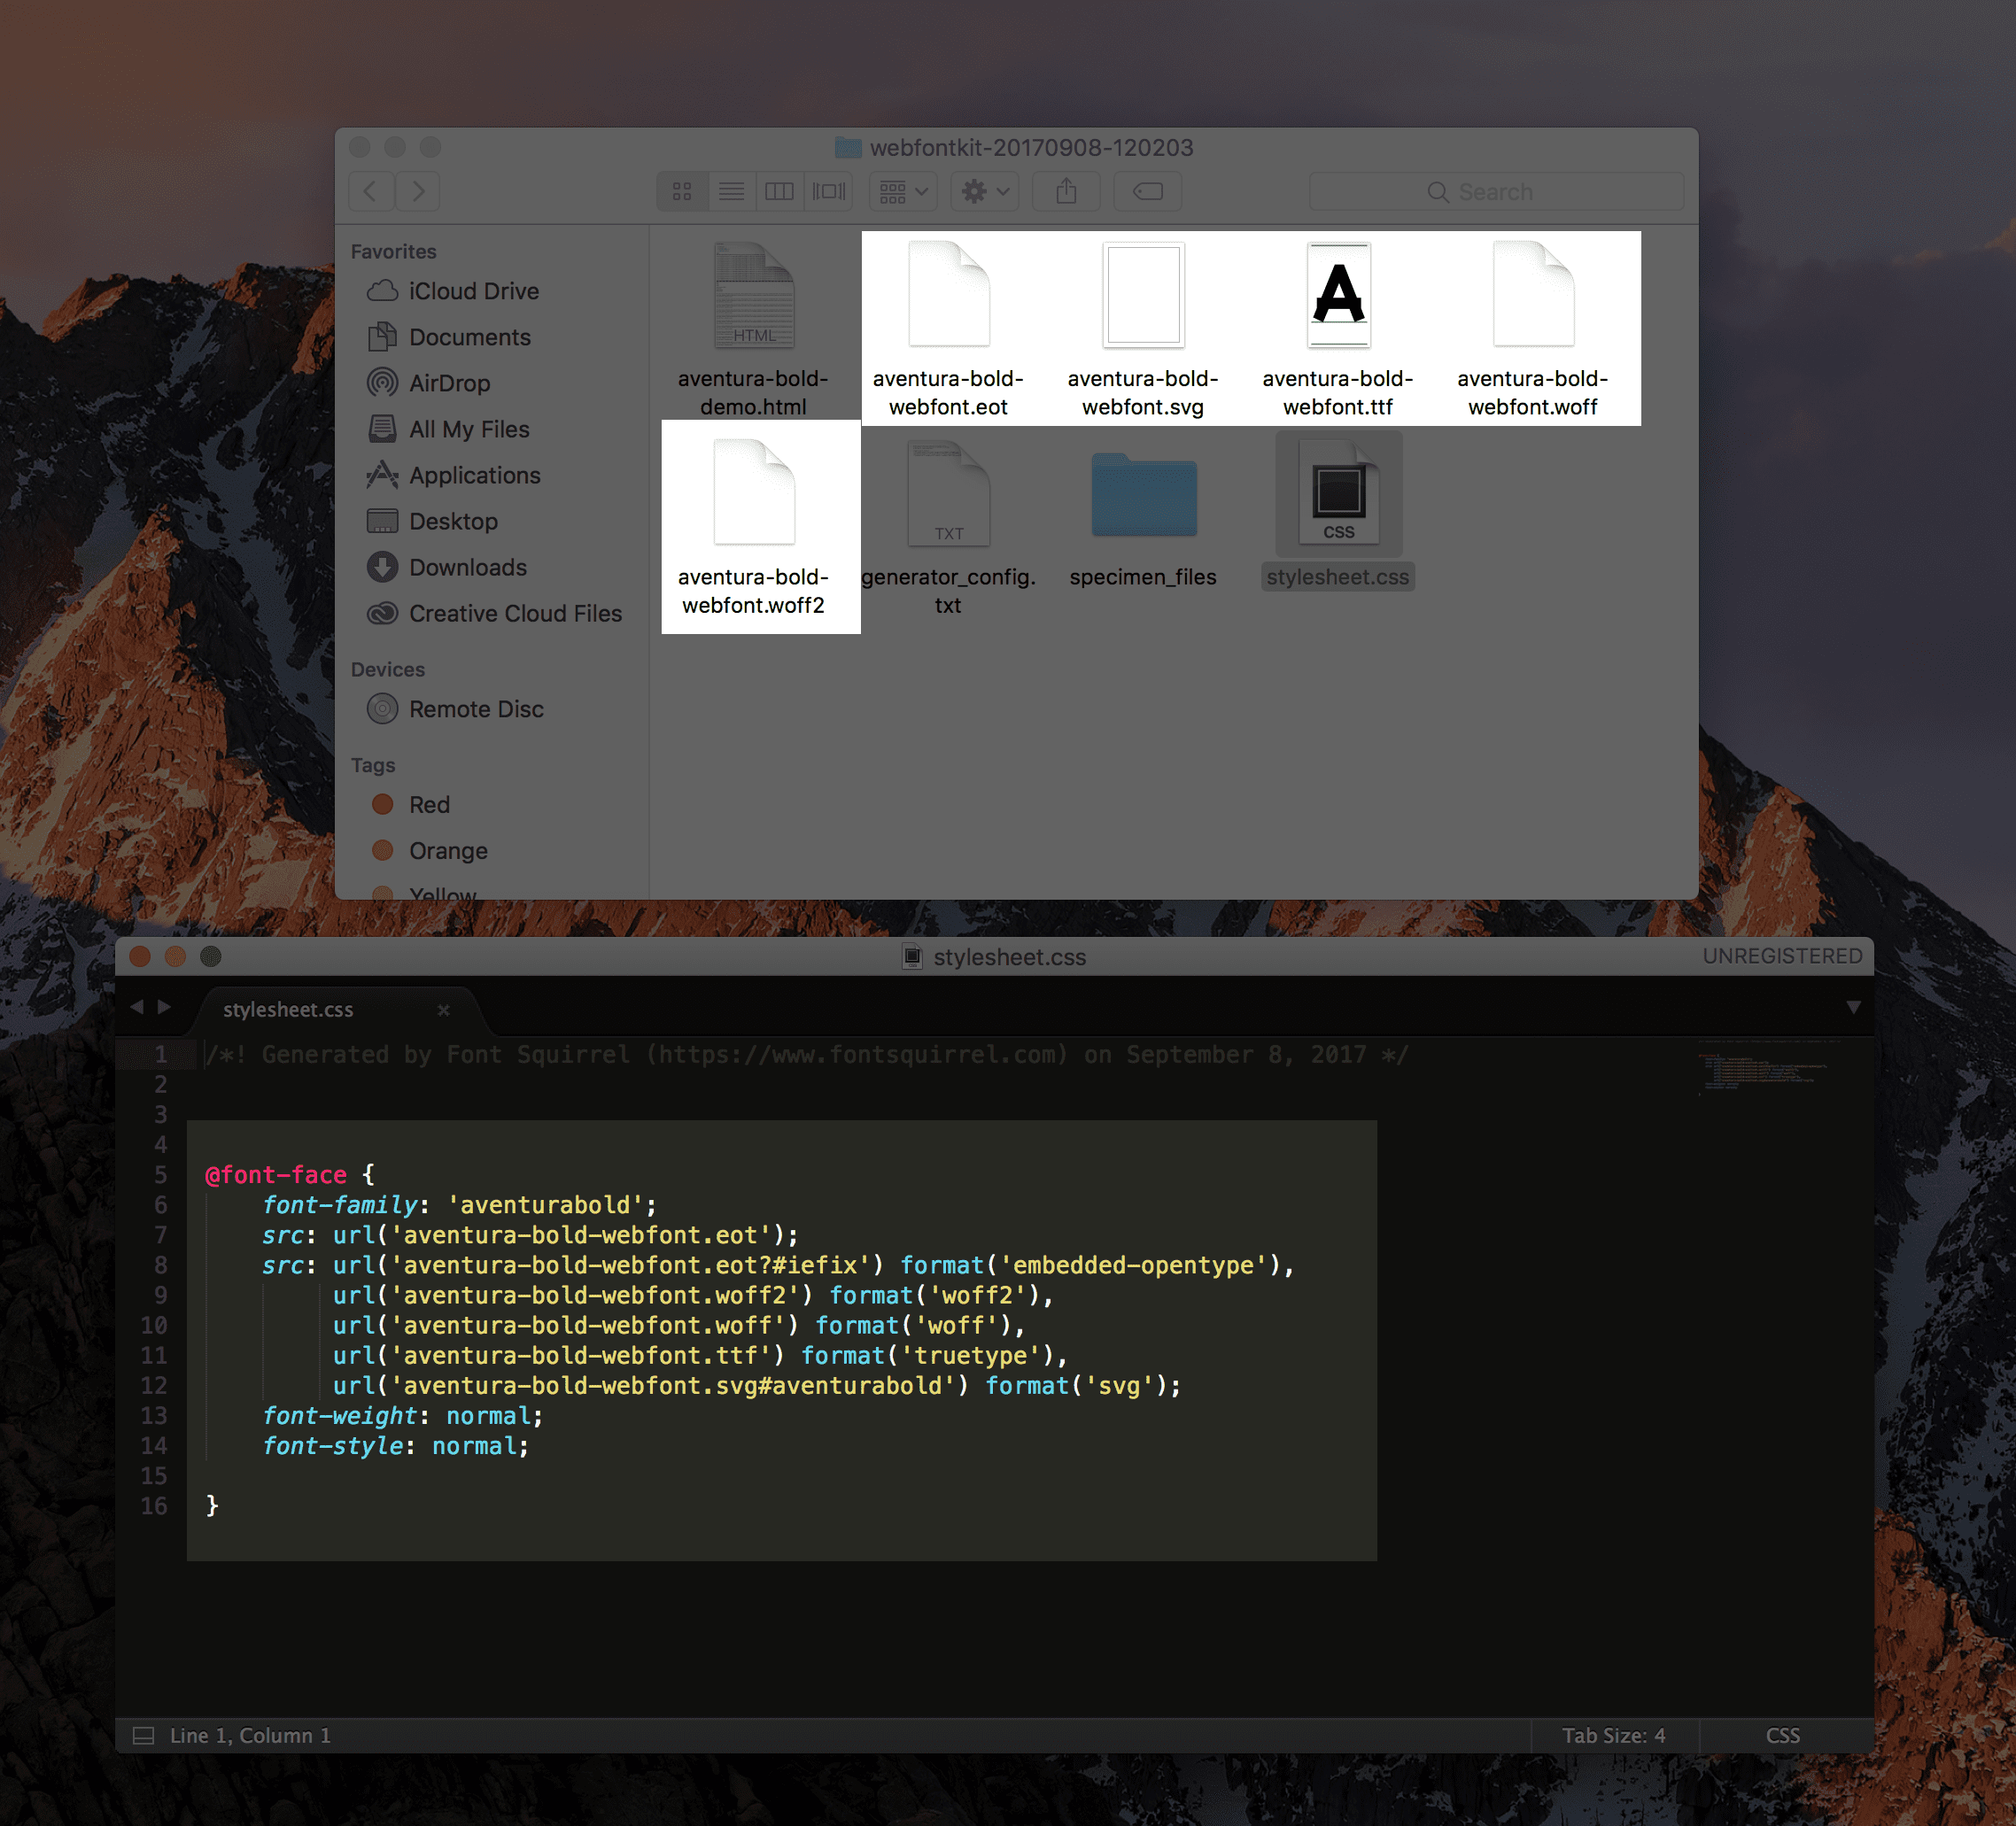
If you used the FontSquirrel tool we discussed above, you will do this for all of the font files you downloaded from them as well. Just drag and drop them into wherever you want to store them.
Using Your Font with CSS
Your font is now uploaded and safely snuggled into its warm, comfy wp-content blanket. It’s time to add the needed CSS import to your theme.
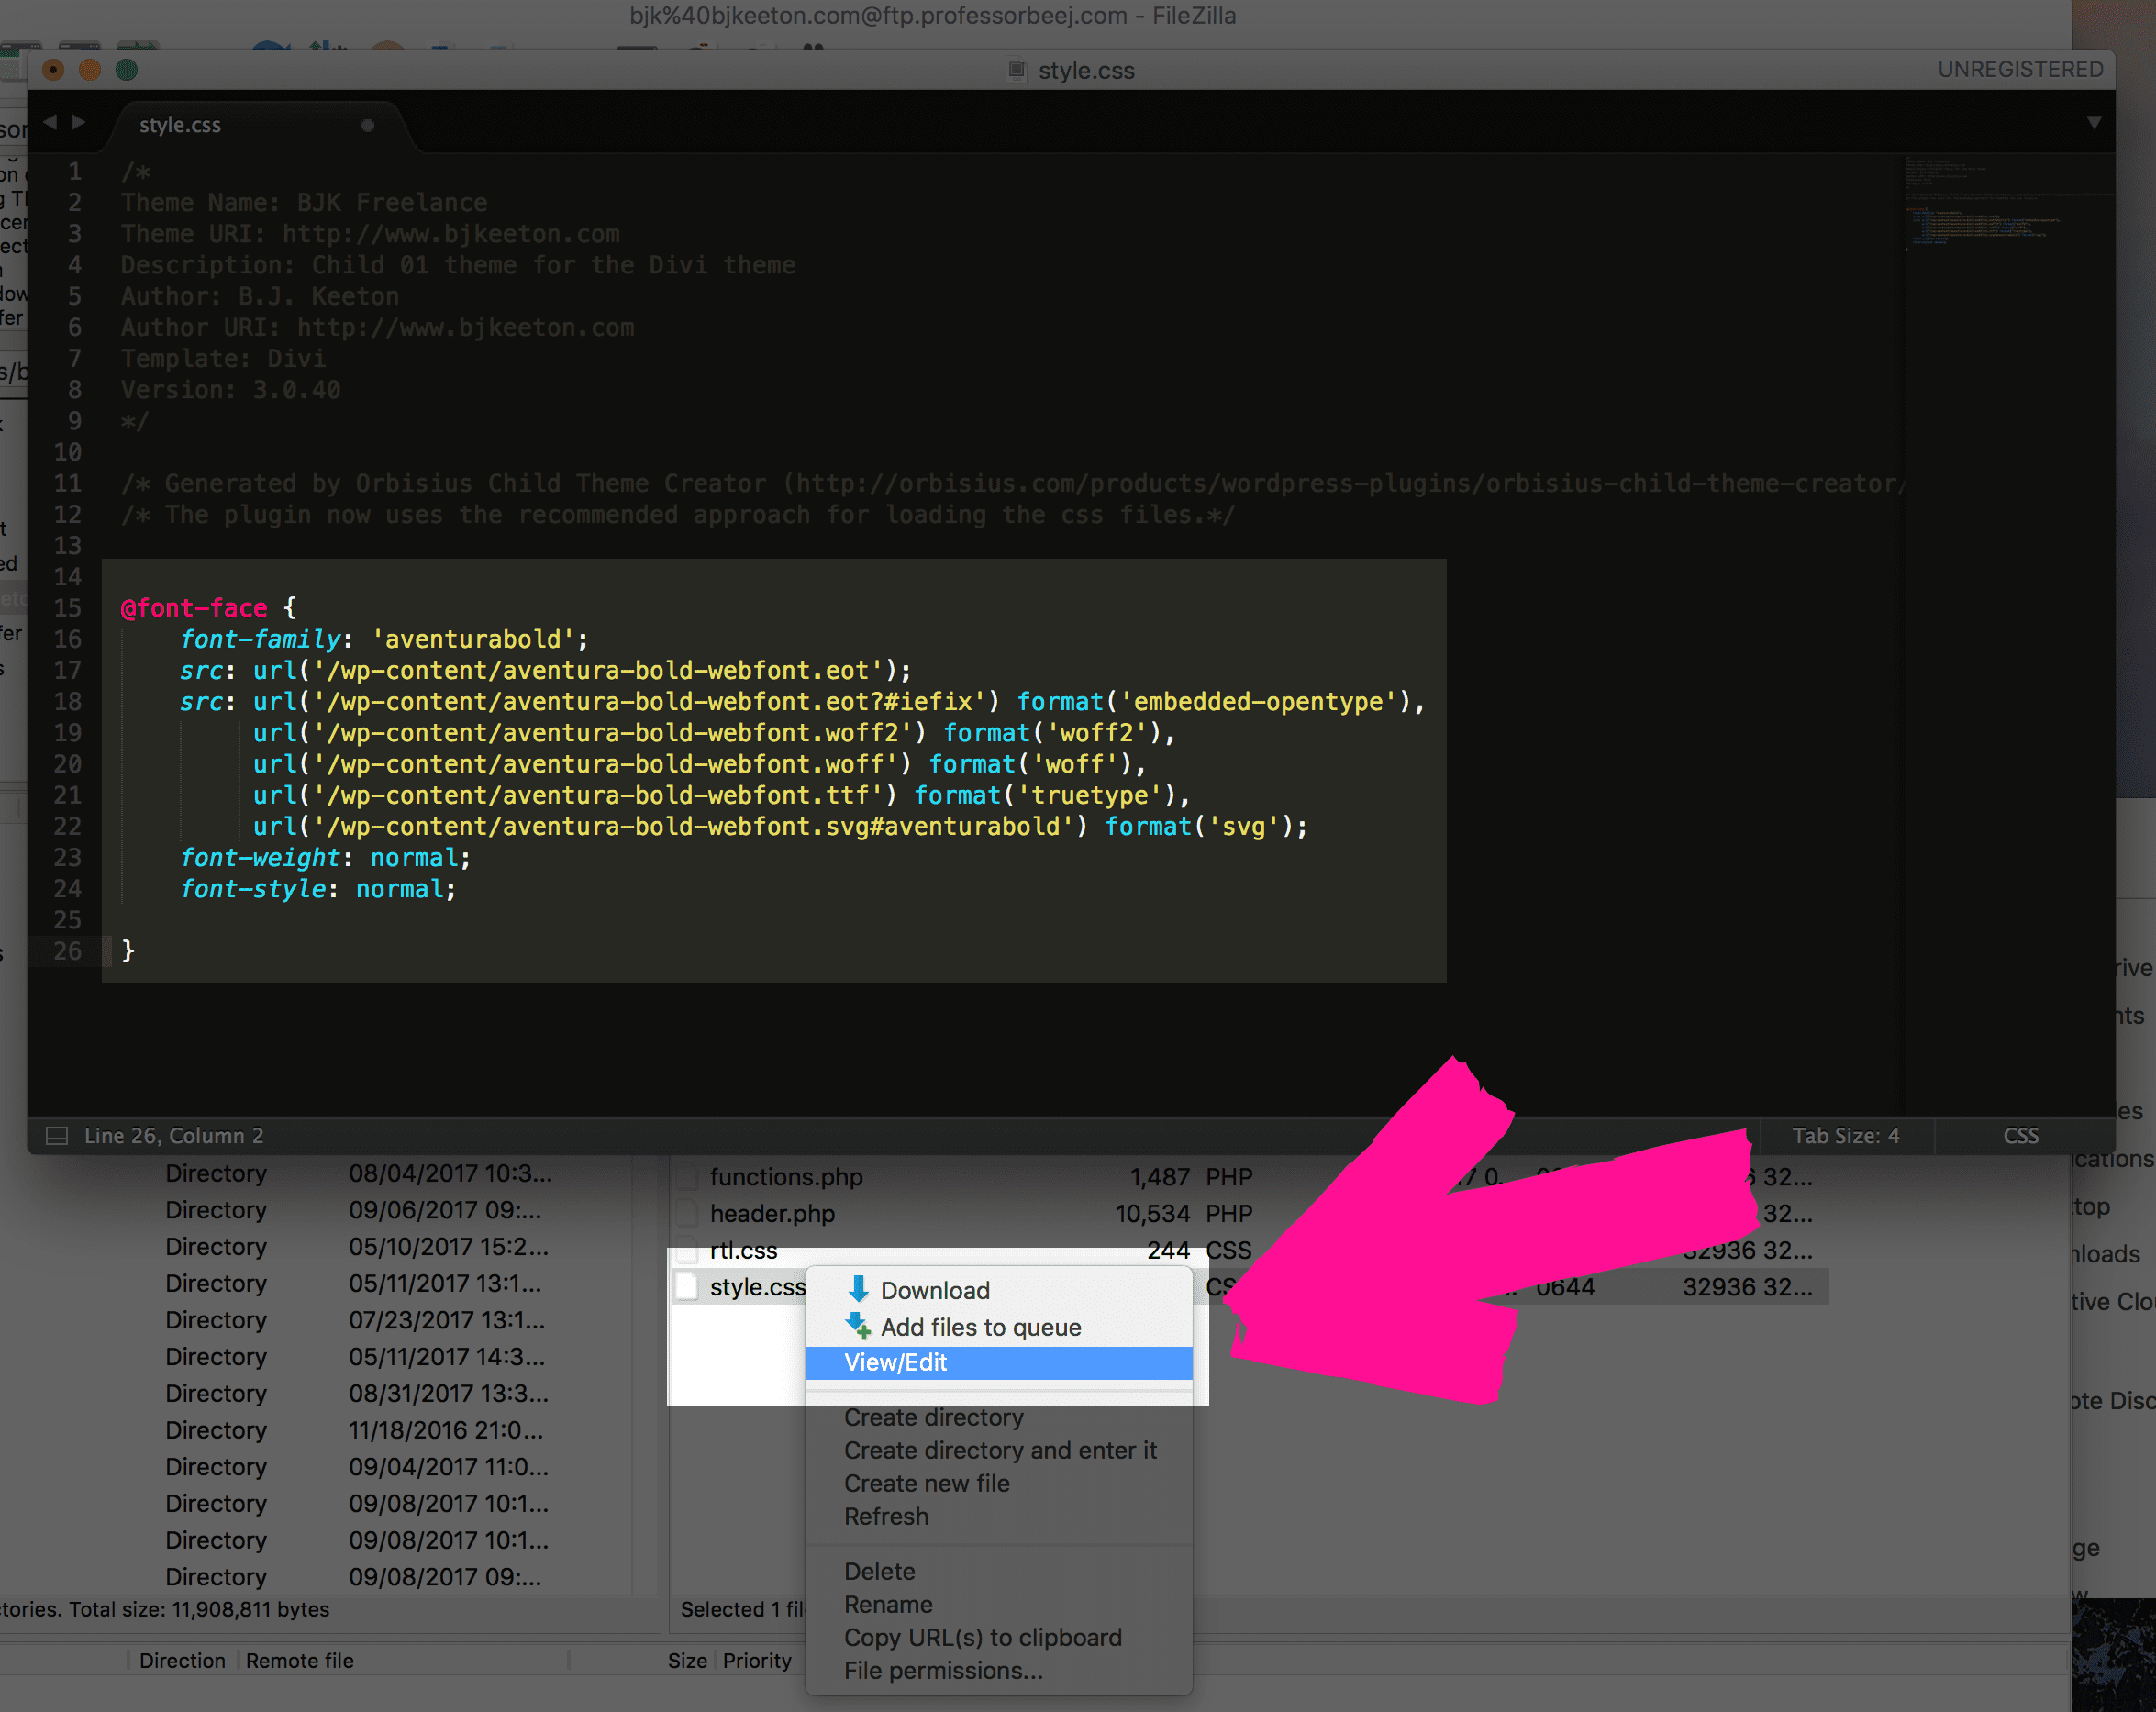
Head to your child theme’s directory (you are using a child theme, right?) in your FTP client and find the style.css file, right-click it, and select View/Edit to bring it up in your default text editor.
If you don’t have a child theme, use the Orbisius Child Theme Creator to do it mega-ultra quick. You can delete the plugin afterward. I love this thing.
@font-face
The code we use comes directly from FontSquirrel (you can write your own or copy/paste the example below), and all I changed was the URL upload path to include /wp-content. Everything else is what the webfont generator provided.
All this @font-face script does is tell your website’s stylesheets, “hey, dude, I’m putting this new font over here if you want to use it sometime.” You know, kind of like you do when you bring cupcakes home and tell the people you live with.
Without @font-face, if you try to call font-family: ‘aventurabold’; by CSS, your site won’t be able to find it because it’s never been told where you’re keeping it.
@font-face {
    font-family: 'aventurabold';
    src: url('https://cdn.elegantthemes.com/blog/wp-content/aventura-bold-webfont.eot');
    src: url('https://cdn.elegantthemes.com/blog/wp-content/aventura-bold-webfont.eot?#iefix') format('embedded-opentype'),
         url('https://cdn.elegantthemes.com/blog/wp-content/aventura-bold-webfont.woff2') format('woff2'),
         url('https://cdn.elegantthemes.com/blog/wp-content/aventura-bold-webfont.woff') format('woff'),
         url('https://cdn.elegantthemes.com/blog/wp-content/aventura-bold-webfont.ttf') format('truetype'),
         url('https://cdn.elegantthemes.com/blog/wp-content/aventura-bold-webfont.svg#aventurabold') format('svg');
    font-weight: normal;
    font-style: normal;

}
Save the file, and since you opened it to edit through the FileZilla, you will get a dialogue asking if you want to replace the one on the server. Your answer is, obviously, yes.
Now all you have to do is go into your custom.css (or if you use Divi, Divi -> Theme Options -> Custom CSS in your WP dashboard’s navigation pane.)
You just add the CSS styling in like you would for any other font. I simply replaced the ‘Roboto’ and ‘Exo’ Google Fonts I was using with ‘aventurabold’, and things were good to go (thanks to the @font-face import above).
body {
    font-family: "aventurabold", arial, sans-serif;
    font-size: 18px;
    line-height: 28px;
    color: #ffffff;
    text-transform: uppercase;
}

h1, h2, h3, h4, h5, h6 {
    color:  #fff;
    font-family: 'aventurabold', sans-serif;
    font-weight: 700;
   text-transform: uppercase;
}
The Fruits of our Labors
Here’s what it looked like before:
And here’s what happened after I added Aventura to the CSS:

Hooray! It works! Good job! Go us!
Lookin’ Good, Friendo
Like Captain Malcolm Reynolds once famously said, “We’ve done the impossible, and that makes us mighty.” Well, okay, so uploading a font and importing it via CSS may not quite amount to having done the impossible, but you’ve certainly done something many WordPress users wouldn’t dare think of doing: adding core functionality without a plugin.
And that, my friends, does indeed make you mighty.
So what’s your favorite font to use on the web that’s not a Google Font? Tell me in teh comments!
Article thumbnail image by 32 Pixels / shutterstock.com
The post How to Use Downloaded Fonts in WordPress without a Plugin appeared first on Elegant Themes Blog.