
It is always a great idea to create different versions of your logo with different colors and sizes. For example, you should probably have a dark and light version of your logo so that it will look great on different background colors. And having a smaller (less vertical and more horizontal) version of the logo for those cramped areas of your website. One of the best places to use a different version of your logo is on your fixed (or sticky) header.
In many cases, your fixed header will need a different style than your main header. If you keep the same logo, you are limited in how to style your fixed header. This is where having a custom logo comes in handy. With a separate logo customized specially for the fixed header, you can style it however you want. This give you more control over the design of your site.
In this post I’m going to show you how to:
- Switch your logo for a different one when your fixed header is active. (This can be done with a single line of CSS)
- Invert the color of your logo on your fixed header.
- Add a cool transition effect when switching your logo on the fixed header.
- Switch and move your centered header logo to the default (left aligned) layout on your fixed header.
Let’s get started.
Sneak Peek
Here is a little sneak peek of what we will accomplish in this tutorial.
Here is what a simple logo switch looks like.
![]()
Here is the logo switch with a transition effect.
Here is the logo changing positions from the centered header style.
The Setup
Before you do anything else, make sure you complete the following:
- Install the latest version of Divi.
- Implement an active Divi Child Theme. If you need help with setting up a child theme, it is covered in this post. If you need additional help. Please contact our support team.
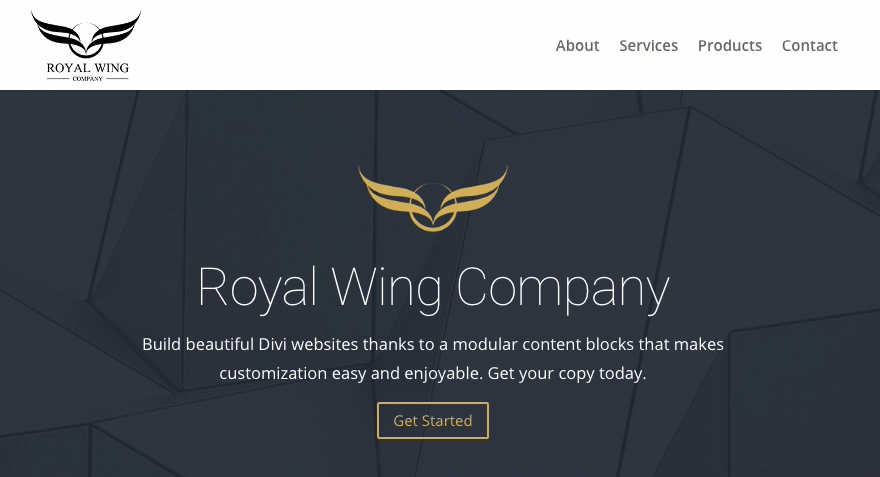
- Make two versions of your logo that are both 200×131 and add them to your WordPress Media library. One logo will be used for the main header and one will be used for your fixed header. If you can, make the fixed header version of the logo more horizontal so that it won’t get smushed vertically on the smaller fixed header.Here is an example of my main header logo I’m using.
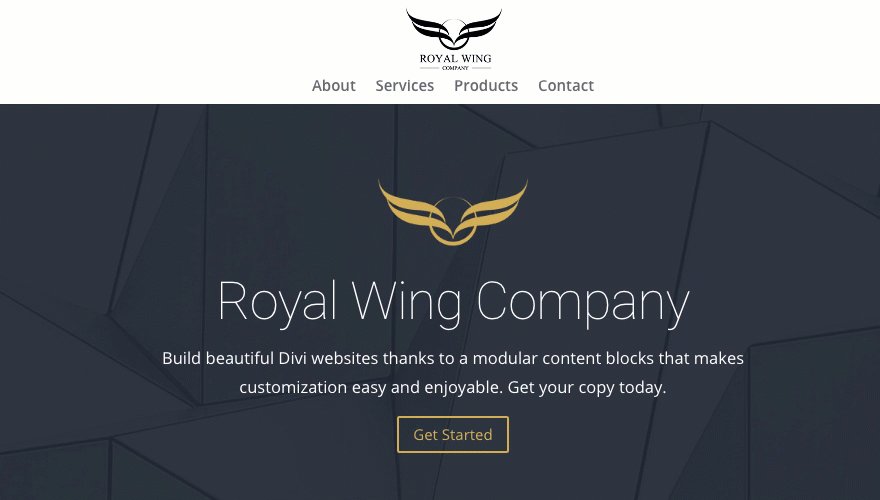
 Here is an example of my fixed header logo. Notice I cropped out the text in order to make a simpler and more horizontal logo that fits nicely on a header with less height. It’s not likely that anyone would be able to read that text anyway and the brand is still being represented.

- Setup your primary menu with menu items.
Once you have completed these steps, you are ready to begin.
Switching the Logo on Your Fixed Header using CSS
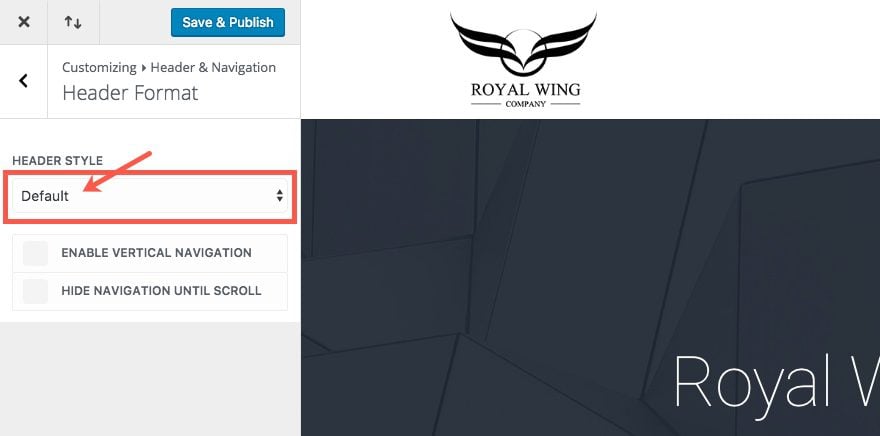
Before we get to our custom CSS, let’s setup our menu settings within the theme customizer. From the backend of your WordPress site, go to Theme Customizer > Header & Navigation > Header Format and make sure you have the default header style selected.
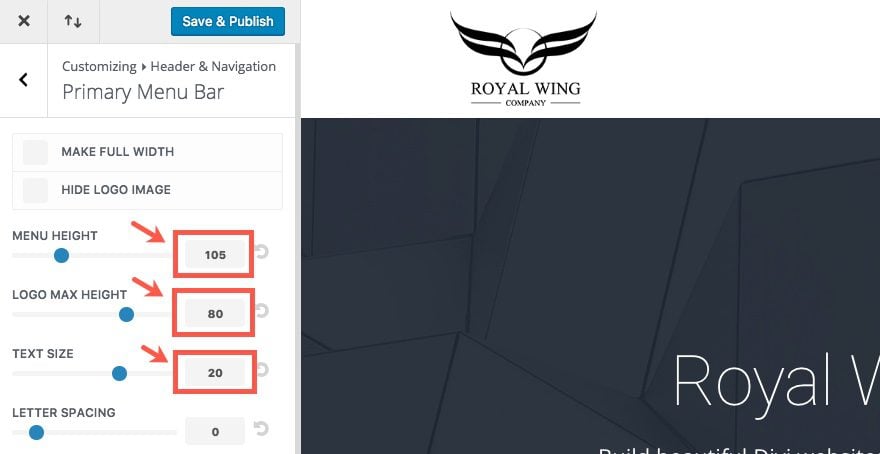
Then go back to the Header & Navigation settings in the Theme Customizer. Select the Primary Menu Bar and update the following:
Menu Height: 105
Logo Max Height: 80
Text Size: 20
Now go back to Header & Navigation. Select Fixed Navigation Settings and update the following:
Fixed Menu Height: 60
Text Size: 20
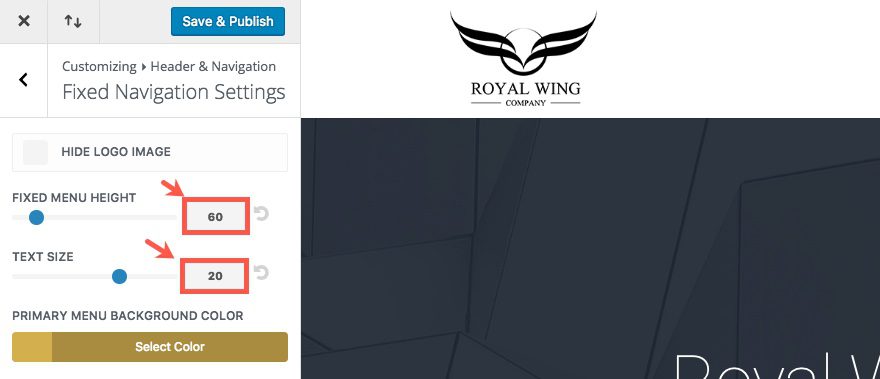
You can add the rest of your settings to fit the design of your site. The menu and logo heights may need to be adjusted according to your needs. However, I suggest you keep these settings if you are wanting to add the transition effect so that the sizing is accurate. You can always come back and change it later.
Insert CSS Snippet to Switch Logo on Fixed Header
One of the simplest ways to switch your logo image with another on the fixed header is to use the CSS property “content”. If you are familiar with CSS, this is normally what is used when adding content to a :before or :after pseudo element. In this case we are going to use it to insert new content (your logo image) to replace the current logo image.
To do this, go to Theme Customizer > Additional CSS and insert the following CSS.
/*********************************
change logo for fixed header (quick and easy way)
**********************************/
.et-fixed-header #logo {
content: url(INSERT NEW LOGO IMAGE URL);
}
![]()
Now replace the text that says “INSERT NEW LOGO IMAGE” with your actual logo image.
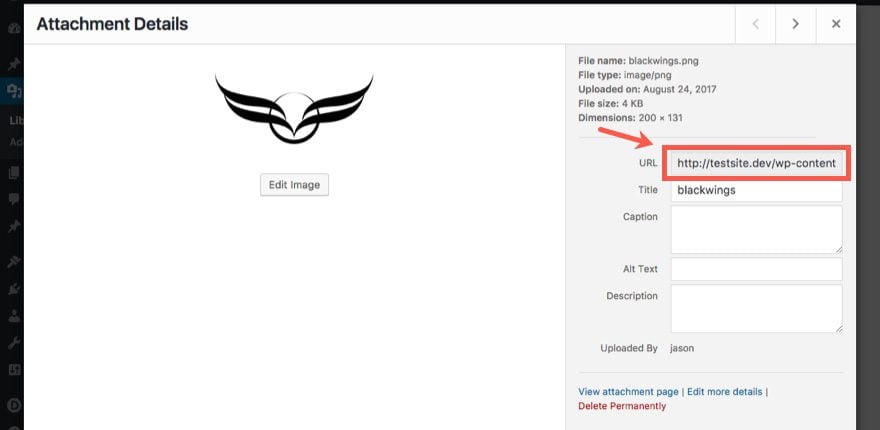
To get the URL, go to your media library from the WordPress Dashboard and click on the image you want to add. You can find the URL in the top right of the screen that pops up.
That’s it. This simple solution will replace your logo with a new one only when the fixed header is active as you scroll throughout the page. The default logo will return when you scroll back to the very top of the page.
![]()
Inverting the Color of Your Logo
If you are only looking to add a dark or light version of the same logo on the fixed header, you may like this solution.
Using the invert CSS property, you can invert the color of your logo with one a few lines of CSS. For example, if your logo is black, inverting the logo color would turn it white. And if the logo is white, it will invert to black. To add this style to your logo, go to Theme Customizer > Additional CSS and add the following CSS (make sure you delete or comment out previously added CSS):
/*********************************
Invert Logo color on fixed header
*********************************/
.et-fixed-header #logo {
-webkit-filter: invert(100%);
filter: invert(100%);
}
Check out the result. This is a black logo being inverted to a white version.
![]()
Adding a Transition Effect When Switching Your Logo on the Fixed Header
You are probably wondering why I’m going to cover another (more robust) way to switch your logo on a fixed header. The main reason is so that we can add a cool transition effect to the logo when it “transitions” to the fixed header. To do this we need both logo images next to each other for styling.
Adding Your New Logo to the Header.php File
To add another logo image to your header, we need to add it to the header.php file. Using an FTP Client (like FileZilla), go to the root of your Divi Theme files and make a copy of the header.php file.
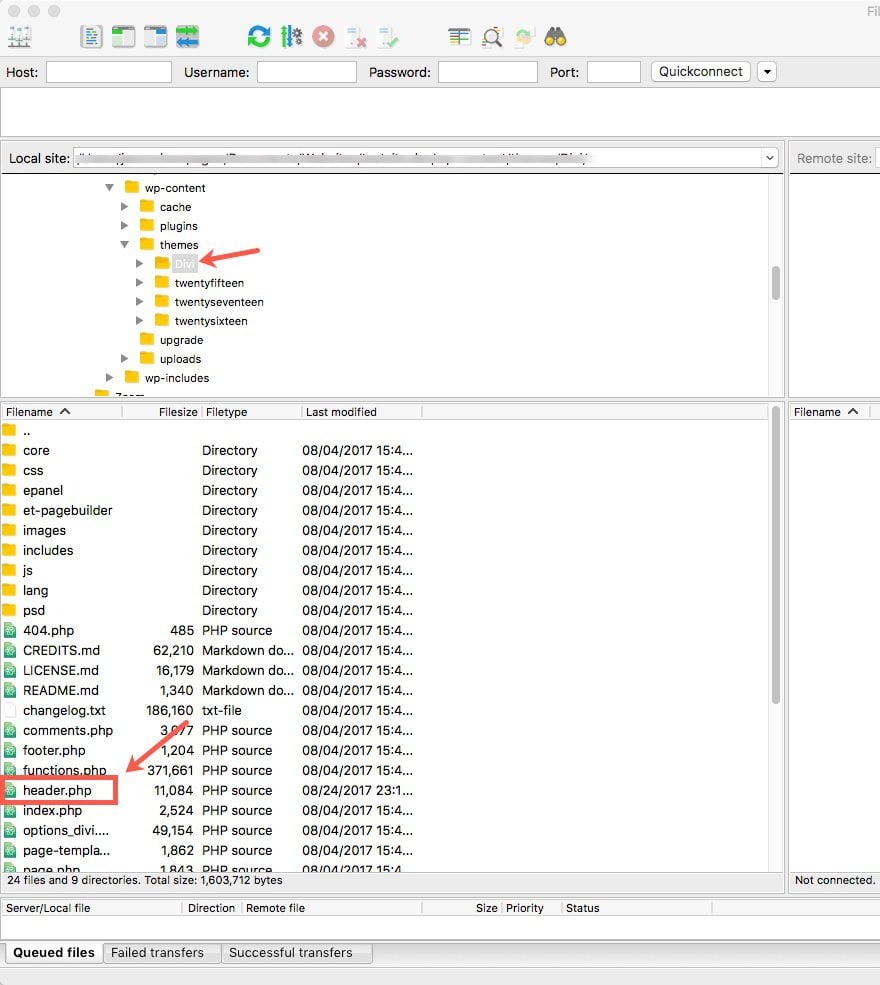
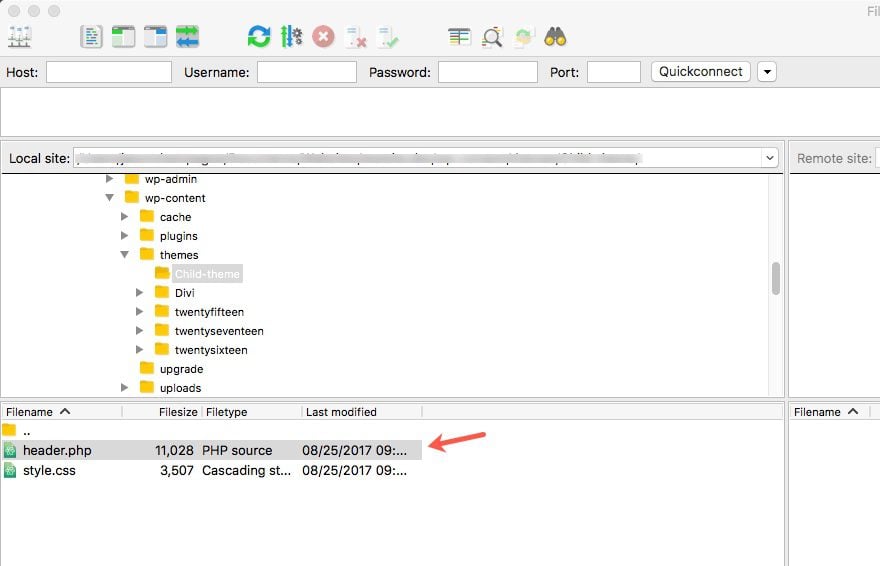
Paste the copy of the header.php file into the root of your child theme folder.
Next, using your preferred text editor, open the header.php file. Locate the html code for the link that holds the logo image wrapped in the div with the class “logo_container”.
<a href="<?php echo esc_url( home_url( '/' ) ); ?>">
<img src="<?php echo esc_attr( $logo ); ?>" alt="<?php echo esc_attr( get_bloginfo( 'name' ) ); ?>" id="logo" data-height-percentage="<?php echo esc_attr( et_get_option( 'logo_height', '54' ) ); ?>" />
</a>
We are going to add a similiar snippet of code to display another image in your header. Copy and paste the following code directly under it.
<a href="<?php echo esc_url( home_url( '/' ) ); ?>">
<img src="INSERT NEW LOGO IMAGE URL" alt="<?php echo esc_attr( get_bloginfo( 'name' ) ); ?>" id="logo" class="second-logo" data-height-percentage="<?php echo esc_attr( et_get_option( 'logo_height', '54' ) ); ?>" />
</a>
Notice this is an updated copy of the original code above it with two differences. First, it has a new image source URL that you will need to add. And second, it a class called “second-logo”.
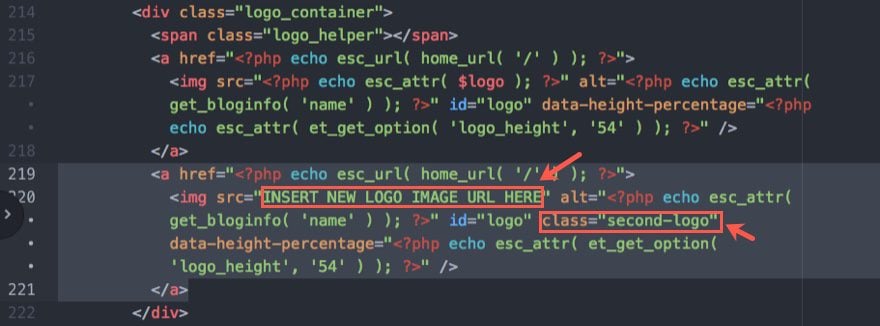
From your WordPress dashboard, go to your media library and get the url for the new logo image you want to add.
Then go back to your header.php file. Find the code snippet you just created and replace the text that reads “INSERT NEW LOGO IMAGE URL HERE” with the actual image URL.
![]()
Save your header.php file.
Now you have two logos that will display side by side on your site. Chances are you don’t want to leave it like that so let’s add the necessary Custom CSS to make our transition effect.
Adding a Cool Transition when the Logo Switches on Your Fixed Header
Go to Theme Customizer > Additional CSS and delete (or comment out) the code from the previous section of this post (if applicable). Then add the following Custom CSS:
@media all and (min-width: 980px){
/*********************************
show, hide, and transition logos for primary and fixed nav;
must have second logo in header.php file for this to work
**********************************/
#logo {
opacity:1;
display:inherit;
margin: 0 0 0 0;
-webkit-transition: all .4s ease-in-out;
-moz-transition: all .4s ease-in-out;
transition: all .4s ease-in-out;
}
#logo.second-logo {
opacity:0;
margin: 0 0 -200px -130px;
-webkit-transition: all .4s ease-in-out;
-moz-transition: all .4s ease-in-out;
transition: all .4s ease-in-out;
}
.et-fixed-header #logo {
opacity: 0;
margin: -200px 0px 0 0px;
-webkit-transition: all .4s ease-in-out;
-moz-transition: all .4s ease-in-out;
transition: all .4s ease-in-out;

}
.et-fixed-header #logo.second-logo {
opacity:1;
margin: 0 0 0 -90px !important;
-webkit-transition: all .4s ease-in-out;
-moz-transition: all .4s ease-in-out;
transition: all .4s ease-in-out;
}

/*********************************
hides overflow on header container so logo doesn't show outsite header on transition
*********************************/
#main-header {
overflow: hidden;
}
}
I’ve commented the CSS code in order to let you know what the code is doing. In short the CSS is decreasing and increasing the opacity of each of the logos while moving them outside of the header. Thus, you have a pretty cool transition effect for you logo when going to your fixed header.
Changing the Location of Your Centered Header Logo to the Left for Your Fixed Header
I you like the Centered Header Style for displaying your header, you may want to check the location of that logo on your fixed header. For me, I prefer to have the default header style (with the logo left-aligned) on my fixed header. The main reason is because having the logo at the top of my navigation tends to make the fixed header a little too tall when scrolling through to view a page.
To make the switch from a centered logo to a left-aligned logo, you can add the following custom CSS in the Additional CSS box in the Theme Customizer. First add the code to switch the logo the quick and easy way:
/*********************************
change logo for fixed header (quick and easy way)
**********************************/
.et-fixed-header #logo {
content: url(INSERT NEW LOGO IMAGE URL HERE);
}
Don’t forget to add your logo image URL.
Then add the following to adjust the placement of the logo:
@media all and (min-width: 980px){
/*********************************
change centered logo on centered header style to default layout when fixed header is active
*********************************/
.et_header_style_centered header#main-header.et-fixed-header .logo_container {
float: left;
width: 20%;
}

.et_header_style_centered #main-header.et-fixed-header div#et-top-navigation {
width: 80%;
float: right;
height: 70px;
line-height: 70px;
text-align: right;
}
.et-fixed-header #top-menu-nav {
float: none!important;
}

.et_fixed_nav #et-top-navigation {
-webkit-transition: none !important;
-moz-transition: none !important;
transition: none !important;
}
}
Note: Make sure you take out any previous CSS from this post which would conflict.
That’s it. Check out the result.
In Closing
It is hard not to be proud of a good logo. So, don’t settle for a small ineligible version or, even worse, hiding your logo on your fixed header. Switch it out for a custom version with a smooth transition that your clients will appreciate.
Coming Up
By default, Divi doesn’t include a fixed header on mobile. But adding one is really simple. In my next post I will show you how to add a custom fixed header with a different logo on mobile. Here is a little sneak peek.
I’m looking forward to it.
Don’t forget to post your comments below. If you have any issues related to setting up and editing your child theme files, please contact our support team.
Cheers.
The post Switching Your Logo on a Fixed Header in Divi appeared first on Elegant Themes Blog.