
Need to give your WordPress content a grammar check? No matter how much of a stickler you are when it comes to grammar and spelling, you’re bound to let a few mistakes slip through over the course of your career.
And when you consider that spelling and grammar mistakes actually make you seem less credible to your readers, such a situation is definitely something you want to avoid. One of the ways you can do that? Turn to a friendly robot for help with proofreading.
In this post, I’m going to dig into three different ways you can give your WordPress website a grammar check. While none of them are a complete replacement for manual proofreading, they’ll help you catch the most obvious errors right away.
1. Jetpack Spelling and Grammar Module
While there are several grammar check plugins listed at WordPress.org, most of them are poorly rated and/or out of date. The one shining star? Good ‘ole Jetpack.
In addition to many other goodies, one of the modules packed into Jetpack is a grammar check tool. Once enabled, you can instantly check spelling and grammar with the click of a button.
What’s especially neat about Jetpack’s spelling and grammar module is that you can turn on checking for specific style errors. So if you’re a huge fan of passive voice (which I don’t recommend), you can turn off passive voice checking to avoid Jetpack nagging you about your use of passive use.
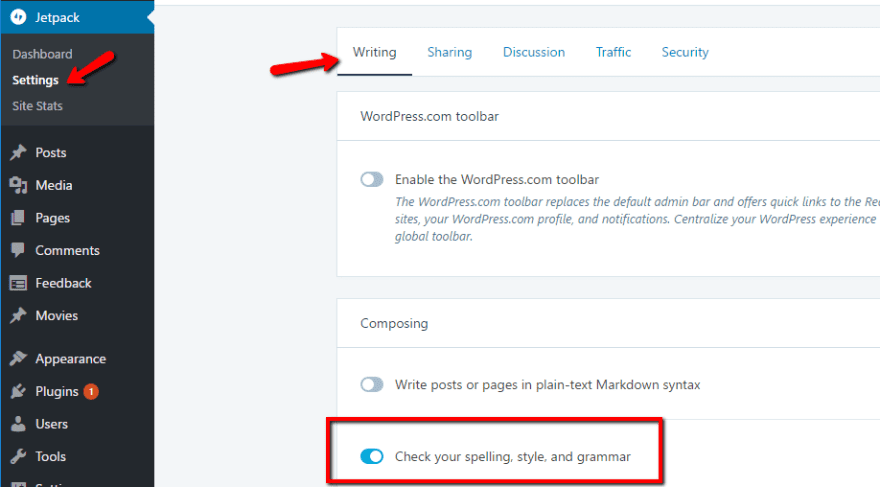
Assuming you already have Jetpack installed and connected to your WordPress.com account, you can enable or disable the spell check feature by heading to Jetpack → Settings → Writing and turning the Check your spelling, style, and grammar option on:
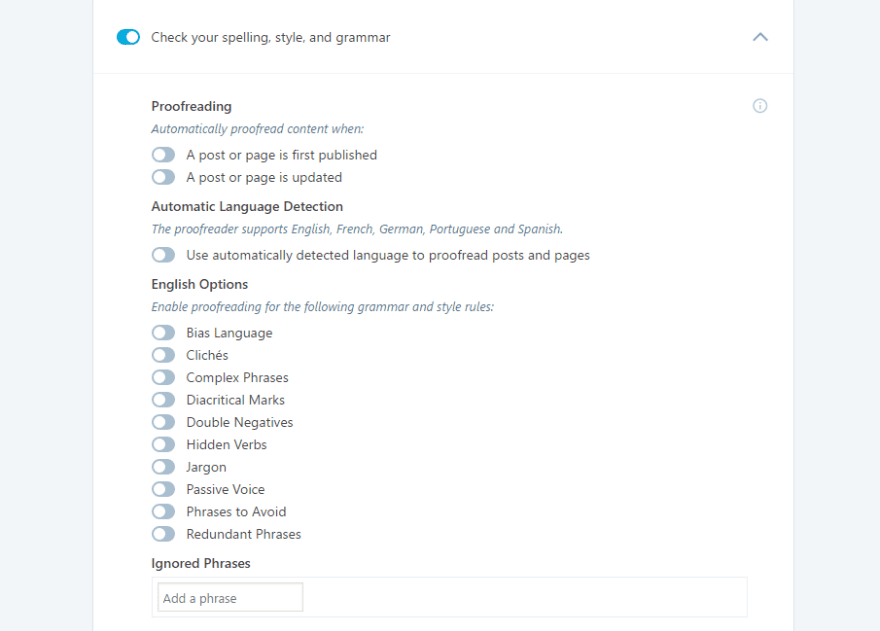
Once you turn on the module, you can configure checks for specific grammar and style rules in the options below:
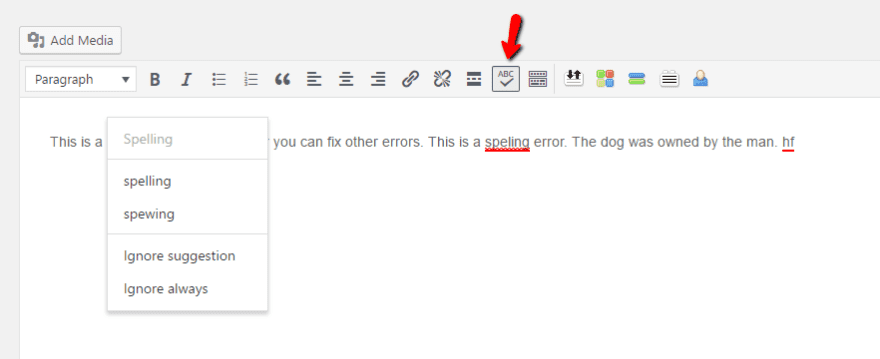
Then, in your WordPress Editor, you just need to click the ABC button to turn on spell checking:
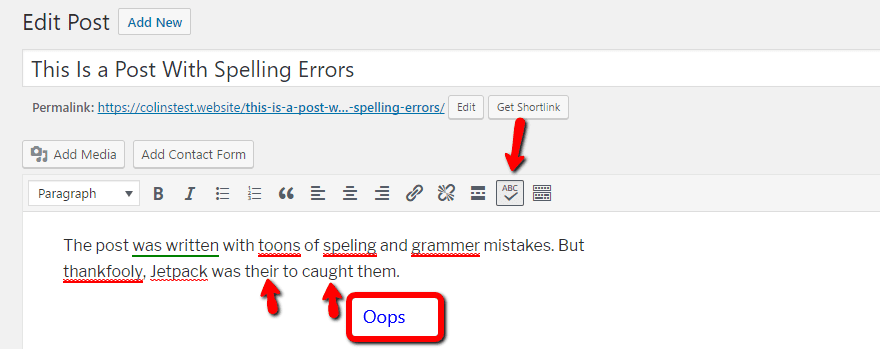
Just be aware – Jetpack might not catch everything, as evidenced by the screenshot above.
You can also see that Jetpack uses different colors to mark mistakes, much like desktop programs. Here’s what the various colors mean:
- Red: spelling errors and misused words.
- Green: grammar mistakes
- Blue: style suggestions
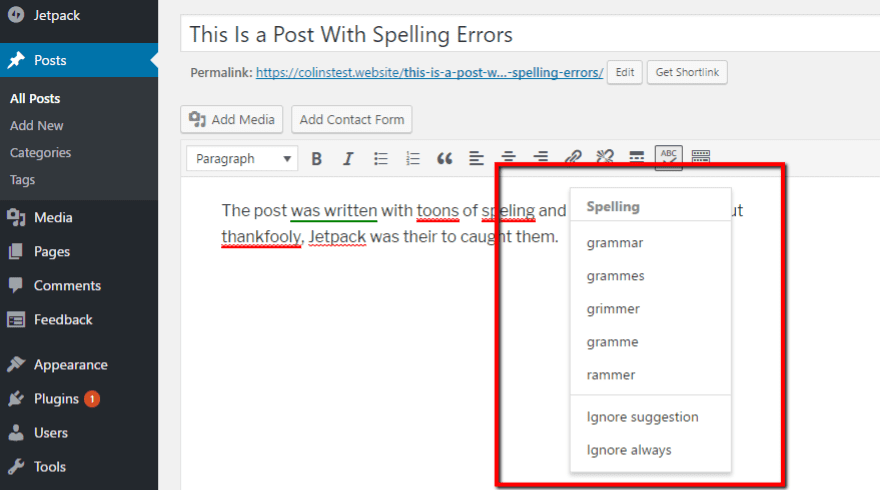
And if you click on a specific error, you’ll get some suggestions, as well as the option to ignore the error:
If you’re already using Jetpack, this is definitely the easiest way to add spell checking to WordPress. Just be aware – Jetpack’s grammar check doesn’t work inside the Divi Builder.
Price: Free | More Information
2. Grammarly Browser Extension
Grammarly is a popular cloud-based spelling and grammar tool. While it’s not a WordPress plugin like Jetpack, it is my go-to tool because it has the most reliability of any grammar tool I’ve tried. That is, it flat out catches more mistakes than most other tools.
And here’s the cool thing:
With the free Grammarly browser extension for Google Chrome or Mozilla Firefox (as well as a native client for Mac), you can actually use Grammarly to proofread any text inside the WordPress Editor:
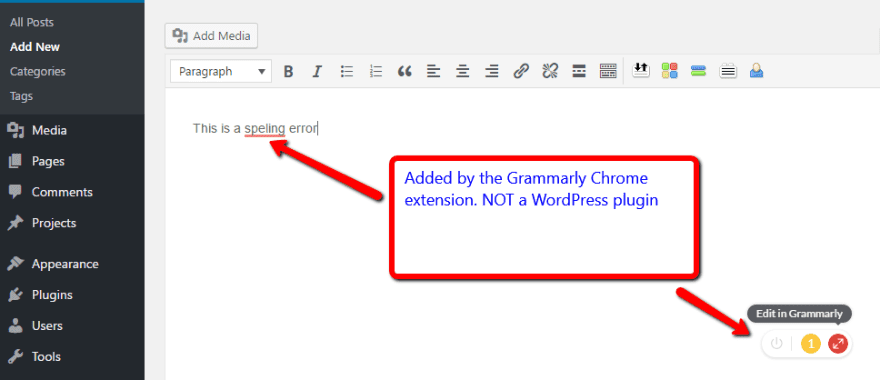
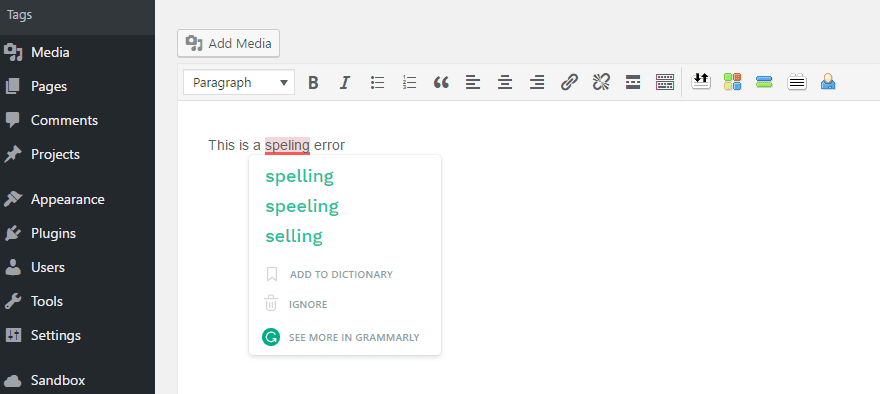
You can fix errors in two different ways. First, you can hover over individual errors to bring up a set of suggestions:
And second, you can bring up every single error in your post by clicking the floating red number icon in the bottom right of the Editor:
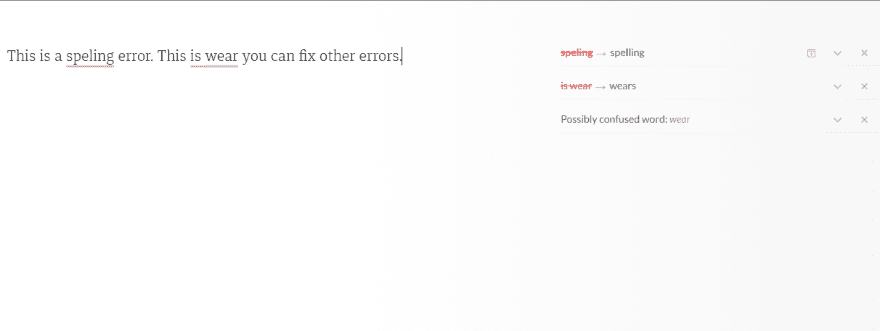
If you correct an error in this popup interface, Grammarly will automatically update the corresponding text in the WordPress Editor.
And here’s what’s really cool if you’re using Divi:
The Grammarly extension even works inside the Divi Builder.
While you can’t run a grammar check on the actual text you see in the Visual Builder, if you open up the Settings popup for a specific text module, Grammarly will mark errors in that interface:
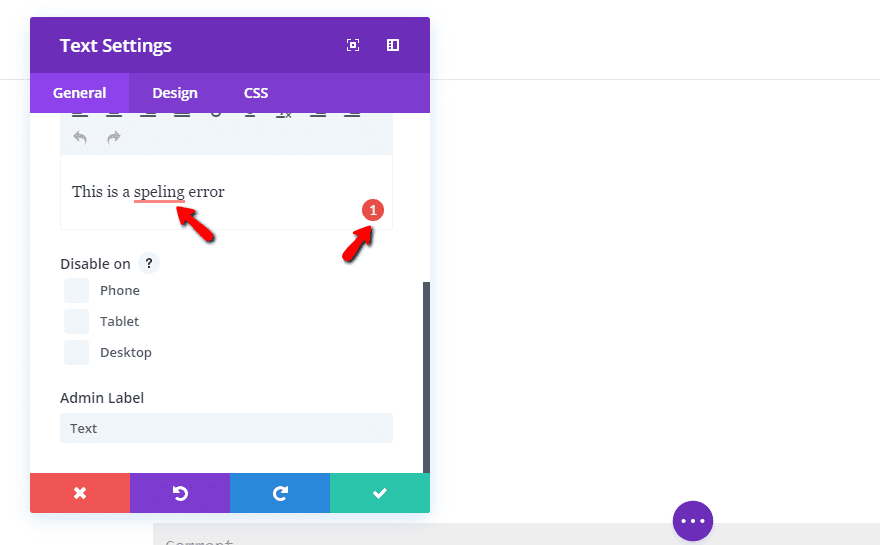
From there, everything is the same as the process I outlined above. Pretty neat!
Price: Free – also a premium plan with more features | More Information
3. TinyMCE Spellcheck
Be aware: This plugin hasn’t been updated in years. While I tested it and didn’t run into any issues – it’s always a good idea to be wary.
TinyMCE Spellcheck is a fork of the even-more-out-of-date After the Deadline plugin, which is the same backend powering Jetpack’s spellcheck module.
To get started with TinyMCE Spellcheck, all you need to do is install and activate the plugin. Beyond clicking the activate button, there’s nothing else to configure.
Then, like the Jetpack spellcheck module, you get an ABC button in the WordPress Editor:
Once you turn on the spell checking function by clicking the ABC button, you can click on individual errors to bring up more options (again – just like Jetpack. Notice a trend?).
So – why pick this plugin over Jetpack if they do pretty much the exact same thing? Well, you get much the same functionality in a more lightweight package. The only thing you’re missing is the ability to toggle on and off specific errors.
One poster at WordPress.org claims TinyMCE Spellcheck loads 20x faster than Jetpack. So unless you’re using other Jetpack modules, that’s a pretty big tradeoff.
Price: Free | More Information
Wrapping Things Up
Checking your spelling and grammar before you publish content just plain makes sense.
Beyond making you seem more credible, using proper grammar might even increase your sales, boost demand for your product or service, and get you plenty of other benefits.
If I had to recommend one of these tools, it would definitely be Grammarly. It has the most thorough checks and will catch mistakes that neither of the other two tools flag.
But, the Grammarly extension can be a tad annoying sometimes because it’s inserting itself into the WordPress Editor after-the-fact. If you find yourself feeling that way, you might want to pick one of the plugins for a more native experience.
In that case, Jetpack is the best option I’ve found. TinyMCE Spellcheck is also good, but the lack of updates over the past three years is worrying…even if it does still function properly right now. Better to be safe and go with the well-supported Jetpack module, even if it does lower your performance a bit when compared to TinyMCE Spellcheck.
Now over to you – what’s your process for catching spelling and grammar mistakes before publishing your content?
Article thumbnail image by focus_bell / shutterstock.com
The post 3 Helpful Tools to Give Your WordPress Content a Grammar Check appeared first on Elegant Themes Blog.