
Divi’s slider module is packed with design options that make it easy to think outside the box and create stunning slider designs. So today, we are going to turn some things around (literally). In the post that follows, we are going to add vertical slider elements to Divi’s slider module. Having a slider with vertical elements (like title text and slide controls) allow visitors to see more slide content and background images in narrower columns (especially on mobile). And the vertical elements add a refreshing twist on the overall design.
To do this, we’ll be using Divi’s transform rotate option to rotate the entire slider and then counter rotate other elements within each slide as needed to create a modern vertical slider design. We’ll start by going over the basic technique. Then we will create a completely unique header design with this vertical slider.
Let’s dive in!
Sneak Peek

Download the Divi Vertical Slider Elements Layout for FREE
To lay your hands on the designs from this tutorial, you will first need to download it using the button below. To gain access to the download you will need to subscribe to our Divi Daily email list by using the form below. As a new subscriber, you will receive even more Divi goodness and a free Divi Layout pack every Monday! If you’re already on the list, simply enter your email address below and click download. You will not be “resubscribed” or receive extra emails.
@media only screen and ( max-width: 767px ) {.et_bloom .et_bloom_optin_1 .carrot_edge.et_bloom_form_right .et_bloom_form_content:before, .et_bloom .et_bloom_optin_1 .carrot_edge.et_bloom_form_left .et_bloom_form_content:before { border-top-color: #ffffff !important; border-left-color: transparent !important; }
}.et_bloom .et_bloom_optin_1 .et_bloom_form_content button { background-color: #f92c8b !important; } .et_bloom .et_bloom_optin_1 .et_bloom_form_content .et_bloom_fields i { color: #f92c8b !important; } .et_bloom .et_bloom_optin_1 .et_bloom_form_content .et_bloom_custom_field_radio i:before { background: #f92c8b !important; } .et_bloom .et_bloom_optin_1 .et_bloom_border_solid { border-color: #f7f9fb !important } .et_bloom .et_bloom_optin_1 .et_bloom_form_content button { background-color: #f92c8b !important; } .et_bloom .et_bloom_optin_1 .et_bloom_form_container h2, .et_bloom .et_bloom_optin_1 .et_bloom_form_container h2 span, .et_bloom .et_bloom_optin_1 .et_bloom_form_container h2 strong { font-family: “Open Sans”, Helvetica, Arial, Lucida, sans-serif; }.et_bloom .et_bloom_optin_1 .et_bloom_form_container p, .et_bloom .et_bloom_optin_1 .et_bloom_form_container p span, .et_bloom .et_bloom_optin_1 .et_bloom_form_container p strong, .et_bloom .et_bloom_optin_1 .et_bloom_form_container form input, .et_bloom .et_bloom_optin_1 .et_bloom_form_container form button span { font-family: “Open Sans”, Helvetica, Arial, Lucida, sans-serif; } p.et_bloom_popup_input { padding-bottom: 0 !important;}

Download For Free
Join the Divi Newlsetter and we will email you a copy of the ultimate Divi Landing Page Layout Pack, plus tons of other amazing and free Divi resources, tips and tricks. Follow along and you will be a Divi master in no time. If you are already subscribed simply type in your email address below and click download to access the layout pack.
You have successfully subscribed. Please check your email address to confirm your subscription and get access to free weekly Divi layout packs!
To import the layout to your page, simply extract the zip file and drag the json file into the Divi Builder.
Let’s get to the tutorial shall we?
What You Need to Get Started
To get started, you will need to have the following:
- The Divi Theme installed and active
- A new page created to build from scratch on the front end (visual builder)
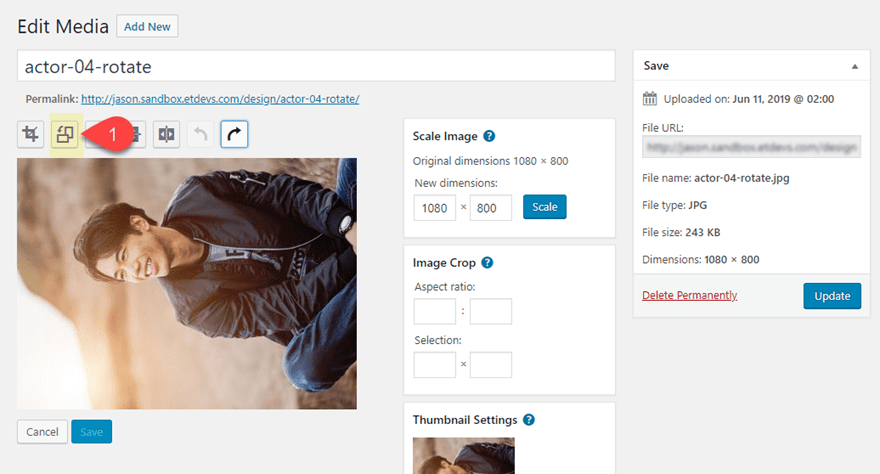
- Two images that have been rotated 90 degrees counterclockwise. This can easily be done using the built-in options of your OS or through any simple photo editing application. You can also rotate an image directly in WordPress by editing the media element.
After that, you ready to create your masterpiece in Divi.
The Basic Idea
The basic idea behind adding vertical slider elements is to use Divi’s transform options to rotate the slider module 90 degrees (clockwise or counterclockwise) so that it displays vertically on the page. For the slider (or slide) background image(s), you will want to rotate the image beforehand (or using the WordPress Image editor) so that the image will display upright whenever you rotate the slider. This will display the slider controls, arrows, and text vertically as you would expect. The tricky part comes with customizing the height and width of the slider since things are literally turned around. This slider design works best in a layout with two or more columns.
Here is a quick example of how to do this.
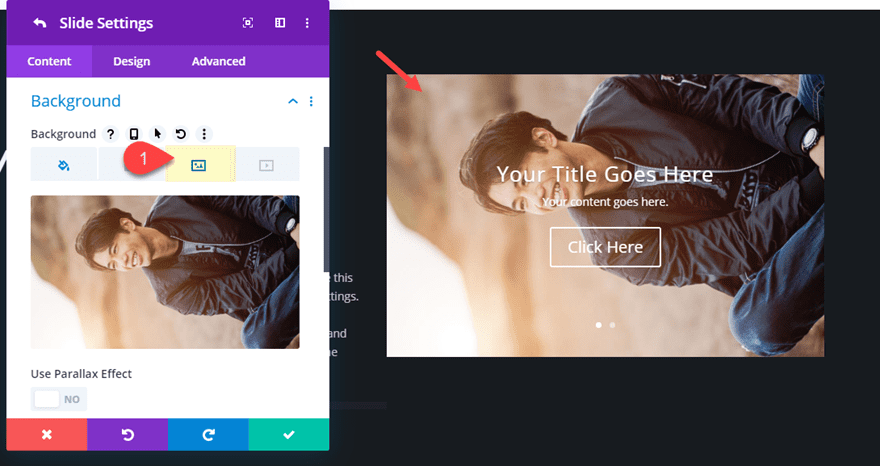
In a regular section with a two column row, add a slider module to the left column.
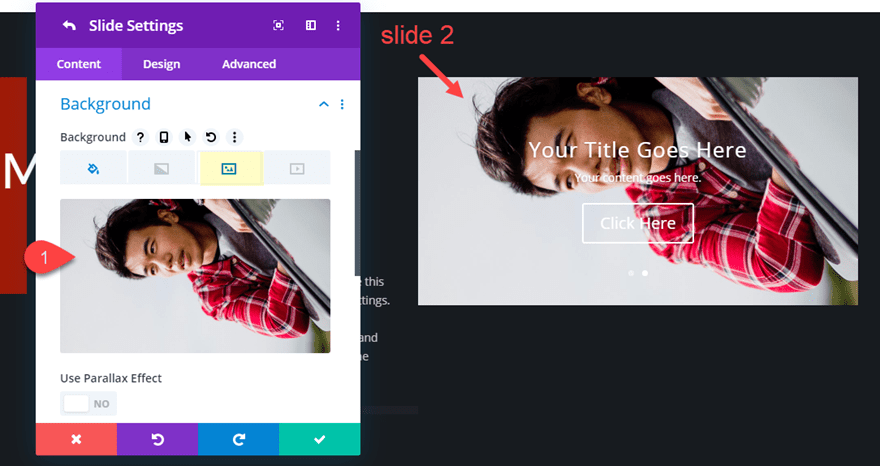
Then add a couple of slides each with a Title, a sentence of body content, and a background image that has been previously rotated counter clockwise 90 degrees.
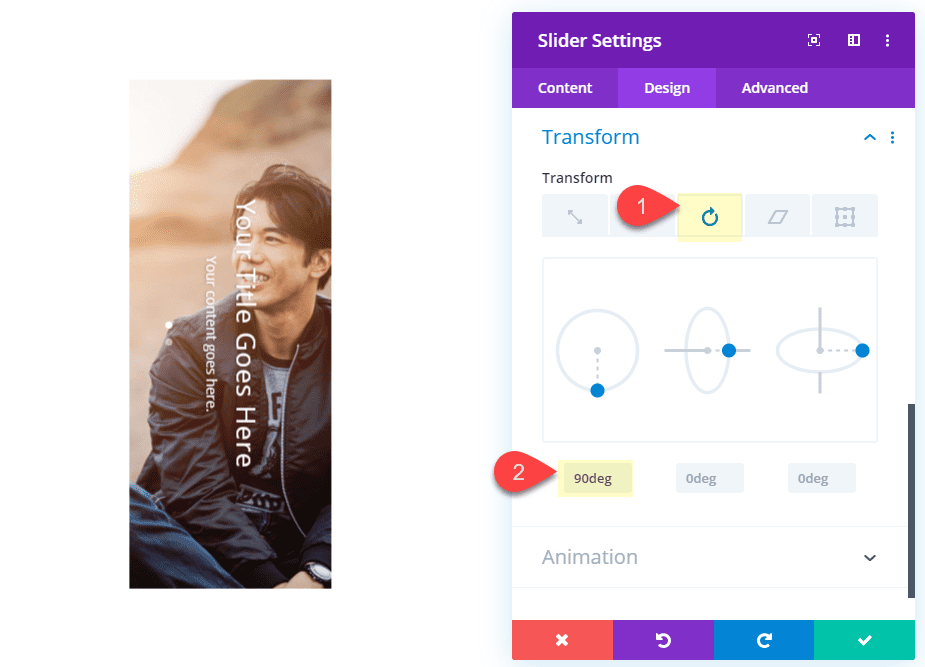
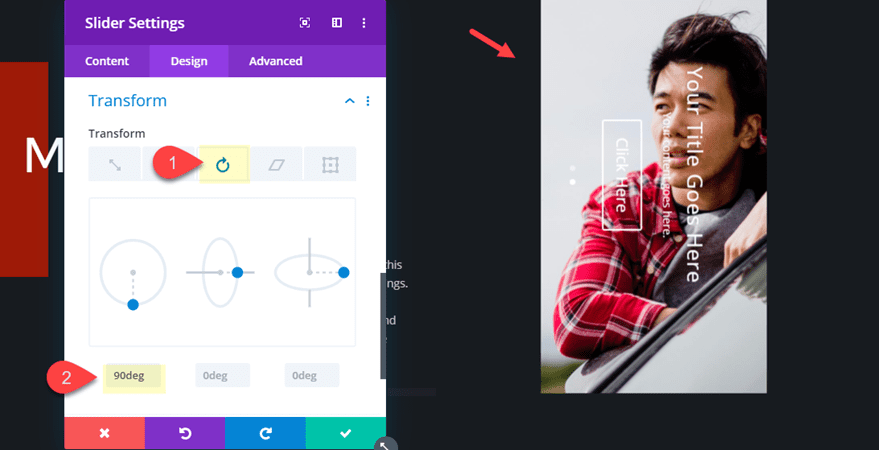
Then rotate the slider module by 90 degrees along the z-axis using Divi’s transform options.
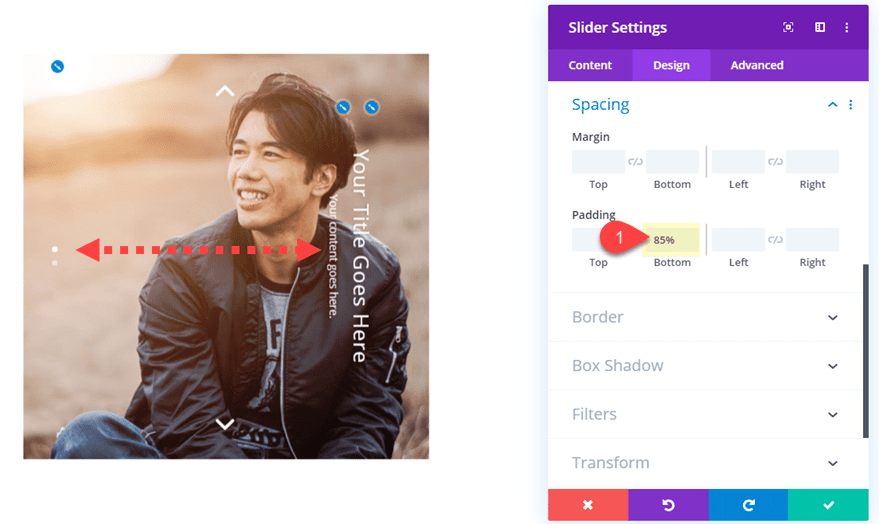
Then add spacing (bottom padding) to the slider to create additional width and align the text to the right of each slide.
Here is the result.

As you can see, the concept is simple, but these vertical slider elements can really come in handy for creating unique designs.
Below, we will take a crack at creating one of these unique slider designs together.
Adding Vertical Slider Elements to Divi’s Slider Module for a Unique Header Design
Creating the Section and Row
Section Background
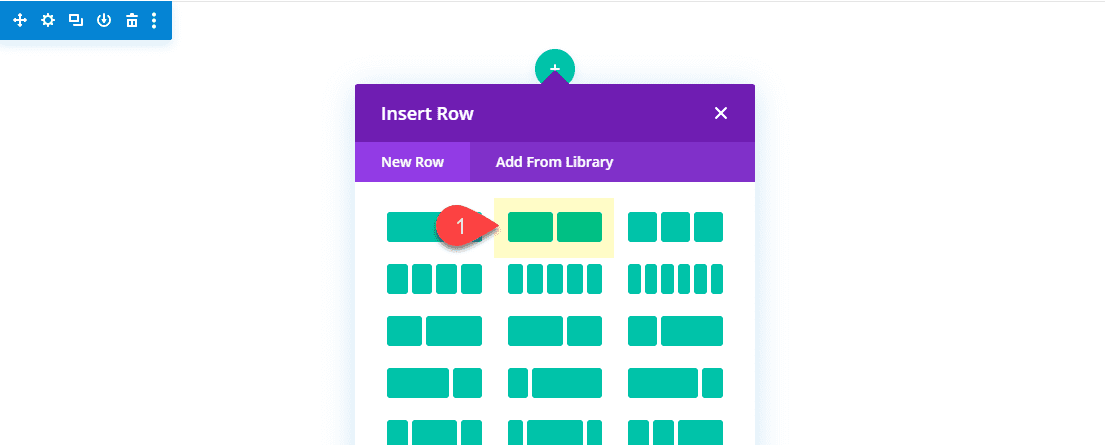
Start by creating a regular section with a two column row.
Before adding a module to the row, first update the section with the following background color:
Background Color: #24272a

Row Settings
Then we need to give our row a custom gutter width of 1 and then set the width using the vw length unit. Using the vw length unit is important for making our vertical slider responsive later on.
Open the row settings and update the following:
Gutter width: 1
Width: 80vw (desktop and tablet), 95vw (phone)
Max Width: 80vw (desktop and tablet), 95vw (phone)
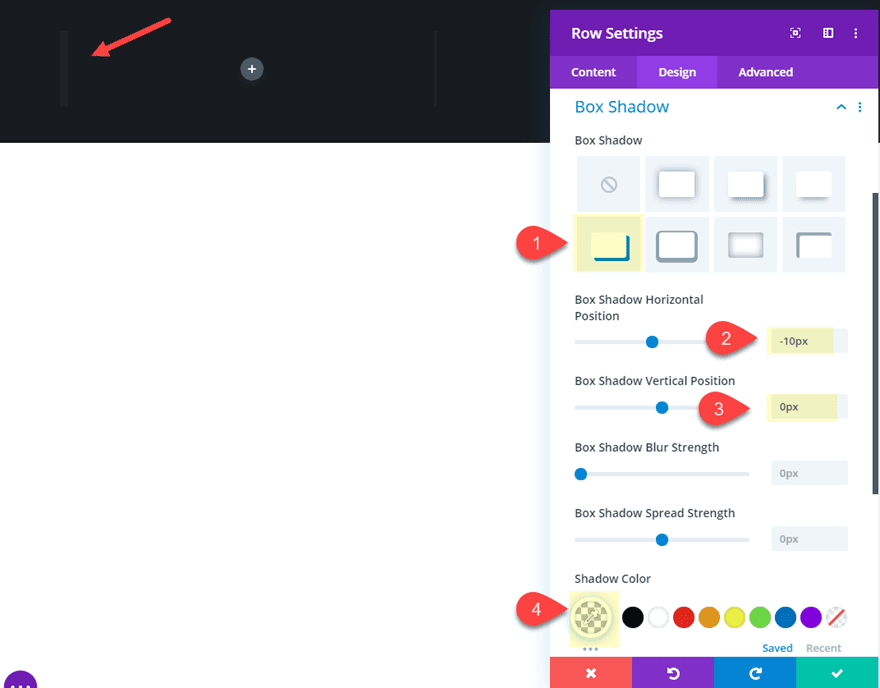
Then we will add a box shadow for design purposes.
Box Shadow: see screenshot
Box Shadow Horizontal Position: -10px
Box Shadow Vertical Position: 0px
Shadow Color: rgba(255,255,255,0.03)
Add Heading Content Using a Text Module
We will eventually add the slider in column 2, but for now let’s add the header title with some additional text in column 1. To do this we will add two text module in column 1.
Add the Text Module for the Title
To add our header title, add a text module to column 1.
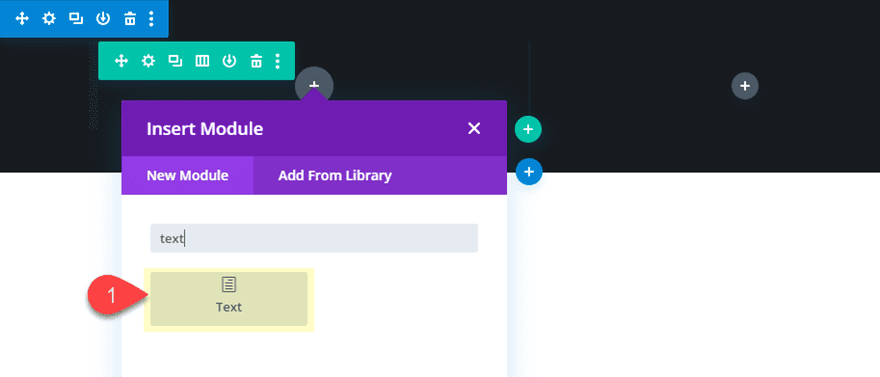
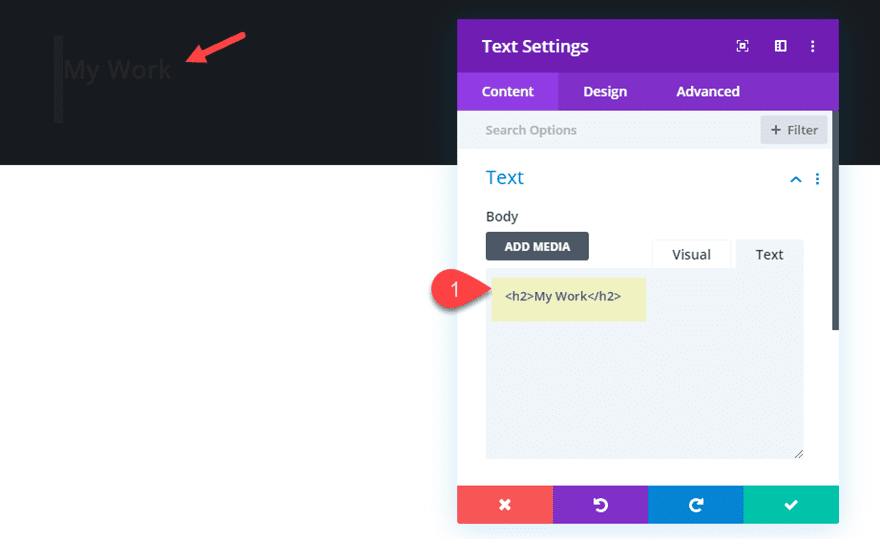
Update the body content with the following h2 heading:
My Work
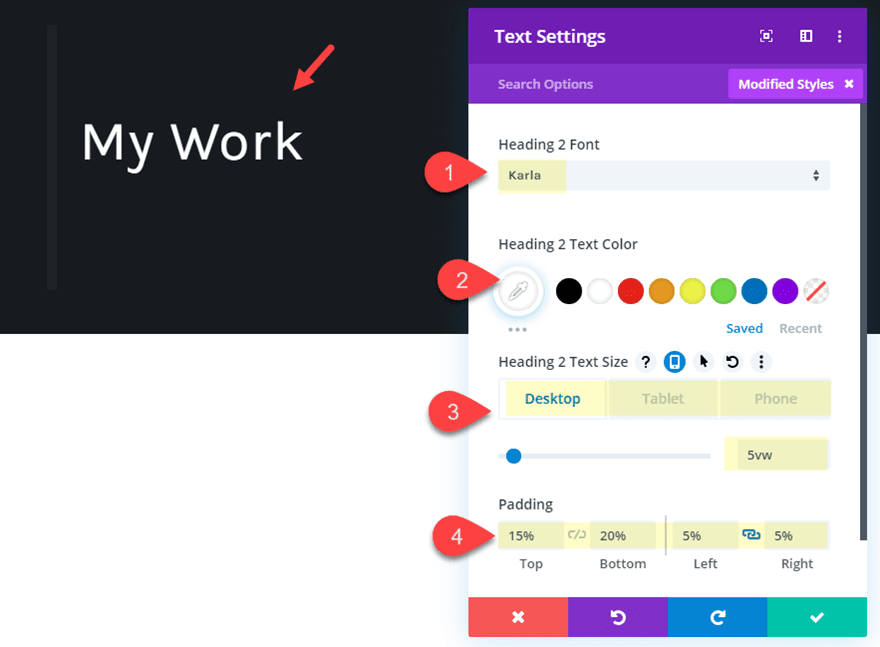
Then update the following:
Heading 2 Font: Karla
Heading 2 Text Color: #ffffff
Heading 2 Text Size: 5vw (desktop), 60px (tablet), 50px (phone)
Padding: 15% top, 20% bottom, 5% left, 5% right
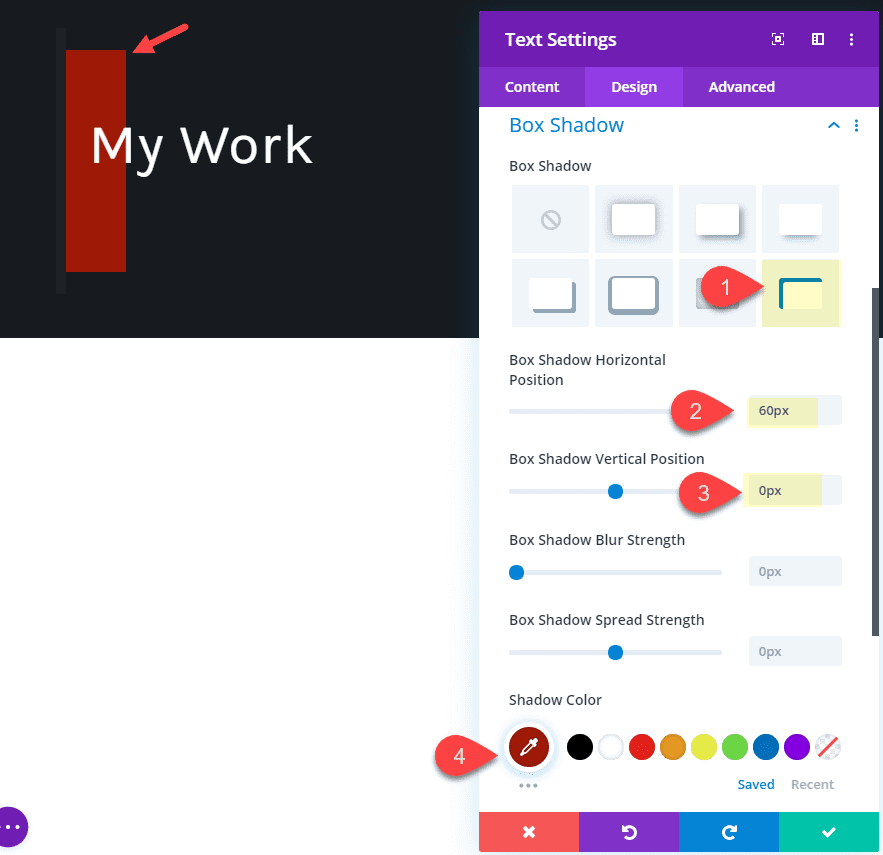
Box Shadow: see screenshot
Box Shadow Horizontal Position: 60px
Box Shadow Vertical Position: 0px
Shadow Color: #9a2508
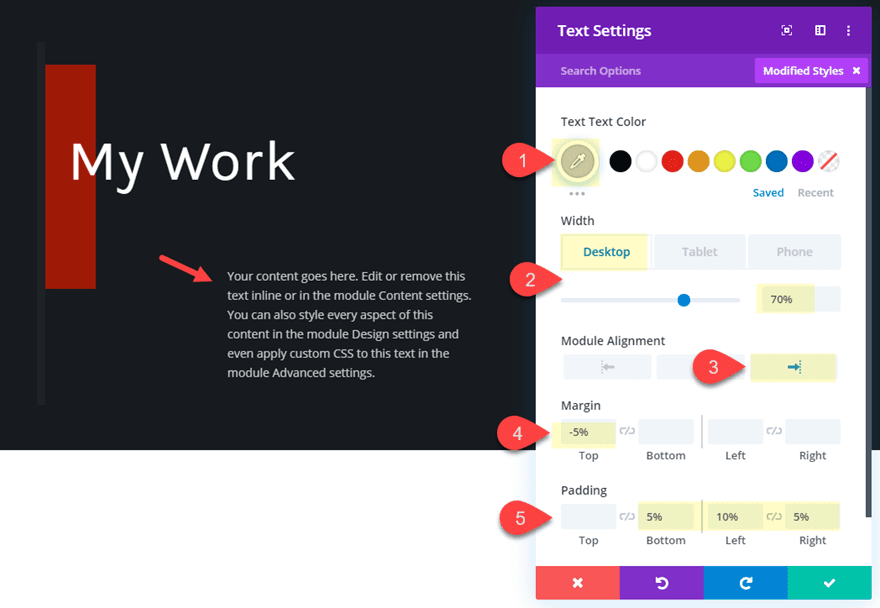
Add Text Module for Body Content
Next, add a new text module under the first text module in column 1. We can leave the default content for now.
Then update the following:
Text Text Color: #cccccc
Width: 70%
Module Alignment: right
Margin: -5% top
Padding: 5% bottom, 10% left, 5% right
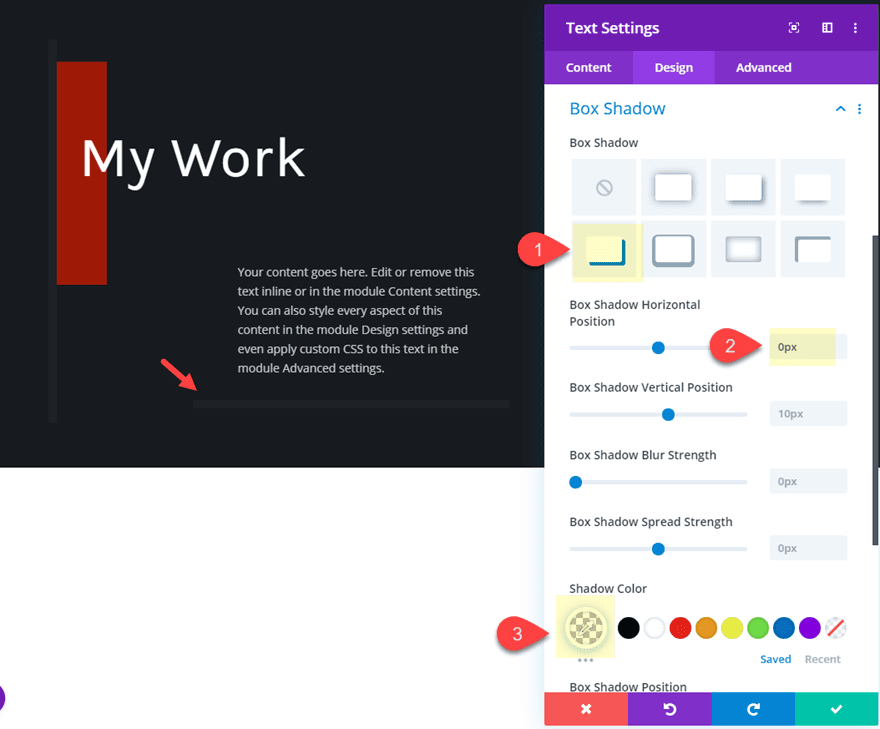
Box Shadow: see screenshot
Box Shadow Horizontal Position: 0px
Box Shadow Vertical Position: 10px
Shadow Color: rgba(255,255,255,0.03)
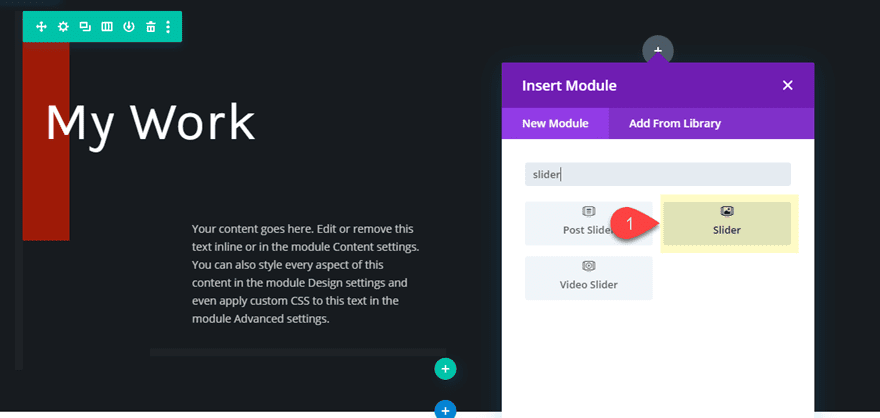
Creating the Vertical Slider
Now we are ready to create the slider with the vertical slider elements.
To do this, add a Slider Module in column 2.
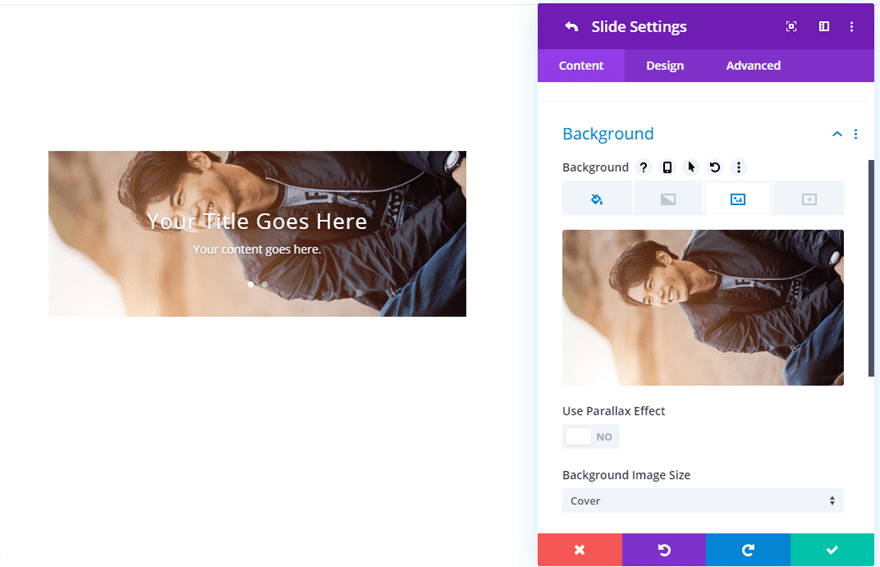
Open the slide settings of the first of the two default slides.
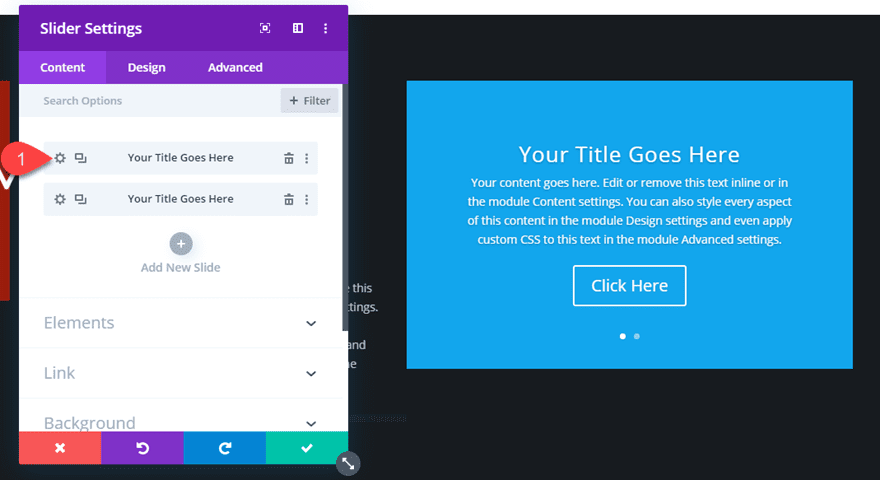
Cut down the default body text to include a single line of text. Then add a background image that has been previously rotated counterclockwise 90 degrees.
Then do the same for the second default slide giving it a different background image.
Rotate the Slider
Next, rotate the slider using the transform rotate option:
Transform Rotate z-axis: 90deg
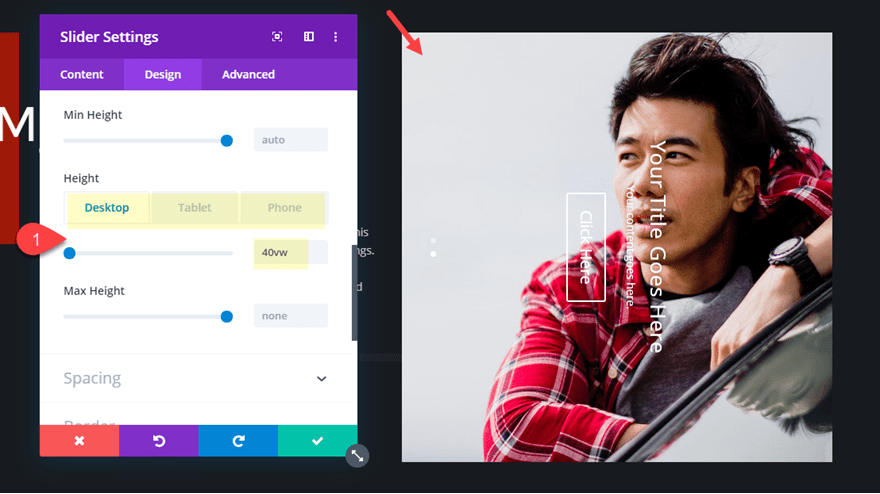
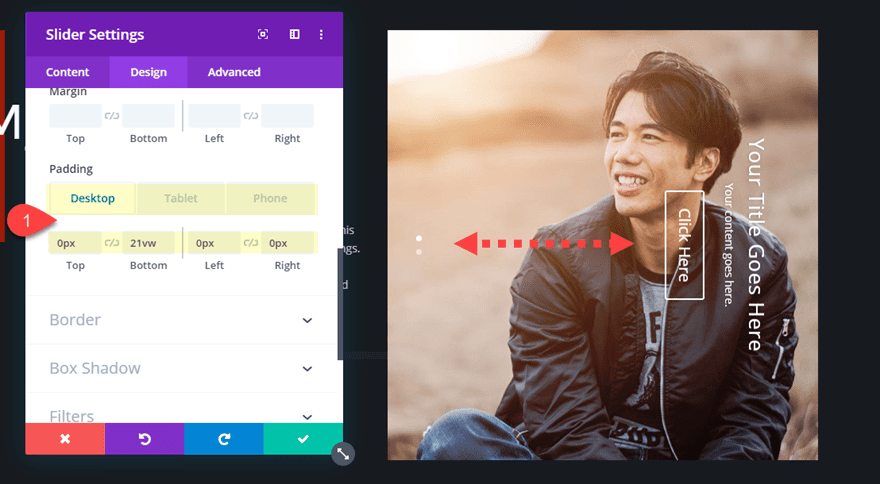
Slider Height
We don’t need to worry about the slider width since it will automatically span 100% of the column. The column is 50% of 80vw (the row width) so basically the width will be 40vw by default. Now we need to give the slider a matching height of 40vw on desktop and then adjust the height to 80vw on tablet and 95vw on phone.
Update the following:
Height: 40vw (desktop), 80vw (tablet), 95vw (phone)
Then adjust the padding to align the text to the right of the vertical slider.
Padding (desktop): 0px top, 21vw bottom, 0px left, 0px right
Padding (tablet): 42vw bottom
Padding (phone): 50vw bottom
Update Text Settings
Adjust the title and body text as follows:
Text Alignment: left
Title Font: Karla
Title Text Size: 32px
Title Line Height: 1.3em
Body Letter Spacing: 3px
Body Line Height: 1.8em

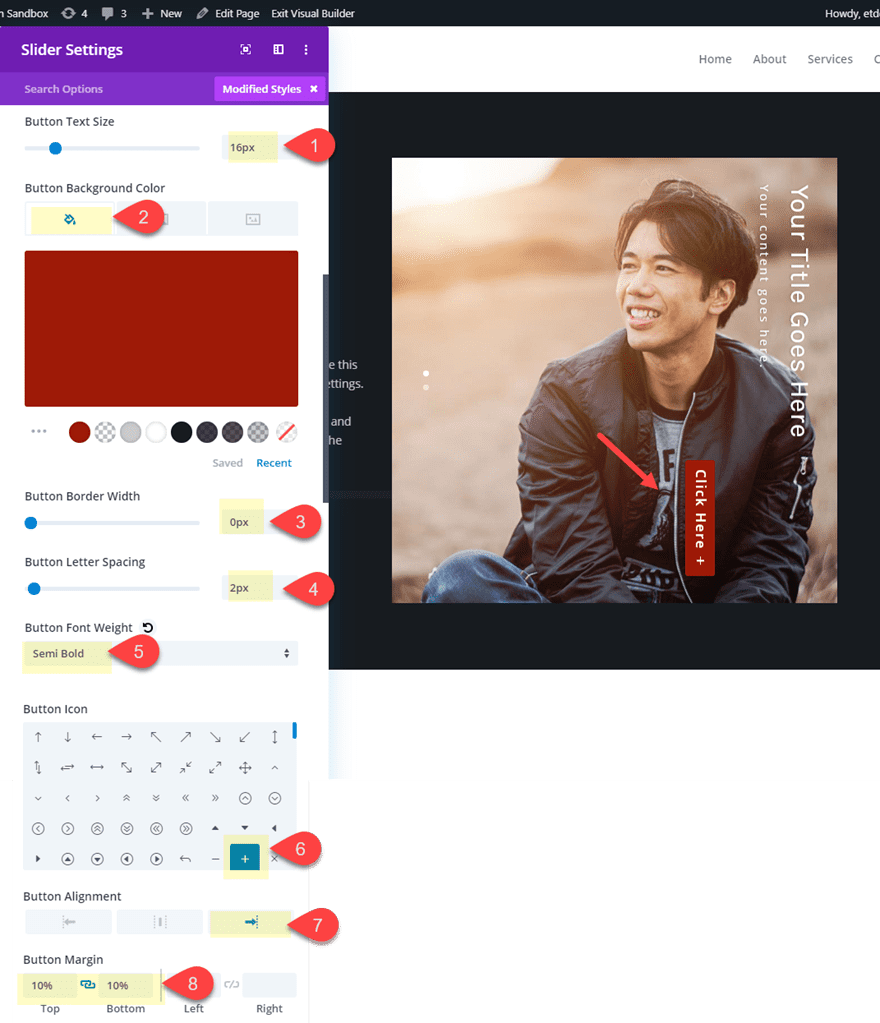
Styling the Button
To style and position the button, update the following:
Button Text Size: 16px
Button Background Color: #9a2508
Button Border Width: 0px
Button Letter Spacing: 2px
Button Font Weight: semi bold
Button Icon: plus sign (see screenshot)
Button Alignment: right
Button Margin: 10% top, 10% bottom
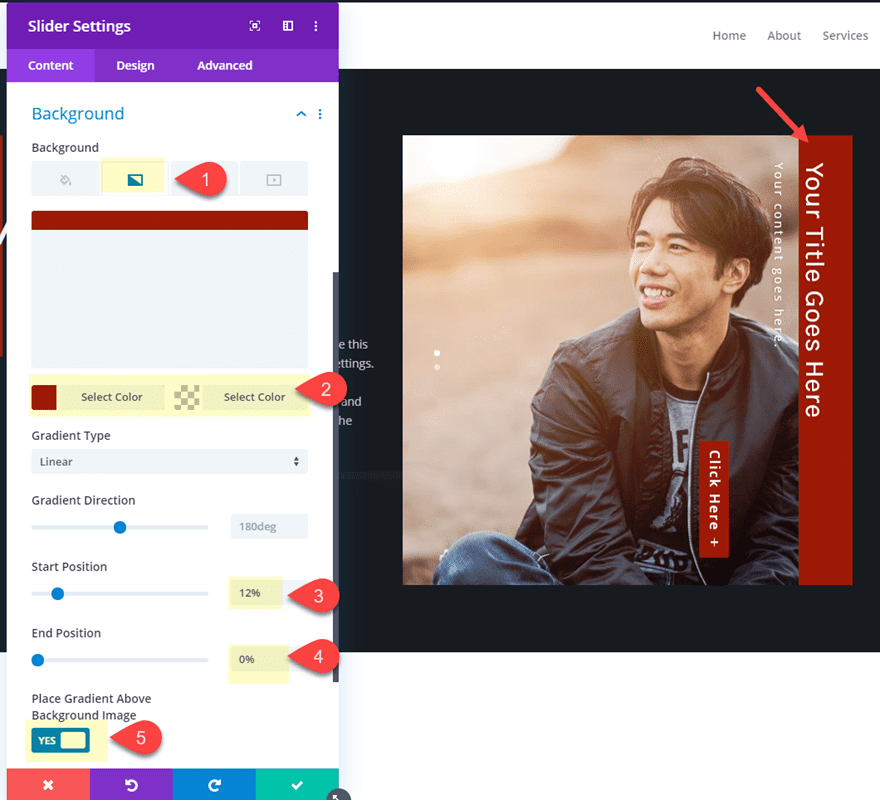
Background Gradient
To create a background for our vertical slider title text, we can add a background gradient to the slider as follows:
Background Gradient Left Color: #9a2508
Background Gradient Right Color: rgba(0,0,0,0)
Start Position: 12%
End Position: 0%
Place Gradient Above Background Image: YES
Note: If you want, you can adjust the opacity of the background gradient right color to create an overlay for your slide images.
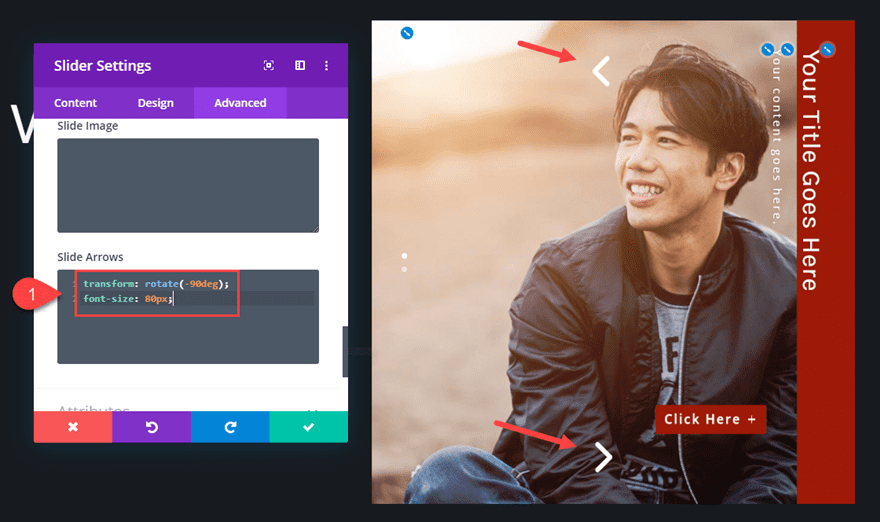
Rotating the Button and Slider Arrows with Custom CSS
Since our button is still vertical, we will need to rotate it back to its previous position with a snippet of CSS. Add the following CSS to the Slide Button:
transform: rotate(-90deg);
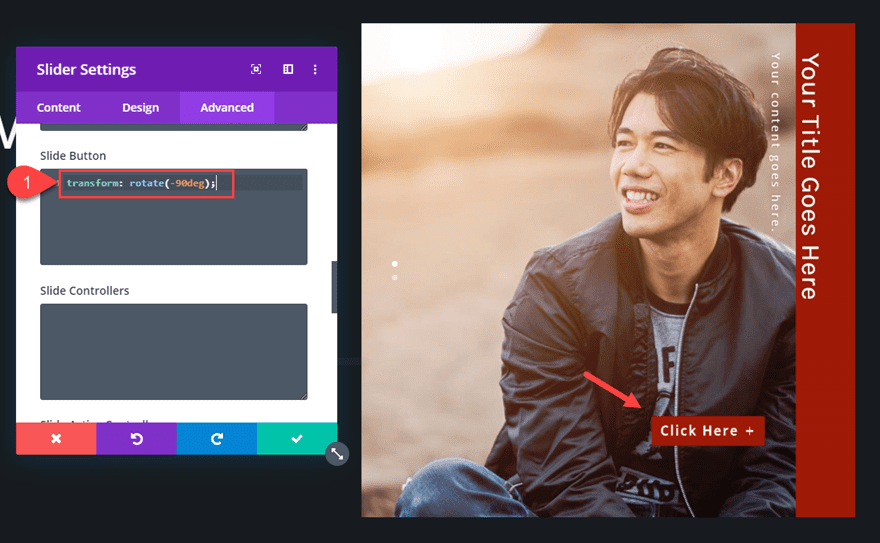
For the slider arrows, you can add the same snippet of css so that they point to the right and left instead of up and down. And while we are there, we can increase the size of the arrows as well. Add the following CSS to the
transform: rotate(-90deg);
font-size: 80px;
That’s it!
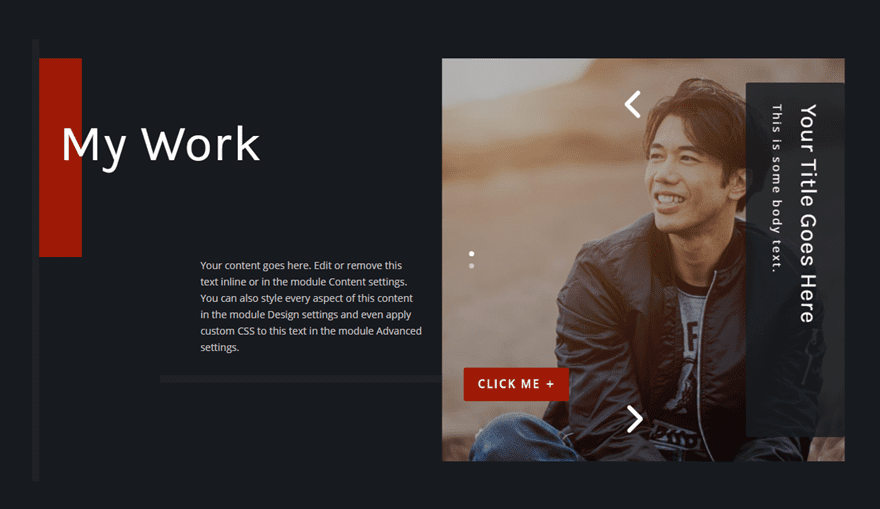
Let’s check out the final result.
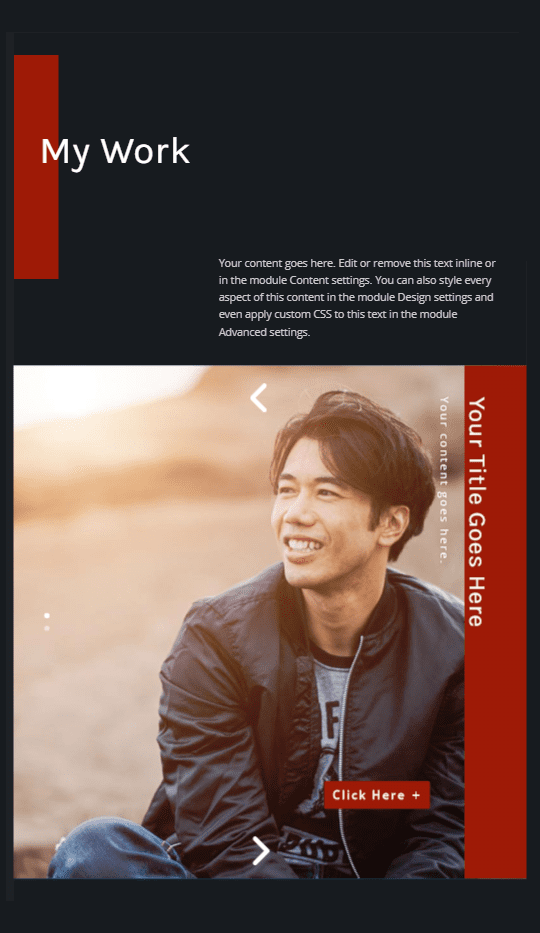
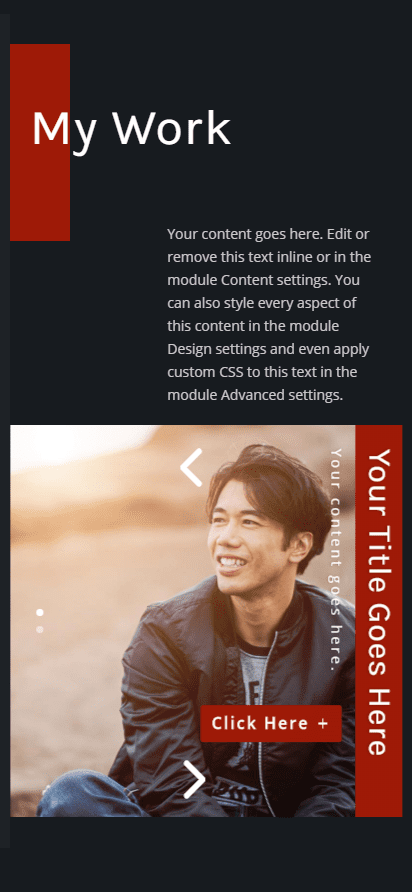
Final Result
And here it is on tablet and phone.
Feel free to explore new designs by tweaking the vertical elements. Here is an example of the same design with the button positioned to the left and a text overlay.
Final Thoughts
Rotating Divi’s slider module is a quick and effective way to add vertical design elements to your slider. Really, the only challenging part is getting the size and spacing to be nice and responsive. But thankfully, Divi has enough built-in options that make it easy to tweak the design to look great on all devices.
This vertical slider design will also work great in other areas of your site besides a header. I can see this being used for showcasing featured products or testimonials in more narrow column layouts.
Hopefully this will give you some inspiration for your next project.
I look forward to hearing from you in the comments.
Cheers!
The post How to Add Vertical Slider Elements to Divi’s Slider Module for a Unique Header Design appeared first on Elegant Themes Blog.