
Every week, we provide you with new and free Divi layout packs which you can use for your next project. For one of the layout packs, we also share a use case that’ll help you take your website to the next level.
This week, as part of our ongoing Divi design initiative, we’re going to show you how to create stunning event custom post type templates with Divi using the free Meetup Layout Pack. This use case tutorial is made possible by the Divi Builder Custom Post Type Support feature, one of Divi’s recent updates. We’re going to create a template that will match the Meetup Layout Pack. After creating this template, you’ll be able to reuse it for all the events you share on your website.
Let’s get to it!
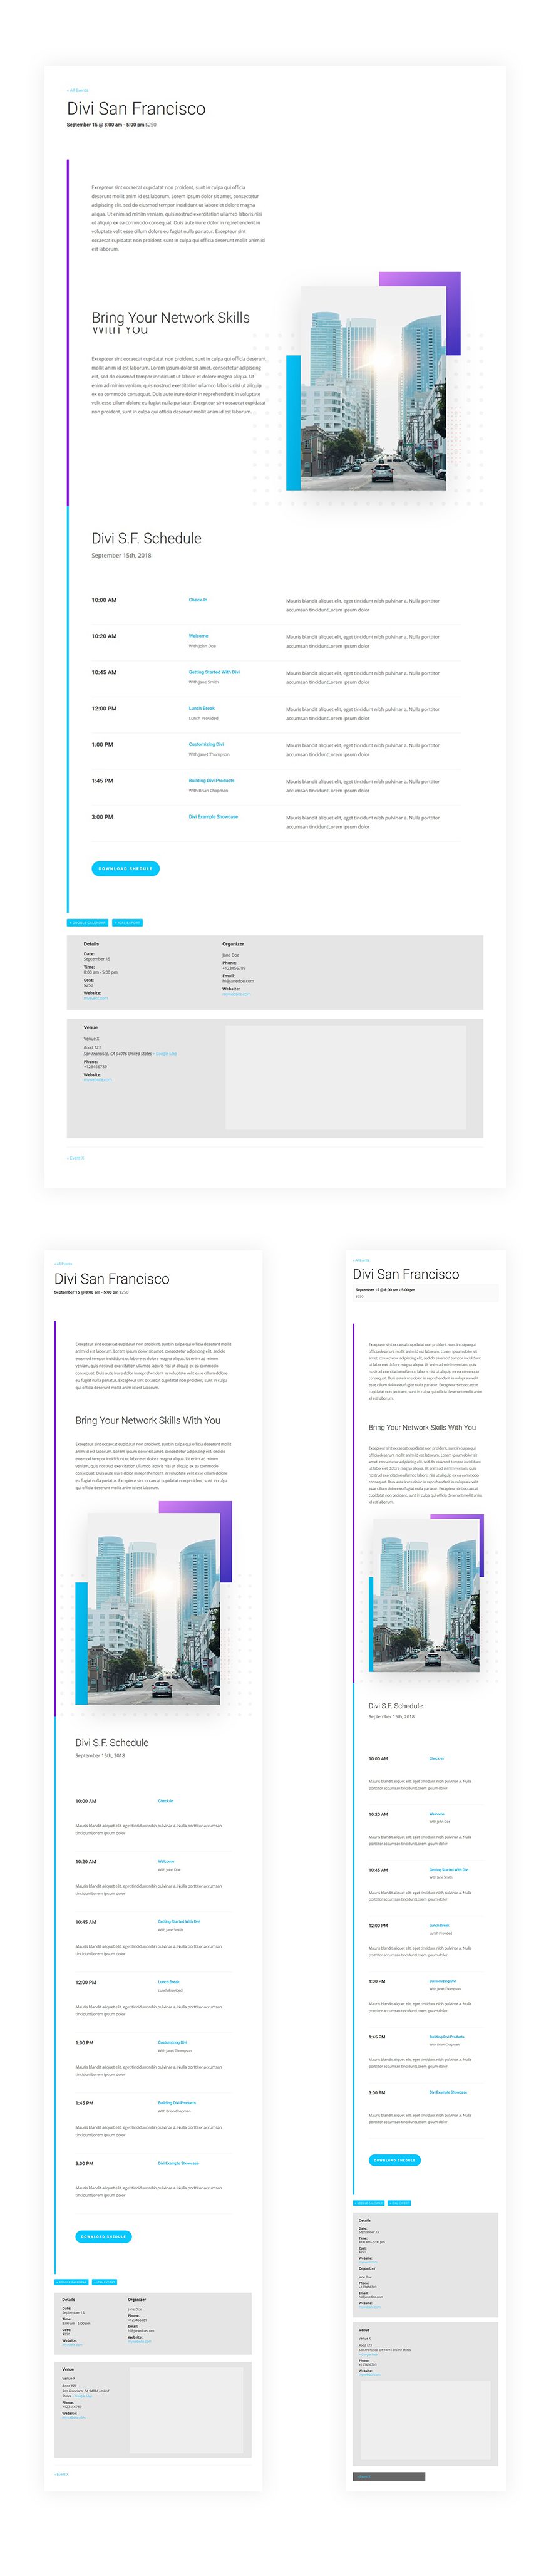
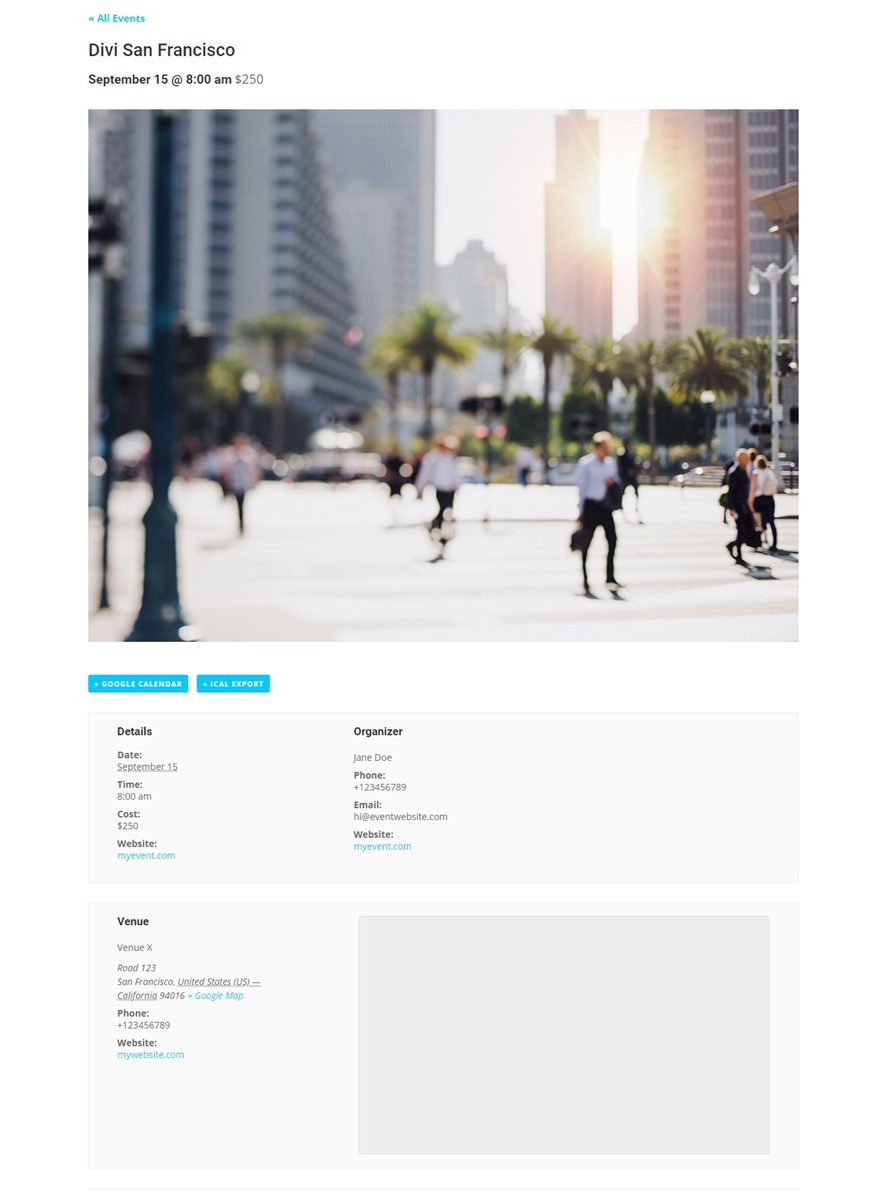
Preview
Before we dive into the tutorial, let’s take a look at the final result on different screen sizes.
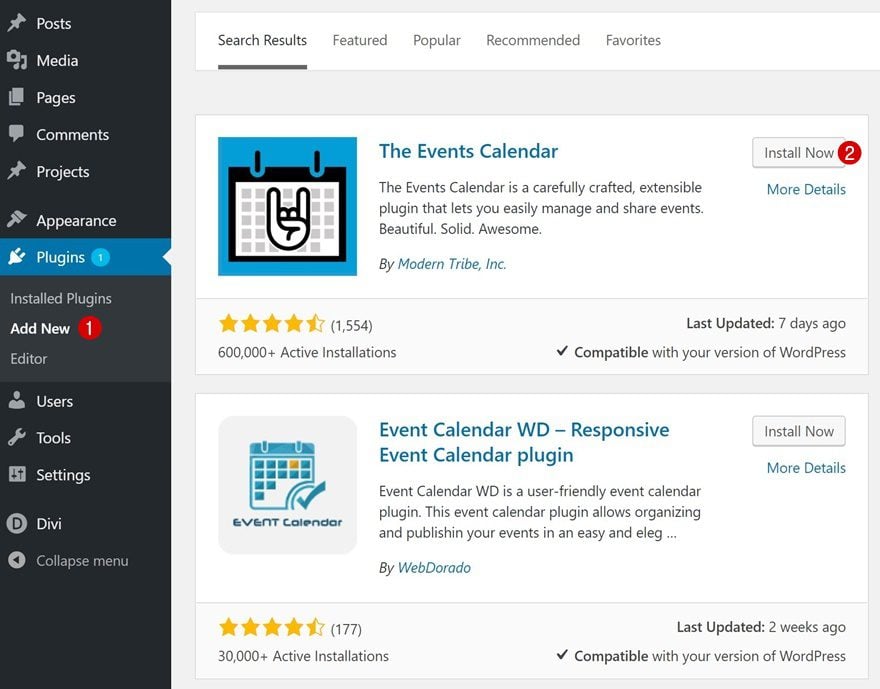
Install The Events Calendar Plugin
Go to Plugins & Add a New One
To add event custom post types to our website, we’ll be using The Events Calendar plugin. This is a free plugin which you can find by going to your WordPress dashboard > Plugins > Add New > Searching for The Events Calendar plugin.
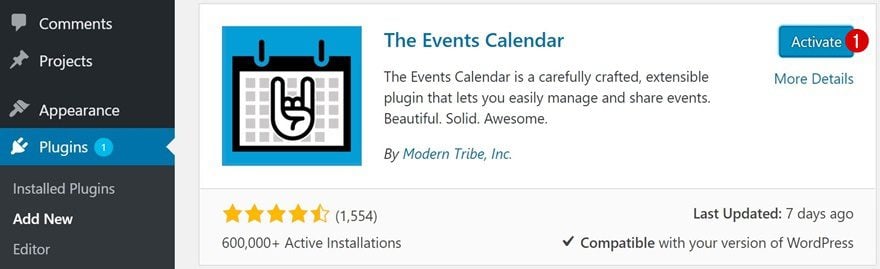
Activate Plugin
Once you’ve installed the plugin, make sure you activate it right away so you can start using it.
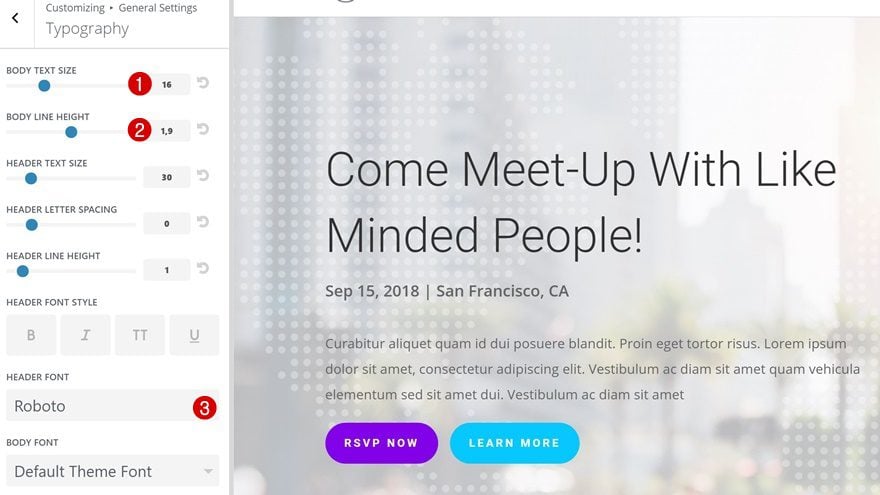
Change Theme Customizer Settings
Change Typography
Now before we create an event, let’s start by getting the fundamentals of our website right. Open your Theme Customizer by going to your WordPress dashboard > Appearance > Customize. Navigate to the typography of your website by going to General Settings > Typography next. Once you’re there, apply the following settings:
- Body Text Size: 16
- Body Line Height: 1,9
- Header Font: Roboto
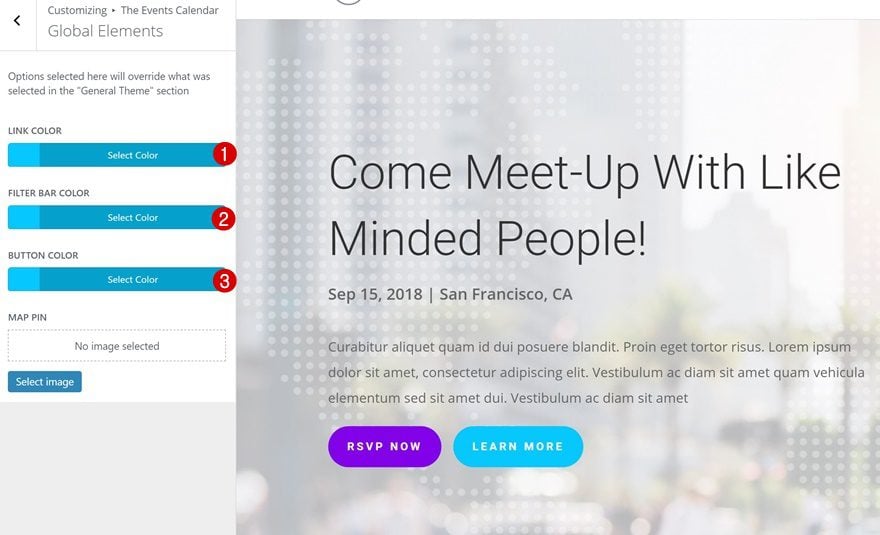
The Events Calendar Settings
The Events Calendar plugin has some of its own settings in the Theme Customizer as well. Go back to the main menu of your Theme Customizer > The Events Calendar > General Theme > And use the following colors:
- Accent Color: #06c8ff
- Featured Highlight Color: #06c8ff
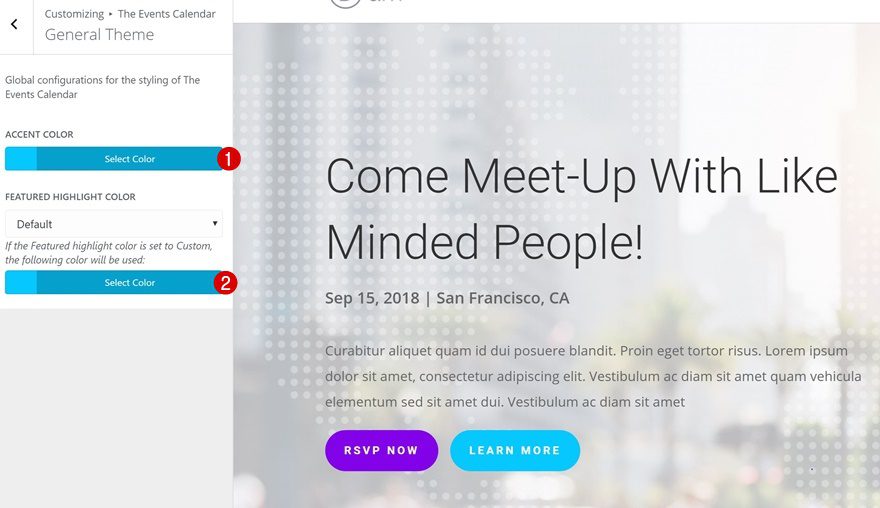
Go back to the settings of The Events Calendar > General Theme and use the same ‘#06c8ff’ color for all the options you can find there.
Add a New Event
Add New Event
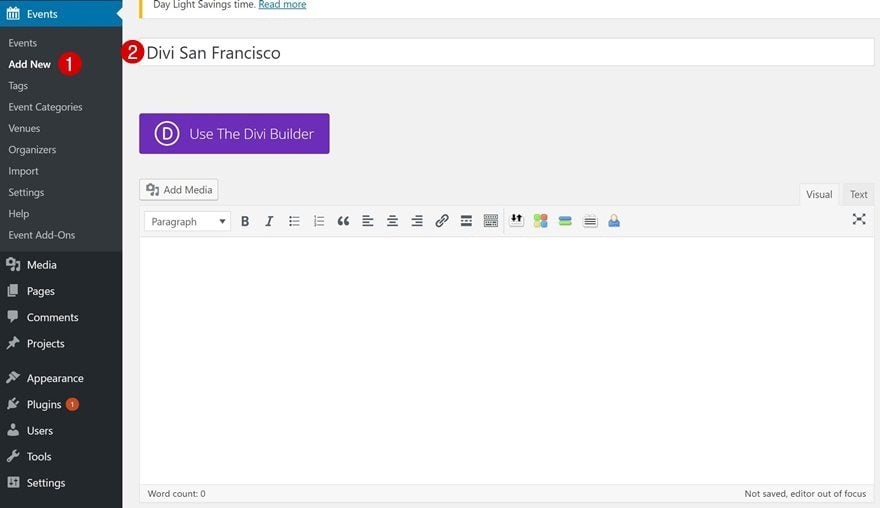
We’re now ready to create a new event. To do that, go to your WordPress dashboard > Events > Add New. Once you’ve added a new event, make sure you give it a title as well.
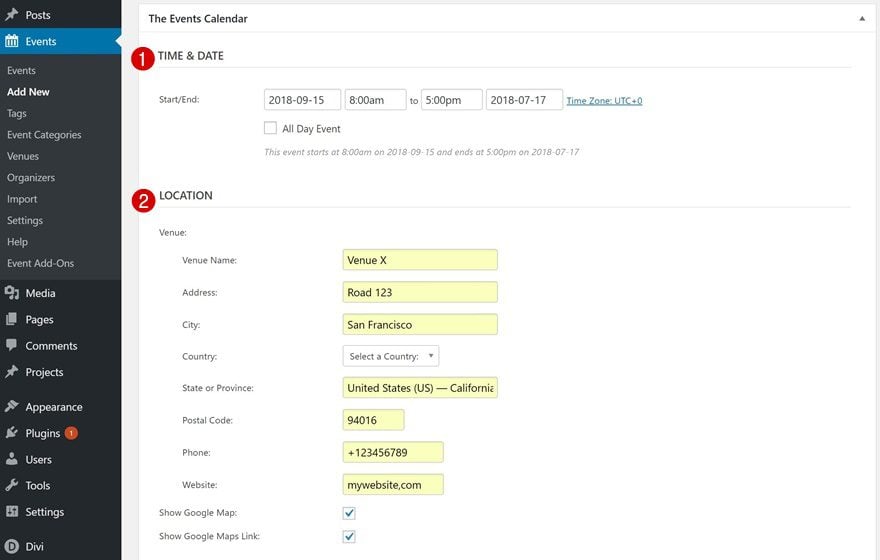
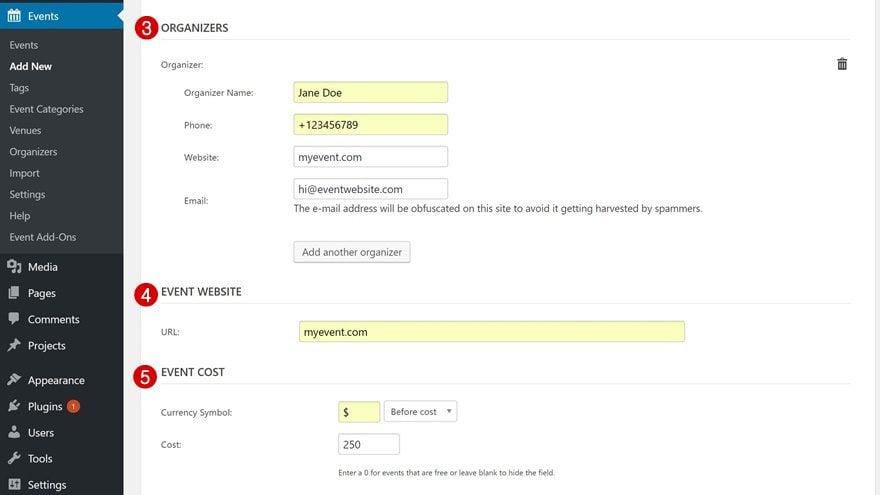
Add Event Details
Continue by entering your event details. This includes:
- Time & Date
- Location
- Organizers
- Event Website
- Event Cost
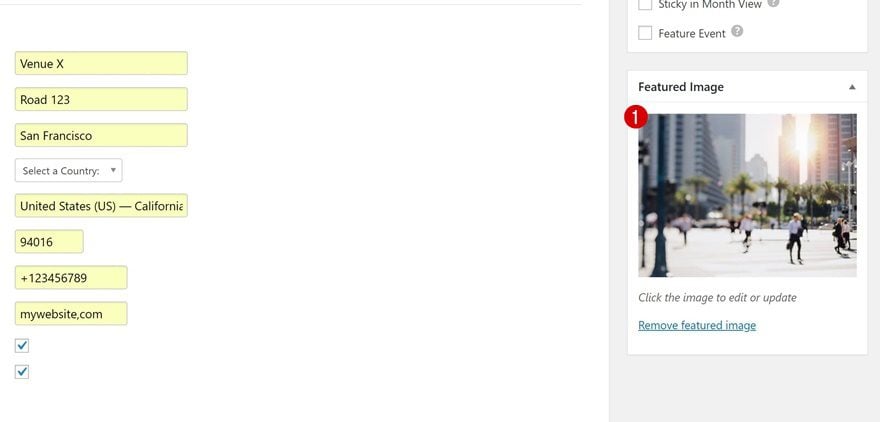
Add Featured Image
Add a featured image to your event as well. Later on this post, we’ll remove this from the frontend but we’ll still need it for social sharing.
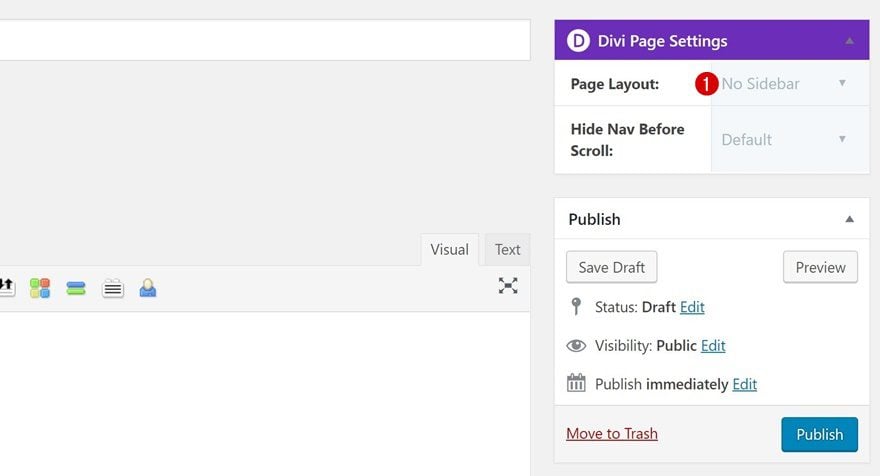
Change Divi Page Settings
In the right corner of your event, you’ll see the Divi Page Settings. There, remove the sidebar by selecting ‘No Sidebar’ for the Page Layout.
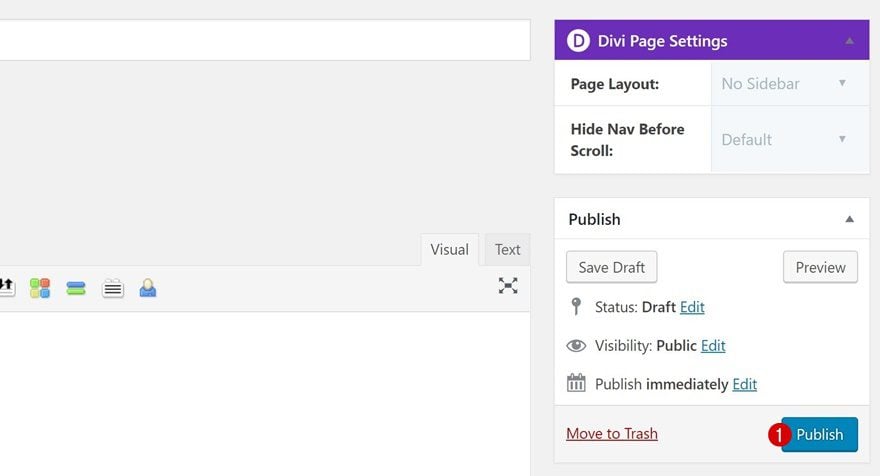
Publish Event
We’re now ready to start working on the frontend. Go ahead and publish your event.
This is default page design without having enabled the Visual Builder:
Open Meetup Landing Page & Save Design Elements
Locate & Save Row to Divi Library
Working efficiently is more important than working hard. That’s why we’re going to save ourselves some time and effort by reusing elements of the Meetup Layout Pack. Start by opening the landing page using Divi’s Visual Builder. Then, locate the following row on your page and save it to your Divi Library:

Locate & Save Section to Divi Library
We’ll also need the following section so go ahead and save this one as well:
Start Creating Event Custom Type Template
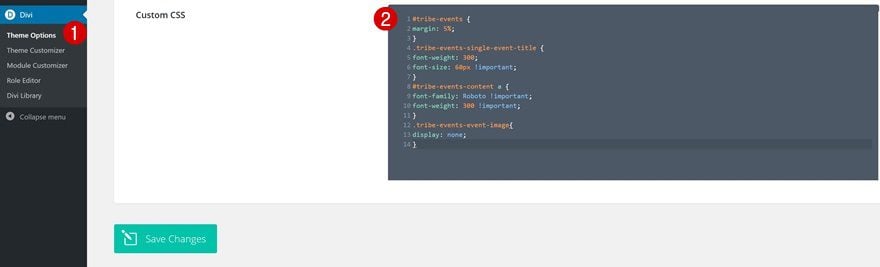
Add Custom CSS Code Lines to Match Meetup Layout Pack
We can use the Visual Builder for event pages but unfortunately, we cannot use it everywhere. To make sure everything is in line with the Meetup Layout Pack, we’re going to add a few CSS code lines in advance:
#tribe-events {
margin: 5%;
}
.tribe-events-single-event-title {
font-weight: 300;
font-size: 60px !important;
}
#tribe-events-content a {
font-family: Roboto !important;
font-weight: 300 !important;
}
.tribe-events-event-image{
display: none;
} 
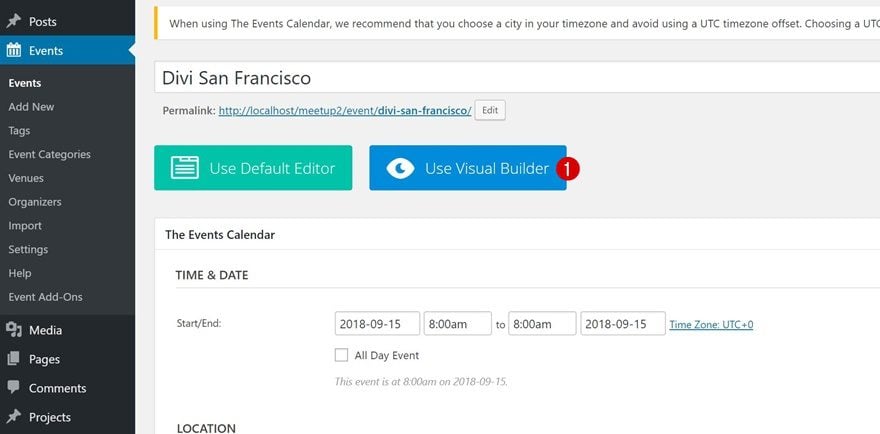
Switch over to Visual Builder
We can now switch over to using the Visual Builder on our event!
Add a New Section
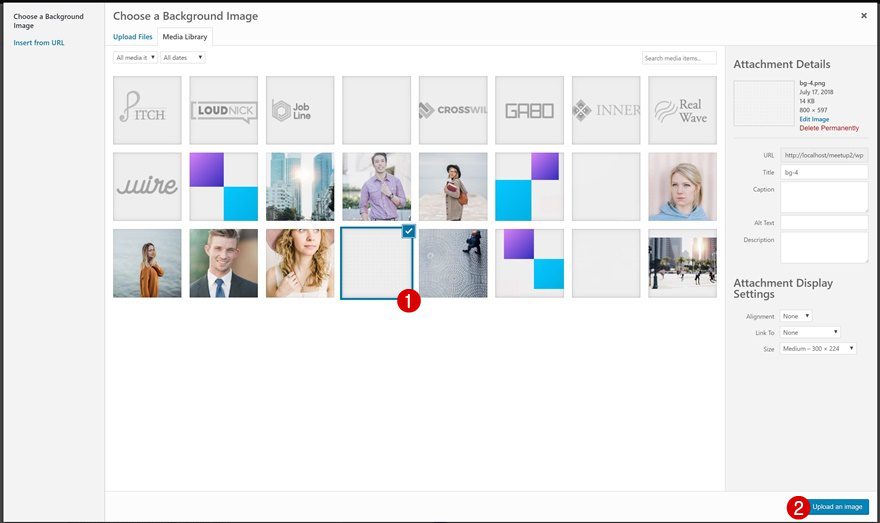
Background Image
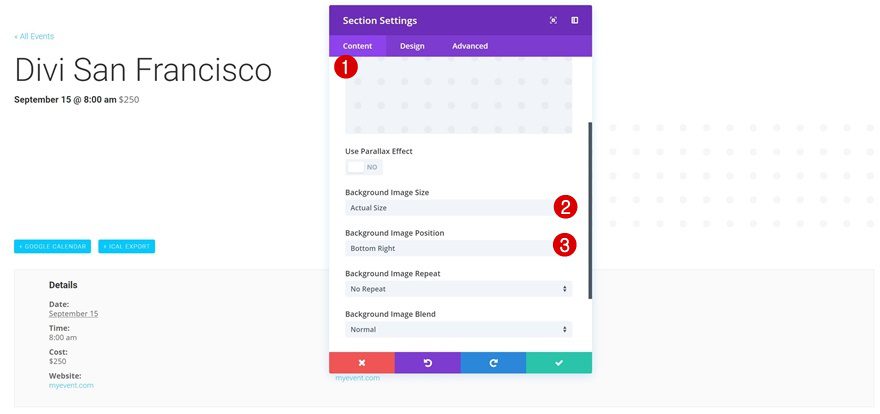
You’ll see that there’s a section already present on the page. That’s the place on the page we’re able to modify. Start by opening the section settings and add the ‘bg-4.png‘ background image. You can find this image in your Media Library if you’ve already uploaded the Meetup Layout Pack to your website. Along with the background image, use the following settings:
- Background Image Size: Actual Size
- Background Image Position: Bottom Right
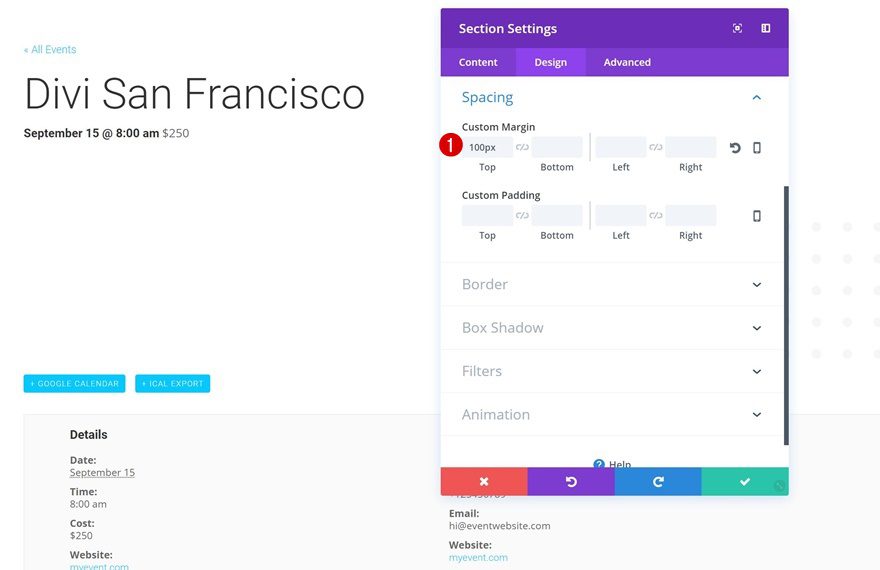
Spacing
Open the Spacing settings of your section next and add ‘100px’ to the top margin.
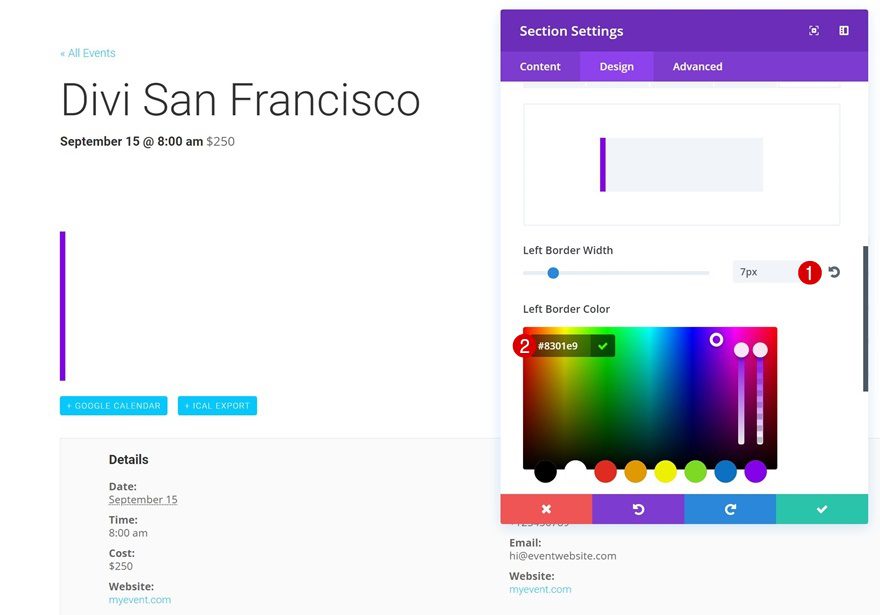
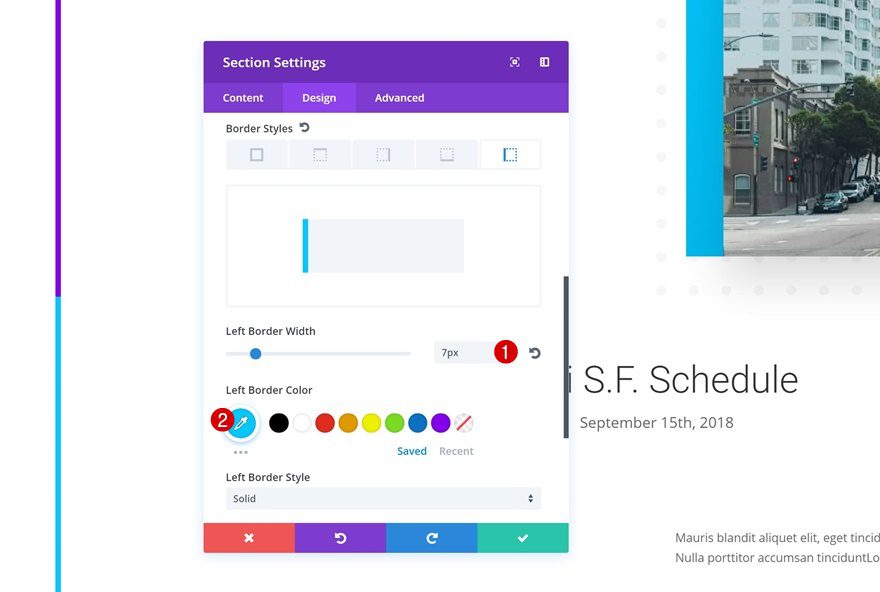
Border
We’re also creating this kind of timeline effect for our template. Go to your Border settings and add the following left border:
- Left Border Width: 7px
- Left Border Color: #8301e9
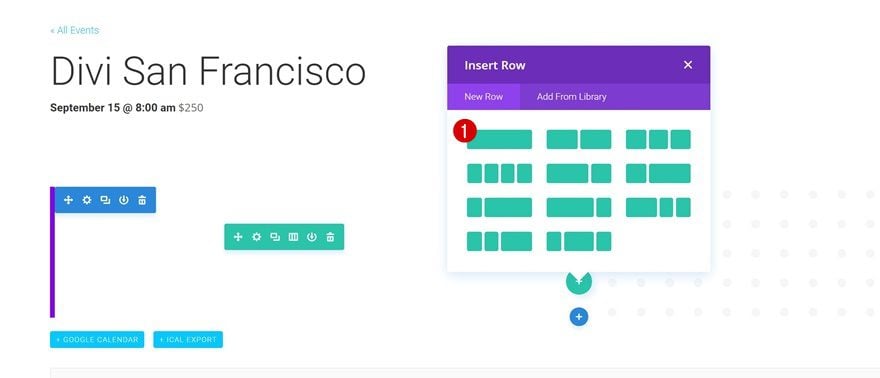
Add a New Row
Column Structure
Now that we’re done modifying the section settings, we can start adding our rows. Add a new row with the following column structure:
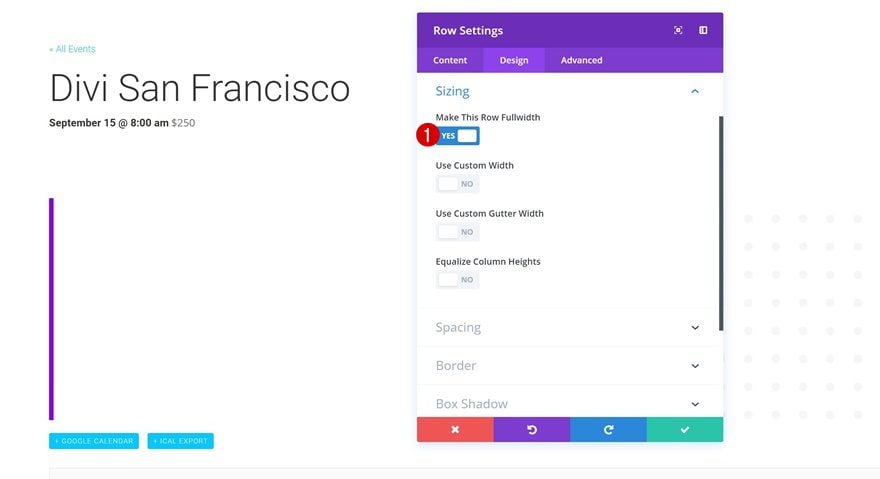
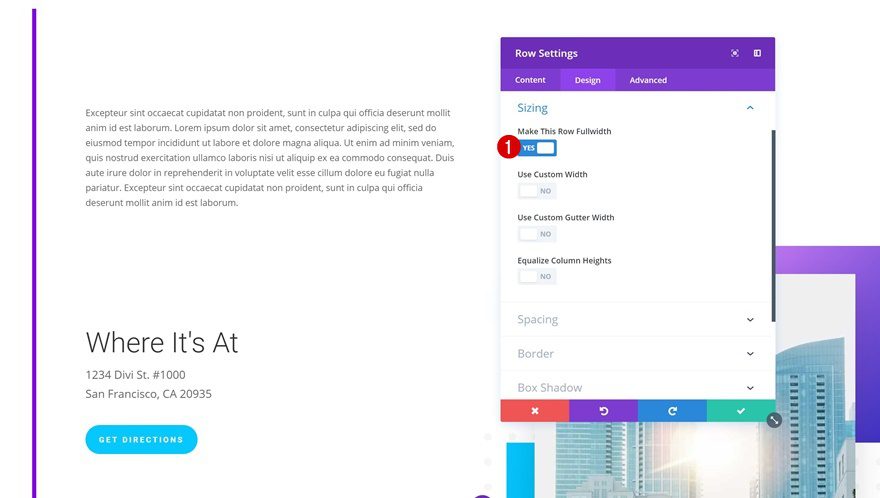
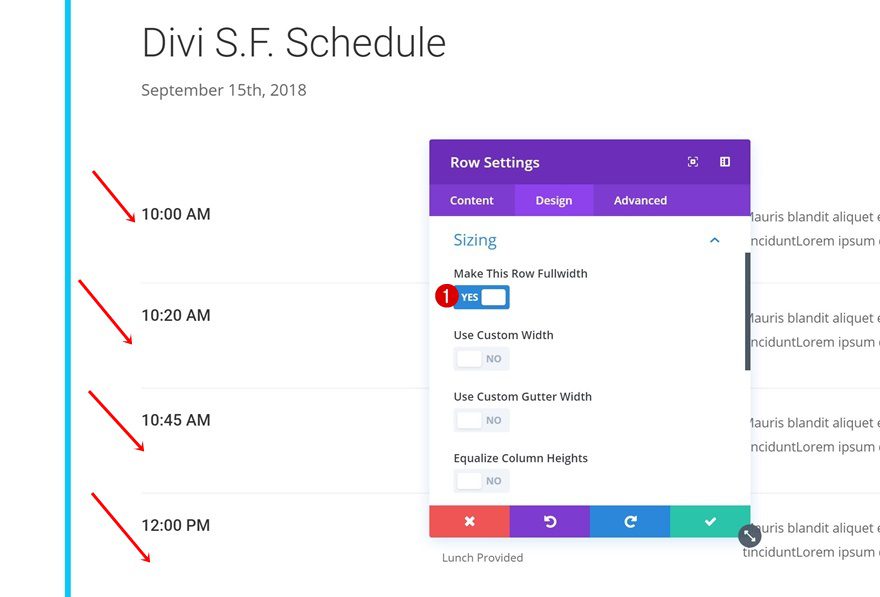
Sizing
Open the settings of your row and enable the ‘Make This Row Fulliwdth’ option in the Sizing settings. This is something we’re going to do for each one of the rows within this layout.
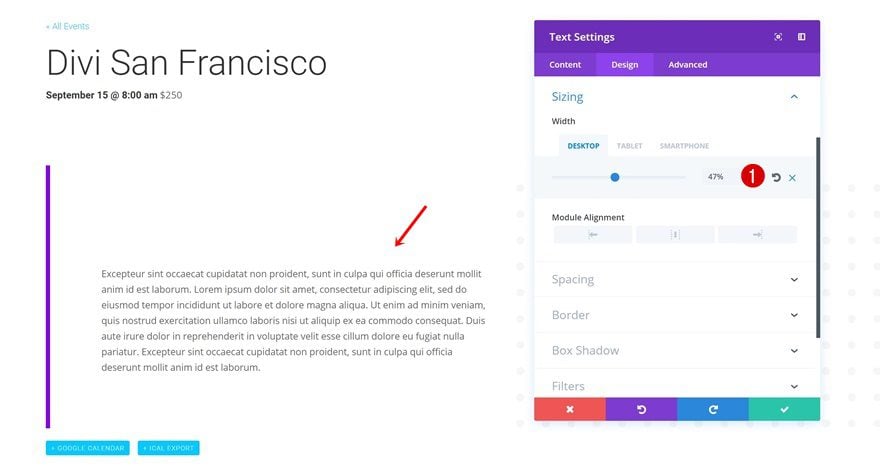
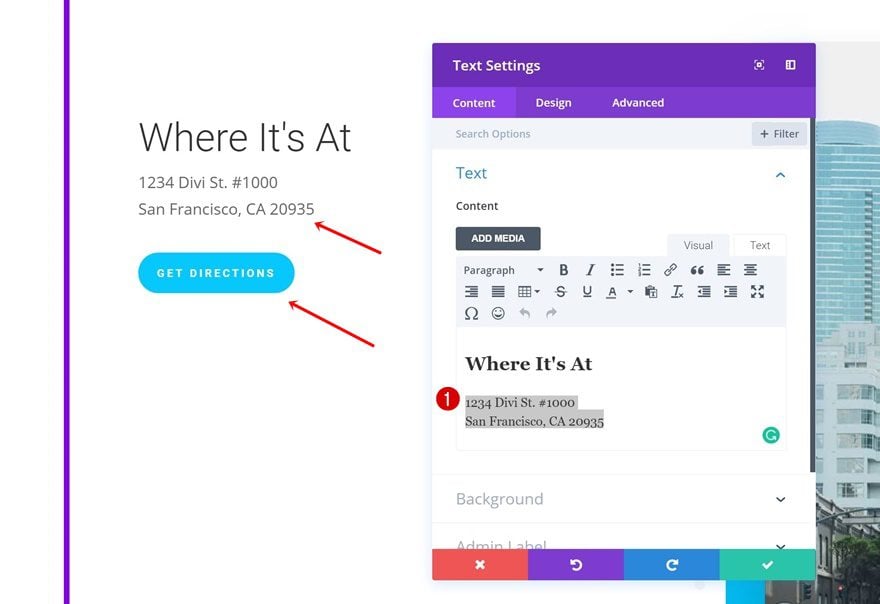
Add Text Module to Row
Sizing
Next, add a Text Module with a description of your event, move on to the Sizing settings and use the following Width:
- Desktop: 47%
- Tablet & Phone: 100%
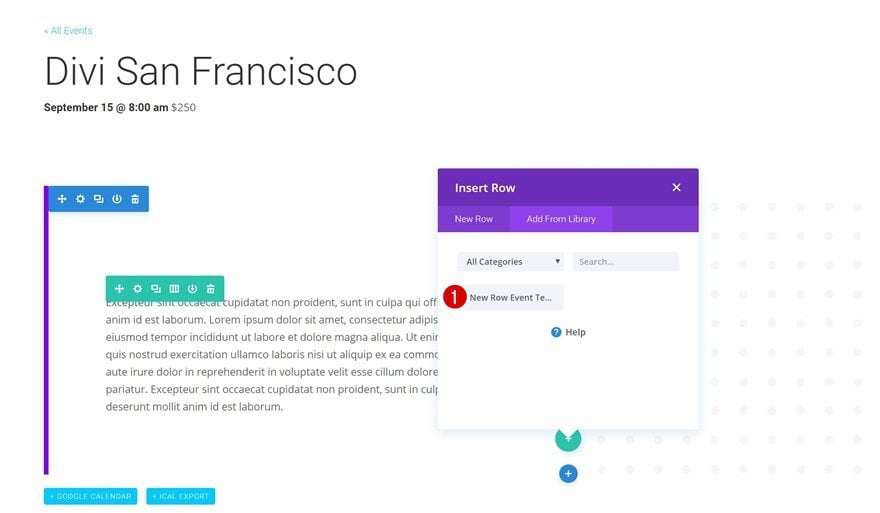
Import Saved Row
Right below the row you’ve added, go ahead and import the row you’ve saved to your Divi Library.
Sizing
We’ll need to modify some things about this row, starting with the Sizing settings. Enable the ‘Make This Row Fullwidth’ option.
Remove Body Text Module & Button Module
Next, remove the paragraph of the Text Module and the Button Module in the first column.
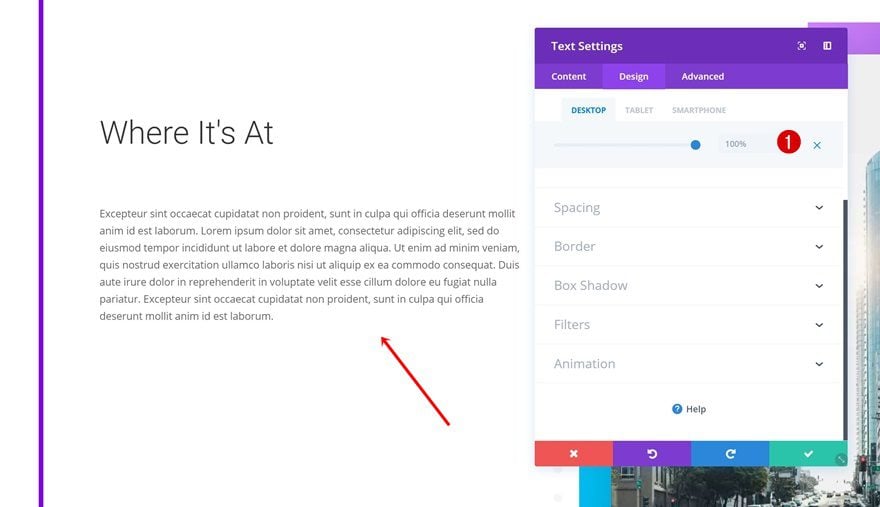
Clone Text Module & Remove Sizing
Go ahead and clone the Text Module in your first row and place it in the first column of your new row. Open the Sizing settings next and remove the customized Width for desktop.
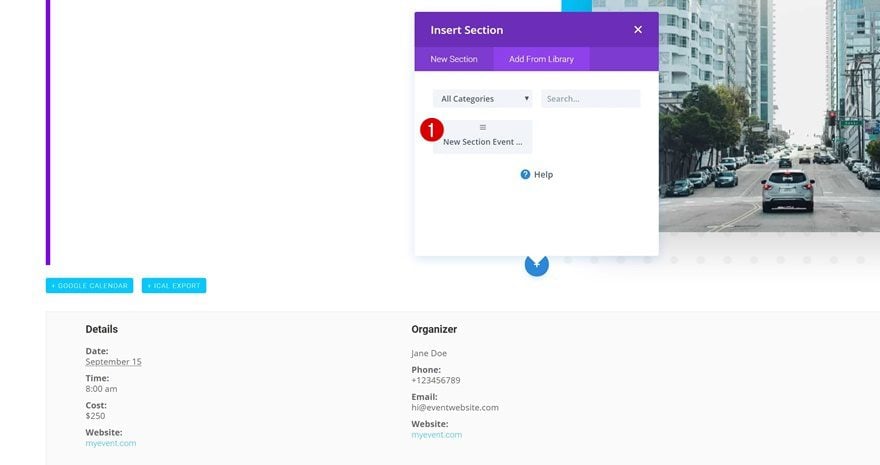
Import Saved Section
We’re done modifying the first section! Go ahead and import the section you’ve saved next.
Add Border
We’re adding a left border to this section as well:
- Left Border Width: 7px
- Left Border Color: #06c8ff
Change Sizing of Each Row
There are a couple of rows within the section you’ve just imported. Enable the ‘Make This Row Fullwidth’ option for each one of these rows.
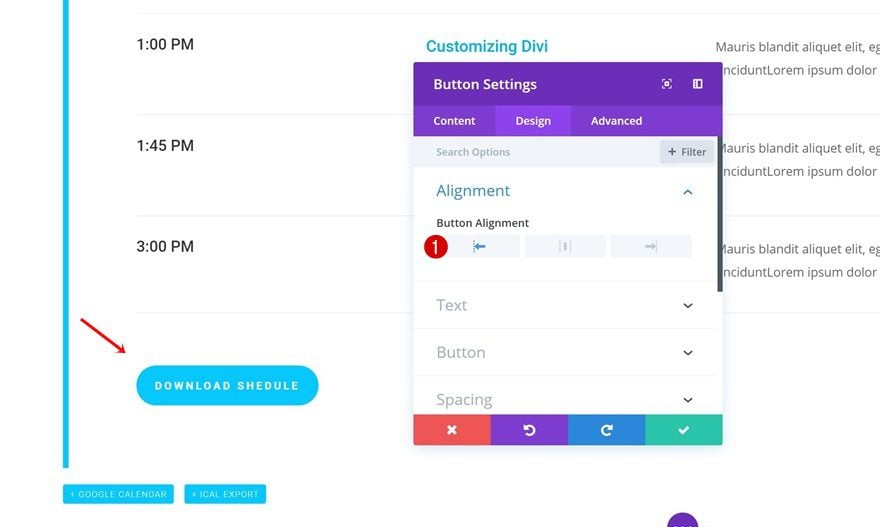
Change Button Alignment
Lastly, change the Button Alignment to left as well.
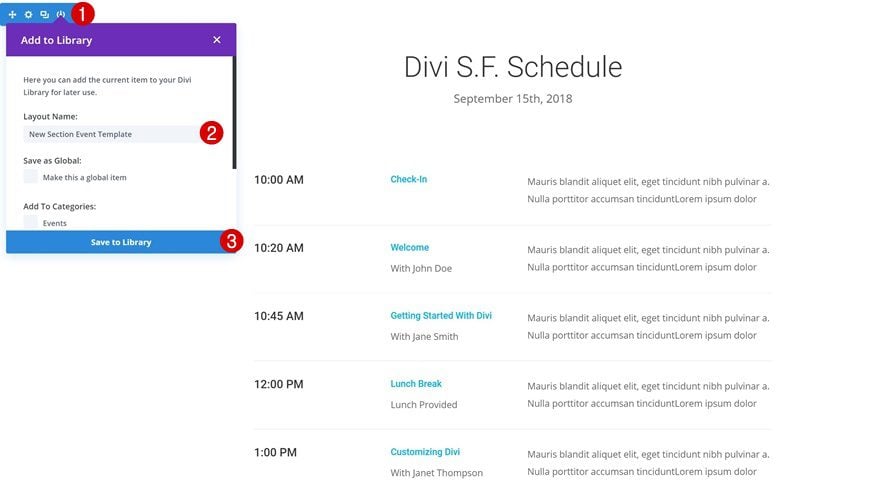
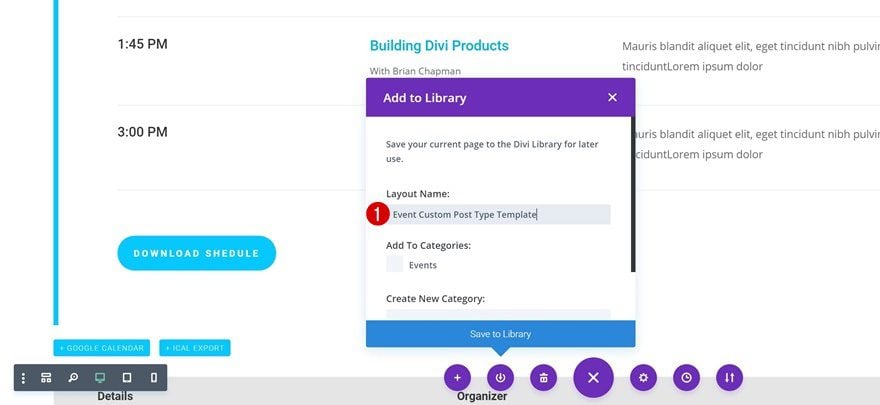
Save Template to Divi Library
Add to Library
The layout template is finished! You can now save it to your Divi Library and reuse it for other events as well.
Preview
Now that we’ve gone through all different steps, let’s take a final look at the result on different screen sizes.
Final Thoughts
In this use case blog post, we’ve shown you how to create stunning event custom post type templates. The template we’ve created matches the style of the Meetup Layout Pack. After creating this template, we’ve also saved it to the Divi Library so we can reuse it for other events as well. If you have any questions or suggestions, make sure you leave a comment in the comment section below!
The post Creating Stunning Event Custom Post Type Templates with Divi appeared first on Elegant Themes Blog.