
Have you ever wanted to display posts, projects, custom post types, and images within a carousel using the Divi Builder? Posts and images are typically displayed within a slider, which displays one post or image at a time, but what if you wanted an actual carousel that displays multiple posts at once? You can do this easily with a plugin called Owl Carousel Pro.
Owl Carousel Pro is a third-party plugin that adds two new modules to the Divi Builder. The first displays post types such as projects, posts, and custom post types. The second is an image carousel compete with visual editor to add any type of content you want.
There is a free version of the plugin available. I’m taking a look at the pro version, which adds several new features including:
- custom post types
- display custom fields
- custom query
- change thumbnail size
- change number of images shown
- open image in lightbox
Images for the examples are taken from Unsplash.com.
Installing Owl Carousel Pro
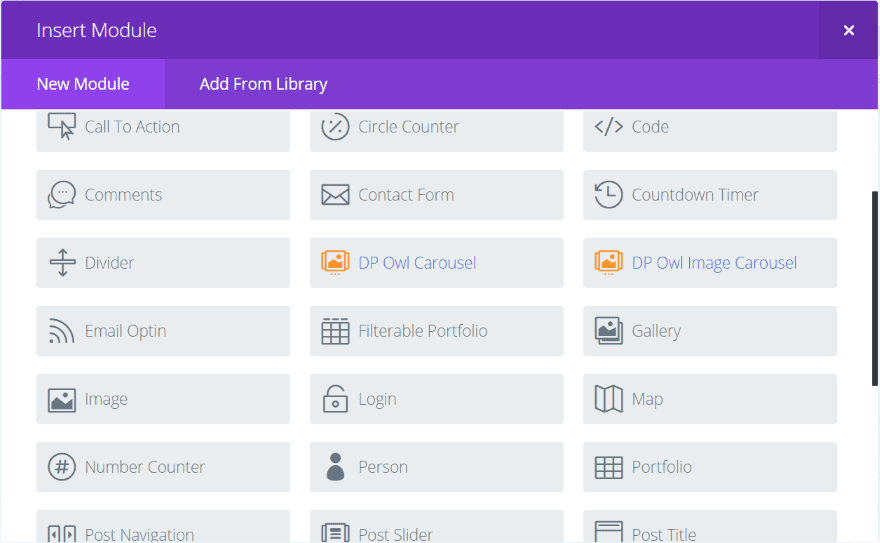
Upload and activate the plugin as normal. You’ll then see two new modules in the Divi Builder: DP Owl Carousel and DP Owl Image Carousel. The modules are colored differently than the standard Divi modules to help them stand apart. This is my preference for third-party modules because it makes them easier to find.
DP Owl Carousel
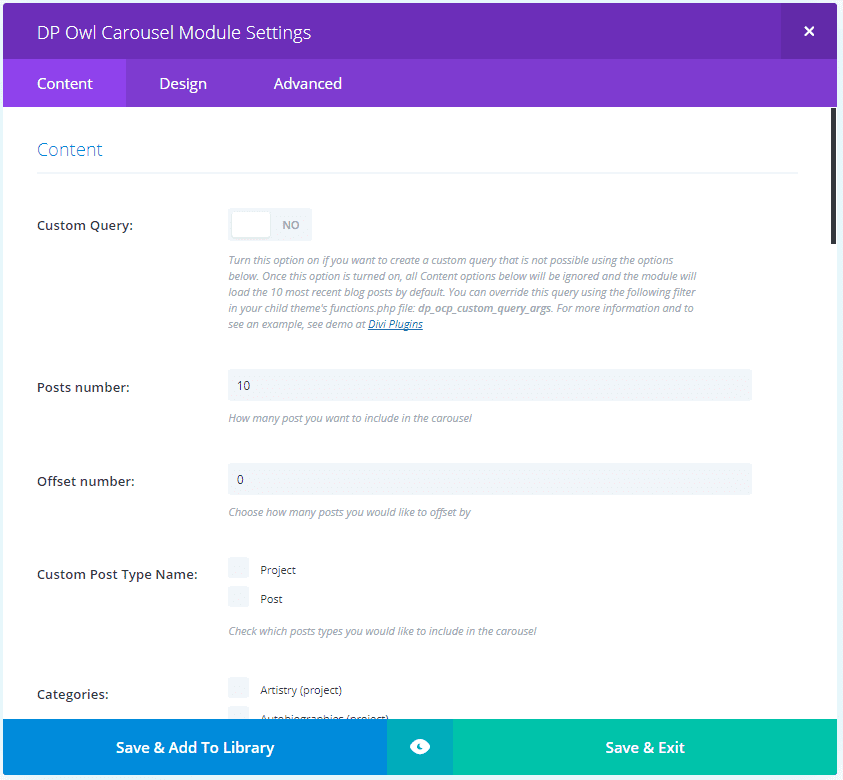
DP Owl Carousel displays posts, and projects, and custom post types within a carousel. It will display your last 10 posts or from categories or tags that you select. Its content tab includes settings for content, and elements. The design tab includes text, post title text, post meta text, post excerpt text, custom filed text, spacing, arrow, controls, and thumbnails.
The advanced tab contains the expected CSS settings but also adds click action, animation (determines the timing for the scroll), background, and visibility. The background colors in both modules are single color only, so there are no gradients or images available. I normally wouldn’t look in the advanced tab unless I wanted to use CSS, so I would have missed these settings as I expected them to be in the content tab.
You can create a custom query (examples given at the website) or you can use the settings within the module to control what is displayed. It includes several settings to control the display such as number of posts, an offset number, custom post type name, categories, tags to include, and tags to exclude. It added my custom post types automatically.
Custom queries are added to your child theme within the PHP code (always make PHP changes in a child theme and not the parent theme so you don’t lose your changes when the theme updates). The developer’s website includes a few examples.
Note – always try code on a test site before adding it to your live site.
DP Owl Carousel Examples
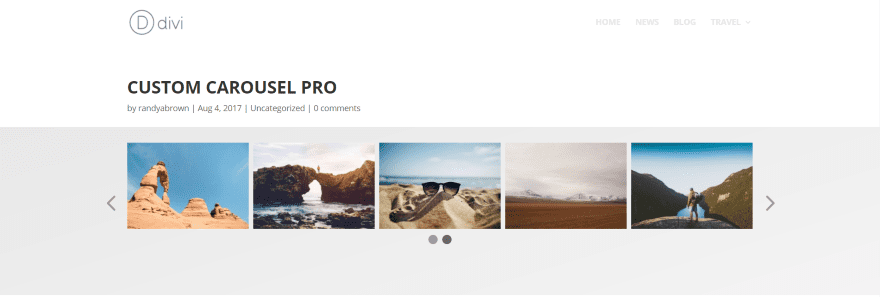
This is the standard design (I’ve added a background to help it stand out). It displays my last 10 posts in all categories. I’ve included the Divi header and post meta to show how it looks within the page. Clicking any of the images takes you to the post.
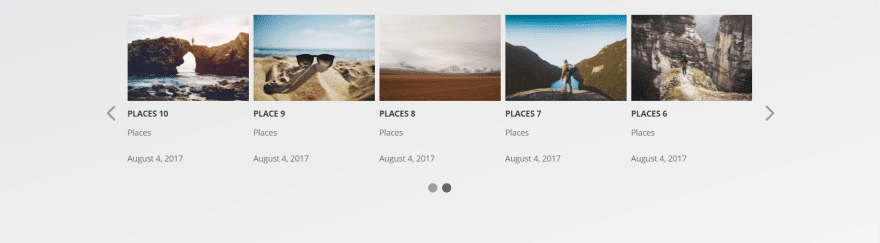
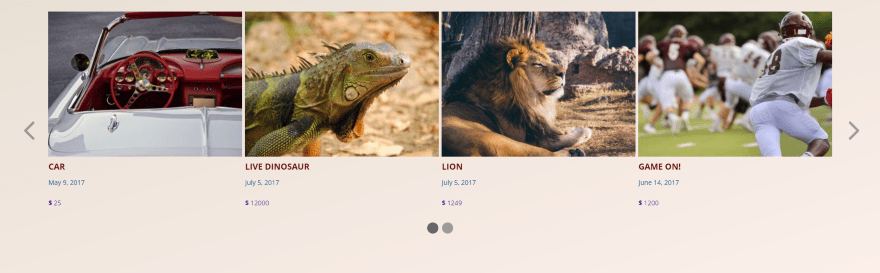
This one adds the title, category, and date. You can also show custom fields if you have them set up.
This one shows the title and post excerpt using the default 270 characters.

In this one I’ve set the post excerpt to 70 characters.

In this one I’ve disabled the arrows and controls. The animation still works but users can’t shuffle through the slides.
In this one I’ve changed the font sizes and colors, made the arrows red, increased the size of the controls and made them purple, increased the size of the thumbnails, reduced the margin to 0, and set it to display 3 images. The second color for the controls are a darker version of the color I chose. The second color is provided by the plugin.
In this one I’ve added a background in the module itself and changed the item margin so the background shows between the posts. I’ve also changed the font colors and this time I adjusted the line height and spacing. It shows 4 posts per screen and I’ve reduced the thumbnail size. I set the arrows to large and controls to small.
When you change the thumbnail size it will only adjust to fit with the number of posts your showing. So if you want the images larger you’ll need to manually reduce the number of posts that display.
DP Owl Image Carousel
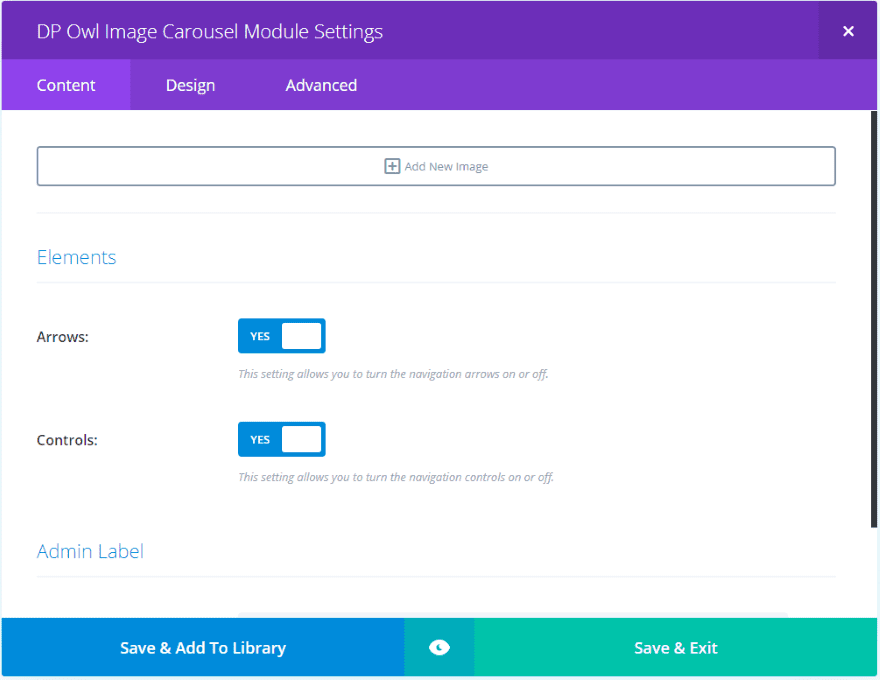
The DP Owl Image Carousel displays images within a carousel. It lets you add images and display the arrows and controls. Design settings include text, image title text, image content text, spacing, arrow, controls, and thumbnails. The advanced tab is the same as the DP Owl Carousel module.
You can add as many images as you want, have them to open in a lightbox, and have it to use a copped version of the image or the original image. I’ve purposely chosen images of different sizes to see how it works.
The images display nicely. I like that you can link to a URL or open them in a lightbox. I’d like to see overlays added to the images as this would enhance the experience even further.
DP Owl Image Carousel Examples
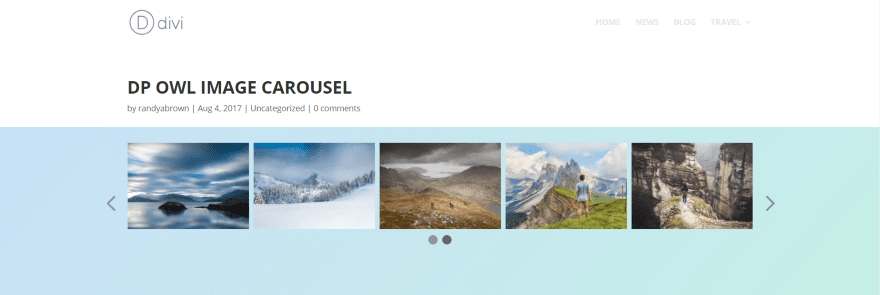
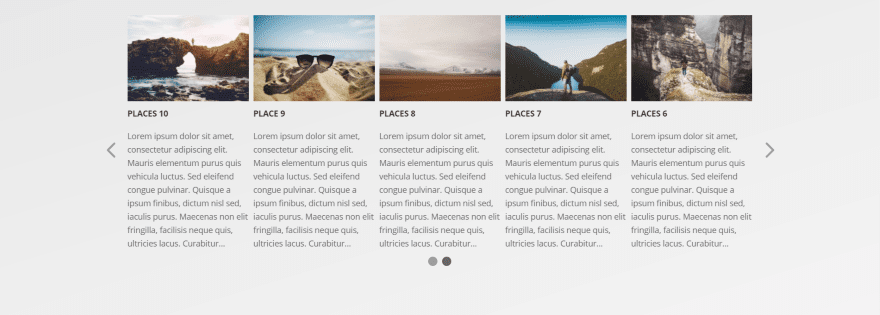
Here’s how the module looks on the page using default settings. I’ve added a background in the section to help it stand out.
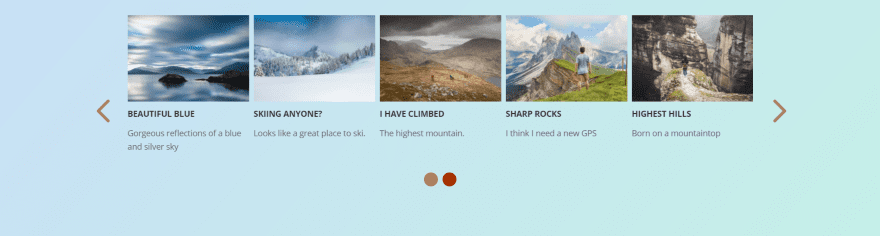
In this example I’ve added titles and text to the images. I’ve also set the arrows and controls to large and changed colors for each.
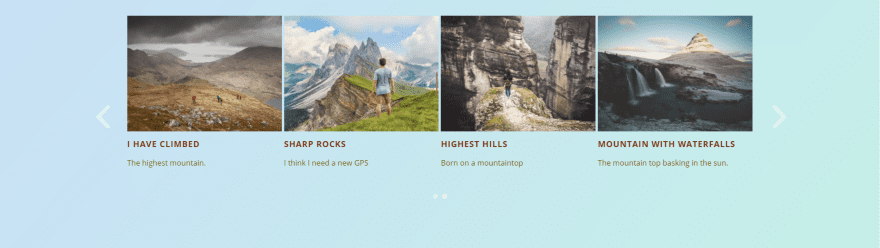
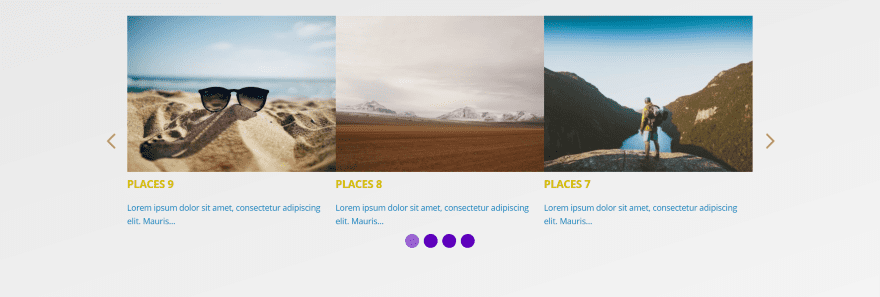
This one displays 4 images. I’ve increased the image size and decreased the item margin from 8 to 4. Next I adjusted the sizes and colors of the fonts, arrows, and controls. The title fonts have increased spacing.
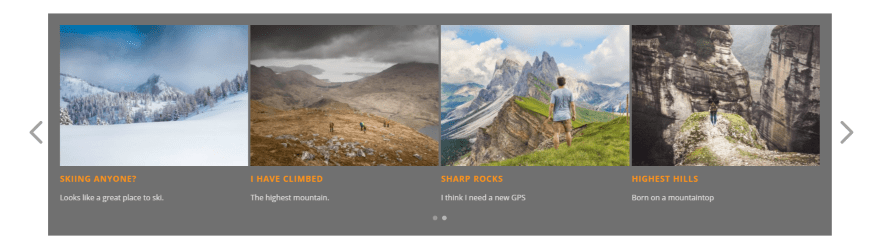
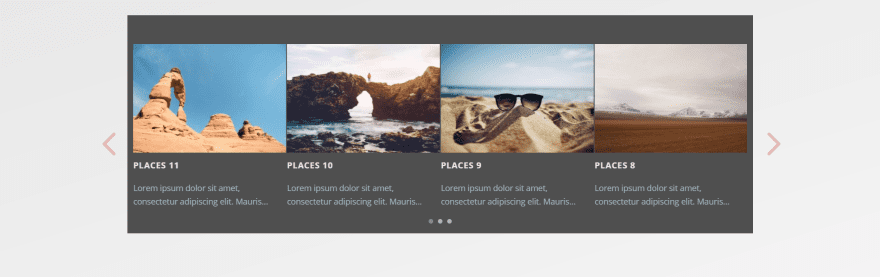
This one uses a dark background with new colors for the fonts, controls, and arrows.
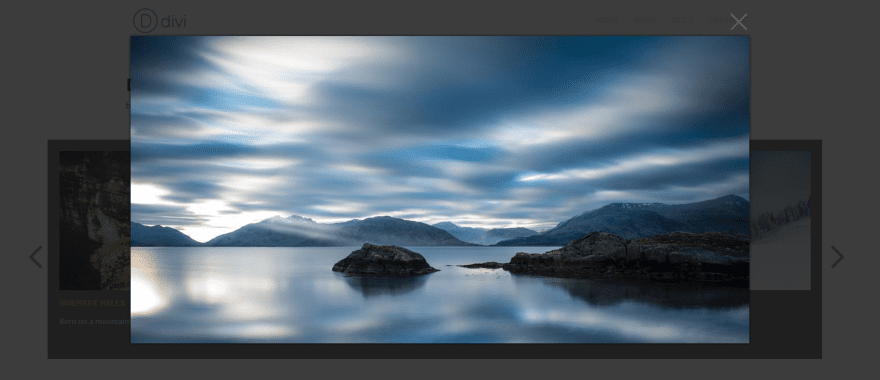
Here’s how the images look when you open them in a lightbox. The scrolling animation still works in the background.
Custom Post Types
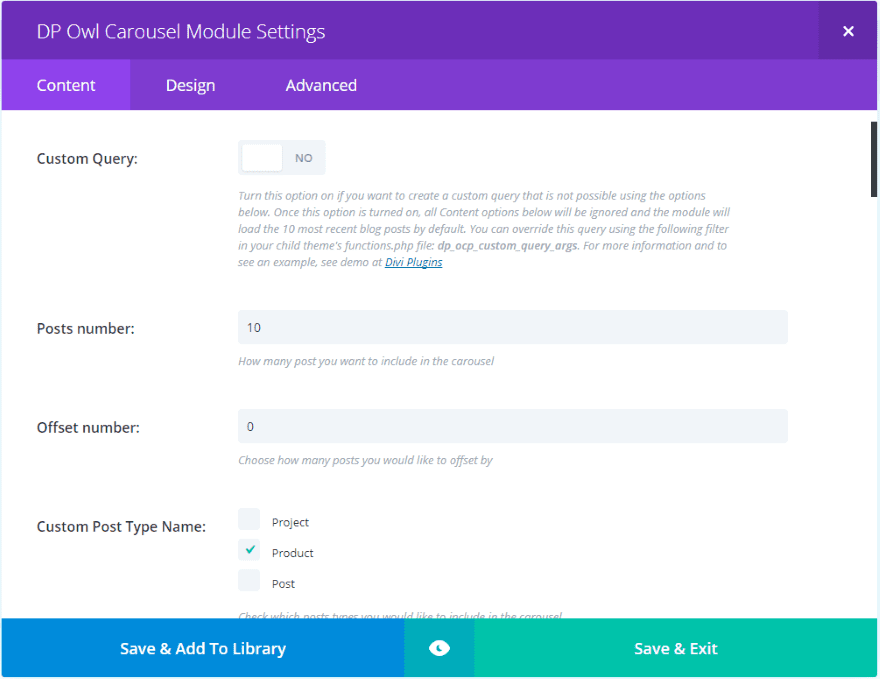
In the Owl Carousel Pro module make sure Custom Query is disabled (this is only used if you want to create your own custom filters instead of choosing categories from the list) and choose your post type under Custom Post Type Name. I installed WooCommerce and now automatically have Product as an option.

Each of my product categories are automatically added to the category list. Now I can scroll down and select the products that I want to display in the carousel.
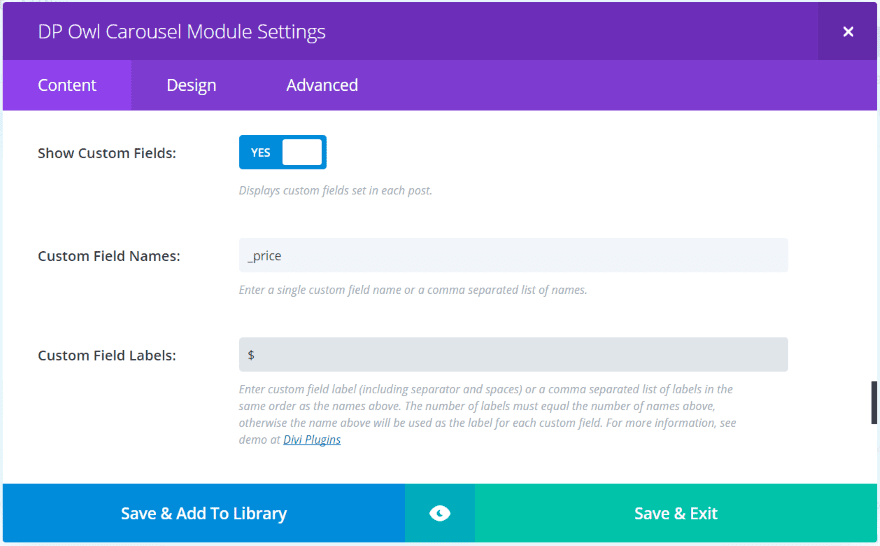
The products will display but in order to show the prices I need to enable the custom field, choose the field to display, and add a label to show my desired currency symbol. Scroll down and enable Show Custom Fields. Add _price to Custom Field Names and $ to Custom Field Labels.
I now have a product carousel that shows off the WooCommerce categories that I selected. I selected to show 4 posts, increased the image size, changed the font colors for the title, meta, and custom fields, and increased the font sizes for the title and custom fields. In this example I’m only showing the date for meta, but just like regular posts I could show any of the meta information and an excerpt.
Using Owl Carousel Pro with Extra and the Divi Builder Plugin
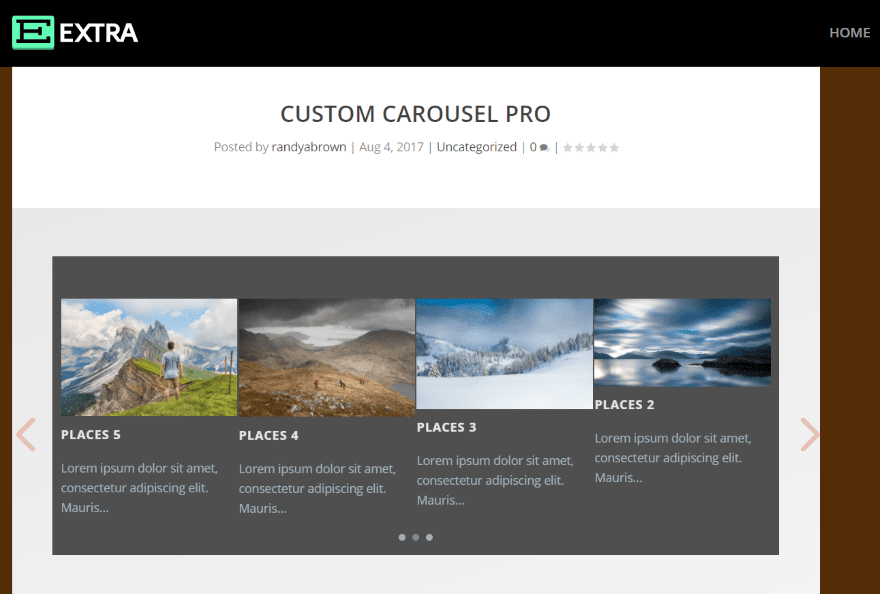
Owl Carousel Pro works great with Extra as well. This is the image carousel.
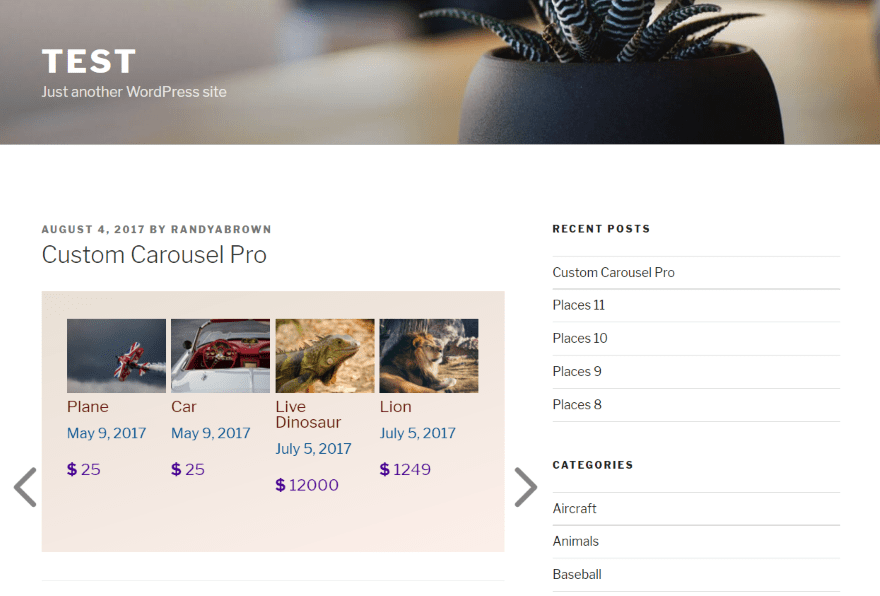
Here’s a look at the plugin with the Divi Builder plugin installed on the Twenty Seventeen WordPress theme. This one displays my WooCommerce products.
License
The plugin can be used on unlimited websites for you and your clients. It includes 1 year of updates and support.
Final Thoughts
Owl Carousel Pro adds two nice modules to the Divi Builder that allows you to display posts, project, custom post types, and images within a customizable carousel. Most of the expected Divi module customizations are included as well as a few new features to control the display.
I found almost every feature and setting to be intuitive. I did find the custom filters confusing for the average user. I’d like to see several complete examples of creating filters as this would demonstrate the vast capabilities of this plugin. Even if you don’t want to deal with code the pro version adds enough features to make it worth considering.
We’d like to hear from you. Have you tried Own Carousel Pro? Let us know about your experience in the comments.
Featured Image via gst / shutterstock.com
The post Divi Plugin Highlight – Owl Carousel Pro appeared first on Elegant Themes Blog.