
According to the most recent 2017 numbers, there are an estimated 3.7 billion (yes, with a B) Internet users. Yeah…that’s a lot. And I think we can agree it’s a safe bet that not all of them speak the native language of your site. So if you’d like to make your WordPress site more accessible to those billions of people, one of the easiest ways you can do that is with a Google Translate button.
Google Translate is by no means the be-all-end-all solution for creating a multilingual WordPress site. But it is one of the quickest and easiest ways to make your site accessible to people who speak different languages.
In this post, I’ll start with a quick rundown of when you should choose Google Translate over something more static like WPML. Then, I’ll show you how to add a free Google Translate button to both Divi sites and other WordPress sites.
When Is It a Good Idea to Use Google Translate for WordPress Sites?
We’ve already featured a guide on how to create a multilingual website with WPML, which might leave you wondering how this Google Translate button is any different.
Basically, WPML gives you the functionality to create fully standalone translated versions of your site that search engines like Google can index. WPML won’t do the actual “translating” for you – it just gives you the ability to create a cohesive, SEO-friendly translated site.
If you’re serious about creating a usable, rankable version of your site in a different language, it’s 100% better to use a dedicated tool like WPML. It just takes a lot more time and effort.
Google Translate, on the other hand, dynamically translates any page on your site into any language supported by Google Translate.
The pros of this approach are:
- You don’t need to handle translations yourself.
- Users can select from more than 90 languages, which would be nigh-on impossible to offer with something manual like WPML.
- You don’t need to store translated versions of your site.
But the cons are:
- Google won’t be able to index the translated versions of your site. This is a huge negative if you’re trying to go multilingual for business purposes.
- It’s exclusively machine translation, which is by no means perfect.
- You can’t go back and manually edit any of the machine translations to correct errors.
If you just want to make your content more accessible and don’t care about SEO, cohesive experiences, or business uses, Google Translate is a good option. Otherwise, stick with something more static like WPML.
How to Add Google Translate to Your WordPress Site
To add Google Translate functionality to your WordPress site, you can use a free plugin named Google Language Translator.
While there are a few other Google Translate plugins available, I recommend this plugin because it’s:
- Popular. Over 100,000 active installs according to WordPress.org.
- Updated. The last update was 2 months ago and the changelog is full of minor bug fixes and enhancements.
- Flexible. It gives you a good deal of control over languages and locations for your translate button.
- Well-reviewed. 4.5-stars on over 120 ratings at WordPress.org.
Here’s exactly how to use the plugin for regular WordPress installs, as well as Divi sites.
Step 1: Install + Activate, Then Head to Configuration
To get started, you can install and activate Google Language Translator right from your WordPress dashboard.
Once you’ve got it activated, you can configure the plugin by going to Settings → Google Language Translator.
The settings are well-documented, so I don’t think you’ll need too much help to get things set up. But here are some of the highlights of what you’ll definitely need to select.
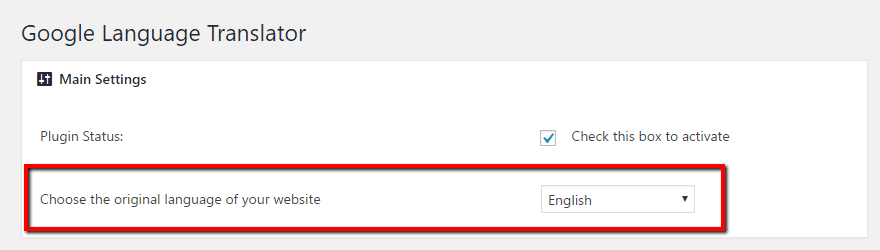
First, under Main Settings, make sure to select the original language of your website in the Choose the original language of your website drop down. For example, if you write your content in English…you should choose English. Not too complicated!
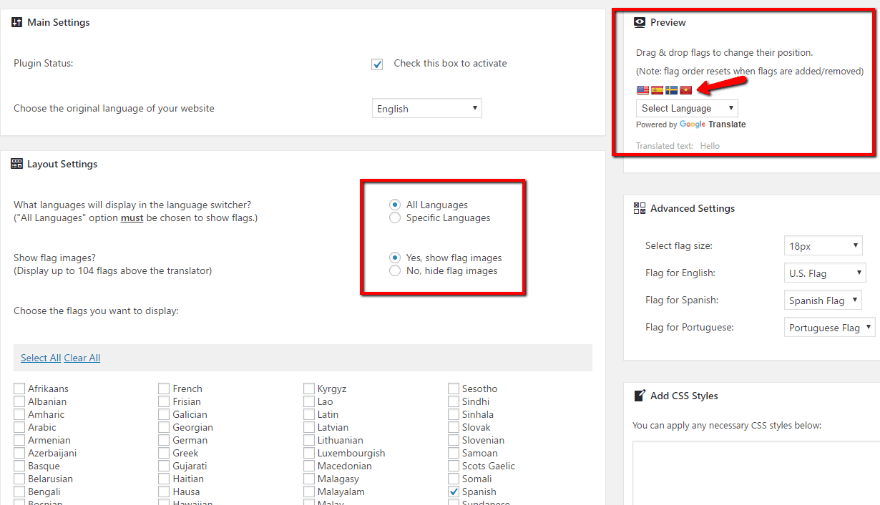
In Layout Settings, you can choose whether or not to show flag images and, if enabled, which specific flag images to display. Note – users can still select any language from the drop down. This setting just affects the quick link flags that are displayed above the language drop down.
For example, I selected flags for:
- English
- Spanish
- Swedish
- Vietnamese
And you can see how that looks in the live preview:
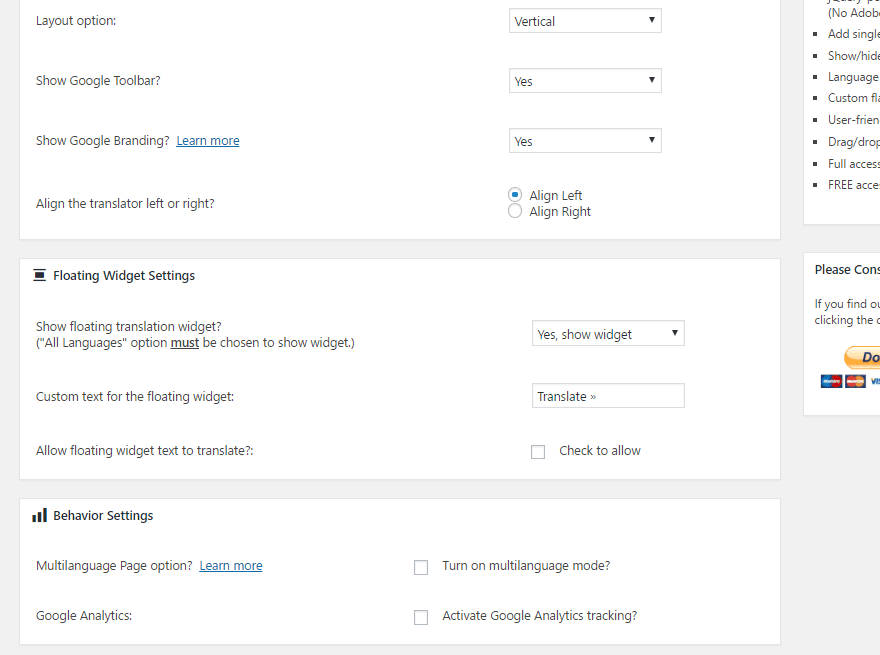
Continuing down the settings page, you can configure some additional layout settings, the text on the optional floating widget, as well as whether or not to activate Google Analytics tracking:
Then, at the bottom, you’ll see a Usage section which gives you a shortcode and PHP function to display your Google Translate tool. Beyond these options, the plugin also gives you a dedicated widget that you can use in any widgetized area on your site.
Make sure to click Save Changes, and then you’re ready to move on to displaying the Google Translate tool.
How to Display Google Translate Tool Site-Wide With a Widget
If you want to make the Google Translate tool available on every page of your website, the easiest way to do that is to use the built-in widget. Of course, you could also use the included PHP function if you feel comfortable digging into some code.
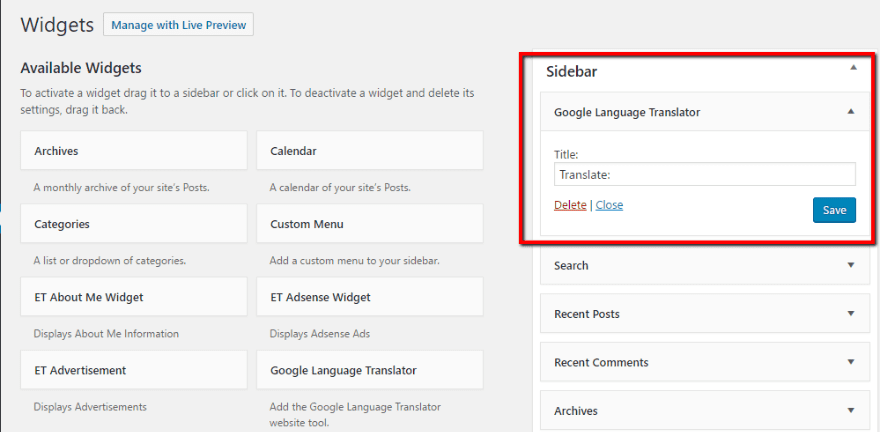
To use the widget, just head to Appearance → Widgets and drag over the new Google Language Translator widget. Beyond giving it a title, there’s nothing else you need to configure:
When you head to your front-end site, you should see the translate option in your sidebar:

How to Display Google Translate Tool In Individual Posts/Pages
If you’d only like to display the Google Translate option for specific posts or pages, you’re probably better off using the shortcode. Note – don’t try to use a shortcode AND the widget at the same time – it won’t work. You need to pick one or the other.
The shortcode works whether you’re using the normal WordPress Editor or the Divi Builder. But I’ll show you both to be thorough.
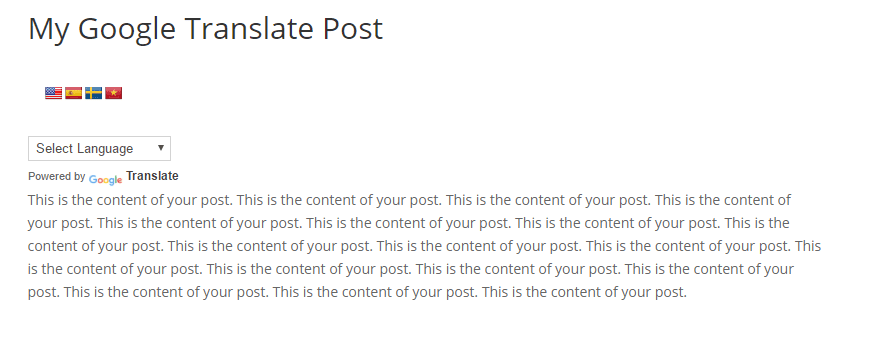
To use the shortcode in the regular WordPress Editor, I recommend placing it above your content so that your visitors can quickly find the translate button. Just paste in the shortcode:
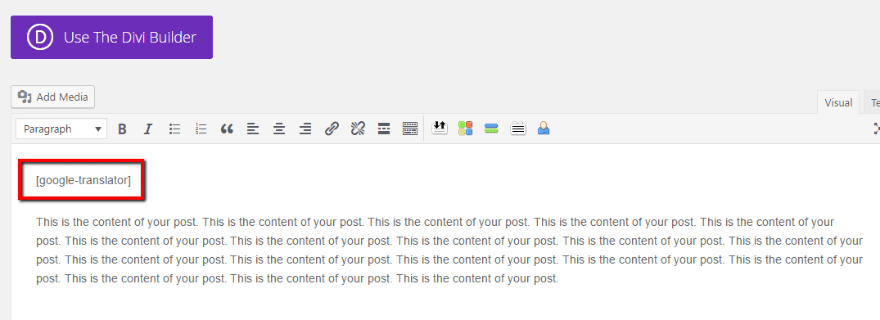
And then you’ll see something like this on the front-end:
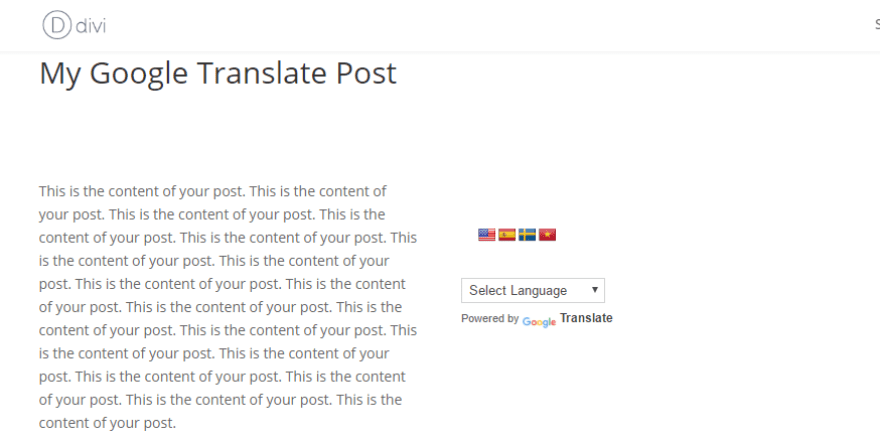
Similarly, to use the Google Translate tool while designing pages with the Divi Builder, all you need to do is paste the shortcode into a Code module:
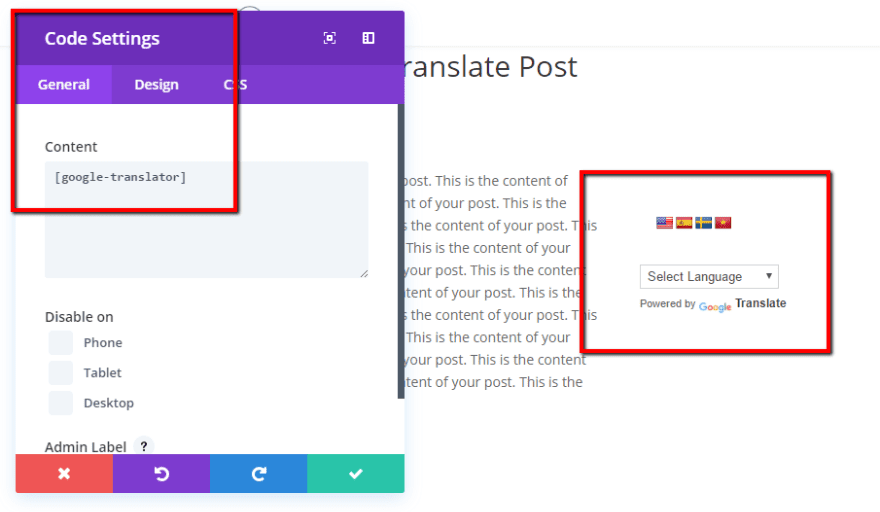
And you can have the Google Translate tool show up anywhere in your page design:
What Does It Look Like When Someone Uses The Translate Tool?
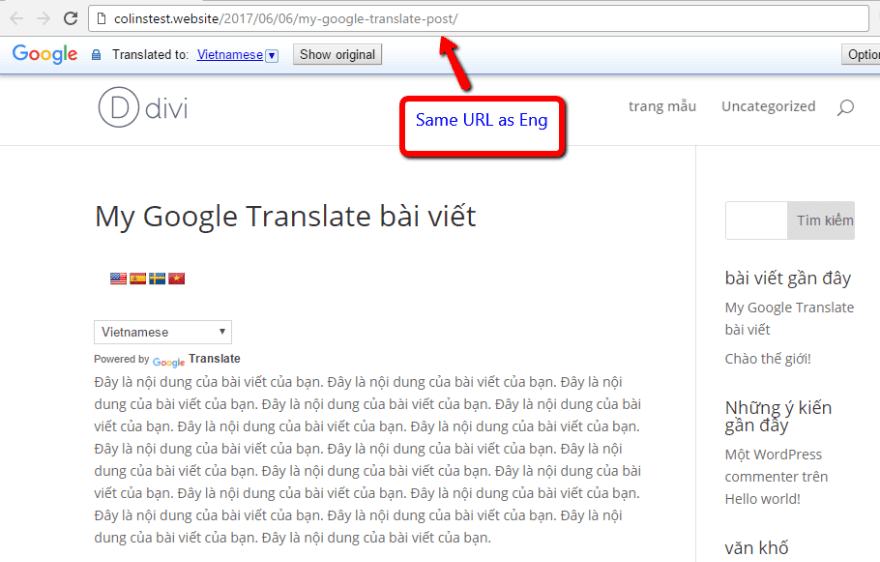
If someone uses the translate drop down, all the text on your site will instantly translate and the Google Translate toolbar will pop up (if enabled in the settings). It’s important to note that the URL of your page will not change, though:
Wrapping Things Up
All in all, you can be up and running with Google Translate on your WordPress site in just a couple of minutes. The only downside is that you can’t manually edit your translations, nor will Google be able to index the translated versions of your site.
If you’d like a plugin that lets you create a multilingual site quickly while still allowing you some flexibility, you might also want to check out Weglot. It offers a happy middle ground between Google Translate and plugins like WPML.
Now over to you – what are your thoughts on Google Translate vs the more heavy-duty multilingual plugins? Which do you prefer and why?
Article thumbnail image by Aysezgicmeli / shutterstock.com
The post How to Add a Google Translate Button to WordPress appeared first on Elegant Themes Blog.