
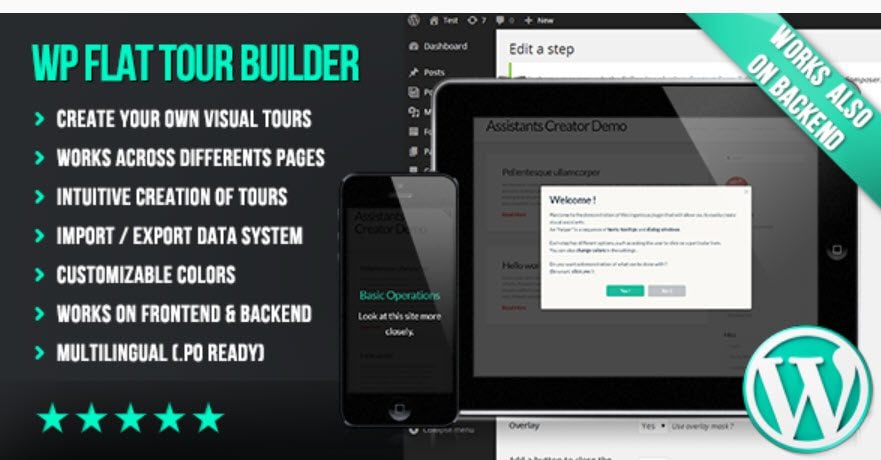
You may not think of yourself as a tour guide, but you certainly are. Every day, people come to your website, and you guide them around one way or another. You direct them with how you lay out your menus and order your sections. Your entire UI should be a funnel for your visitors to go from visitor to customer or subscriber. One way you can do that in a novel way is to use a website tour builder to point out the most important aspects of your site.
Easy as 1, 2, 3
Leading your guests through a guided tour of your site is far easier than you might think. Thanks to the WP Flat Tour Builder plugin. You’re really not going to find a more solid way to go step-by-step with your users. Within just a few clicks, you’ll be set up to, well, get them set up.
I should mention, however, that WP Flat Tour Builder is a premium plugin, and no, there’s not a free version. You can grab it for just $20, though. That’s a pretty small investment for a site that either needs to direct its users through a sales funnel or teach them a process.
Installation and Set Up
When you purchase the plugin, you’ll download a file called WP_Tour_Builder.zip. Premium plugins have to be installed manually since they’re not in the repo, so go to Plugins – Add New and select the .zip file on your computer.
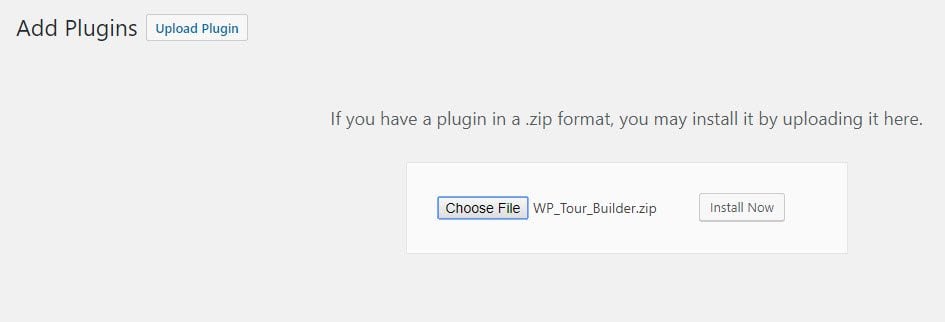 Once you hit Install Now, you just activate it like you do any other plugin. Now you should have a sidebar item called Flat Tour Builder and its sub-menus.
The base plugin page may be a bit odd at first because you haven’t set up a tour yet. It wants you to choose your color palette for the tour. If you know what you want, feel free to do this now. If not, you can always come back and choose the right hues.
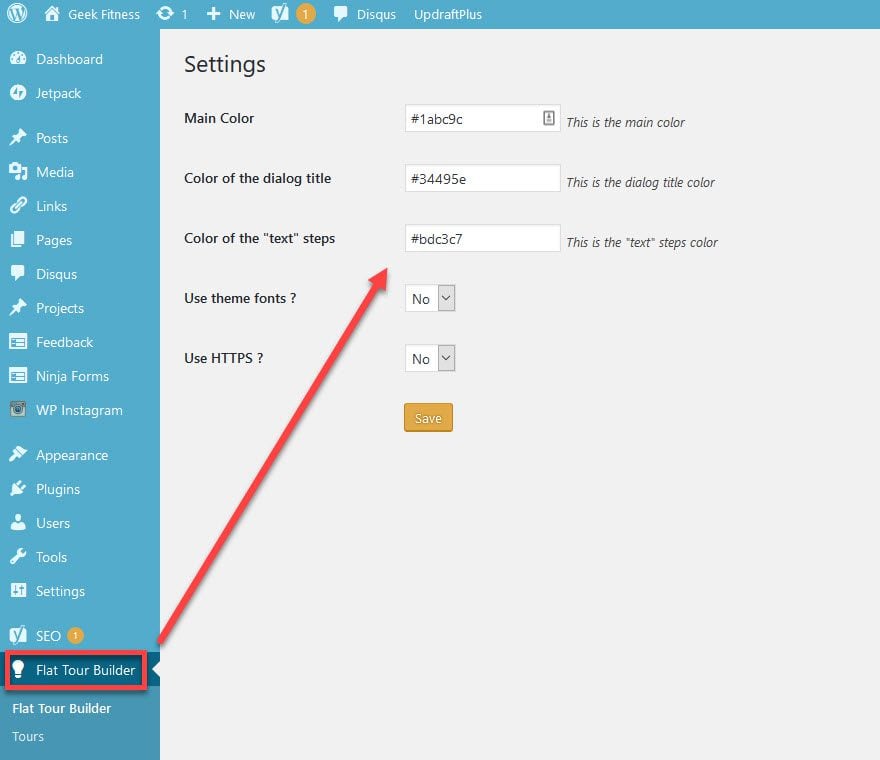
You may also set the fonts individually for the tours, but I personally prefer to have yes chosen for Use Theme Fonts (and for Use HTTPS for obvious reasons).
Creating Your Tour
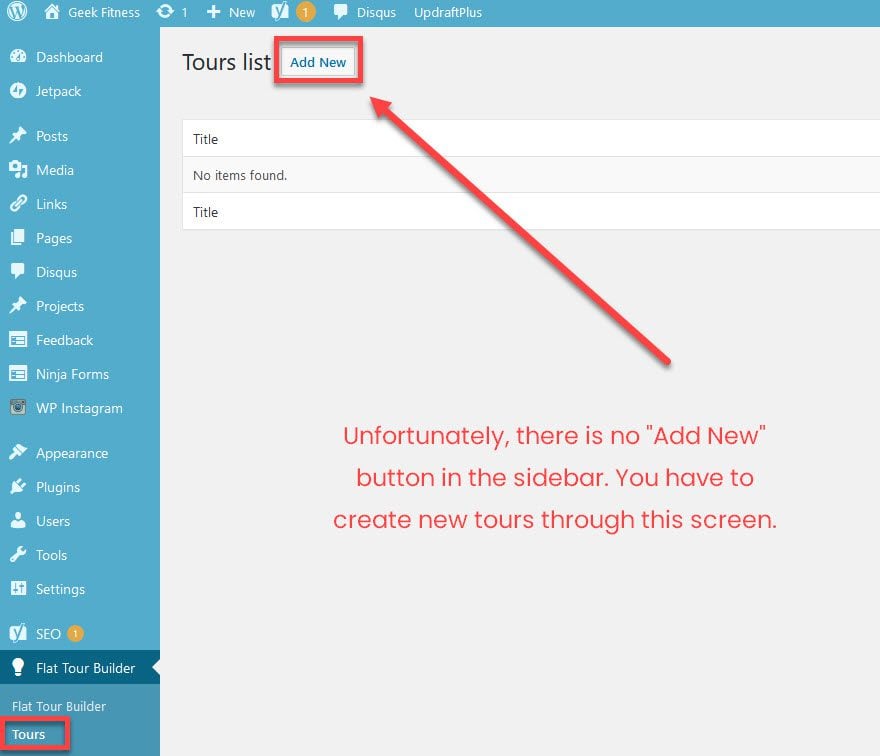
Unfortunately, there is no Add New button in the sidebar. You have to create new tours through the Tours item in the dashboard sidebar.
Obviously, the most important options you’re going to deal with are going to be on the tour creation page. And boy, do you get a lot of them to root through.
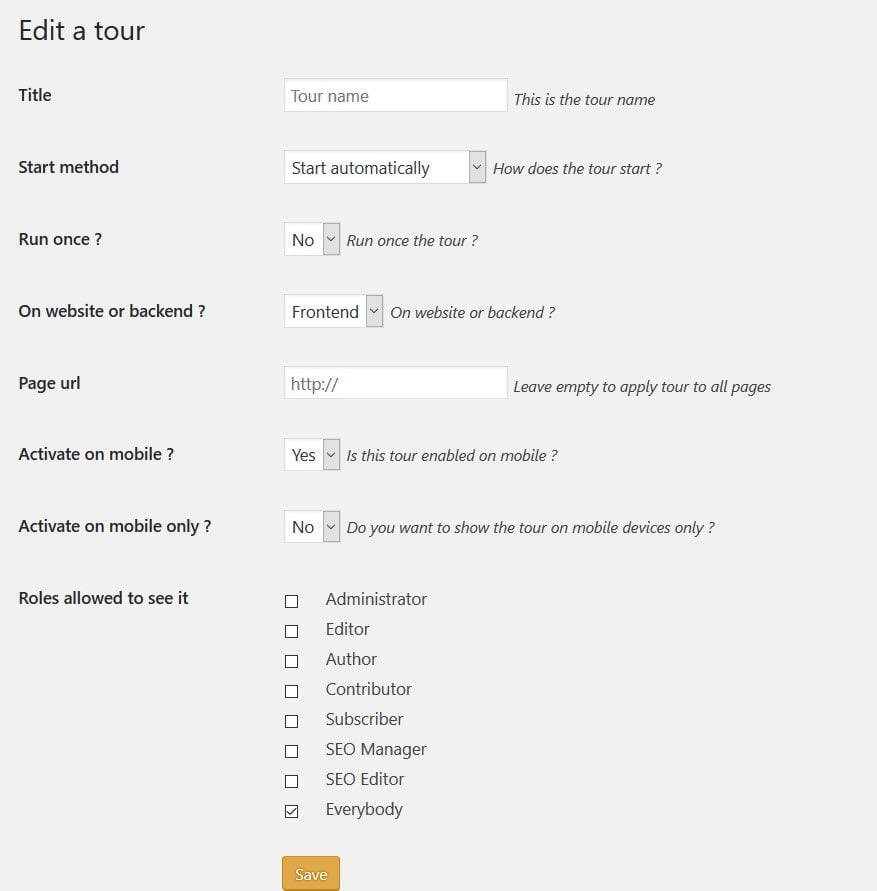
In general, what you’re doing to set up the tour initially is pretty straightforward.
- Title – The title will only be visible to you. Use this for your own organization.
- Start Method – You can set it to start automatically on page load, or when a user clicks on an element.
- Run Once? – Do you want the tour to run every time someone loads into the page, or only a single time?
- Page URL – Set a single page for a tour. This is great for courses or maybe checkout pages. This option allows for page-specific instruction.
- Activate on mobile? – Pretty straightforward. Does your tour fit a mobile user?
- Activate on mobile only? – Or does your tour only make sense to mobile users?
The Other Two Options
The plugin also has two other options that I think deserve to be talked about separately: Roles allowed to see it? and On website or backend?
It will depend on who needs to see the tour as to what roles you choose. For instance, when everyone is chosen, it will appear to every single visitor who shows up, from search, referral, or direct access. If you choose subscriber, for instance, you may be limiting access to the tour because you’re leading a paid member through a process to use the product.
But why would you need to limit access to just admin or editor? And why would you need to show a tour on the back end of your website (the WP dashboard) instead of the front? Two words: client training (or staff training, maybe).
When you do design or development work, handing off a site to clients is sometimes…difficult. Training can take quite a long time, especially if they’re not used to WordPress or you’ve done any customization. Using a website tour builder on the backend of your website will be a hands-on way for them (and a hands-off way for you) to see what the best practices are for using their new site.
Or it could be a way to onboard new staff members on how you run things and what their new workflow is going to be. Or how to use a new feature you added. Whatever. There are tons of uses for a back-end website tour builder.
Creating the Tour Steps
Now that you have a tour made, you will see it in your overall list. 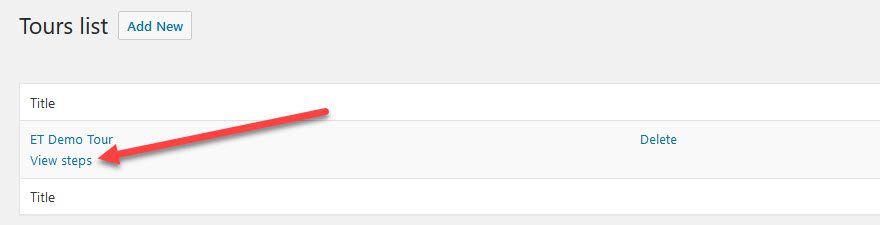
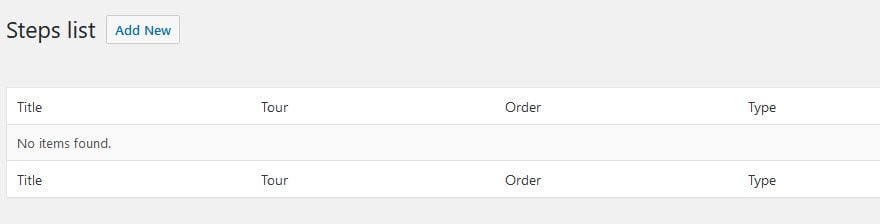
When you hover over the item, you will see the View Steps link. Since you haven’t created any steps yet, that will take you to an empty list. Click Add New to…well, you know.
You will have to enter each step of a tour individually because each step will lead or point to a different part of the site or require a different action. Within each one, you get to pick exactly how it behaves down to the element it’s attached to, timing before showing it, or even allowing the user to close it.
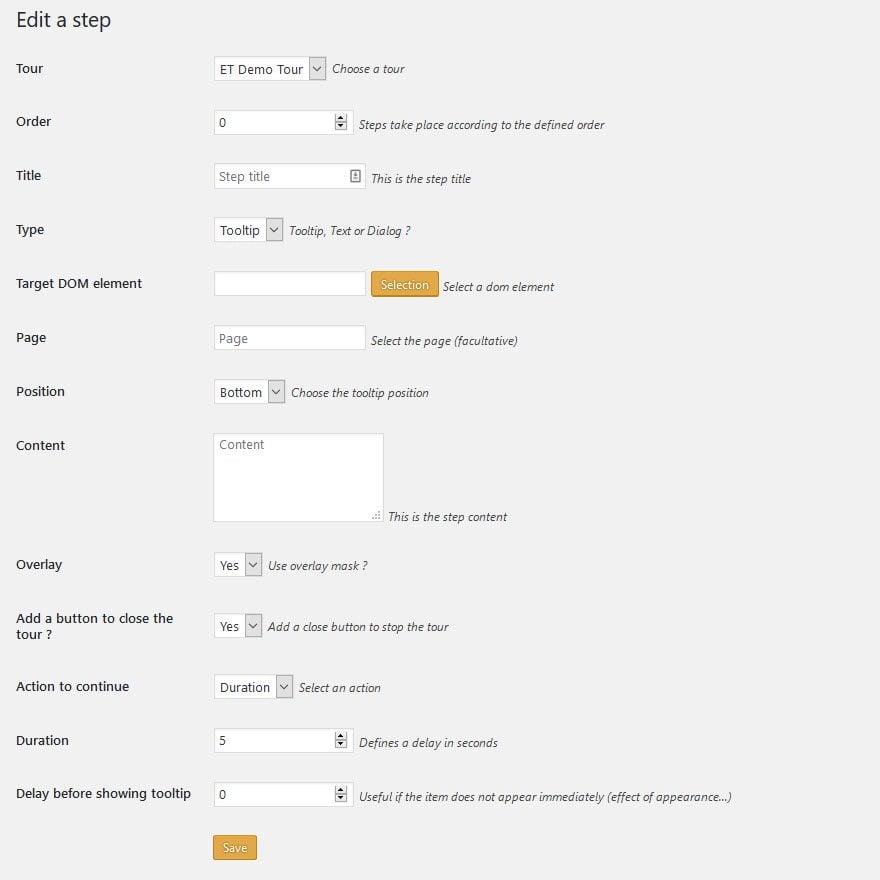
What you do with the steps is entirely up to you, but thee are three types that you can rotate between, entirely dependent on what you have to accomplish with that tour.
Tooltip
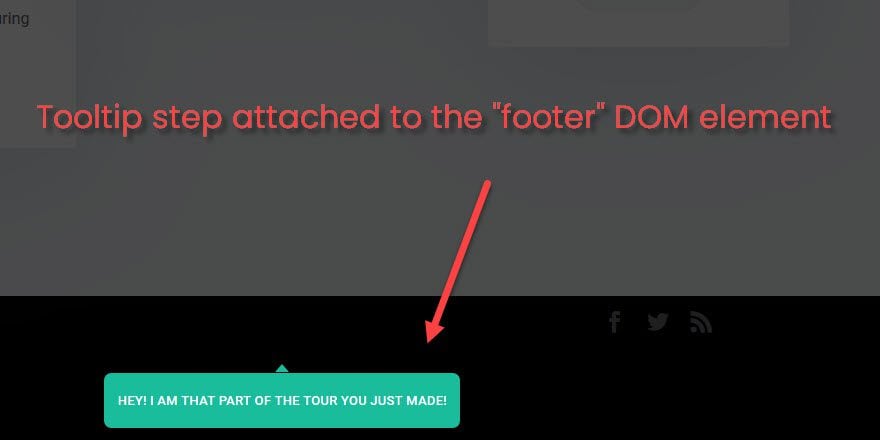
You will use a tooltip anytime you need to point out a particular element on the screen. Maybe a link or image. Good for a series of steps or making sure that a user knows where something important is.
Text
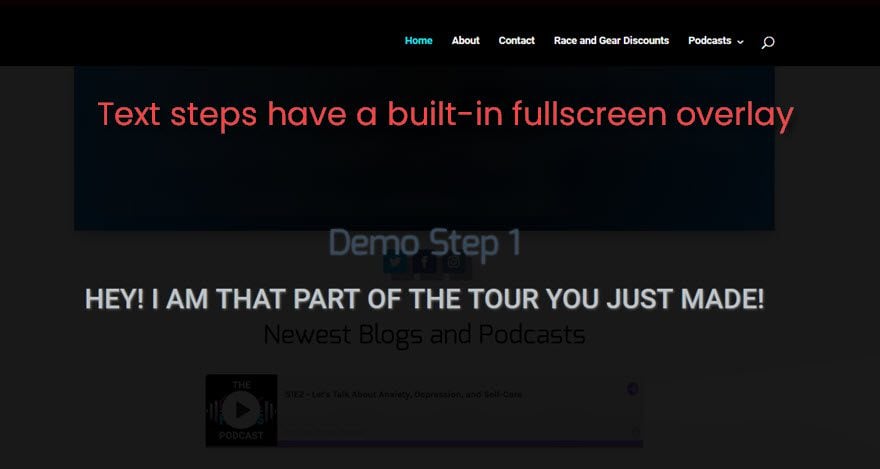
Text steps are great for introducing and ending tours, as well as providing information that your user absolutely must not miss.
Dialog
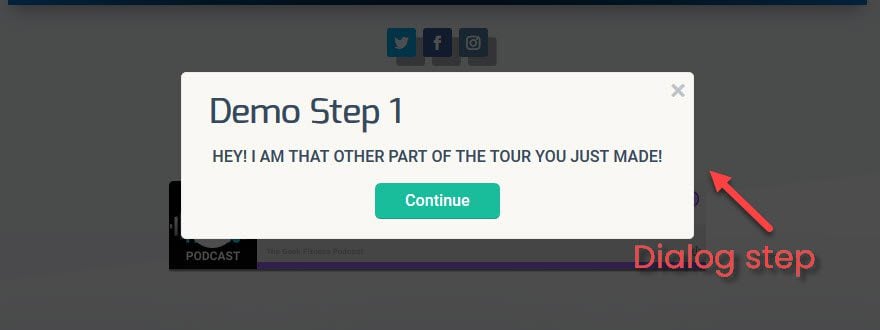
Dialog steps are pop ups that the user has to interact with. They continue or close or accept a term (or a condition!). You can use this to make sure that your user is aware that they are completing a purchase or cancelling an account. Or like the text steps, you may want to guarantee they saw some information and require them to take action to proceed.
Do You Need a Website Tour Builder?
Well, even if you didn’t think so before, I bet you’ve thought of a few ways to use a builder on your site. You can even have a single-step tour that directs your user to something you want them to see (maybe a quick note over the play button of your newest podcast episode).
Whatever your reason and however you want to use it, it’s no trouble at all to add a tour to pretty much any WordPress site.
What do you use tours for on your websites?
Article featured image by Andrew Rybalko / shutterstock.com
The post How to Add a Visual Tour of Your WordPress Website appeared first on Elegant Themes Blog.