Featured Plugin On Sale Now In The Divi Marketplace
Divi Ajax Search is available in the Divi Marketplace! That means it has passed our review and has been found to meet our quality standards. You can visit Divi Extended in the marketplace to see all of their available products. Products purchased from the Divi Marketplace come with unlimited website usage and a 30 day money back guarantee (just like Divi).
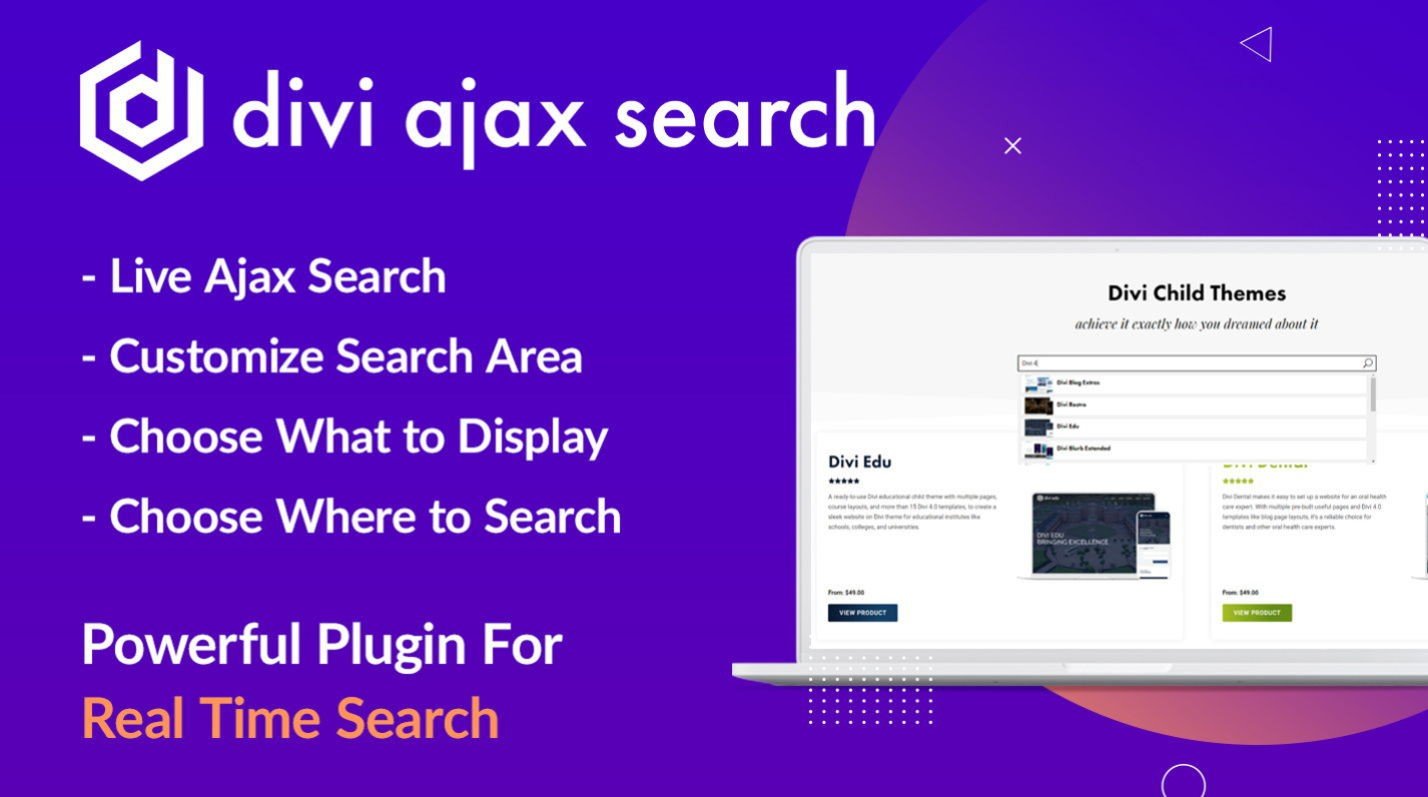
Ajax is a great way to add live searching to Divi. With Ajax, the page doesn’t have to reload to show the users the search results. This lets your visitors see the results much faster, which helps keep them on your pages longer. The result is a website that looks cleaner and functions smoother.
Ajax searching isn’t built into Divi, but it can easily be added using a third-party plugin. In this tutorial, we’ll see how to add Ajax searching to Divi and see how to style the search to fit your website’s design.
On to the tutorial.
Sneak Peek
Before we get started, here’s a look at how our Ajax search will look when we’re finished. This is the Desktop view. I’ll add an Ajax search to a WooCommerce store. I’m using the show page from the Online Store layout pack. We’ll also style the search to match the layout. Of course, since this is a test site I’m cheating and using the WooCommerce test products. The results will work the same with any products.
Here’s how the same design looks on a phone.
Subscribe To Our Youtube Channel
1. Installing Divi Ajax Search

First, purchase Divi Ajax Search from the Divi Marketplace. It’s normally $29 and includes unlimited usage and one year of support and updates. Divi Ajax Search lets you search pages, posts, projects, and WooCommerce products. It works the same with each of these post types. It can search the title, excerpt, and featured image and display them according to your settings.

To install the plugin, go to Plugins > Add New and select Upload Plugin.
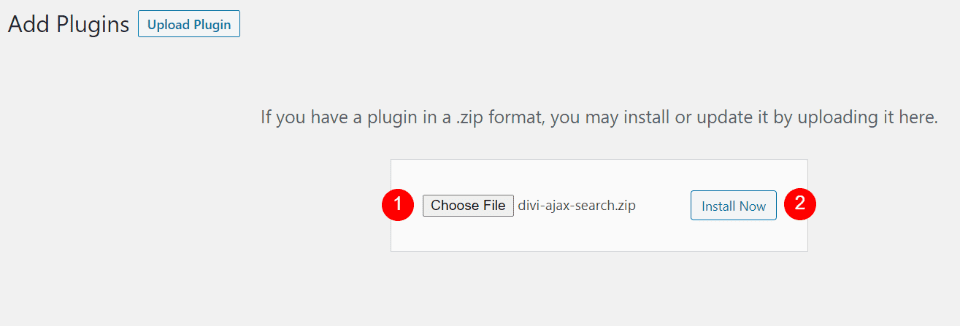
Select Choose File and navigate to the file’s location on your computer and select it. Click Install Now.
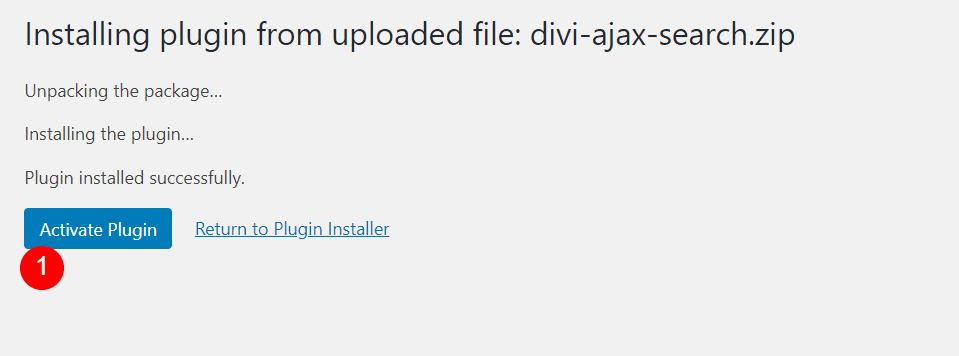
Once the plugin installs, select Activate Plugin.
2. Add Ajax Search to Your Divi Website
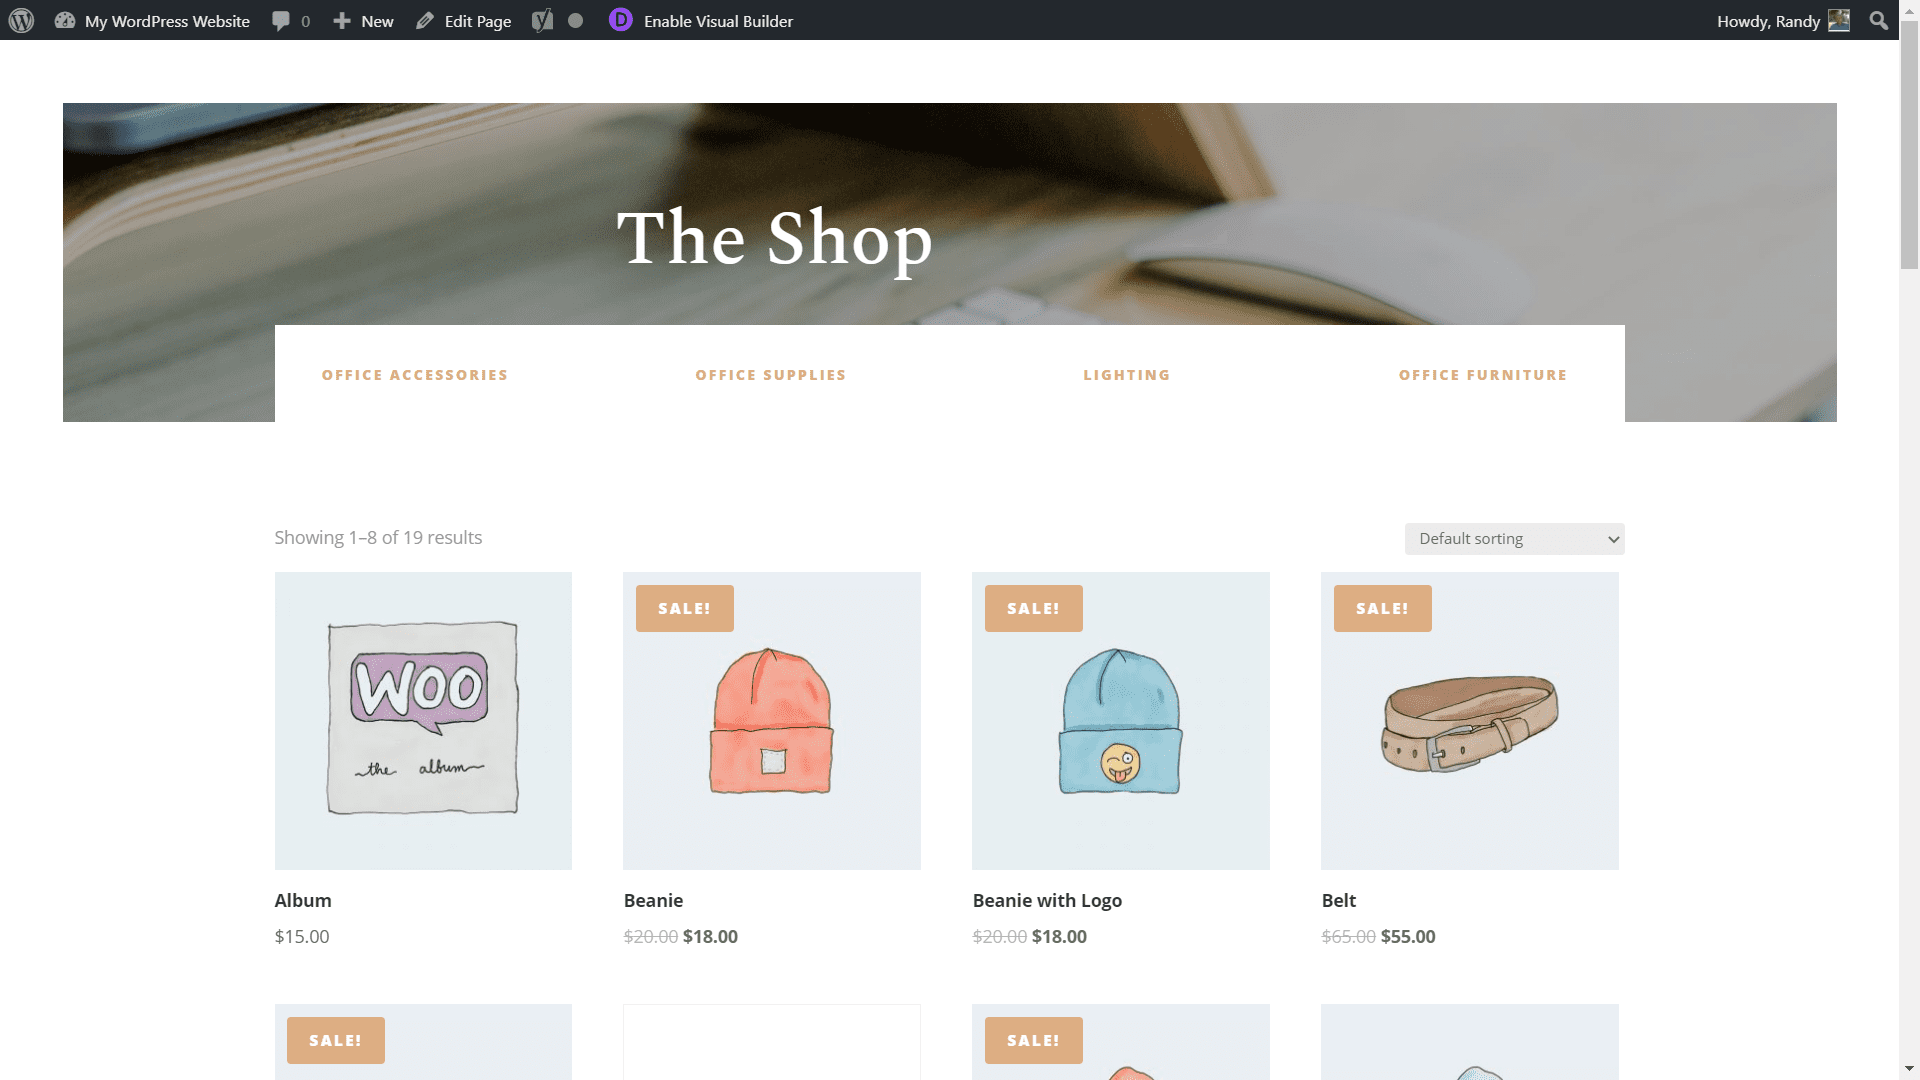
Here’s a look at the original layout. it includes the header, categories that overlap the header image, and the WooCommerce module to display the products. I will add the Ajax search feature above the shop module. I’ll also style it to match the elements of the layout.
Add Divi Ajax Search to the Layout
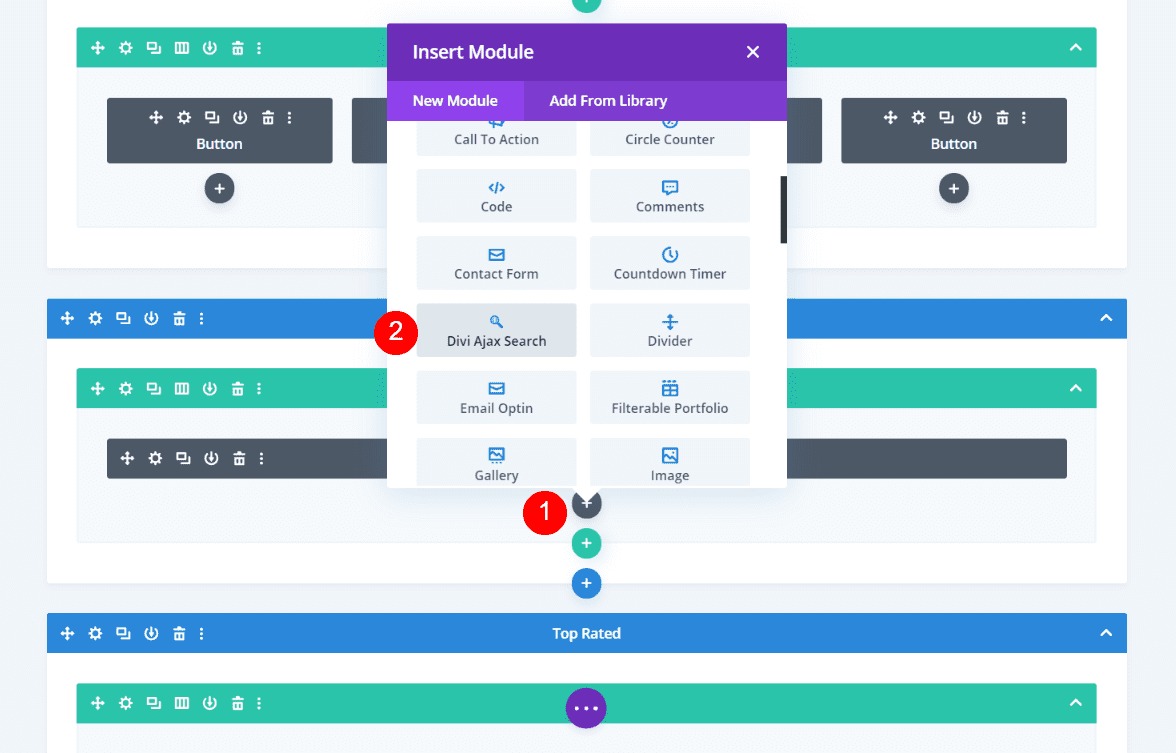
Click the icon under the shop module to open the module modal. Scroll to or search for Divi Ajax Search and add it to the layout. I’m showing the wireframe view, but any of the views work the same.
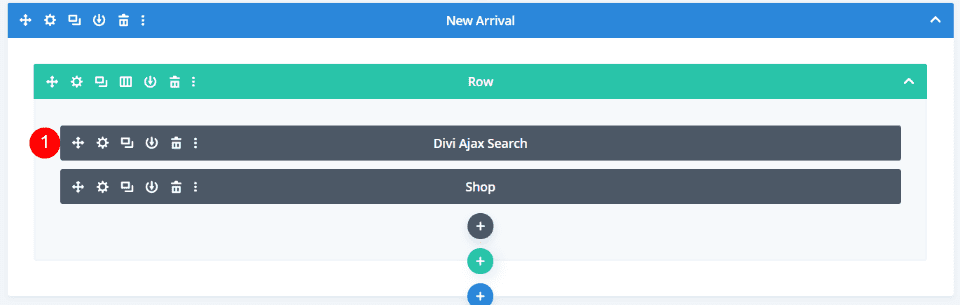
Drag and drop the module above the shop module.
Configuring the Search Box
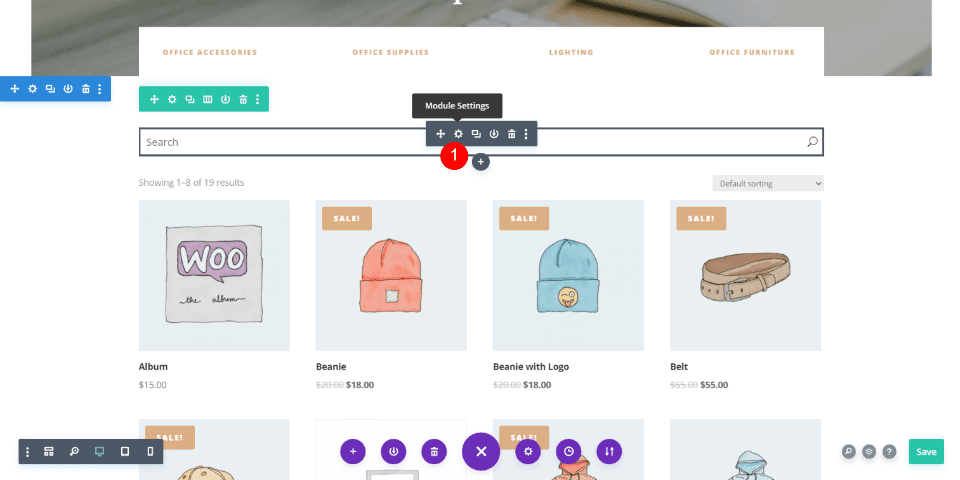
Click the gear to open the options. I’ve switched to the desktop view so I can see my changes live.
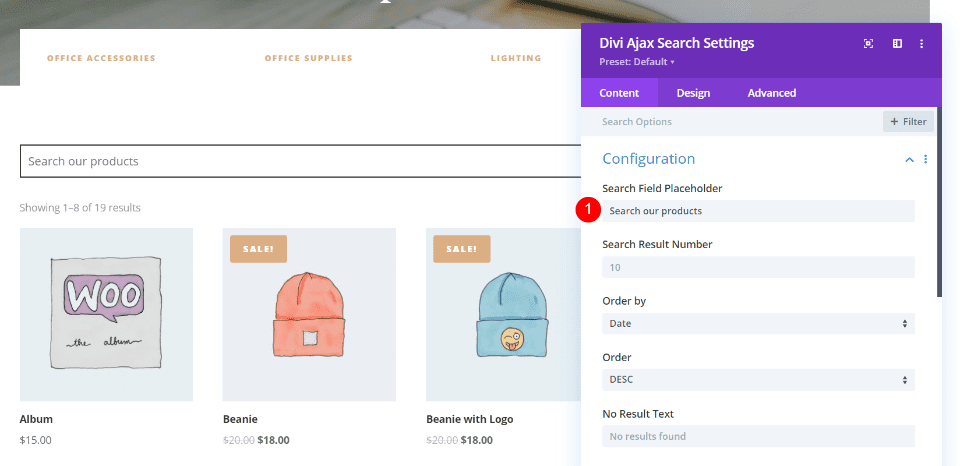
First, we’ll adjust the placeholder text. The default placeholder text uses the word Search. This is fine, but I’m changing it to Search our products so the user knows that they’re searching the store rather than blog posts or other content. I’ll leave the Order By, Order, and No Results Text at their defaults.
- Placeholder text – Search our products
- Search result – 10
- Order by – date
- Order – desc
- No result text – No results found
Decide What to Display in the Search Results
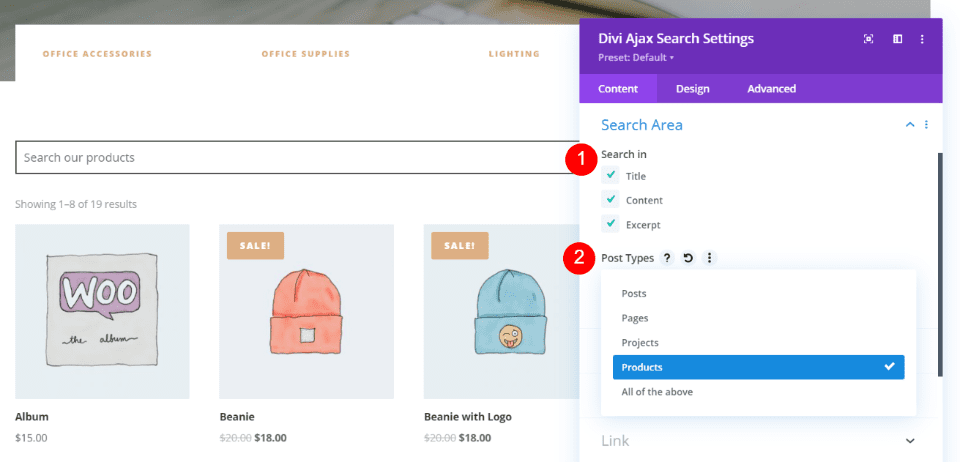
Under the section called Search Area, select what you want to search in. I’m leaving it at the default settings, which includes Title, Content, and Excerpt.
Next, choose the post types. You can have it to search Posts, Pages, Projects, Products, or all of the above. I’m selecting Products.
Search In:
- Title
- Content
- Excerpt
Post Types:
- Products
Select What to Display

Scroll down to the Display area to choose how the results will display. I’m keeping the default settings for the search icon, title, excerpt, and featured image. I’ve also enabled the product price, changed the number of columns to 4, and selected to use masonry. This will give me the layout I want.
Show Search Icon:
- Yes
Display Fields:
- Title
- Excerpt
- Featured Image
- Product Price
Number of Columns:
- 4
Use Masonry:
- Yes
Show the Scrollbar
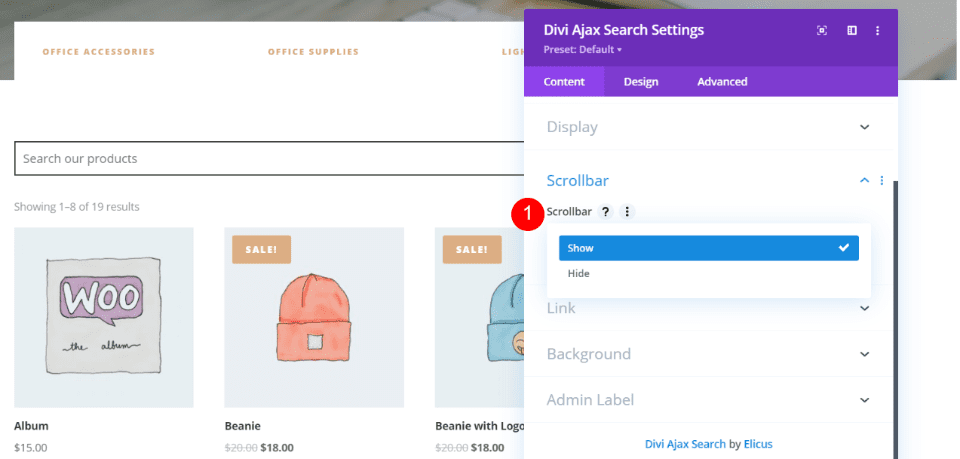
Go to the Scrollbar settings and decide to show or hide the scrollbar. I’m including the scrollbar so the user is better aware that they can scroll.
Scrollbar:
- Show
Divi Ajax Search Result
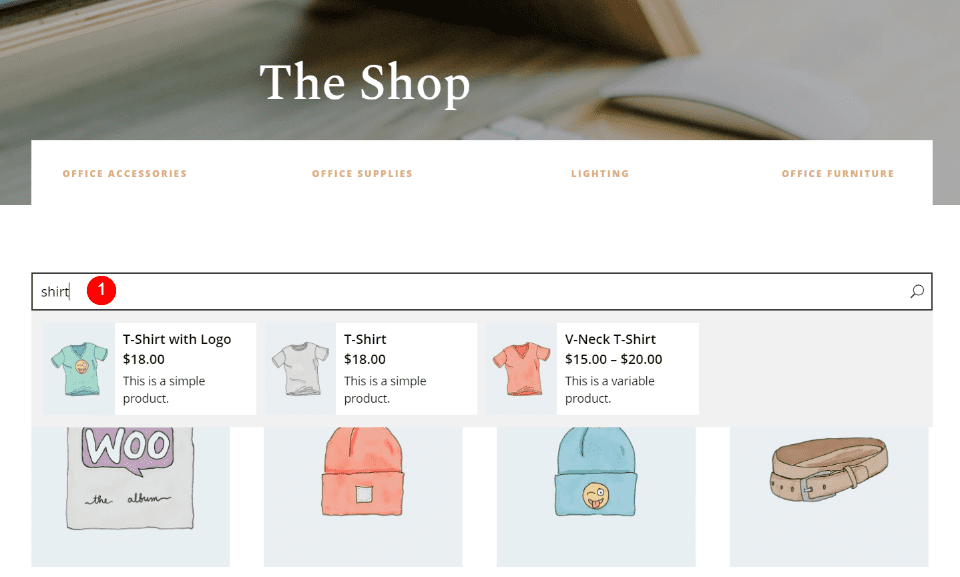
Entering a search term shows the results under the search field. This looks great, but it doesn’t stand out from the content of the website. We’ll style it so that it fits the design of the site and doesn’t blend with the product images.
3. Style the Module to Fit Your Website
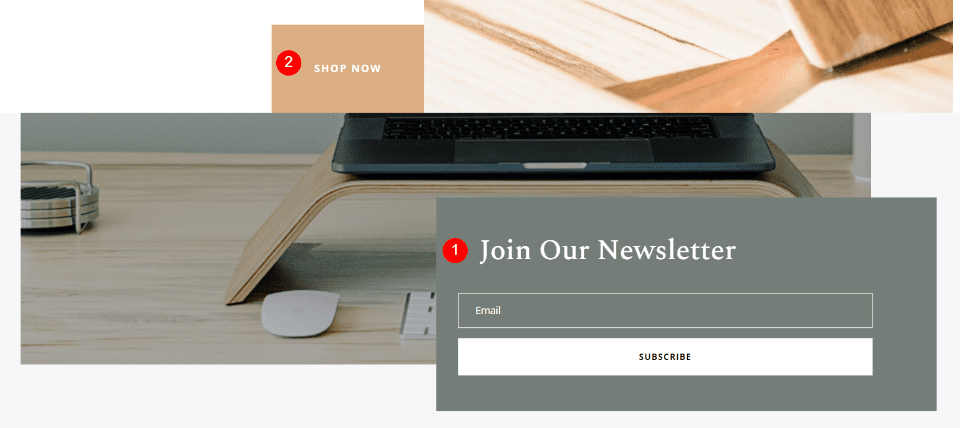
To style the search box, I’ll use design elements from the layout that I’m using. At the bottom of the Online Store layout’s shop page are a couple of design elements. One is an interesting email optin module. I’ll use this as my inspiration for the background and the field. I’ll also use the background color of the Shop Now CTA for the search results. I’m especially paying attention to three design elements:
- Newsletter Background color – #757d79
- Shop CTA Background color – #dcae83
- Padding for both – 50px (top, bottom), 60px (right, left)
Styling the search field

Open the Background settings in the content tab. This section has three different background areas. Go to the last one. It’s just called Background. Enter the color here.
- Background color – #757d79
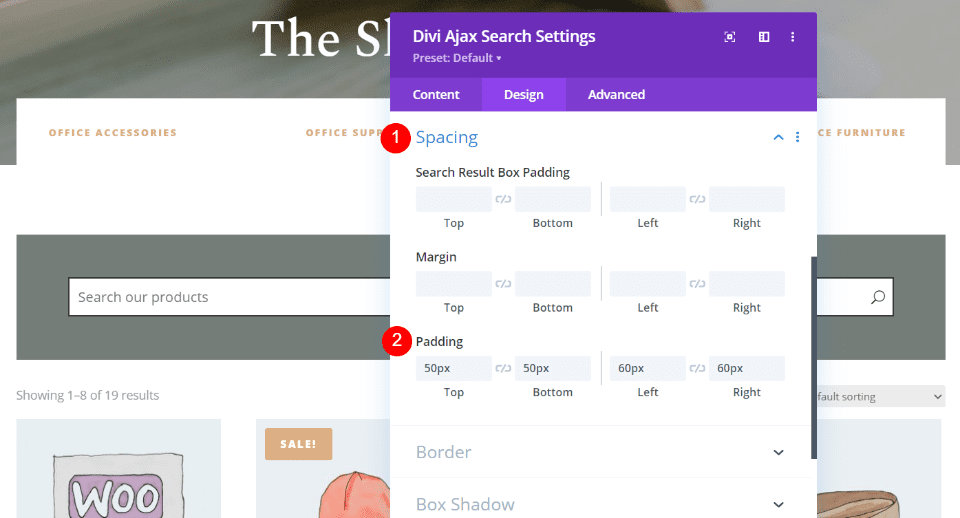
In the Design tab, go to the Spacing settings and enter the padding. This will let us see the area around the field so we can see the results better as we go. This also gives the search box a lot of color around it, which will match the elements in the layout.
- Padding 50px (top, bottom), 60px (right, left)
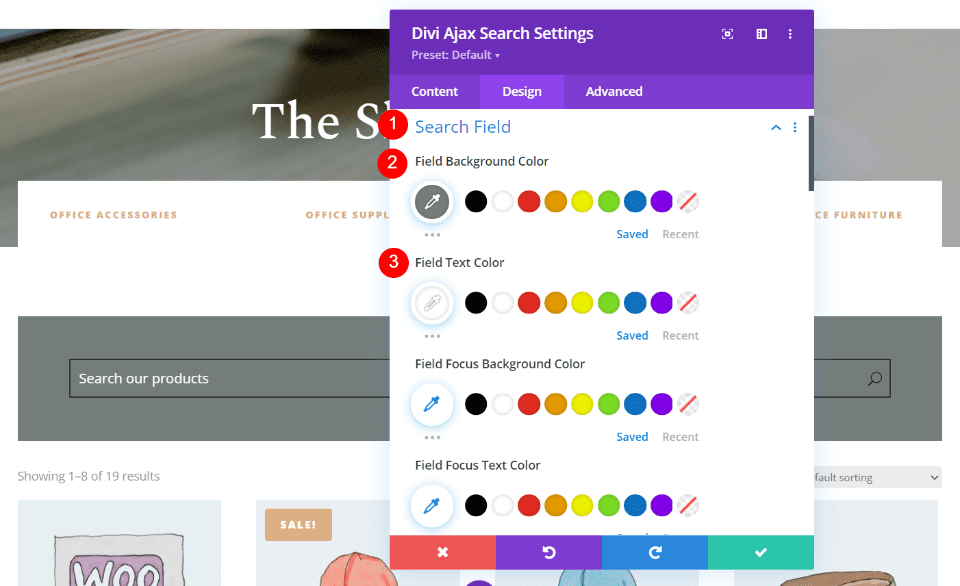
In the Search Field settings, add the field background color and the field text color. I made the field match the background of the module and just selected white for the text.
- Field Background Color – #757d79
- Field Text Color – #ffffff
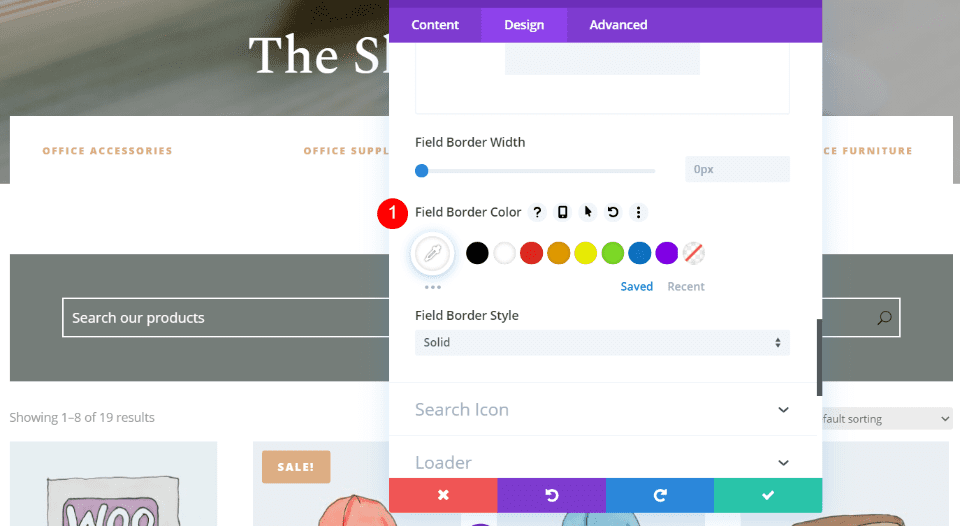
In the same settings, scroll down to Field Border Color and choose white. We could also adjust the thickness and radius of the border. I’ll leave it square to match the text field of the optin module.
- Field Border Color – #ffffff
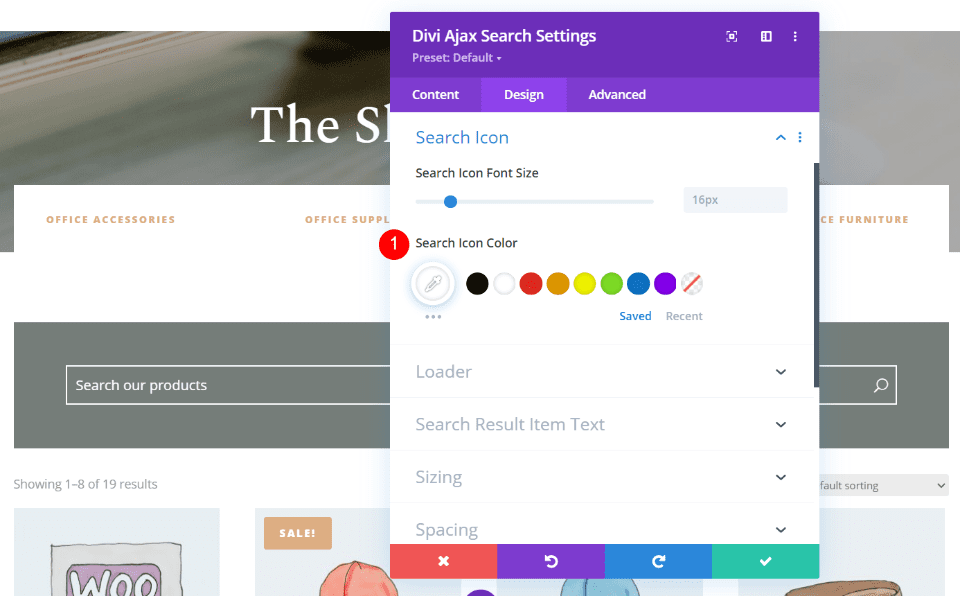
Open the settings for Search Icon and select white.
- Search Icon Color – #ffffff
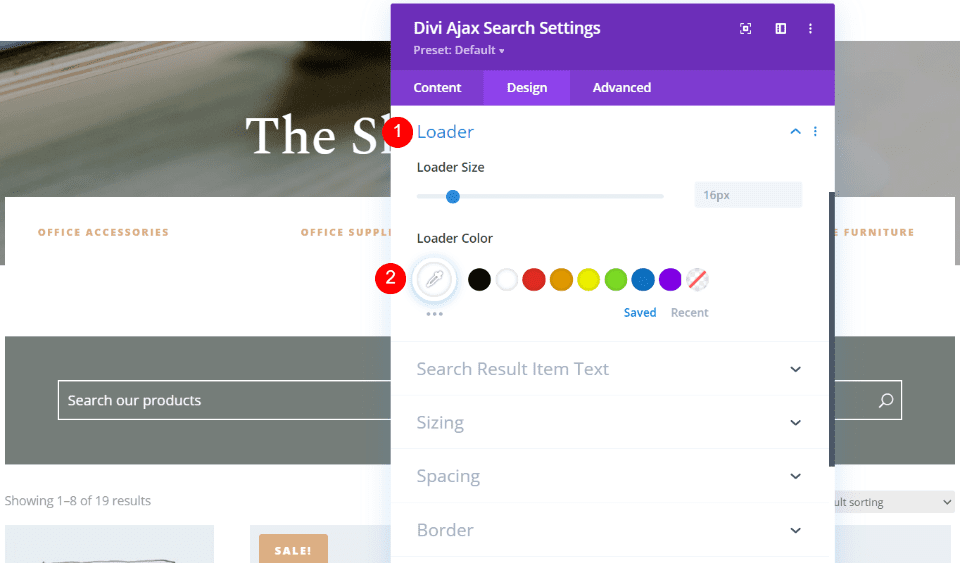
Open the settings for the Loader and select white for the Loader Color. The loader will only be seen momentarily, but it will look better if it matches the rest of the elements.
- Loader Color – #ffffff
Styling the results field
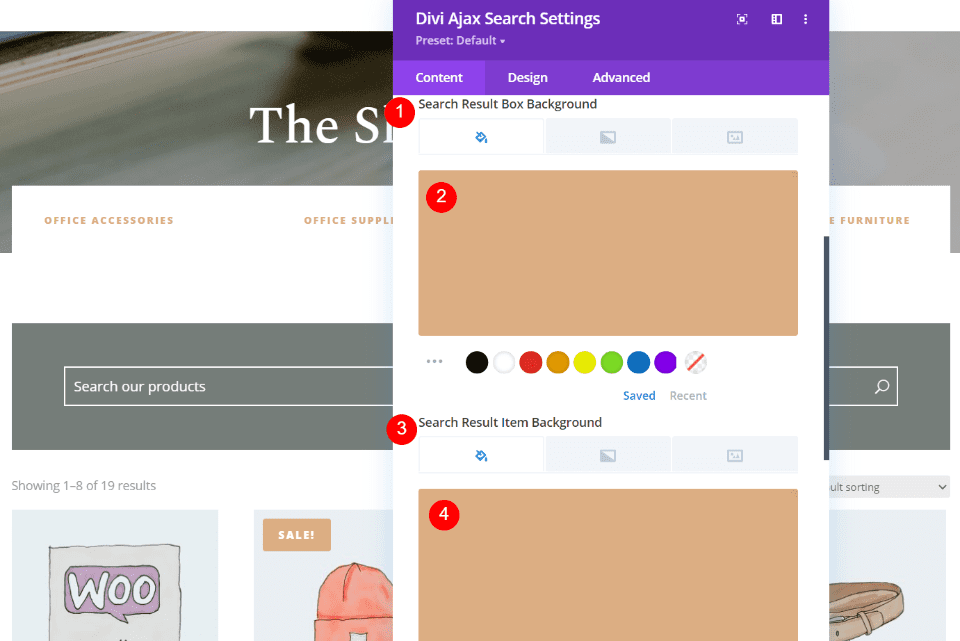
Open the Background settings in the Content tab and add the color to the Search Result Box and Search Result Item backgrounds. This won’t be visible while we’re styling the module since it only shows when it displays search results.
- Background color – #dcae83
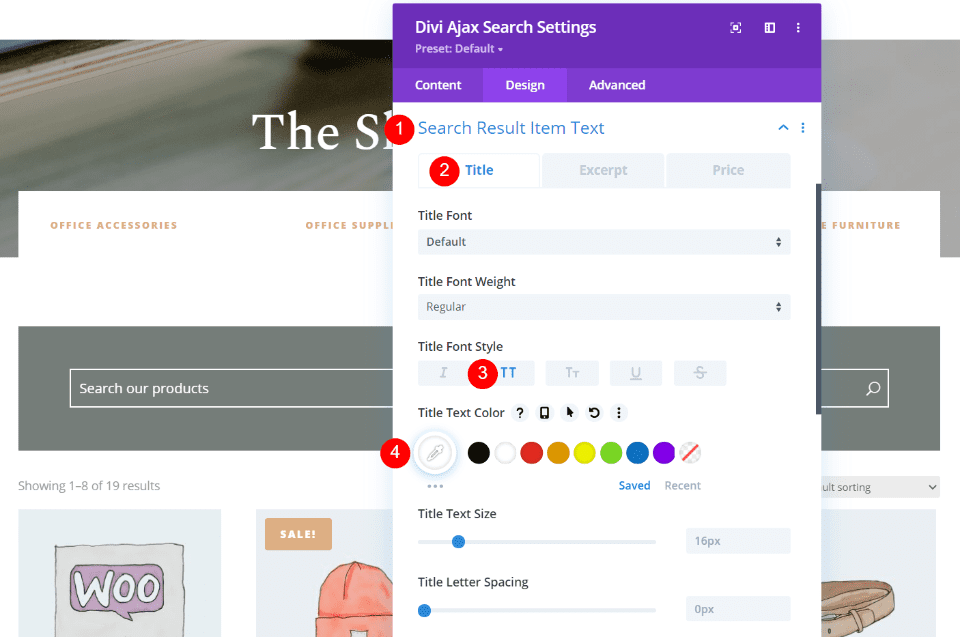
In the Design tab, open the settings for the Search Result Item Text. In the Title tab, select the all-caps font style and choose white for the text color. I’m leaving all of the other title settings at default.
- Title Font Style – TT
- Title Text Color – #ffffff
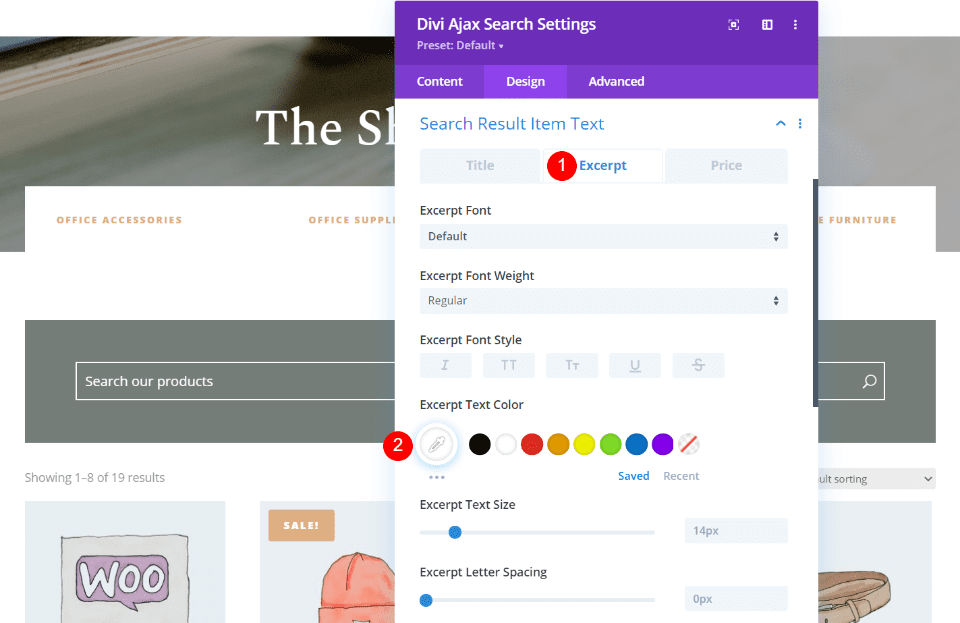
Open the Excerpt tab and select white for the Excerpt Text Color.
- Excerpt Text Color – #ffffff
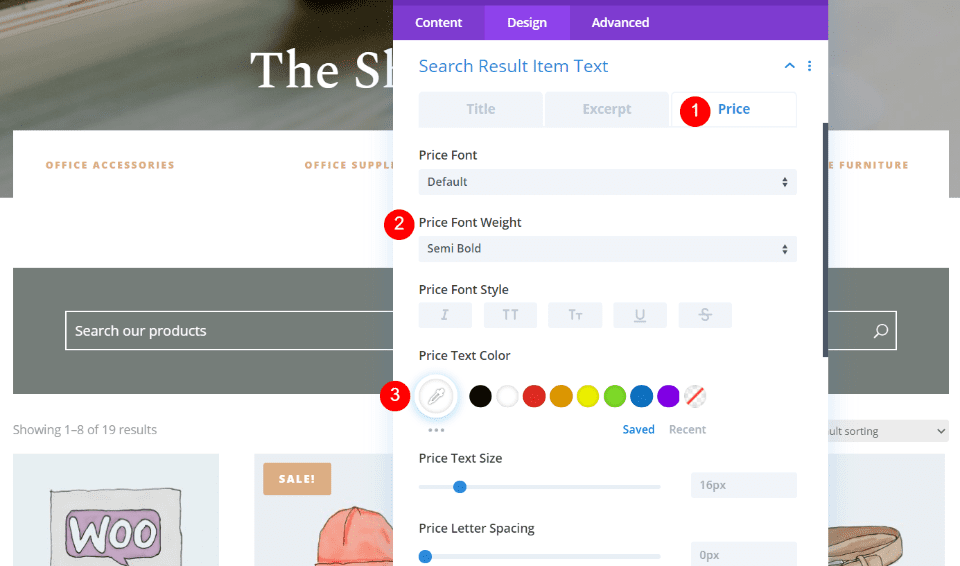
Open the Price tab. Select Semi Bold for the price weight and white for the text color.
- Price Font Weight – Semi Bold
- Excerpt Text Color – #ffffff
Results
Here’s how the Ajax Search looks on Desktop with my styling. The search results display almost immediately. It looks elegant and smooth.
Here’s how it looks on Phone. The results stack and adjust to fit the screen.
Ending Thoughts
Adding Ajax search to your Divi website is fast and easy with the Divi Ajax Search plugin. It’s easy to use, easy to style to match your website, and the results are fast and look fantastic. You have a lot of options for the post types it can search and for the types of content it will display in the results.
Now your Divi website can have a professionally designed Ajax search feature that your visitors will appreciate!
We want to hear from you. Have you added a real-time Ajax search to your Divi website? Let us know about your experience in the comments.
Featured Image via Kroster / shutterstock.com
The post How to Add Real-Time Ajax Search to Your Divi Website appeared first on Elegant Themes Blog.