
When you set up a new WordPress website, the platform gives you three image sizes to play with: thumbnail, medium, and large (plus the file’s original resolution). This gives you a solid number of options to work with. However, thumbnails in particular can be tricky to use, since you need to make sure they look good across all themes and devices.
Fortunately, changing your images’ thumbnail size in WordPress only takes a minute or two. While you’re at it, you can also add new default image sizes to your website, for even more choices. In this article, we’ll teach you how to do both, so let’s get to work!
How to Change Your Thumbnail Size in WordPress
Changing thumbnail sizes in WordPress is remarkably easy. Here are the steps you’ll need to follow, which we’ll dig more into shortly:
- Go to your WordPress dashboard.
- Navigate to the Settings > Media tab.
- Look for the Image sizes > Thumbnail size section.
- Change the default width and height of your thumbnails in pixels.
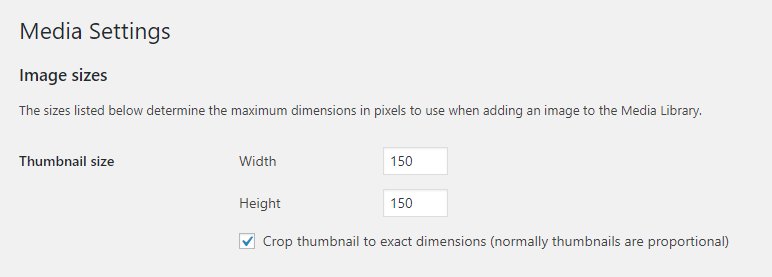
That’s pretty much it. Let’s take a closer look at the Image Sizes > Thumbnail section, however:
 Thumbnail section.” width=”772″ height=”277″ />
As you can see, the default thumbnail sizes make for a proportional, square image. At 150×150 pixels, here’s what you should be looking at:

This image employs what’s called a ‘hard crop’, since we enabled the setting Crop thumbnail to exact dimensions. What this means is that WordPress will take the thumbnail size you set, ‘fill’ the area with the image you use, and leave the rest of the image off. A ‘soft crop’, on the other hand, is a resize that shrinks your images while retaining their proportions.
For now, go ahead and choose your new default thumbnail size. Then, remember to save the changes to your settings.
Once you set a new default thumbnail size, WordPress will use it for all images you upload from that moment on. However, what if you already have a sizable media library that uses other thumbnail sizes?
Instead of re-uploading those images, you can simply ‘resize’ them. The best tool for that job is the AJAX Thumbnail Rebuild plugin:
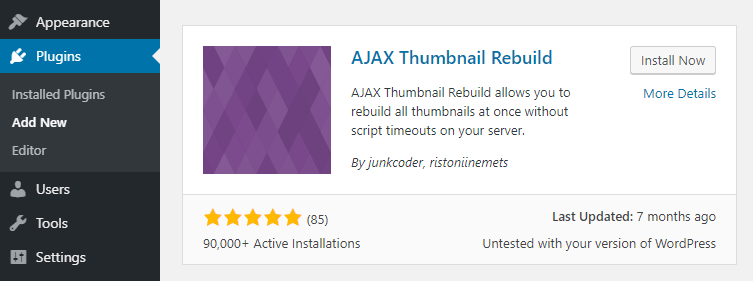
What this plugin does is take all your existing thumbnails and resize them, one by one. It also works on the other image sizes WordPress uses, such as Medium, Large, and so on. That means you can use it even if you change any of those default dimensions (which we’ll show you how to do later).
To get started, install and activate the plugin. Once you do, jump to the Settings > Rebuild Thumbnail tab and choose the images you want to resize, and then click on the Rebuild All Thumbnails button:
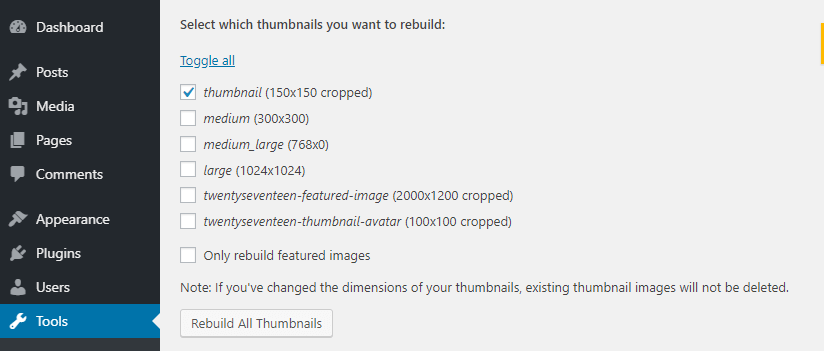
The process might take a while, depending on how many images your media library contains. So be patient, and don’t close the tab until you see the Done message appear.
Why You Might Need to Change Your WordPress Thumbnail Size
At this point we’ve already covered the how when it comes to changing your thumbnail size, but we haven’t discussed the why yet. WordPress’ default thumbnail size of 150×150 pixels can work well for some users, but no single image resolution is appropriate for all types of designs.
You might want larger thumbnails that show off more detail, for example. This is particularly relevant if you’re running an e-commerce store. Or you may want to use a more rectangular shape, especially when it comes to featured images for a blog or news site.
If you’re redesigning your website or trying out a new theme, it’s also a good idea to spend some time experimenting with image sizes, so you can see what works best with the new style. Plus, the process is so simple that it should barely take you a few minutes, and it doesn’t affect your existing media library unless you install the extra plugin we introduced above.
What If You Want to Add Custom Image Sizes to WordPress?
Whenever you upload an image to WordPress, the platform works some magic in the background to resize that image into multiple dimensions you can use. As we mentioned earlier, this includes thumbnails, medium, and large images. Having multiple sizes of the same image can make your life easier, by enabling you to pick the option that best fits your needs.
You can change these default image sizes by using the same process we described above. However, you can also add new default sizes to your site. This can be a very useful option to have. You can set up specific sizes for all different types of images across your site, and avoid having to resize each new image manually.
To add new default image sizes to WordPress, you’ll need to edit your theme’s functions.php file. That means you’ll want to connect to your site using a File Transfer Protocol (FTP) client such as FileZilla, and then navigate to your site’s root folder.
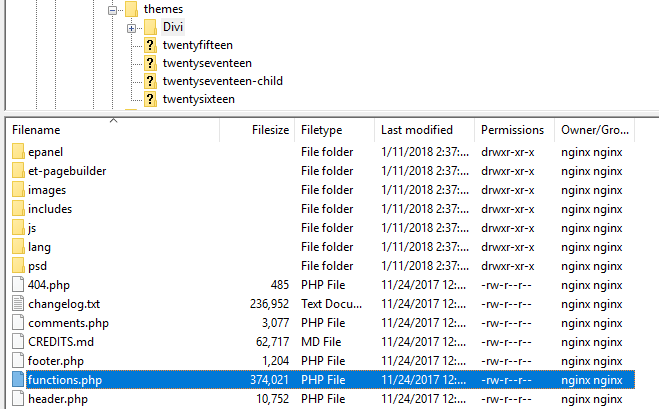
Once you’re there, open up the wp-content/themes directory and look for the folder that shares your theme’s name:
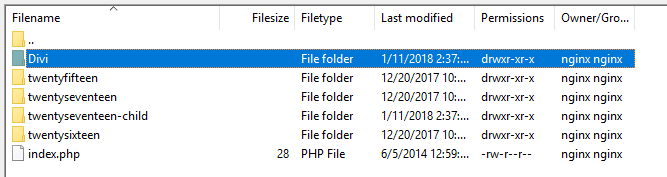
You should find the functions.php file inside this folder. Once you do, right-click on it and hit the View/Edit option. This will open the file using your local text editor, so you can make changes to it:
Be very careful when making any changes to your theme’s functions.php file, and don’t change any of its existing content. Instead, you’ll want to add a new snippet of code at the bottom:
// This enables the function that lets you set new image sizes

add_theme_support( 'post-thumbnails' );

// These are the new image sizes we cooked up

add_image_size( 'post-image', 660 );

// Now we register the size so it appears as an option within the editor

add_filter( 'image_size_names_choose', 'my-custom-image-sizes' );

function my-custom-image-sizes( $sizes ) {

return array_merge( $sizes, array(

'post-image' => __( 'Post Images' ),

) );

}
The comments within this code explain how it works quite well. First, it tells WordPress that you want to add new image sizes to your theme. Then it creates a new default option, and registers it so that it shows up within the editor the next time you open it.
Let’s take a closer look at the new default we registered:
add_image_size( 'post-image', 660 );
When you add new custom image sizes, you can set both a width and height. In our example, we just set the width, which is always the first value. This means that WordPress will resize images to the width we want, and a proportional height.
If you want to add a specific height as well, your line would look like this instead:
add_image_size( 'post-image', 660, 480 );
Feel free to add any custom sizes you want, using a new line for each. Then save the changes to your functions.php file, and the new options should show up in your WordPress editor.
Conclusion
One of the best parts about using WordPress is its customizability. There’s no aspect of the platform – big or small – that you can’t change. That also applies to WordPress’ thumbnail size, and the various other default image options.
If you want to change the default WordPress thumbnail size, you can do so in four quick steps:
- Go to your WordPress dashboard.
- Navigate to the Settings > Media tab.
- Look for the Image sizes > Thumbnail size section.
- Change the default width and height of your thumbnails in pixels.
Do you have any questions about WordPress image sizes? Let’s talk about them in the comments section below!
Article thumbnail image by ConceptVectorDesign / shutterstock.com
The post How to Change Thumbnail Size in WordPress and Why You Want To appeared first on Elegant Themes Blog.