
By default every WordPress installation has two login URLs: yourdomain.com/wp-admin.php and yourdomain.com/wp-login.php. While perfectly functional, there are two very good reasons you may want to change these URLs. The first and most important is security. The second is that it gives you the ability to rebrand every element of the login experience for your site users. In this article we’ll begin by expanding on these two points and then show you step-by-step how to create a custom WordPress login URL.
Why Change the WordPress Login URL?
Like I mentioned above, there are a lot of security issues that can come from having your login page open to the public. Most specifically, brute force attacks. Because of the ubiquity of WordPress, these kinds of attacks are becoming more and more common. One of the reasons is because the vast majority of WP users keep /wp-admin for signing in.
And you know what? They will probably get in. Because people (and I am not saying you), but people generally don’t take security seriously and use the same usernames and passwords over and over again. Not only that, they use the same bad usernames and passwords over and over again. Behold the list of top usernames and passwords of 2017 and weep.
- 123456
- Password
- 12345678
- qwerty
- 12345
- 123456789
- letmein
- 1234567
- football
- iloveyou
- admin
And what’s worse…most of these are used in conjunction with the most cliche of cliches, the default username admin. If you’ve inherited a site with admin as the username, I’m sorry. I’ve been there. Honestly, I’ve even done it because it’s easy and quick. But it’s massively insecure. Luckily, you can actually change a WordPress username after it’s created even though the documentation says you can’t.
But that’s neither here nor there. No matter what your username is, if the bad guys can’t get to the entry fields in the first place, the point is (nearly) moot. If that’s not enough reason to change your WordPress login URL (or change a username, at least), I don’t know what is.
Maybe custom branding and a totally new login experience is? Customers love login screens customized to their business and brand, by the way. No matter the reason behind the change, here’s how you do it.
How to Change Your WordPress Login URL without a Plugin
Don’t. Use a plugin.
It may sound blunt, but changing your WordPress login URL without a plugin may not be the best idea. You can do it. But you shouldn’t. When you completely change the WordPress login URL without a plugin, you’re getting into messing with the WP Core files, and that’s kind of a big no-no. There is documentation in the WP.org Codex on creating an entirely new login page using hooks to put login fields in isolation. But there’s a reason that they don’t include one to change it completely.
Now, normally, I suggest doing anything you can without a plugin. It tends to save a bit of server memory, processes, bandwidth, and eventual troubleshooting. Plus it can teach you a lot about how the CMS works. This time, however, it’s plugins all the way down.
How to Change the WordPress Login URL with a Plugin
The safer and better way to change the WordPress login URL is to use a plugin. There are quite a few out there (iThemes Security works as a login obfuscator as well as a full security suite), but the lighter option is WPS Hide Login. It’s by far the gold standard for the process. It does one thing, and it does it well.
Once installed and activated, you will have a new option under your general settings in which you can simply enter the new slug you want the login fields to live. Go to either Settings > General or Settings > WPS Hide Login to change it. Both of them take you to the same place.
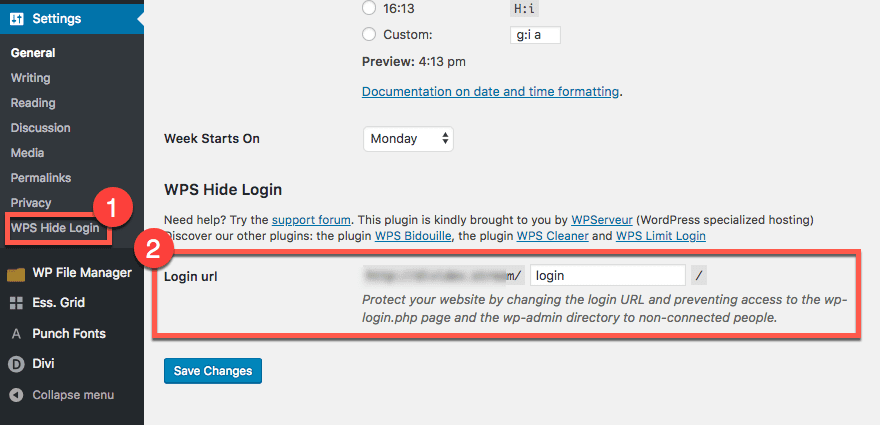
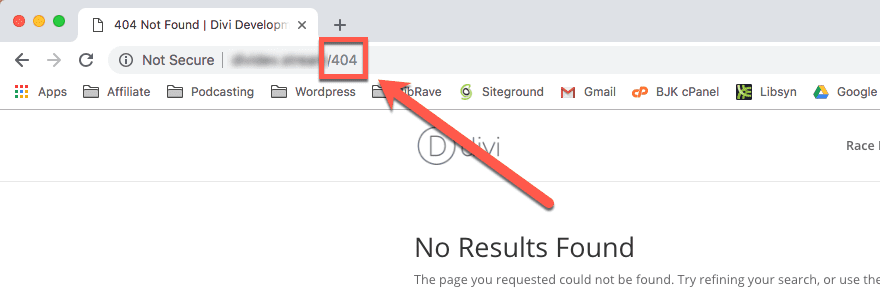
All you have to do is type in your new login URL and hit the Save Changes button. Note that it says it also prevents access to the wp-login.php and the wp-admin directory to non-connected people. In other words, you can access them if you’re logged in. Otherwise, you get a 404 Error.
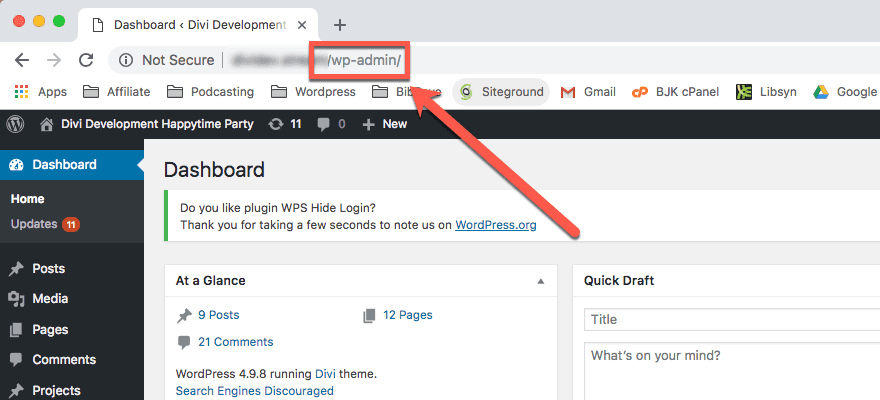
When you are logged in, you just see your dashboard.
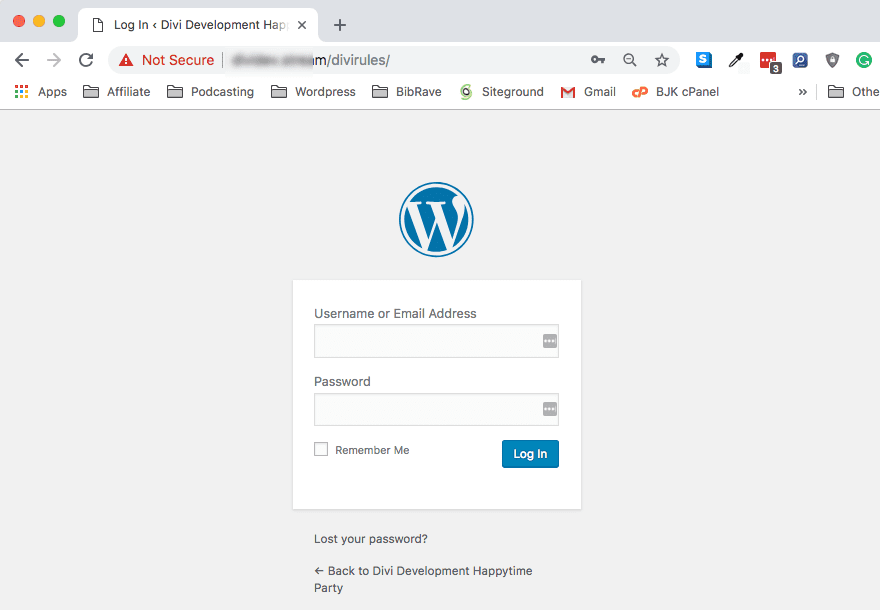
However, when you head to your newly changed WordPress login URL, you should see a familiar site (pun intended).
Two Things to Keep in Mind
The first is that the moment you activate this plugin, you will not have access to the old login screens. By default, WPS Hide Login will take you to /login for entry. This will take place immediately upon activation, even before you head into your settings to customize it yourself. Please remember that. And if you have changed the URL, please remember that, too. Otherwise, you’re going to have a couple of issues logging in, I think.
After all, you’re trying to make things easier for your team/clients and harder for hackers. You don’t want to lock yourself out of your own site.
The second thing is that when and if you deactivate the plugin, your site will immediately go back to using wp-admin and wp-login.php as the entry point for users. So you won’t mess up the database or lock anyone out if you do choose that you don’t want to go this route.
Final Thoughts
While the entire concept of changing one of the most fundamental elements of WordPress may be daunting, hopefully you’ve seen that all it takes is a few clicks thanks to the effort of some really fantastic developers out there. Like I said above, it is entirely possible to change the WordPress login URL without a plugin, but it’s really not a best practice. There are just too many factors from within the Core files to take into consideration, and whenever you have to get into changing those as well as the database, relying on a plugin is definitely the safer bet.
After all, you want to change this URL for security and to keep your site up and running the best it can.
What have your experiences been when you’ve changed the WordPress login URL?
Article featured image by BarsRsind / shutterstock.com
The post How to Create a Custom WordPress Login URL appeared first on Elegant Themes Blog.