Divi’s sticky position options allow you to make any element on your page sticky. This allows you to fix elements on the page at certain intervals as the user scrolls down the page so they stay visible longer. And for you bloggers out there, it makes a lot of sense to add a sticky email opt-in to your post template for a subtly, yet effective, to keep that important form at the forefront.
In this tutorial, we are going to show you how to add a sticky email opt-in to your Divi blog post template that draws more attention and, hopefully, grabs more leads. We’ll even show you how to add a popup hover effect to the sticky email opt-in as well!
Let’s get started!
Sneak Peek
Here is a quick look at the design we’ll build in this tutorial.
Download the Sticky Email Optin Post Template for FREE
To lay your hands on the designs from this tutorial, you will first need to download it using the button below. To gain access to the download you will need to subscribe to our Divi Daily email list by using the form below. As a new subscriber, you will receive even more Divi goodness and a free Divi Layout pack every Monday! If you’re already on the list, simply enter your email address below and click download. You will not be “resubscribed” or receive extra emails.
@media only screen and ( max-width: 767px ) {.et_bloom .et_bloom_optin_1 .carrot_edge.et_bloom_form_right .et_bloom_form_content:before, .et_bloom .et_bloom_optin_1 .carrot_edge.et_bloom_form_left .et_bloom_form_content:before { border-top-color: #ffffff !important; border-left-color: transparent !important; }
}.et_bloom .et_bloom_optin_1 .et_bloom_form_content button { background-color: #f92c8b !important; } .et_bloom .et_bloom_optin_1 .et_bloom_form_content .et_bloom_fields i { color: #f92c8b !important; } .et_bloom .et_bloom_optin_1 .et_bloom_form_content .et_bloom_custom_field_radio i:before { background: #f92c8b !important; } .et_bloom .et_bloom_optin_1 .et_bloom_border_solid { border-color: #f7f9fb !important } .et_bloom .et_bloom_optin_1 .et_bloom_form_content button { background-color: #f92c8b !important; } .et_bloom .et_bloom_optin_1 .et_bloom_form_container h2, .et_bloom .et_bloom_optin_1 .et_bloom_form_container h2 span, .et_bloom .et_bloom_optin_1 .et_bloom_form_container h2 strong { font-family: “Open Sans”, Helvetica, Arial, Lucida, sans-serif; }.et_bloom .et_bloom_optin_1 .et_bloom_form_container p, .et_bloom .et_bloom_optin_1 .et_bloom_form_container p span, .et_bloom .et_bloom_optin_1 .et_bloom_form_container p strong, .et_bloom .et_bloom_optin_1 .et_bloom_form_container form input, .et_bloom .et_bloom_optin_1 .et_bloom_form_container form button span { font-family: “Open Sans”, Helvetica, Arial, Lucida, sans-serif; } p.et_bloom_popup_input { padding-bottom: 0 !important;}

Download For Free
Join the Divi Newsletter and we will email you a copy of the ultimate Divi Landing Page Layout Pack, plus tons of other amazing and free Divi resources, tips and tricks. Follow along and you will be a Divi master in no time. If you are already subscribed simply type in your email address below and click download to access the layout pack.
You have successfully subscribed. Please check your email address to confirm your subscription and get access to free weekly Divi layout packs!
How to Upload The Post Template with the Sticky Email Optin to Your Site
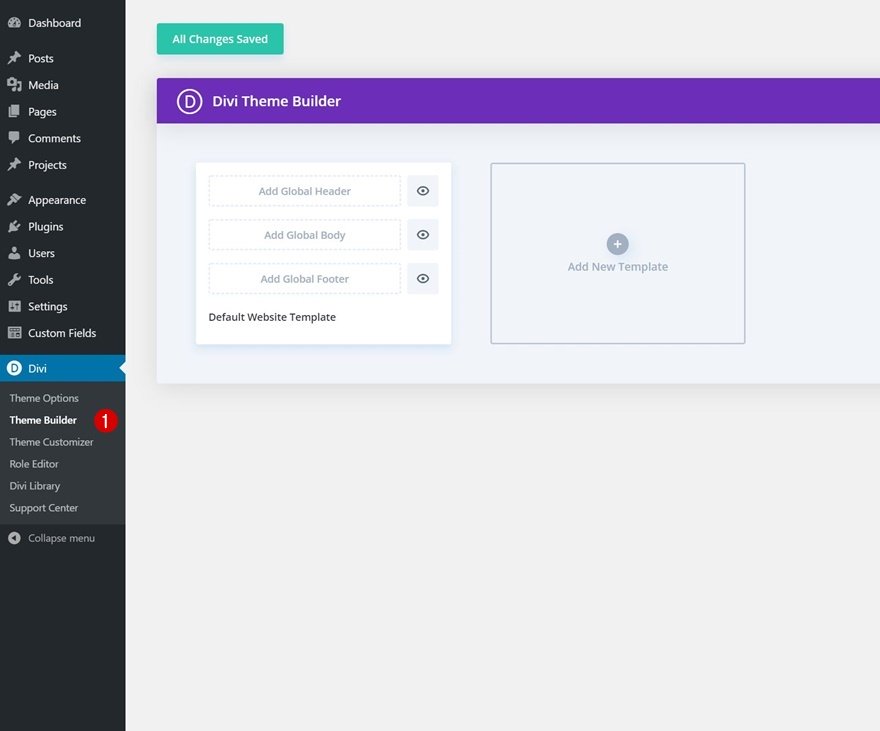
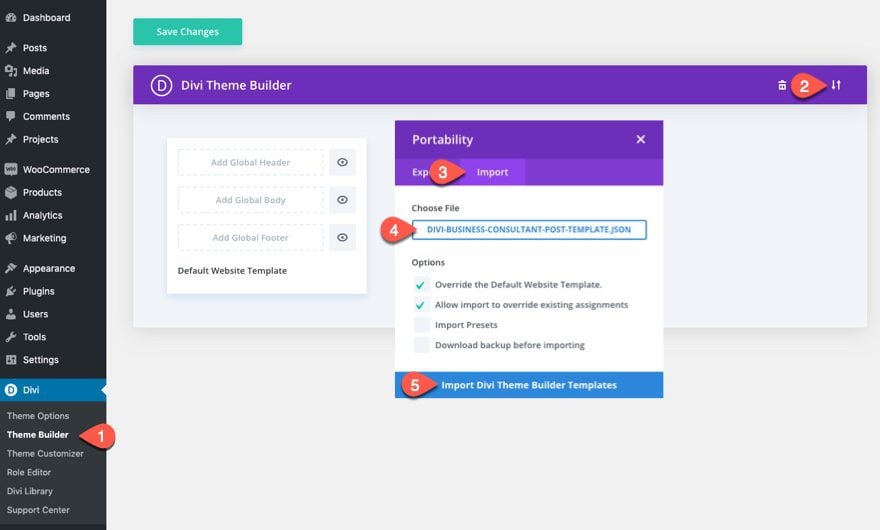
To upload the template, navigate to the Divi Theme Builder in the backend of your WordPress website.

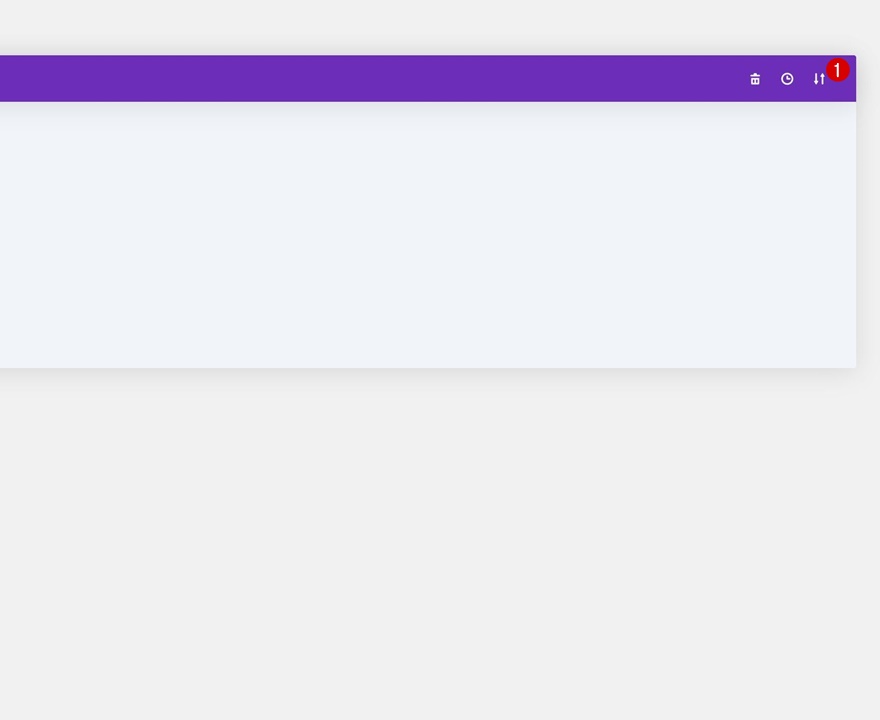
Then, in the top right corner, you’ll see an icon with two arrows. Click on the icon.
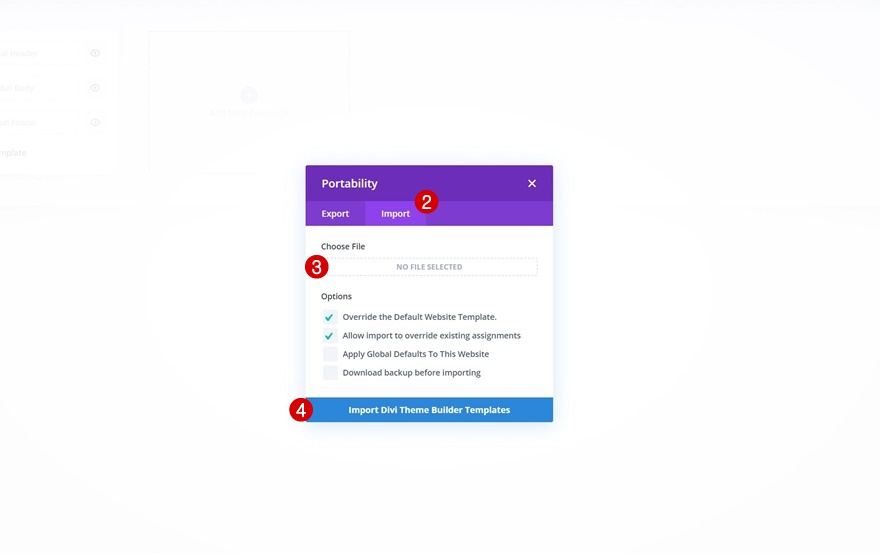
Navigate to the import tab, upload the JSON file which you were able to download in this post, and click on ‘Import Divi Theme Builder Templates’.
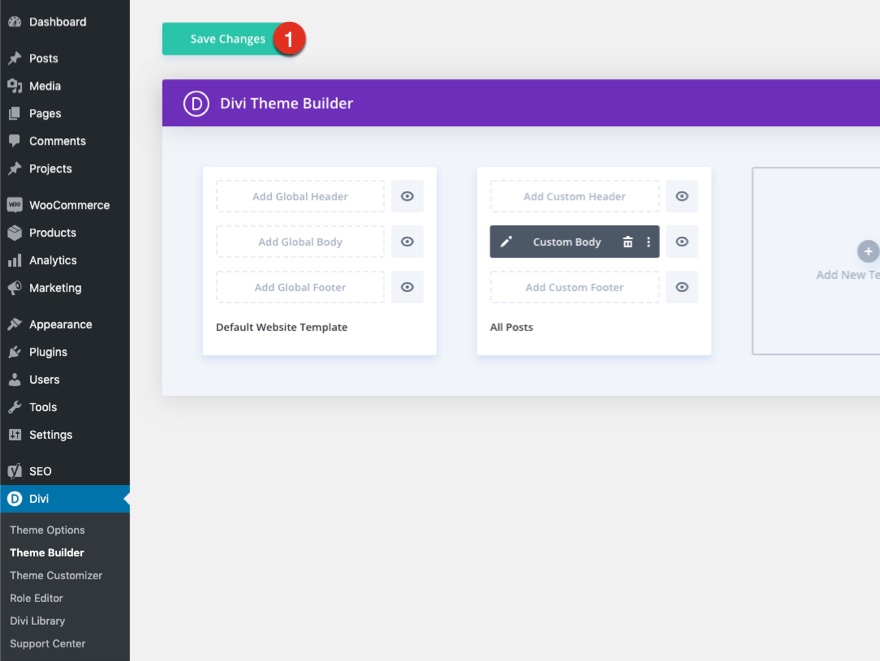
Once you’ve uploaded the file, you’ll notice a new template with a new body area that has been assigned to All Posts. Save the Divi Theme Builder changes as soon as you want the template to be activated.
Let’s get to the tutorial, shall we?
Part 1: Import the Premade Blog Post Template
For this tutorial we are going to use the blog post template for Divi’s Business Consultant Layout Pack which you can download from this blog post.
Once you download the zip file, you will need to unzip it and import the file to the Divi Theme Builder.
Here’s how to do it…
- navigate to Divi > Theme Builder.
- Click the portability icon at the top right.
- Select the import tab in the portability popup.
- Choose the json file from the file you downloaded.
- Click the Import button.
Part 2: Adding the Sticky Email Optin to the Template
Once the JSON file has been imported, click the edit icon to edit the custom body template layout.

At the bottom of the post template layout, you will find the section with the email opt-in form we will be using for our sticky email opt-in.
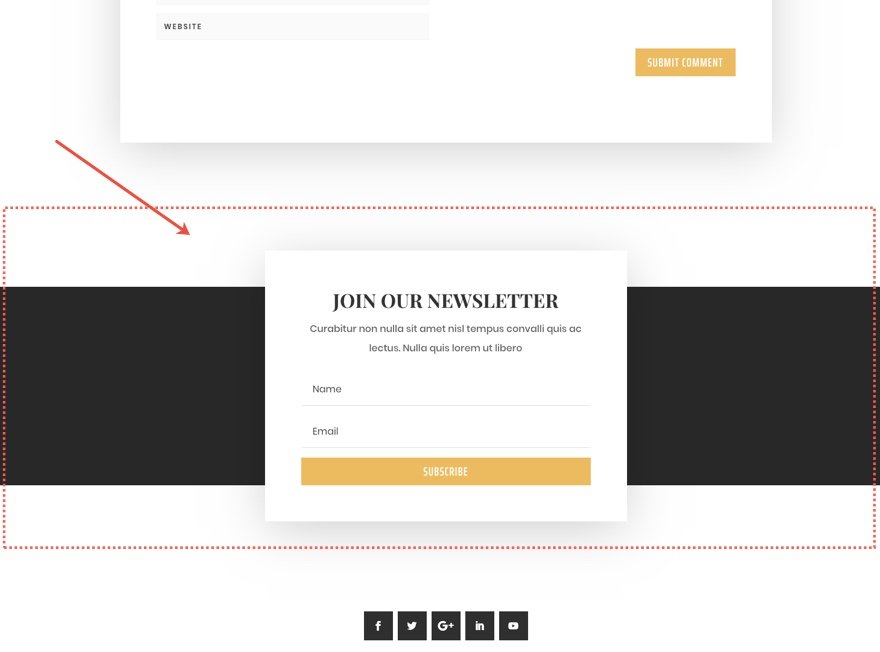
For this example, we want the sticky position of the email opt-in to a section so that the user will not see the email opt-in until they scroll to the section with the sticky email opt-in. However, because the email opt-in is in its own section, the email opt-in will not have enough room to move. Therefore we need to bring it into the section above which contains the comment section so that the email opt-in will hover over that section before coming to rest in its original place.
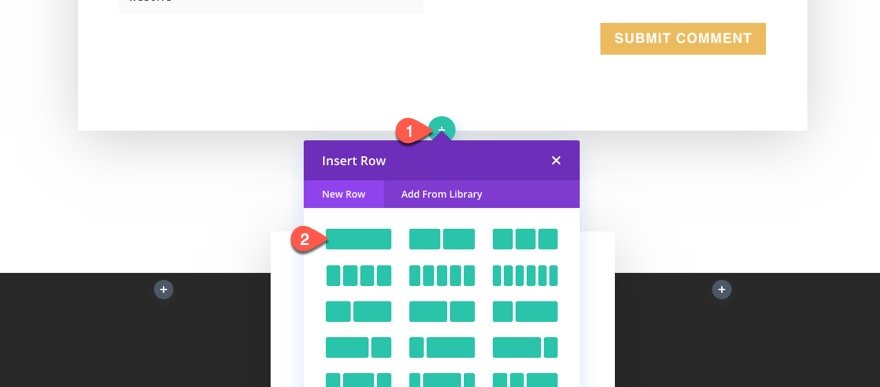
Add New Row in Section Above
To do this, create a new one-column row directly under the row containing the comments module.
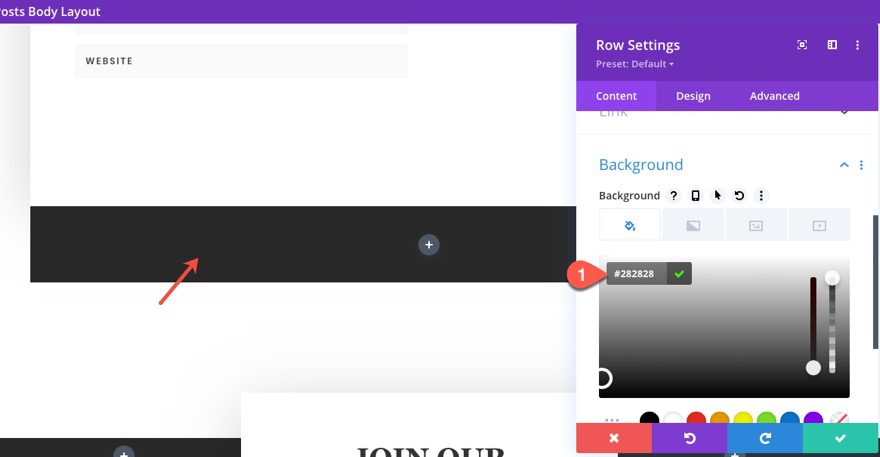
Add Row Styling
Then open the settings of the new row and add a background color as follows:
- Background Color: #282828
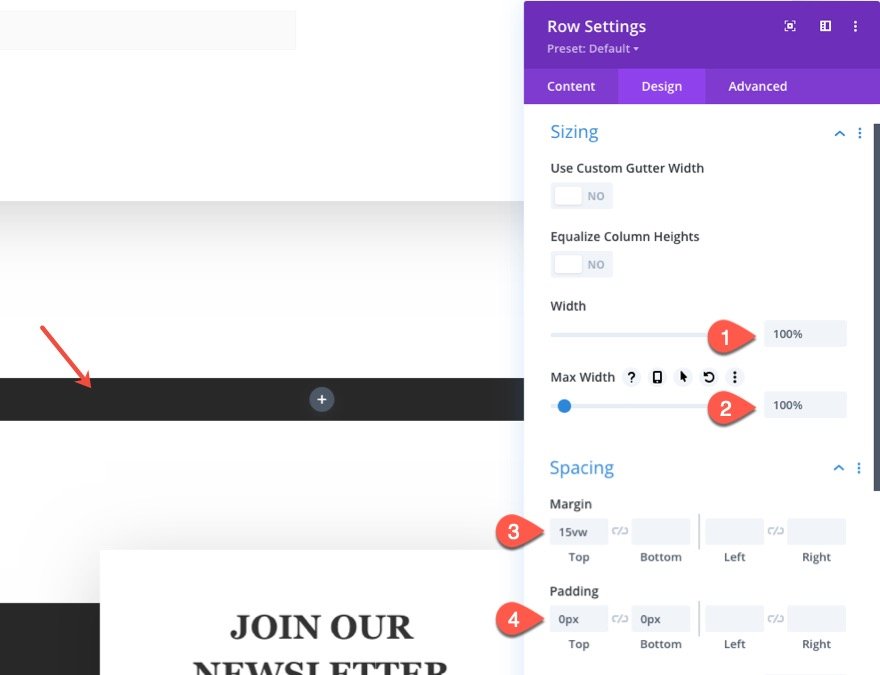
Under the design tab, update the following size and spacing of the row:
- Width: 100%
- Max Width: 100%
- Margin: 15vw top
- Padding: 0px top, 0px bottom
Move Email Opt-in to New Row
Once the row styling is in place, move the email opt-in in the bottom section into the new row you just created.
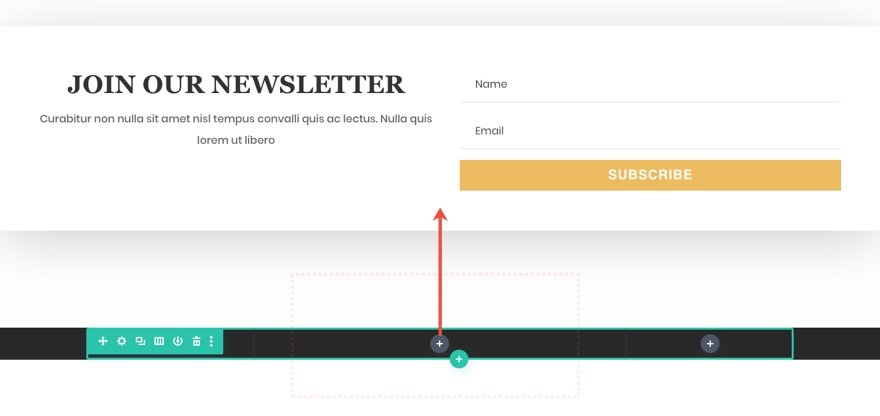
Delete the bottom section (we don’t need it anymore).
Update Email Opt-in with Sticky Position
Then open the settings for the email opt-in now inside the new row and update the stick position options as follows:
- Sticky Position: Stick to Bottom
- Top Sticky Limit: Section
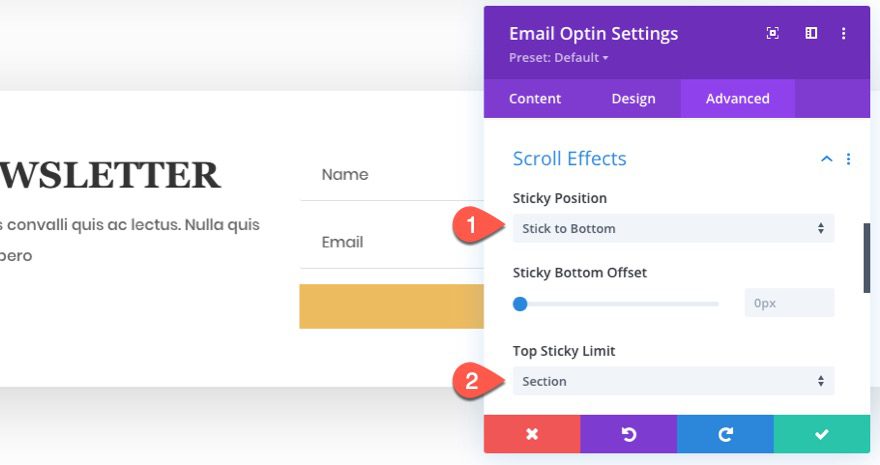
This will cause the email opt-in to stick at the bottom of the browser window when scrolling through the section before coming to rest in its parent row.
Update Email Opt-in Styling
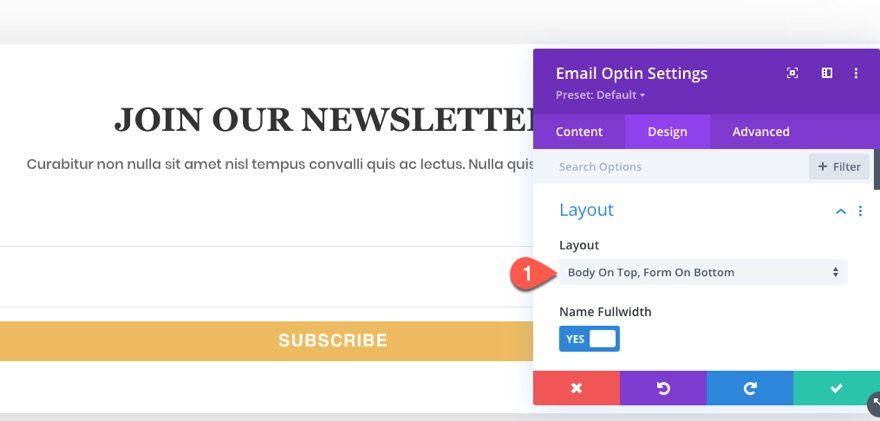
Under the design tab, update the layout of the email opt-in as follows:
- Layout: Body On Top, Form on Bottom
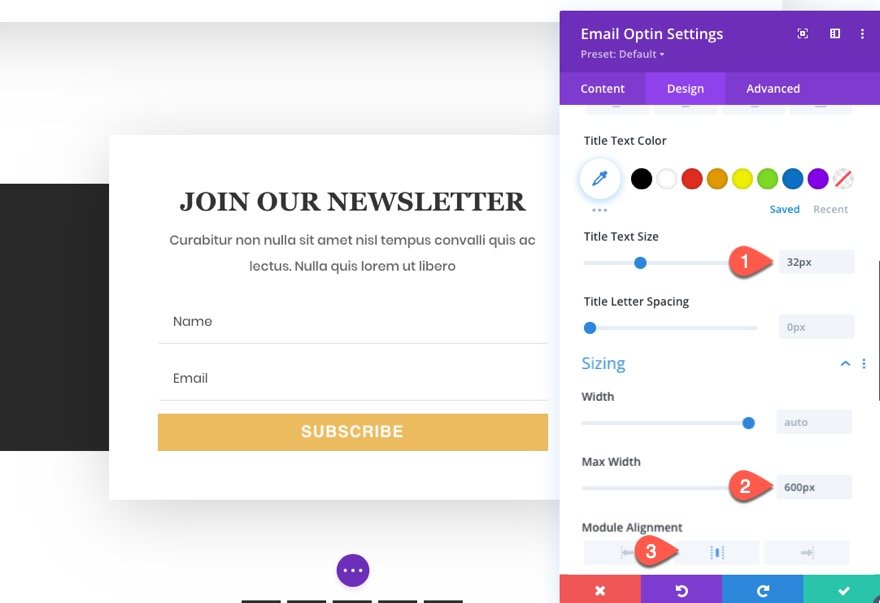
Then update the following styling:
- Title Text Size: 32px
- Max Width: 600px
- Module Alignment: Center
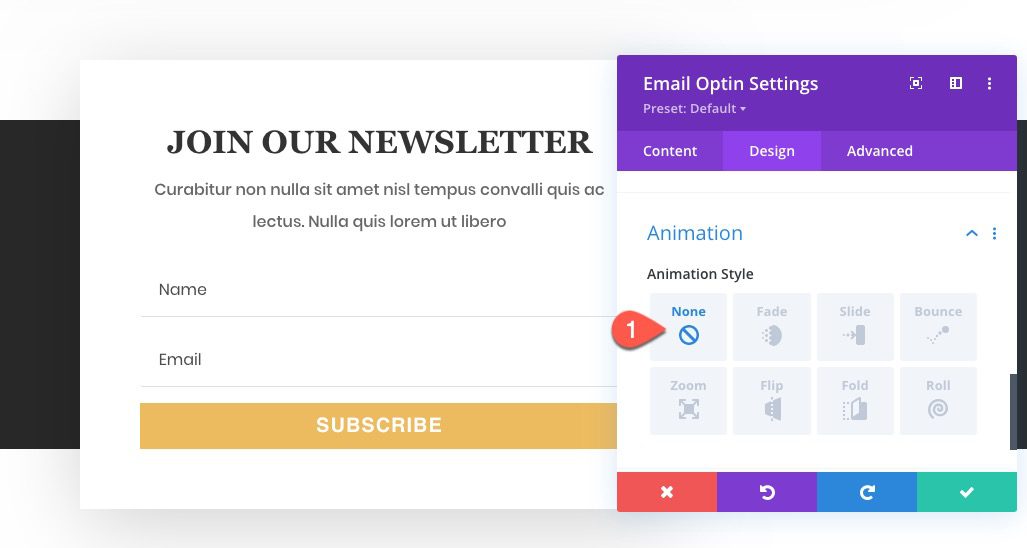
Then set the animation style to none.
Result
At this point, we can check out the result by viewing a post in another browser window.
Adding Sticky Position Styling
When the email opt-in is in the sticky position, we can add specific styling to the module that will only apply to the sticky state. This allows us to add different color schemes to offset the white background to make it stand out a bit more.
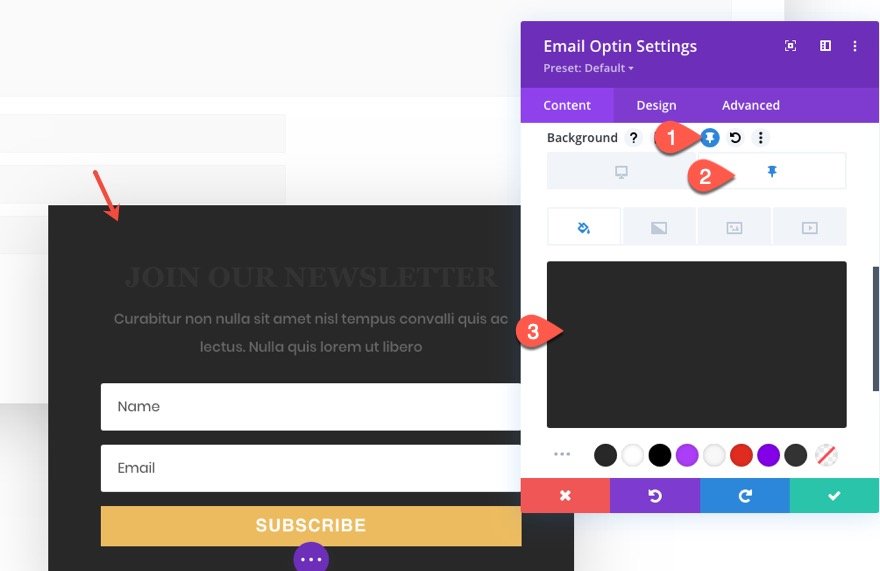
To add a different background color for the sticky state, open the email opt-in settings and select the thumbnail icon (sticky icon) next to the background option. Then click the sticky tab and add the following background color:
- Background Color (sticky): #282828
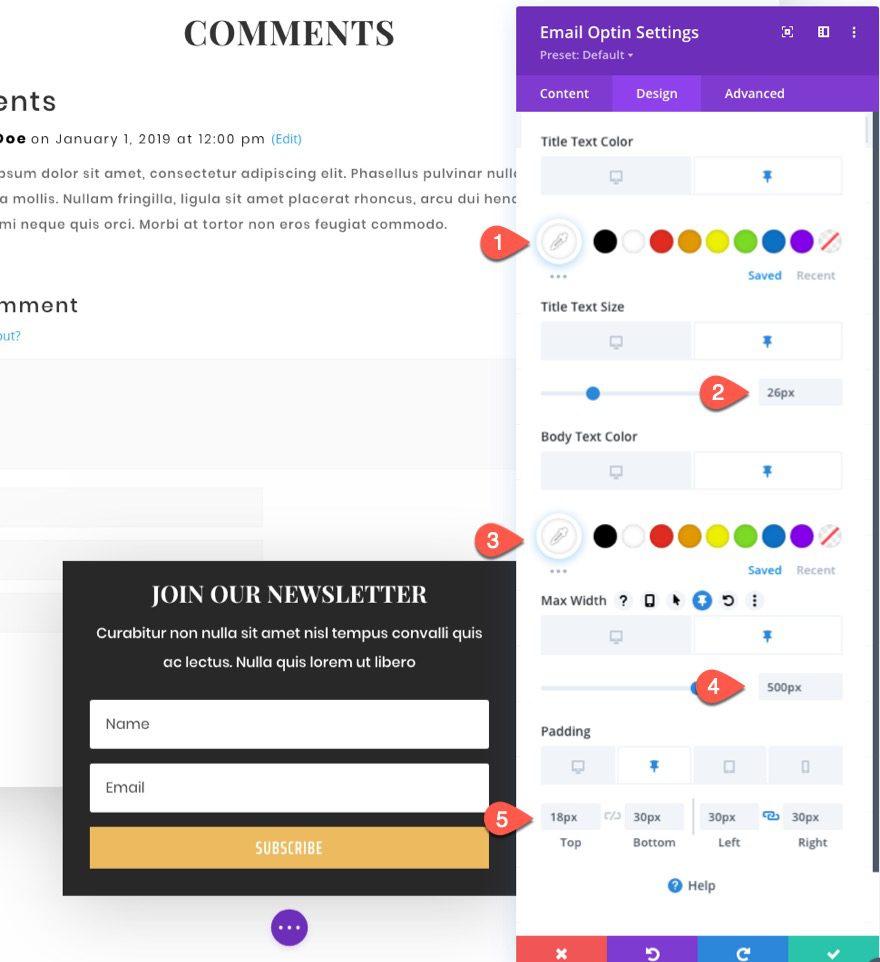
Continue this same process to add sticky styling to the following options under the design tab:
- Title Text Color (sticky): #ffffff
- Body Text Color (sticky): #ffffff
- Max Width (sticky): 500px
- Padding (sticky): 18px top, 30px bottom, 30px left, 30px right
Result
Now let’s check out the result on a live post.
Add Hover Popup Effect to Sticky Email Opt-in
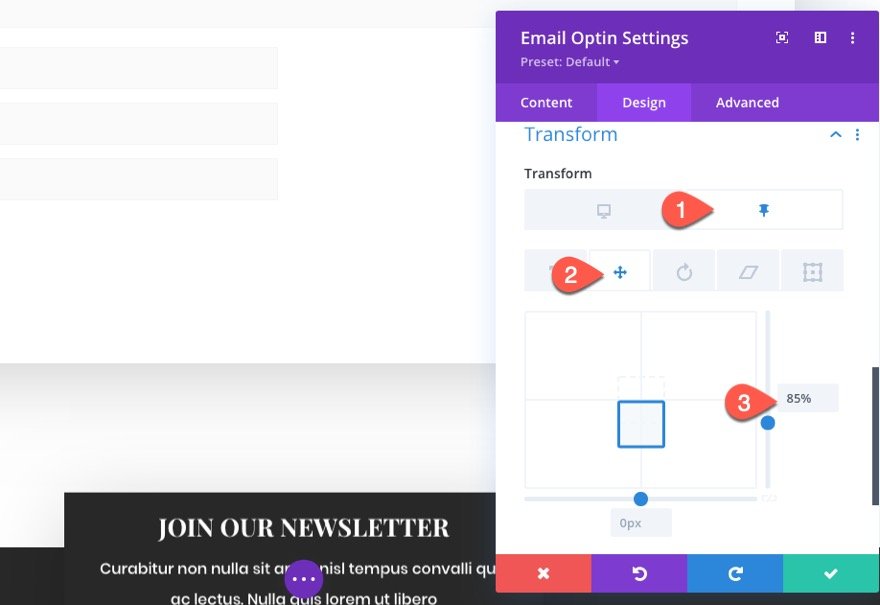
To add a hover popup effect on the sticky email opt-in, open the email opt-in settings, and update the stick transform translate as follows:
- Transform Translate Y Axis (sticky): 85%
This will bring the email opt-in downward (outside of the viewport) by 85% of its own height, exposing just enough of the email optin so that the user can hover over the title.
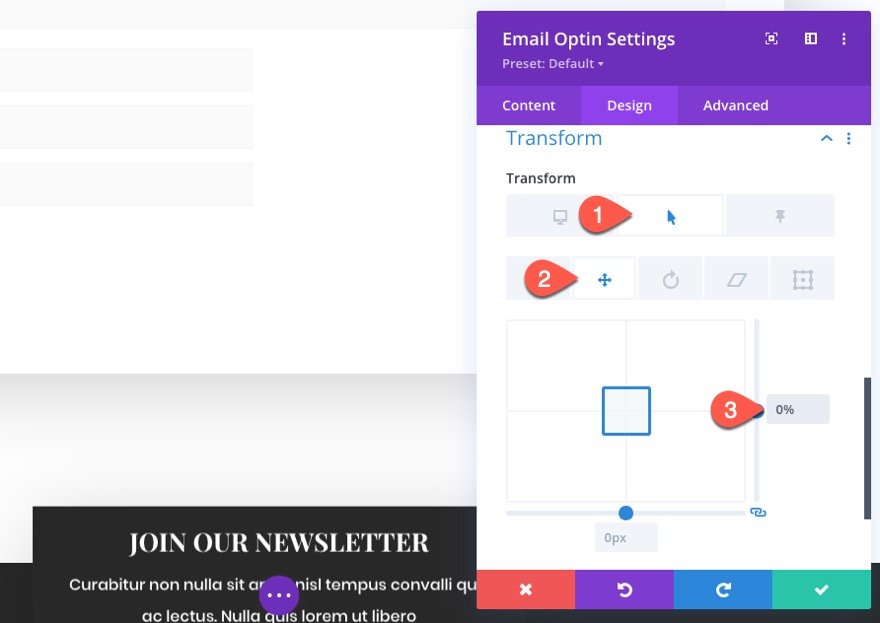
Then add a hover state to the transform option so that the transform translate position is back to its original position on hover:
- Transform Translate Y Axis (hover): 0%
Result
Here is the final result.
Final Results
Here are the three versions of our sticky header that we built.
Final Thoughts
Thankfully, Divi makes adding sticky email opt-ins to your site easy. This frees up more time for tweaking the design of your sticky element for more unique ways to display your form. Hopefully, this technique serves you well in upcoming blog projects.
I look forward to hearing from you in the comments.
Cheers!
.inline-code{padding: 0px 4px; color: crimson; font-family: Monaco,consolas,bitstream vera sans mono,courier new,Courier,monospace!important} video.with-border {border-radius: 8px;box-shadow: 0 8px 60px 0 rgba(103,151,255,.11), 0 12px 90px 0 rgba(103,151,255,.11);display:block;margin: 0 auto;}
The post How to Create a Sticky Email Optin in Divi That Draws Attention appeared first on Elegant Themes Blog.