
If there’s one thing that online surveys aren’t renowned for, it’s their stylishness. They often tend to be dry affairs where you just jump from one question to the next. However, there’s no reason why you can’t add a touch of flair to yours.
That’s where Typeform comes in. This tool not only enables you to create surveys, but also other form styles with modern design sensibilities. In this article, we’re going to talk about the benefits of using surveys, what makes for a good one, and how to create them using Typeform. Let’s get to work!
Why You Should Consider Using Surveys
Surveys don’t need to look boring – they can use modern interface elements.
Of course, a survey is a collection of questions geared towards finding out more about your users, or what they think about specific topics. Depending on your questions, you can use surveys as market research tools, or to gauge customer satisfaction, for example.
There are other ways to gather data about your visitors, but few methods are as straightforward and flexible as surveys, and here are two reasons why:
- You can be direct about your questions. Other tools may provide you with more data about your users, but in most cases, you’ll need to make conjectures about what it means. When it comes to surveys, you can ask a question and get a clear-cut answer.
- You can ask questions about anything. There’s no rule to say what you can or can’t ask your users, so you can use your surveys for any purpose you want. However, the smart thing is to use them to gauge audience reactions and get to know your users better.
The best thing about surveys is that you can use them to complement your existing customer research tools without making any changes to them. For example, there’s no reason why you can’t continue gathering data using Google Analytics while running a survey on a specific topic. After all, the more data you have about your users, the better decisions you’ll be able to make.
The Key Elements of a Compelling Survey
As we mentioned earlier, one of the only downsides to using surveys on your website is their potential to be rather dry. The good news is there are ways to optimize your surveys to make them more compelling. Let’s go through a few suggestions:
- Keep things short. The longer your survey is, the greater the chance your visitors will throw in the towel along the way.
- Focus on a single topic or a small handful of them. A highly-focused survey is more likely to provide you with actionable data about your users.
- Keep your questions simple and avoid repetition. Ideally, it shouldn’t take longer than a couple of seconds for someone to answer any of your questions, which brings us to our next point.
- Use multiple-choice questions whenever possible. Not all questions can be adapted to fit this format, but try to stick with it whenever possible to keep things simple.
- Add a little flair to your survey. People are used to surveys being boring, so if you can make yours stand out visually, you’ll get their attention.
At this point, you understand the importance of using surveys correctly, and the need to make yours more compelling. The next step is to put that information to good use and create one for your site.
An Introduction to Typeform
Typeform is far from the only survey tool available online, but it’s one of our favorites thanks to its focus on design. Every survey you create feels like a modern application thanks to its modern interface elements, which makes for a great experience for you and your users.
Plus, Typeform doesn’t limit itself to creating just surveys. In fact, you can use it to craft any type of form-based content, such as signup sections, job applications, and even order forms.
Finally, the service enables you to keep track of your results, break them down for analysis, and even export them if necessary.
Key Features:
- Build form-based content using a drag-and-drop editor.
- Create compelling surveys to engage with your visitors.
- Customize every aspect of your survey’s style.
- Display fully responsive content on devices of any size.
- Analyze the results of your surveys using built-in tools.
Price: Free and premium plans available | More Information
How to Create a Survey Using Typeform (In 6 Steps)
Typeform’s free tier enables you to create as many surveys as you want, but it can only process 100 responses per month. However, before you go off and upgrade to a premium tier, we recommend you get acquainted with the tool first and see if it’s right for you.
To do so, head to the home page and click on the Get started free button. This will send you to a dashboard where you can create your first form even before signing up.
Once you’re ready to save your work, you can sign up by clicking on the Save Account button on the top right of the page. For now, let’s talk about how to create your first survey.
Step #1: Create a New ‘Typeform’
The term ‘typeform’ doubles as both the name of the service and the way it refers to the forms you create – hence the Create a new typeform button:
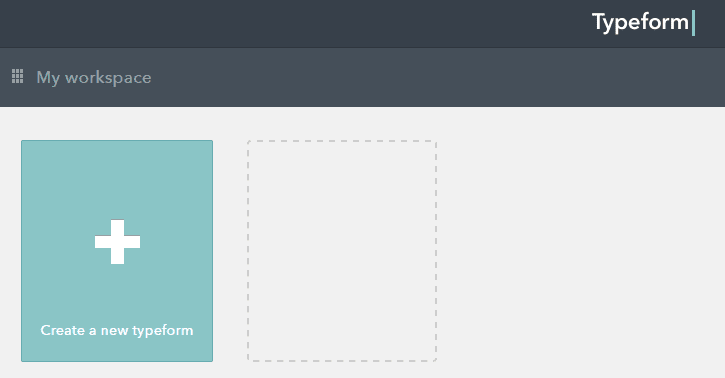
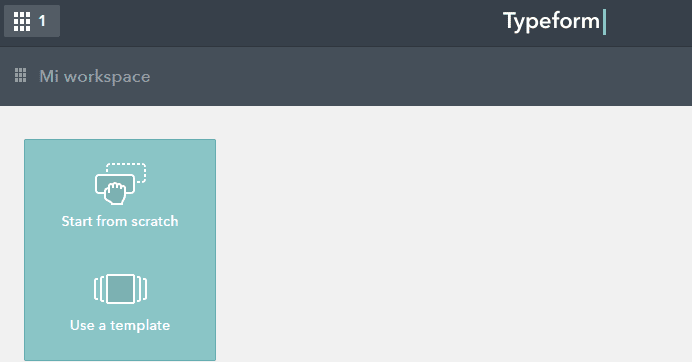
To avoid confusion, we’re going to refer to your typeform as a survey throughout this tutorial. For now, click on the button mentioned above and choose the Start from scratch option once it appears:
Typeform will ask you to choose a name and a language for your survey. Once you’re done, the platform will send you into the survey customization screen:
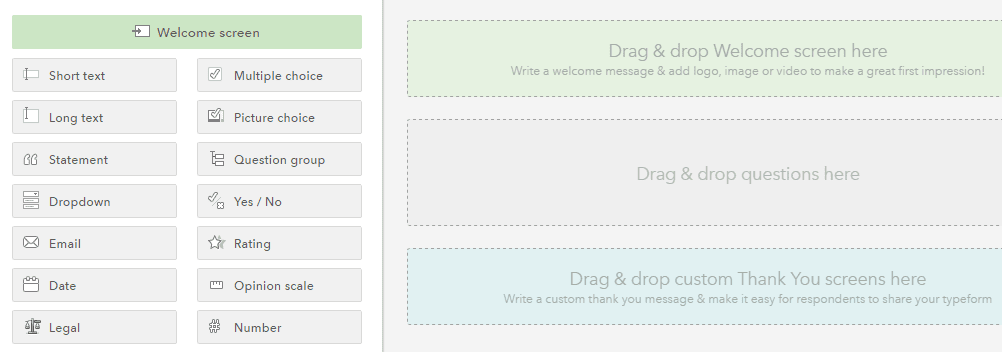
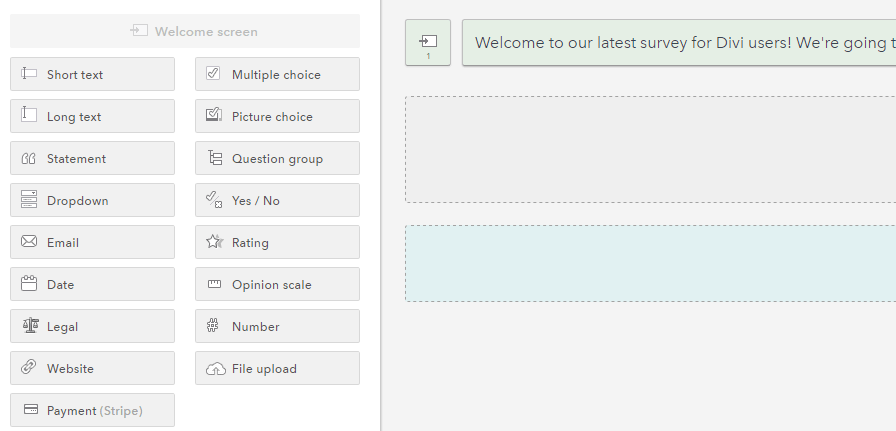
As we mentioned earlier, Typeform uses a drag-and-drop system to put together your content. All the elements you can use appear on the left side of the screen, and you can place them by dragging them to the right in the order you want. There’s also a preview button (called View my typeform) on the top right. For now, let’s move on to step number two and get to know the elements we’ll be using.
Step #2: Create a ‘Welcome Screen’ for Your Survey
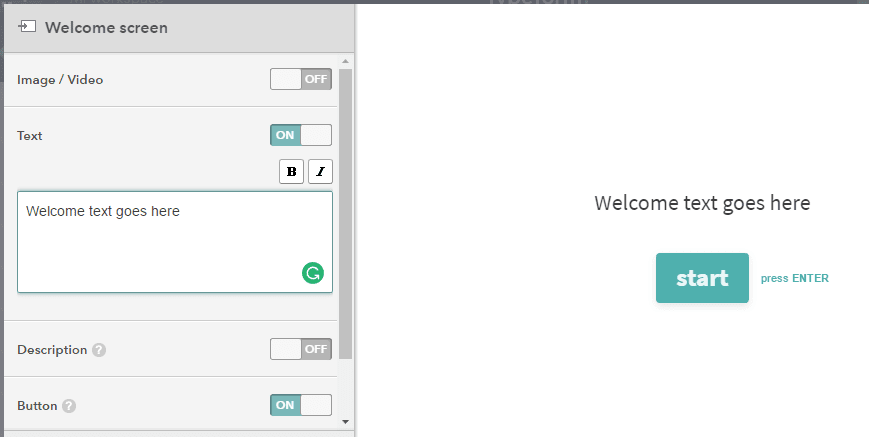
In short, a welcome screen serves as an introduction to your survey. Ideally, it should tell your users what type of questions to expect and how long it’ll take to complete. Plus, it offers you a nice way to add some style to the proceedings.
Typeform enables you to add and customize your welcome screen using a dedicated element. To get started, click on the Welcome screen button to the left of your survey customization screen, and a window should pop up:
If you want to, you can add an image or a video background to this section by clicking on the Image/Video option on the menu. Here’s an example of a background we added for ours:
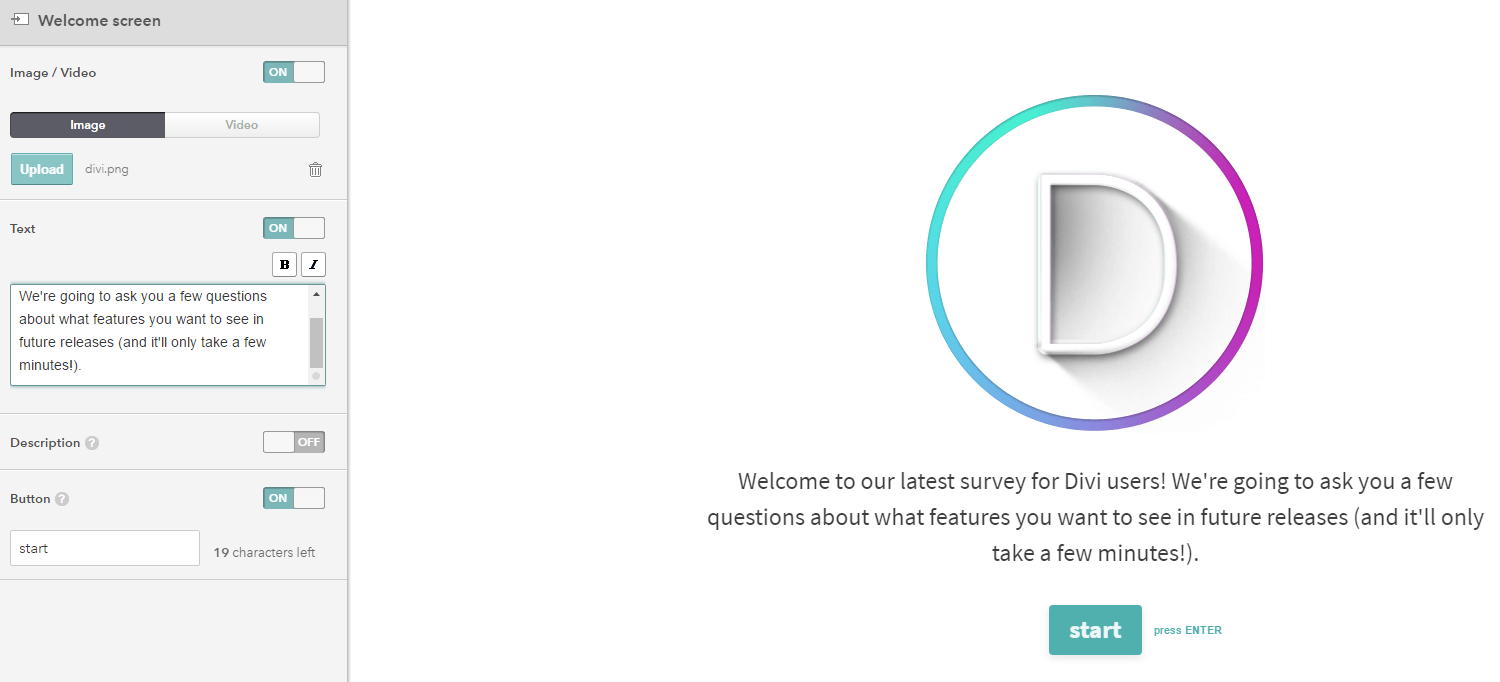
We also added a brief text introduction. Plus, this element enables you to include a simple button to start the survey. The option is enabled by default, and you can change its text using the field within the Button section of the customizer. Now that our welcome screen is ready, let’s ask some questions!
Step #3: Add Questions to Your Survey
Questions are the main component of any survey, and Typeform enables you to use severaln types, including multiple choice, Yes/No queries, opinion scales, and text fields. Each of these varieties appears as an individual element on the left side of your survey customization screen:
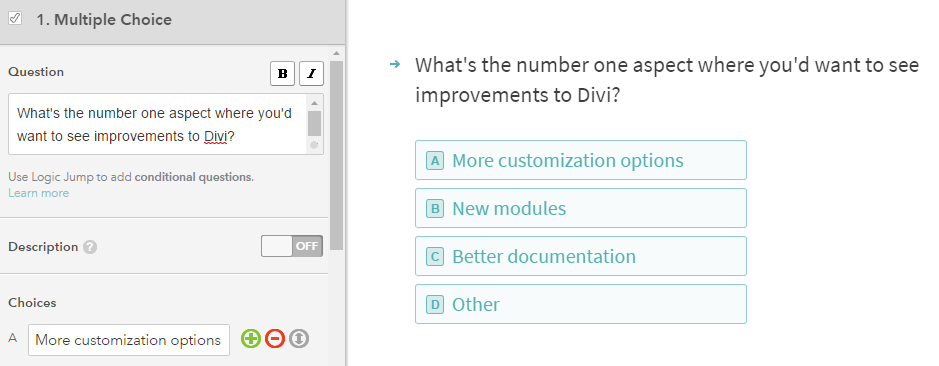
For example, clicking on the Multiple Choice element will bring up a menu where you can type in your question and every potential answer you want to include:
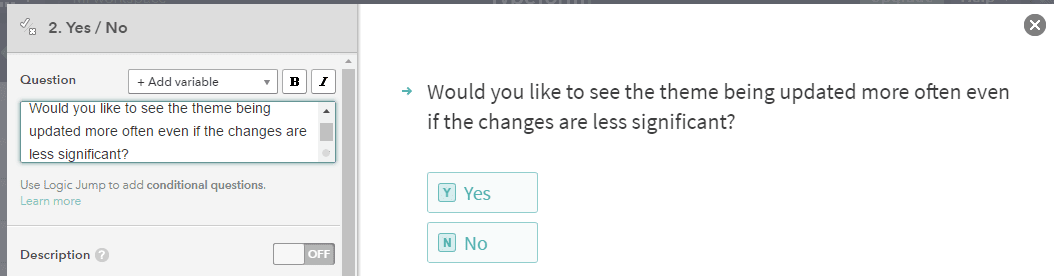
As for Yes/No questions, they’re even simpler – once they’re written, Typeform will add the buttons for you:
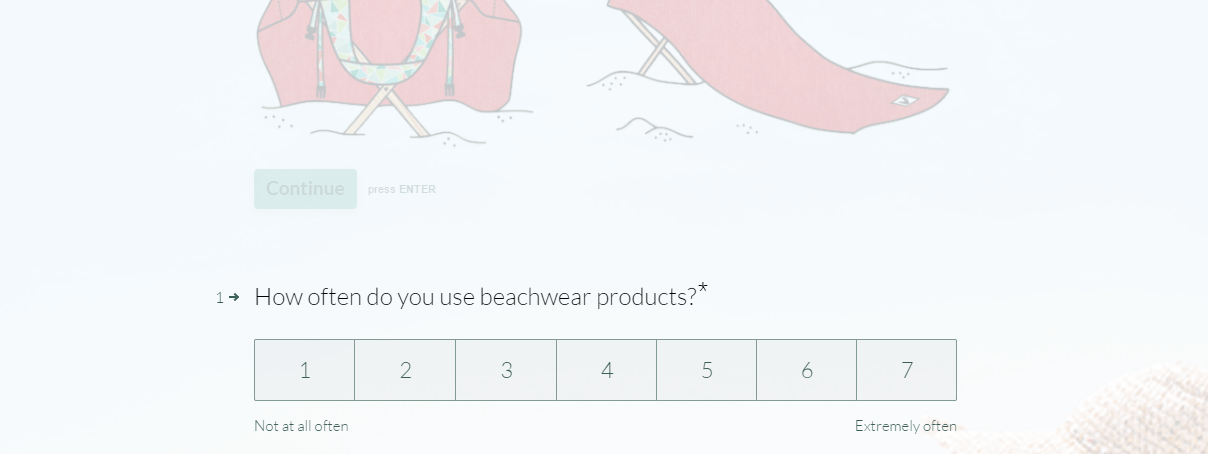
Opinion scales are similarly straightforward: type in the text for your query, and choose a suitable range for users to rate their answers:

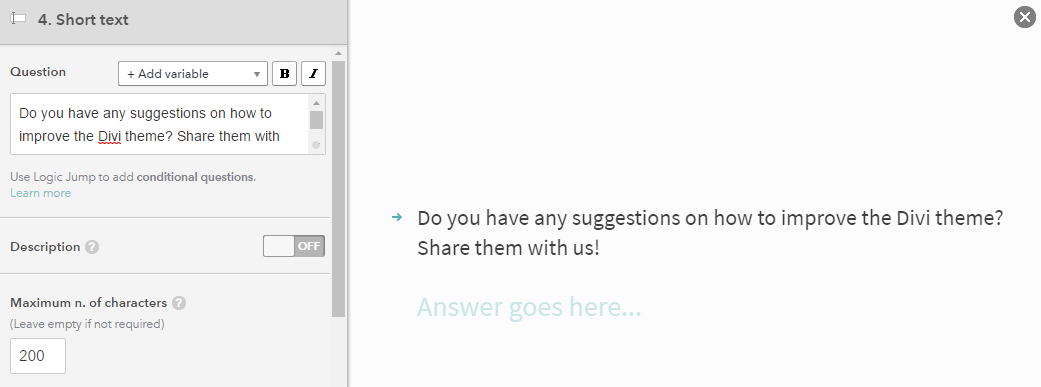
Finally, when it comes to text questions, all you need to do is formulate them and indicate the maximum number of characters allowed for each response:
Right now, here’s how our test survey is shaping up…
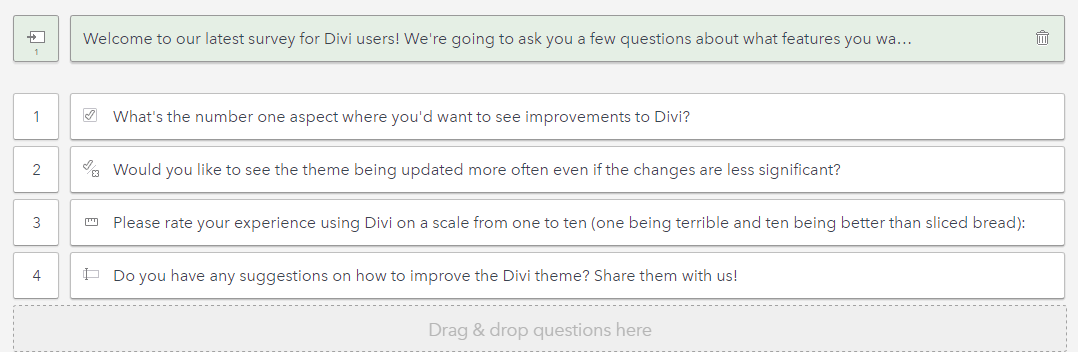
…so go ahead and use a mixture of question types to flesh out your own and you’ll be ready to go. The next step is to add a little flair to your survey before sharing it.
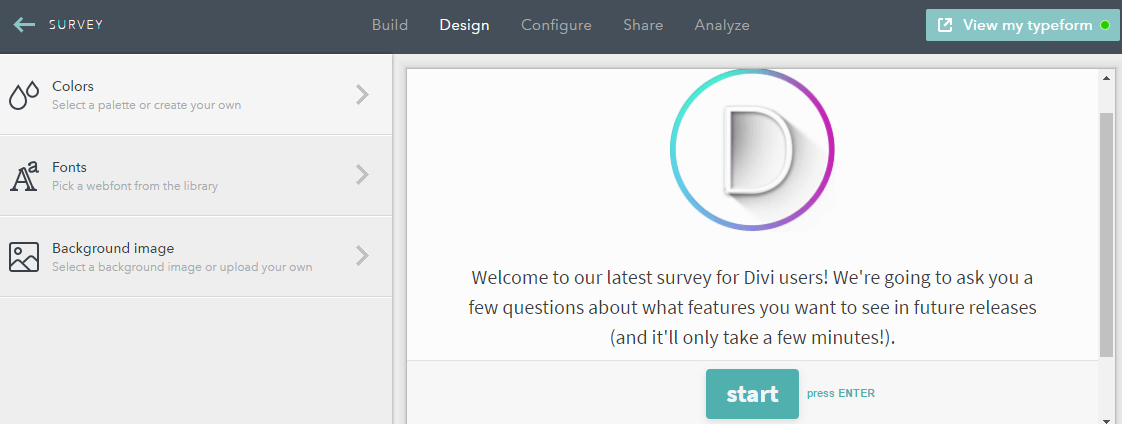
Step #4: Customize Your Survey’s Design
For this step, click on the Design tab in the black bar at the top of the screen. This will open up a menu where you can change your survey’s color scheme, add background images, and modify the font:
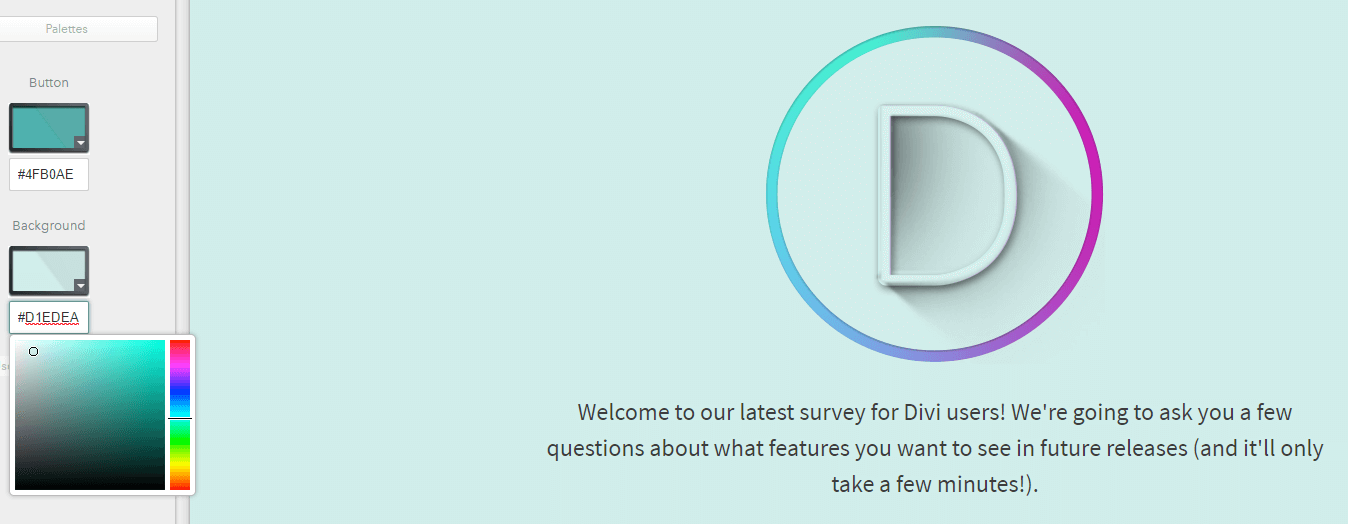
Let’s start by checking out the color options. Changing the palette of your survey is simple – you can choose a color for your text, buttons, answers, and background. For example, we decided to change our background color to something soft:
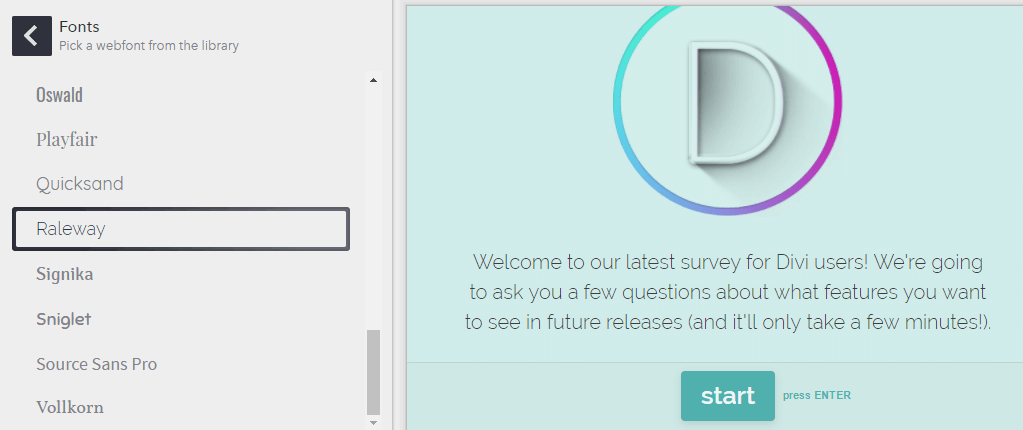
Changing fonts is just as simple. You can choose which one to use by picking an option from a list and saving your changes:
We’re not going to use a background image for our example, but it works similarly to adding one to your welcome screen. For now, save your changes and get ready for your survey to go public.
Step #5: Share Your Survey on Your Divi Site
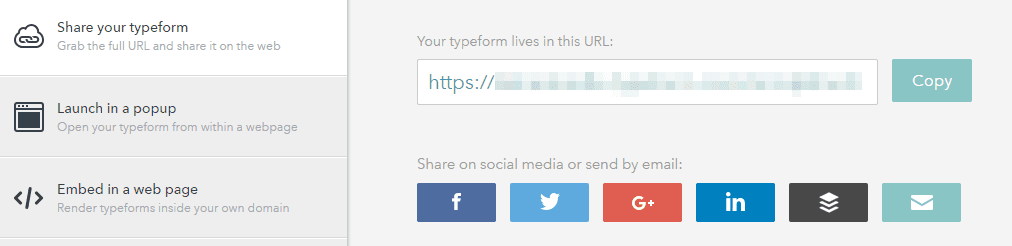
Typeform provides you with several ways to share your surveys. To access them, head to the Share tab on your customization dashboard. The two methods we’re interested in are sharing via a link and embedding it within Divi.
To do the former, click on the Share your typeform button and copy the URL that displays. This is the perfect method for sharing your survey via social media:
On the other hand, if you want to embed your survey directly on your Divi site, go to the Embed in a web page tab and click on the Get the code option under the Embed Code section:
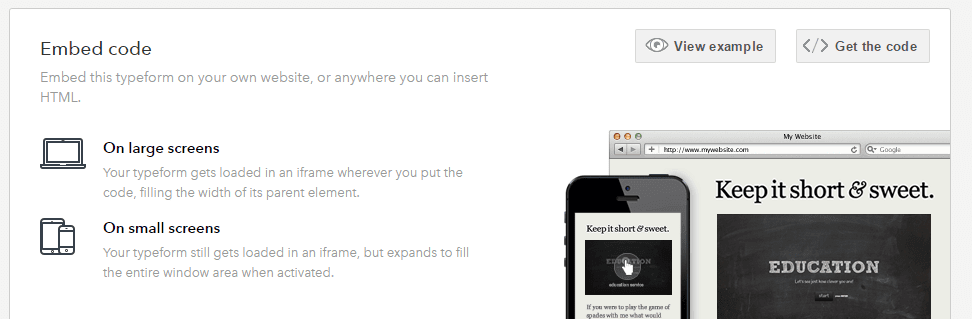
A small pop-up window will appear now that includes your survey’s code. Copy it, and paste the code anywhere you want on your Divi site using the Code module:
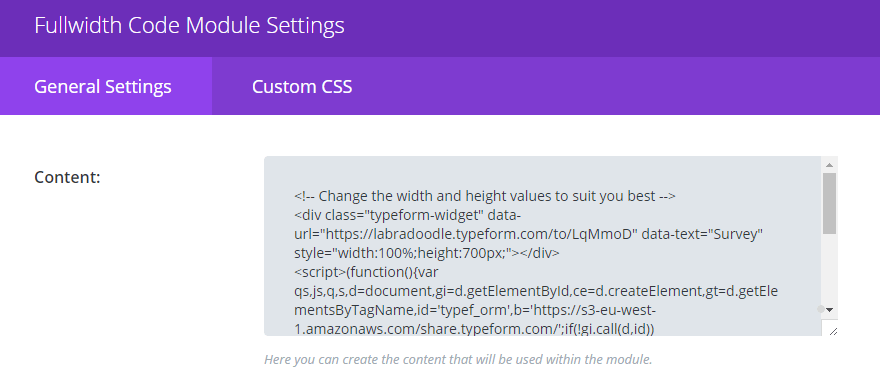
Keep in mind that you’ll want to use the Fullwidth Code module for this task. Otherwise, your survey will look a bit squished. Here’s an example of ours on a page built using Divi:
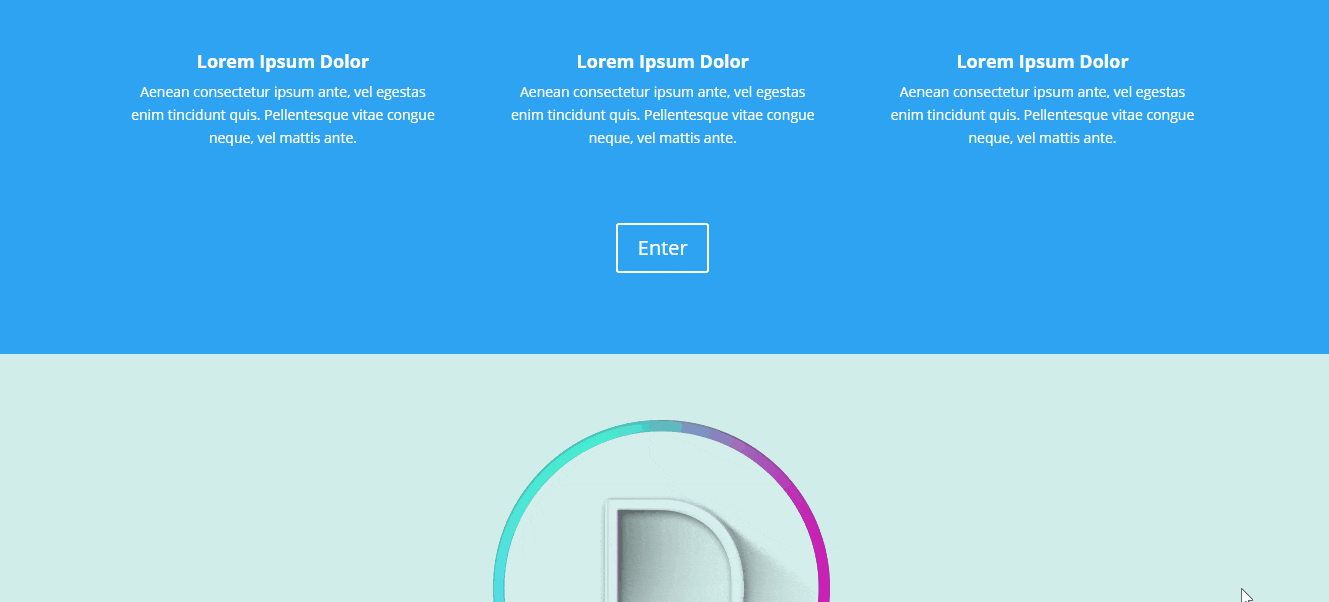
As you can see, the survey looks great and is easily in keeping with the design of a modern website. Mission accomplished!
Step #6: Analyze Your Results
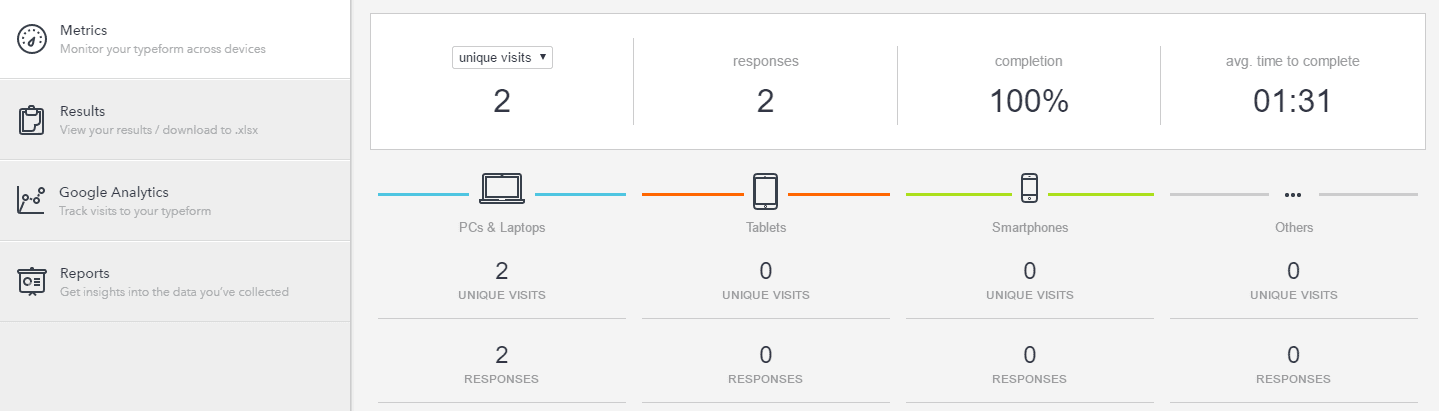
Once your survey has gone live, you’ll need to wait for the first results to come in so you can analyze them. Typeform enables you to do that using the Analyze tab on your survey’s dashboard.
For example, you can keep an eye on how many people have completed your survey and which types of devices they’re using from the Metrics tab:
You can also analyze the individual results for each question from the Results section:

This data should provide you with the direction you need to produce better content, and you’ll likely redesign and improve your surveys constantly the more information you glean.
Conclusion
Formulating the perfect questions for your surveys is hard enough, but so is making sure you get its presentation right. If yours looks too dry, it might drive users away, and you won’t get enough answers for your results to be relevant.
In this piece, we’ve shown you how to create a survey befitting a modern website by using Typeform. Let’s quickly recap the steps:
- Create a new typeform.
- Create a Welcome Screen for your survey.
- Add questions to it.
- Create a Thank You screen for your survey.
- Share your end product.
- Analyze your results.
Do you have any questions about how to create a survey using Typeform? Ask away in the comments section below!
Article thumbnail image by vladwell / shutterstock.com
The post How to Create a Stylish Survey Using Typeform and Add it to Your Divi Website appeared first on Elegant Themes Blog.