
Looking for a unique way to put a specific part of your page in the spotlight? Keep on reading! Today, we’re going to show you how to create animated border overlaps to highlight content on your page. We’ll create three different animated border overlaps on the App Developer Layout Pack‘s landing page, but you can use this technique for any kind of website you’re building. It’ll definitely help you add an extra dimension to your page. We hope this tutorial inspires you to create your own alternative animated border overlaps as well.
Let’s get to it!
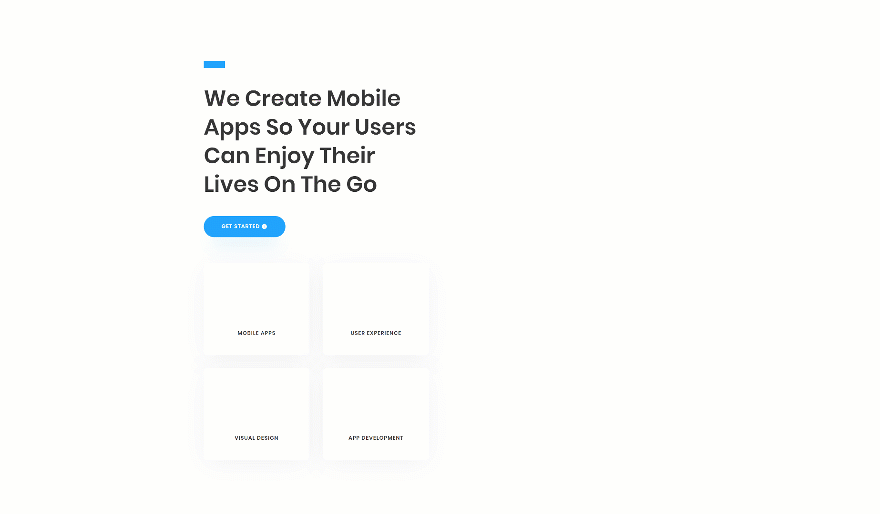
Preview
Before we dive into the tutorial, let’s take a quick look at the outcome of all three examples. You can expect a similar outcome on smaller screen sizes as well.
Example #1
Example #2

Example #3
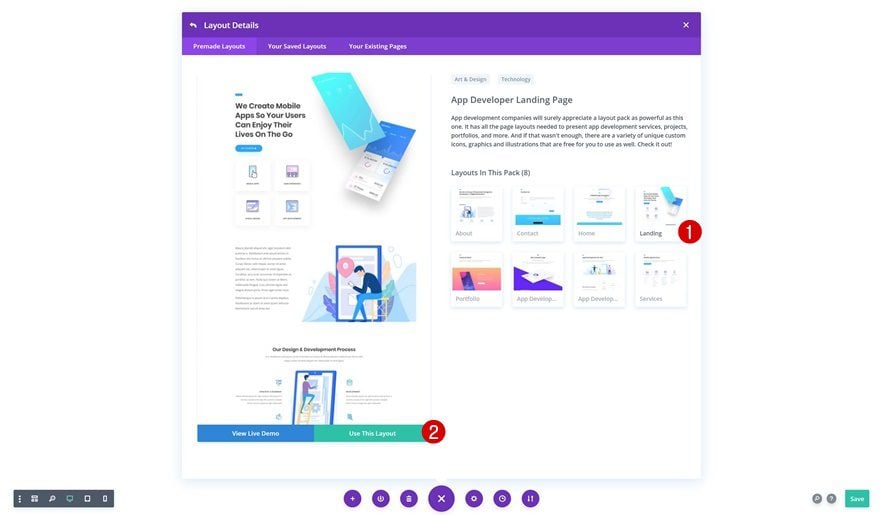
Create New Page Using App Developer Layout Pack’s Landing Page
The first thing you’ll need to do is create a new page using the App Developer Layout Pack‘s landing page.
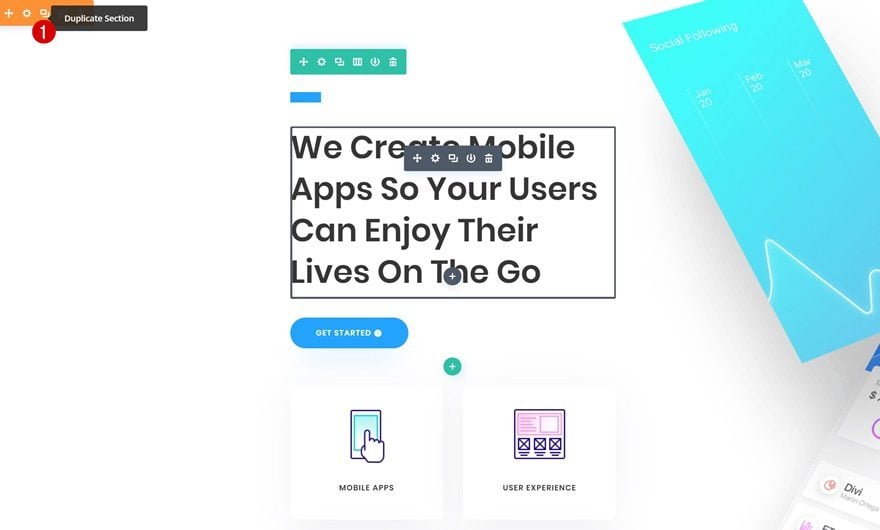
Clone Hero Section
Our first two examples are created in the hero section. If you want to recreate both examples, it is recommended you clone the hero section so you can move on to the duplicate to recreate the second example.
Recreate Example #1
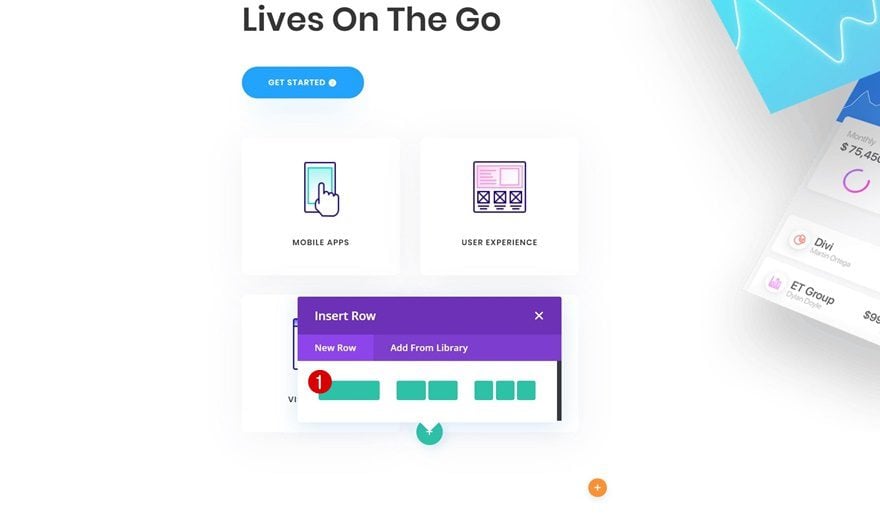
Add New Row to Hero Section
Column Structure
Let’s start recreating the first example! Add a new row in the specialty section using the following column structure:

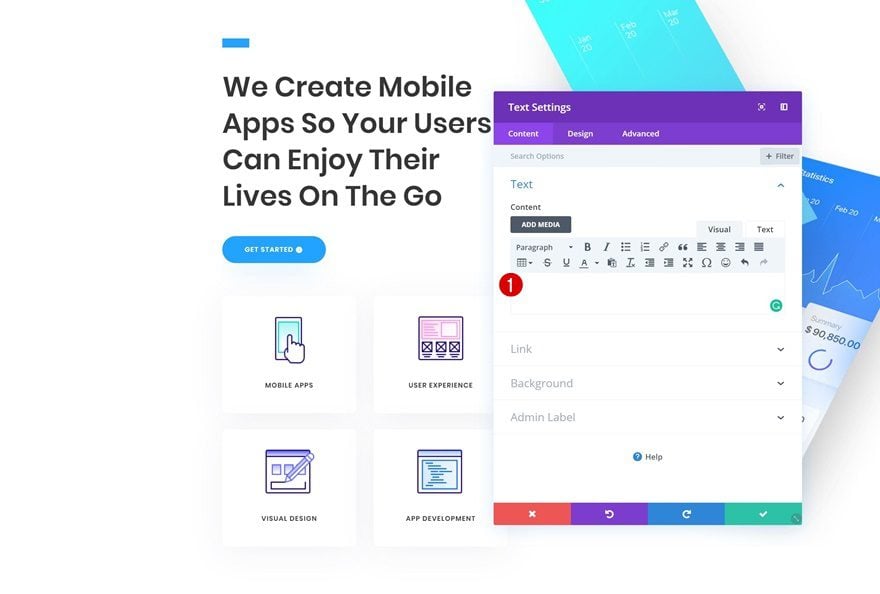
Add Text Module
Leave Content Box Empty
Add e new Text Module to the row and make sure you leave the content box empty. We’re using the module for its built-in design options, not to display written content.
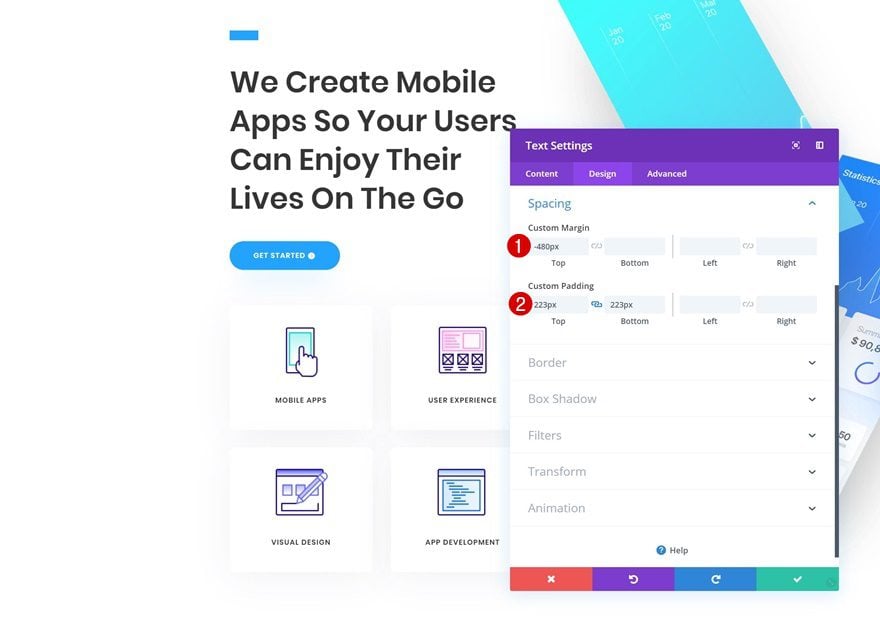
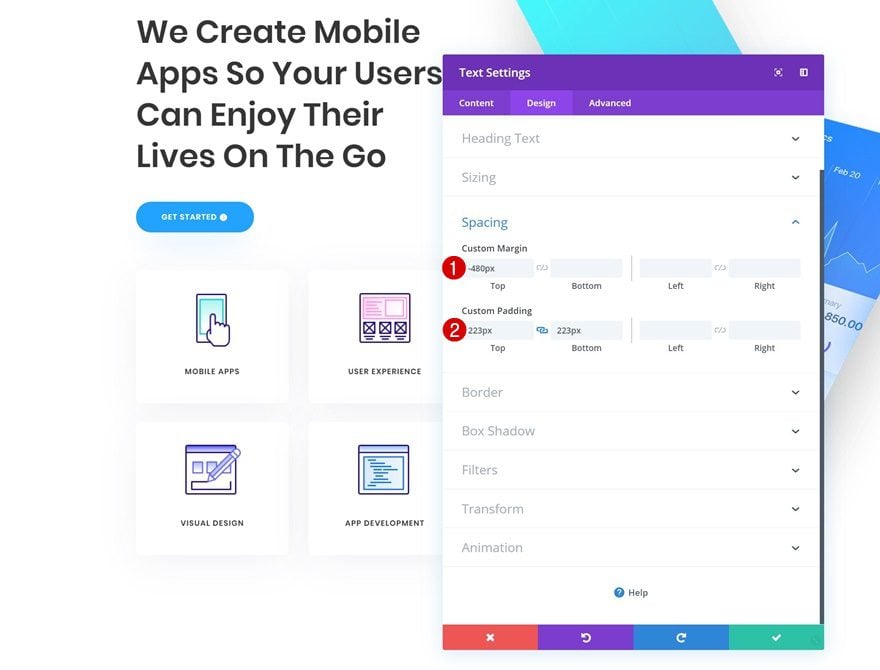
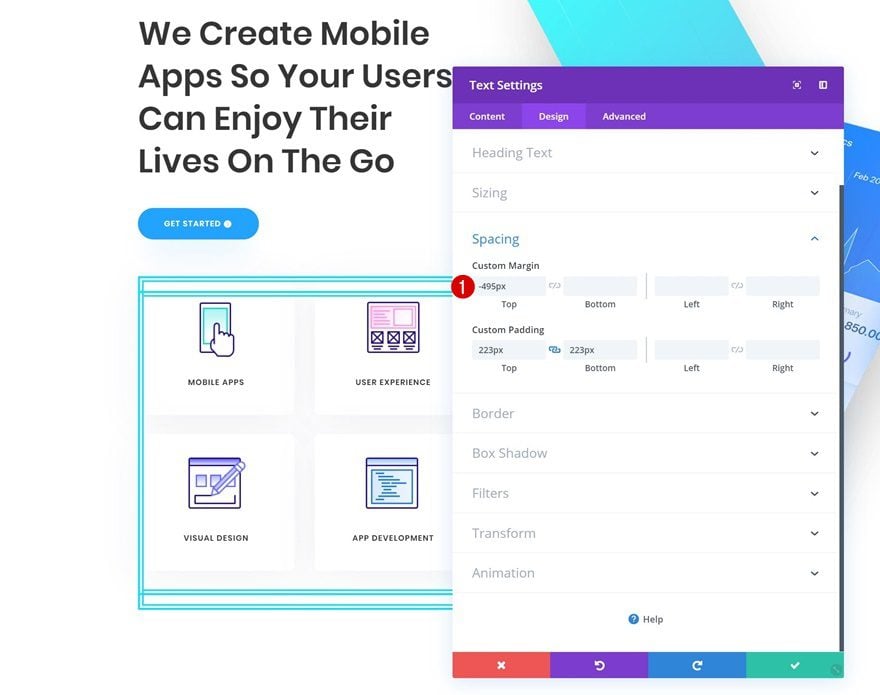
Spacing
Go to the spacing settings of the Text Module and give the module a shape by adding custom top and bottom padding. Create the overlap between this module and the previous modules by adding some negative top margin as well.
- Top Margin: -480px
- Top Padding: 223px
- Bottom Padding: 223px
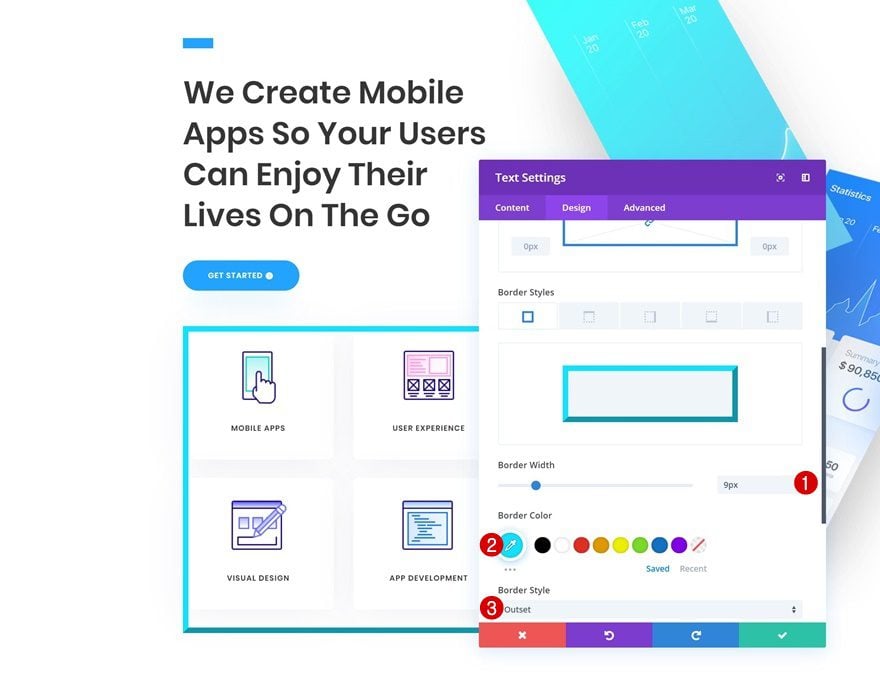
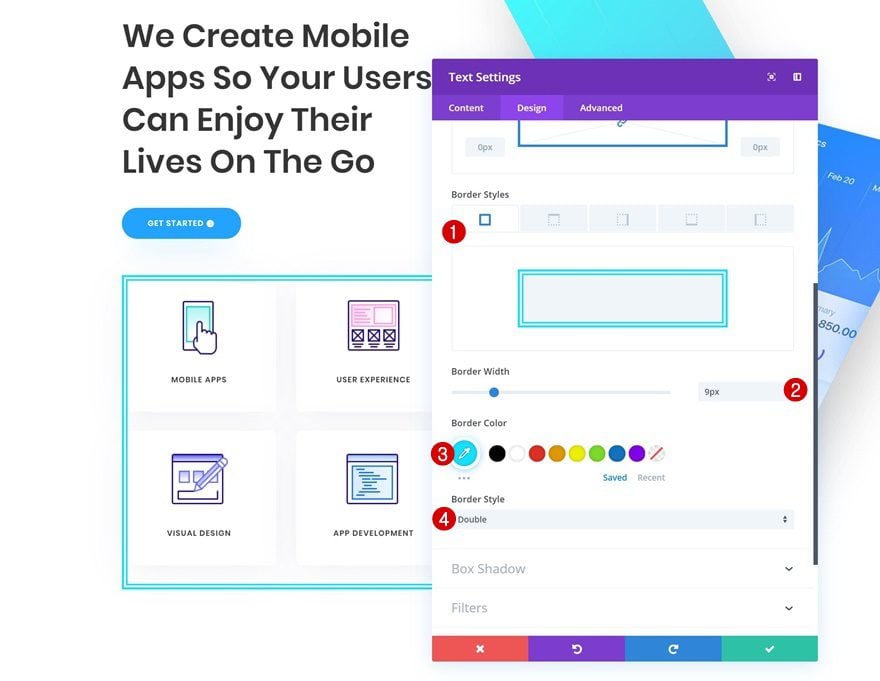
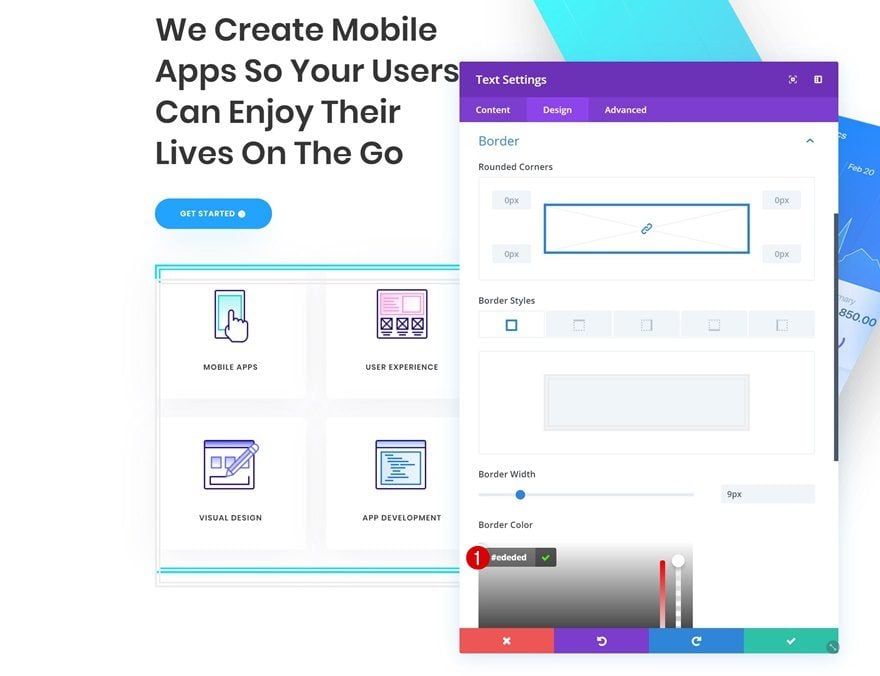
Border
Then, go to the border settings of the module and add a border of your choice.
- Border Width: 9px
- Border Color: #0ae2ff
- Border Style: Outset
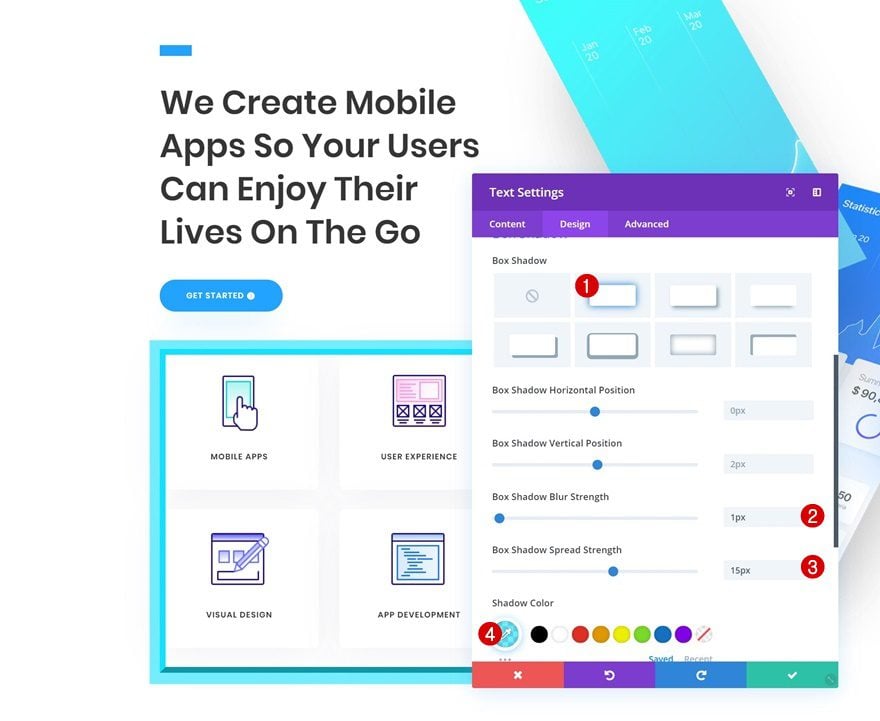
Box Shadow
Add a box shadow too.
- Box Shadow Blur Strength: 1px
- Box Shadow Spread Strength: 15px
- Shadow Color: rgba(10,226,255,0.59)
Animation
And play around with the animation settings to make the content pop.
- Animation Style: Flip
- Animation Repeat: Once
- Animation Direction: Right
- Animation Duration: 1500ms
- Animation Delay: 1500ms
- Animation Intensity: 500%

Recreate Example #2
Add New Row to Duplicate Hero Section
On to the second example! Add a new row to the duplicate hero section using the following column structure:
Add Text Module #1
Leave Content Box Empty
We’re, again, using an empty Text Module.

Spacing
Go to the spacing settings and give the module a shape using custom top and bottom padding. Make it overlap with the previous modules by adding some negative top margin as well.
- Top Margin: -480px
- Top Padding: 223px
- Bottom Padding: 223px
Border
Continue by adding a border to the Text Module.
- Border Width: 9px
- Border Color: #0ae2ff
- Border Style: Double
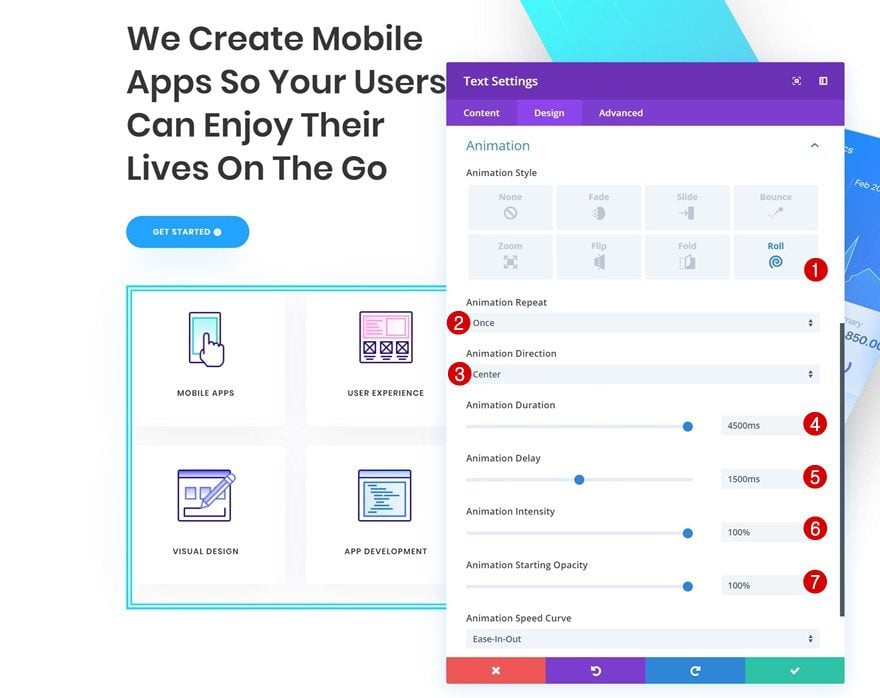
Animation
And play around with the animation settings to create a rolling effect.
- Animation Style: Roll
- Animation Repeat: Once
- Animation Direction: Center
- Animation Duration: 4500ms
- Animation Delay: 1500ms
- Animation Intensity: 100%
- Animation Starting Opacity: 100%
Clone Text Module
Once you’re done modifying the first Text Module, go ahead and clone it.

Change Spacing
Open the duplicate’s settings and change the top margin value in the spacing settings.
- Top Margin: -495px
Change Border
Modify the border color as well.
- Border Color: #ededed
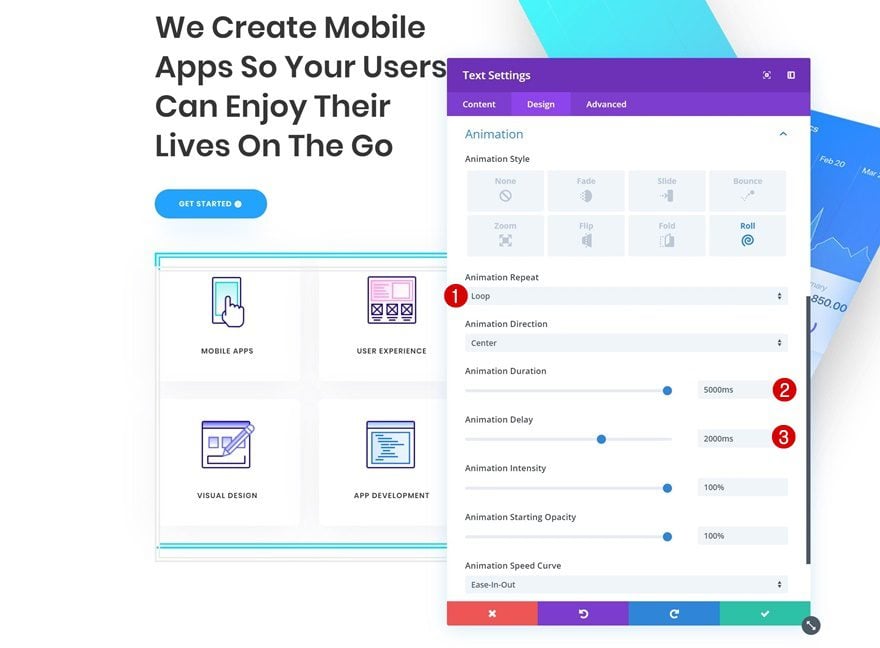
Change Animation
And modify the animation settings to achieve the outcome you’ve seen in the preview of this post.
- Animation Repeat: Loop
- Animation Duration: 5000ms
- Animation Delay: 2000ms
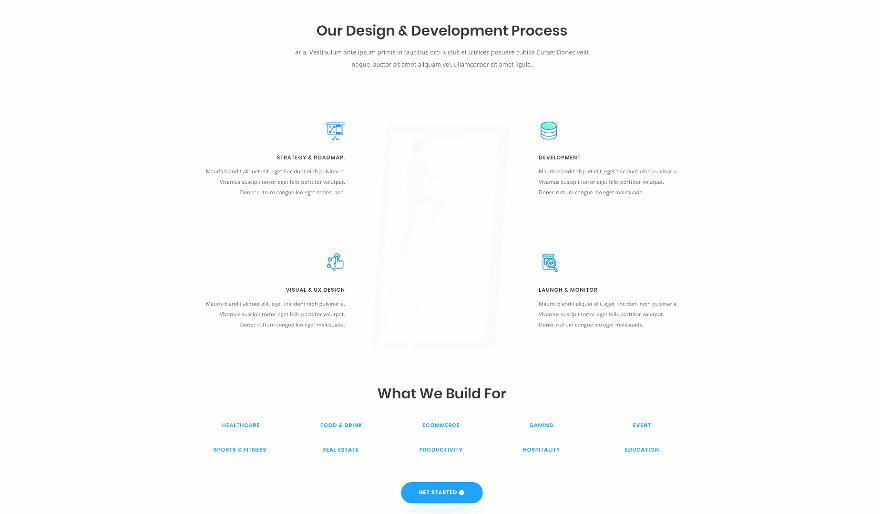
Recreate Example #3
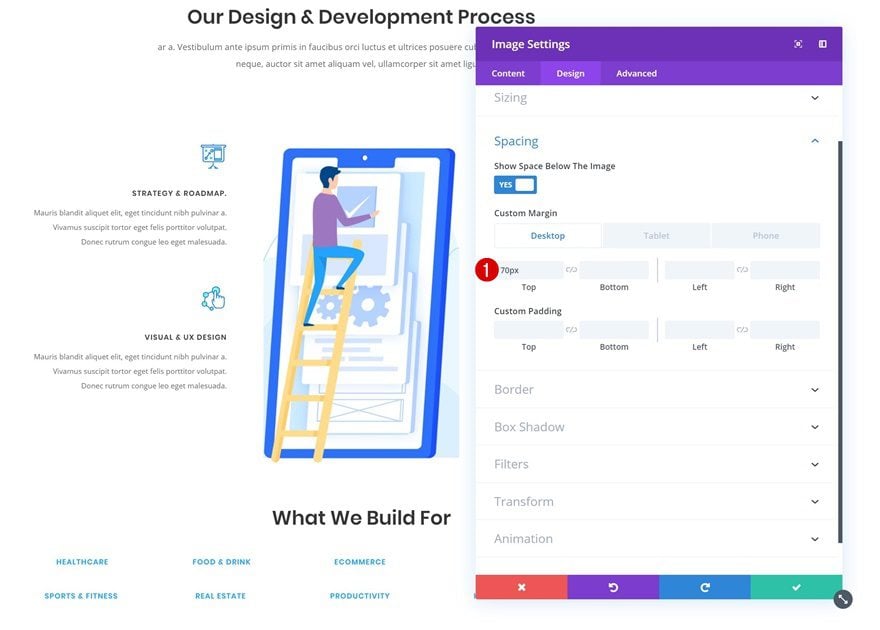
Change Spacing of Image Module in Column 2
On to the next and last example! Navigate to the process section on the page and add some top padding to the Image Module containing the big illustration in the middle.
- Top Margin: 70px (Desktop), 0px (Tablet & Phone)
Add Background Color to Existing Text Modules
Continue by adding a white background color to each one of the Text Modules in the first and third column.
- Background Color: #ffffff

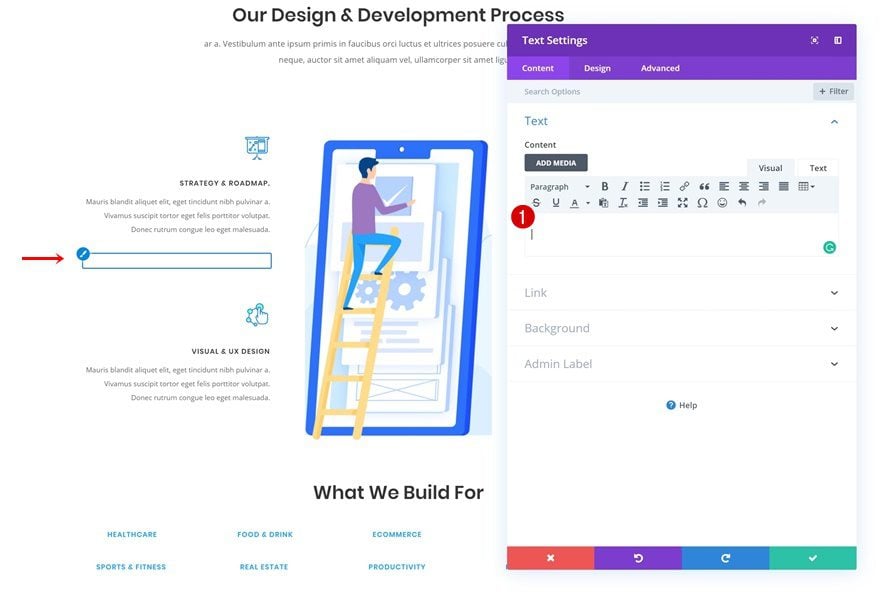
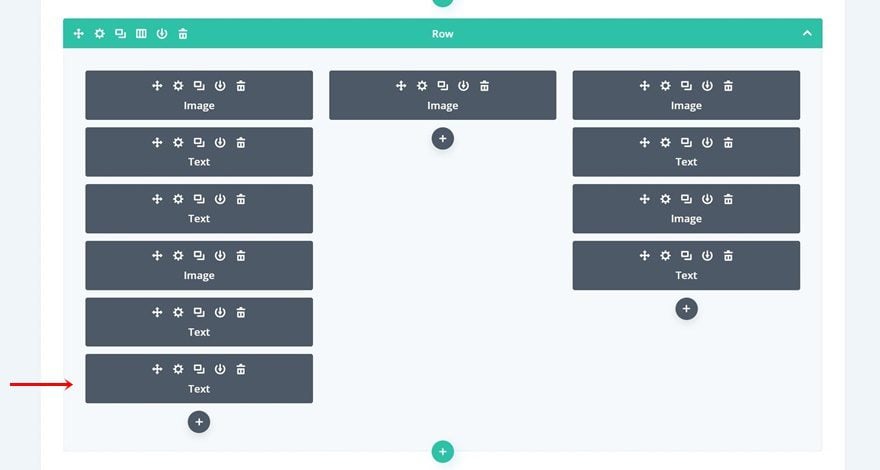
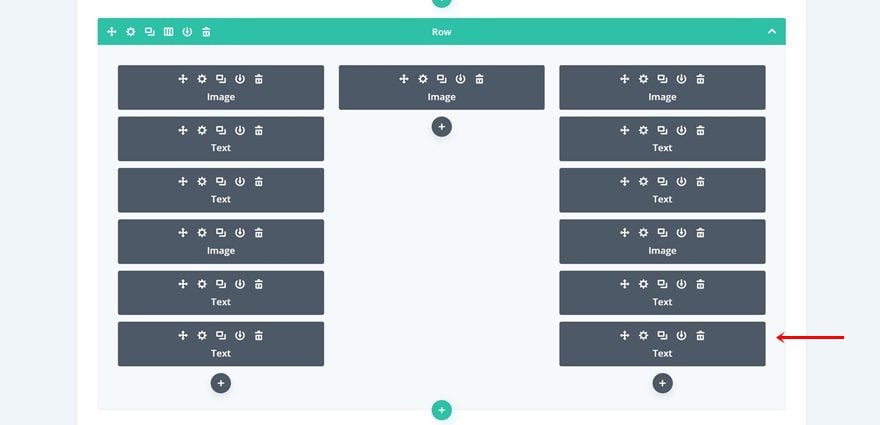
Add Text Module to Column 1
Leave Content Box Empty
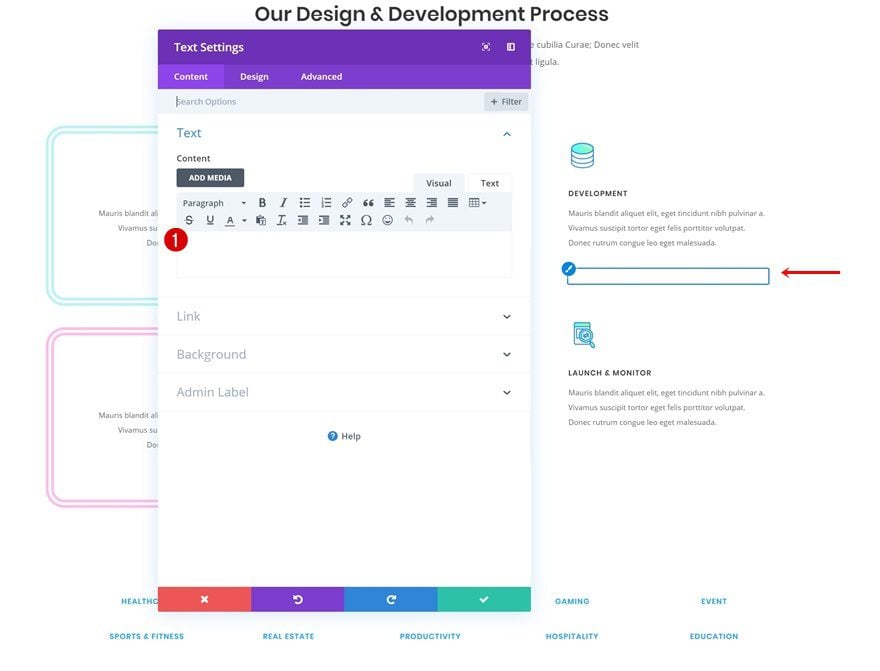
We can now start adding the first animated border overlap! Add a new Text Module to the first column (see print screen) and make sure you leave the content box empty.
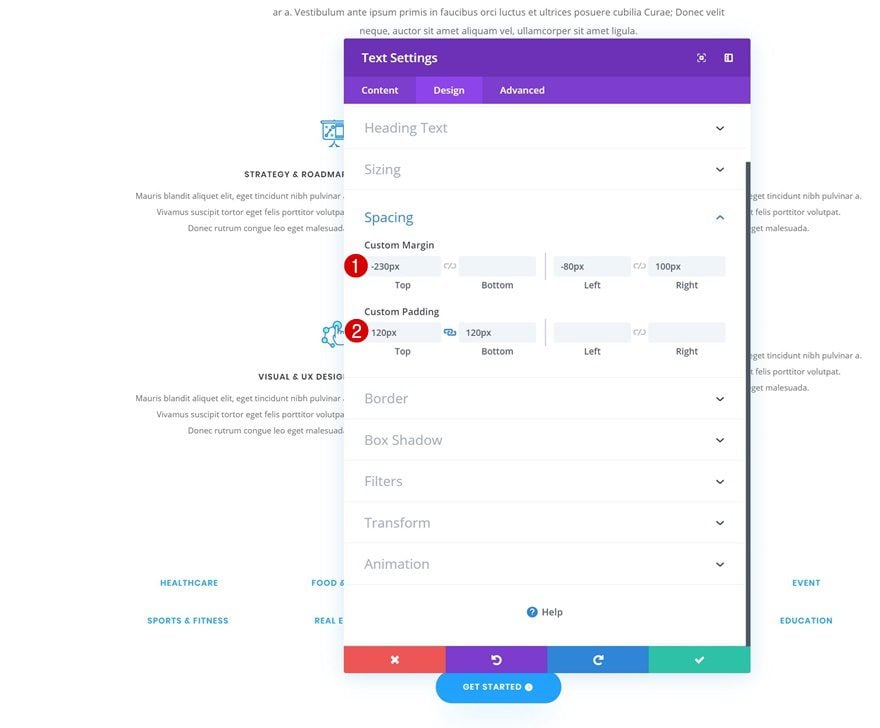
Spacing
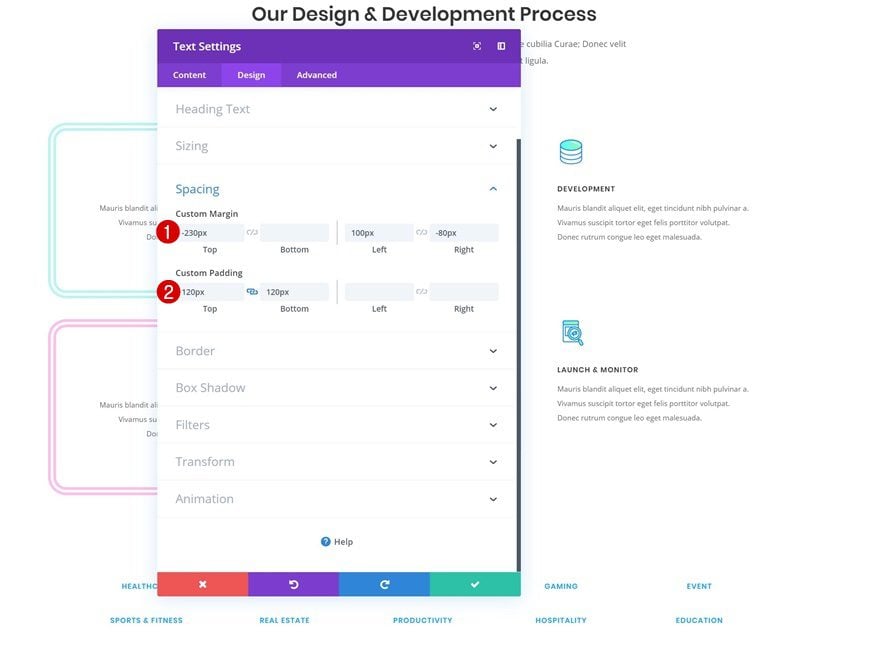
Go to the spacing settings of the Text Module next and create the shape and overlap using custom margin and padding values.
- Top Margin: -230px
- Left Margin: 80px
- Right Margin: 100px
- Top Padding: 120px
- Bottom Padding: 120px
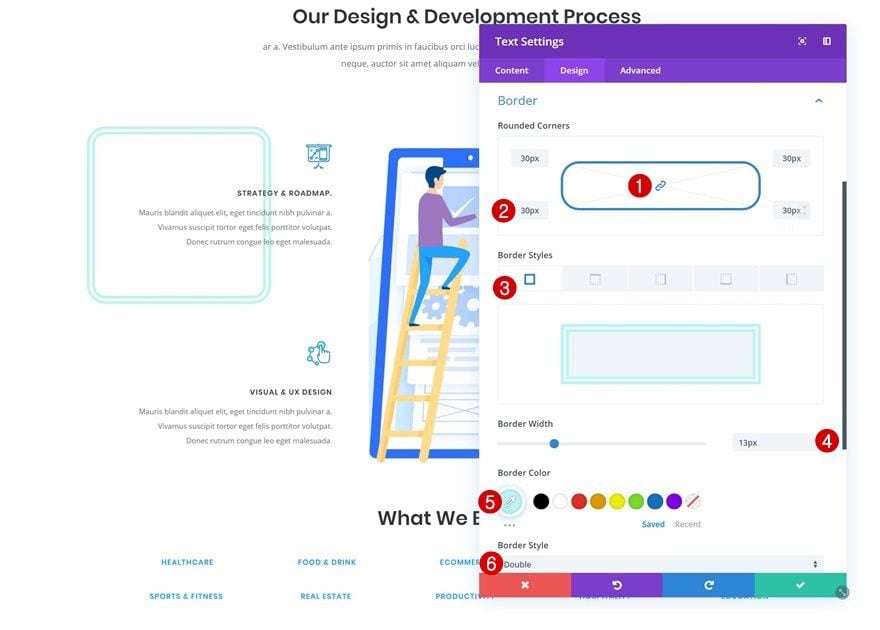
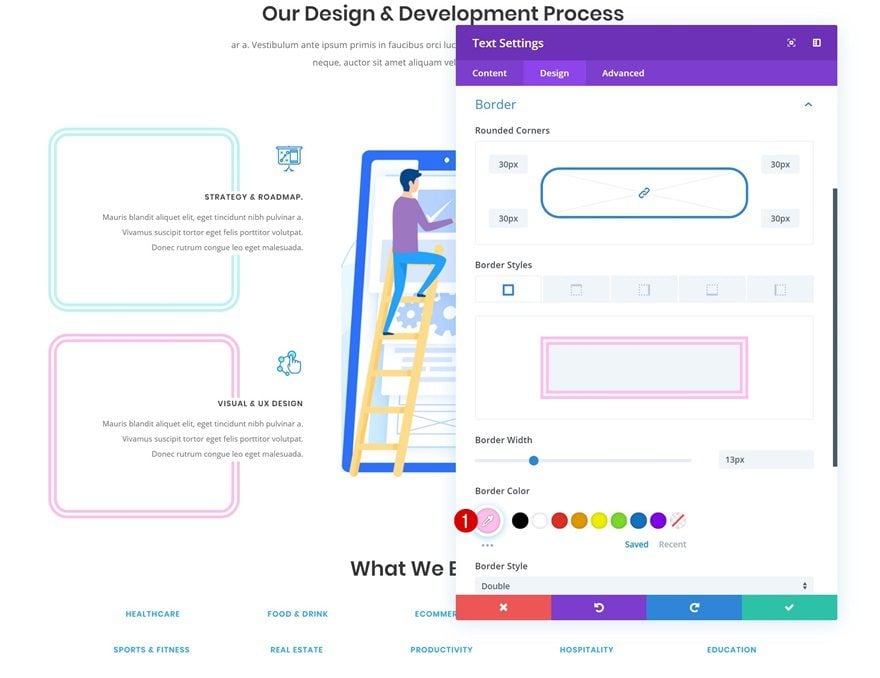
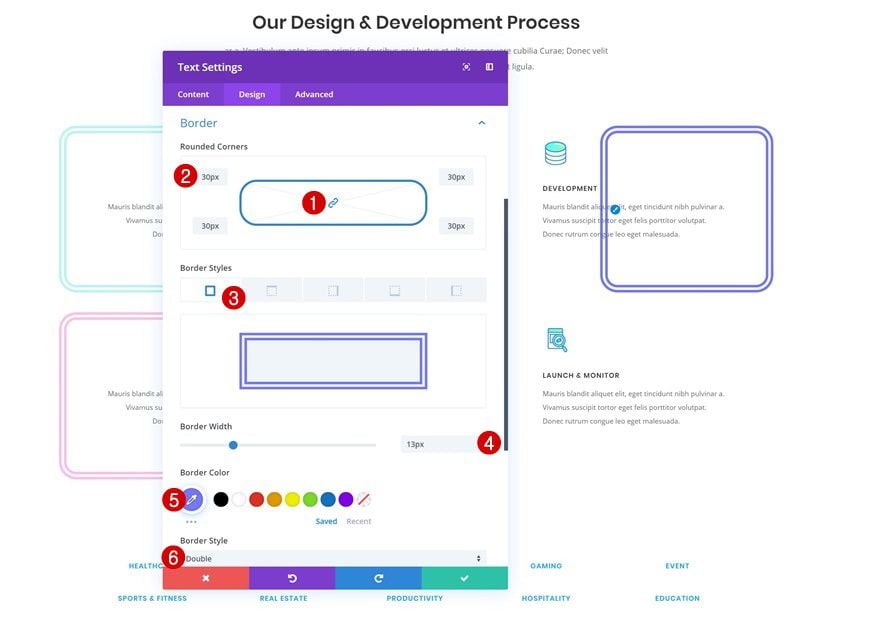
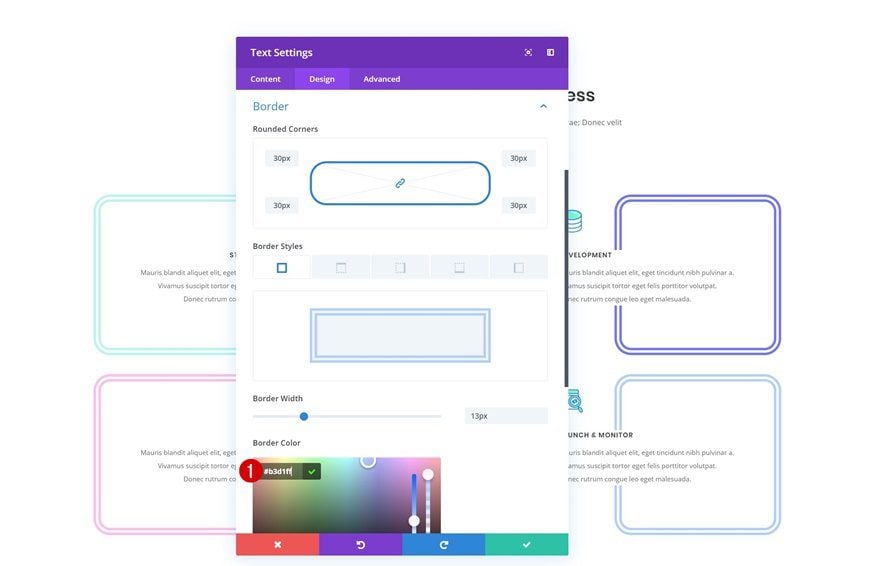
Border
Add a border next.
- Border Width: 13px
- Border Color: #bcf5f3
- Border Style: Double
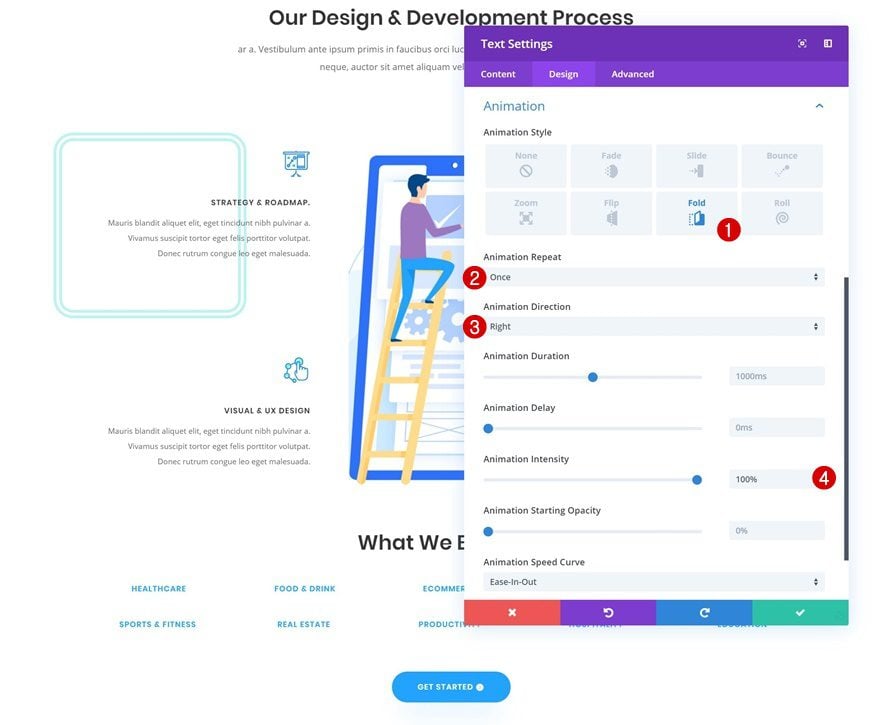
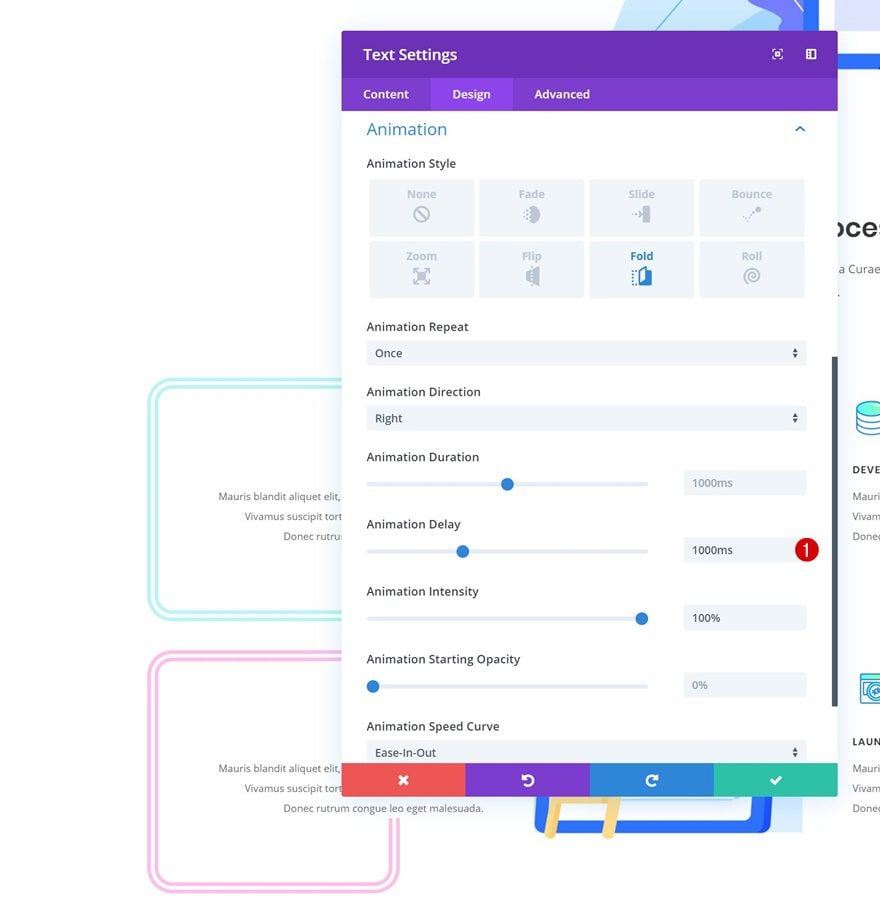
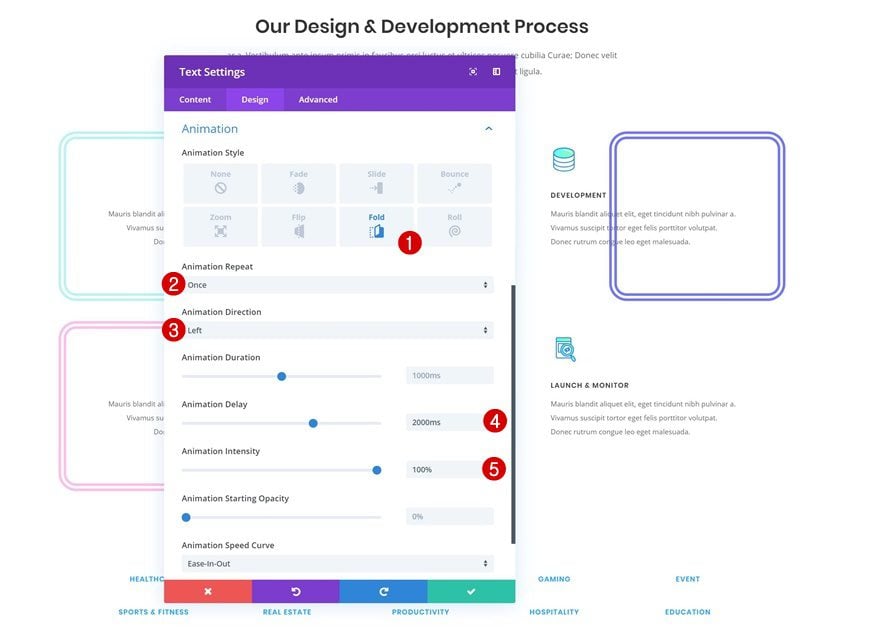
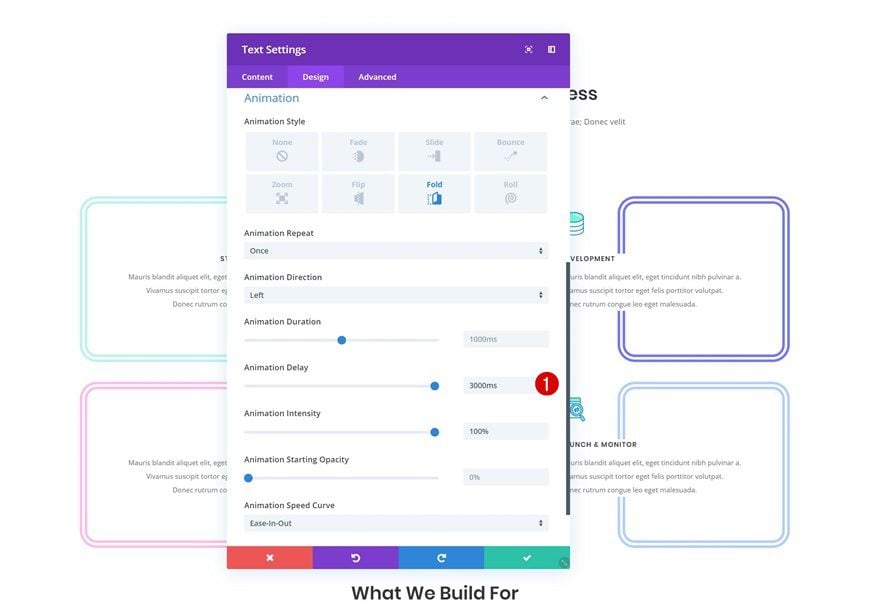
Animation
Continue by adding an animation of your choice that’ll help you highlight the content you’re sharing.
- Animation Style: Fold
- Animation Repeat: Once
- Animation Direction: Right
- Animation Intensity: 100%
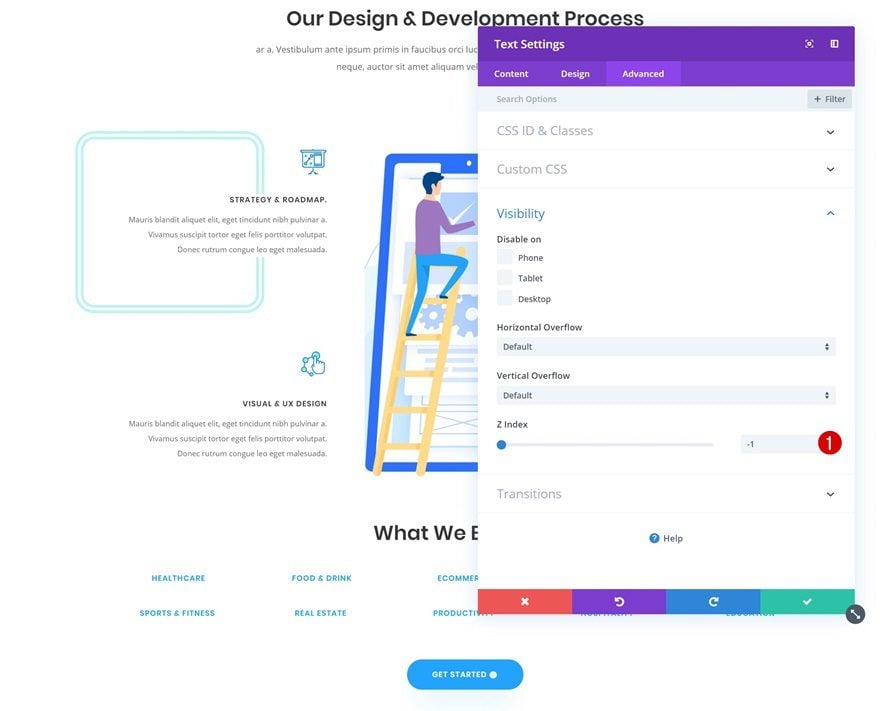
Z Index
To make sure the borders appear below the content, we’re going to use a negative value for the Z index of the Text Module containing the border settings.
- Z Index: -1
Clone Text Module & Place at End of Column 1
Once you’re done creating and modifying the Text Module, go ahead and clone it. Place the duplicate at the end of the first column.
Change Border
Change the border color.
- Border Color: #ffc0ec
Change Animation
And add an animation delay as well.
- Animation Delay: 1000ms
Add Text Module to Column 3
Leave Content Box Empty
Continue by adding a Text Module to the third column (see print screen) and make sure you leave the content box empty.
Spacing
Move on to the spacing settings and create the shape and overlap using custom margin and padding values.
- Top Margin: -230px
- Left Margin: 100px
- Right Margin: -80px
- Top Padding: 120px
- Bottom Padding: 120px
Border
Add a border of your choice next.
- Border Width: 13px
- Border Color: #7479ff
- Border Style: Double
Animation
Along with an animation that includes an animation delay higher than the ones that were given to the two previous Text Modules.
- Animation Style: Fold
- Animation Repeat: Once
- Animation Direction: Left
- Animation Delay: 2000ms
- Animation Intensity: 100%
Z Index
Make sure the module appears below the content by using a negative Z index.
- Z Index: -1

Clone Text Module & Place at End of Column 3
Once you’re done adding and modifying the Text Module, clone it and place the duplicate at the end of the third row.
Change Border
Change the border color of the duplicate.
- Border Color: #b3d1ff
Change Animation
Add some extra animation delay and you’re done!
- Animation Delay: 3000ms
Preview
Now that we’ve gone through all the steps, let’s take a final look at the outcome of all three examples we’ve recreated throughout this tutorial.
Example #1
Example #2
Example #3
Final Thoughts
In this post, we’ve shown you how to put your content in the spotlight using animated border overlaps. This is a great technique for drawing attention to a specific part of your page and doing it so in an elegant way as well. You can use this technique for any kind of website you’re building. If you have any question or suggestions, make sure you leave a comment in the comment section below!
The post How to Create Animated Border Overlaps to Highlight Content with Divi appeared first on Elegant Themes Blog.