
In this Divi tutorial, we’re going to show you how to create beautiful section transitions using nothing else than the built-in Divi options.
Sections are the foundation of all the content you share on your website. Each section is a chapter and going from one section to the other is part of the storytelling process. Making this transition as smooth as possible will emphasize the message you’re trying to articulate. To help you with that, we’re going to show you how you can create beautiful section transitions for your next website project.
Sneak Peek
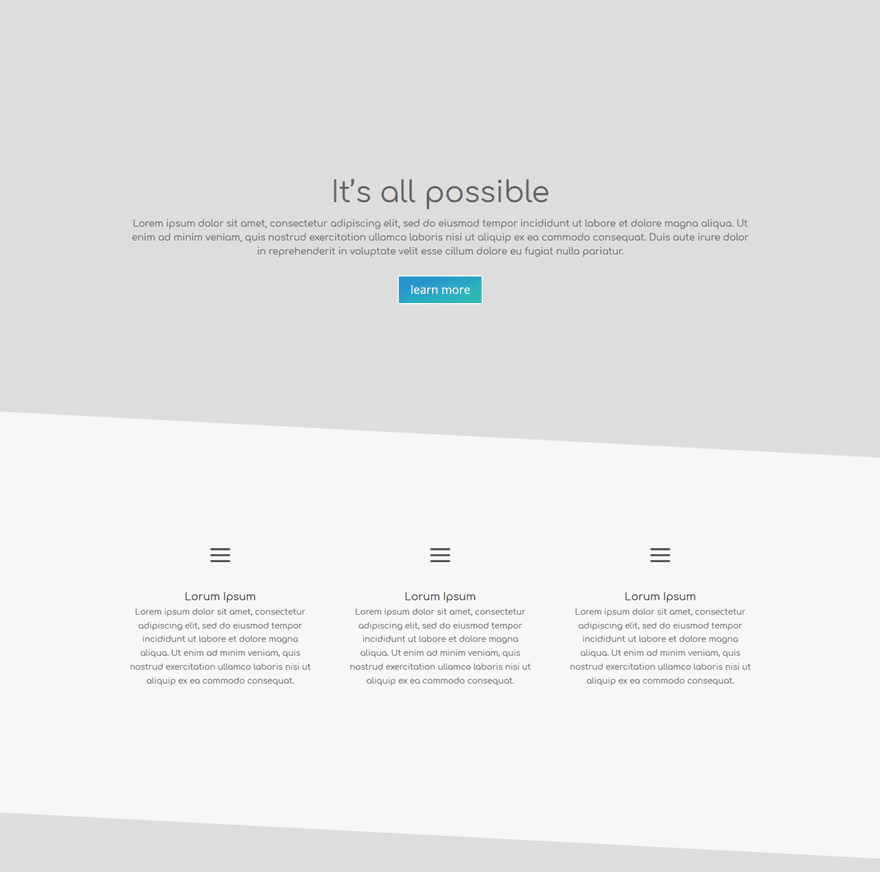
Before diving into all the different section transitions individually, let’s take a look at what you can expect:
Recreate Sections
We’re going to start by recreating the two section we’ll be using in all of the examples. In these two sections, we’ve used the needed padding to get the best out of the transitions. If you’re, however, using sections with a different height, it might be possible that you have to slightly adjust the gradient backgrounds that are being used to match the sections perfectly.
Create First Section
Start by creating the first standard section and choosing a fullwidth row.
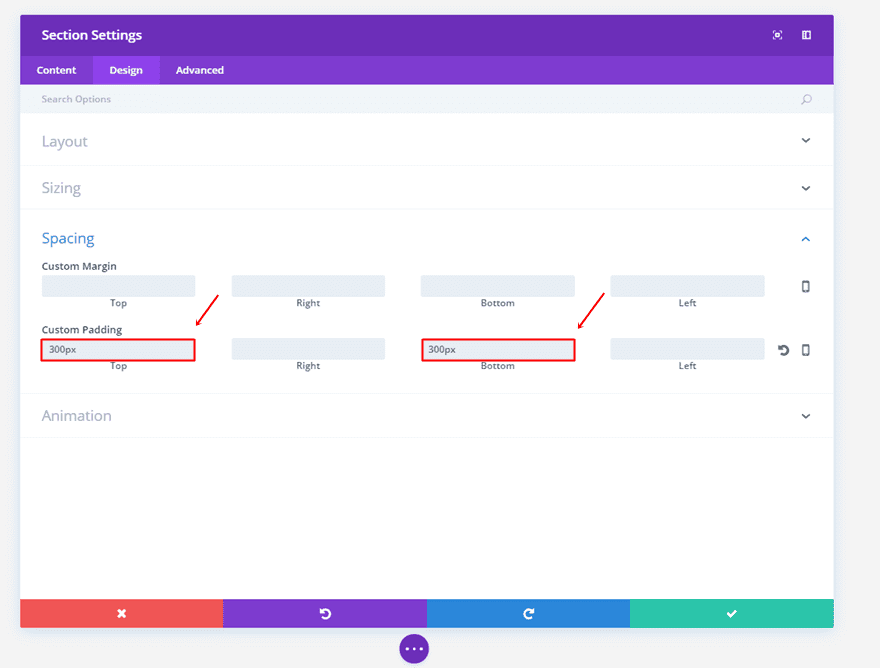
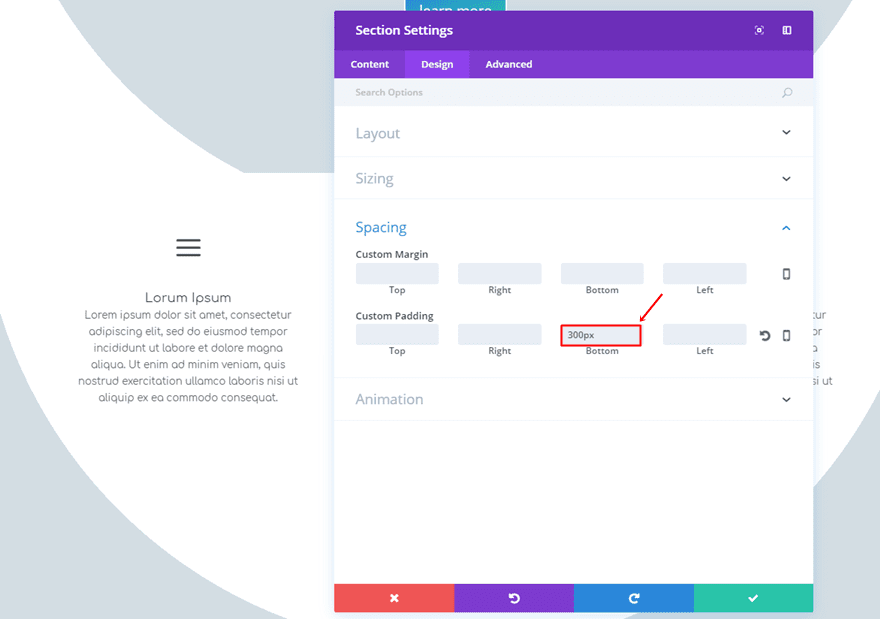
Section Settings
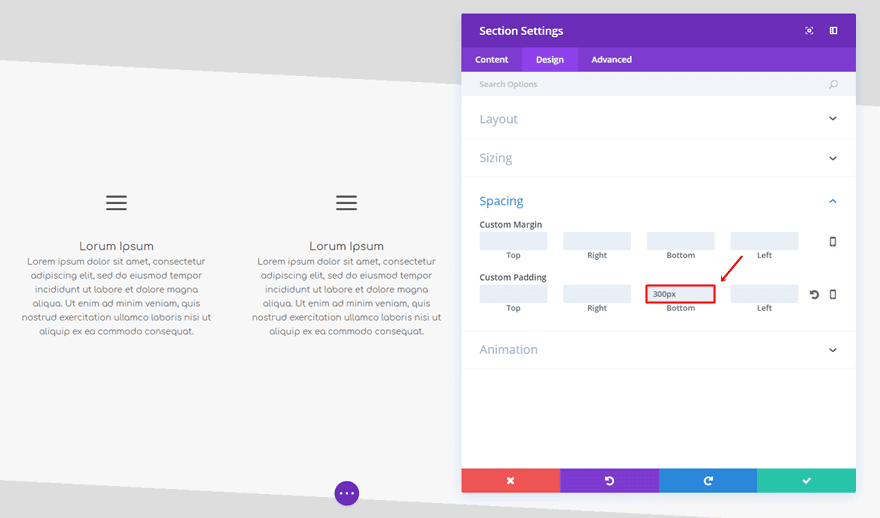
We’re going to need a top and bottom padding of ‘300px’ which you can add within the Spacing subcategory of the Design tab.
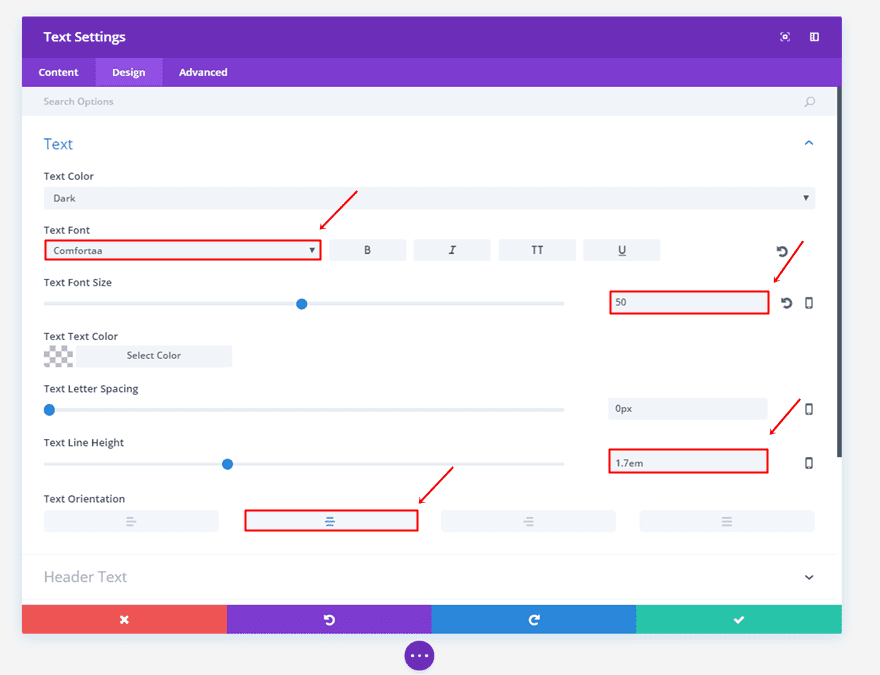
First Text Module
Then, we’re going to add a Text Module to our fullwidth row. Type down the text you want to appear and go to the Design tab. Within the Design tab, use the following settings for the Text subcategory:
- Text Font: Comfortaa
- Text Font Size: 50
- Text Line Height: 1.7em
- Text Orientation: Center
Second Text Module
Do the same for the second Text Module but use the following settings instead:
- Text Font: Comfortaa
- Text Font Size: 16
- Text Line Height: 1.7em
- Text Orientation: Center

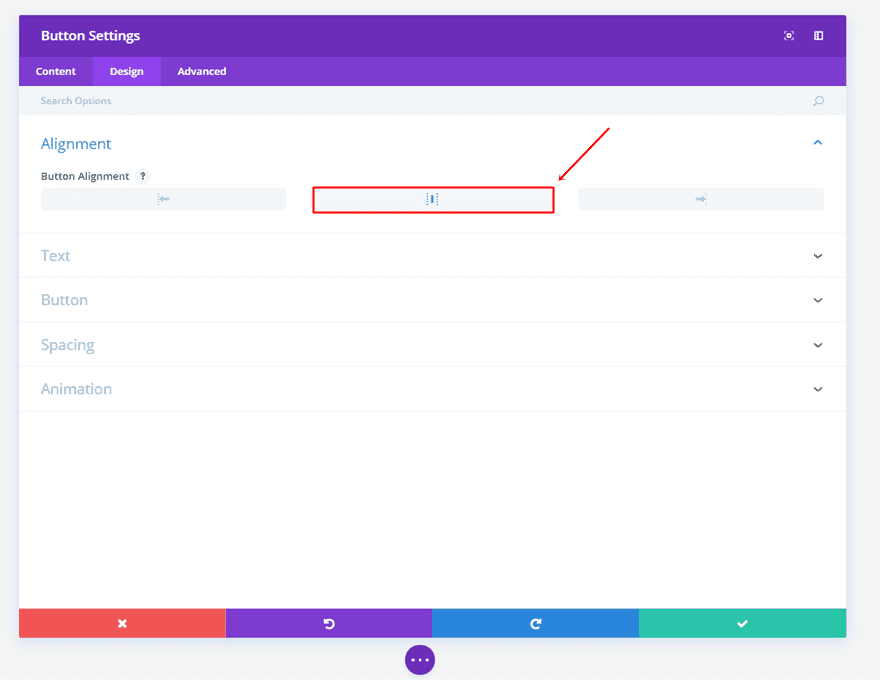
Button Module
Lastly, we’re also going to add a Button Module. Start by choosing the center alignment in the Design tab.
Then, open the Button subcategory, enable the ‘Use Custom Styles for Button’ option and choose ’20’ as the Button Text Size.
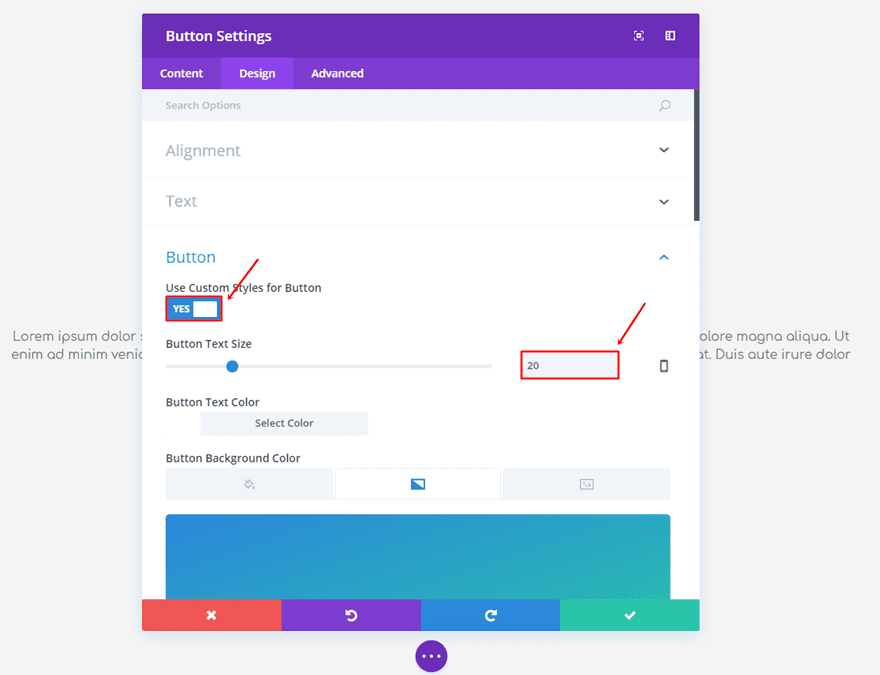
While still in the Button subcategory, use the following gradient background for the button:
- First Color: #2b87da
- Second Color: #29c4a9
- Gradient Type: Linear
- Gradient Direction: 162deg
- Start Position: 0%
- End Position: 100%

Create Second Section
Add another standard section but choose a three-column row instead.
Section Settings
The second section will make use of a ‘300px’ padding for the top and bottom as well.
Blurb Module
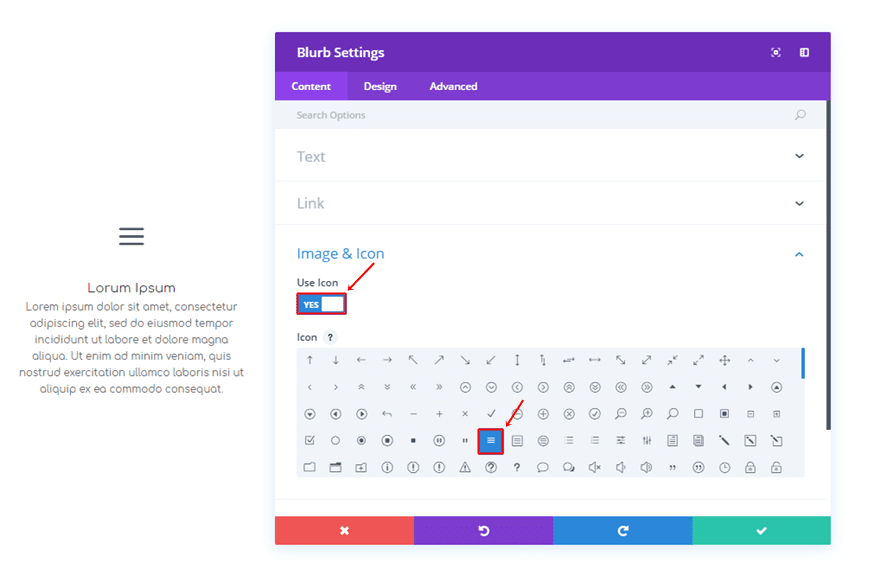
Next, we’re going to add a Blurb Module to the first column of the row. Once you’ve decided on the text you want to appear, scroll down the Content tab, enable the ‘Use Icon’ option and select an icon.
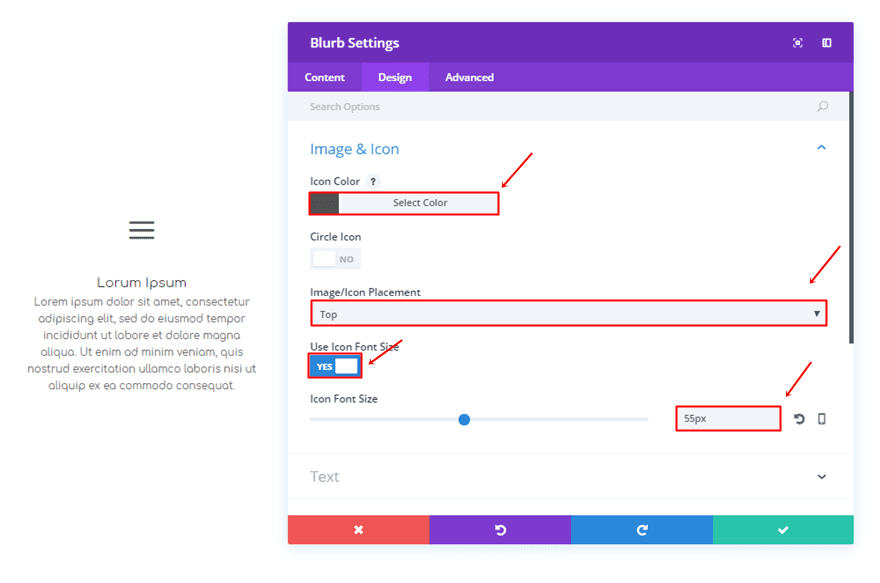
Once you’ve done that, move on to the Design tab and use the following settings for the Icon Subcategory:
- Icon Color: #515151
- Image/Icon Placement: Top
- Use Icon Font Size: Yes
- Icon Font Size: 55px
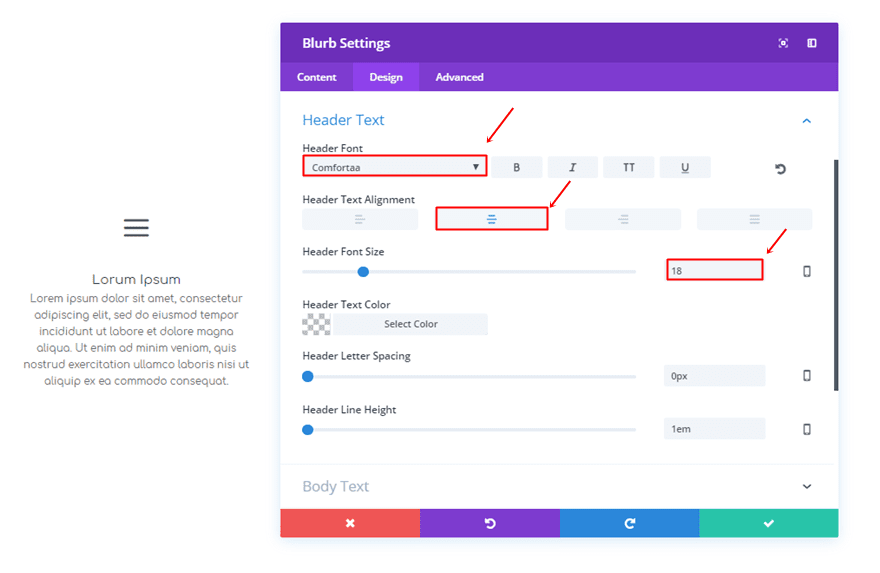
Then, make sure the following settings apply to the Header Text subcategory:
- Header Font: Comfortaa
- Header Text Alignment: Center
- Header Font Size: 18
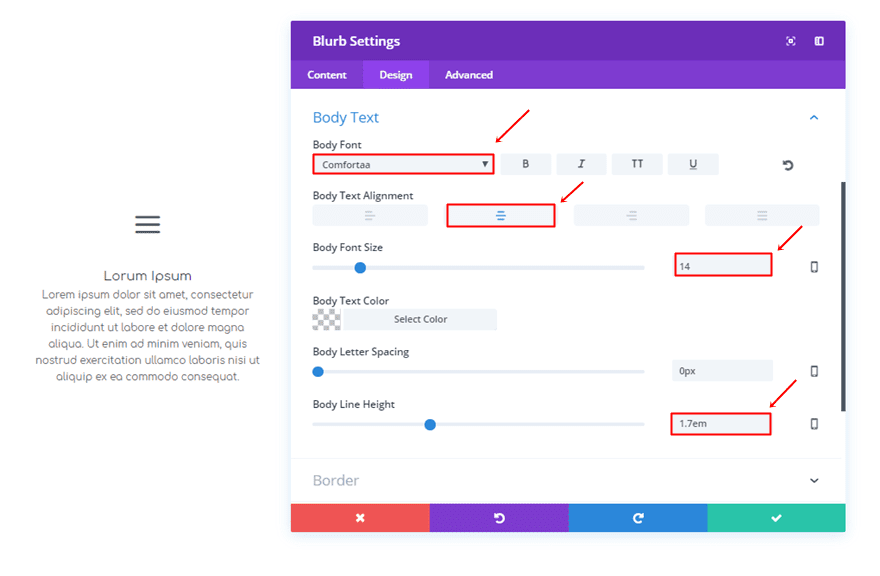
And lastly, these are the settings for the Body Text Subcategory:
- Body Font: Comfortaa
- Body Text Alignment: Center
- Body Font Size: 14
- Body Line Height: 1.7em
Clone Blurb Module
Once you’ve created the Blurb Module, clone it twice and put it in the other two columns of the row.
1. All The Way Diagonal
Now that we’ve created the sections, it’s time to start adding the section transitions. The first example we’re going to show you how to create consist of simple diagonal lines.
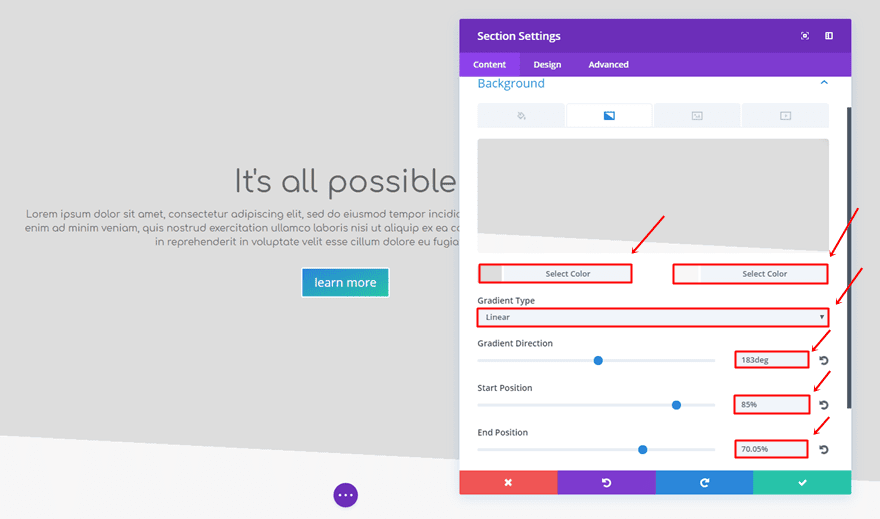
Gradient Background Settings of First Section
Open the settings of the first section and add the following gradient background:
- First Color: #dddddd
- Second Color: #f7f7f7
- Gradient Type: Linear
- Gradient Direction: 183deg
- Start Position: 85%
- End Position: 70.05%
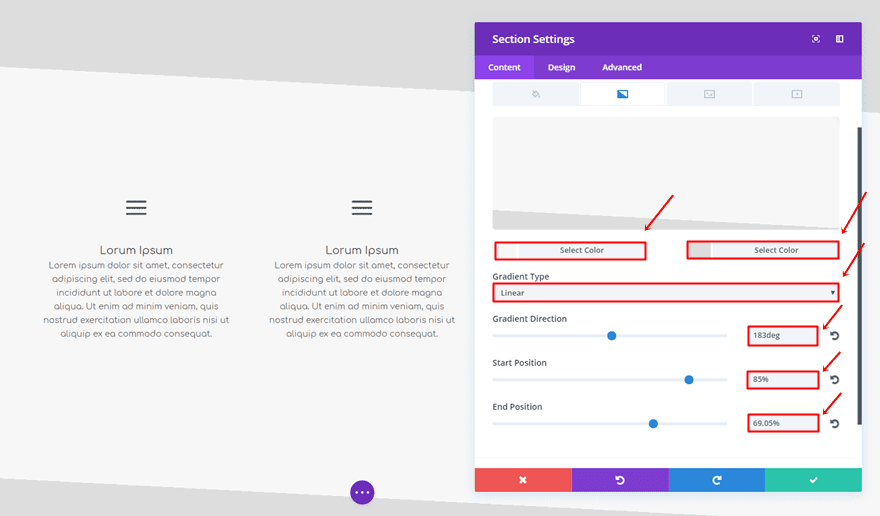
Gradient Background Settings of Second Section
The second section will need the following gradient background settings instead:
- First Color: #f7f7f7
- Second Color: #dddddd
- Gradient Type: Linear
- Gradient Direction: 183deg
- Start Position: 85%
- End Position: 69.05%
Remove Top Padding of Second Section
The last thing you’ll need to do for this example is remove the top padding of the second section.
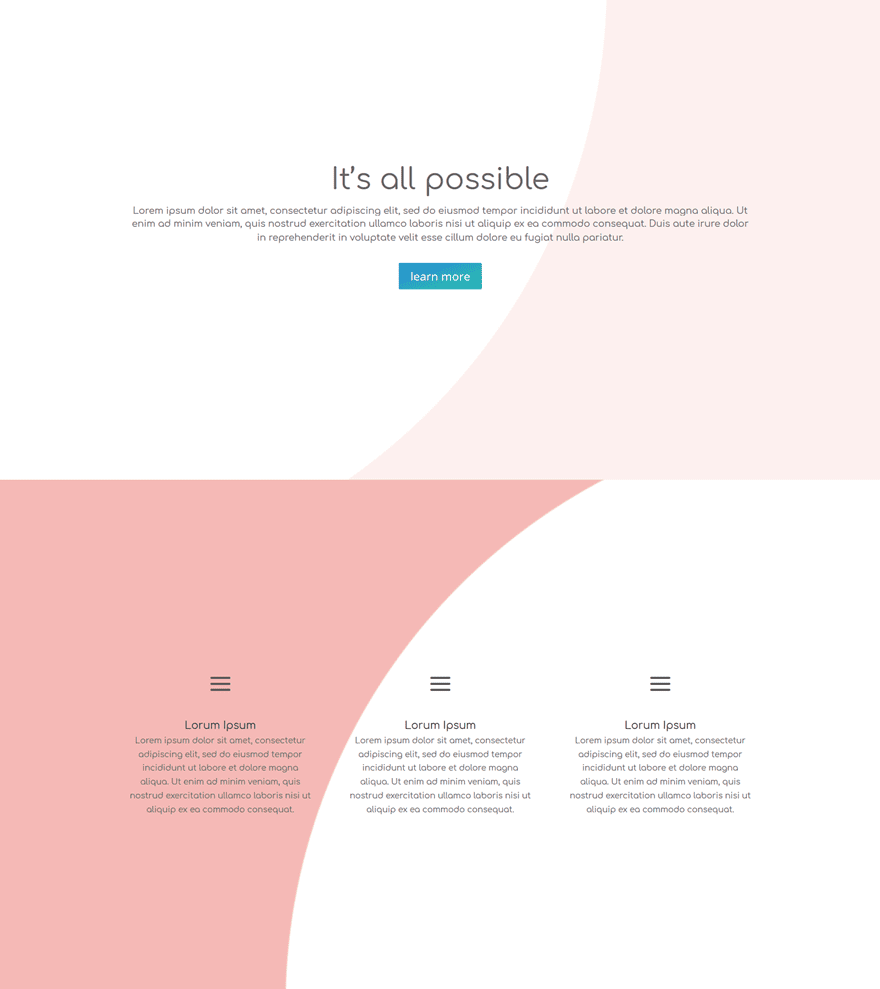
2. Meet me Halfway
The next example we’d like to share is a very elegant one where two opposite gradient backgrounds are being used. By using this effect, the sections feel like they follow up on each other.
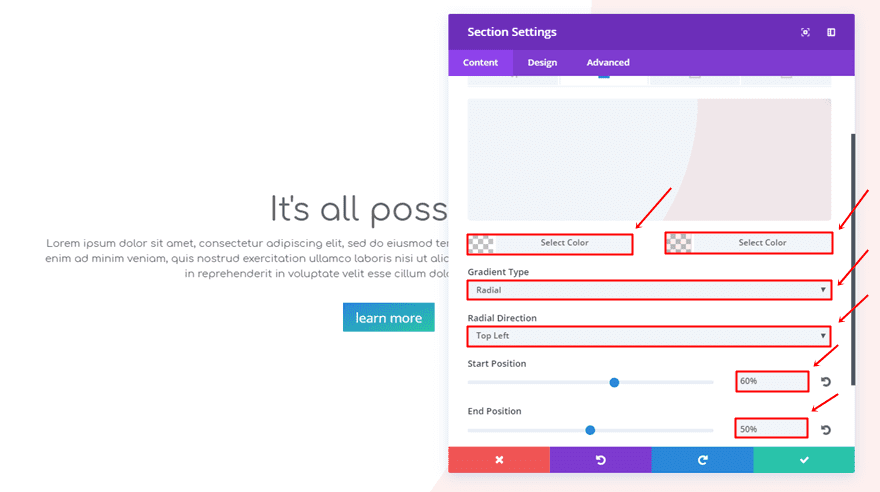
Gradient Background Settings of First Section
For the first section, we’ll be needing the following gradient background settings:
- First Color: rgba(255,255,255,0)
- Second Color: rgba(224,43,32,0.07)
- Gradient Type: Radial
- Radial Direction: Top Left
- Start Position: 60%
- End Position: 50%
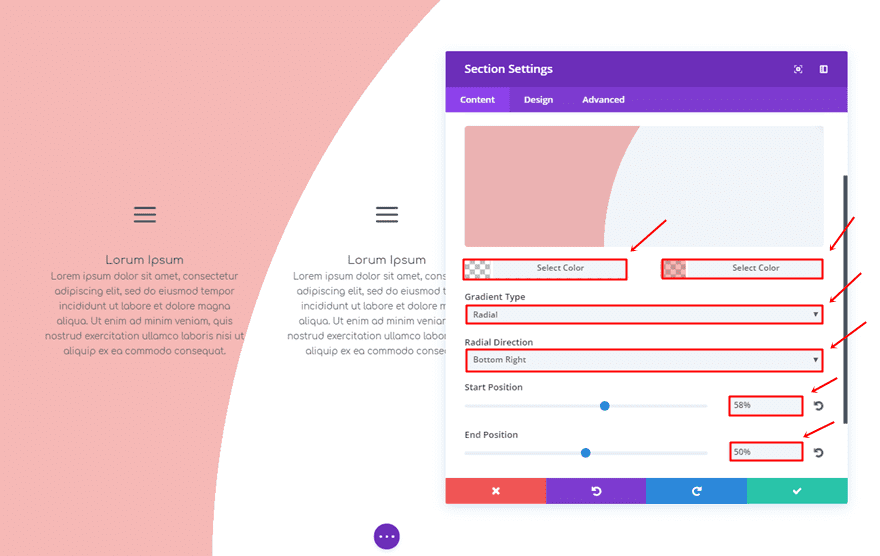
Gradient Background Settings of Second Section
The second section will enjoy the following gradient background:
- First Color: rgba(255,255,255,0)
- Second Color: rgba(224,43,32,0.33)
- Gradient Type: Radial
- Radial Direction: Bottom Right
- Start Position: 58%
- End Position: 50%
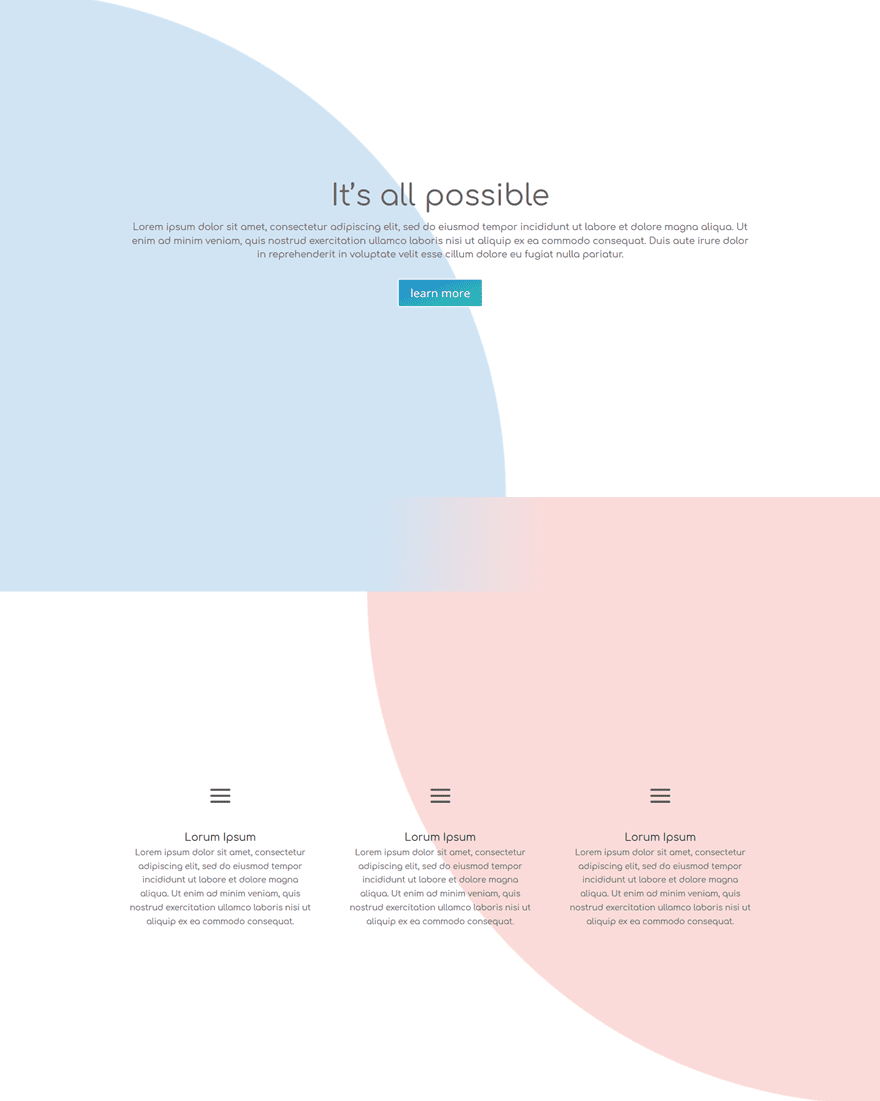
3. Fusion
The next example is a little different from the rest. It will need an extra section between both sections to achieve the result you can notice in the image below.
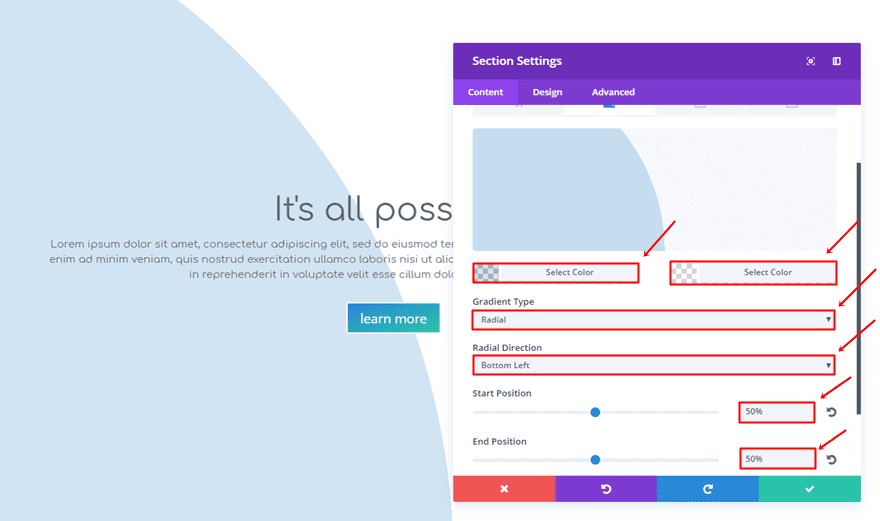
Gradient Background Settings of First Section
For your first section, you’ll be needing the following gradient background:
- First Color: rgba(12,113,195,0.19)
- Second Color: rgba(255,255,255,0.39)
- Gradient Type: Radial
- Radial Direction: Bottom Left
- Start Position: 50%
- End Position: 50%
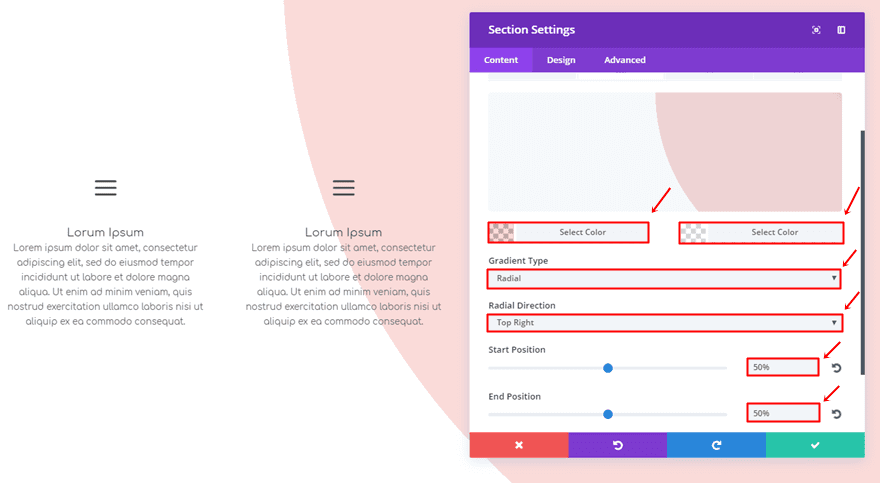
Gradient Background Settings of Second Section
For the second section, we’ll be using the following gradient background settings:
- First Color: rgba(224,43,32,0.17)
- Second Color: rgba(255,255,255,0.39)
- Gradient Type: Radial
- Radial Direction: Top Right
- Start Position: 50%
- End Position: 50%
Add New Standard Section in Between
Once you’ve added the gradient backgrounds to both sections, it’s time to add a section right in between them.
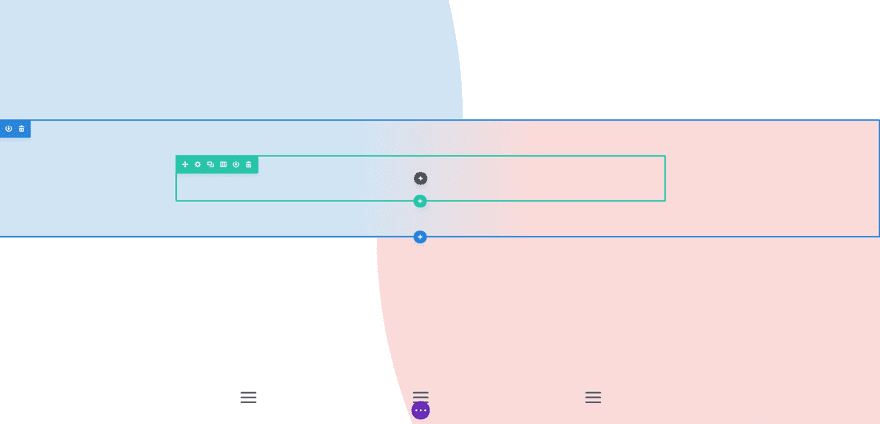
Add Gradient Background Color to New Section
That new section will need a gradient background as well, using the following settings:
- First Color: rgba(12,113,195,0.19)
- Second Color: rgba(224,43,32,0.17)
- Gradient Type: Linear
- Gradient Direction: 92deg
- Start Position: 43%
- End Position: 62%

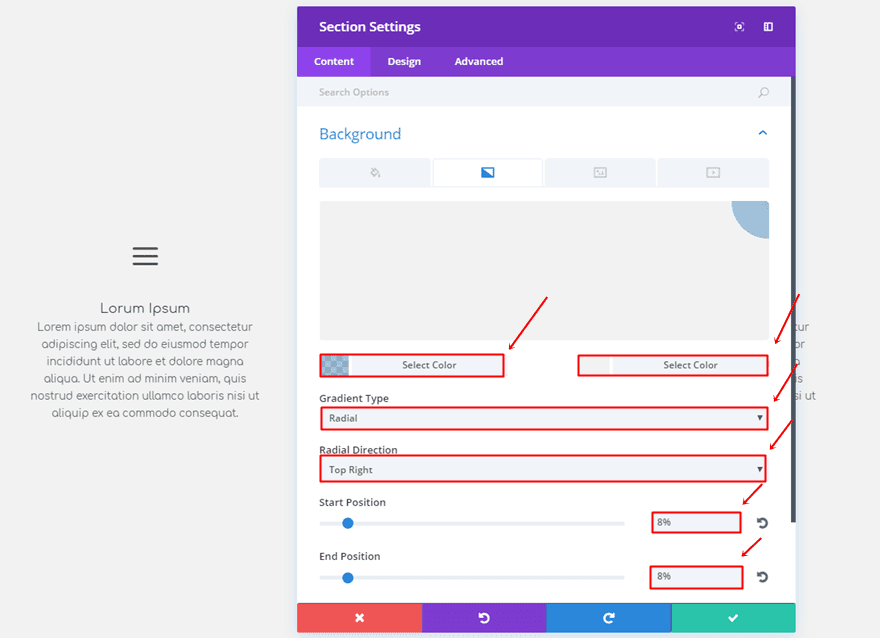
4. Inverse
Then, we also have a section transition that is not as striking as the other ones but still manages to add a subtle touch to your sections.
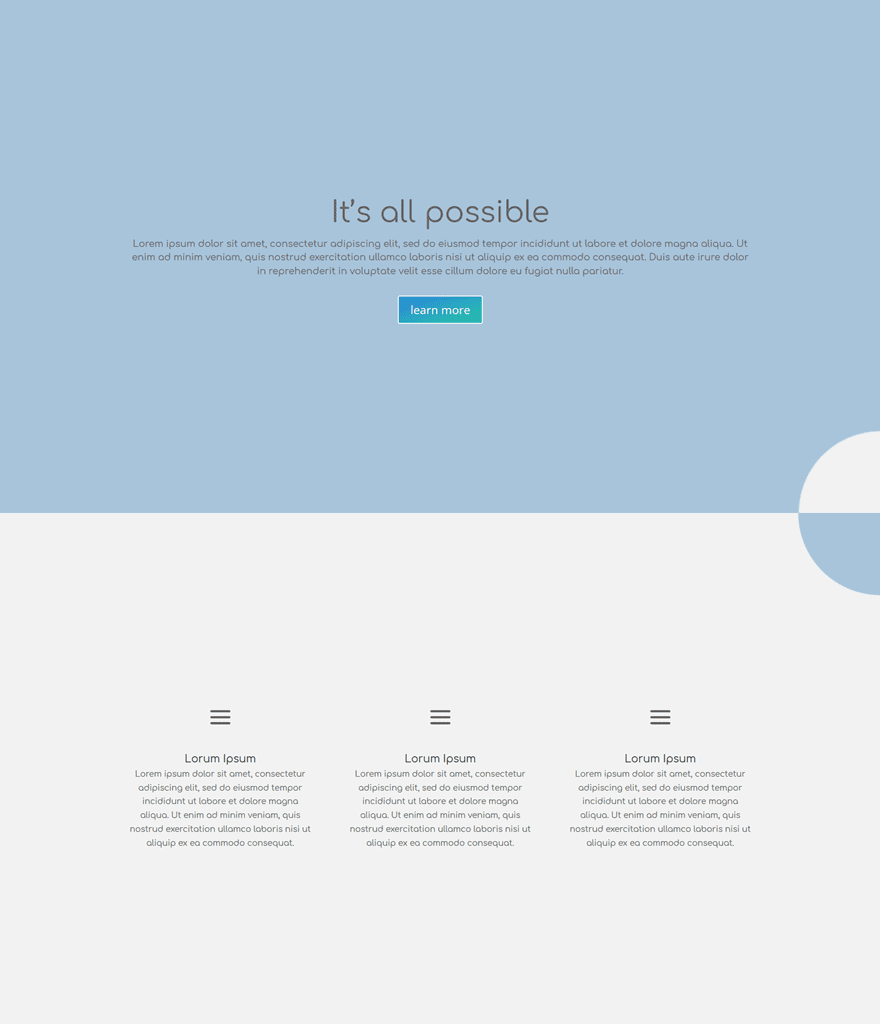
Gradient Background Settings of First Section
The gradient background for the first section is the following:
- First Color: #f2f2f2
- Second Color: rgba(104,153,193,0.58)
- Gradient Type: Radial
- Radial Direction: Bottom Right
- Start Position: 7.9%
- End Position: 7.9%

Gradient Background Settings of Second Section
And the second gradient background will need the following gradient background settings:
- First Color: rgba(104,153,193,0.58)
- Second Color: #f2f2f2
- Gradient Type: Radial
- Radial Direction: Top Right
- Start Position: 8%
- End Position: 8%
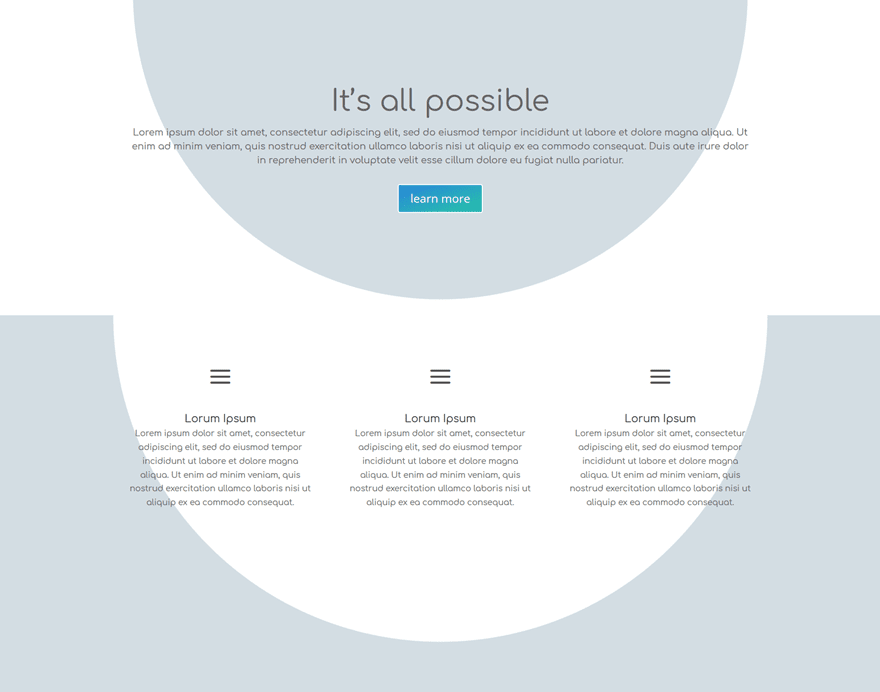
5. Pointers
The fifth example looks a bit cleaner and minimalistic than the other ones. You can perceive the transition in two ways by seeing either the pointers or the circles (or both).
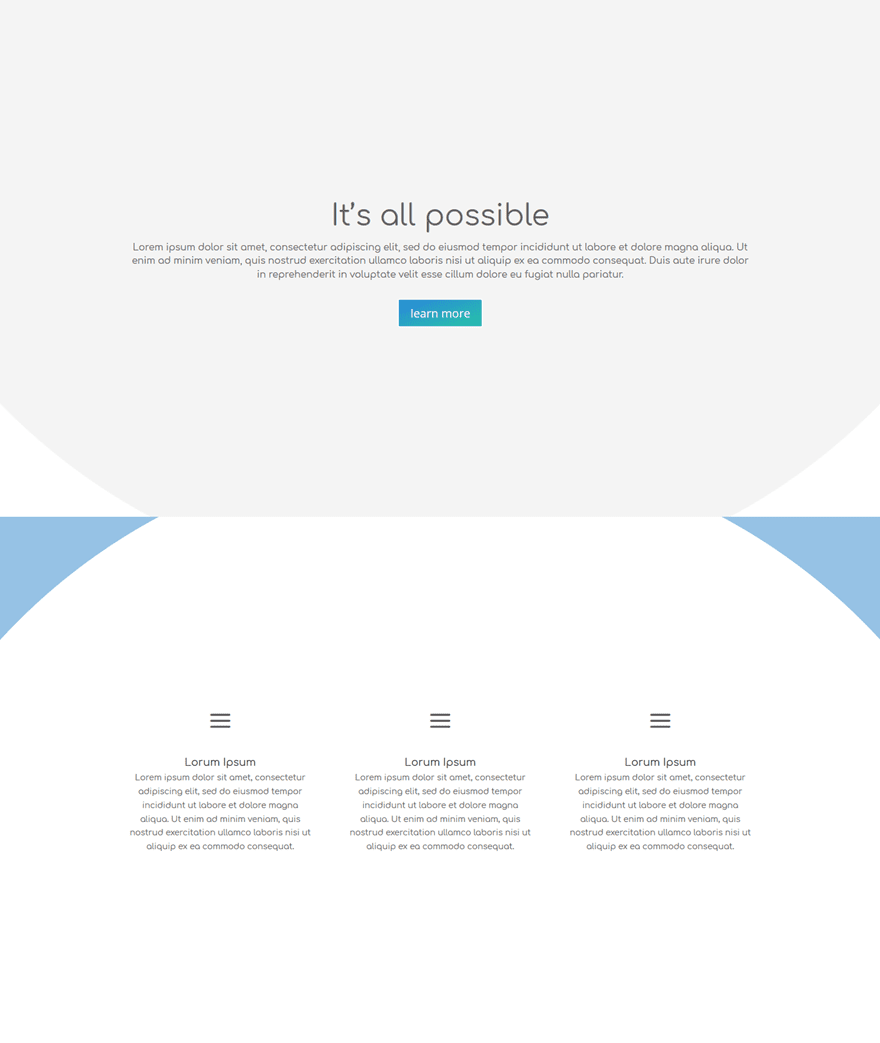
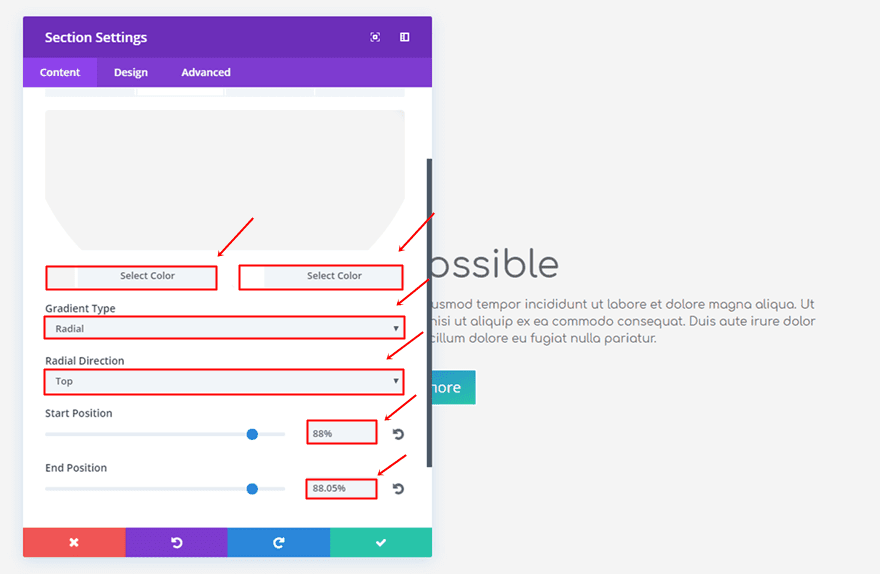
Gradient Background Settings of First Section
Use the following gradient background for the first section:
- First Color: #f4f4f4
- Second Color: #ffffff
- Gradient Type: Radial
- Radial Direction: Top
- Start Position: 88%
- End Position: 88.05%
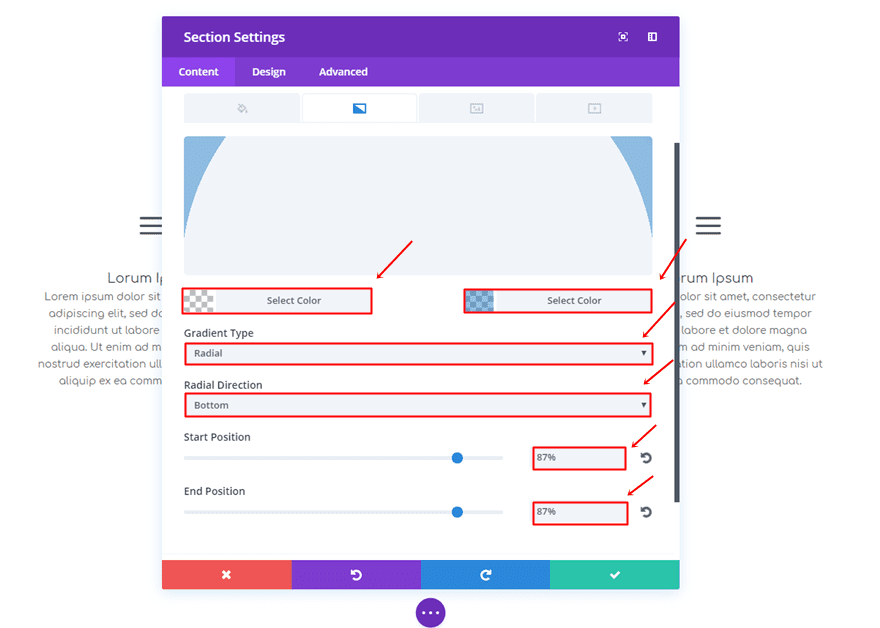
Gradient Background Settings of Second Section
Lastly, apply the following gradient background settings to the second section:
- First Color: rgba(43,135,218,0)
- Second Color: rgba(12,113,195,0.43)
- Gradient Type: Radial
- Radial Direction: Bottom
- Start Position: 87%
- End Position: 87%

6. Puzzle
The last example definitely makes the sections feel as if they belong together.
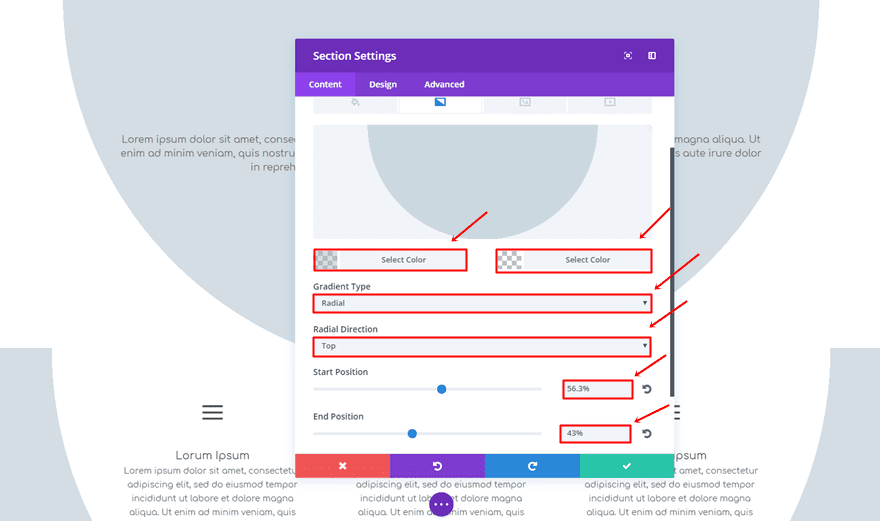
Gradient Background Settings of First Section
Open the settings of the first section and use the following gradient background:
- First Color: rgba(160,181,193,0.46)
- Second Color: rgba(255,255,255,0)
- Gradient Type: Radial
- Radial Direction: Top
- Start Position: 56.3%
- End Position: 43%
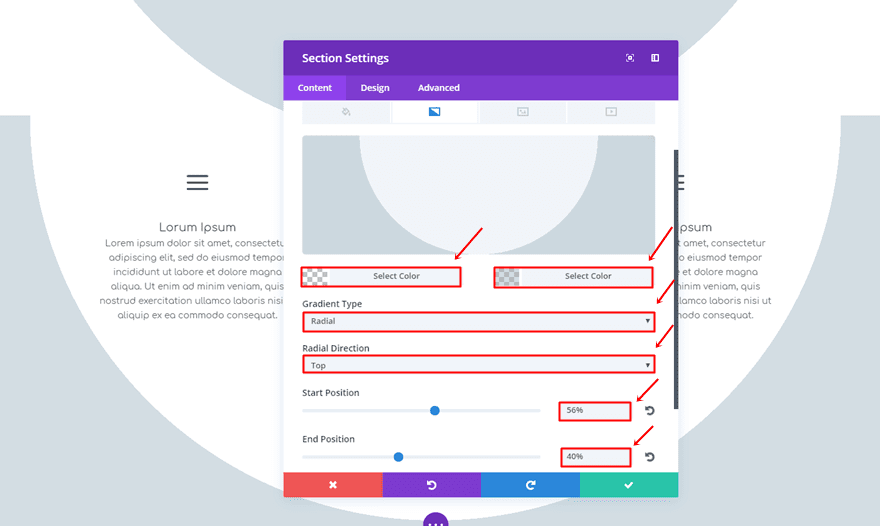
Gradient Background Settings of Second Section
Then, use the following gradient background settings for the second section:
- First Color: rgba(242,242,242,0)
- Second Color: rgba(160,181,193,0.46)
- Gradient Type: Radial
- Radial Direction: Top
- Start Position: 56%
- End Position: 40%
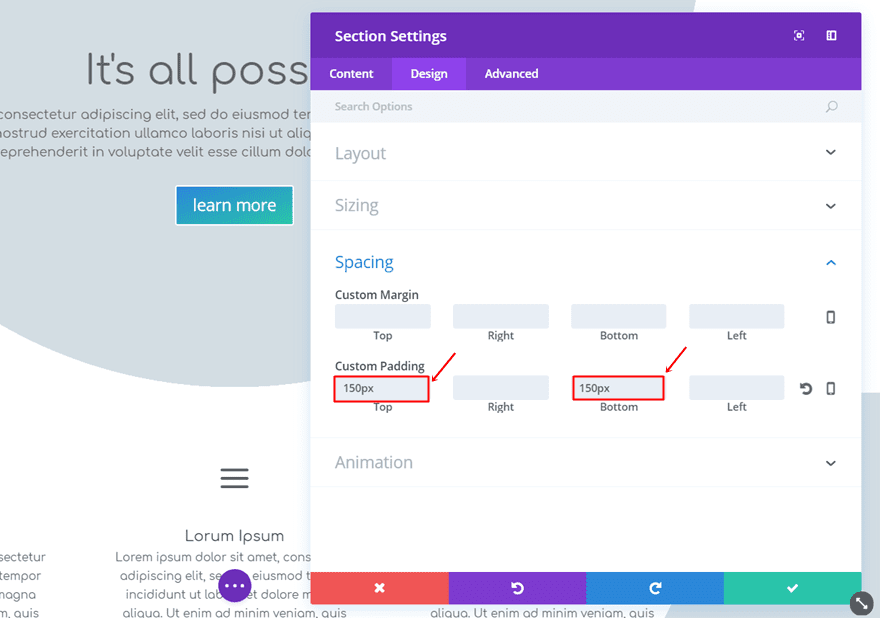
Change Padding of First Section
To make the two sections fit better, we’re going to change the top and bottom padding of the first section into ‘150px’.
Remove Top Padding of Second Section
Lastly, we’re going to remove the top padding of the second section as well.
Final Thoughts
Section transitions help connect different sections and their purpose. In this post, we’ve shared 6 examples which you can recreate by using nothing else than the Divi built-in options. If you have any questions or suggestions; feel free to leave a comment in the comment section below!
Be sure to subscribe to our email newsletter and YouTube channel so that you never miss a big announcement, useful tip, or Divi freebie!
Featured Image by NikVector / shutterstock.com
The post How to Create Beautiful Section Transitions Using Divi’s New Design Features appeared first on Elegant Themes Blog.