
We talk about Divi a lot here–mainly because it’s awesome. But it’s not the only amazing product that’s bundled with your Elegant Themes membership. (What, you’re not a member already? Get on that!) Bloom is our email opt-in plugin, and if you’ve never used it before–you’re in for a treat.
Today, I’m gonna guide you through creating some contextual email opt-ins with Bloom to really show you what makes us special (spoiler: everything). You see, people ignore email optins most of the time. They’re flooded with them–pretty much every site wants you to enter your email for some kind of amazing free something-or-other. So, like with banner ads, we tend to ignore them and go about our business.
With Bloom, you can make a special, contextual email optin for individual pages, single pieces of content, and promotions that will absolutely and totally bypass your visitors’ filters and get them on your list and you on their radar.
Ready, Set, Bloom!
The first thing you need to do is head over to your Elegant Themes member area (or, if you’re not a member already, become one). Once there, it’s time to download and install Bloom to your website. (Full documentation on that process can be found here.)
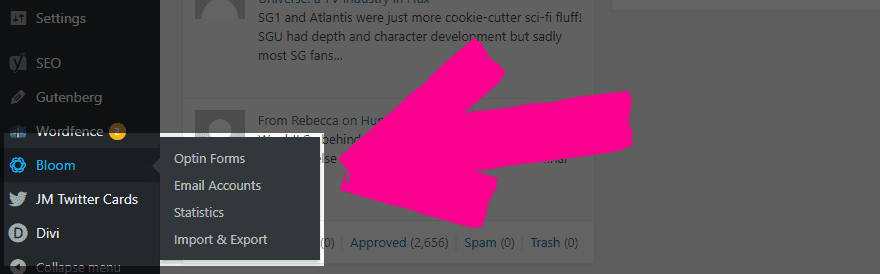
Once you’re set up there, scroll down in your WP dashboard to the new Bloom entry and click into the Email Accounts page. Before you can start working with Bloom for your awesome fly ins, you have to tell it where to send the email from. So follow these directions and add your provider to the plugin.
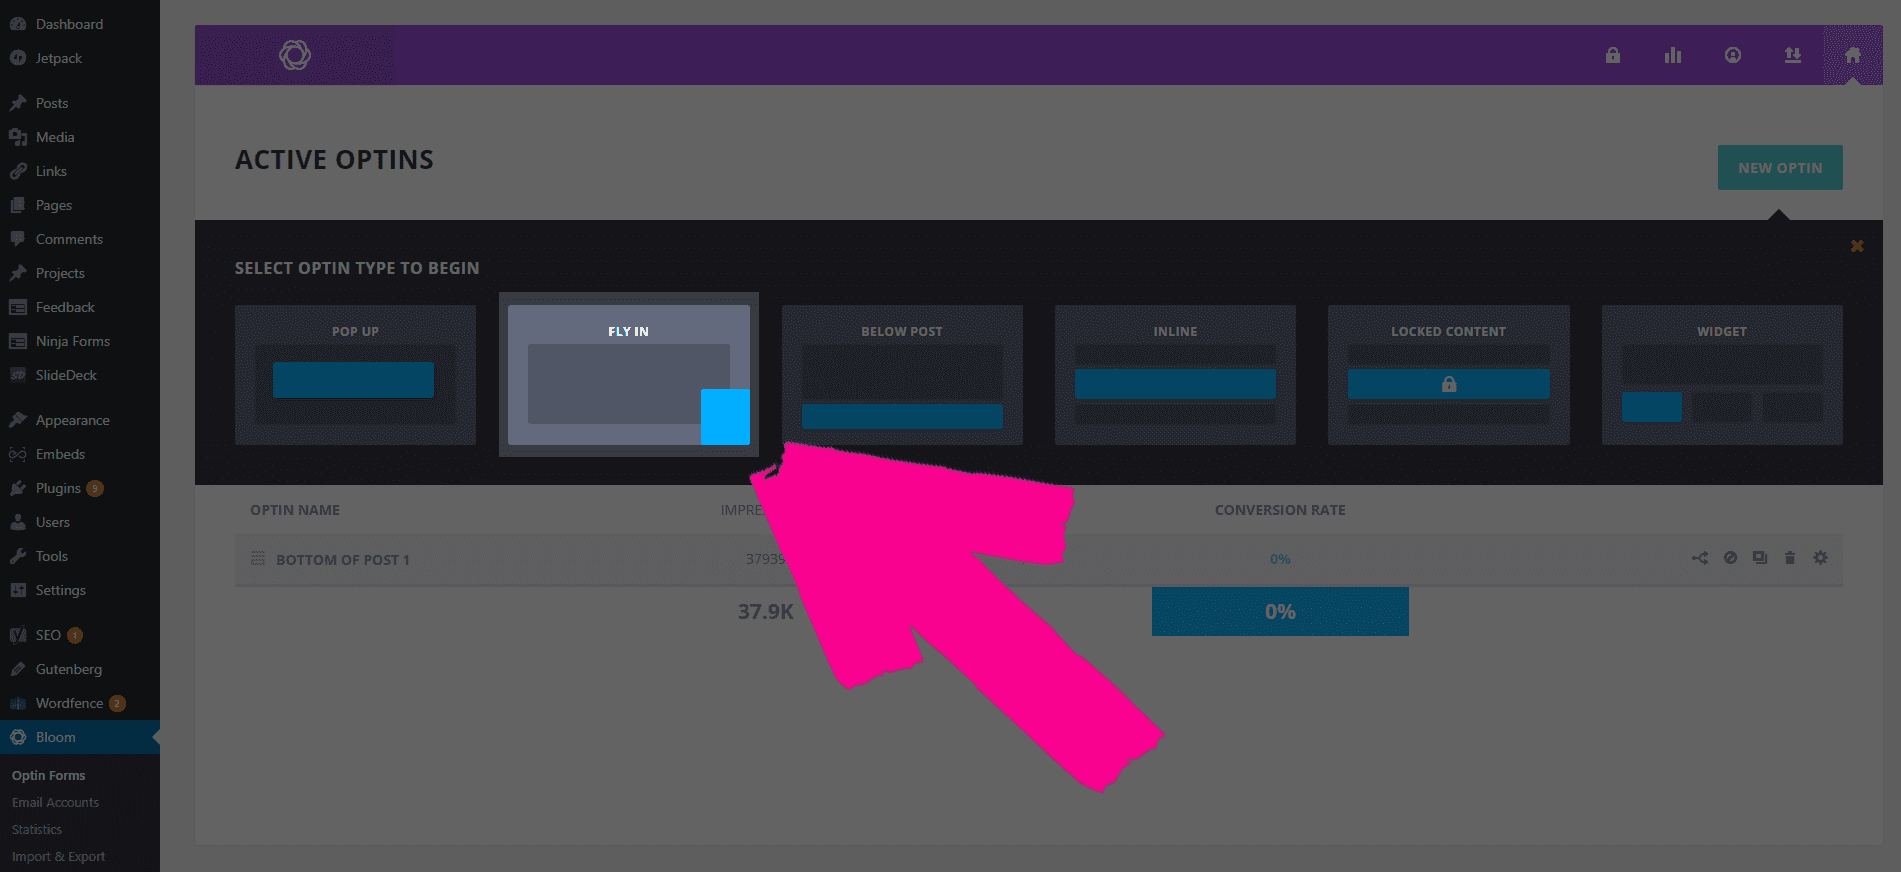
After that, it’s just a hop, skip, and a click to the Bloom -> Optin Forms page to get a new contextual email optin created. Just click on the New Optin button and select the fly in option. Super simple.
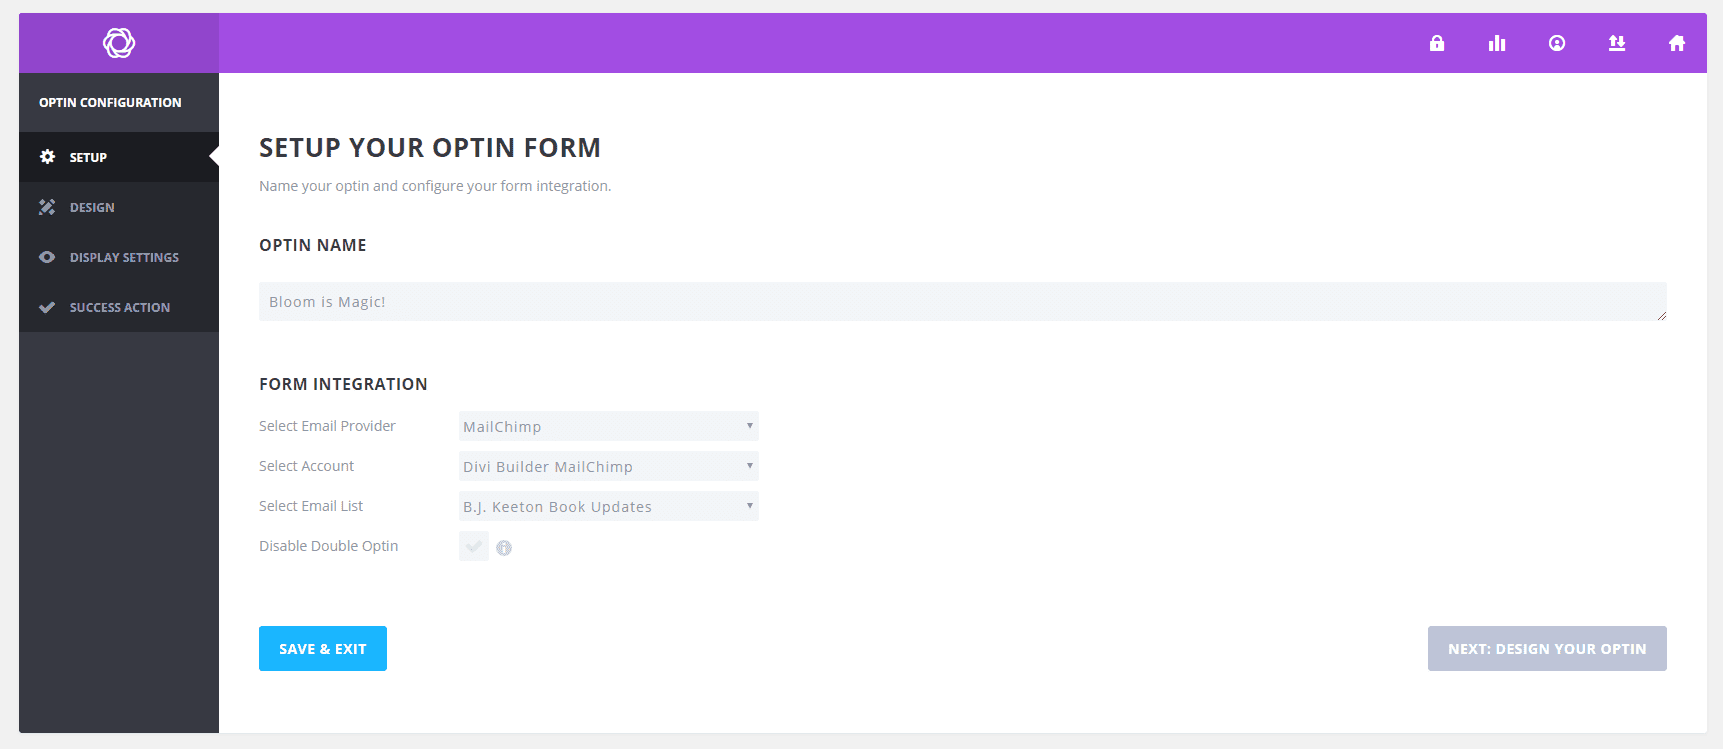
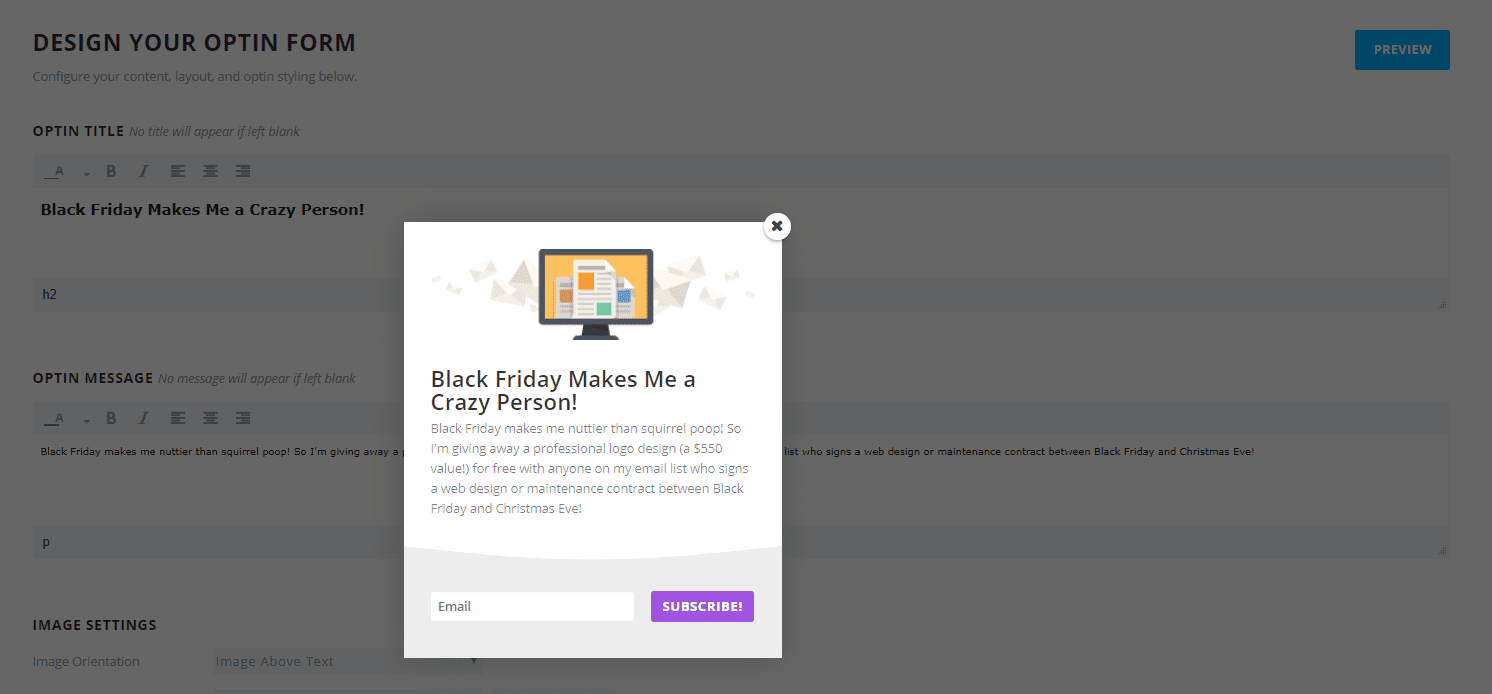
My Little Optin: Email is Magic
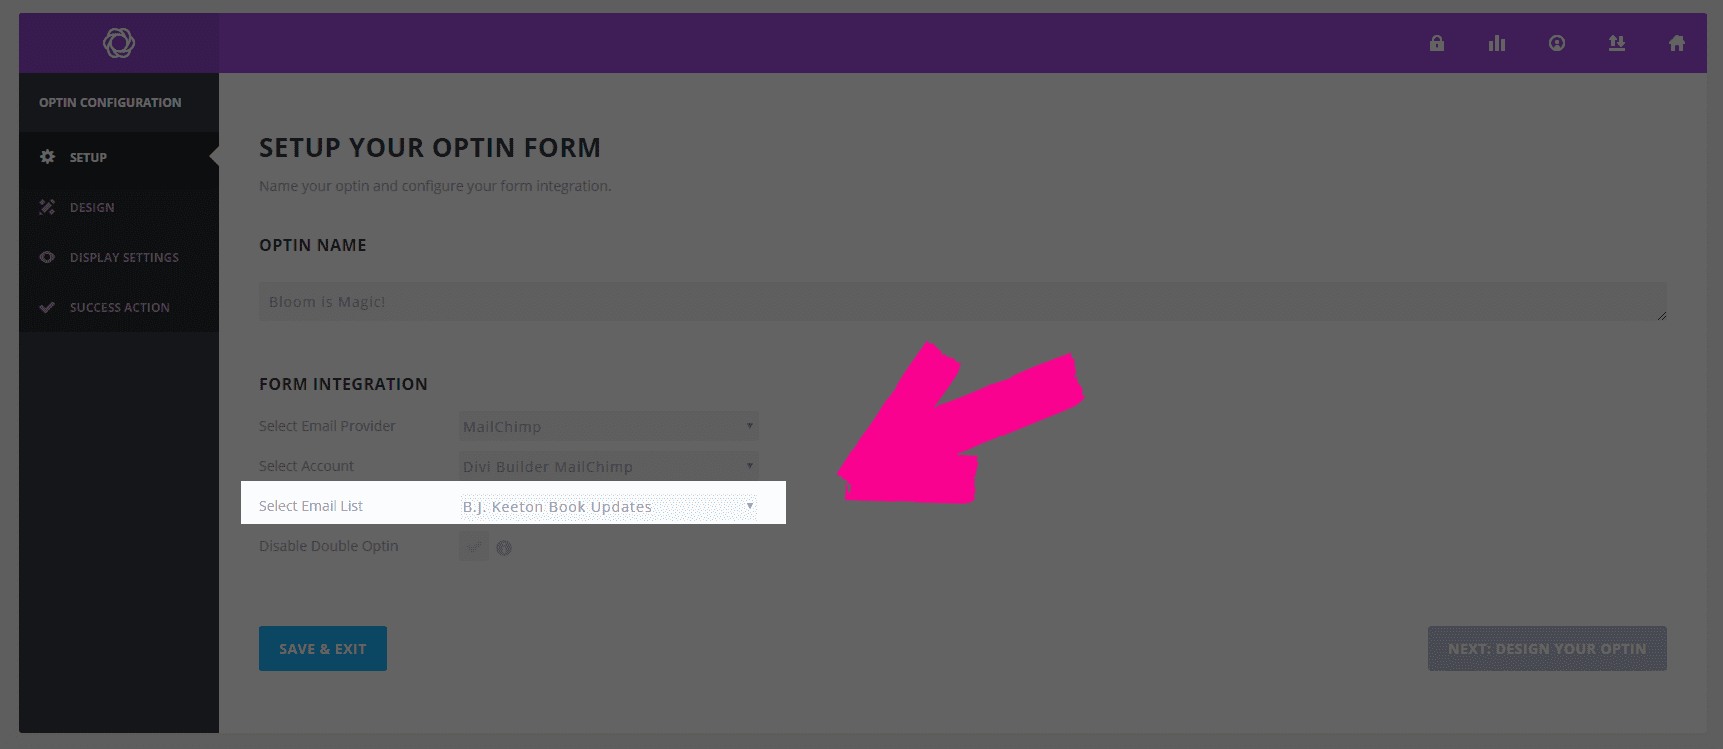
The basics are, well, basic. You pick a name for your new fly in, what email service it will connect to, and which list you want to add the email addresses to. It’s not rocket surgery, but if you’ve connected the stuff like the documentation up top shows, you won’t have any issues here.
Note that this is an important step when creating multiple optins because you can use different lists for different contexts that may attract visitors. So make sure you get things set up well. We’ll be returning here later.
When you’re good to go hit Next: Design Your Optin. This page is where the magic really begins. Bloom is oodles upon bunches upon tons of templates for you to choose from when designing your flyin. No matter what you choose, you’re gonna be fine. This will just be the foundation for the fly in.
When you’re done, head to the next page to get to the real meat-and-taters of the contextual email optin.
Design, Design, Design
First off, because this is contextual, we gotta have some context. What do we want to make sure our visitors see, why, and when?
For this, let’s say you’re a freelance web designer who is gonna give have a Black Friday special for clients. Maybe a free logo design if they sign a contract before Christmas. But you don’t want this plastered all over your site and blog. That has the potential to be a ton of work with very little return.
So let’s say you want this contextual email optin to do three things:
- Bypass visitors’ popup filters
- Get new people on your email list
- Get new clients to sign a contract
The design is a big part of hitting these marks. So let’s look at what you can do with Bloom in this regard. First off, you’re gonna need a catchy headline and some copy.
That’s pretty good, but it still looks like every other friggin’ email optin ever. I can almost guarantee that you would gain very few extra clients or subscribers based on this optin alone. It’s merely okay, and definitely not contextual. Not yet.
Add an Eye-Catching Image
The best way to make sure they don’t ignore your new optin is to have an image they can’t ignore. Bloom lets you include animated GIFs in your forms, so take advantage of that. For the brand I work on building around myself, that’s making myself look like a complete goofball. So I made a GIF of me with a dumb look on my face, waving to the camera. To add it to Bloom, you just upload it like you would any other image.
When you preview your new optin, you will see that it is far harder to simply ignore.

Now, if your brand isn’t quite as…silly…as mine is, you might not want to use an image like this (remember, this was just an example.) Since the optin form is giving your users an offer for free logos, why not show off a bunch of the logos you’ve done? (Note, these logos are all free from Canva.)
My point is that you can make it as brand-contextual or content-contextual as you like, and animated gifs make that a cinch. (I use gifmaker.me to put together quick slideshows as gifs, most of the time.)
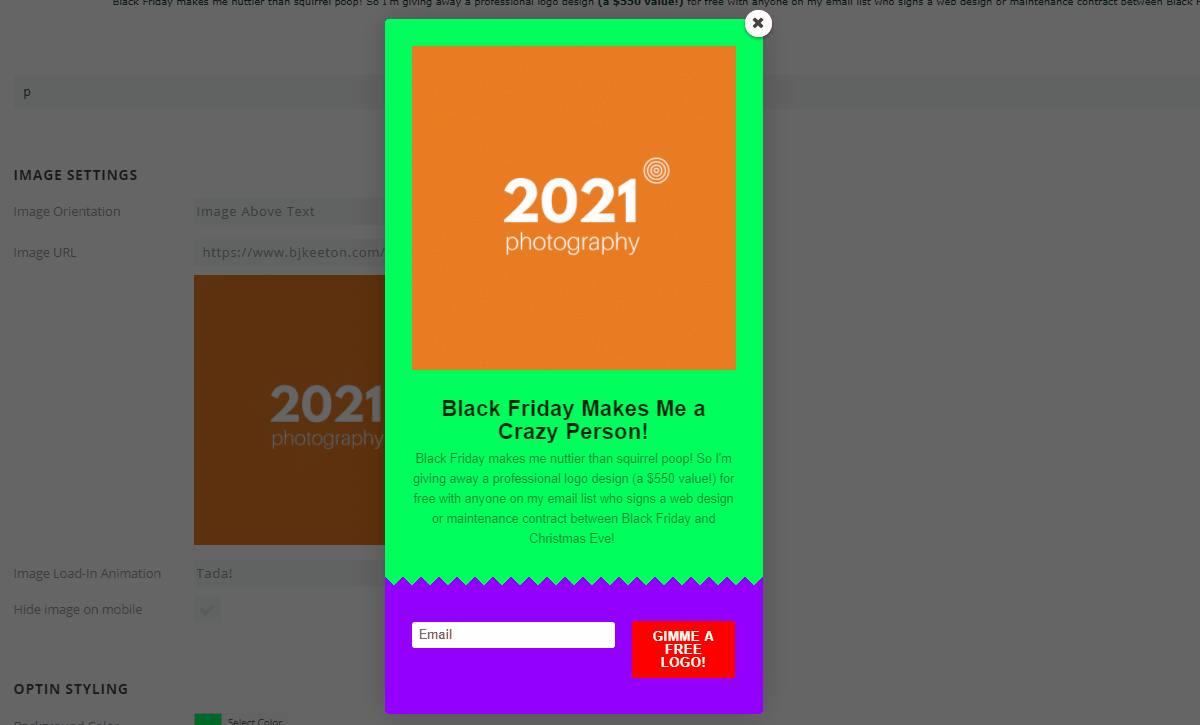
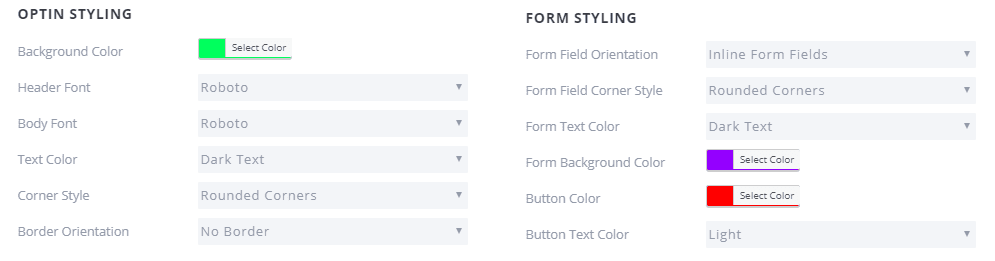
Colors, Fonts, and Such
Now because I am going for a contextual email optin that will grab the user’s attention, I don’t necessarily want this one to match my site. So I am going to choose fonts and colors–on purpose–that are garish and downright ugly in hopes they won’t automatically click the X to dismiss the optin.
Context Clues
Up to this point, there hasn’t been necessarily anything truly contextual. That’s where the display settings come into play. Bloom gives you a slew of options to control exactly where and how your email optins are displayed.
A lot of these will depend on your own preferences and users, but I think a couple are very much worth calling out. I like to make the form fly in from the left instead of the center/right because it’s used far less often–which will grab people’s attention.
Additionally, choosing when to display the form is important. If you mention logo design in an article a quarter of the way through, set the Bloom optin to trigger after scrolling between 30-35% so your readers see the form while the content is fresh in their mind. Or you can offer up a discounted logo design for subscribers after they make a purchase. Or you could even surprise your readers by having an optin appear after they comment to encourage discussion and foster community.
These kinds of contextual email optins work wonders because they’re not the stale popups that we get every single day.
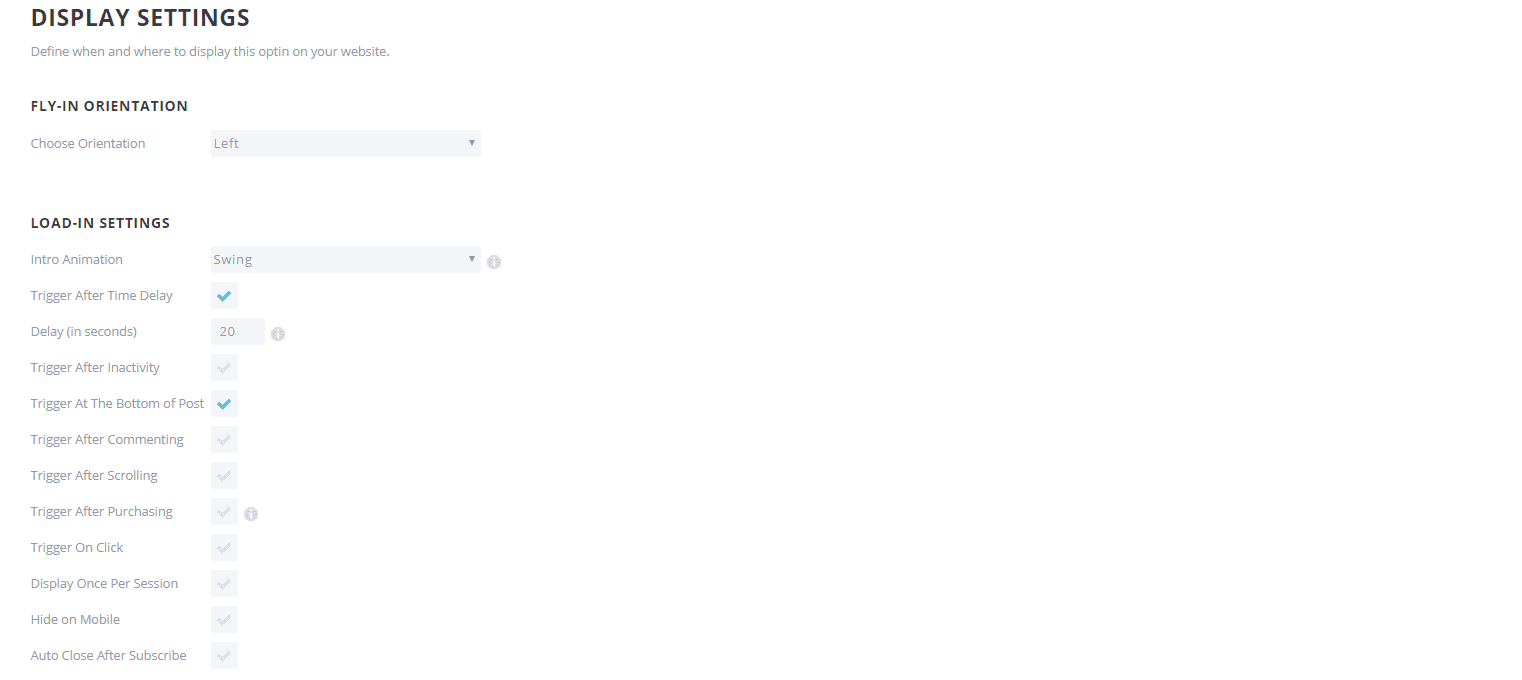
If your content is pretty in-depth, and you know your readers will remain inactive for the duration of reading it, set the trigger after inactivity or trigger after time delay to grab their attention while they’re fully invested. I prefer to use inactivity here, personally, because time-delay tends to be more obnoxious than useful.
Plus it tends to pop up when you don’t want it to, and inactivity lets you have slightly more control over when you expect your users to slow down on your page.
Your Users, Your Context
The biggest benefit for a Bloom contextual email optin is that you can choose which pages and posts you include specific optin forms on.
For instance, for your logo promotion, you can include it on, let’s say, any post in your Logo Design category. Or you can have a separate form setup that sends a special YouTube channel promo on your Video Production categories or tags. And if you leave all of the Display On boxes unchecked, you can simply type in individual pages or posts you want to include the optins on, giving you even more customization.

Being able to tailor your optins like this makes Bloom super powerful. I love being able to have segmented lists in Mailchimp that have different automations for different ways people optin. All you do is repeat this process for each style of list or optin you want, and you’re good to go. In the initial setup of the form, you would just choose whichever specific list would target those specific users. (You’d have to get it set up in your email service first, though.)
The Sky’s the Limit
Bloom gives you a ton of options to really configure your email forms for as much contextualization as you want or need. If you just need a time-sensitive optin, you can have it. A content-sensitive one? Donezo. Maybe even a contextual optin based on how long you want your visitors to spend on the page? You got it.
If you’re really looking to up your email game and score some conversions, you really should look into Bloom and experiment with a contextual email optin or two.
Article featured image by hanss / shutterstock.com
The post How to Create Contextual Email Opt-ins with Bloom appeared first on Elegant Themes Blog.