
If you are looking for a unique way to showcase text on a web page, knowing how to create curved text designs in Divi may come in handy. This kind of design would work for building custom graphics or creative header designs in Divi without having to use a photo editor. Usually this involves more complete html and css to accomplish, but with Divi, the custom CSS in minimal and you have so many more built in options to easily design your text in unique ways.
In this tutorial, We’ll show you how to create a couple of curved letter designs that you can use as a helpful template for your own purposes. If anything, you may add something new to your design toolbox for the future.
Let’s get started.
Sneak Peek
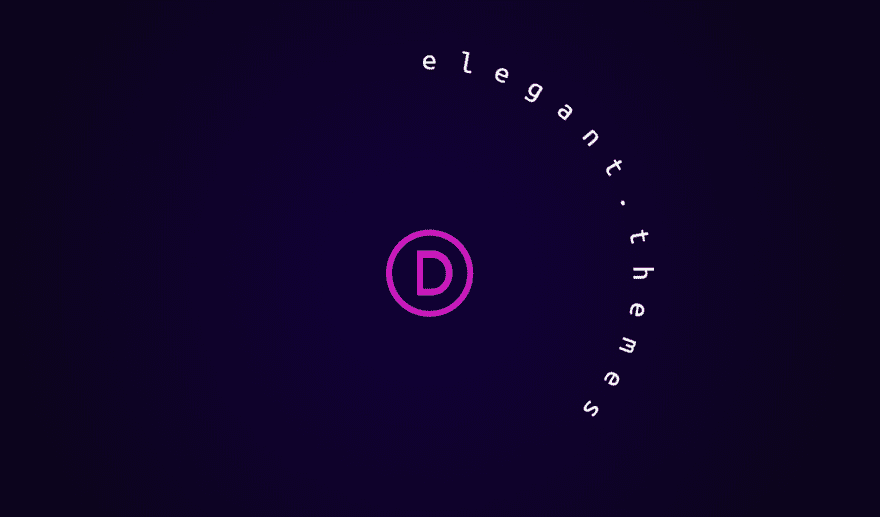
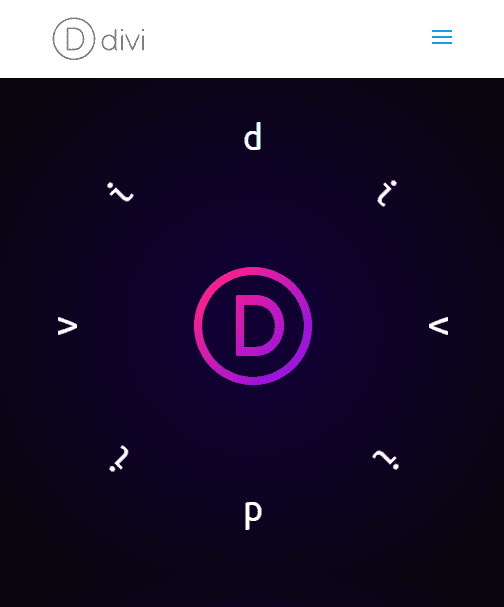
Here is a sneak peek of the curved text designs we will build in this tutorial.

Download the Letter Animation Design Examples Layout for FREE
To lay your hands on the curved text designs from this tutorial, you will first need to download it using the button below. To gain access to the download you will need to subscribe to our Divi Daily email list by using the form below. As a new subscriber, you will receive even more Divi goodness and a free Divi Layout pack every Monday! If you’re already on the list, simply enter your email address below and click download. You will not be “resubscribed” or receive extra emails.
@media only screen and ( max-width: 767px ) {.et_bloom .et_bloom_optin_1 .carrot_edge.et_bloom_form_right .et_bloom_form_content:before, .et_bloom .et_bloom_optin_1 .carrot_edge.et_bloom_form_left .et_bloom_form_content:before { border-top-color: #ffffff !important; border-left-color: transparent !important; }
}.et_bloom .et_bloom_optin_1 .et_bloom_form_content button { background-color: #f92c8b !important; } .et_bloom .et_bloom_optin_1 .et_bloom_form_content .et_bloom_fields i { color: #f92c8b !important; } .et_bloom .et_bloom_optin_1 .et_bloom_form_content .et_bloom_custom_field_radio i:before { background: #f92c8b !important; } .et_bloom .et_bloom_optin_1 .et_bloom_border_solid { border-color: #f7f9fb !important } .et_bloom .et_bloom_optin_1 .et_bloom_form_content button { background-color: #f92c8b !important; } .et_bloom .et_bloom_optin_1 .et_bloom_form_container h2, .et_bloom .et_bloom_optin_1 .et_bloom_form_container h2 span, .et_bloom .et_bloom_optin_1 .et_bloom_form_container h2 strong { font-family: “Open Sans”, Helvetica, Arial, Lucida, sans-serif; }.et_bloom .et_bloom_optin_1 .et_bloom_form_container p, .et_bloom .et_bloom_optin_1 .et_bloom_form_container p span, .et_bloom .et_bloom_optin_1 .et_bloom_form_container p strong, .et_bloom .et_bloom_optin_1 .et_bloom_form_container form input, .et_bloom .et_bloom_optin_1 .et_bloom_form_container form button span { font-family: “Open Sans”, Helvetica, Arial, Lucida, sans-serif; } p.et_bloom_popup_input { padding-bottom: 0 !important;}

Download For Free
Join the Divi Newlsetter and we will email you a copy of the ultimate Divi Landing Page Layout Pack, plus tons of other amazing and free Divi resources, tips and tricks. Follow along and you will be a Divi master in no time. If you are already subscribed simply type in your email address below and click download to access the layout pack.
You have successfully subscribed. Please check your email address to confirm your subscription and get access to free weekly Divi layout packs!
To import the layout to your page, simply extract the zip file and drag the json file into the Divi Builder.
Let’s get to the tutorial shall we?
The Basic Idea Behind Creating Curved Text in Divi
To create curved text using the method in this tutorial, you need to add each letter of your text in a separate text module (you will want to use a monospaced font for best results). Give the text module a set height. Then you need to give each text module a centered absolute position so that they all stack on top of each other.
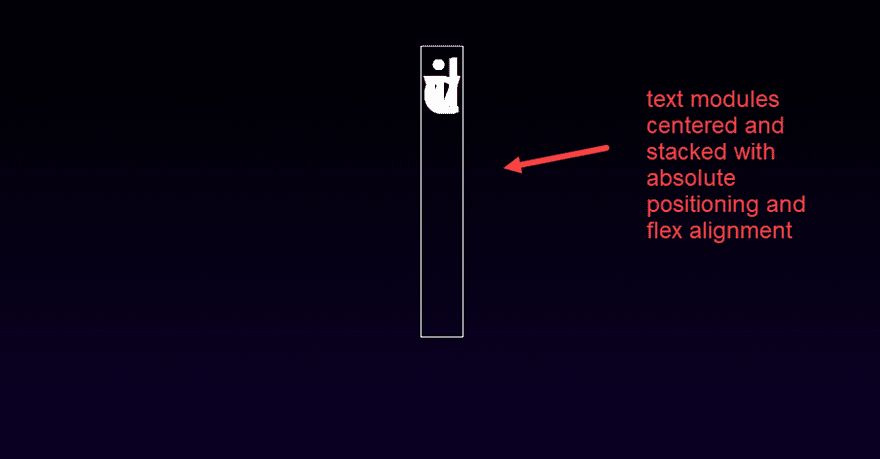
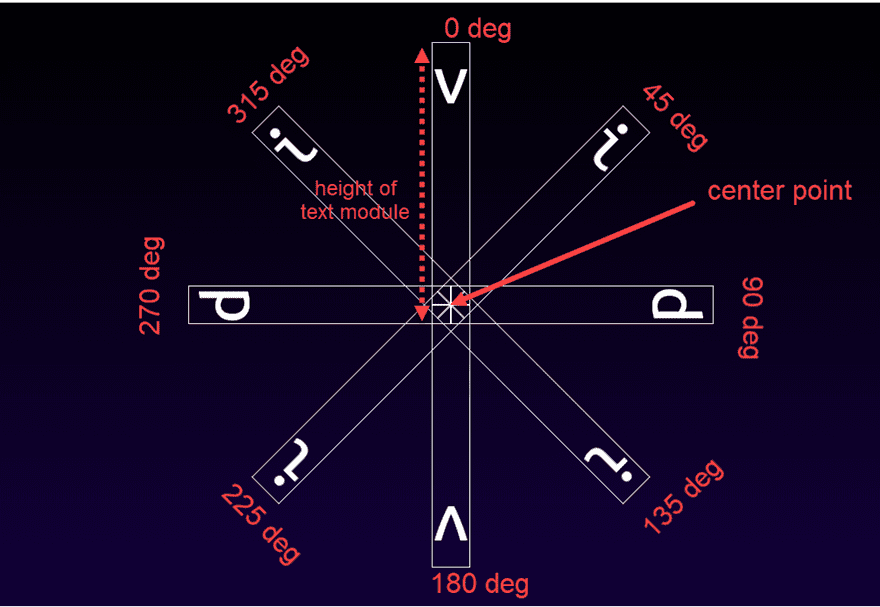
This is important because we want each letter to rotate from the same center point. After that you can use Divi’s transform options to rotate each letter along the z-axis to create the curved text (think of using a compass in math class to draw a circle). Also, notice that the height of each text module determines the circle radius which will also increase the circumference of the circle, and as a result more space between the letters.
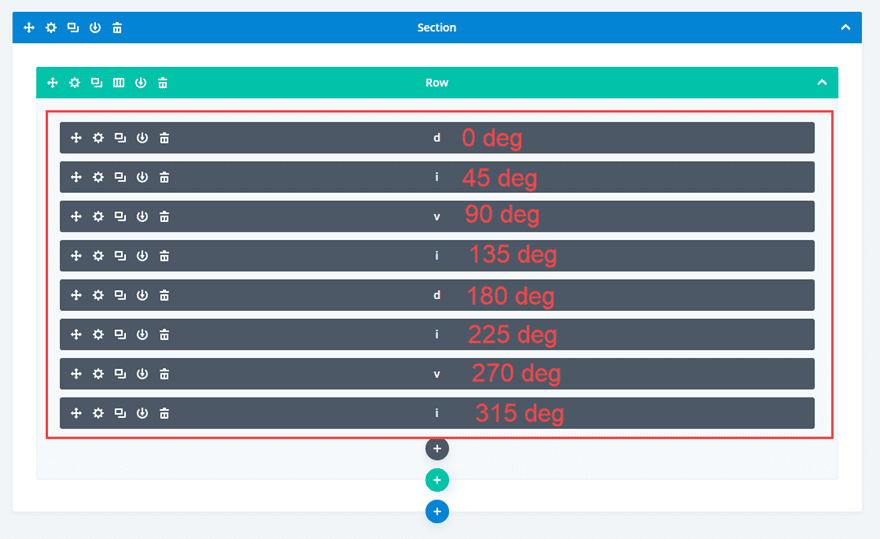
Here is an example of 8 text modules being rotated by 45deg increments to create a perfect circle layout for the text. I’ve added a white border around each module so you can easily see the rotation.
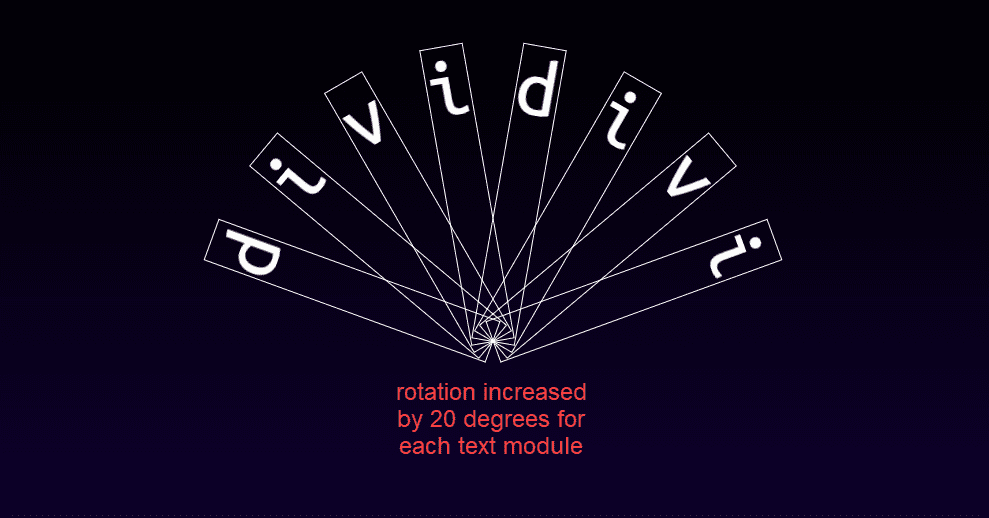
And, here is an example of the same text modules being rotated in 20deg increments.
Getting Started
To get started, create a new page in Divi. Then give you page a title and deploy the Divi builder on the front end. Select the option “build from scratch”. Now you are ready to go!
Creating the Curved Text Design
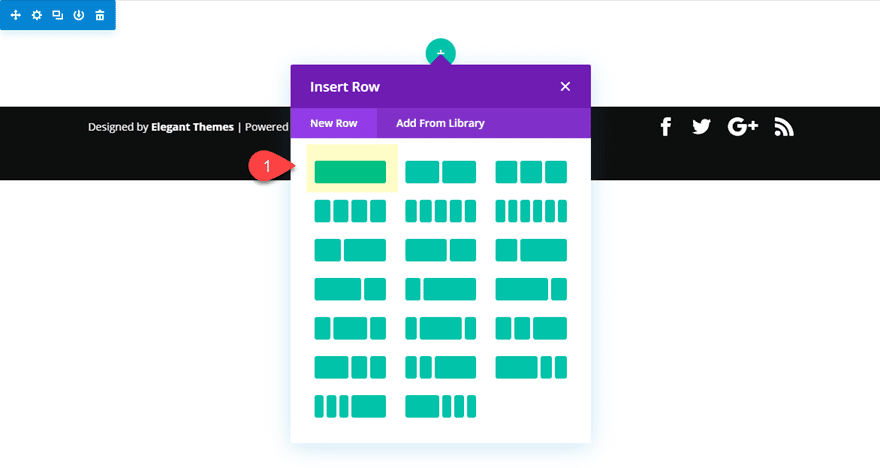
Creating the Section and Row
First create a regular section with a one-column row.
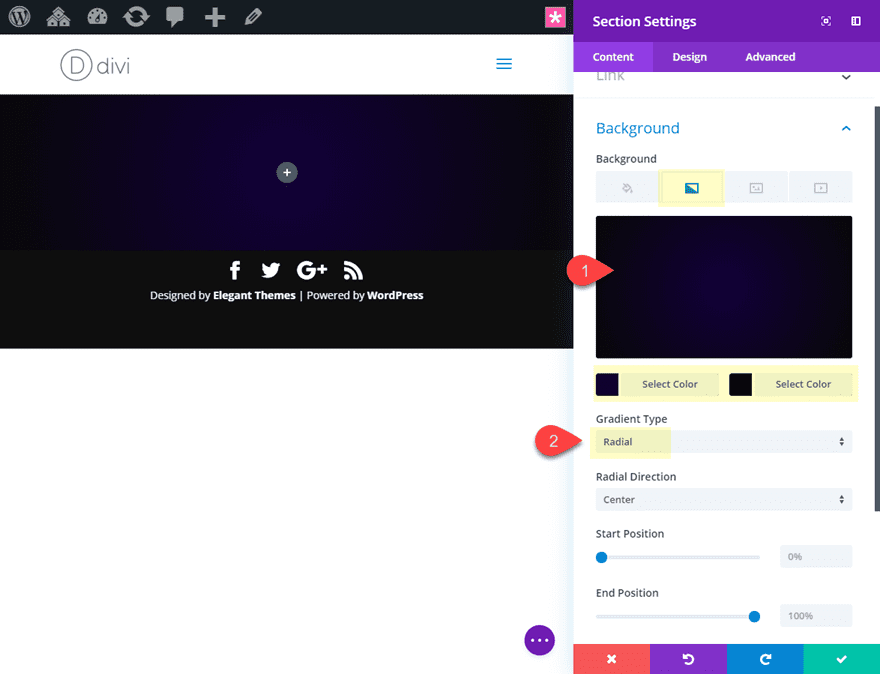
Before we add our modules, go ahead and update the section settings as follows:
- Background Gradient Left Color: #1e003d
- Background Gradient Right Color: #121212
- Gradient Type: Radial
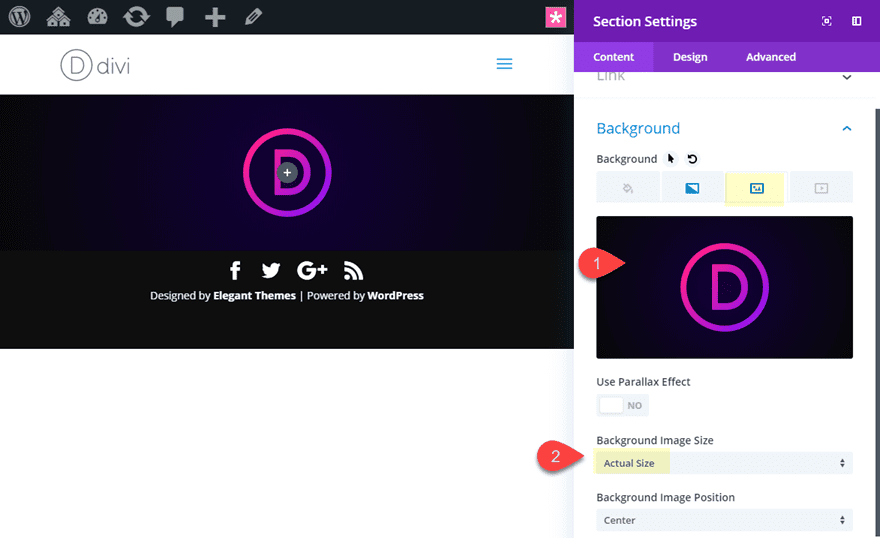
- Background Image: [insert image of logo around 100px by 100px]
- Background Image Size: Actual Size
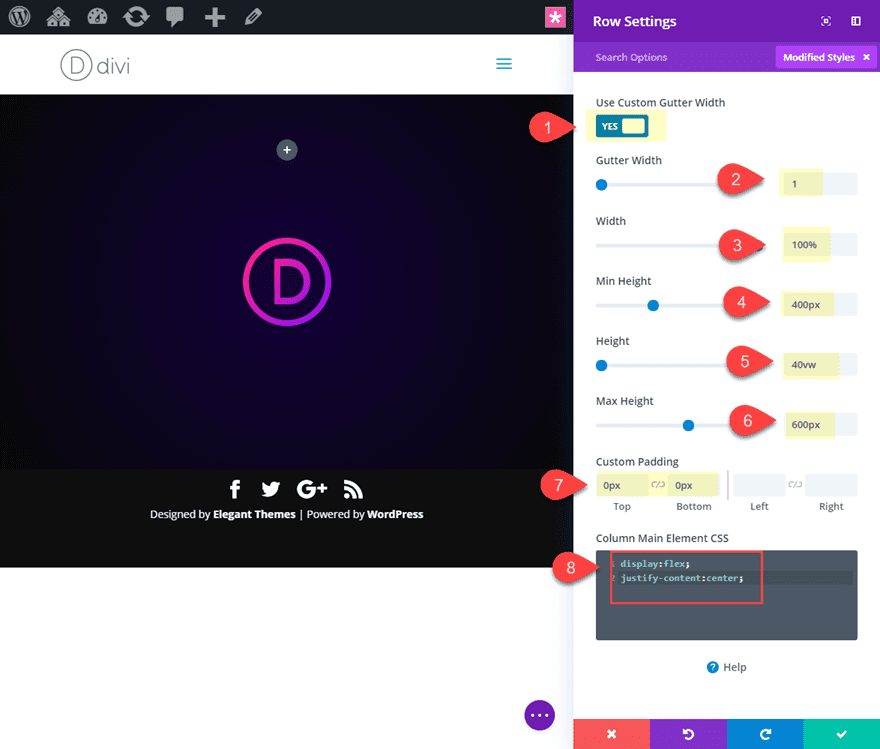
Save settings and then jump over to the row settings and update the following:
- Gutter Width: 1
- Width: 100%
- Min Height: 400px
- Height: 40vw
- Max Height: 600px
- Custom Padding: 0px top, 0px bottom
Then add the following custom CSS to the Column Main Element to make sure all text modules will remain horizontally centered:
Column Main Element CSS:
display:flex;
justify-content:center;
Creating the Text Modules for Each Letter
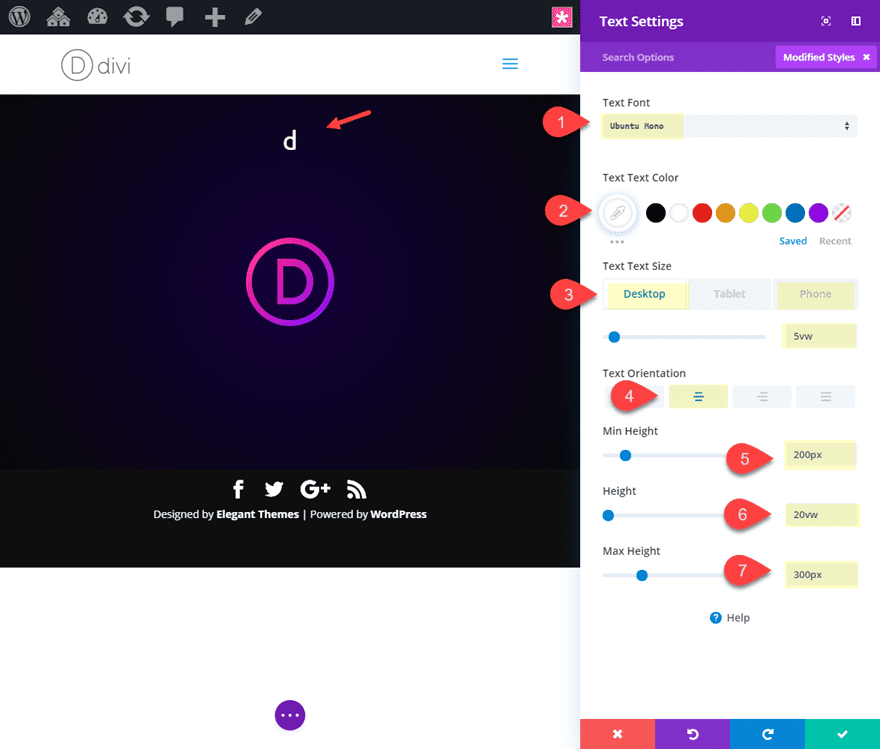
Now we are ready to add our first text module with our first letter. To do this add a new text module to the row column and update the following:
- Content: d (just the single letter)
- Text Font: Ubuntu Mono (any monospaced font will do)
- Text Text Color: #ffffff
- Text Text Size: 5vw (desktop), 40px (phone)
- Text Orientation: center
- Min Height: 200px
- Height: 20vw
- Max Height: 300px
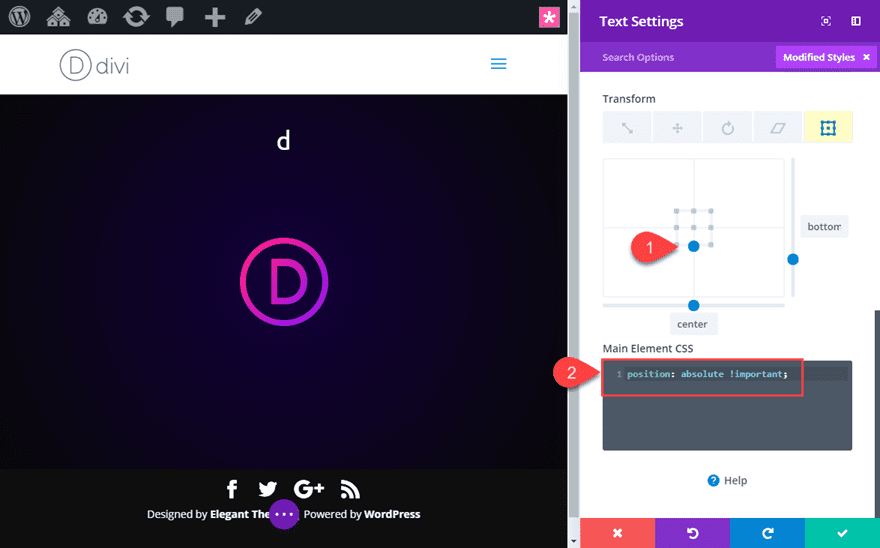
Then update the transform origin to bottom. This is going to be important for determining where the rotation of the text happens. We want the text module to rotate at the bottom point of the module. Even though this first text module will not need to be rotated, it is important to add it here so that we can carry this option over whenever we duplicate the text module for the additional letters.
- Transform Origin: 100% (or bottom)
Then add the following custom CSS to the Main Element to give the text module an absolute position.
position: absolute !important;
Creating and Rotating the Other Text Modules
To create the rest of the letters, we will be duplicating the text module. Once we duplicate the text module, all we will need to do is update the letter and then increase the rotation by 45deg with each new module.
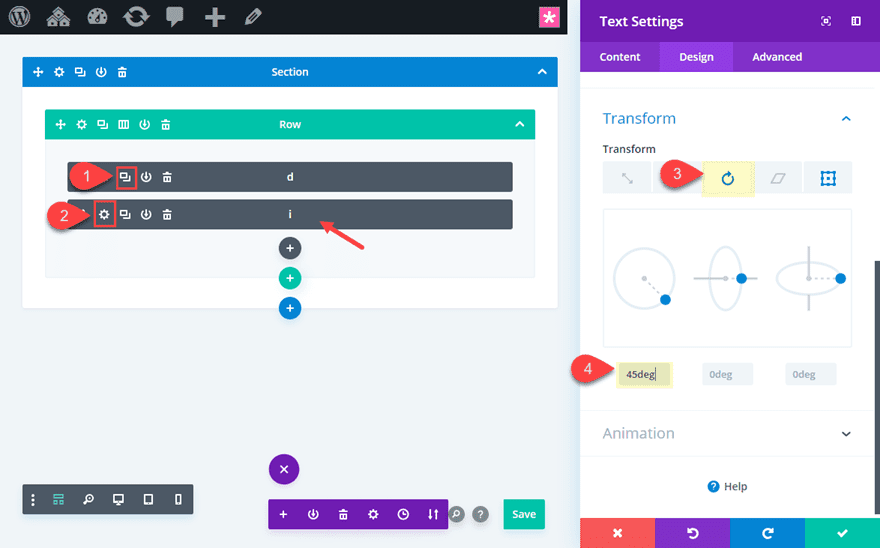
Since the text modules will be stacked on top of each on the front end, it is best to use the wireframe view mode to make these updates.
Go ahead and duplicate the text module and then update the following:
- Content: i
- Transform Rotation z-axis: 45deg
Continue the process of duplicating the text module and then updating the text module with a new letter and increasing the transform rotation by 45deg. Here is a breakdown of the remaining 6 text module updates:
Text Module 3
- content: v
- Transform Rotation z-axis: 90deg
Text Module 4
- content: i
- Transform Rotation z-axis: 135deg
Text Module 5
- content: d
- Transform Rotation z-axis: 180deg
Text Module 6
- content: i
- Transform Rotation z-axis: 225deg
Text Module 7
- content: v
- Transform Rotation z-axis: 270deg
Text Module 8
- content: i
- Transform Rotation z-axis: 315deg
That’s it! Now check out the final result.
Final Result
Adjusting the Text size and degree of rotation for Longer Text
If you want to adjust the curved text for larger text design options, you can change the text size and transform rotation of each text module.
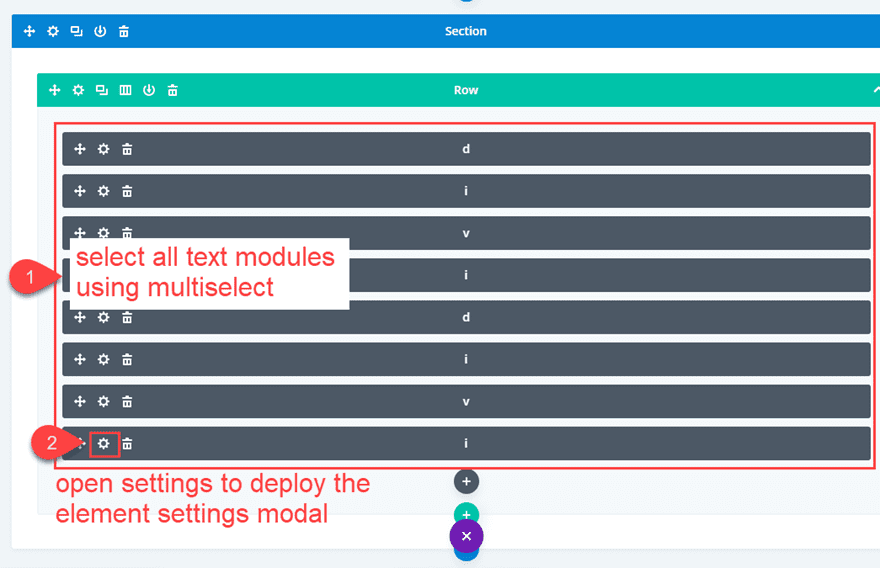
Deploy the wireframe view mode and then use Divi’s multiselect feature to select all of the text modules that contain the curved letters. Then click to open the settings of one of the selected text modules to open the element setting modal that will update all the selected modules at once.
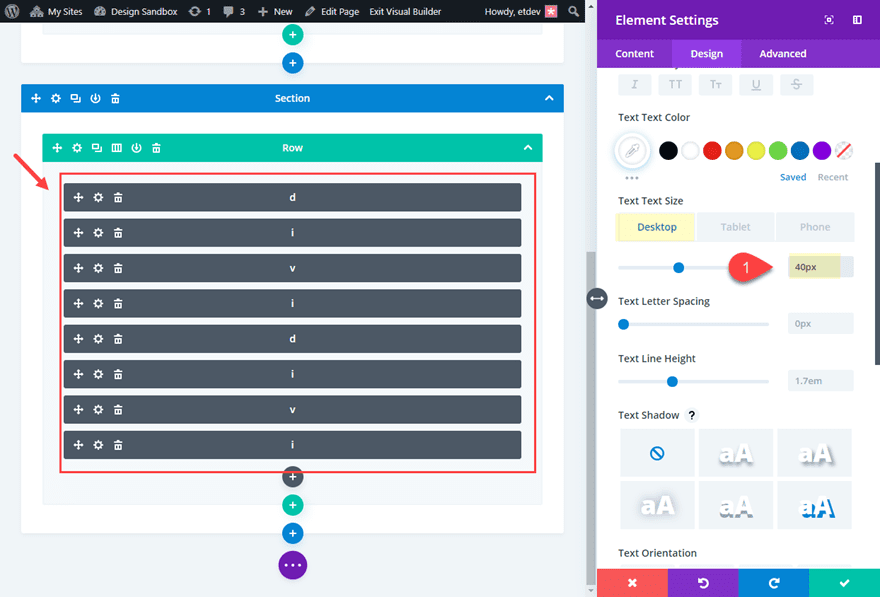
Under the element settings, change the text text size to 40px on desktop.
Save settings and then open the settings for each of the text modules and update the letters and rotation for each. Leave the first text module with a 0deg rotation and then increase the z-axis rotation by 10 degrees for every text module that follows. Then duplicate the text module for even more letters as needed. In this example, I’m going to spell out “elegant.themes”.
Here is the breakdown of the content letter and rotation needed for each text module.
- Text Module 1
- content: e
- Transform Rotation z-axis: 0deg
- Text Module 2
- content: l
- Transform Rotation z-axis: 10deg
- Text Module 3
- content: e
- Transform Rotation z-axis: 20deg
- Text Module 4
- content: g
- Transform Rotation z-axis: 30deg
- Text Module 5
- content: a
- Transform Rotation z-axis: 40deg
- Text Module 6
- content: n
- Transform Rotation z-axis: 50deg
- Text Module 7
- content: t
- Transform Rotation z-axis: 60deg
- Text Module 8
- content: .
- Transform Rotation z-axis: 70deg
- Text Module 9
- content: t
- Transform Rotation z-axis: 80deg
- Text Module 10
- content: h
- Transform Rotation z-axis: 90deg
- Text Module 10
- content: e
- Transform Rotation z-axis: 100deg
- Text Module 11
- content: m
- Transform Rotation z-axis: 110deg
- Text Module 12
- content: e
- Transform Rotation z-axis: 120deg
- Text Module 13
- content: s
- Transform Rotation z-axis: 130deg
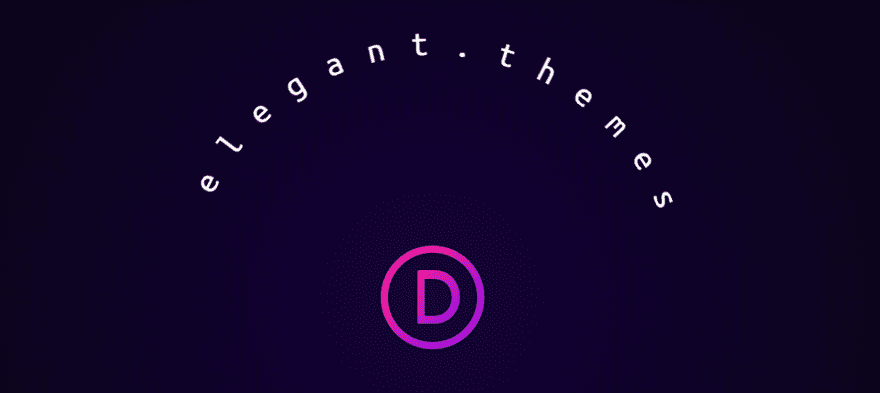
Here is the result so far.
An easy way to adjust the rotation of the entire text is to apply a transform rotate to the row. Open the row settings and and use the z-index control dial to position the curved text wherever you want it.
Here is the final design.
Feel free to explore adding more text and tweaking the degree of rotation to get the right spacing between letters. You can also adjust the height of the text modules to decrease or increase the radius.
Final Thoughts
Creating curved text designs in Divi is a pretty simple process once you understand how it works. This article should help you understand the geometry involved in setting up the text modules so that they rotate on a curve. And once you get the setup right, besides a few snippets of custom css, you can use Divi’s built-in design settings to get pretty creative. Hopefully this will give you a little inspiration for making some unique curved text designs of your own.
And, if you want to add some animation to your curved letters, check out our article on how to animate letters.
I look forward to hearing from you in the comments.
Cheers!
The post How to Create Curved Text Designs in Divi appeared first on Elegant Themes Blog.