
One of the best ways to boost the design of your website is by using different section transitions. In a previous post, we’ve shown you how you can do that using the Divi built-in options only. However, if you’re looking to create something a little bit more advanced or personalized, you can create irregularly shaped section transitions as well. Because of their complexity, the best way to approach this is by using images with a transparent border.
In this post, we’ll show you how you can do that. We’re not only going to show you what to do within the Divi Builder, but we’re also going to show you how you can create these transparent borders on images with a few steps using Photoshop.
Example Result
Let’s take a look at a layout sample with stunning irregularly shaped section transitions:
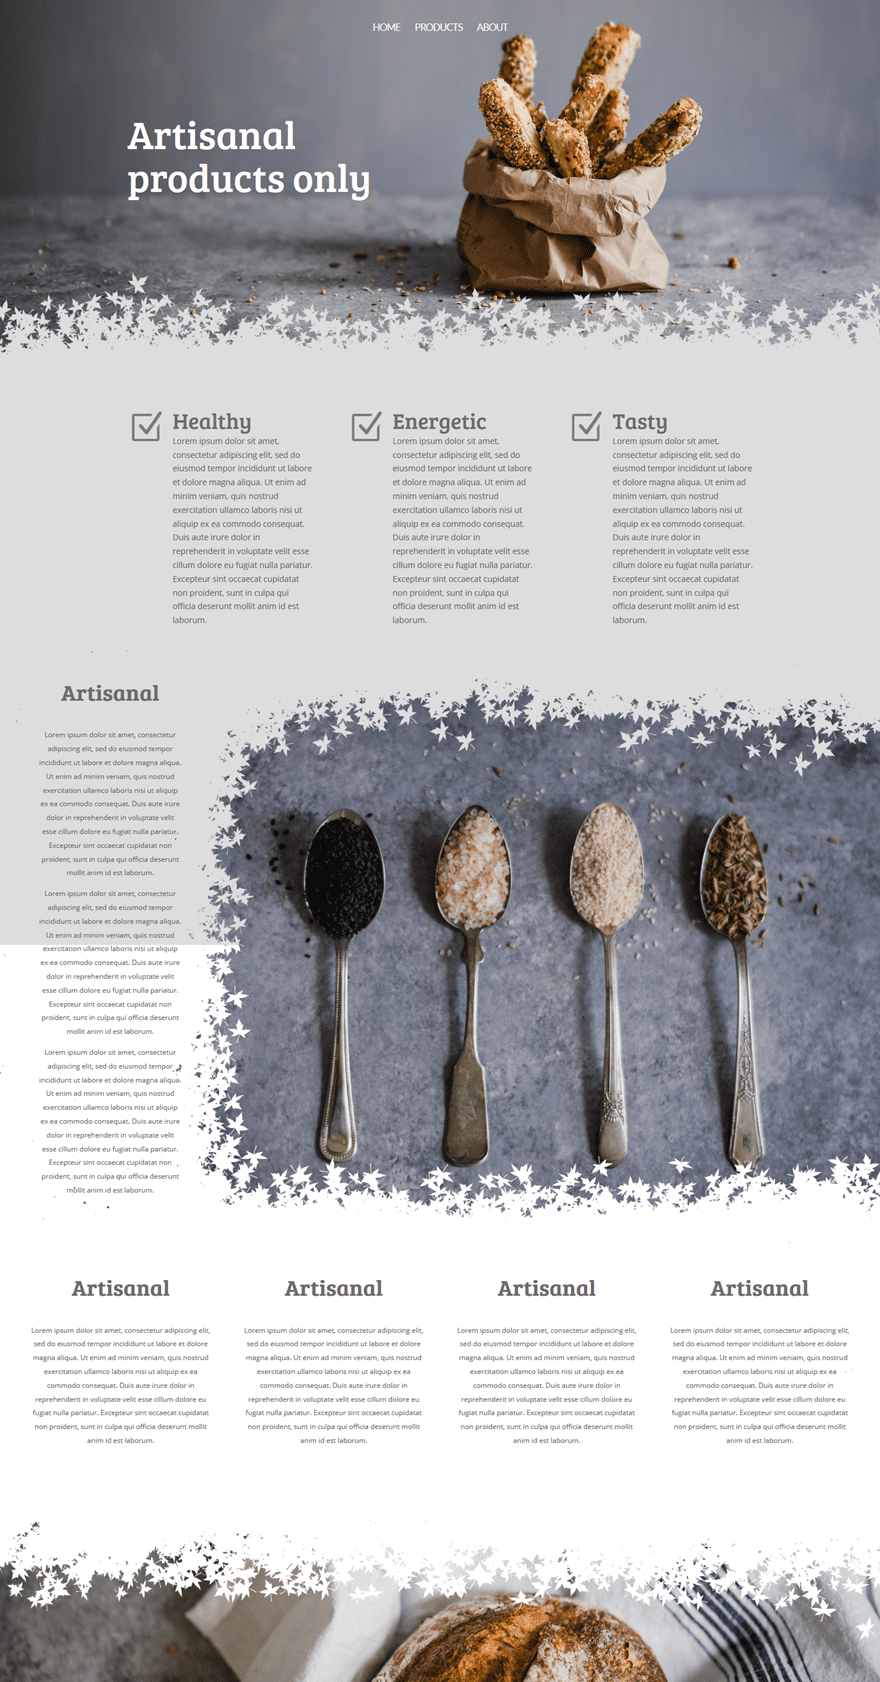
As you can notice, you can use these transparent borders throughout your whole site and within different sections. It’s important to remember that, depending on how large your transparent border is, you should have enough place left within the sections to fit the different content you’re trying to share. It’ll also create a nice balance between the various sections.
How to Create Irregularly Shaped Section Transitions with Divi
Subscribe To Our Youtube Channel
Create Transparent Borders with Photoshop
You can achieve as original shapes as you want with Photoshop. You could also opt for a free alternative called GimpShop. For this tutorial, we’ll be using Photoshop though.
Open Photoshop
Start by opening photoshop on your computer.
Open Image
Once you’ve done that, open the image you’d like to work on.

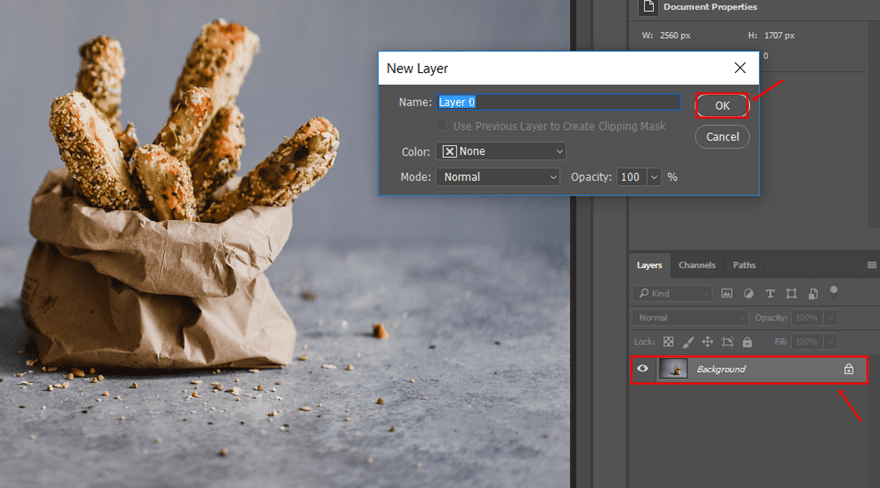
Double-Click on Image & Create Layer
Once your image is uploaded within Photoshop, double-click on the image layer and create a new layer for it (Layer 0).
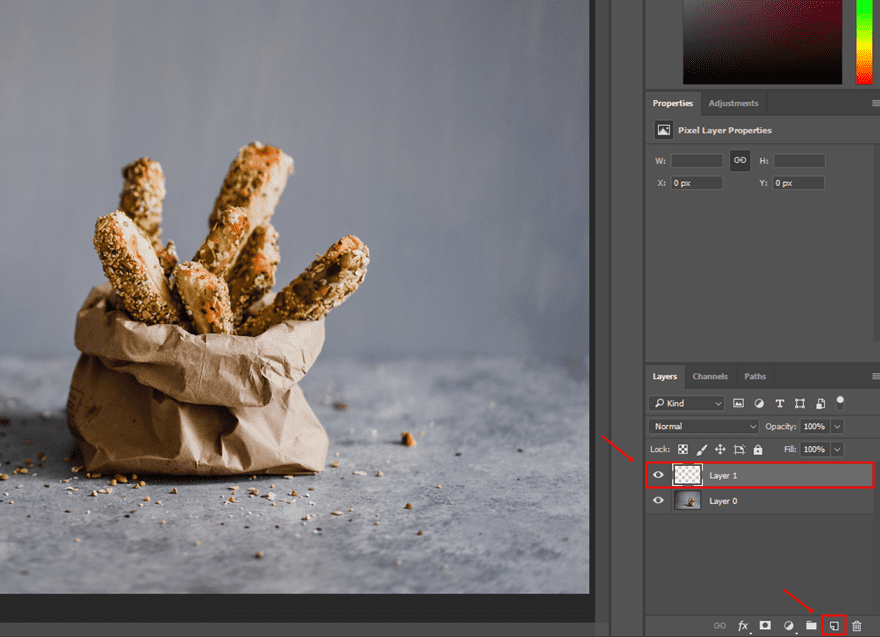
Add Another Layer
To add the transparent border, you’ll be needing another layer as well so go ahead and add it by clicking on the icon which we marked in the print screen below. Once you create the layer (Layer 1), make sure it’s placed above the layer that contains your image.
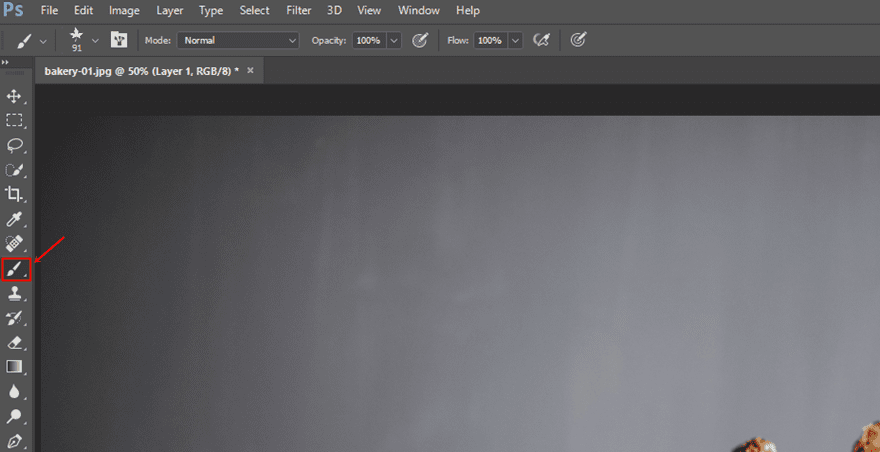
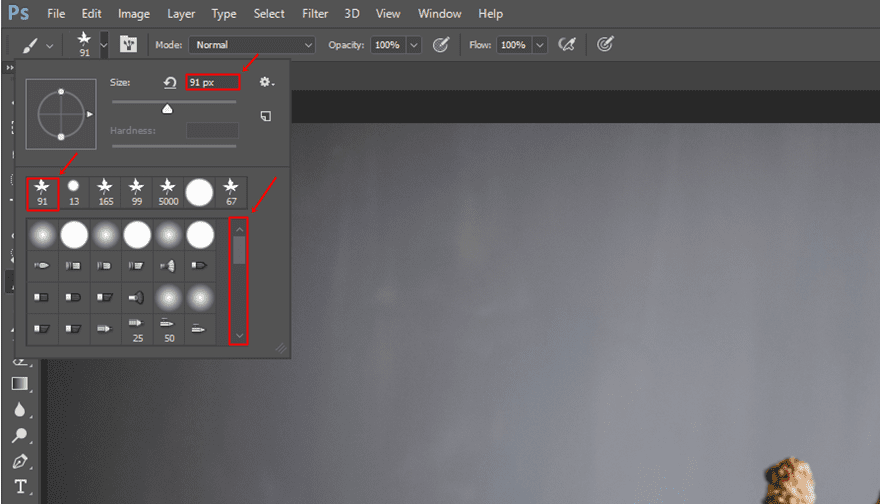
Select Brush & Size
While having the Layer 1 activated, go ahead and click on the brush icon.
Once you do, you can adjust the size and pattern that’s being used for the brush to your own preference. There are tons of free Photoshop brushes on the internet so depending on what type of website you’re creating, choose a fitting one. Also, make sure that the opacity is set at a 100%.
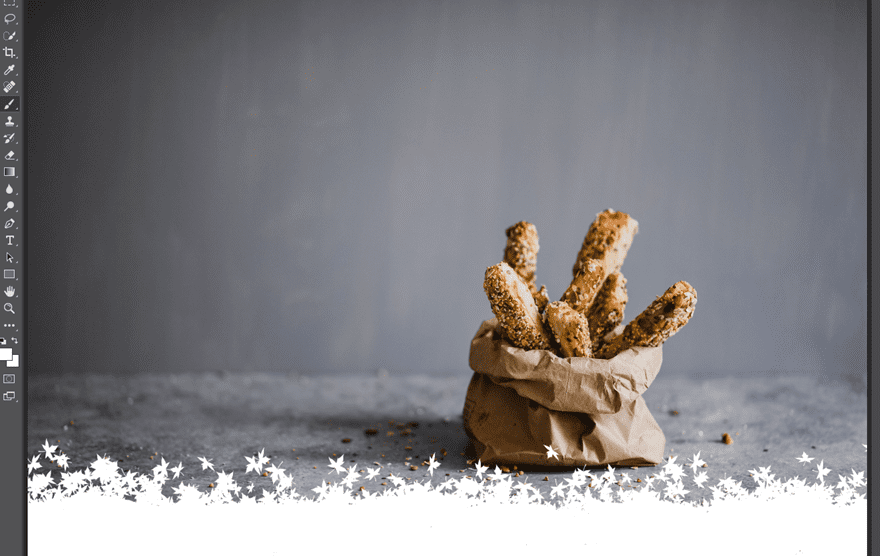
Start Using The Brush on The Borders
Once you have your brush in place, start using it on the side you want to be transparent. Make sure you cover the whole border with your brush so it’ll all become transparent afterwards.
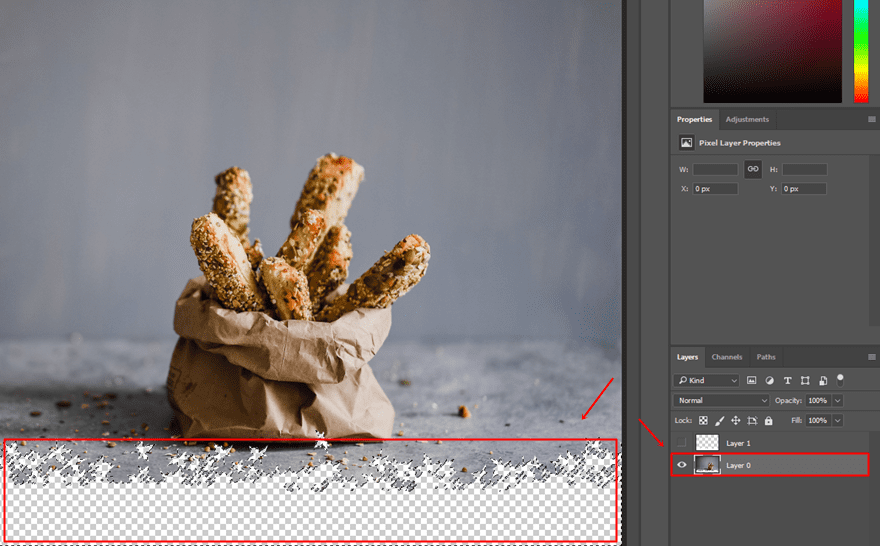
CTRL (Windows) or Command (Mac) + Select New Layer
Once done, you can press CTRL (for Windows) or Command (for Mac) on your keyboard and click on Layer 1 at the same time. You’ll see that Photoshop will select everything you’ve added to that layer, which is, in this case, the shaped border.
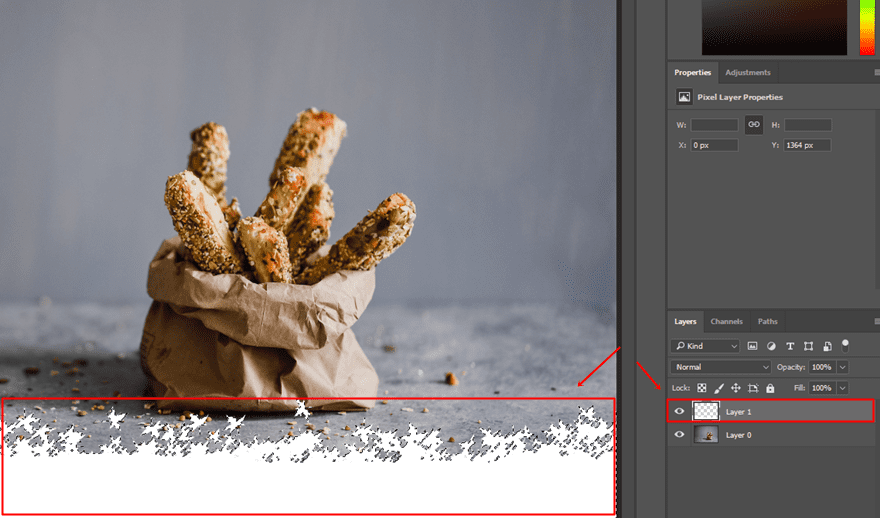
Make New Layer Invisible
Next, make Layer 1 invisible by removing the eye as marked in the print screen below.
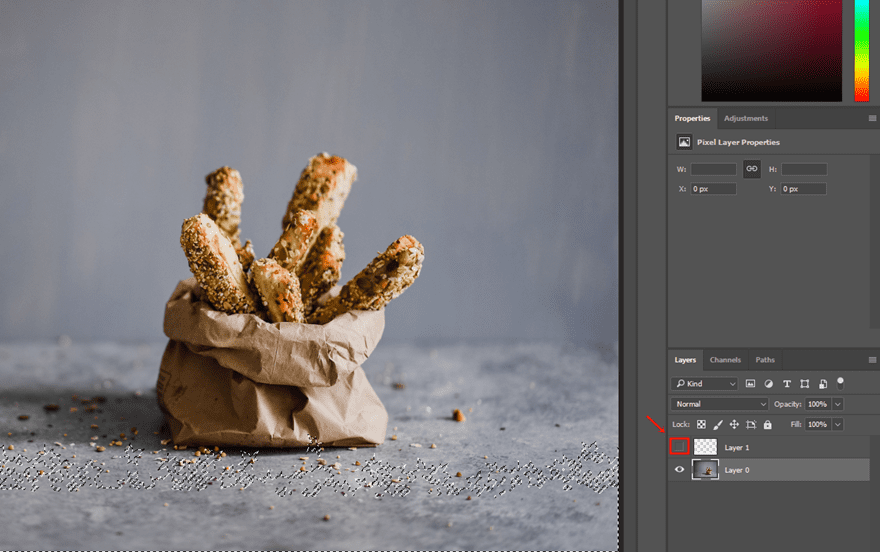
Select Image & Delete New Layer
Then, click on the layer that contains your image and press the delete button on your keyboard. Once you do that, you’ll see that the border will become transparent.
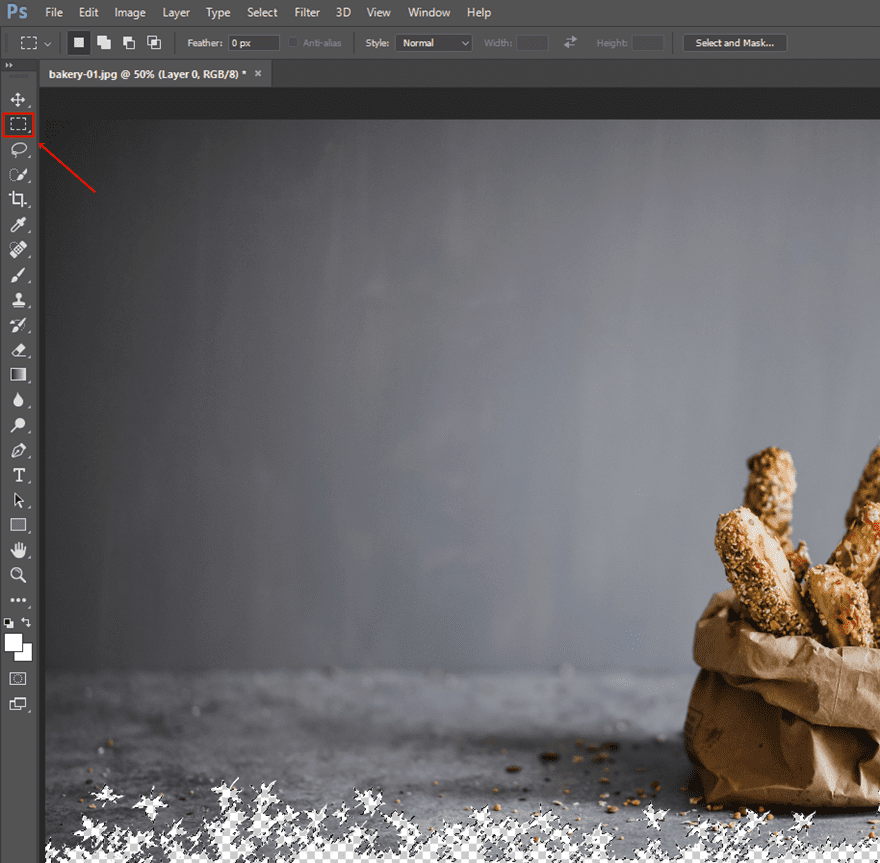
Select Rectangular Marquee Tool & Click on Image
Click on the Rectangular Marquee Tool and press somewhere randomly on the image.
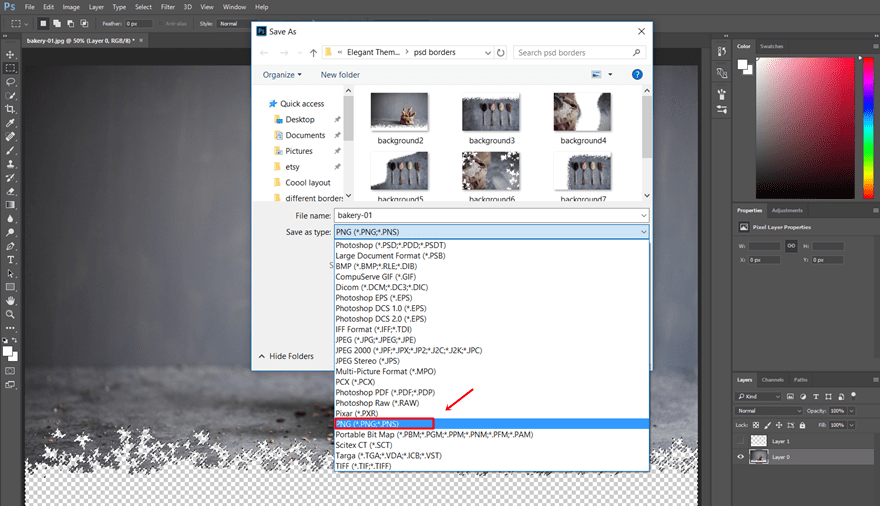
Save Image as PNG
Lastly, you’ll need to save the image as a PNG so you can use it on your website.
Add Backgrounds to Divi
Once you create the different images you want to use within your Divi website (by using the Photoshop technique above), the rest of it is straightforward. The images you’ve created serve as the background of a particular section. We’re only going to show you how to build the hero section of our example since the same method applies for the different sections as well.
Add New Standard Section
Add a new page, switch over to Visual Builder and add a new standard section to that page.
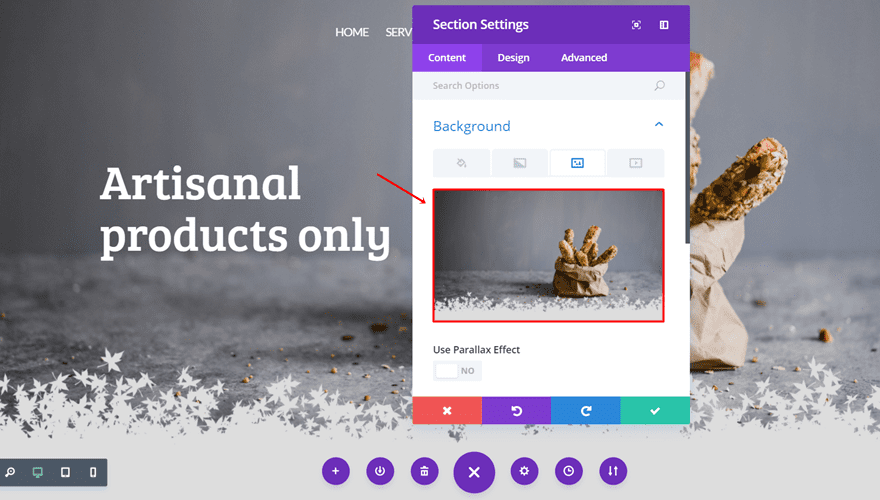
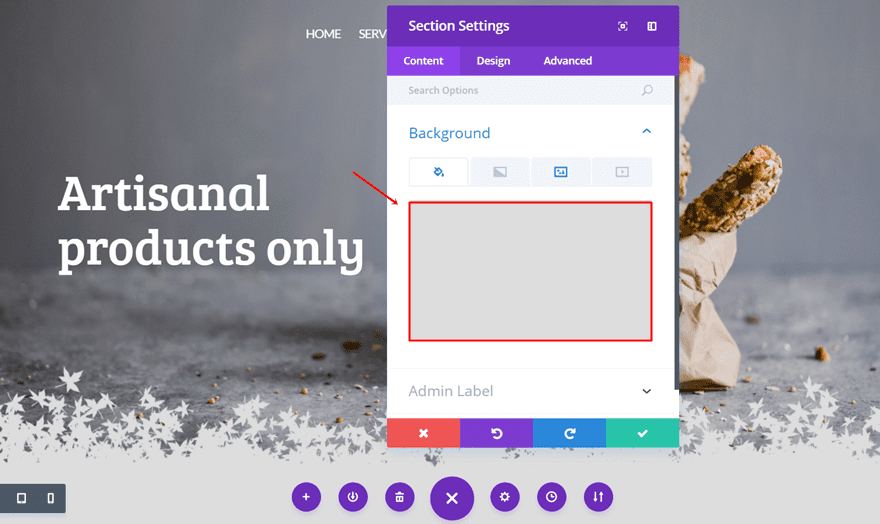
Upload Background Image
Once you’ve placed all the modules you want to appear in the hero section, you can go ahead and add the image you’ve created in the previous part of this post.
Add Background Color
Once you’ve done that, you can decide what color will appear in the transparent part of your image. In this example, we’ve used ‘#dddddd’ as the background color. You can immediately see that the color will appear right within the transparent part of the image.
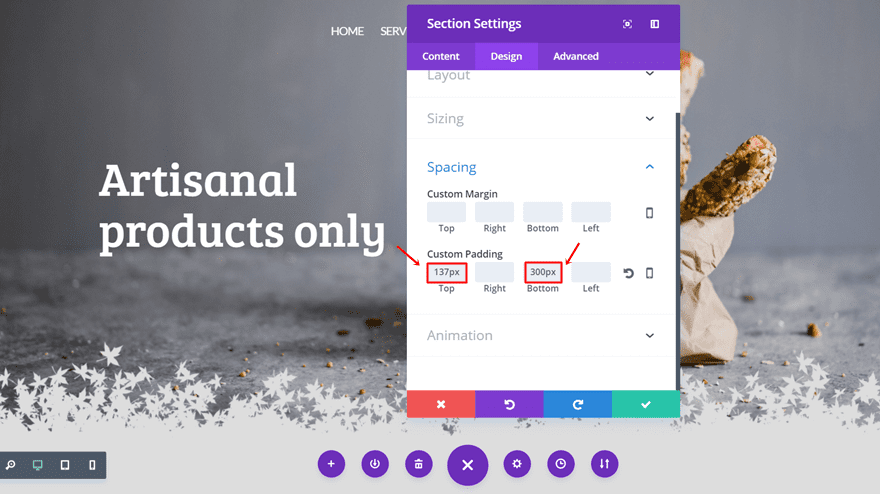
Make Sure There’s Enough Padding
Depending on the number of modules and the size of your transparent border you’ve used in your hero section, you might have to add some custom padding. Play around with the different section padding values and see which one gives you the best result.
Add Same Background Color to Next Section
To make sure the different sections blend well with one another, use the same background color you’ve used in your hero section within your next section as well. That doesn’t necessarily mean that you have to use a one color background color for your next section, you can use a gradient background as well as long as the colors of both sections blend beautifully.
Example
As mentioned before, you can create as many image borders as you want and use them in a creative way throughout your website. To give you a taste of it, we’ve created the following example preview:
Final Thoughts
In this post, we’ve shown you how you can easily make use of irregularly shaped section transitions. By using this method, you can basically create any kind of section transition you desire. Besides showing you how to create these irregular shapes with a few steps in Photoshop, we’ve also shown you how you can then make it work within the Divi Builder. If you have any questions or suggestions; make sure you leave a comment in the comment section below!
Be sure to subscribe to our email newsletter and YouTube channel so that you never miss a big announcement, useful tip, or Divi freebie!
The post How to Create Irregularly Shaped Section Transitions with Divi appeared first on Elegant Themes Blog.