
WordPress has developed into a robust and flexible Content Management System (CMS) that can handle almost any type of website. One of the features that makes this possible is the ability to create custom post types for your website. The problem is that to do so, you’ll need to use PHP, which you may not be that comfortable with.
That’s where Toolset Types comes in. This powerful tool enables you to create custom post types for WordPress without having to write a single line of code, and it’s simple enough that anyone can use it. In this article, we’ll explore what custom post types are, then we’ll talk more about this tool and what it does. Finally, you’ll learn how to create your own custom post types with Toolset Types. Let’s get to work!
What Custom Post Types Are (And Why You Need Them)

Posts are one of the default content types that are hardcoded into WordPress.
By default, WordPress includes an array of ‘post types‘ including media files, pages, and regular posts. You can customize and categorize them in any way you want, but WordPress will still recognize them under their original classification. Using a custom post type enables you to add new types of content to WordPress. For example, if you publish a lot of reviews on your site, you could create a Reviews custom post type that includes some of the features you’ve grown accustomed to using.
Using custom post types isn’t strictly necessary, but it’s the logical thing to do in some cases. For example:
- If you’re not using WordPress as a blogging platform, it makes sense to add a new custom post type that suits your unique needs.
- It enables you to separate content from your Posts section to keep your site more organized.
Take that last reason, for example. WordPress already provides you with several taxonomic classifications to organize your content, such as categories and tags – using custom post types doesn’t mean you need to do away with them. In fact, you can still use categories to subdivide your new custom post types, which provides you with an even greater level of organization.
An Introduction to Toolset Types
Toolset Types is a powerful plugin that enables you to add custom post types, fields, and taxonomies to WordPress without having to use a single line of code.
The best part is that the plugin doesn’t limit itself to merely adding custom post types; it also enables you to customize how the WordPress editor behaves for each of them. You can even change the location of your new post type’s tabs on the dashboard for greater organization.
Key Features:
- Add new custom post types to WordPress.
- Create templates for your new custom post types.
- Add new taxonomies to your website.
- Enable the use of multiple new custom field types, including checkboxes, drop-down lists, and file uploads.
Price: Freemium | More Information
How to Create PHP-Free Custom Post Types Using the Toolset Types Plugin (In 5 Steps)
Before adding a new post type to WordPress, it’s worth noting that you might want to set up a child theme, since the process involves modifying your functions.php file. You should also look into backing up your website if you don’t have a recent snapshot of it, although the process itself is quite safe. As for Divi users, you don’t need to worry – you’ll still be able to use our builder with any custom post types you create (although you’ll need to enable it for each of them).
Finally, since we’ll be using a plugin to do this, you’ll naturally want to install and activate it before moving on to step number one.
Step #1: Add a New Custom Post Type
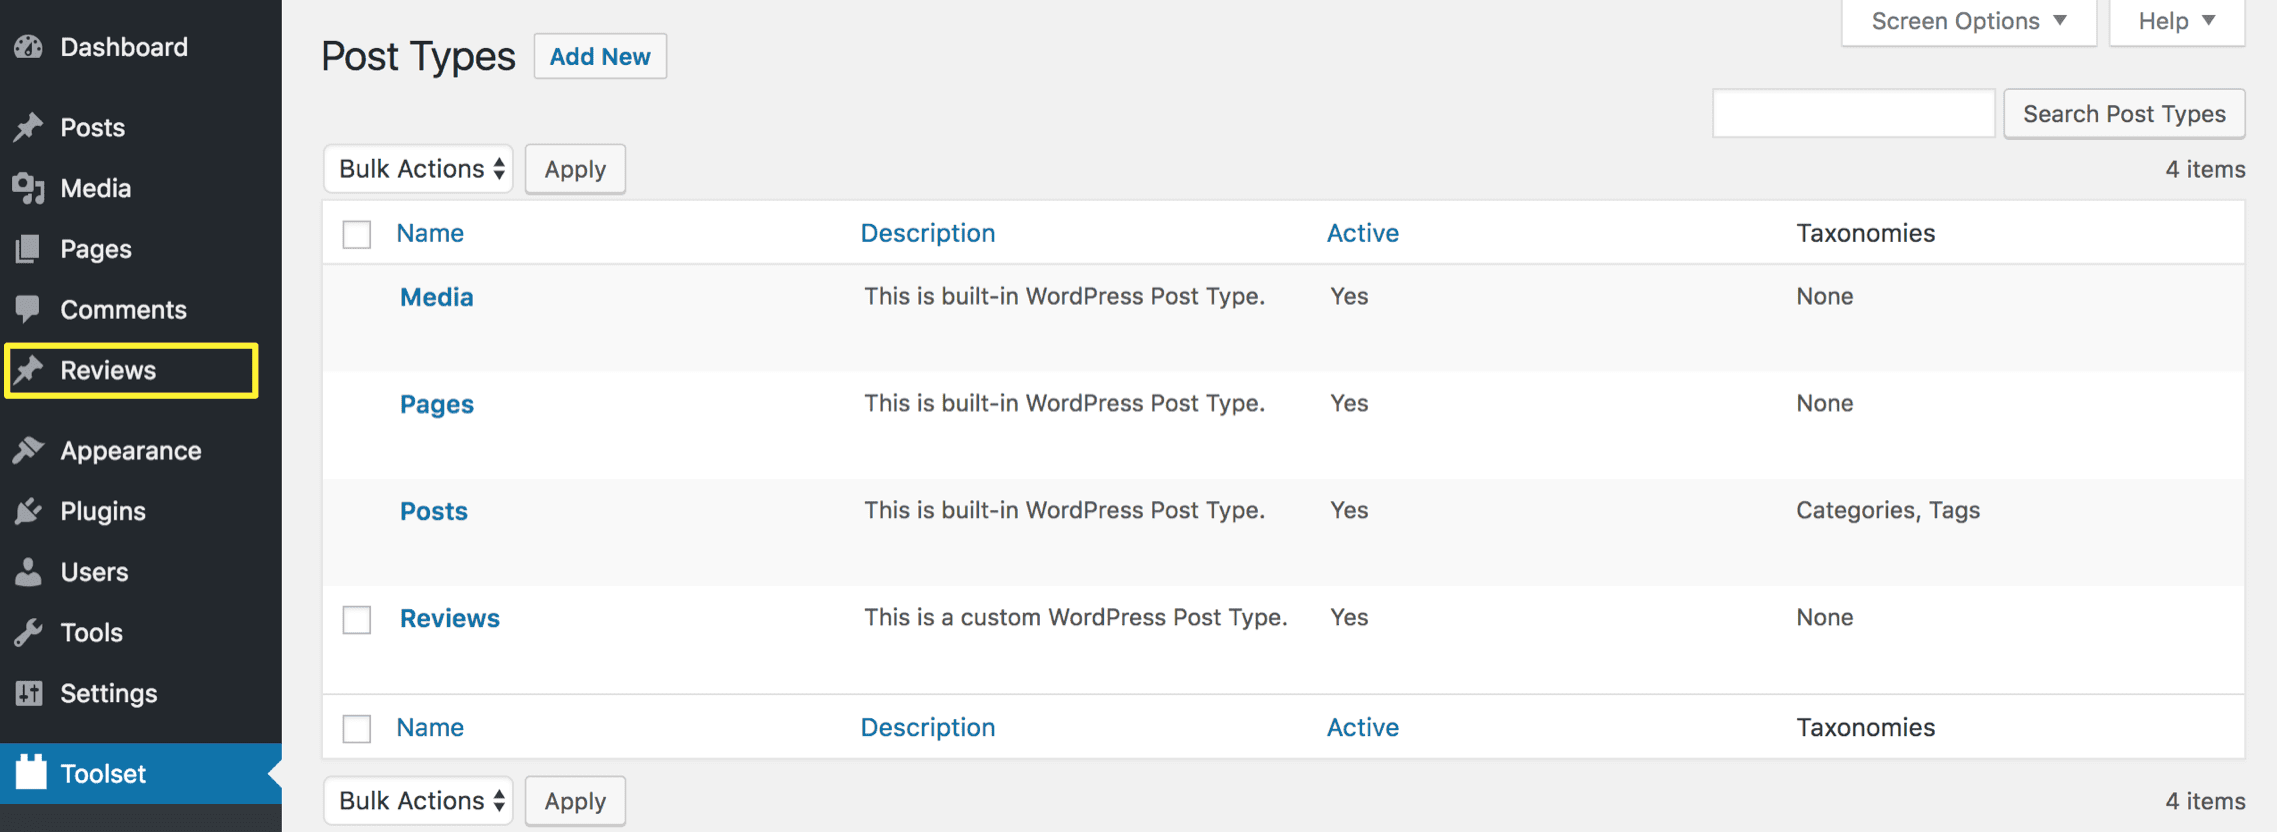
Activating the Toolset Types plugin will add a new Toolset tab to your dashboard. To create your first custom post type, go to Toolset > Post Types. Here, you’ll see a list of WordPress’ default post types and the option to add a new one. Click on Add New:

At first glance, you’ll notice there are a lot of settings on this page but don’t worry – we’ll go over all of them step by step. For now, let’s just focus on the Name and description section:
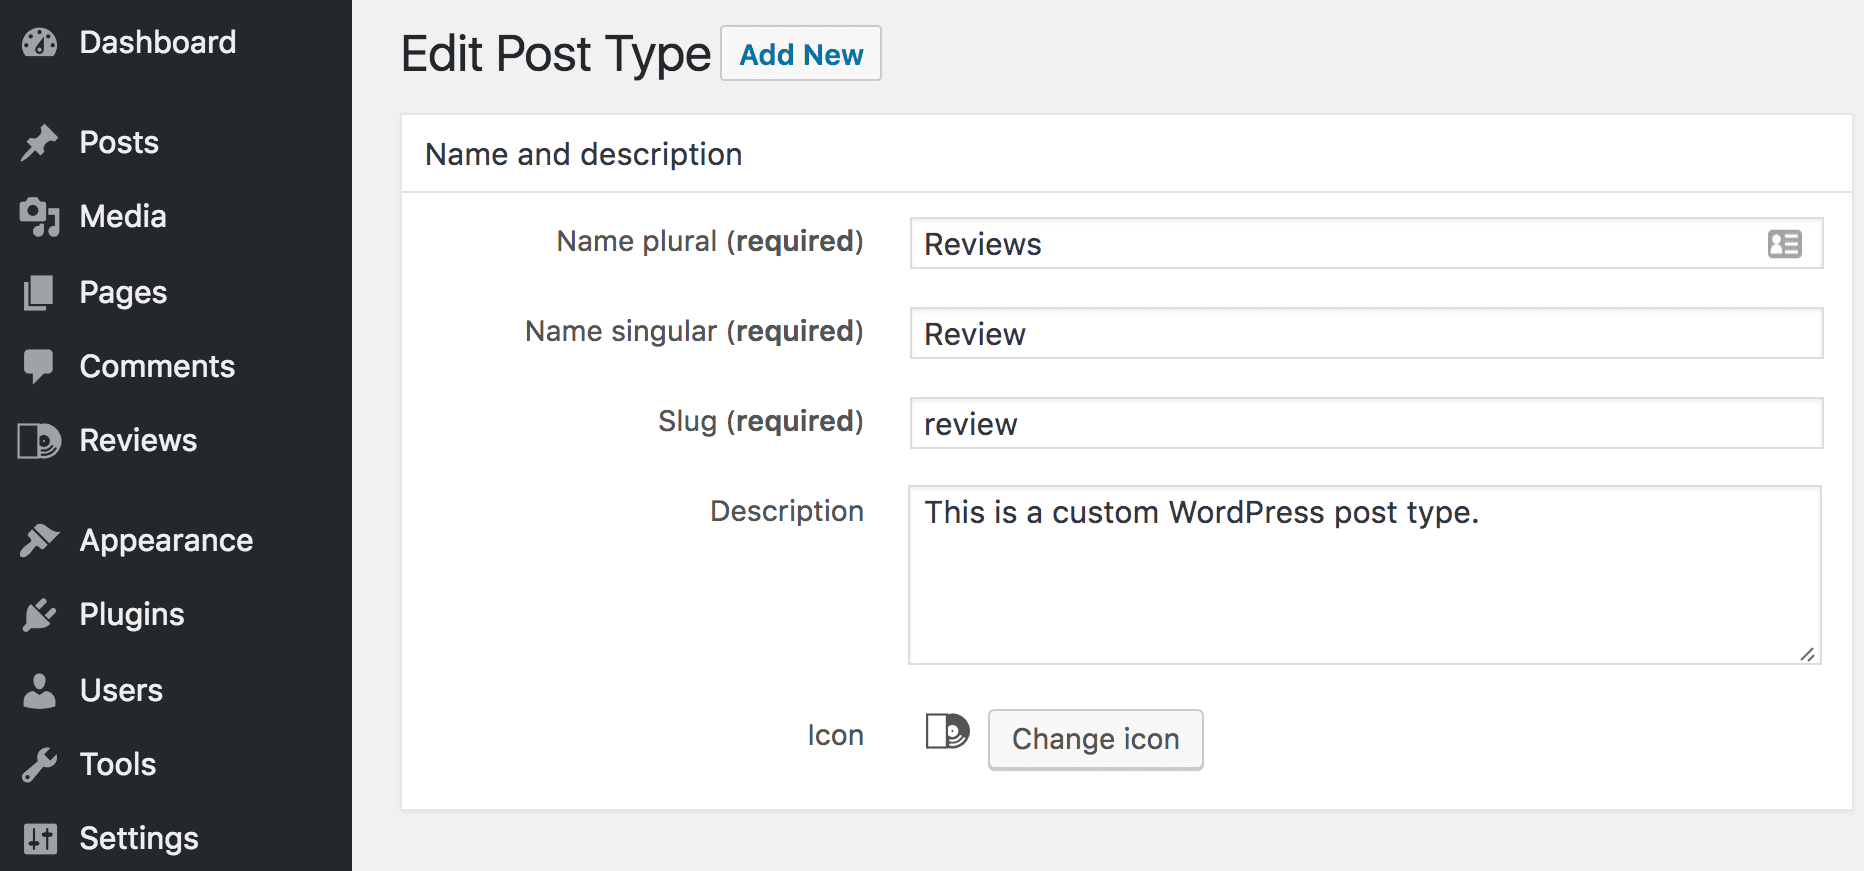
To get started, you’ll need to set the plural name for your custom post type, which is the title that will appear on your dashboard. Then type in the singular of that name below, which also doubles as the ‘slug‘ by default. Slugs are the versions of your post types that appear in URLs.
Toolset types enables you to add a description for your custom post type, which can come in handy if you create several of them and want to keep track. You can also change the icon that’ll appear next to its name within your dashboard:
![]()
Once you’ve chosen an icon, click on the Save Post Type button to your right and your new custom post type will appear on your Dashboard:
Now that you’ve added your new post type, it’s time to look into new taxonomies to keep your site organized.
Step #2: Create a New Taxonomy and Assign It to Your Custom Post Type
As we mentioned earlier, Toolset Types enables you to create a custom taxonomy and assign it to your custom post types. To do this, head to the Toolset > Taxonomies tab on your dashboard and click on Add New:
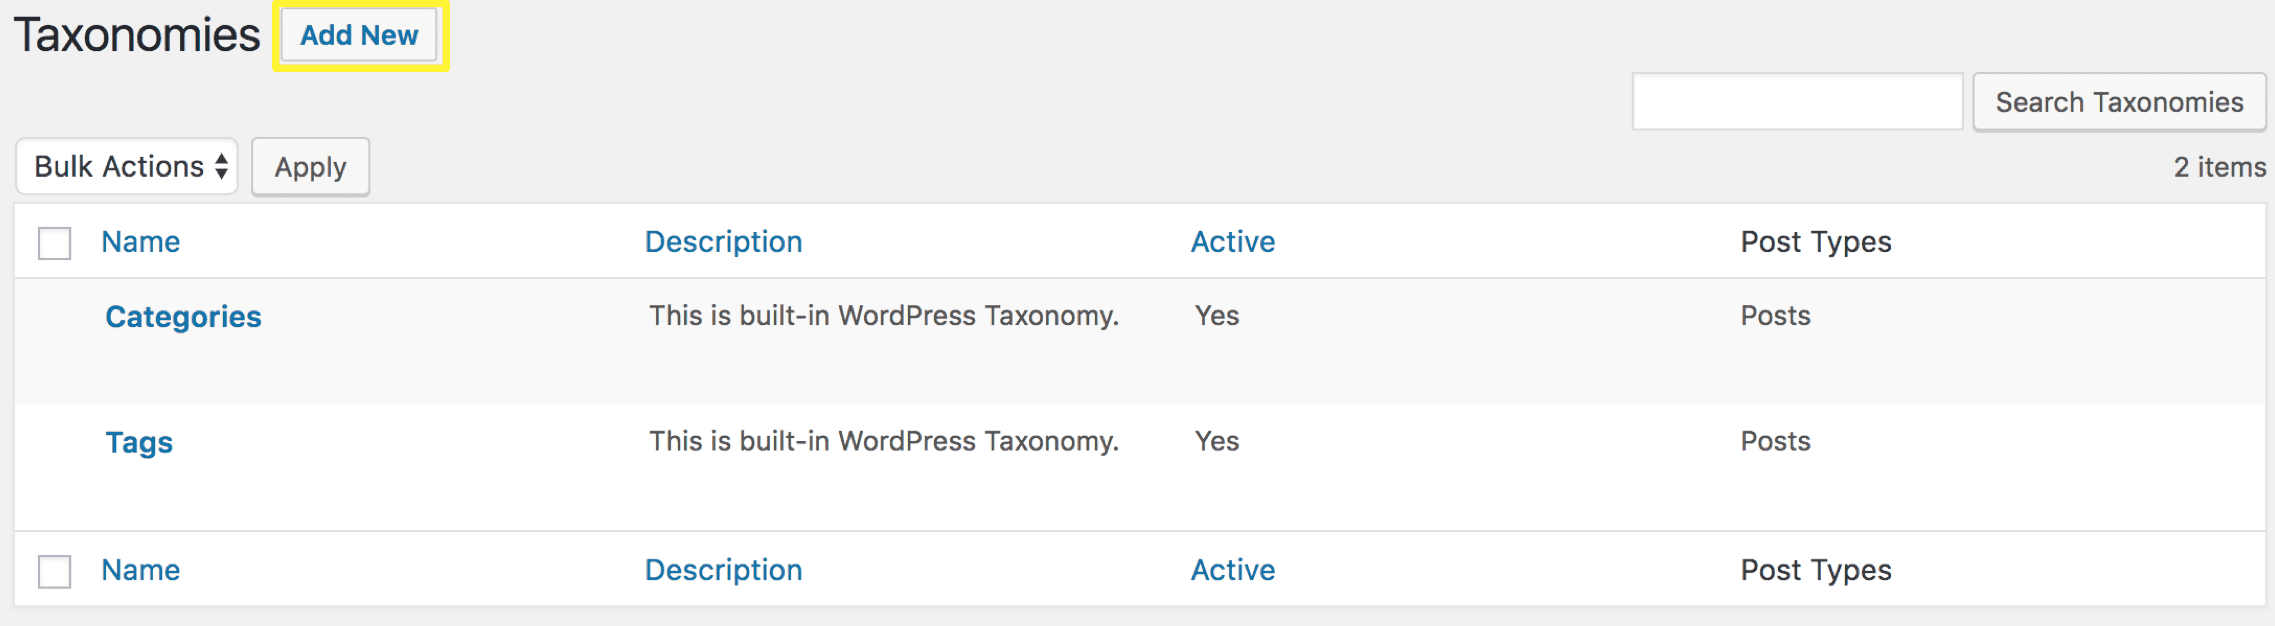
The first part of this process is the same as with step number one. You’ll need to choose a name for your taxonomy and enter its plural and singular versions, as well as a slug:
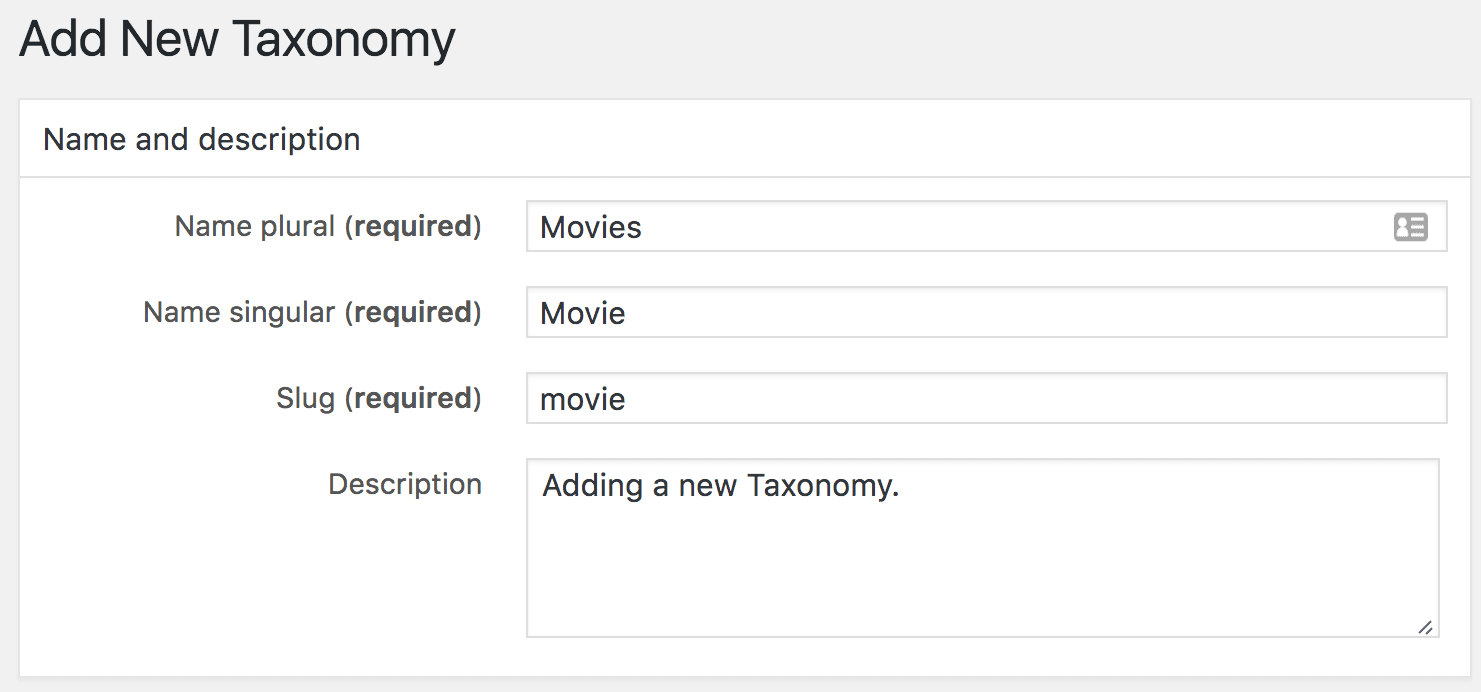
Afterwards, you’ll need to choose whether your new taxonomy will be Hierarchical or Flat:

The former enables you to create sub-categories for further organization, while the latter works just as post tags. For this example, we’ve created a hierarchical taxonomy called Movies. We’ll then assign our new custom post type to this taxonomy by ticking the box with its name under the Post Types to be Used with this Taxonomy section:

Afterward, click on the Save Taxonomy button and you’re good to go! If you want to add subcategories to your new taxonomy, you’ll be able to do so by going to your custom post type’s tab and looking for the new Movie tab within. Once you’re in, you’ll be able to add new categories by choosing a name and a slug for them:
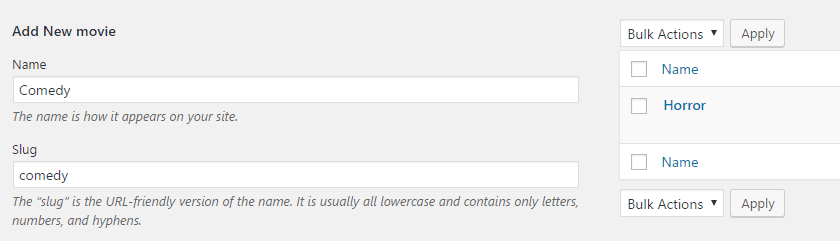
Each category you add here will be nested under the Movie taxonomy, and you’ll be able to assign posts to them from within the editor.
Step #3: Customize Your Custom Post Type’s Editor
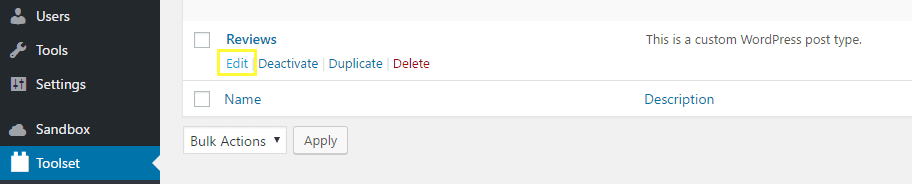
Toolset Types enables you to customize the sections that appear in the editor for any custom post type you create with it. We can access these settings by going into the Toolset > Post Types tab on your dashboard, looking for the post type you want to update, and clicking on the Edit button below it:
Once you’re in, scroll down until you find the Sections to display when editing “your post name” widget and you’ll find a list of all the available options.
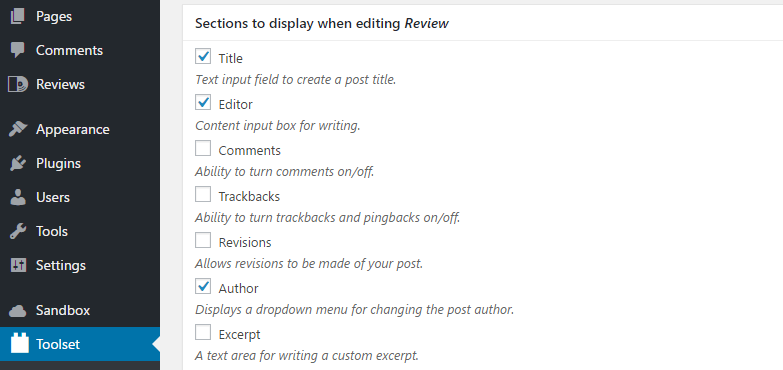
Tick on any sections that you want to enable within the editor for your custom post type and remember to save your changes when you’re done.
Step #4: Change Your New Custom Post Type’s Location
By default, Toolset Types will add a new top-level tab on your dashboard for each of your new post types, but we can change this if you want to organize things differently. To do so, you’ll need to return to the Toolset > Post Types section and edit the post type whose location you want to update.
When you’re on their settings page, scroll down until you reach the Options section and look for the one that reads show_in_menu:
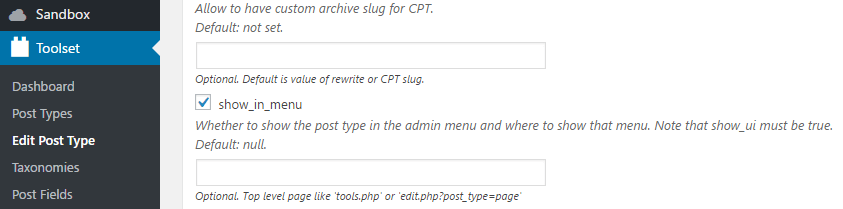
If you leave that field blank your custom post type will remain as a top level tab. To nest it within another one, you’ll need to type in the following:
edit.php?post_type=slug
For this to work, you’ll need to replace the word slug with the slug for the post type you want to nest your new one within. For example, if you wanted to add a custom post type under the Pages tab, that line would read like this:
edit.php?post_type=page
If you’re unsure what the slug for the tab you want to use as a parent is, return to the Toolset > Post Types section and open the editor for the post type in question. You’ll be able to check out what its slug is from there.
Step #5: Establish Parent/Children Relationships Between Your Custom Post Types
Last but not least, parent/children relationships are one of Toolset Types’ most exciting features. This functionality enables you to connect custom post types hierarchically and display specific categories within a specific post type’s editor.
Let’s use an example to illustrate how this works. If you wanted to create a Vintage Cars custom post type, you could use parent/children relationships to display particular car listings without leaving its editor. That way, you’d be able to manage listings more efficiently.

This can get rather tricky, and it’s something that you might not want to mess around with until you’re comfortable customizing your own post types. When you’re ready for it, the Toolset Types homepage includes thorough documentation on how to do it.
Conclusion
Custom post types can be a great addition to almost any WordPress site. After all, they enable you to manage your content more efficiently by customizing the ways that you interact with it. Plus, you don’t need to learn how to code to create your own custom post types.
Here are the five steps you need to set up your first custom post type using Toolset Types:
- Add a new custom post type.
- Create a new taxonomy and assign it to your custom post type.
- Customize your new post type’s editor.
- Change the location of your new custom post type.
- Establish parent/children relationships between your custom post types (if you want to).
Do you have any questions about how to use Toolset Types to create custom post types for WordPress? Ask away in the comments section below!
Article thumbnail image by Faber14 / shutterstock.com
The post How to Create PHP-Free Custom Post Types Using the Toolset Types Plugin appeared first on Elegant Themes Blog.