
With over a million active installs, Contact Form 7 is by far one of the most popular WordPress plugins ever. It’s popularity probably has a lot to do with the truth behind its description: “Simple but flexible.”
Contact Form 7 allows you to create multiple contact forms using nothing but simple HTML markup (which it generates for you). Once created, each form can be quickly deployed by placing its corresponding shortcode where you’d like the form to appear; in page, post, or widget area. Messages submitted via the forms are sent to the email address provided in the plugin settings and spam is combatted via support for CAPTCHA and Akismet.
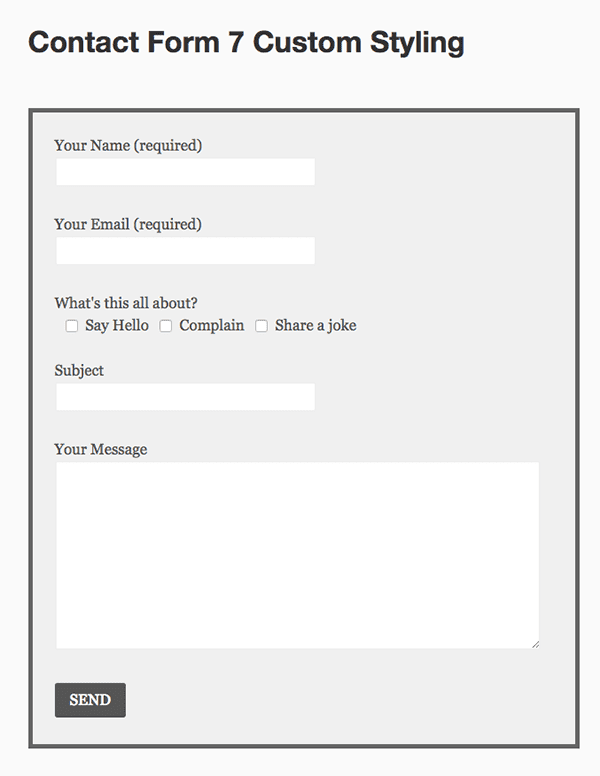
Contact Form 7 is so simple that it seems literally anyone can use it effectively. Styling too, is intended to be simple. But perhaps too simple for some. By default the Contact Form 7 plugin does not style its forms. Any styling they do have is a result of default stylings present in a WordPress theme’s style sheet.
Usually resulting in something quite basic, like this:
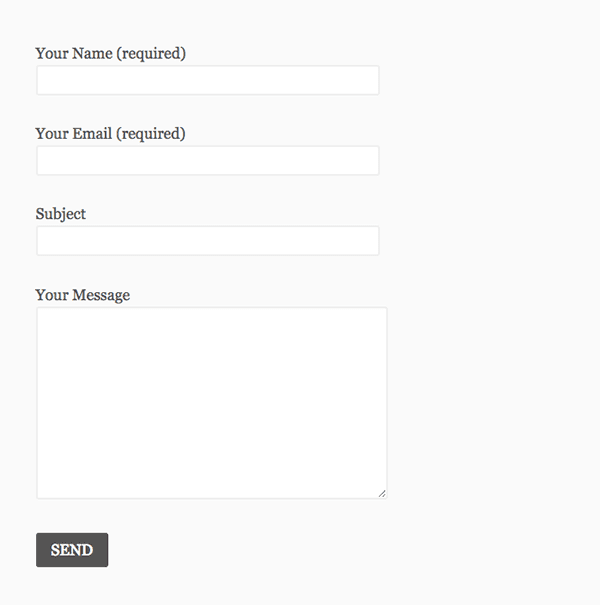
Unfortunately this kind of form, while indeed simple and flexible, may not be as beautifully designed as the other elements on one’s website. Leaving many otherwise happy users looking for alternatives to Contact Form 7 with more styling options. Thankfully though, with just a bit of CSS, no plugin alternative is necessary.
In today’s post I’m going to share a series of tips that will open up a wide variety of Contact Form 7 styling possibilities for anyone, using any theme.
How To Customize The Style Of Contact Form 7 To Match Your Website
Subscribe To Our Youtube Channel
Where to Edit Your Contact Form 7 CSS (and Why)
It’s important that when adding custom CSS you do not add it to the style sheet of either Contact Form 7 or your parent theme. Any changes or additions you make there will be overwritten as soon as the theme and/or plugin are updated.
Instead, you will want to add the CSS below to your child theme’s CSS. You can also use the custom CSS feature on Jetpack, or if your theme provides a section in its admin panel for custom CSS you can use that too.
Ok, now that we know where to place the styles we’ll be going over below, let’s get started!
How to Create Site Wide Form Styles
Let’s start by making some general edits that will apply themselves to the whole form. We can do this by using the class selector .wpcf7 and then adding styles beneath it.
(I’d also like to highly suggest that you place the commented out heading I’ve written below within your style sheet to denote where your Contact Form 7 styles begin.)
/* Contact Form 7 Styles
---------------------------------*/

.wpcf7 {

background-color: #F0F0F0;

border: 5px solid #666666;

}
After adding the above code to your style sheet, every form you create with Contact Form 7 will have the background and border styles you’ve just defined. Below is an example.
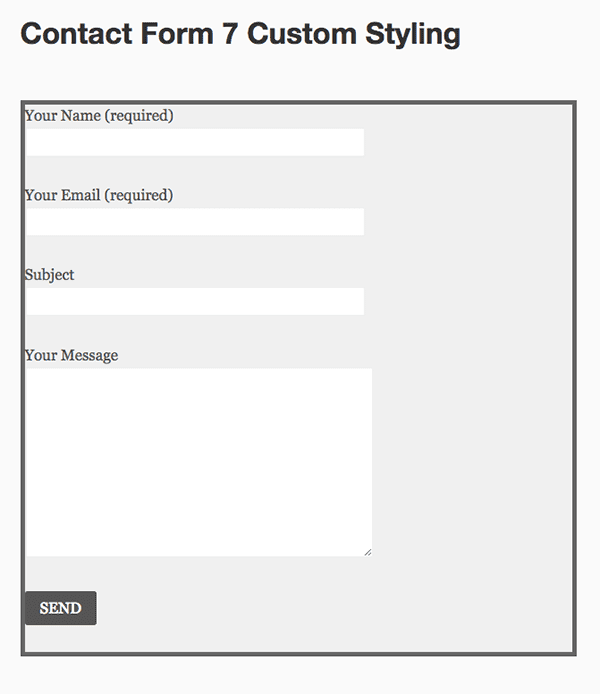
As you can see, there are some spacing issues. To fix this you’ll want to adjust the margins between the border and the inner form elements. You can do this with the code below.
.wpcf7-form {

margin-left: 25px;

margin-right: 25px;

margin-top: 25px;
On my test site, this resulted in the following:
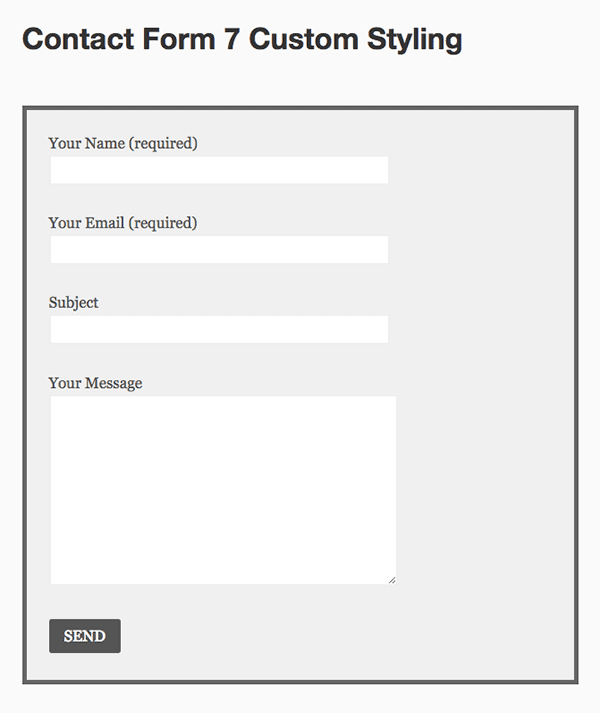
Note: these styles may affect your forms in slightly different ways due to the fact that we’re most likely working with different themes. That doesn’t mean that this code won’t work for you, only that you may have to tweak the numbers a bit to get things just right for your site.
How to Create Site Wide Form Field Styles
One of the more common requests people have when it comes to styling Contact Form 7 is how they can adjust the width of the fields. Particularly the message area which does not extend very far.
The code below will extend the message area to your desired width (when adjusted). I have set mine in the example for 95% as that is what looked best in my imagined use case. You can set it to suit your needs as well–using a percentage or a fixed pixel count.
.wpcf7-textarea {

width: 85%;

}
You can adjust the width of the other fields as well by adjusting the input class selector.
.wpcf7 input {

width: 50%;

}
If you do not want to adjust all of your input fields with the same criteria you can drill down a bit by selecting just those you are interested in. In the example below I’ve opted to just change my text fields so that my submit button is not also affected.
.wpcf7-text {
width: 50%;
}
After all of the above changes, I was able to style the form you see below.
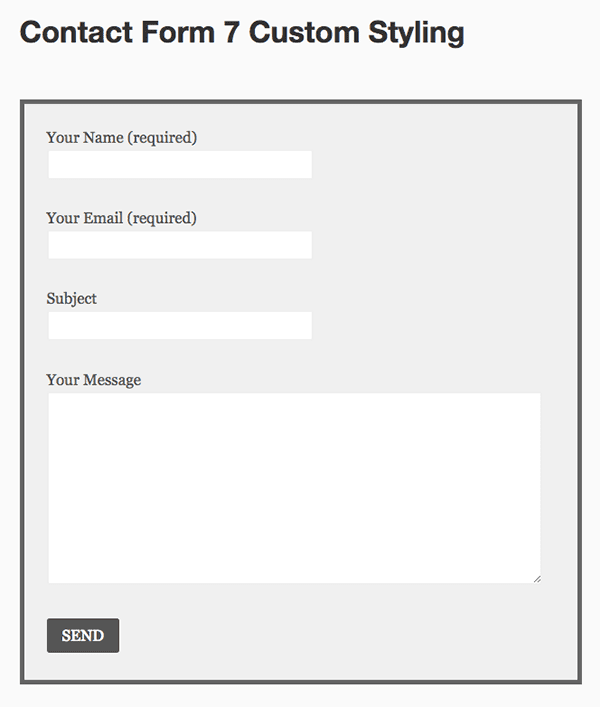
I personally didn’t want to change my button color, but I think that is most likely another common desire. So if you’d like to alter your button color you can use the CSS below to experiment.
.wpcf7-submit {

background: #555555;

color: #ffffff;

}
With these bits of CSS in place, every form created with Contact Form 7 will look like the final image above. But what happens when you want one form in particular to look different from all of the others?
How to Style a Specific Form
Getting the specific CSS ID required to make style edits to a specific form can be a bit of a bother, but it is possible with a little tinkering.
The first thing you’ll want to do is actually add the form shortcode into your site and preview it. (You’ll notice that within that shortcode there is a number for the ID–but that is not actually the full ID you will need.)
Then, using either Google Chrome’s inspect element feature or something similar in another browser, take a look at the code for the form. Using this you will find the full form ID.
In my case, the ID number in my shortcode was 4407. The full ID turned out to be wpcf7-f4407-p4405-o1. Which meant that I could make further edits, just to that specific form, by using the code below with various criteria that differed from my site-wide settings.
#wpcf7-f4407-p4405-o1 {
background-color: #333333;
border: 5px solid #0074A2;
}
How to Style Specific Fields
You can do the same thing with specific fields. Instead of tracking down a specific CSS class or ID in your browser all you have to do is add it in the form builder.
When you are generating a tag to place in the form builder you will notice that there are two options for creating an ID, a Class, or both.
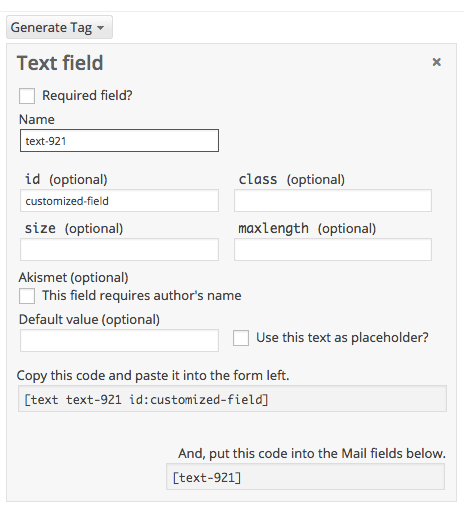
In this example I chose to create a class called customized-field. If you do the same (or something similar) you will then be able to style just that field using your new id (or class) as I have below.
#customized-field {

color: #ffffff;

border: 2px solid #333333;

}
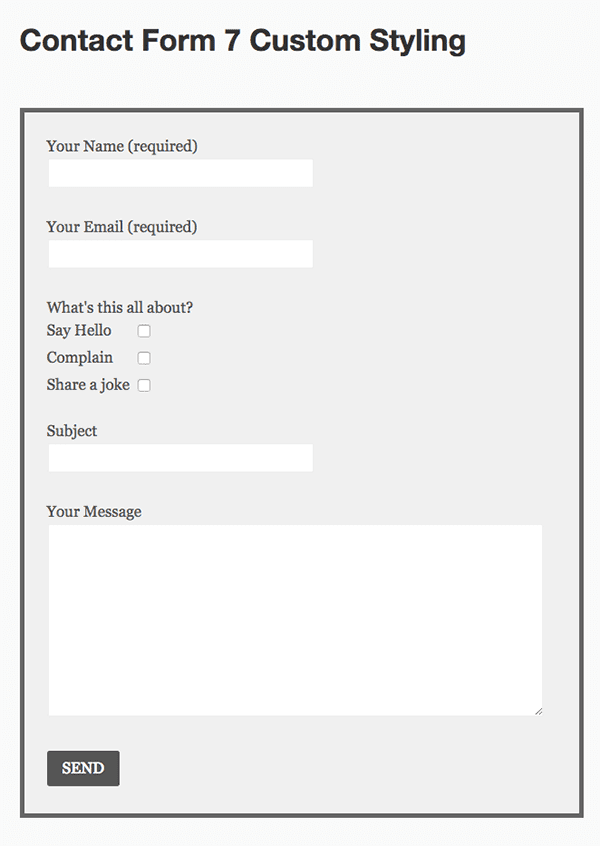
How to Create Custom Form Layouts for Checkboxes and Radial Buttons
By default, checkboxes and radiuses display from left to right.
But because of personal preference or a specific use case in which displaying them top to bottom might be preferable, you can use one of the two options below.
To display your checkboxes or radial buttons top to bottom and on the left, use this.
.wpcf7-list-item {
display: block;
}

To display your checkboxes and radial buttons top to bottom and on the right, use this. Also be sure that when you generate the tag for this option that you choose the “label first” checkbox.
.wpcf7-list-item {
display: table-row;
}

.wpcf7-list-item * {
display: table-cell;
}
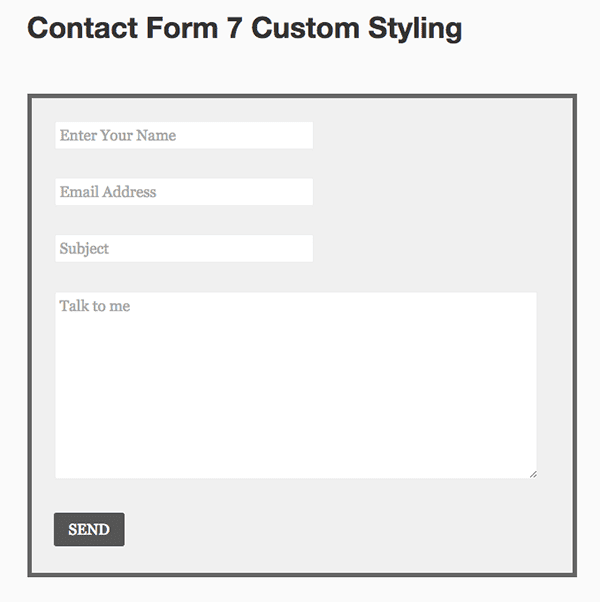
Bonus Tip: How to Remove Field Titles & Use Placeholder Text Instead
This tip does not require use of CSS like the others above, but rather a simple tweak to the markup used in the Contact Form 7 form builder.
Sometimes it isn’t necessary to have field titles, especially when you can put placeholder text within the fields themselves that explain what information belongs there.
If that’s the case on your site, then all you have to do is delete the titles in the form builder and add placeholding text like I have done in the example below.
<p></p>

<p>[email* your-email placeholder "Email Address"]</p>

<p></p>

<p>[textarea your-message placeholder "Talk to me"]</p>
The result is a cleaner form with less clutter.
In Conclusion
I hope I’ve shown in the examples above that the Contact Form 7 plugin is highly customizable. True, it does require a bit of tinkering but for a free plugin that might be expected.
I think the lack of styling options by default is a big part of why the plugin works so well for so many. So it’s only fair that anyone getting a lot of value from it who wants more style to commit a few minutes to dropping in a version of one of the code example above.
Do you have any Contact Form 7 style tips of your own? Any favorites you’ve used that you’d like to share? Drop us a line in the comments below!
Article Thumbnail via Dmitry Lemon5ky // shutterstock.com
The post How To Customize The Style Of Contact Form 7 To Match Your Website appeared first on Elegant Themes Blog.