

A welcome gate is an effective way to boost conversions of any call to action on your site. In fact, welcome gates are a popular feature with plugins like OptinMonster for creating high-converting email optins. The basic idea behind a welcome gate is to hide the content of the webpage with a fullscreen call to action. This forces the user to interact with the CTA before viewing the intended page.
In this tutorial, we are going to show you a quick and easy way to add a custom welcome gate to your web page without using a plugin. This may come in handy for boosting the conversions of your CTAs on landing pages.
Check it out!
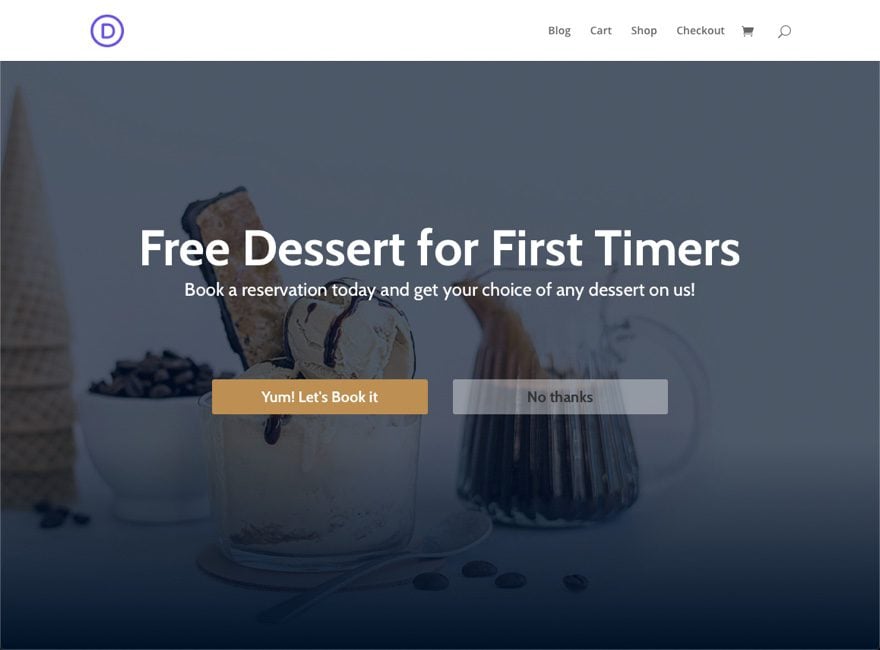
Sneak Peek
Here is a quick look at the welcome gate we will build in this tutorial.
Download the Layout for FREE
To lay your hands on the designs from this tutorial, you will first need to download it using the button below. To gain access to the download you will need to subscribe to our Divi Daily email list by using the form below. As a new subscriber, you will receive even more Divi goodness and a free Divi Layout pack every Monday! If you’re already on the list, simply enter your email address below and click download. You will not be resubscribed or receive extra emails.
@media only screen and ( max-width: 767px ) {.et_bloom .et_bloom_optin_1 .carrot_edge.et_bloom_form_right .et_bloom_form_content:before, .et_bloom .et_bloom_optin_1 .carrot_edge.et_bloom_form_left .et_bloom_form_content:before { border-top-color: #ffffff !important; border-left-color: transparent !important; }
}.et_bloom .et_bloom_optin_1 .et_bloom_form_content button { background-color: #f92c8b !important; } .et_bloom .et_bloom_optin_1 .et_bloom_form_content .et_bloom_fields i { color: #f92c8b !important; } .et_bloom .et_bloom_optin_1 .et_bloom_form_content .et_bloom_custom_field_radio i:before { background: #f92c8b !important; } .et_bloom .et_bloom_optin_1 .et_bloom_border_solid { border-color: #f7f9fb !important } .et_bloom .et_bloom_optin_1 .et_bloom_form_content button { background-color: #f92c8b !important; } .et_bloom .et_bloom_optin_1 .et_bloom_form_container h2, .et_bloom .et_bloom_optin_1 .et_bloom_form_container h2 span, .et_bloom .et_bloom_optin_1 .et_bloom_form_container h2 strong { font-family: “Open Sans”, Helvetica, Arial, Lucida, sans-serif; }.et_bloom .et_bloom_optin_1 .et_bloom_form_container p, .et_bloom .et_bloom_optin_1 .et_bloom_form_container p span, .et_bloom .et_bloom_optin_1 .et_bloom_form_container p strong, .et_bloom .et_bloom_optin_1 .et_bloom_form_container form input, .et_bloom .et_bloom_optin_1 .et_bloom_form_container form button span { font-family: “Open Sans”, Helvetica, Arial, Lucida, sans-serif; } p.et_bloom_popup_input { padding-bottom: 0 !important;}

Download For Free
Join the Divi Newlsetter and we will email you a copy of the ultimate Divi Landing Page Layout Pack, plus tons of other amazing and free Divi resources, tips and tricks. Follow along and you will be a Divi master in no time. If you are already subscribed simply type in your email address below and click download to access the layout pack.
You have successfully subscribed. Please check your email address to confirm your subscription and get access to free weekly Divi layout packs!
To import the layout to your page, simply extract the zip file and drag the json file into the Divi Builder.
Letís get to the tutorial shall we?
What You Need to Get Started
To get started, you will need to do the following:
- If you haven’t yet, install and activate the Divi Theme.
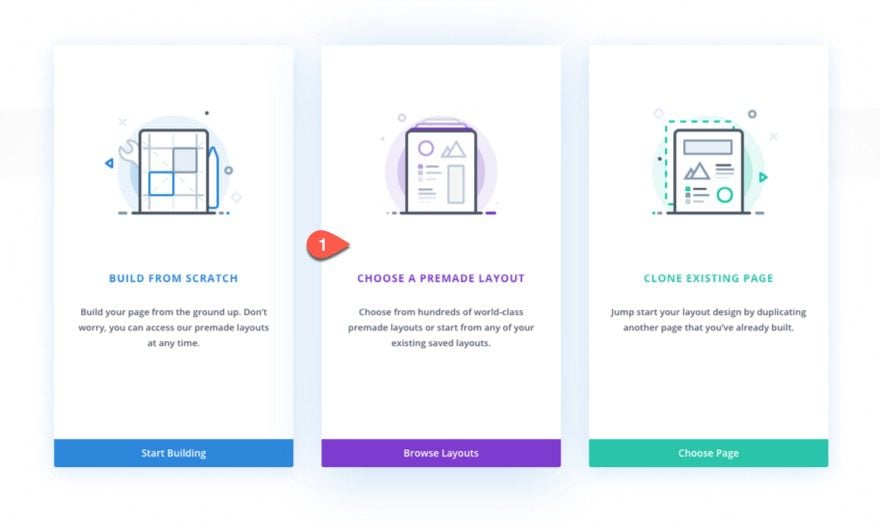
- Create a new page in WordPress and use the Divi Builder to edit the page on the front end (visual builder).
- Select the option “Choose a Premade Layout”.
- Select the Bistro Layout Pack and, from the Load from Library popup, select the Bistro Landing Page Layout and click the “Use This Layout” Button to import the layout to the page.
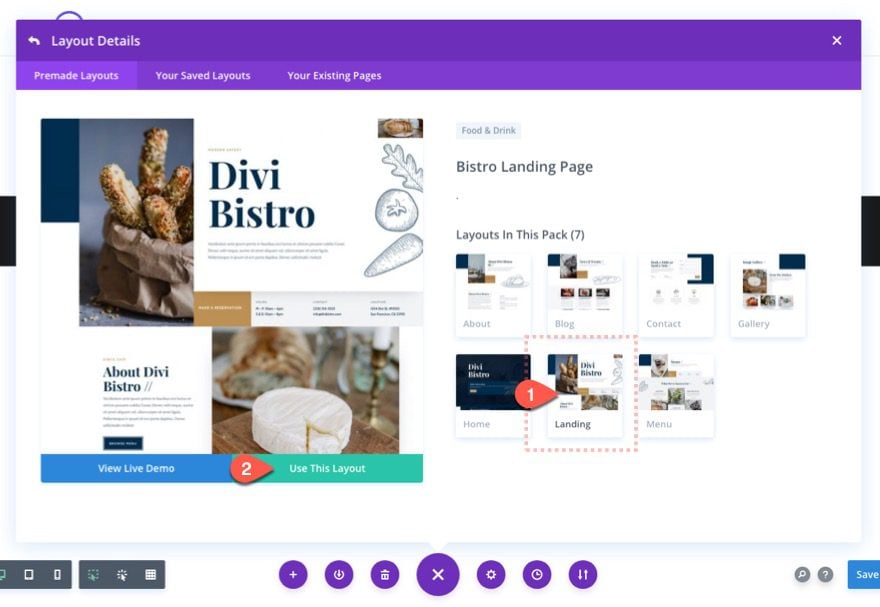
After that, you have a landing page to use when creating the custom welcome gate.
Creating the Welcome Gate
Add New Section
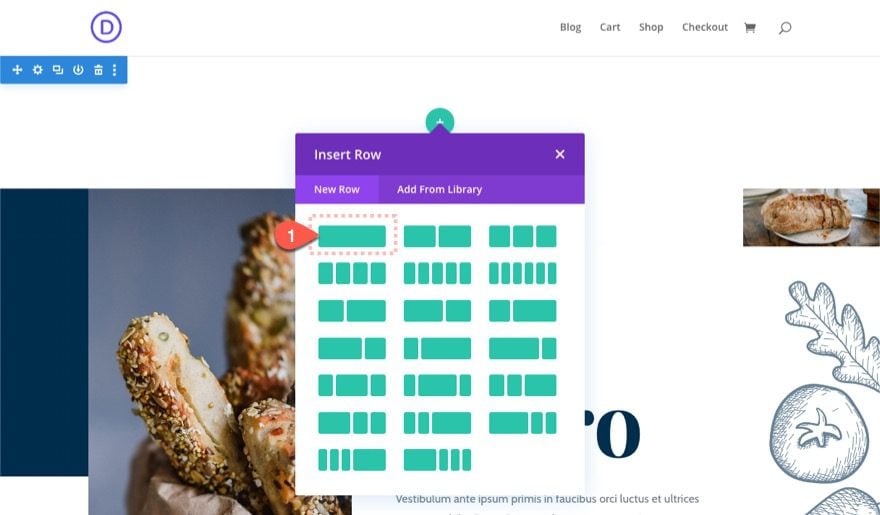
First , create a new regular section and drag it to the top of the page. Then add a one column row to the section.
Design the Section
Before we start adding any modules/content to the section, let’s add some custom design so that we have a nice canvas to work from going forward.
Background
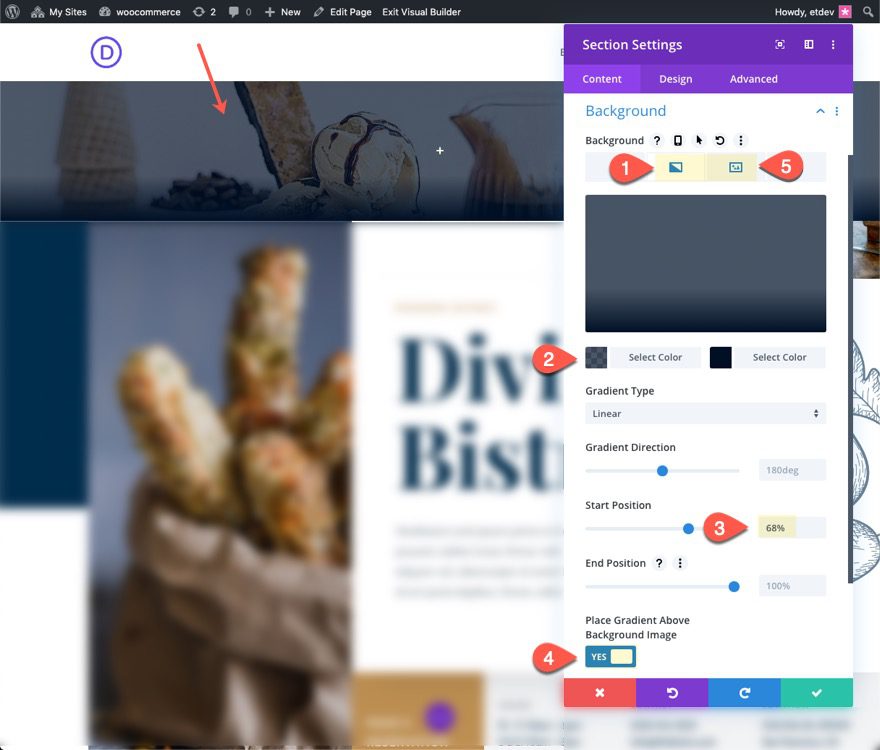
To start, add a background gradient and image as follows:
- Background Gradient Left Color: rgba(0,17,38,0.7)
- Background Gradient Right Color: #001126
- Start Position: 68%
- Place Gradient Above Background Image: YES
- Background Image: [insert image]
Padding and Animation
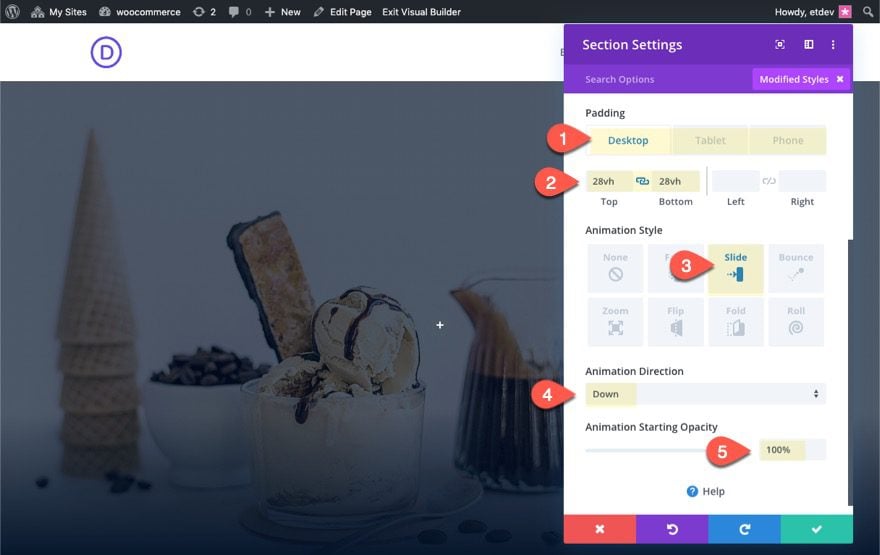
Next, jump over to the design tab and update the following padding and animation settings:
- Padding (desktop): 28vh top, 28vh bottom
- Padding (tablet): 18vh top, 18vh bottom
- Padding (phone): 10vh top, 10vh bottom
- Animation Style: Slide
- Animation Direction: Down
- Animation Starting Opacity: 100%;
Position the Welcome Gate Section
Now we are ready to give our section a fixed position with a higher z index so that the welcome gate will fill the browser screen until the user clicks the “No thanks” button.
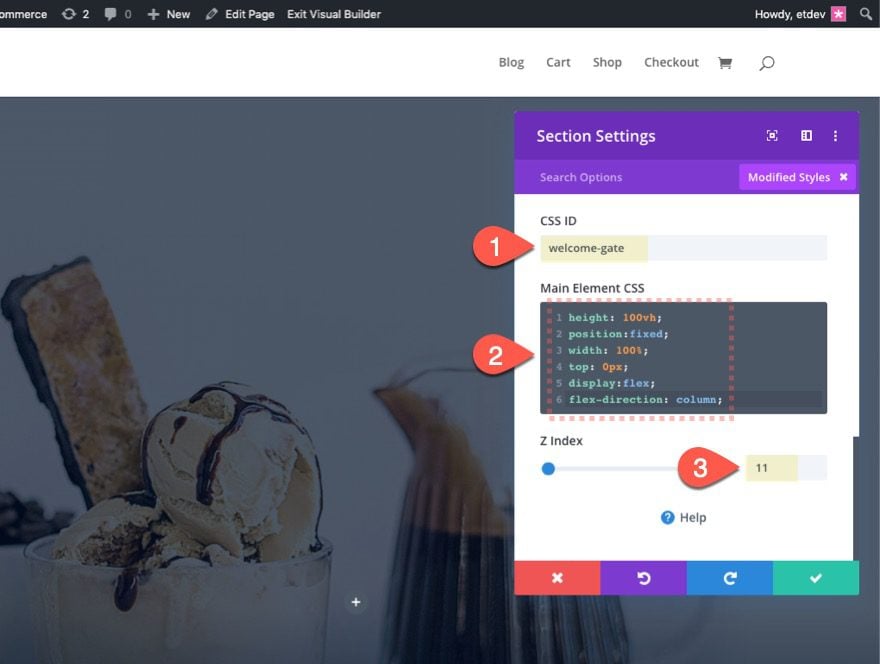
Before we add our positioning css, let’s add a custom CSS ID as follows:
- CSS ID: welcome-gate
This will be used to target the section with jQuery to move it upward out of view when the user clicks the “No Thanks” button.
Add the following custom CSS to the main element:
height: 100vh;
position:fixed;
width: 100%;
top: 0px;
display:flex;
flex-direction: column;
Then update the Z Index as follows:
- Z Index: 11
NOTE: if you want the welcome gate to hide the header as well, you can add a higher Z Index like “99999”.
Creating the Welcome Gate Content
Now that our section is ready, let’s start adding the welcome gate content. You can add any content you want to this welcome gate. For now, let’s create a simple CTA with two buttons. The button on the left will be the one you want users to click on. The button on the right will be the “No Thanks” button that will close the Welcome Gate.
Text Module
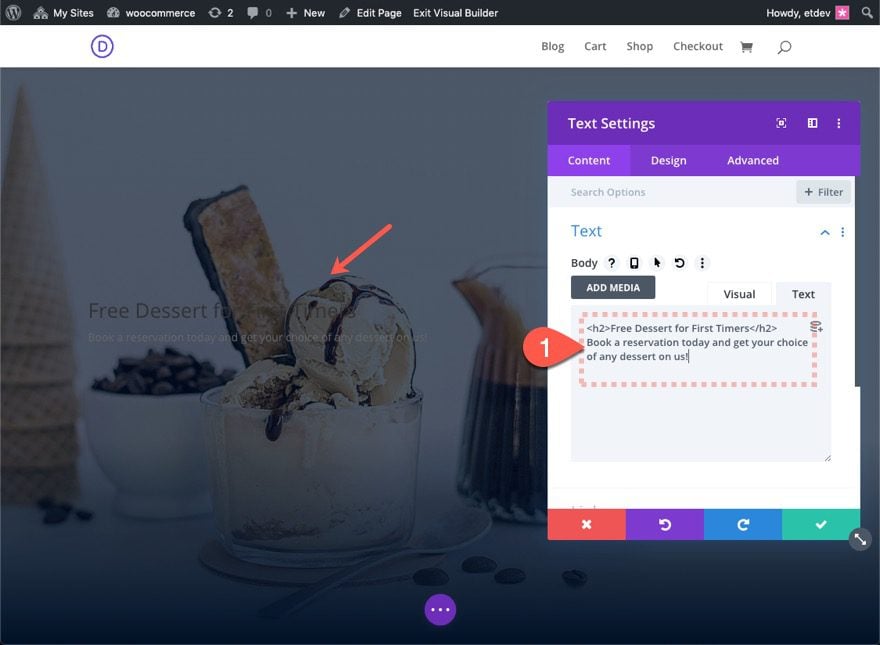
Inside the one column row, add a new text module with the following content:
Free Dessert for First Timers
Book a reservation today and get your choice of any dessert on us!
Text Design
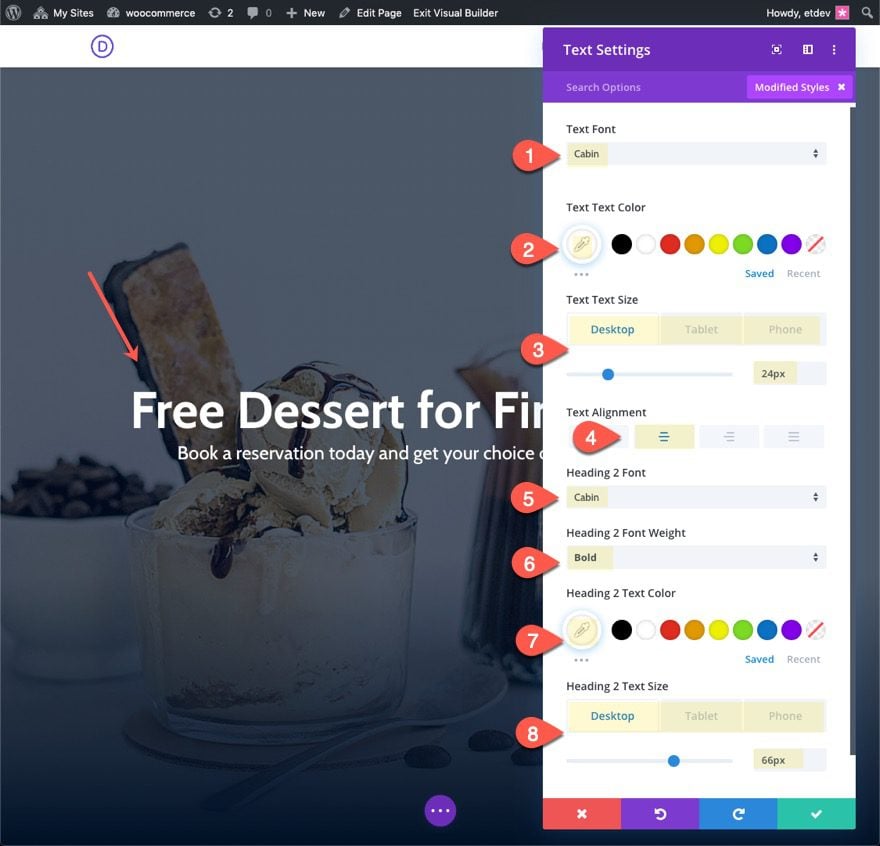
Then update the text design as follows:
- Text Font: Cabin
- Text Text Color: #ffffff
- Text Text Size: 24px (desktop), 18px (phone)
- Text Alignment: Center
- Heading 2 Font: Cabin
- Heading 2 Font Weight: Bold
- Heading 2 Text Color: #ffffff
- Heading 2 Text Size: 66px (desktop), 26px (tablet)
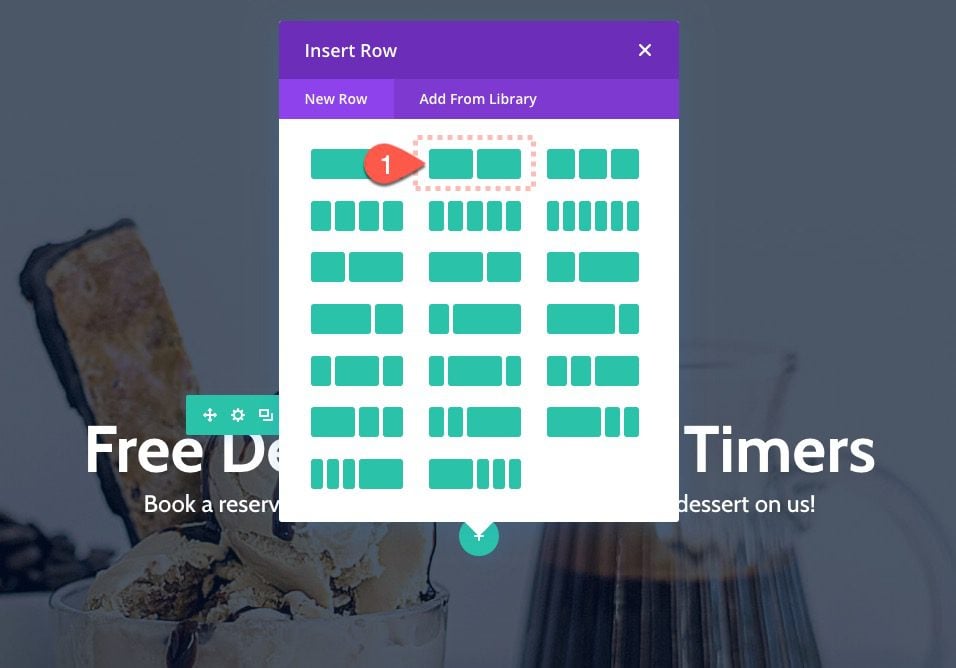
Add Two Column row
For our buttons, let’s create a two column row under the text.
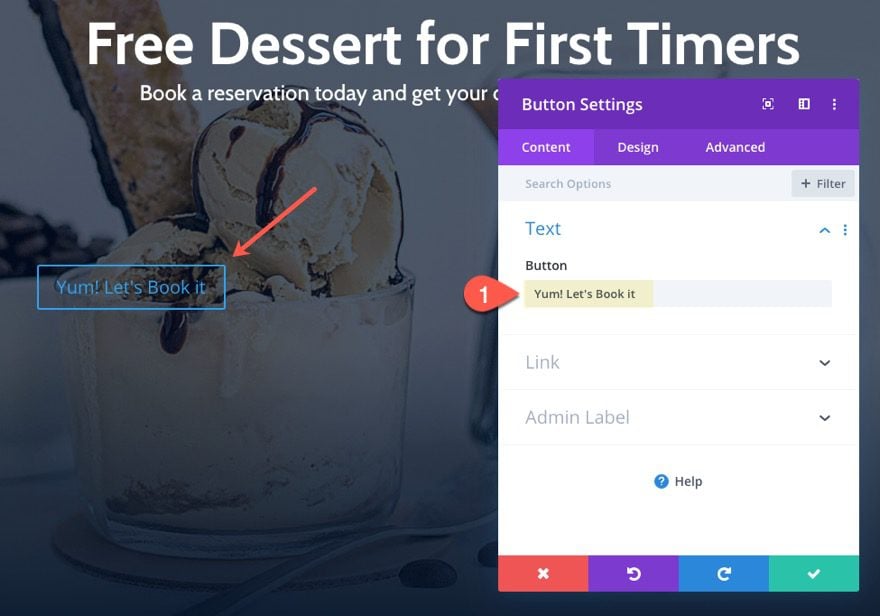
Add Left Button
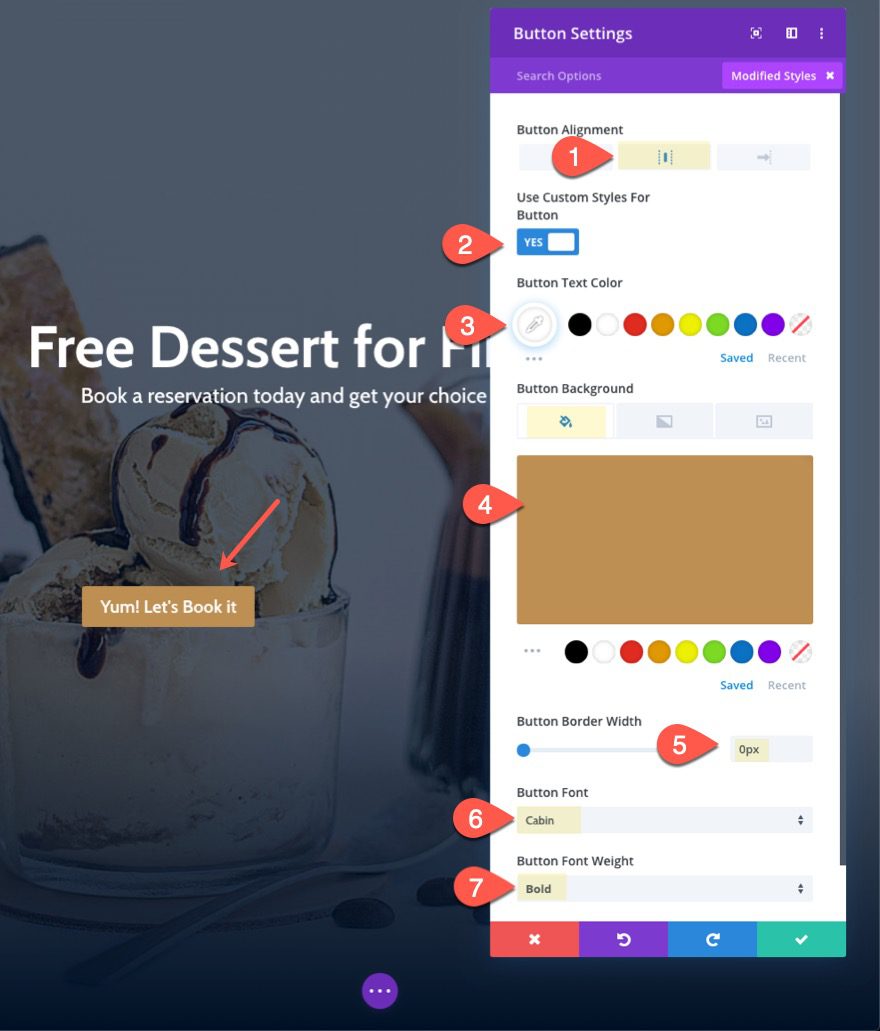
In the left column, add a button module and update the settings as follows:
- Button Text: “Yum! Let’s Book it”
- Button Alignment: center
- Button Text Color: #ffffff
- Button Background Color: #bd8f52
- Button Border Width: 0px
- Button Font Weight: Bold
Then add the following custom CSS to make the button span the fullwidth of the column:
display: block !important;

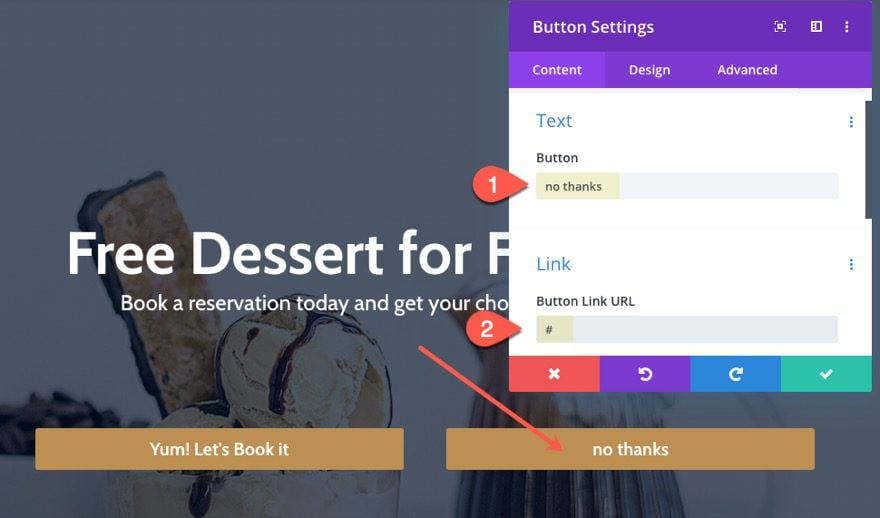
Add Right “No Thanks” Button
To create the “No Thanks” button, first copy the left button and paste it in the right column.
Then update the content as follows:
- Button Text: no thanks
- Button Link URL: # (this is important so that the button doesn’t refresh the page)
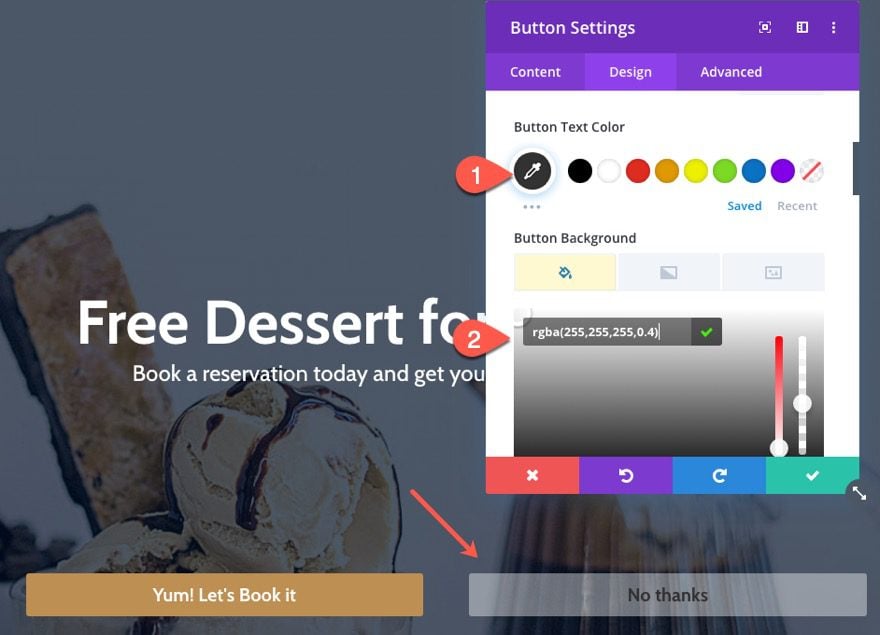
Then update the button design as follows:
- Button Text Color: #333333
- Button Background Color: rgba(255,255,255,0.4)
Then add the following CSS Class to the no thanks button:
- CSS Class: nothanks
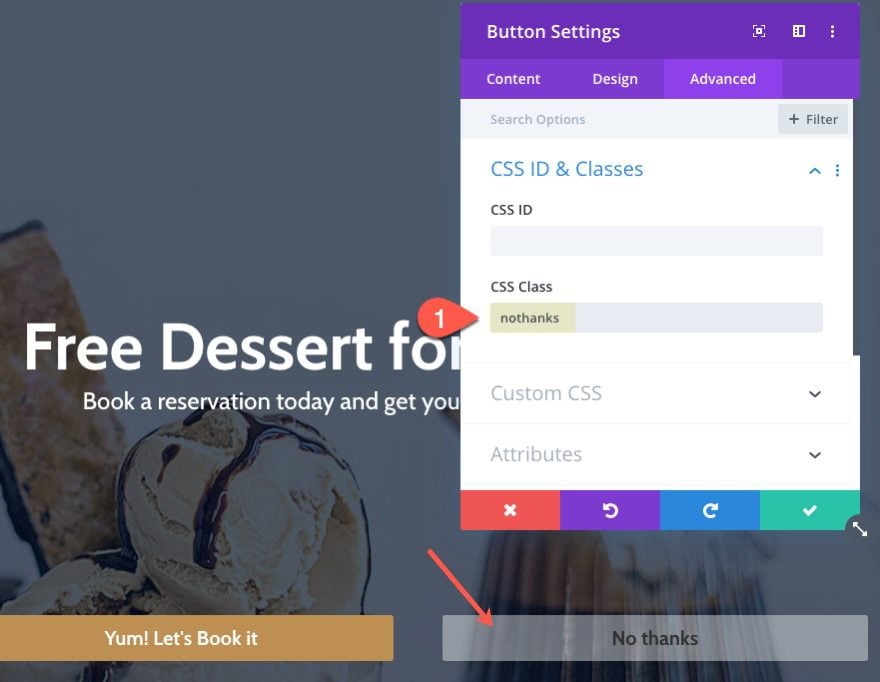
This will be our selector in the jQuery that closes the welcome gate on click.
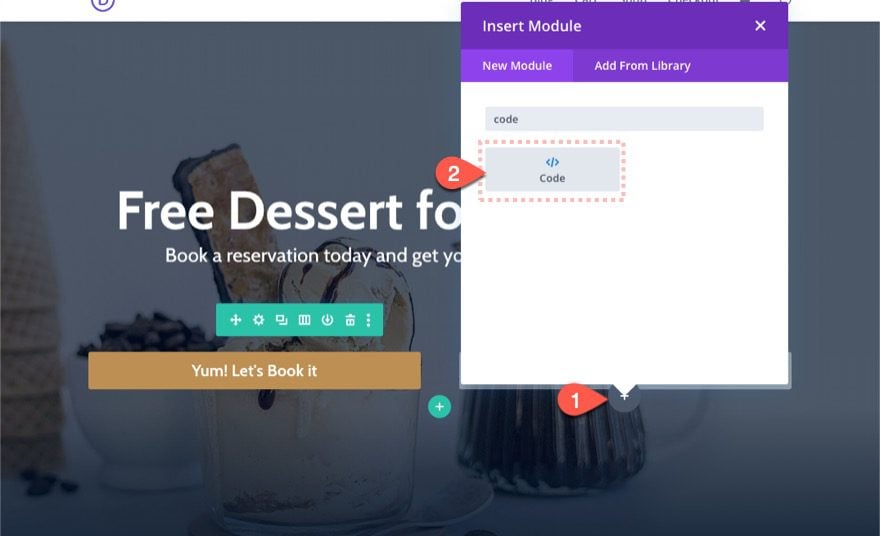
Add the Custom Code
Now let’s add the custom code snippet needed to add the functionality that closes the welcome gate when a user clicks the “No Thanks” button. To do this, add a code module below the no thanks button module.
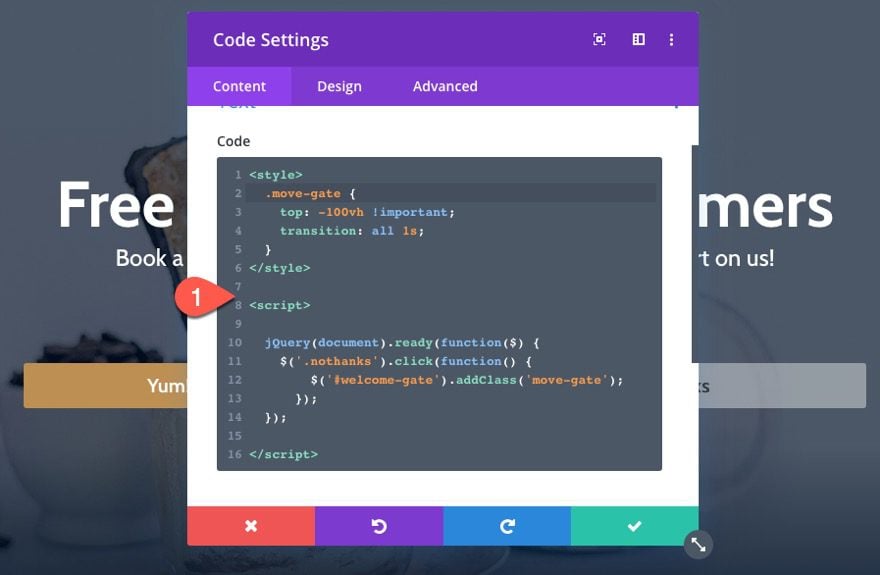
Then paste the following code into the code module code box:
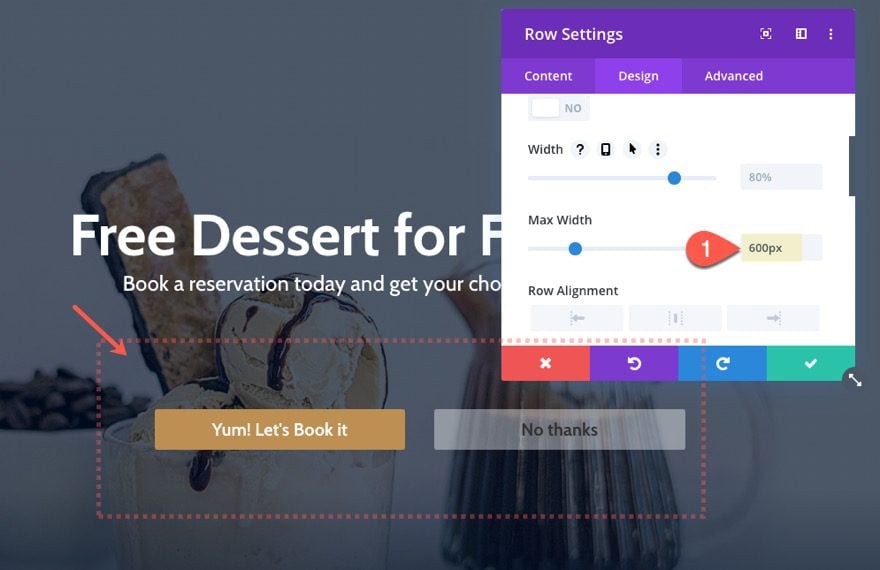
For one last touch, let’s bring the buttons closer together by giving the row containing our buttons a max width. Open the row settings and update the following:
- Max Width: 600px
Final Result
Here is what the final design looks like.
And here is what the welcome gate looks like when refreshing the page.
And here what the welcome gate looks like on mobile.
Final Thoughts
Hopefully this welcome mat will be a helpful addition to your page or template. Divi makes it easy to design and position the welcome mat using the visual builder and it only takes a small snippet of jQuery to complete the functionality. So if you are looking for a quick welcome mat for your page without using a plugin, this should come in handy.
I look forward to hearing from you in the comments.
Cheers!
.inline-code{padding: 0px 4px; color: crimson; font-family: Monaco,consolas,bitstream vera sans mono,courier new,Courier,monospace!important}
The post How to Design a Welcome Gate for Your Page in Divi appeared first on Elegant Themes Blog.