
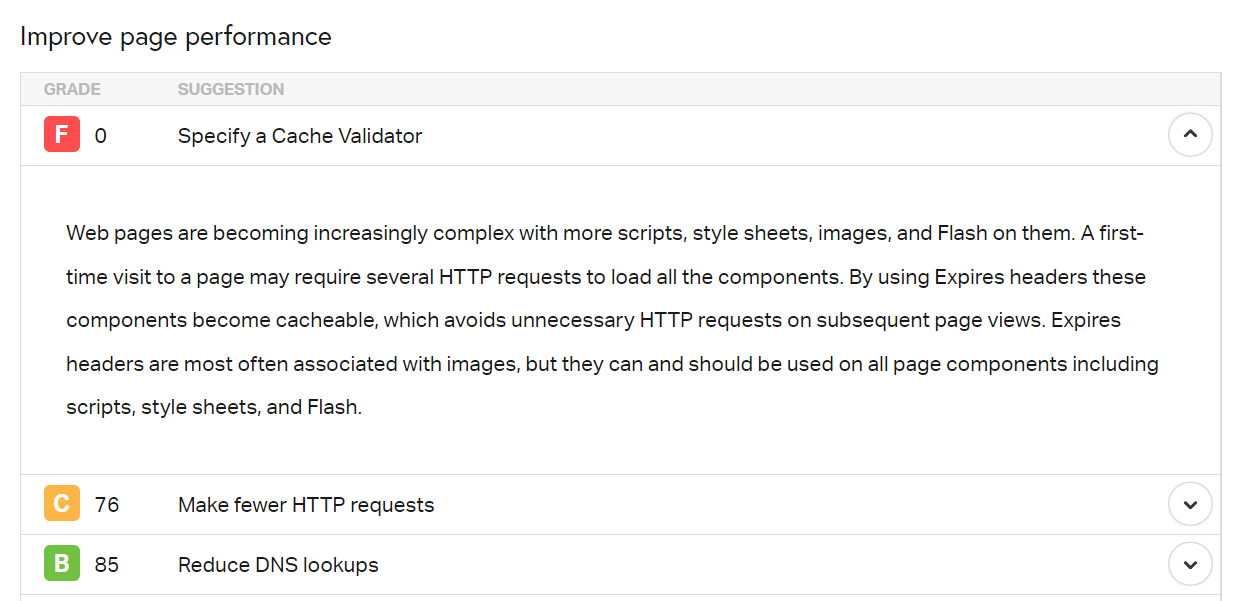
If you test your website’s performance using GTmetrix or Pingdom, you may run into an error that says to “specify a cache validator.” That message means that you’re not leveraging browser caching to its full extent. Unfortunately, this can negatively affect your site’s performance.
In this article, we’ll talk about what the “specify a cache validator” error means. We’ll also show you how to fix it in WordPress and optimize your website’s performance. Let’s get right to it!
What Does “Specify a Cache Validator” Mean?
By enabling caching, you can instruct visitors’ browsers or “clients” to store critical files locally when they visit your website. That way, users won’t need to reload the entire site and its resources each time they open your page.
Caching is an incredibly common practice among websites. It’s also one of the most effective ways to improve your site’s performance. However, a proper implementation requires a caching “policy.”
That policy means including caching headers that provide explicit instructions on the following:
- How to validate the cached resources
- What resources the client should cache
- How long the client should cache resources for
- How the client should look for changes in cached resources
The “specify a cache validator” error means that your website doesn’t have the corresponding caching headers in its responses. That lack of instructions doesn’t mean that caching won’t work. However, it won’t work as efficiently as it could:
If you run into this error when analyzing the performance of your WordPress website, that means your website might not be loading as quickly as possible. However, you can fix this problem by using the appropriate caching headers.
How to Specify a Cache Validator on WordPress (3 Methods)
There are several types of cache validators that you can implement in your website’s headers. The server automatically adds them in some cases, such as with last-modified or ETag validators.
If you’re running into the “specify a cache validator” error, the most likely culprits are missing cache-control or expires headers. Let’s cover how to add both of them to WordPress.
1. Add Cache-Control Headers Manually
Cache-control headers enable you to specify the cache’s duration or “length” in seconds. You can also use these headers to indicate which file types the length applies to. The structure of the header itself will vary depending on which web server software you’re using.
For Apache servers, you’ll need to edit the .htacess file. You can find it within your WordPress root folder. However, we recommend accessing it via File Transfer Protocol (FTP).
Open the .htaccess file and add the following code snippet, then customize it:
Header set Cache-Control "max-age=604800, public"
That code indicates the cache length for the filetypes within the filesMatch tag. Depending on which elements you want to cache, you can add or remove filetypes.
If you’re using NGINX, you’ll need to modify the server’s primary config file. You can find it within the /etc/nginx directory.
Open the file and add the following code to it:
location ~* .(jpg|jpeg|png|gif|js|css)$ {
add_header Cache-Control "public";
}
Save the changes to your file and close it. We also recommend adding expires headers before testing your website’s performance again.
2. Add Expires Headers Manually
Expires headers are somewhat outdated types of cache validators. In fact, cache-control headers now supersede them. Most modern browsers will look for cache-control headers first, but you can indicate both validators to cover your bases.
Adding expires headers manually works similarly to cache-control entries in both Apache and NGINX. To add expires headers in Apache, you’ll need to edit the .htaccess file.
Here’s an example of a header that you can copy, and we recommend adding it to the bottom of the file to avoid conflicts:
## EXPIRES HEADER CACHING ##

ExpiresActive On
ExpiresByType image/jpg "access 1 year"
ExpiresByType image/jpeg "access 1 year"
ExpiresByType image/gif "access 1 year"
ExpiresByType image/png "access 1 year"
ExpiresByType text/css "access 1 month"
ExpiresDefault "access 7 days"

## EXPIRES HEADER CACHING ##
Expires headers indicate specific expiration dates for each file type. If you don’t specify a date for a file type, it’ll use the ExpiresDefault value.
For NGINX servers, you’ll need to modify the primary config file. Here’s what an expires header looks like in NGINX:
location ~* .(png|jpg|jpeg|gif)$ {
expires 7d;
add_header Cache-Control "public";
}
Save the changes to whichever file you’re using, and that’s it. Go test your website’s performance again and see if the “specify a cache validator” error persists.
3. Use a WordPress Caching Plugin
Finally, you might consider using a plugin to specify cache validators. Some of the most popular WordPress caching plugins enable you to configure expires and cache-control headers for your site without touching any code.
The downside of using a caching plugin is that many web hosts disallow them. In fact, many managed web hosts, in particular, often won’t let you use caching plugins because they manually configure caching for their users for optimum performance.
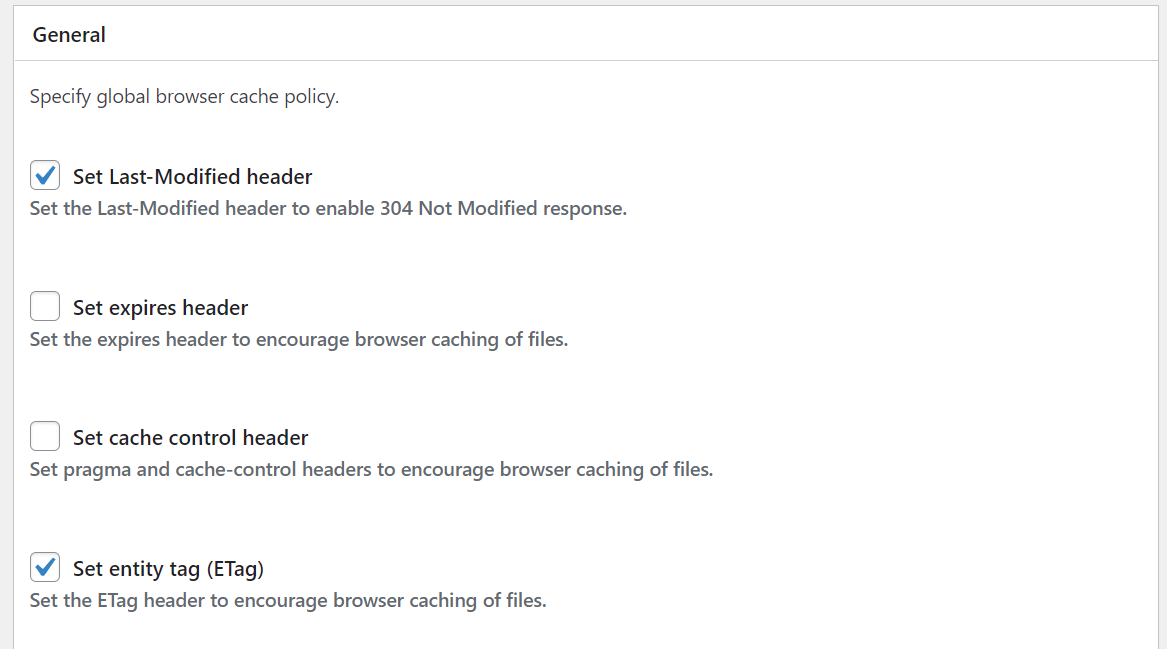
Most caching plugins will automatically configure your website to use ETag or Last-Modified headers. If they don’t, you can default to cache-control and expires validators.
W3 Total Cache, for example, gives you complete control over which type of cache headers you can use:
If your web host allows you to use caching plugins, we recommend exploring multiple options to see which one you feel more comfortable with. Alternatively, you can specify cache validators manually (it’s not that difficult!).
Conclusion
Caching is one of the most efficient ways to decrease loading times for your users. Repeat visitors will benefit from good caching policies since loading times will improve with locally stored files. However, you won’t get the best website performance if you don’t configure a specific caching policy.
There are several ways to specify a cache validator in WordPress if your server doesn’t do so by default (which is relatively common). Depending on your host and site needs, either adding cache-control headers manually, adding expires headers manually, or using a caching plugin will solve your problems. If none of these do, it is time to contact your host’s support for more in-depth assistance.
Do you have any questions about how to specify a cache validator in WordPress? Let’s talk about them in the comments section below!
Featured image via apghedia / shutterstock.com
The post How to Fix the “Specify a Cache Validator” Error appeared first on Elegant Themes Blog.