
You can create almost any type of website you want using WordPress. However, you can’t use it to build simple static HTML websites. In some cases, that’s all you need, and you may end up needing to use another platform to achieve it.
Fortunately, there’s very little you can’t do with WordPress plugins. In this article, we’ll talk about when it makes sense to use simple static WordPress pages. We’ll also introduce you to a plugin that enables you to generate static WordPress pages and discuss how to host them.
Let’s go!
Why You Might Want to Use a Simple Static Website
Before we dive any further, let’s talk about what static pages are. We say a page is ‘static’ when it doesn’t load any dynamic content and it’s made up of only HTML, CSS, and potentially some JavaScript. In a lot of cases, people associate static pages with overly simple designs, but you can do a lot just with HTML and CSS.
WordPress, in contrast, only generates dynamic pages, no matter how simple your designs are. For example, by default your latest posts are featured on your homepage. To achieve this, it uses something called the WordPress ‘loop’. The loop looks for the latest posts you published and lists them in chronological order:

The fact that WordPress only generates dynamic pages isn’t a downside. Far from it, as it enables you to create almost any type of site you want, from simple to complex projects. However, there are cases when you might want to use simple static pages instead. For example:
- It can be better for security purposes. With static pages, your server doesn’t need to ‘render’ your site each time someone visits it. Instead, it just sends them simple HTML and CSS, so it’s harder to exploit your website.
- Static pages tend to be faster. Static pages generally load faster since your server doesn’t need to generate them on the fly.
- They’re less prone to errors. WordPress is very user-friendly, but errors can still occur. With static pages, most of these, such as database connection errors, won’t be a problem.
While static pages have clear benefits, it’s no coincidence the web is steadily moving towards more and more sites using Content Management Systems (CMS) instead of building pages from scratch. This is because dynamic pages enable you to implement many more advanced features.
Let’s look at a quick example. With a static blog, you’d need to update your homepage every time you create a post. That means adding a new blurb, featured image, and more for every single update. WordPress, on the other hand, does all that heavy lifting in the background thanks to the loop.
However, if you want to set up a website you won’t need to update often, static pages will work great. Likewise, sites with very simple functionality, such as small portfolios or online archives, might be better off with a static approach.
The downside is you usually wouldn’t be able to use WordPress to create those sites. With Divi, it might take you only a few hours to set up a professional looking website with a couple of pages. However, they wouldn’t be static. Fortunately, there’s a plugin that can help.
Introducing the WP Static HTML Output Plugin

The WP Static HTML Output plugin has been around for a while, and for good reason. This plugin enables you to generate fully static copies of your entire WordPress website and to deploy them to other platforms.
On top of transforming your WordPress pages into static copies, the plugin can also replace all its internal links. In practice, this enables you to use WordPress to create your website in a local test environment, and then deploy it on your hosting platform of choice.
WP Static HTML Output also packs all your media files when you export your website. You can also use it to store a past copy of your site as a backup.
However, keep in mind it’ll run into trouble if you try to use it to replicate dynamic features, such as comments sections, log-in forms, and more. Generally speaking, if there’s functionality on your site that requires user input or could be considered dynamic, it won’t work when you translate it into a static page, so bear that in mind while considering whether to use the plugin.
Key Features:
- Create fully static copies of your entire WordPress website.
- Export your content alongside all your media files.
- Replace all your internal links so you can deploy your static WordPress pages to a live environment.
- Store copies of past exports as backups.
- Rewrite the paths for your WordPress content to hide the fact your website uses the platform.
Price: Free, with a premium version available | More Information
How to Generate a Static HTML Copy of Your WordPress Website (And Host It Using GitHub)
In this section, we’re going to show you how to deploy your static WordPress pages to GitHub. GitHub enables you to host static pages for free, which makes it a decent option if you want to use it as a no-frills host for static pages.
Step #1: Generate a Static HTML Copy of Your Site
For this step, we’re going to use the WP Static HTML Output plugin that we introduced earlier. Go ahead and install and activate it on your website now. Once that’s done, go to the Tools > WP Static HTML Output tab on your site.
Before you generate a static copy of your site, let’s go over a few settings the plugin offers. First off, you’ll see an option to state the URL you intend to use for your site once it goes live. Keep in mind, your static pages won’t display properly unless you enter the correct URL here since your pages won’t be able to pull the CSS they require to look pretty:

This setting will take all your internal links and replace them with the URL you set. Earlier, we talked about how you can use this feature to create sites locally and deploy them in a live environment. As such, you might want to check out our tips on how to choose the perfect domain name.
Moving on, you can enable settings to export your website as a zip file, which you can download from your dashboard. Otherwise, the plugin will just export your new files to the wp-content/uploads/ directory. Here you can see that directory with a couple of full exports of our site. You can also choose whether you want to retain the last export you create, to use as a backup:

If you want to change the folder to which the plugin exports your pages, you can do so under the Override Output Directory section:

Finally, there are options to replace your default WordPress paths with names of your choosing. The idea is to obscure the fact your site was built with WordPress:
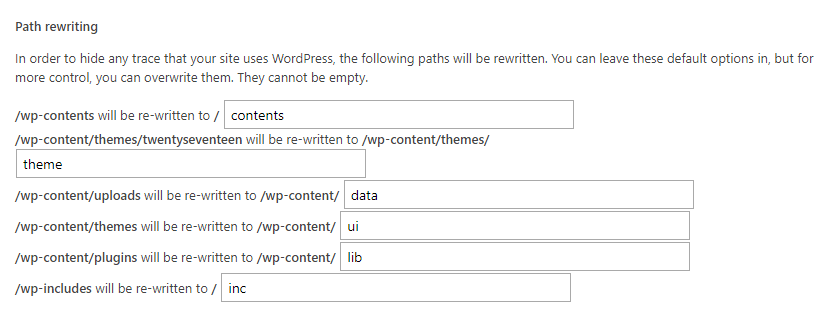
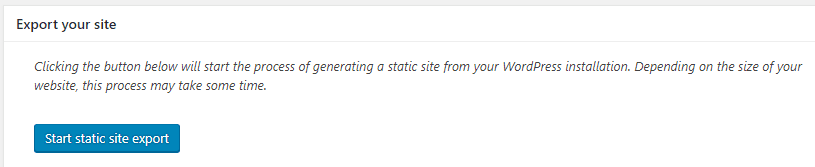
Whether to use this feature is up to you since it won’t affect your exported page’s functionality in any way. Once you’re ready to create static copies of your WordPress pages, click on the Start static site export button:
The plugin will do its thing now and you can track its progress through the Export Log at the bottom of the tab:

Once the process is finished, you should see a line within the Export Log near the very top that says ZIP CREATED including a link to its right:

If you copy and paste that link on your navigation bar, you’ll be able to download a static copy of your website directly, so you don’t have to use FTP. Once you have your static site, it’s time to test and publish it.
Step #2: Upload Your Static Website to GitHub
At this point, you should have all the static files created from your WordPress website. It’s now time to find somewhere to host them, so you can check if they’re working as intended.
Let’s do this using GitHub, which enables you to set up simple static pages through repositories. If you haven’t used GitHub before, or need a reminder, here’s a quick guide to get you started with the platform.
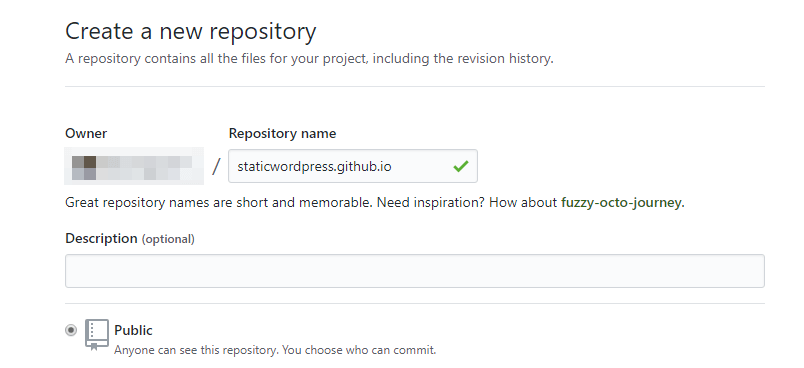
Once you’ve set up a GitHub account, you’ll need to create a new repository. Type a description if you want to and leave your repository set to Public, then click the Create repository button:
Once your repository is ready, you need to upload your WordPress files to it. For this, you can use the command line if you’re familiar with git version control or use GitHub’s desktop app. We’ll use the desktop approach here since it’s easier to follow along.
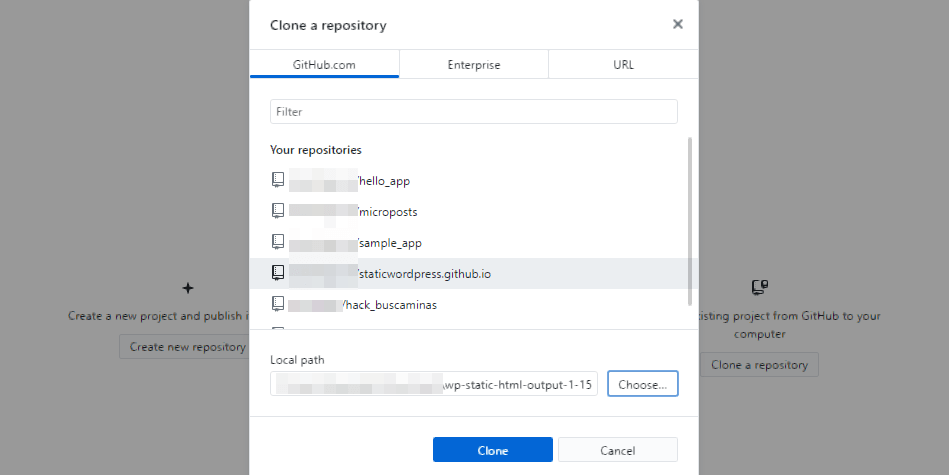
When you set up GitHub desktop’s app, you’ll be able to clone existing repositories from your account:
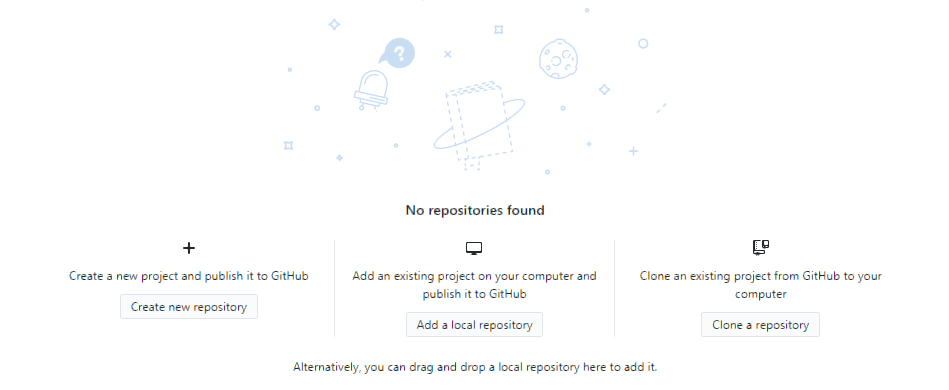
Choose the repository you set up earlier from the list and set its Local path to any folder you want. You’re going to use that folder to add your WordPress files, so make sure it’s somewhere you can remember:
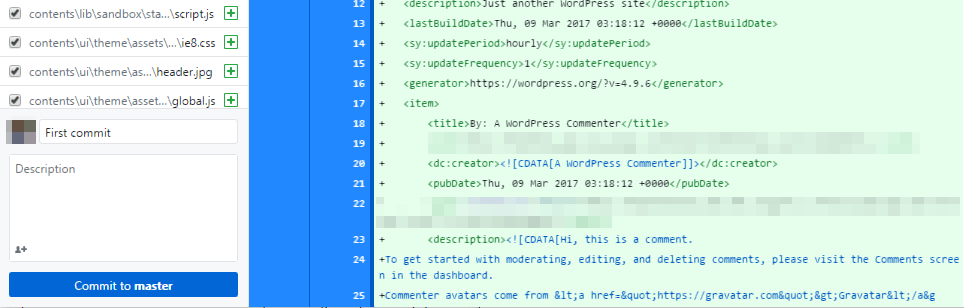
Unzip your exported file from step number one and extract its contents to the local repository folder you set up a second ago. Once you do that, the GitHub desktop app will detect the changes to the repository. Specify a name for your first commit and then click the Commit to master button:
Now, when you click the Publish button at the top of the app your changes will be uploaded to GitHub.
You’re almost ready to access your page now. However, first we need to configure GitHub to recognize your repository as a website. To do that, go into your repository settings and look for the GitHub Pages section. Under Source choose the master branch option and click save:

Your site’s URL will now show up at the top of the section. If you visit it, you should see your WordPress website show up, only as a static page:

As we mentioned earlier, some parts of your website might not work if they rely on dynamic content, such as comment sections. However, if this is the case, you would likely have any use for static pages anyway and should stick to use WordPress as normal.
Conclusion
In some cases, simple HTML and a little CSS is all you need to build an informative and elegant website. However, WordPress generates dynamic pages out of the box. That’s far from a bad thing, but it does mean you need to do a little tinkering if you want to create static WordPress pages.
Here’s how to get the job done and publish your static pages for free, in three steps:
- Use the WP Static HTML Output plugin to create a static copy of your site.
- Upload your static pages to GitHub.
Do you have any questions about creating static WordPress pages? Let’s talk about them in the comments section below!
Article image thumbnail by Andrew Rybalko / shutterstock.com
The post How to Generate a Static HTML Copy of Your WordPress Website appeared first on Elegant Themes Blog.