
Whenever someone signs up to your WordPress website, the platform stores their information within a database (much like every other aspect of your website). At some point, you may want to save the information. Fortunately, getting it out of WordPress intact is relatively simple.
By default, WordPress includes built-in export and import options. You can use these to save your user databases and migrate them. There are a lot of situations where this functionality can come in handy, and this piece will discuss them. We’ll also show you two ways to import and export user databases in WordPress.
Let’s get right to it!
Why You Might Need to Handle User Databases in WordPress
In a nutshell, databases are collections of information arranged using tables and variables. If that sounds like a spreadsheet, you wouldn’t be wrong. The main difference between spreadsheets and databases is the latter relies on ‘links’ between your tables. These connections make it much easier to pull the information you need from specific tables and keep the whole system updated.
As we said, your entire website is stored in a database. WordPress will usually create a new database by default for each of your websites sharing the same server space. Most of your site’s information is stored within, including your post’s content, their authors, and any essential metadata. While it’s not always the case, your database also stores all of your website’s user information. Because it’s well-organized, exporting it isn’t too much trouble. Here’s why the functionality can come in handy:
- You can export users from one website to another. This is useful if you’re merging two sites, for example.
- It enables you to save your user list. You can use this information for marketing purposes or with third-party software.
- You can save your user list locally for easier access. If you have a local copy of your user list, you can refer to it instantly any time you want. Plus, you can update the list anytime you want by exporting your user database again.
The good news is WordPress already includes built-in import and export functionality that can handle some of its data. However, this feature doesn’t support user databases out of the box, which brings us to the next section.
How to Import and Export User Databases in WordPress (2 Methods)
In this section, we’ll cover two solutions to this problem, one using a plugin and one without. Let’s start with the plugin approach.
1. Use a Plugin to Import and Export User Databases
If you check out your WordPress dashboard, you’ll notice two tabs called Import and Export under Tools:
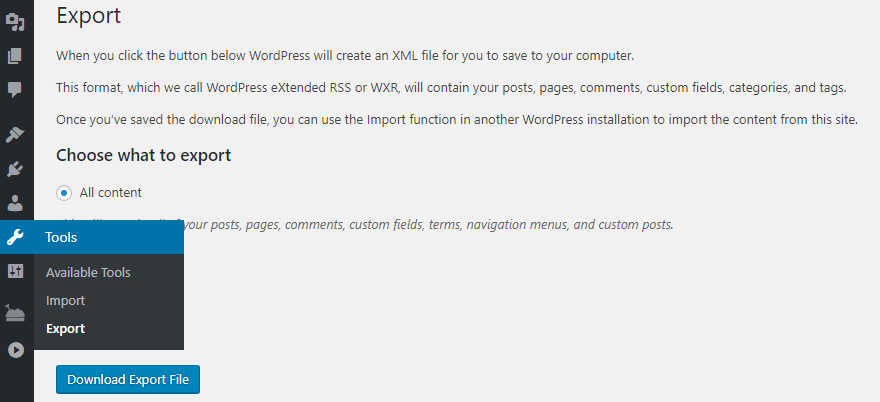
When you go to the Export tab, you’ll see the option to save most of your WordPress website’s data, including its posts, comments, pages, custom fields, categories, and tags. Your user list, however, isn’t part of the package by default. If you want to add this functionality to WordPress, you’ll need to use a plugin such as Import Export WordPress Users & WooCommerce Customers:

Despite its mouthful of a name, this plugin gets our vote because it adds the exact functionality we need in a simple fashion. After you install and activate it, you’ll see a new User Import Export tab appear under Users within WordPress. Inside, there should be an option to import your user database at the top of the screen:

We’ll come back to this later, but for now, scroll down and look for the section reading Export Users in CSV Format. Now choose which user roles you want to export – in this case, your Subscribers:
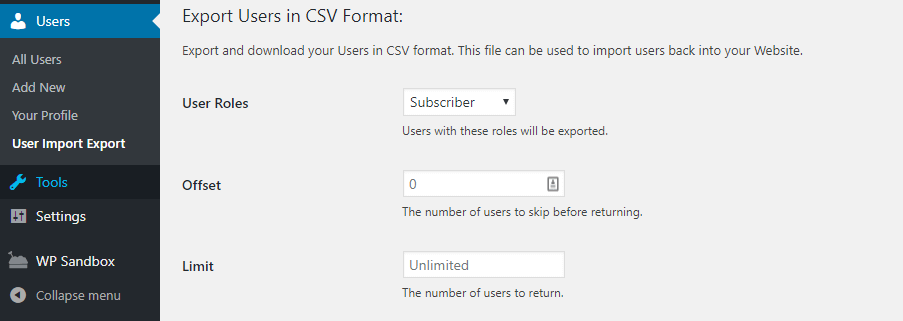
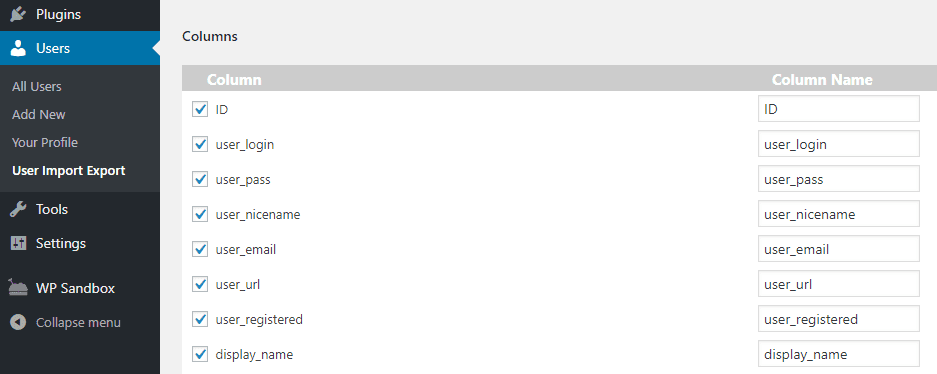
Ignore the Offset option, which is only helpful if you want to skip specific lines within your tables, and leave the Limit setting unchanged. Scroll down again now and you’ll see a list of all the tables the plugin will export. Some of those names should be recognizable since they include usernames, passwords (encrypted, of course), emails, first and last names, and more:
Once you’ve reviewed the settings, click on the Export Users button at the bottom of the screen. The plugin will now save your user database in CSV format – in other words, a common spreadsheet.
To import those users to another website, you’ll need to install the Import Export WordPress Users & WooCommerce Customers plugin on it. When you’re ready, return to the Users > User Import Export tab in WordPress, and click the Import Users button at the top of the screen. Now you’ll be able to choose the CSV file from your computer and upload it:

The importing process may take a while depending on how big your spreadsheet is. The plugin will also merge the user database you import with your existing one, which means it’s best to import your database into a pristine website to avoid running into problems.
2. Export User Data from Your WordPress Database
As we mentioned earlier, WordPress saves the majority of information to a database unique to each website. The previous method enabled you to interact with your database through a plugin. However, you can also accomplish the same results by accessing it manually.
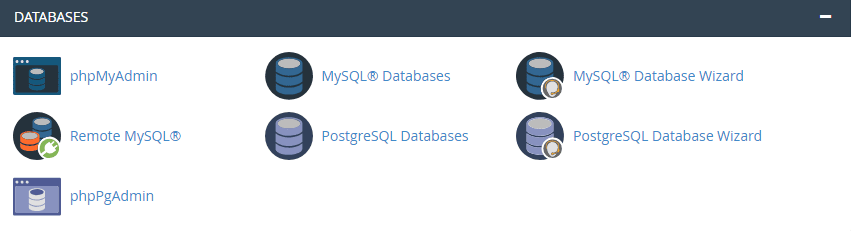
To do so, we’ll need to use a tool such as phpMyAdmin, which enables us to interact with our WordPress databases. If your web host uses cPanel, you should have access to phpMyAdmin there:
In many cases, web hosts not using cPanel can still provide you with a way to interact with your database, so check your provider’s documentation to see what options you have. Moving on, once you enter phpMyAdmin, you’ll see a list of your existing databases on the left-hand side. If you’re hosting a single website, you should only see one database, which you can expand by clicking on the Plus sign next to its name:
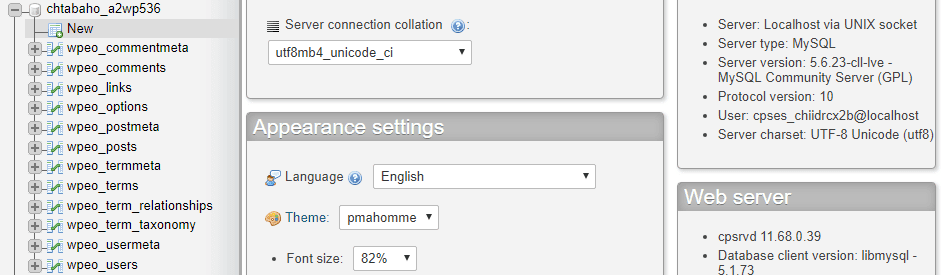
If you pay attention to the table names, you’ll see there’s an option reading wp_users or similar (this can change depending on your host). That’s the table we care about, and once it’s opened, you’ll see a list of your existing WordPress users. There should be a menu at the top of the screen showing several options, including ones reading Import and Export:
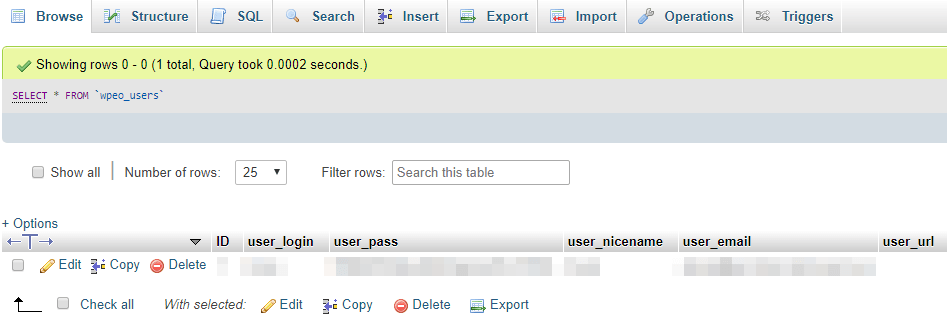
Click on Export, and you’ll be able to export your user database in SQL format, although you can also choose from other options such as CSV, which is better if you want to browse your database locally. There aren’t any settings to play around with here, so simply click the Go button:

Now phpMyAdmin will save a copy of your database to your computer. You can open a CSV using any spreadsheet software you want. You can also go ahead and import it into another website’s database using the Import option within phpMyAdmin. When you click on it, you’ll see an option to choose a file to import:

Just choose the database backup you created earlier and make sure to indicate what format it’s in. Then scroll down and click on the Go button once more. Keep in mind that this method will override your existing user’s table, unlike the plugin approach we used earlier. This means it’s best used on a new website, unless you don’t mind losing your existing users.
Conclusion
WordPress makes it easy for you to export your user list and save it to other devices in CSV format. Moreover, you can import user databases from other sites if you’re merging two properties. Plenty of other platforms can also interpret CSV files, so it’s always a good idea to have an up-to-date copy of your user list saved.
As far as how to get access to your user database goes, WordPress provides you with two approaches:
- Use a plugin to export and import your users table.
- Locate your database’s Users table and export its contents.
Do you have any questions about how to import and export user databases in WordPress? Let’s talk about them in the comments section below!
Article thumbnail image by Sky Designs / shutterstock.com.
The post How to Import and Export User Databases in WordPress appeared first on Elegant Themes Blog.