
Metadata provides your readers with simple but important information about your content. Fortunately, metadata is easy to add to any Divi post template with dynamic content. In this article, we’ll see how to include metadata in your blog post template with Divi.
Let’s get started!
Preview
First, let’s look at what we’re making.
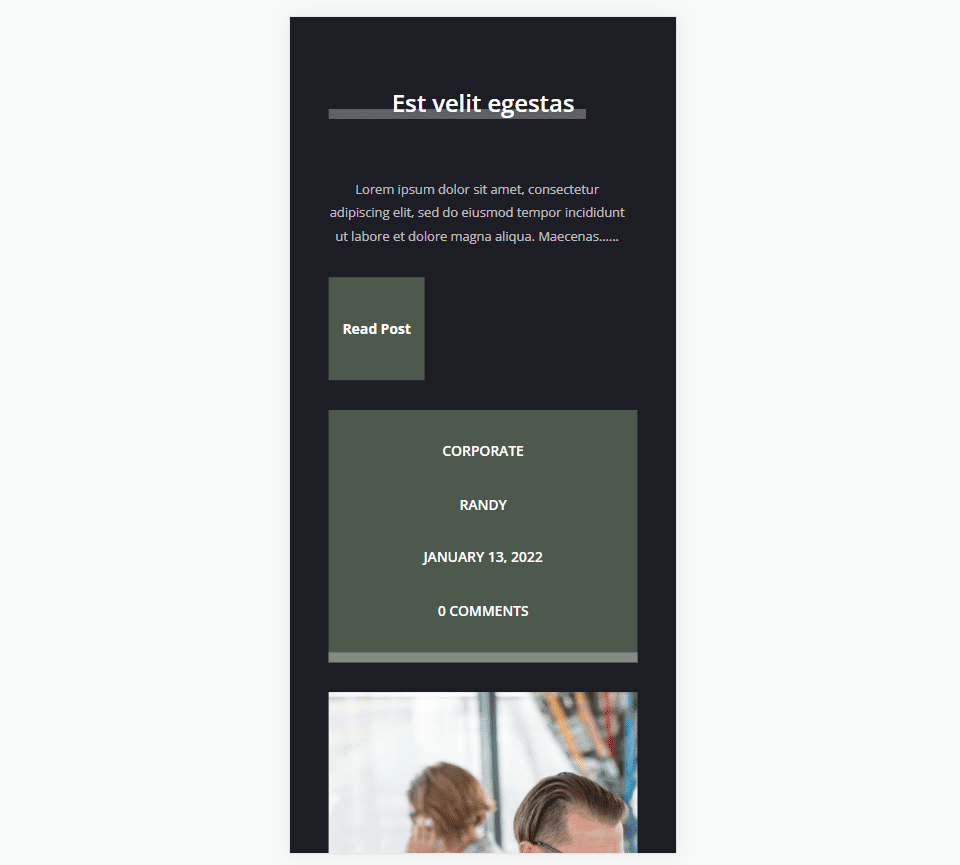
Blog Post Template with Metadata on Desktop

Here’s how the metadata will look on a desktop.
Blog Post Template with Metadata on Phone
Here’s how our metadata will look on a phone.
What is Metadata
Metadata is information about content. There are several types of metadata. For blog posts, this is descriptive metadata. This is the information such as the author’s name, post category, post tags, publication date, and the number of comments.
Readers use this metadata to know if they’re interested in the category, if it’s written by an author they know, if the content is current, and if visitors have interacted with the content. This type of metadata is easy to add to your Divi blog post templates.
Why Use Dynamic Content for Metadata with Divi
There are a couple of ways to add metadata to your Divi blog post templates. They include the Post Title module and Text modules. Here’s a look at both and why I recommend the Text module for most templates.
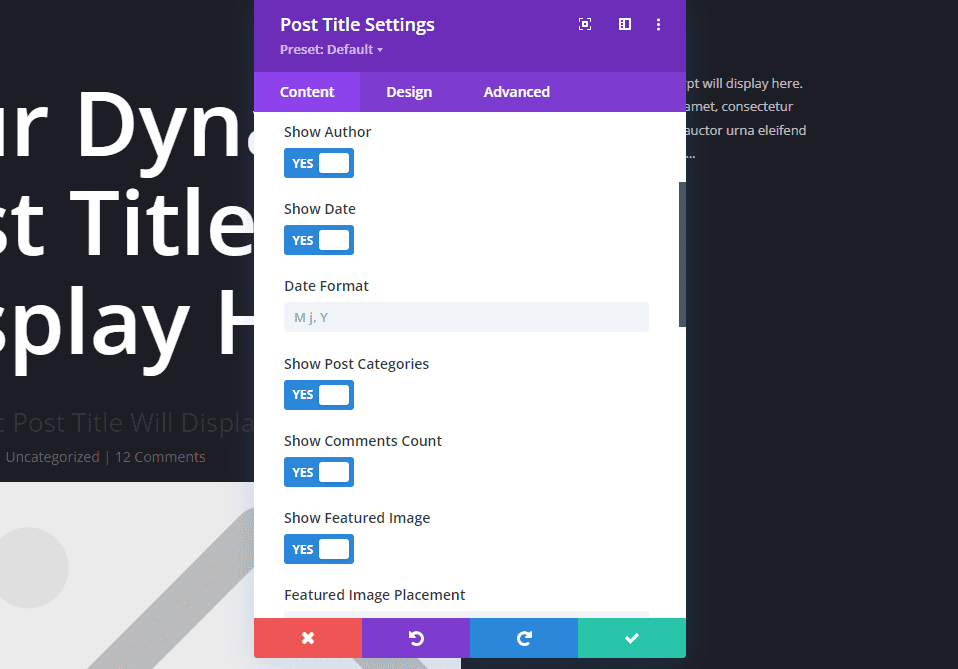
The Post Title module includes metadata. This one includes toggles to enable the specific metadata you want to use. This is great for displaying a title with metadata. A lot is going on in this module that isn’t needed if you just want to display metadata. Also, the metadata sits next to each other, and you don’t have control over their order or placement.

Text modules give you the most control and features. Text modules include Dynamic Content for the body of the text. This allows you to select any type of metadata to display within the Text module. Use multiple Text modules to display all the metadata independently, or together arranged in any order or layout.
How Dynamic Metadata Works in Divi Text Modules
Rather than manually entering the content to display, dynamic content brings in the content based on the type of content you choose. For example, if you select the post title, Divi displays the title that’s unique to that post.
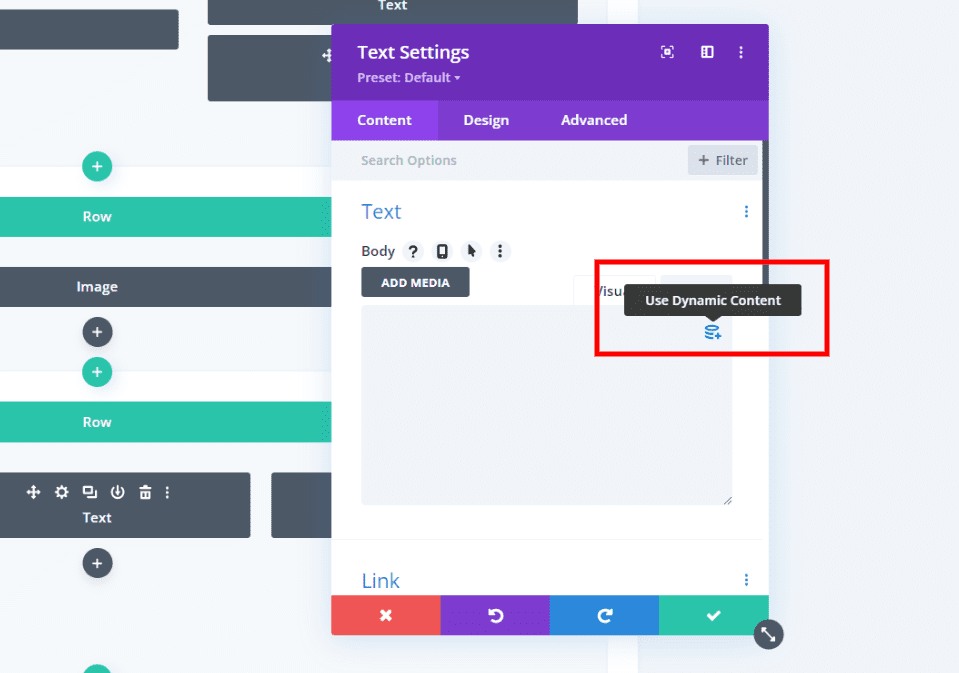
Divi Text modules have an option to display dynamic content. When you hover over the content area, you’ll see a small icon in the right corner where you can choose the type of dynamic content to display.

Each module displays one type of dynamic content. It gives you a list of content to choose from that includes multiple types of metadata. You can choose one per module. To display more than one type of metadata, you’ll need to add more Text modules.
Dynamic Content Options
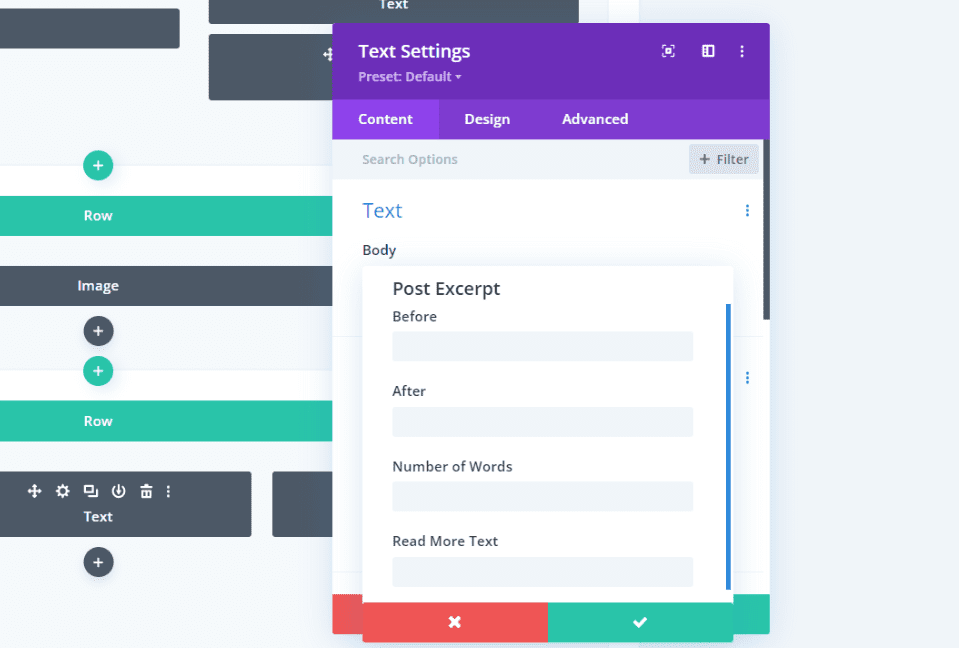
Certain types of content include extra options. These options are not dynamic. In other words, they display the exact text you enter into their fields or the parameters you enter such as the number of characters to display. This example from the Post Excerpt includes Before, After, Number of Words, and Read More Text. For example, the text you enter in the Before field displays before the dynamic content.
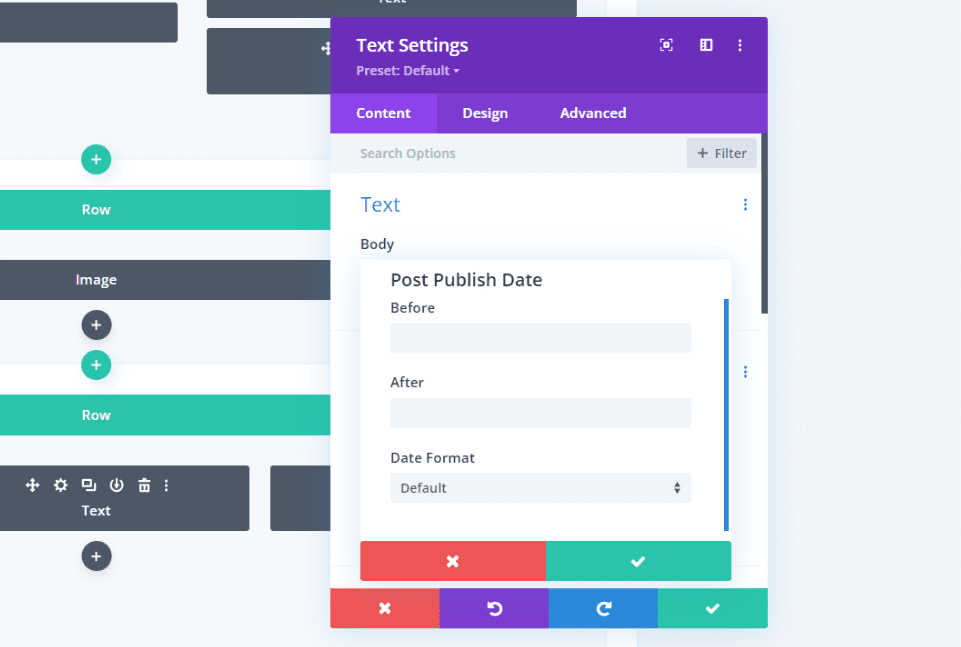
Publish Date includes Before and After fields, and you can choose the Date Format.
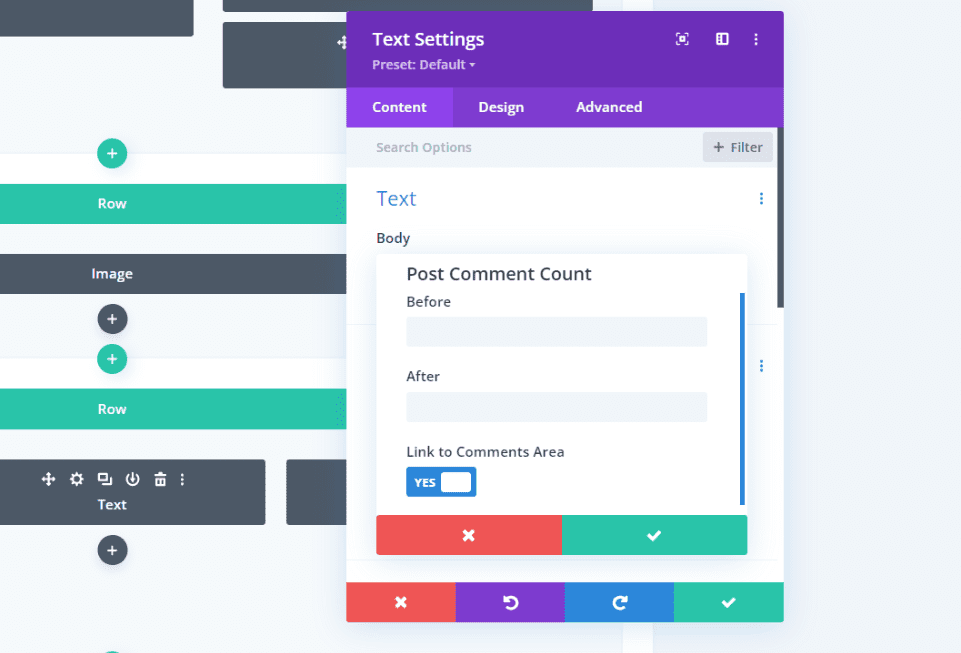
Post Comments Count includes Before, After, and the option to link to the comments area. For example, if you enter “Comments” in the After field, and the post has 12 comments, this Text module displays the text “12 Comments”.
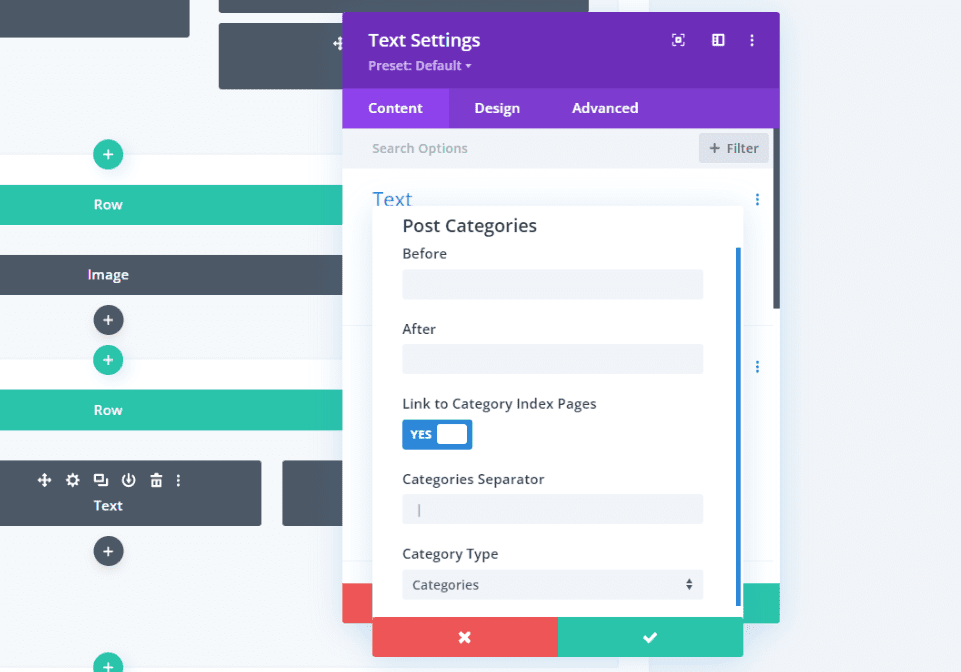
Post Categories includes Before and After fields, the option to link to the category index pages, the category separator, and the category type.
Once you make a selection, the Text module will show the type of dynamic content it will display. You can edit its settings and customize the module as normal.
Include Metadata in Your Blog Post Template with Divi
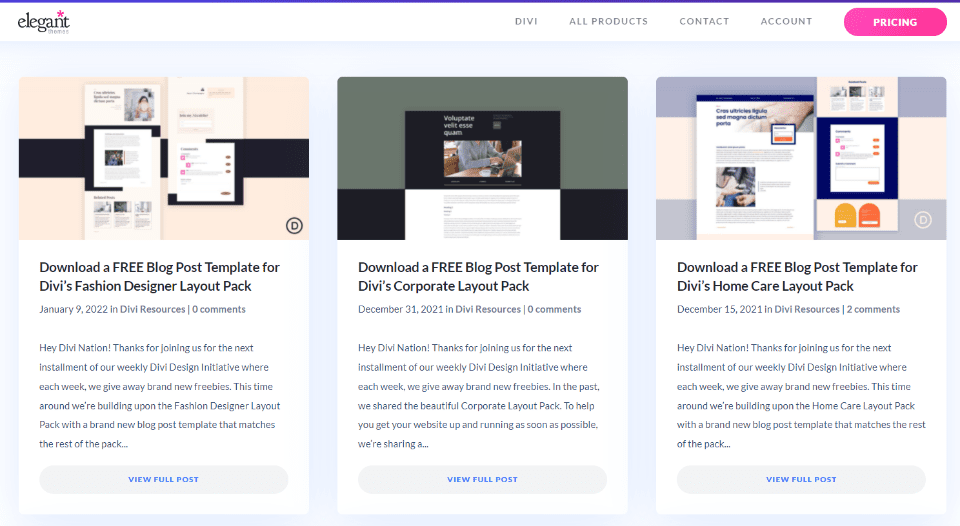
First, you’ll need to create or upload a Divi blog post template to the Divi Theme Builder. ET provides lots of free blog post templates that match the Divi Layout Packs. To find a free template, search the blog for “free blog post template”. Download and unzip your template.
I’m using the free Corporate blog post template for my examples.
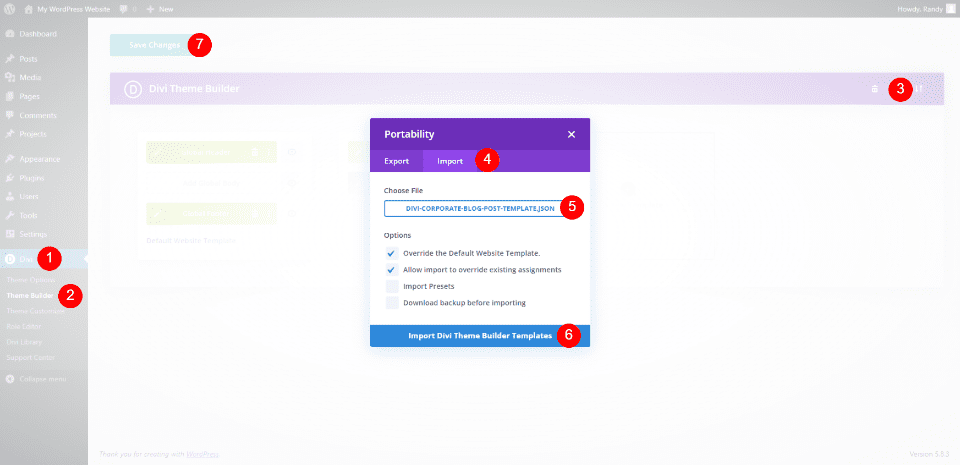
Next, upload the JSON file to the Divi Theme Builder. Go to Divi > Theme Builder in the WordPress dashboard. Select Portability and click Import in the modal that opens. Click Choose File and navigate to your JSON file and select it. Click Import Divi Theme Builder Templates. Save your settings.
- Divi
- Theme Builder
- Portability
- Import
- Chose File
- Import Divi Theme Builder Templates
- Save your settings
Add Metadata to Your Divi Blog Post Template
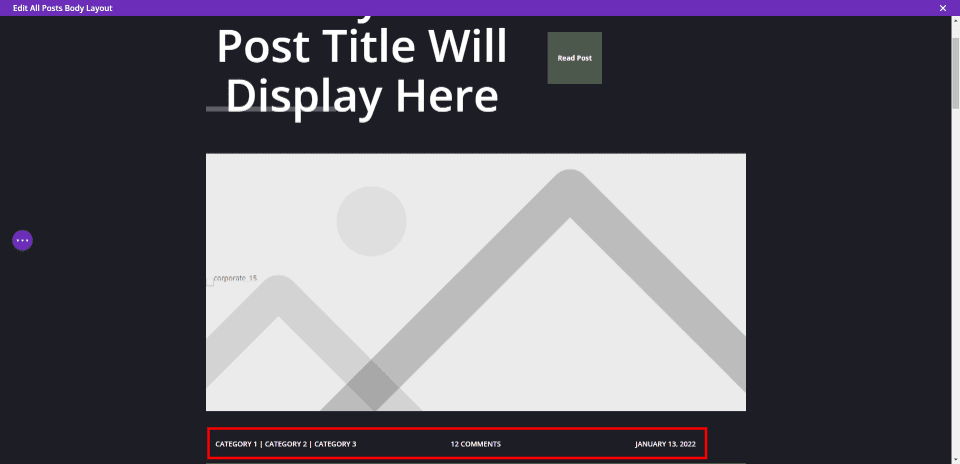
This layout already includes metadata, but we’ll delete it and add our own in a different location.
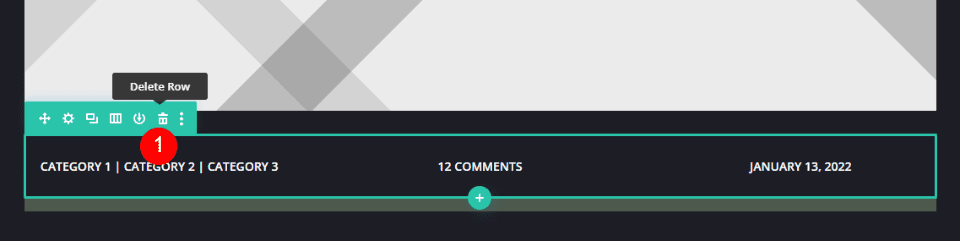
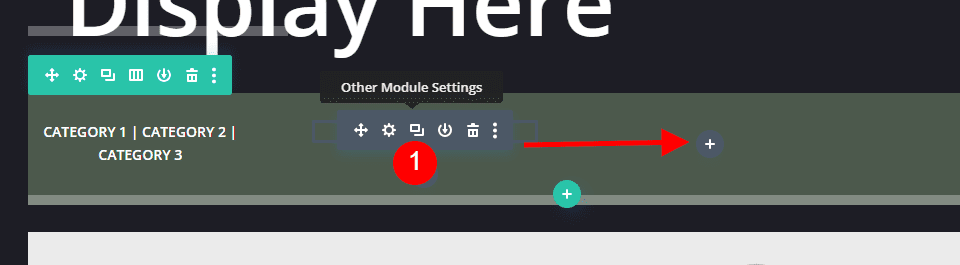
Hover over the Row that contains the metadata and delete it. Alternately, you can drag and drop it to the new location, but I want to show how to set up each of the elements.
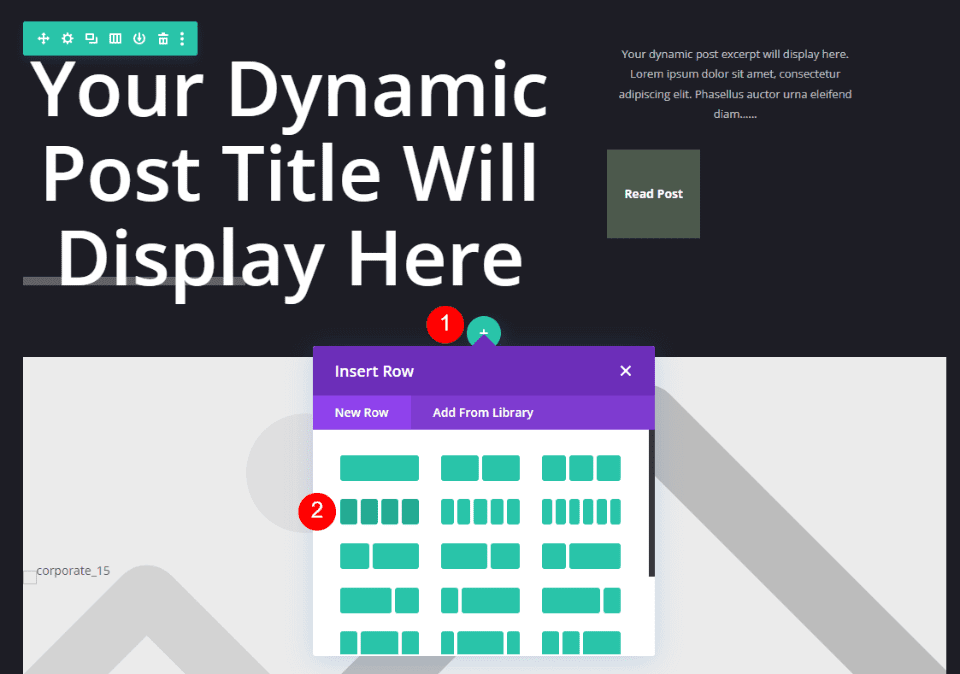
Add a 4-column Row under the first row.
Style the Row
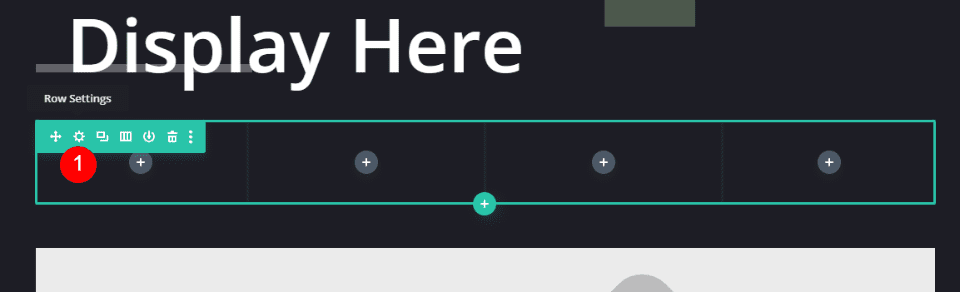
First, we’ll style the Row. Open the Row Settings by clicking the gear icon.
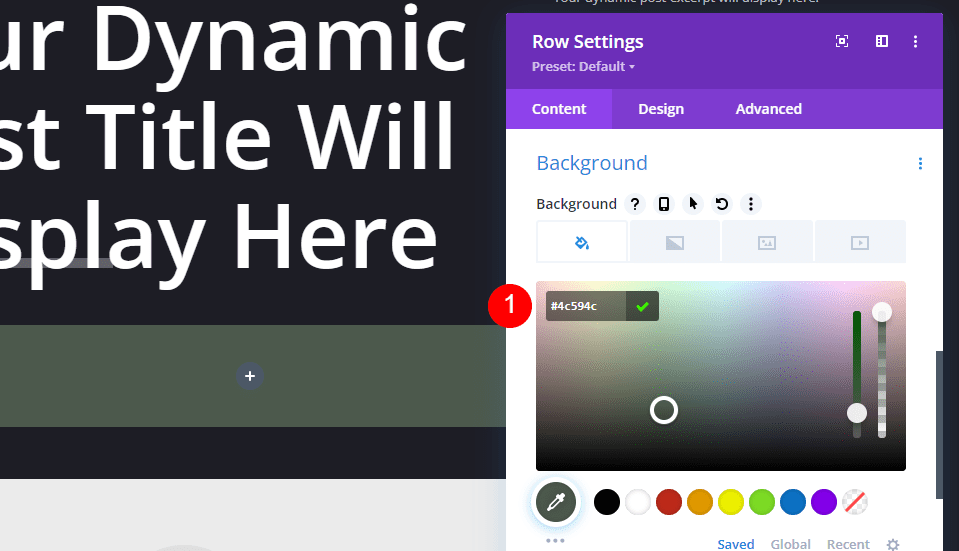
Scroll to the Background settings and enter #4c594c for the color.
- Background Color: #4c594c
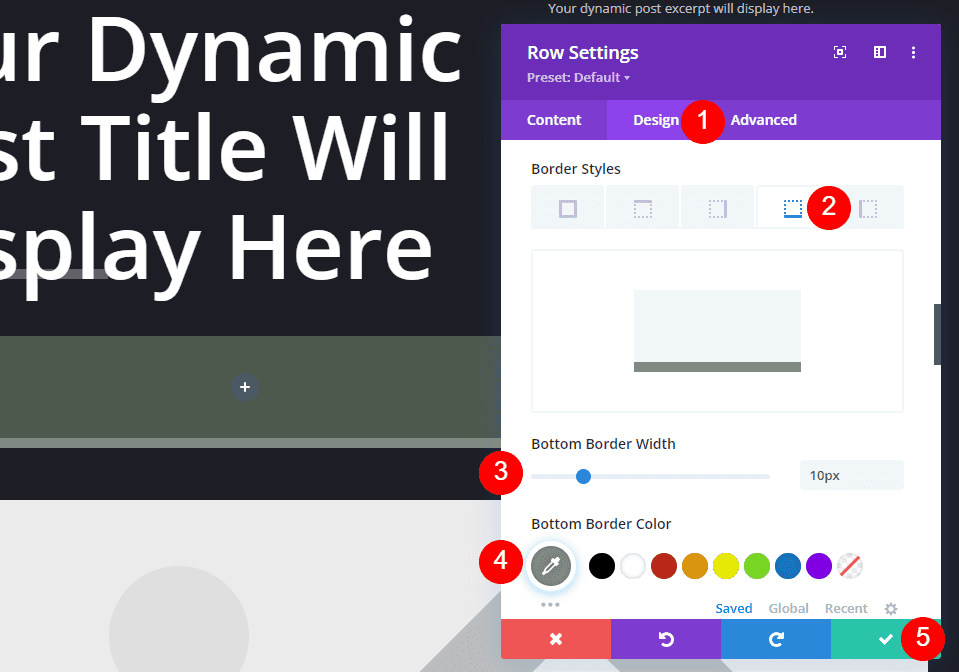
Go to the Design tab and scroll down to Border and select the Bottom Border. Change the Border Width to 10px and the Border Color to #828b82. Close the Row settings.
- Bottom Border Width: 10px
- Bottom Border Color: #828b82
First Text Module
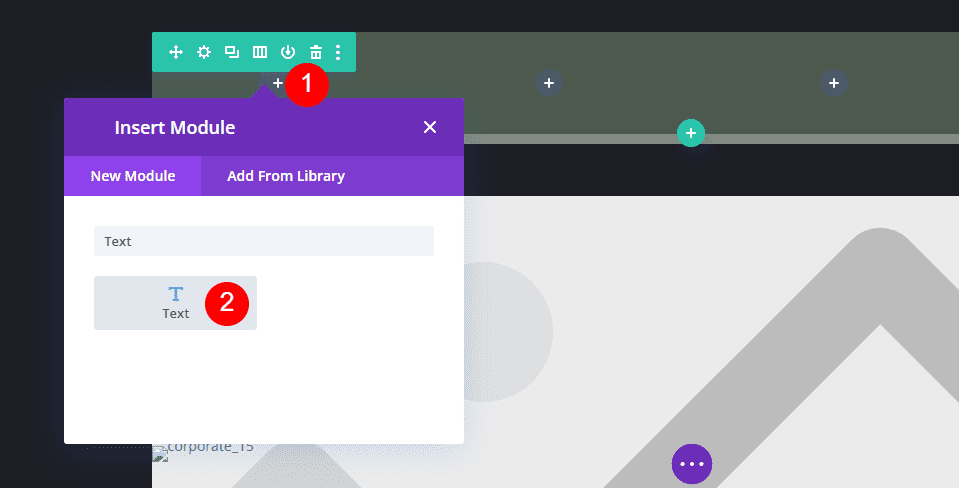
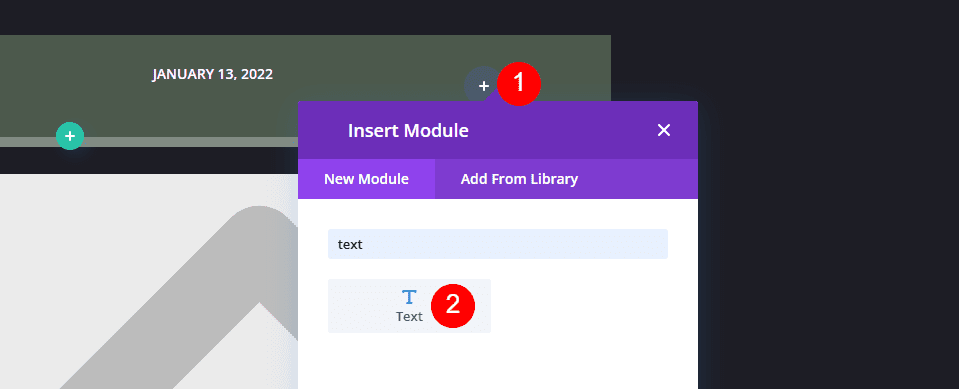
Click the dark gray icon and add a Text module in the left column.
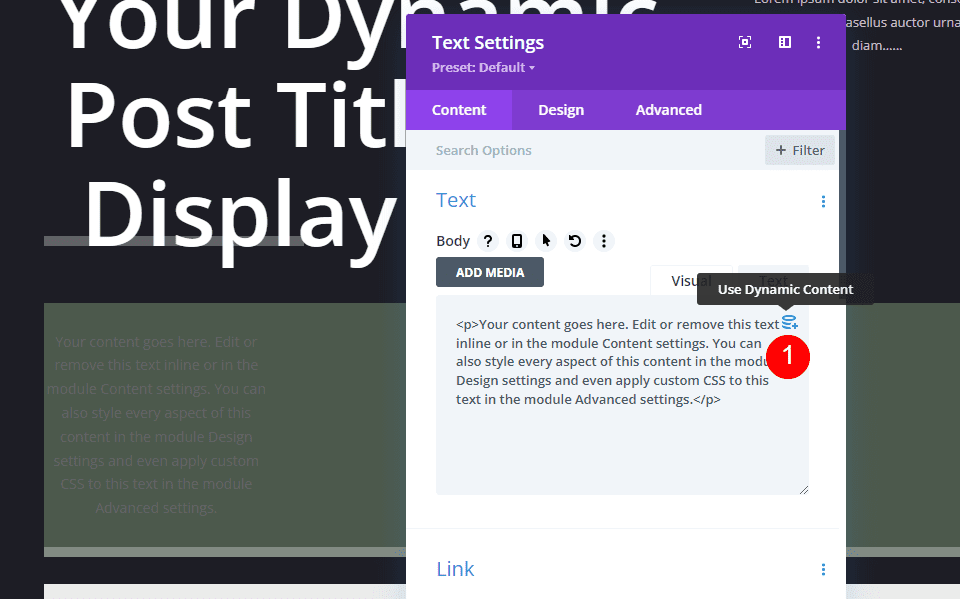
Select to Use Dynamic Content.
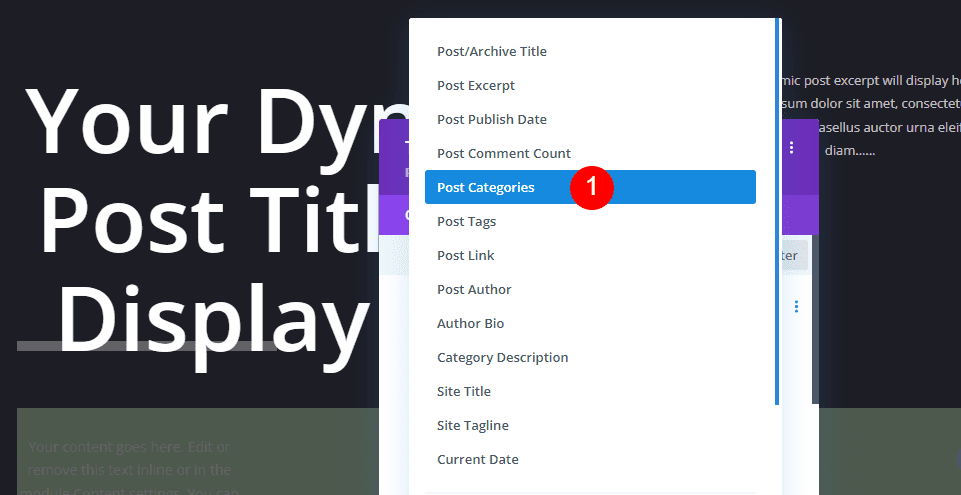
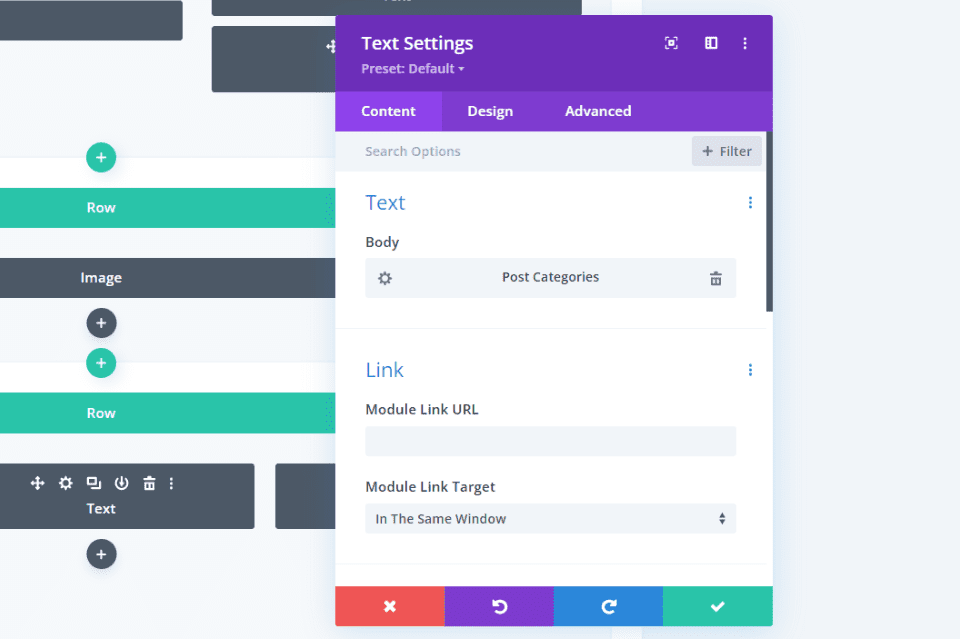
Choose Post Categories from the list of options.
- Dynamic Content: Post Categories

It will display settings for this dynamic content. Here, you can add the Before and After text, choose to link to the category index page, change the separator, and choose the category type. I’ll leave these at default and click to close the settings.
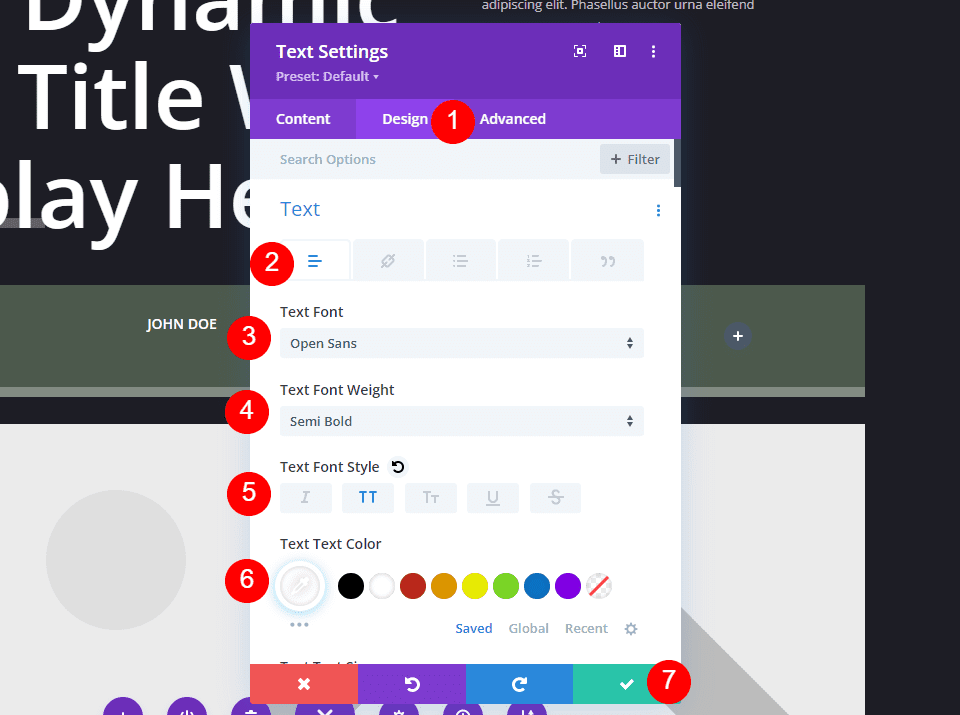
Style the Text Module

Go to the Design tab. Since we left the categories as clickable links, we need to style the link version of the text. Select the Link icon. Set the Link Font to Open Sans, semi bold, all caps, center alignment, and the color white. Close the settings.
- Link Font: Open Sans
- Weight: Semi Bold
- Style: All Caps
- Alignment: Center
- Color: #ffffff
Second Text Module
Duplicate the Text module and drag it to the next column.
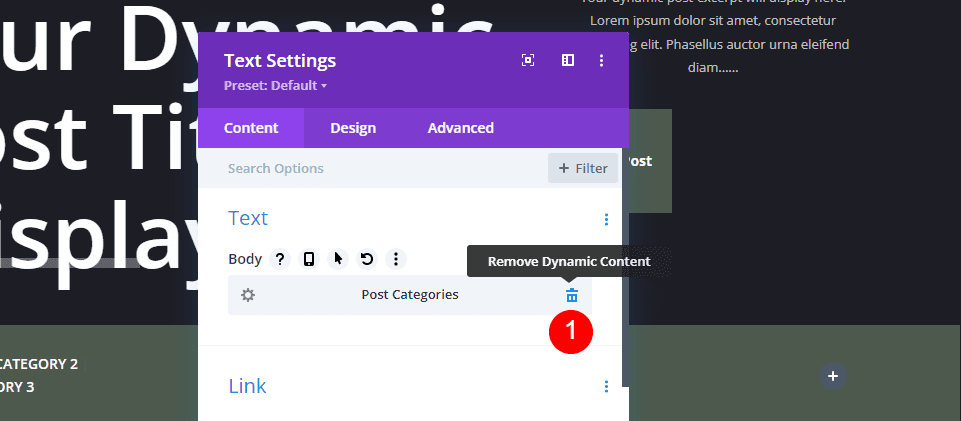
Delete the Dynamic Content.
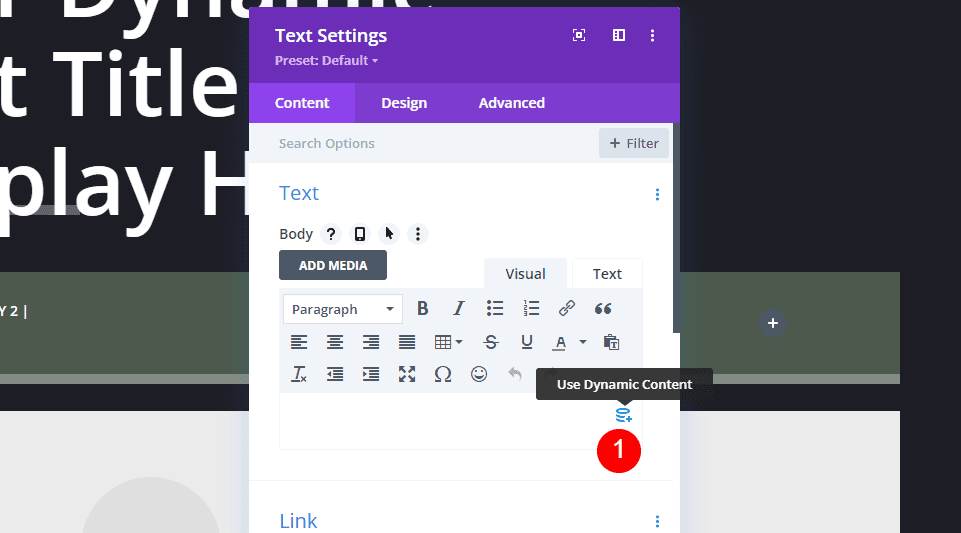
Select to Use Dynamic Content.
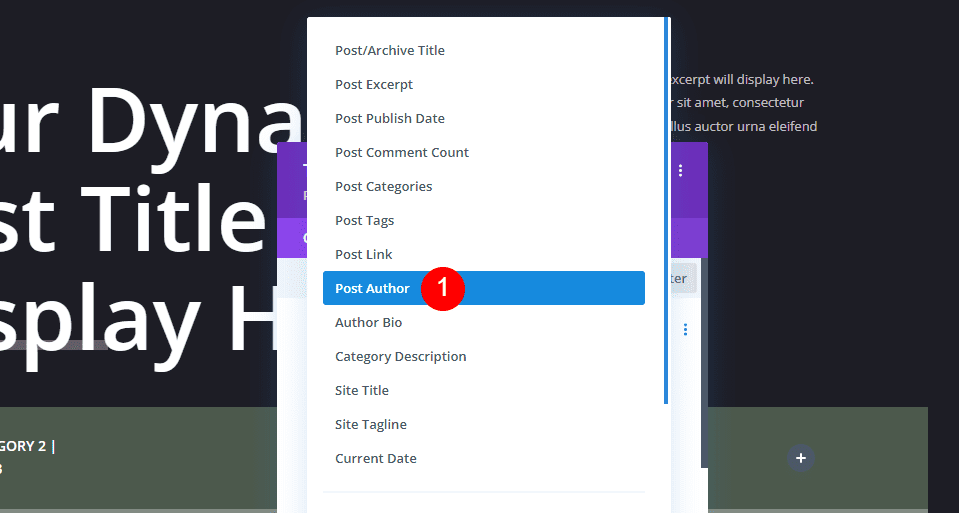
Choose Post Author from the list of options.
- Dynamic Content: Post Author
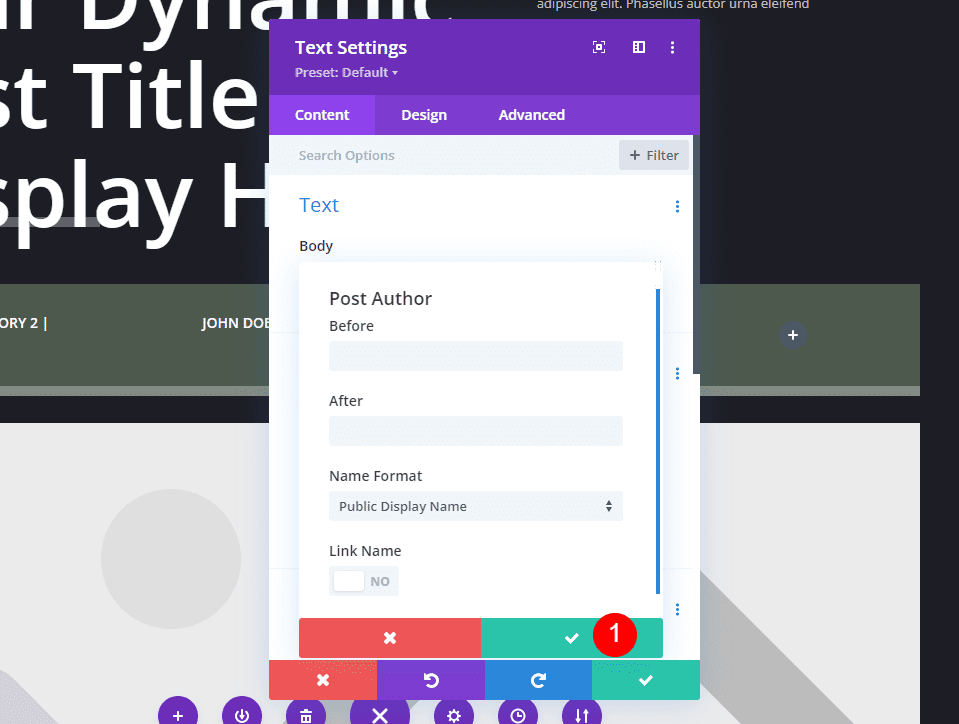
This opens another set of options with Before and After text, the name format, and the option to make the name a link. I’ll leave these at default and click to close the settings.
Style the Text Module
Since this text is not a link, we’ll need to style the regular text instead of the Link Text. However, Divi changes the styling to the regular text for us. Close the module.
The settings already include:
- Link Font: Open Sans
- Weight: Semi Bold
- Style: All Caps
- Alignment: Center
- Color: #ffffff
Third Text Module
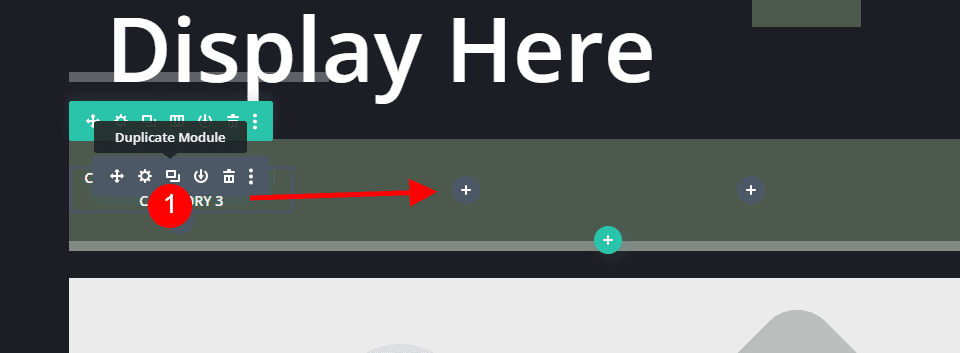
Duplicate the Post Author module and drag it to the next column.

Delete the Post Author Dynamic Content.
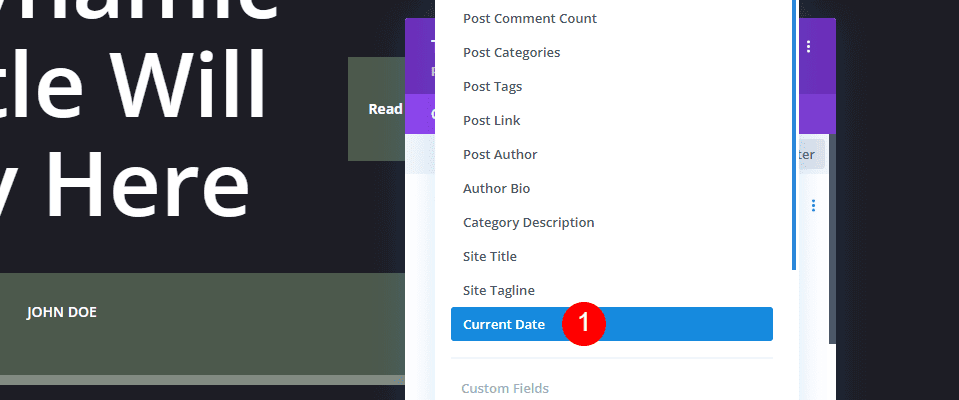
Select to Use Dynamic Content and choose Current Date.
- Dynamic Content: Current Date
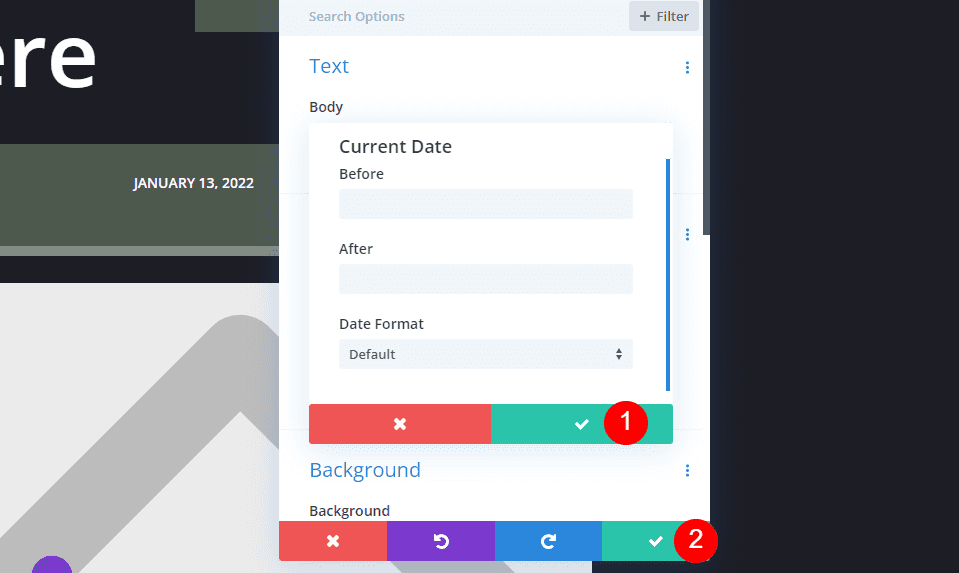
This opens options with Before and After text and the date format. I’ll leave these at default and click to close the settings and then close the module. The styling was copied from the last module, so we don’t need to adjust it.
Fourth Text Module
Finally, click to add a new module in the last column.
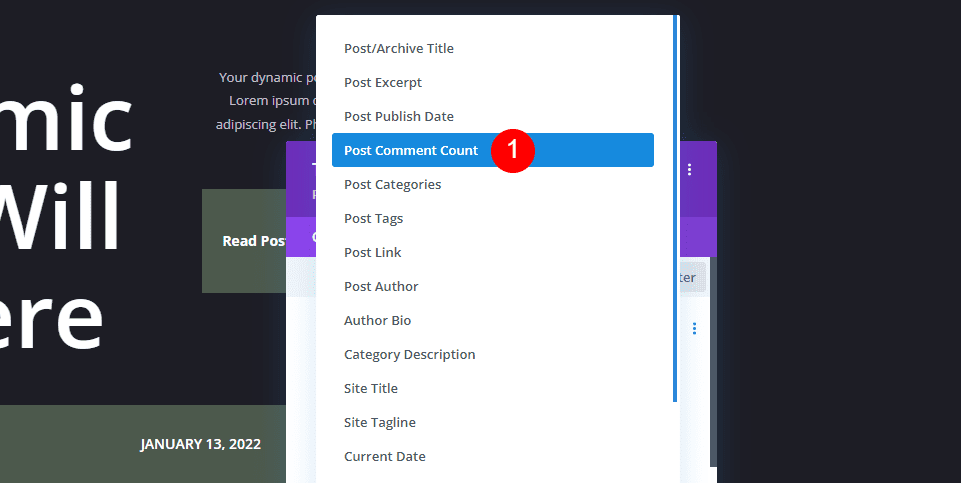
Click Use Dynamic Content and select Post Comment Count.
- Dynamic Content: Post Comment Count
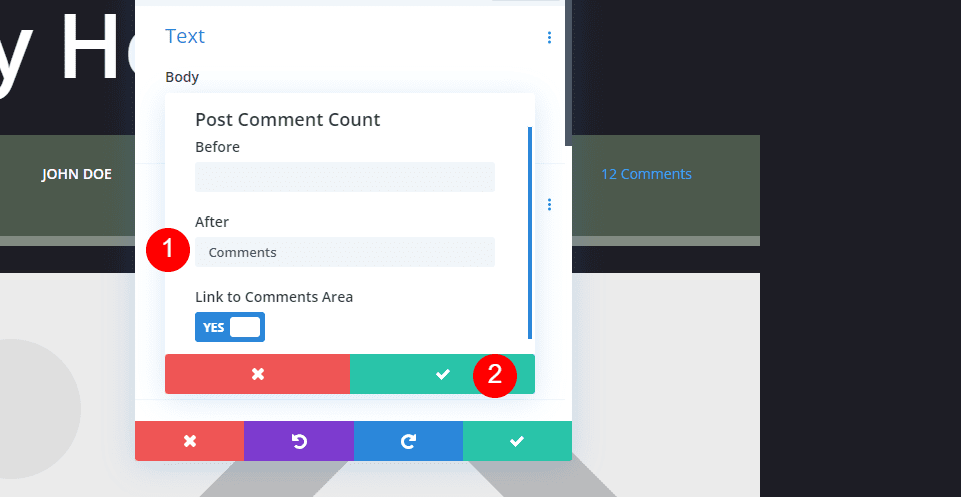
This opens the options for Post Comment Count with Before and After text, and the option to link to the comments area. In the After field, add a space and the word Comments. Close the option settings.
- After: Comments
Style the Text Module
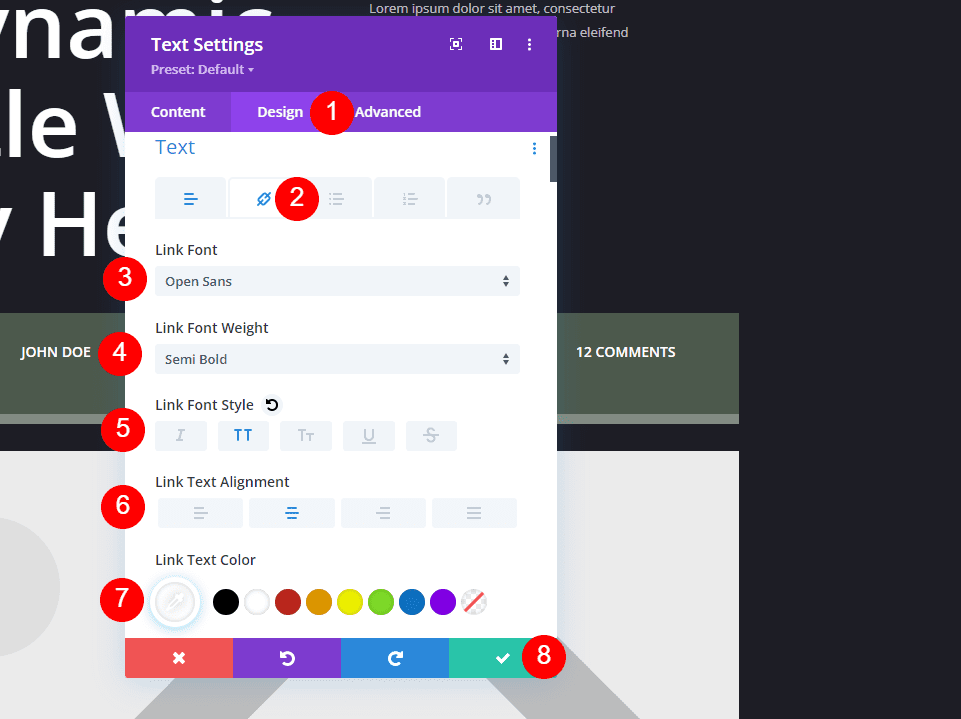
Select the Design tab and then click the Link icon. Set the Link Font to Open Sans, semi bold, all caps, center alignment, and the color white. Close the module and save your settings.
- Link Font: Open Sans
- Weight: Semi Bold
- Style: All Caps
- Alignment: Center
- Color: #ffffff
Results
Blog Post Template with Metadata on Desktop
Here’s how the metadata modules look on a desktop.
Blog Post Template with Metadata on Phone
Here’s how our metadata looks on a phone.
Ending Thoughts
That’s our look at how to include metadata in your blog post template with Divi. Metadata is simple, but it provides important information to your readers. Fortunately, it’s easy to add to any Divi post template with Text modules and dynamic content.
We want to hear from you. Do you include metadata in your Divi blog post template? Let us know about it in the comments.
The post How to Include Metadata in Your Blog Post Template with Divi appeared first on Elegant Themes Blog.