
Launching a website is easier than ever nowadays. However, the process still involves several steps. If you skip any of them, your site’s launch might not go as smoothly as you want it to. Plus, figuring out how to launch a website without any planning whatsoever is a recipe for disaster.
In this article, we’re going go over eight steps you need cover when launching a website using WordPress. We’ll walk through practically everything you need to do from the conceptual stages of your site to its launch. We have a lot of ground to cover, so let’s roll up our sleeves and get to work!
Step #1: Develop Your Site’s Concept
Every great website starts with an idea. For example, you might want to write about video games, movie reviews, or even tech tutorials. Each of those ideas should also come with a clear goal.
For example, a website focused on tech tutorials might have the ultimate goal of getting people to sign up for an online course or sell a product. Before you get to work on your site, you need to have a concept well ironed out. Otherwise, you’ll flounder around without a goal and waste valuable time.
At this stage, we recommend you do the following:
- Write down what you want your website to focus on.
- Define what your site’s ultimate goal is (i.e. making you money, positioning you as an expert in your field, just a hobby, etc.).
- Imagine who you want your target audience to be.
- Come up with potential names for your site.
Numbers one and two are relatively simple since you probably already have an idea of what you want. However, figuring out who your potential audience is can be tricky. The key is to think about who could benefit from the type of content you want to publish, since they should make up the bulk of your traffic.
Having an audience in mind is important because it’ll help keep you focused on your blog’s goal. Finally, coming up with a name for your website is a highly personal decision. However, we recommend you stick with something that’s easy to remember and to type, since you’ll need to buy a corresponding domain (which we’ll go over in a minute).
Step #2: Buy a Domain for Your Website
Now we’re moving past the conceptual stage and onto the technical side of learning how to launch a website. Your next move is going to be to register a domain for your site.
There are a lot of places where you can buy a domain. For most cases, we recommend you use a dedicated domain registrar, as they tend to have the best selection of Top-Level Domains (TLDs) at reasonable prices.
During step one, you came up with some potential names for your blog. If you haven’t narrowed them down yet, we recommend you check which ones among them are available as domains:
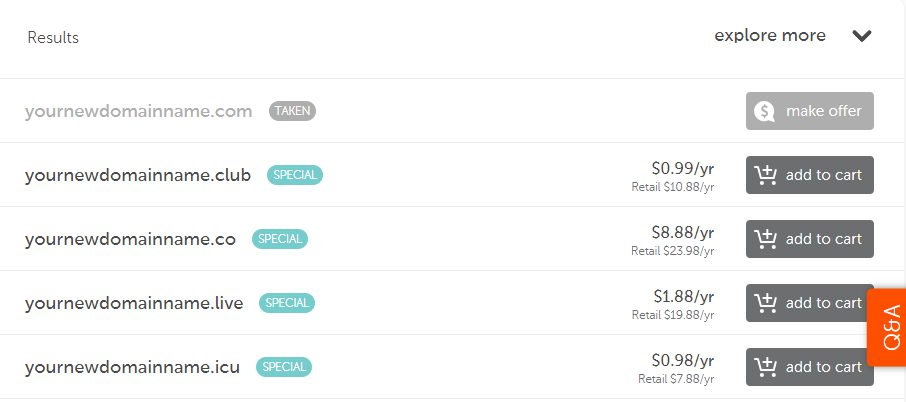
In most cases, we recommend you stick with .com TLDs since they’re classic choices people know and trust. A regular .com domain should run you around $10 per year, so it’s a small investment for your site’s future.
Once you’ve landed on a domain you like, registering it should only take you a few minutes.
Step #3: Find Adequate WordPress Hosting (And Install the Platform)
The next step in your journey is to find the web host that’s going to house your website. The provider you choose will depend greatly on your chosen platform for building your site.
Of course, we recommend WordPress to power your website, as you can build professional websites with relative ease thanks to its broad array of features, plugins, and themes.
You’ll also want to opt for a WordPress-friendly web host. We’ve reviewed a lot of web hosts, so we recommend you take a look at our findings before you make a final decision. In any case, most reputable hosts will enable you to set up WordPress automatically for your website. If they don’t, installing the platform yourself is simple, so don’t be scared by the idea!
Step #4: Create Your Site’s Essential Content
Most new websites launch without much fanfare. Usually, the initial content goes largely unread until traffic levels pick up after an indeterminate amount of time. But that doesn’t mean creating your site’s most essential content early on isn’t incredibly important.
It’s tough for a new website to gain traction, especially upon launch. In our experience, the best way to boost traffic numbers is to create long-form blog content that targets a keyword you think it can rank well for.
For this to work, you’ll need to do come up with several potential topic ideas and carry out some Search Engine Optimization (SEO) research. Then, aim to write an article that beats anything else the competition has on the same subject. For this to work, we like to use an approach called the ‘Skyscraper Technique’.
Ultimately, your goal is to put yourself on the map from day one. A single article won’t be enough to make your website relevant, though, which is where the last step comes in.
Step #5: Choose the Perfect Theme for Your Website
With WordPress set up on your site and your essential content created, it’s time for your website to start taking shape. The first thing we recommend you do is install a theme that reflects the style you want for your site.
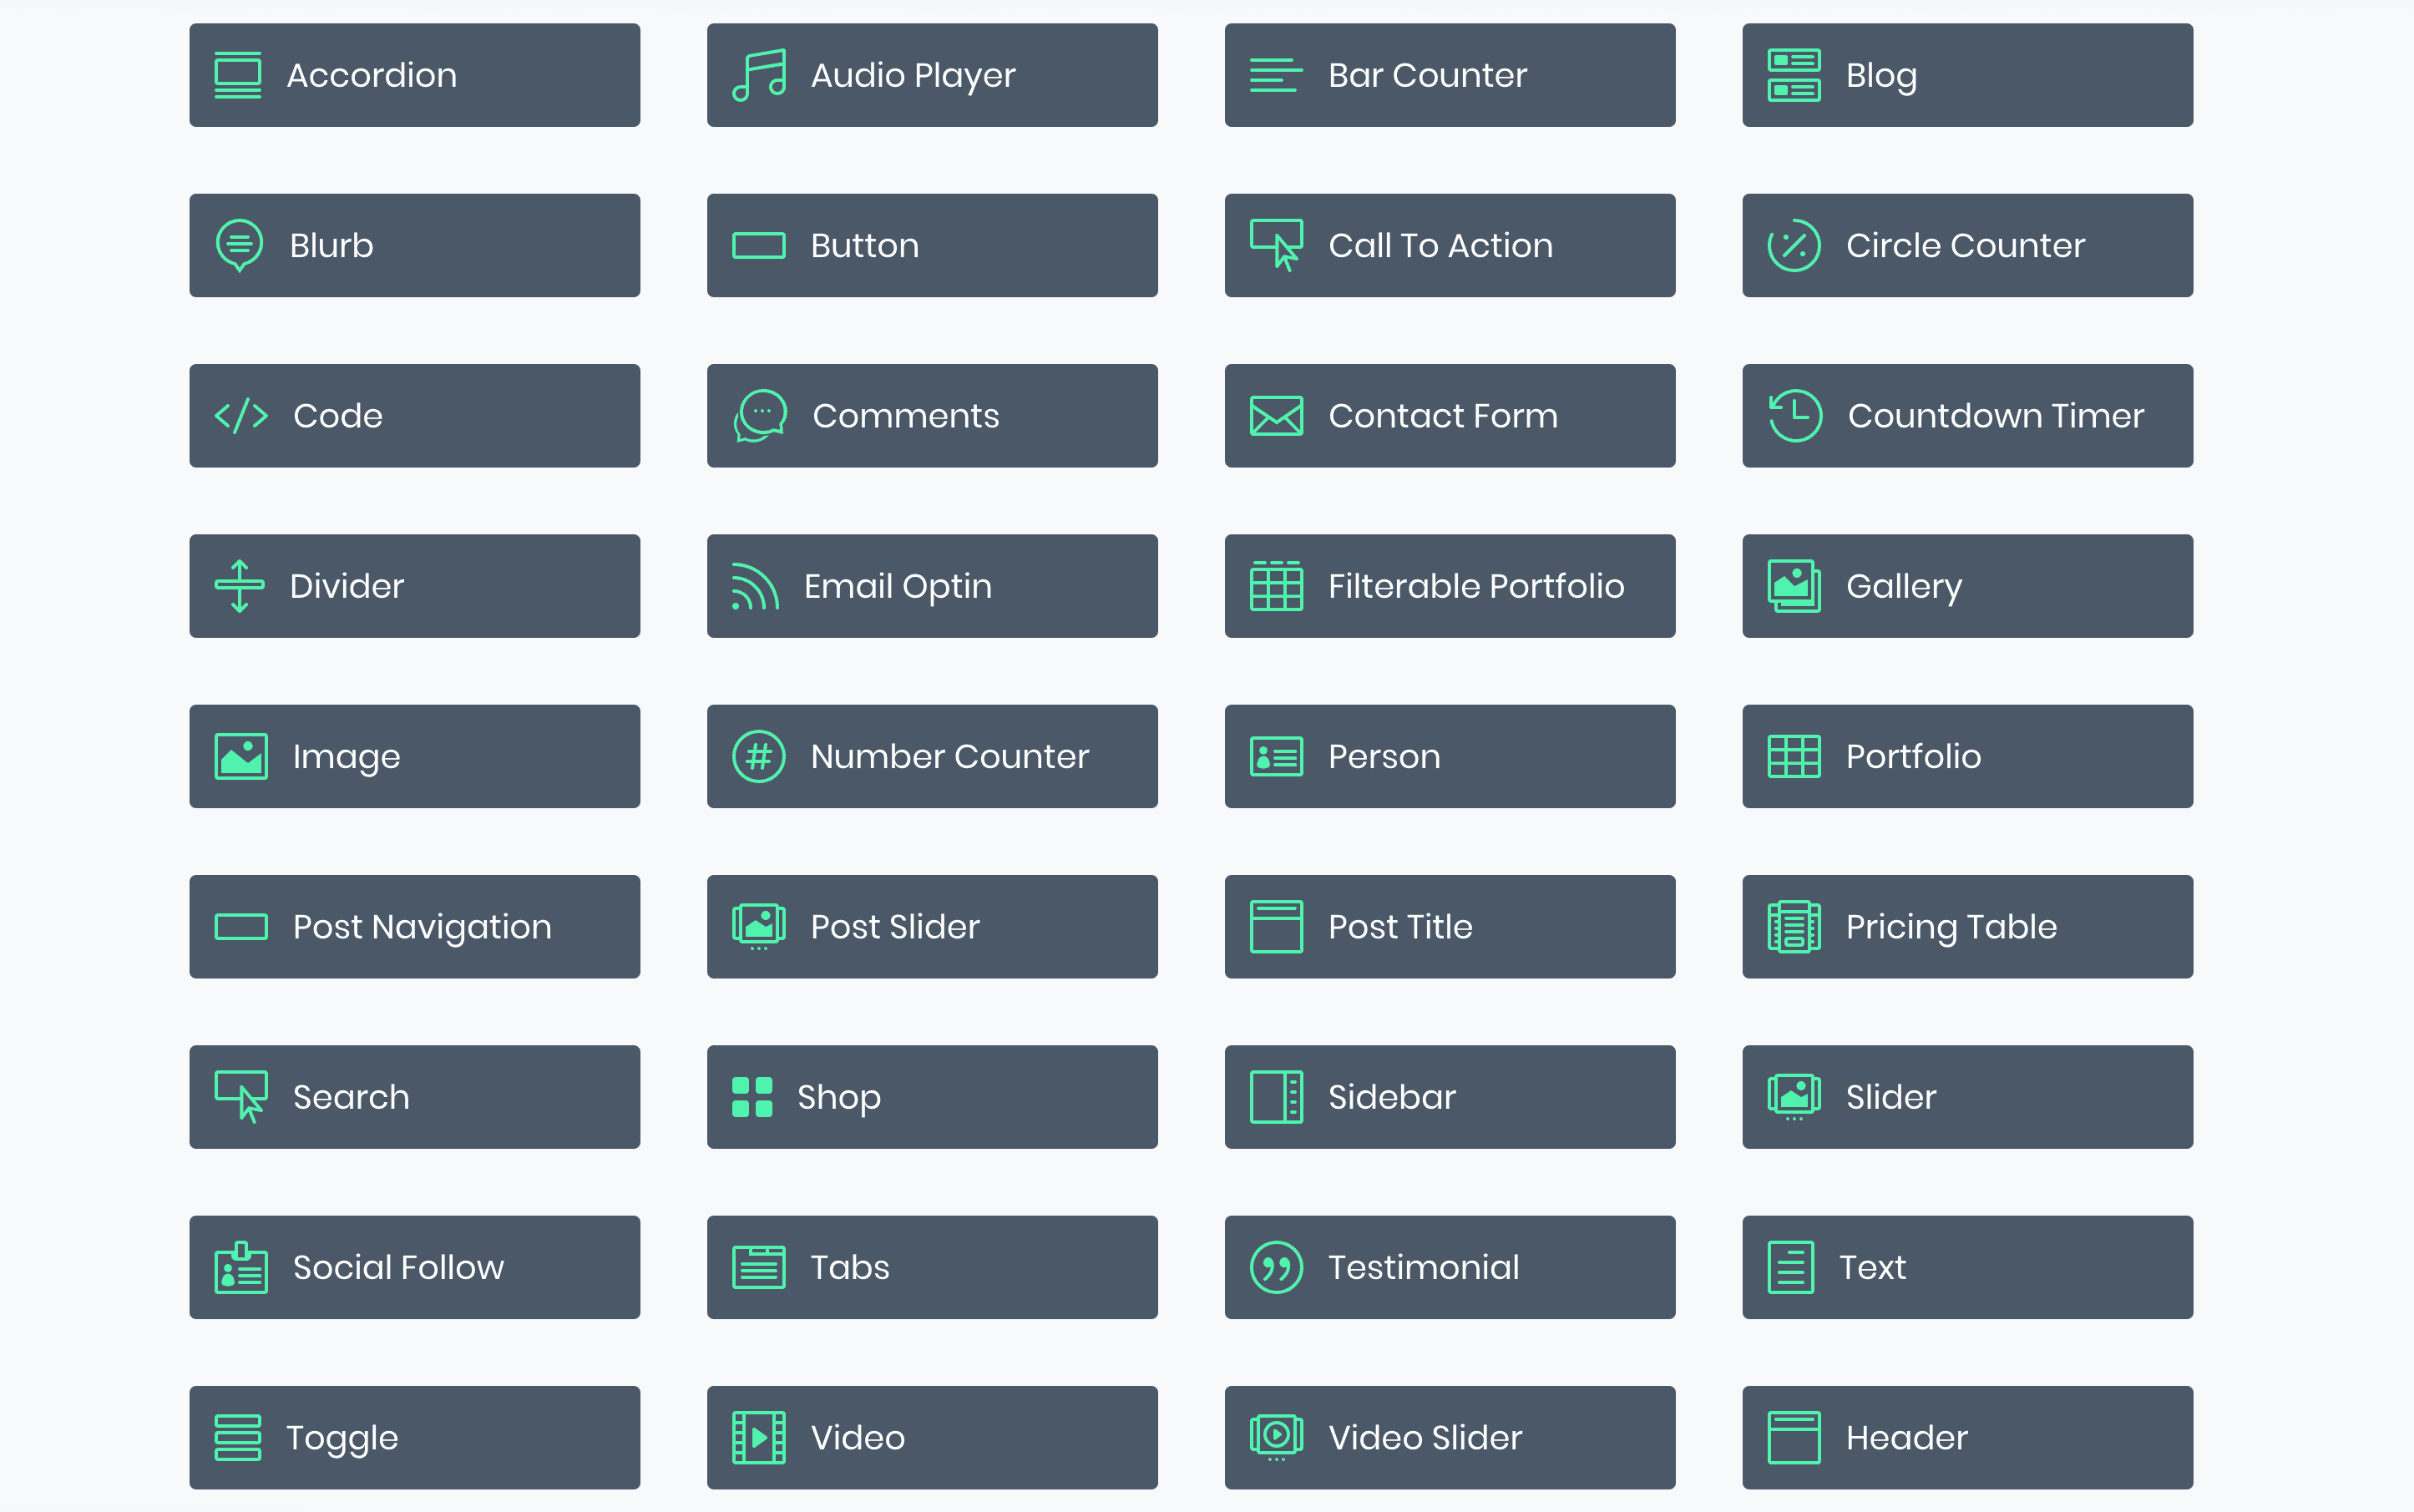
Generally speaking, there are two types of themes you can use. You have niche themes, which are built with specific types of sites in mind. You can also look at multipurpose themes which specialize in being flexible and able to adapt to nearly any type of website. For example, our own flagship theme Divi includes a dedicated page builder that enables you to design and create websites without needing any coding knowledge. You can essentially create a unique layout for each of your pages, and add any ‘modules’ for specific elements such as galleries, contact forms, sliders, and much more besides.
Ideally, your choice of theme will be a long-term decision. With this in mind, we recommend you take your time to pick the perfect choice for you, test it, and only then move onto the next step.
Step #6: Install the Plugins You’ll Need
“Plugins” are one of WordPress’ main selling points, and you’ll probably want to utilize them to power your site’s additional functionality. They’re essentially add-ons, and your choices will depend largely on what features you want your site to include. However, some are essential, and we’ve written a lot about some of the best plugins for a particular use case previously:
- 15 Best WordPress Forms Plugins Compared.
- The 9 Best Popular Post Plugins for WordPress Bloggers.
- 10 WordPress Backup Plugins You Need to Know About.
Those are just the tip of the iceberg, though. You can find over 50,000 free plugins within the WordPress.org Plugin Directory alone, so the best thing you can do is spend some time taking a look around. If a plugin interests you, there’s little downside to trying it out.
However, we recommend skipping plugins with less than a four-star rating, and with no recent updates within the past six months. Those could have unpatched bugs and other vulnerabilities, so bearing this rule of thumb in mind is a key consideration.
Step #7: Customize Your Site’s Design to Fit Your Content & Objectives/h2>
Due to the wide variety of pre-designed themes and page builders in WordPress, this part of the process usually comes with a significant head-start. You get to begin with your parent theme’s standard design and customize it to fit your needs. And with builders like Divi, there can be hundreds of pre-designed layouts to choose from.
That said, putting together your site’s design will probably take a while, especially if it’s your first rodeo. But it pays to spend time getting everything looking just right here, so the rest of your site’s launch runs smoothly. Just remember to always keep in mind what you want each page and post to accomplish and design according to that need.
Step #8: What to Do After Your Site Goes Live
After you publish your first piece of content on your new site, you’ll want to set up a schedule for new posts. For a new website, blogging at least once a week is a good way to build up an audience. Which is why it’s such a good idea to write all of your website’s essential content before you even launch. That way you can spend your weeks or even months post-launch putting your full energy into marketing and building backlinks.
On top of backlinks, you’ll also want to set up a social media presence so you can interact with your growing audience and create an email list. With a list, you’ll be able to send campaigns and set up autoresponders, which can help bring traffic to your site in the long run.
Ultimately, your long-term goal will decide how you move on from here. For example, monetizing your site has different tasks than simply creating a ‘hobby blog’. However, finding and cultivating visitors is a perennial consideration.
Conclusion
Almost anyone can set up a WordPress website. However, that doesn’t mean you should launch it blindly. If you want your site to get off on the right foot, you need to plan ahead, develop a concept, think about the elements you want to include, decide on the type of content you want to publish, and more.
Once these elements are clear in your head, you can get started on the technical aspects. This means procuring a domain, finding a web host, setting up WordPress, and myriad other steps.
Do you have any questions about how to launch a website? Let’s talk about them in the comments section below!
Article thumbnail image by Sentavio / shutterstock.com.
The post How to Launch a WordPress Website in 8 Steps appeared first on Elegant Themes Blog.