
In today’s Divi tutorial, we’re going to show you how to create a fixed footer for your website instead of a normal one. In a previous post, we showed you how to make it sticky which actually differs from making it fixed, although they might seem like the same at first. If you were not looking to make it sticky but fixed instead, this post will help you out.
Adding a footer that is fixed to your website could be a request you had from one of your clients or a need you have for your own website. Although it is not as often used as a fixed header is, it could be one of those things you’re struggling with. We’re going to show you two ways how to make your footer sticky on your Divi website. The first one will be by using some CSS lines and the second one will be by using jQuery code. Both ways will make modifications to the CSS style sheet of the footer on your website.
Here you have an example of how the fixed footer looks like when scrolling:
When to Use a Fixed Footer
There are different reasons why you’d like to have a fixed footer on your website. One of those reasons could be the relevancy of the information that your footer holds. You could, for example, put your social icons in your footer and because you want to encourage the visitors that are on your website to explore your social media channels. Another reason could be that you simply just like the effect it gives to your website.
If you’re using a fixed footer, you should be aware that a part of visitor’s window will be taken up all the time. That means that they’ll need to scroll more to see the same content they’d be seeing if there was no fixed footer. That’s a challenge because visitors like to put in as little effort as possible.
However, if your footer is not that big, it could increase the number of actions that are being taken in your footer. We do discourage making use of a fixed header, primary menu and footer at the same time. By making all three fixed, the content that shows up will be reduced drastically which can lead to a higher bounce rate.
Difference Between Fixed and Sticky Footer
Before we get started, we’ll explain the difference between a fixed footer and a sticky one.
A sticky footer is usually a bit more complex. It’s made to behave like a fixed footer if a page has not enough content to push the footer to the bottom of the screen. In cases where pages are long enough, the footer will behave like a normal one and will get pushed down until the bottom of the page, thus not the screen.
Let’s Get Started
Subscribe To Our Youtube Channel
We’ll get started right away by showing you how to add the fixed footer to your website in two ways; through CSS code and through jQuery code. Both methods work but it all depends on which one you prefer using for the website you need it for.
Add Fixed Footer Through CSS
The first and easiest way to create a fixed footer is by adding some CSS lines. With the Divi Builder and WordPress, we can add these lines in different places. Let’s have a look at them.
Add CSS Code Through Custom CSS For One Page
The first way to add the CSS code is by adding it to one page in particular. Although it’s better to make a fixed footer the same for each page on your website (to have that consistency on your website), you can choose to let it apply to one page in particular as well.
Open the page you want to add the CSS code lines to and click on the following button of the Divi Builder.
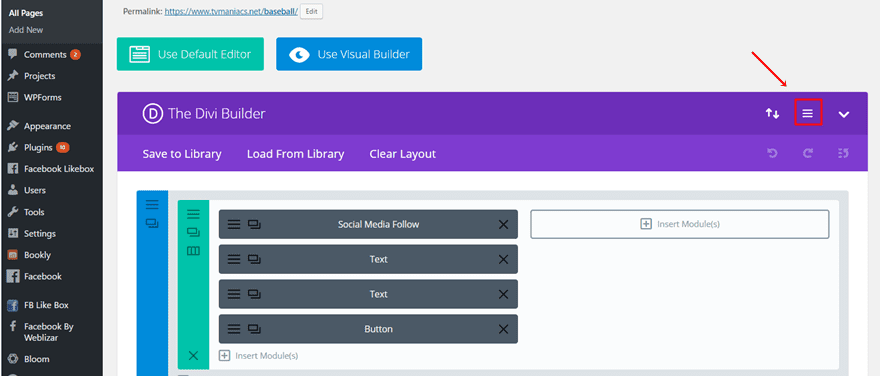
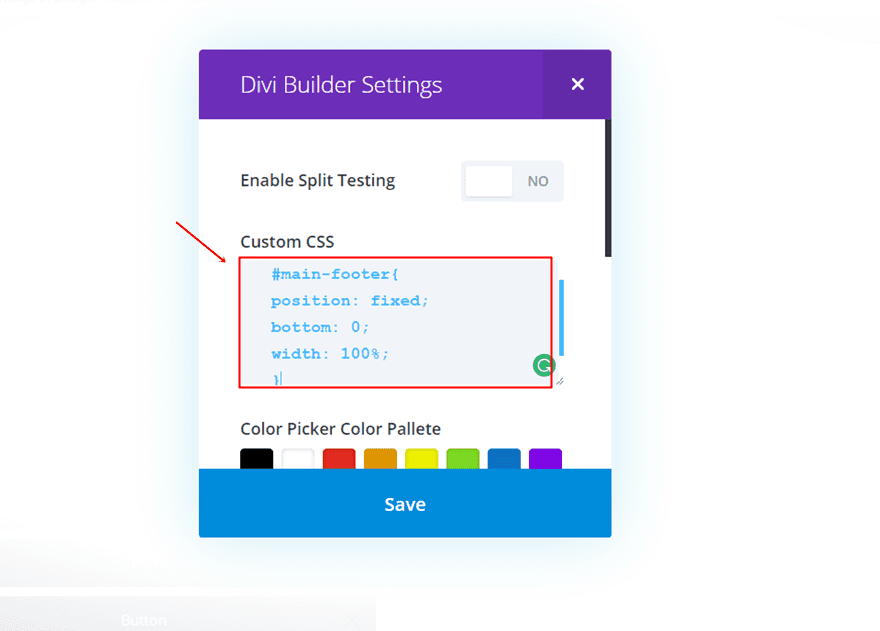
Scroll down and add the following code to the Custom CSS field:
#main-footer{
position: fixed;
bottom: 0;
width: 100%;
} 
Add CSS Code Through Theme Customizer
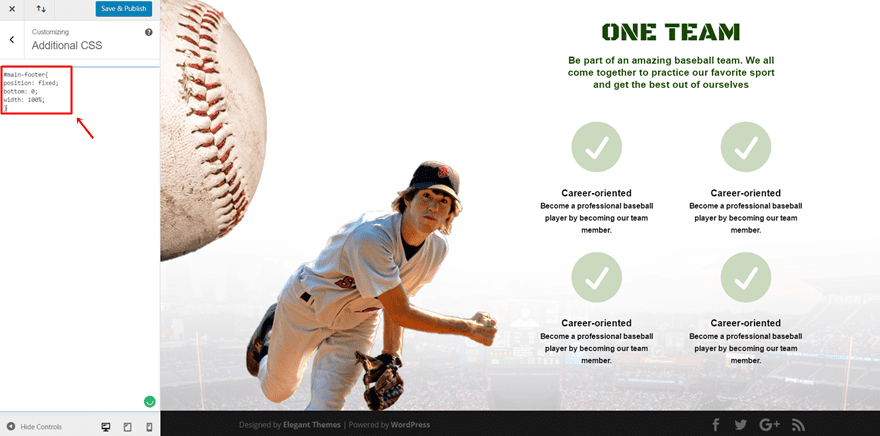
Another way to add the code is through the Theme Customizer. By using the Theme Customizer, you’ll watch the results happen in real-time on your website. The code that you add through the Theme Customizer applies to all the pages on your website.
Go to Theme Optimizer on your website > Additional CSS > Paste the following CSS lines of code:
#main-footer{
position: fixed;
bottom: 0;
width: 100%;
} 
Add CSS Code Through Theme Options
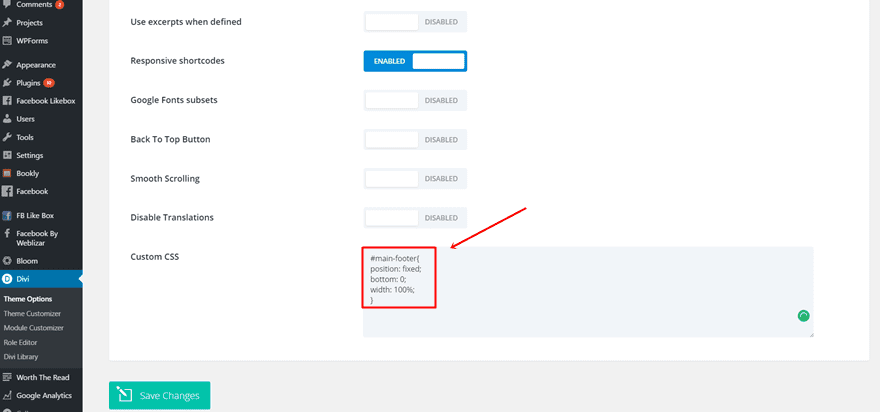
The last way to add the CSS code to your website is through the Theme Options. When you add your code in the Custom CSS field of the Theme Options, the code will apply to the whole website as well. This is the most frequently used way to add custom CSS code to your whole Divi website.
Go to Divi > Theme Options > General > Scroll down and add the following code to the Custom CSS field:
#main-footer{
position: fixed;
bottom: 0;
width: 100%;
} 
Add Fixed Footer Through jQuery
Another possibility we have is making the CSS changes through some jQuery code lines. When you’re using a fixed footer, you usually want to make sure it applies to all the pages on your website. That kind of consistency makes it easier for your visitors to navigate through your website without getting confused.
Add jQuery Code Through Code Module For One Page in Particular
Open the page where you want the fixed footer to apply and add a new standard section to the top of your page. Next, choose a fullwidth row and add a Code Module to it. Open the Code Module and past the following jQuery code in the Content Box:
<script text="text/javascript">
jQuery(function($) {
$("#main-footer").css("position","fixed").css("bottom",0).css("width",'100%');
});
</script> 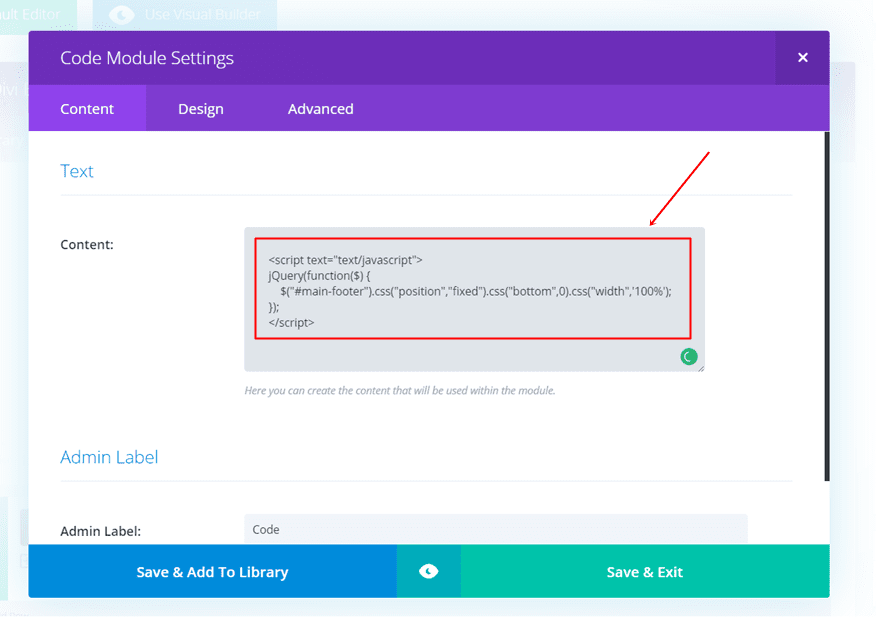
By adding jQuery code through the Code Module on one particular page, the code will only apply to that page. The rest of your website will have a normal footer whereas the one where you used the Code Module will have a fixed footer.
Add jQuery Code Through The Theme Options
The last option to add jQuery code that makes your footer fixed is through the Theme Options. The lines of code will immediately apply to your whole website and will offer that consistency your website needs.
Go to Divi > Theme Options > Integration > And paste the following lines of codes in the <head> of your website:
<script text="text/javascript">
jQuery(function($) {
$("#main-footer").css("position","fixed").css("bottom",0).css("width",'100%');
});
</script> 
Final Thoughts
We showed you how to make a sticky footer in one of the previous posts. This post particularly handled how to make a fixed footer for your website. The fixed footer will always remain at the bottom of the visitor’s screen while visiting your website. If you have any questions or suggestions, make sure you leave a comment down in the comment section below so we can get in touch!
Be sure to subscribe to our email newsletter and YouTube channel so that you never miss a big announcement, useful tip, or Divi freebie!
Featured Image by Zeeker2526 / shutterstock.com
The post How to Make Your Divi Footer Fixed appeared first on Elegant Themes Blog.