If you are running a design agency, you’re probably dealing with a lot of pressure while designing your company’s website. That’s most likely because creating websites is going to be one of the services you offer. It’s only logical that you want your design agency website to reflect the results that you can achieve for your potential customers, and to help you with that process, our design team has created a Design Agency Layout Pack that you can download for free!
And because we know that understanding your visitors’ needs and increasing your conversion rates are two of the main purposes of your website, we’re going to show you how to easily do split testing on your website while using our built-in feature Divi Leads.
Setting up Your Website Using The Design Agency Layout Pack
Before getting to Divi Leads, there are some necessary steps you should go through before you’re able to follow along with this tutorial. The first thing you’ll need to do is download the free Design Agency Layout Pack. Then, follow this tutorial to get your website set up properly and ready to run split tests. Or, if you prefer, you can follow along with the video below.
Using Divi Leads for Split Testing

Once you have all your pages in place, and once you’ve changed all the content to match your own website, you can start doing some split tests with Divi Leads to see which design settings and copy works best to turn your visitors into leads, and eventually, customers.
It’s important to note that split testing takes time and enough visitors to be representative of real user trends. You can’t expect accurate results if your split test only lasts for one day or if you don’t have enough visitors. Accurate results require qualitative data which comes from from a reasonable testing period and enough visitors. We’ve written a separate article about this if you’re wondering what exactly that means.
A few other things to consider…
Divi Leads Lives in the Backend Builder (For Now)
As mentioned before, Divi Leads is a built-in feature within Divi. To enable the split testing and make use of it, you’ll have to use the backend builder of the page you’re working on.
Subject & Goal
Every time you start a new split test, you’ll be asked to select a subject and a goal. The subject represents the module, row or section you want to experiment with and the goal is the part of your page that you want to influence. Since in this example we’re going to talk about how you can improve your lead generation with split testing, the goal will always be the one thing on the page that’ll bring leads to you; the contact form.
Choosing a Winning Design Variant
During your split test, you’ll be able to observe the results generated by the different design options or copy you create. Not only will you be able to see the difference in conversions, you can also see how many times your goal has been clicked or read, for instance. Once you feel like the answer as to which option is better is clear, you can go ahead and pick a winner that’ll be shown to all of your visitors from that point on.
Ok, it’s time to get started.
How to Set up Conversion Split Tests on The New Design Agency Layout Pack with Divi
Subscribe To Our Youtube Channel
Start Split Testing
Test #1: Change Headline Copy
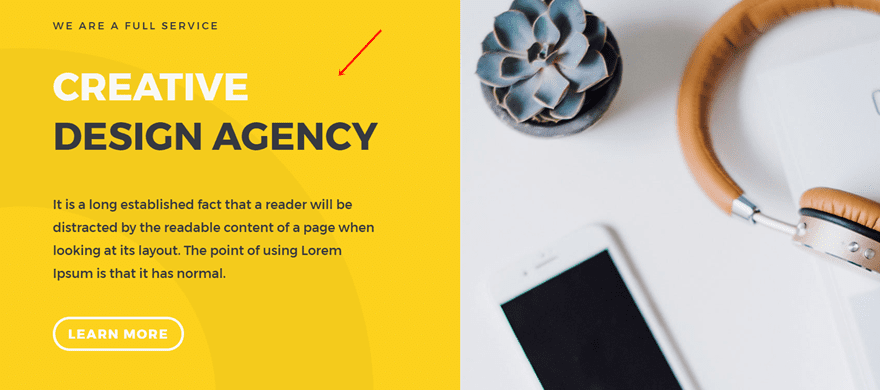
One of the things you can do with Divi Leads is testing the headline copy of your homepage. Your headline is one of the first things your visitors will see, so you want it to be as effective as possible.
Enable Split Testing
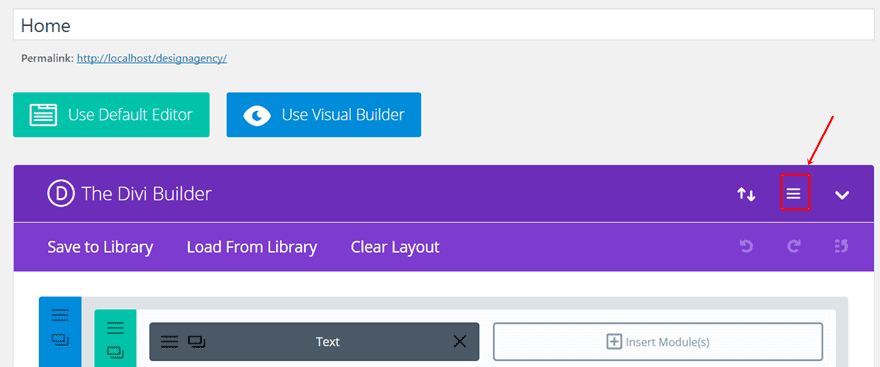
Go ahead and open your homepage with the backend builder. Once you’ve done that, click on the following icon within your Divi Builder:
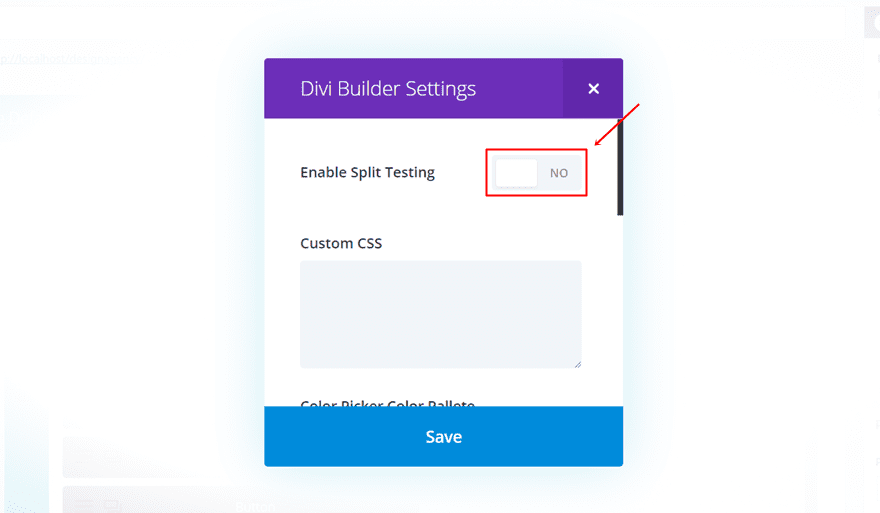
In the pop up that appears, go ahead and enable split testing.
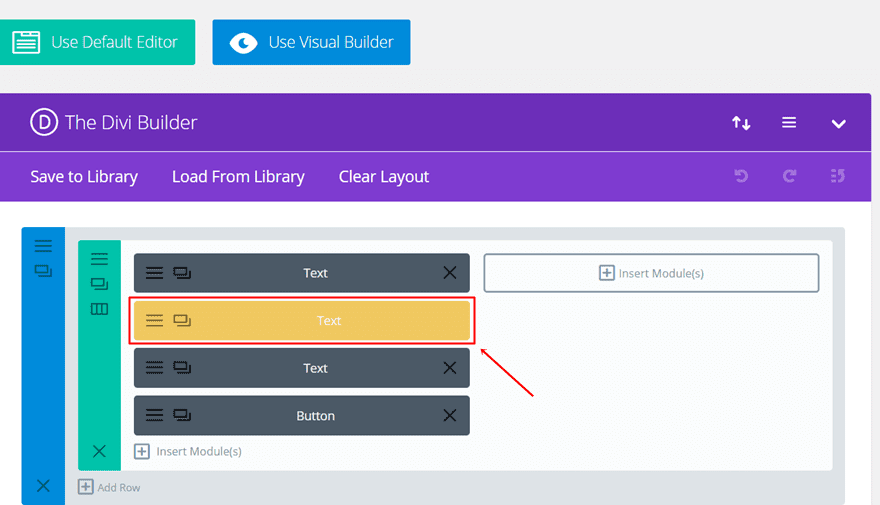
Choose Headline Text Module as Subject
As soon as you’ve enabled the split testing, you will see a popup that tells you to choose a subject. The subject is the thing you want to change on your website, which is, in this case, the Text Module that contains our headline.
Choose Contact Form as Goal
The next thing you’ll need to choose is the goal. For this use case, we’re going to focus on improving the lead generation or our website. That means our goal will always be the contact form, as it is the only thing on the page that is actually focused on getting contact details from your visitors.
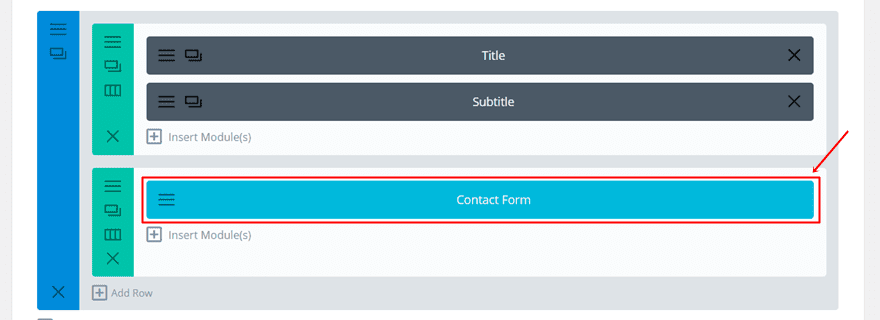
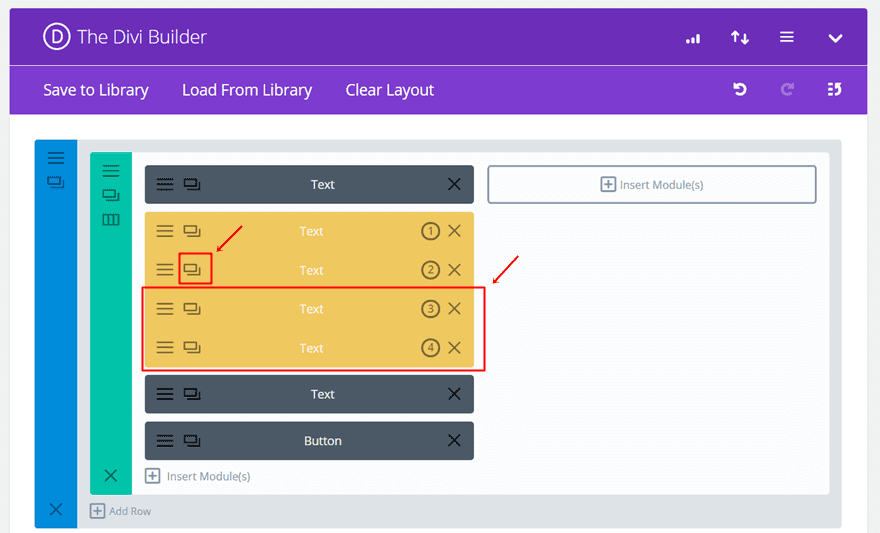
Clone Text Module
Once you’ve selected your goal, you can start making the changes to your subject (which in this case, is the headline Text Module). You can test as many versions of this Text Module as you want. By default, you’ll have 2 Text Modules but if you want to test 3 or 4 possibilities instead, you can click on the clone icon to duplicate your Text Module.
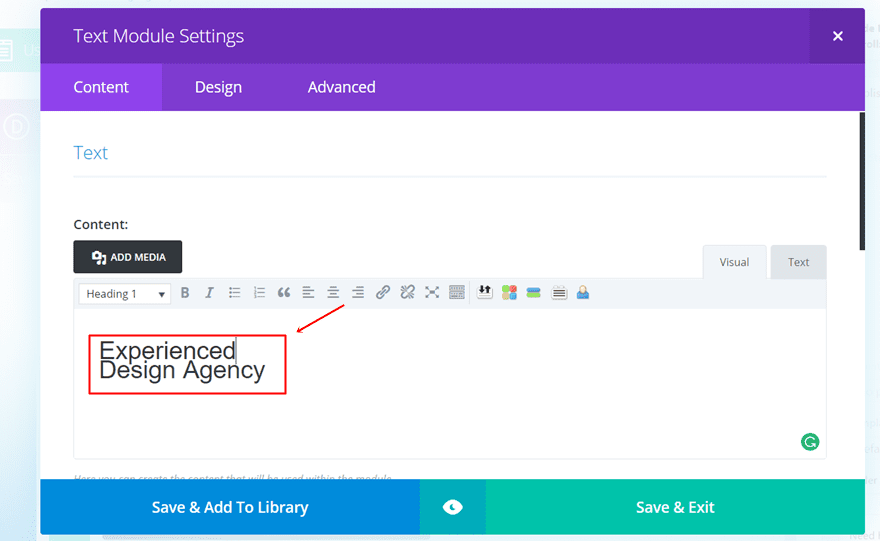
Change Text Modules
Then, it’s time to start changing the copy and/or design of your Text Modules. Every time a visitor lands on your page, they’ll only see one of all the possibilities.
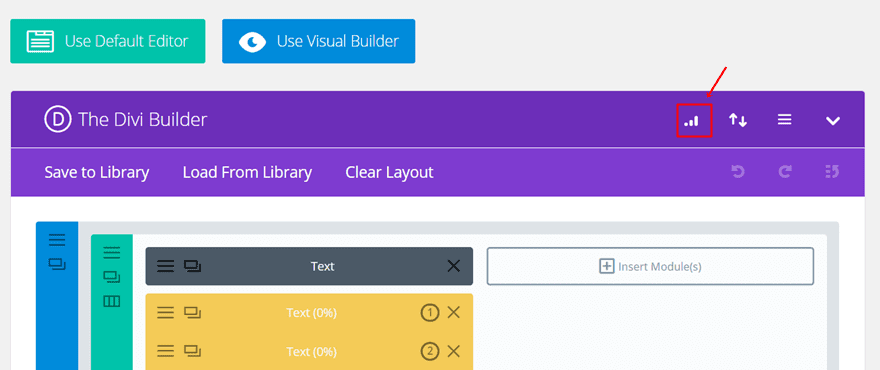
Consult Stats & Pick a Winner
You can check the data of your split test by clicking on the following icon within your Divi Builder:
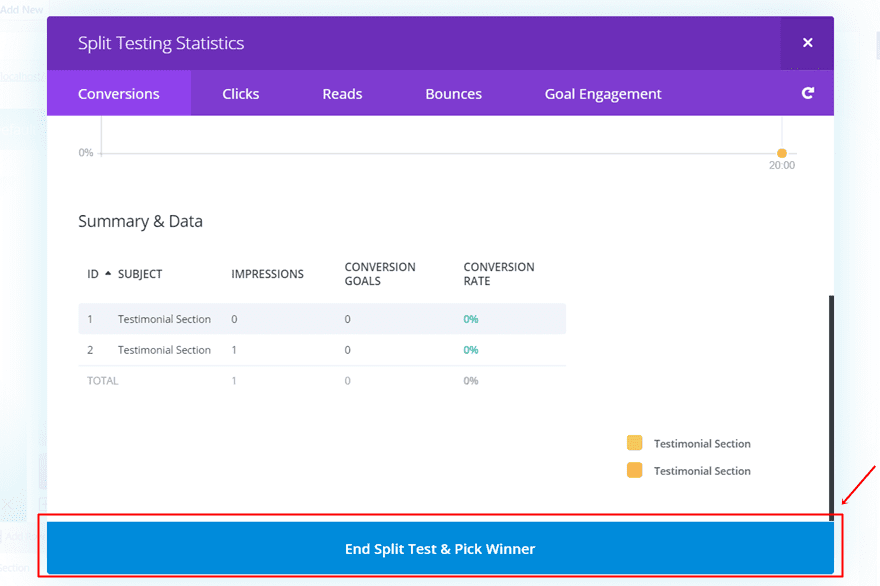
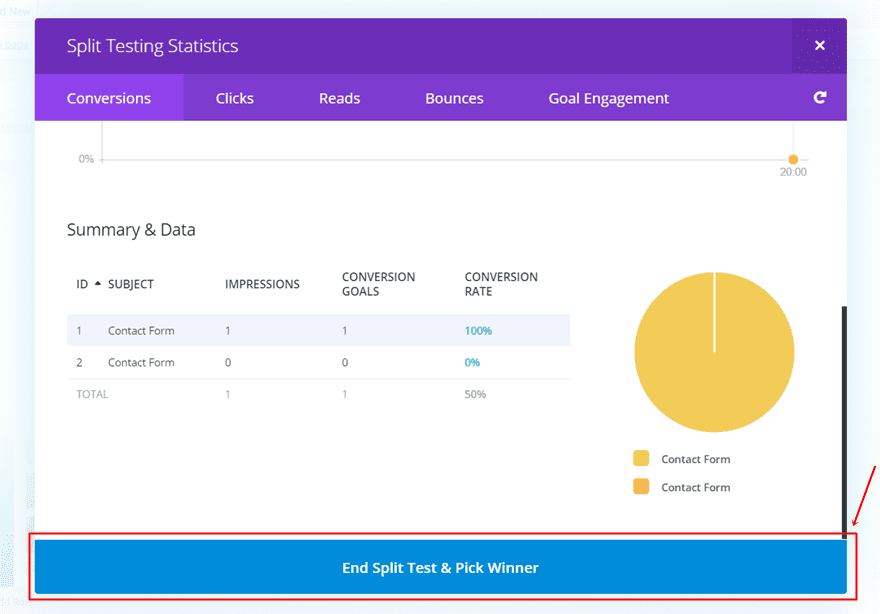
Once enough time has passed your results become representative and clear. You can then pick a winner by clicking on the button at the bottom of your statistics popup:
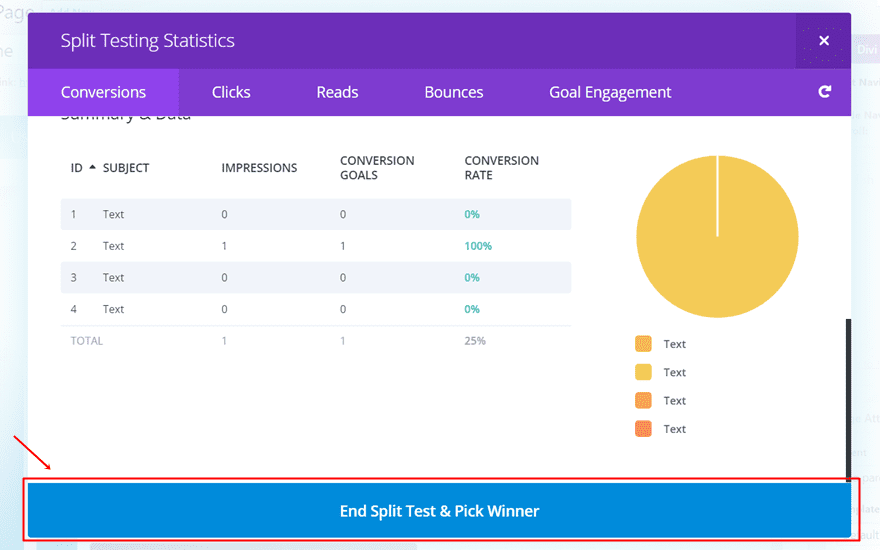
And clicking on the headline Text Module that you want to keep.
Test #2: Change Blurb Positions

Another thing you could do within the homepage is change the positions of your blurbs. People tend to read from left to right so the organization of your Blurb Modules could really make the difference in your conversion rates.
Enable Split Testing
Once again, start by enabling split testing on the homepage.

Choose Row with Blurb Modules as Subject
Then, instead of choosing a module as your subject, go ahead and select the complete row that contains your blurb modules.
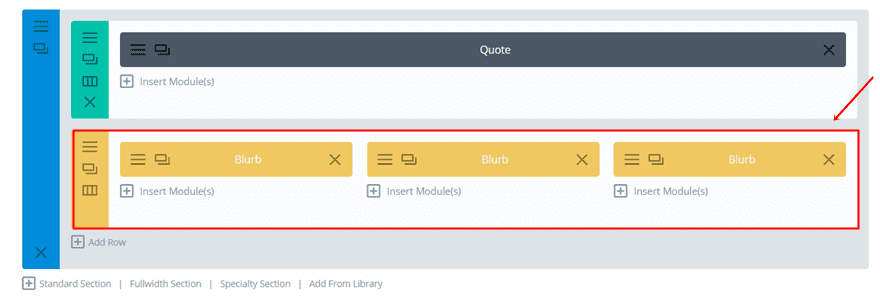
Choose Contact Form as Goal
Our goal, once again, will be the contact form.

Change Blurb Positions
Once you’ve selected your subject and goal, you can change the positions of your blurbs within one of the rows that you are testing.
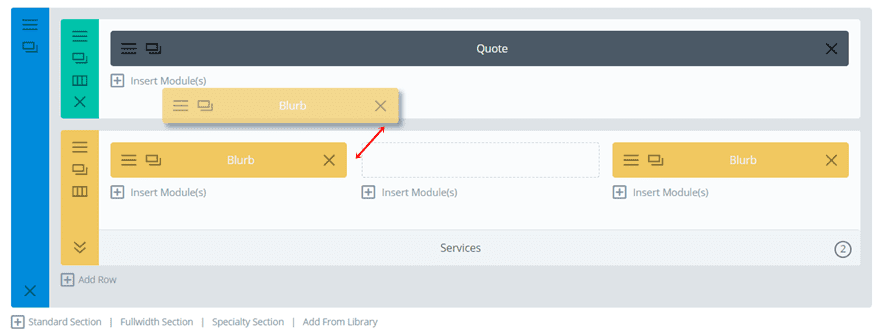
Consult Stats & Pick a Winner
Again, check the stats and pick the winner with the highest conversion rate.
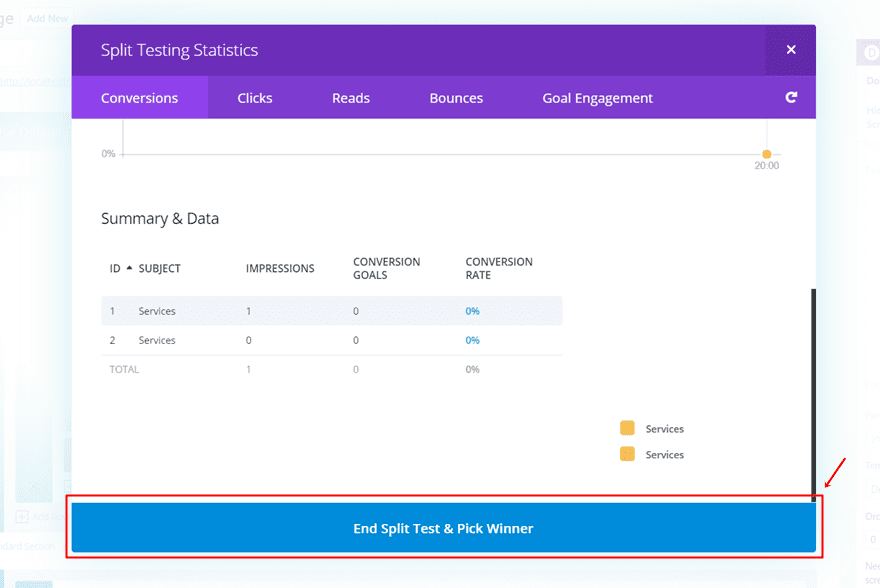
Test #3: Change Position of Testimonial Section
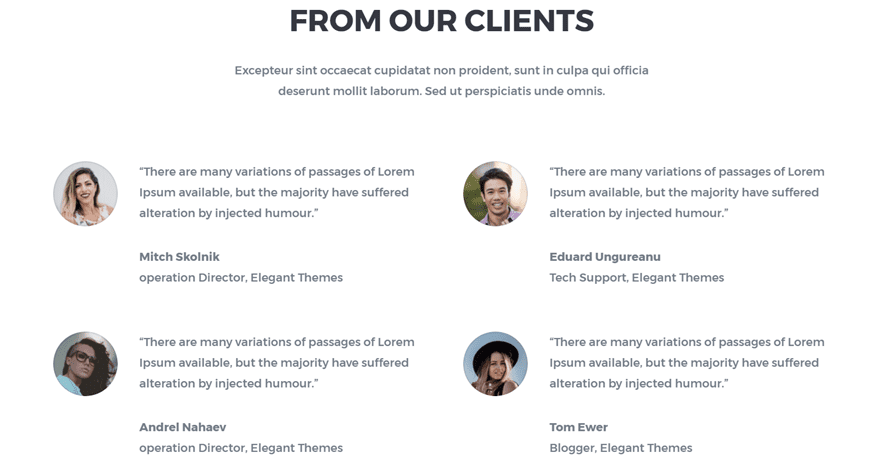
Until now, we’ve shown you how you can use split testing on both modules and rows. But you can use it on sections as well. For instance, you may wish to use it on a section that contains testimonials. If you open the landing page, you’ll notice that the testimonials are located at the bottom of the page, right before the contact form. However, these testimonials may be one of the things that’ll convince your visitors to get in touch. You might want to consider putting them at the beginning of the page to see if this improves your conversion rates.
Enable Split Testing
Open the landing page you’ve created and enable the split testing option.

Choose Testimonial Section as Subject
Next, choose the section with the testimonials at the end of the page as your subject.
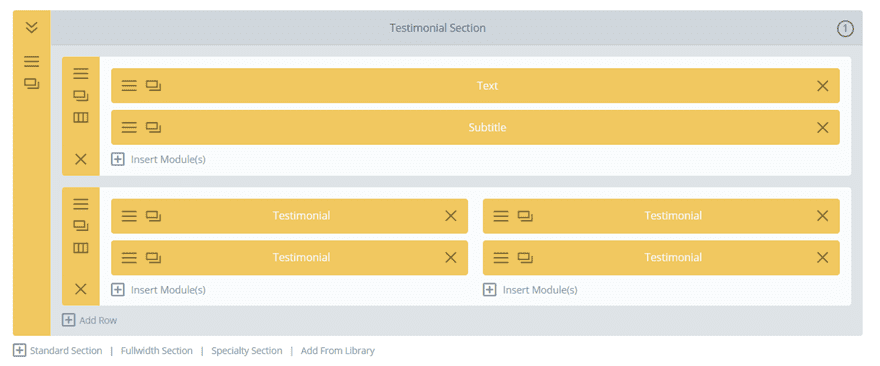
Choose Contact Form as Goal
Once again, choose the Contact Form as your goal.

Drag The Second Testimonial Section Higher up The Page
Open the second test version of the testimonial section and place it right below the hero section.

Consult Stats & Pick a Winner
After having obtained accurate results, pick a winner within the statistics popup.
Test #4: Use Contact Form as Both Subject Goal
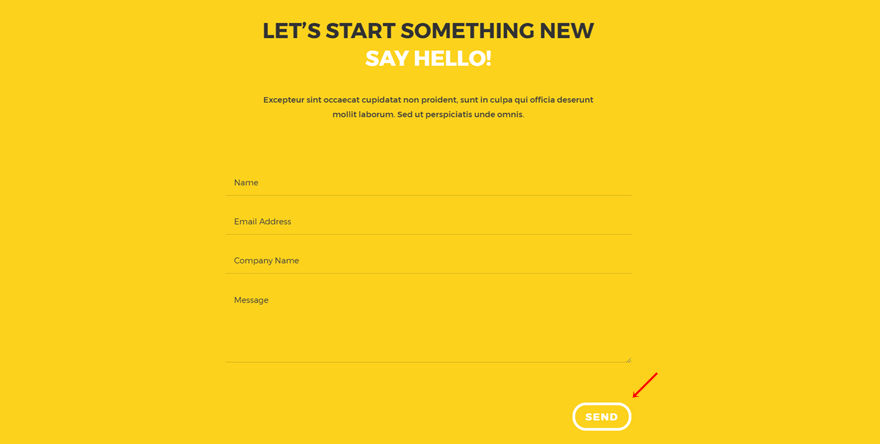
Last but not least, you can also make your subject and your goal the same thing. That means you’ll change something in the contact form, design or copy wise, and look at how this affects the conversion rate of that same contact form.
Enable Split Testing
By default, the split testing is disabled. So each time you want to do split testing on a page, whether you have done split tests on that page before or not, you’ll have to enable the split testing option.

Choose Contact Form as Subject
Then, go ahead and choose the Contact Form as your subject.
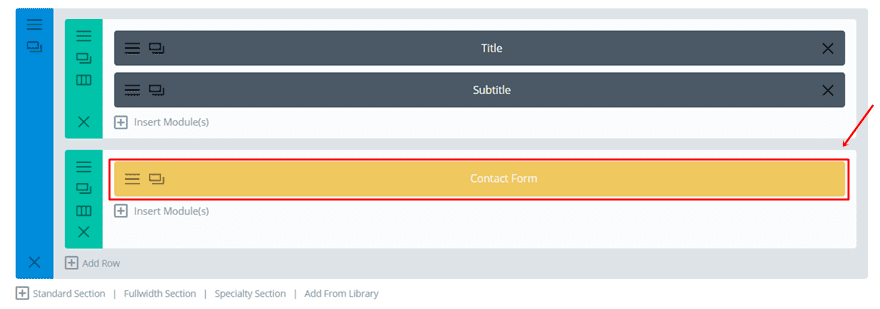
Choose Contact Form as Goal as well
Once again, click on the Contact Form to make it your goal as well.
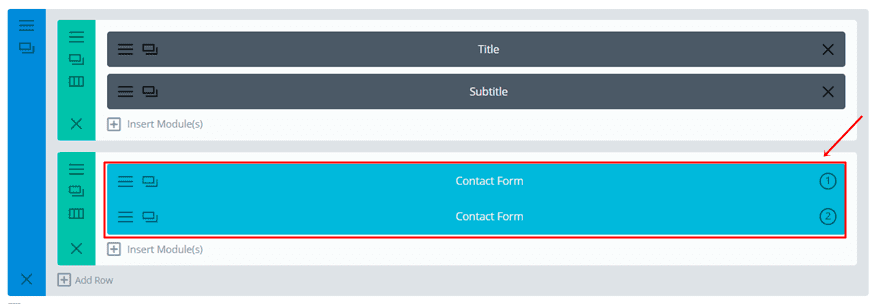
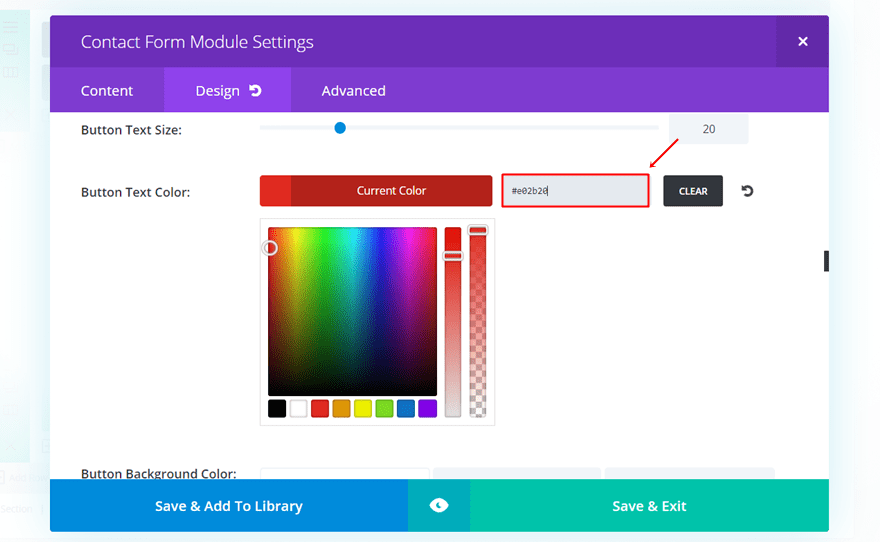
Change Button Color
Then, you can go ahead and make changes to the contact form, such as adding a more noticeable color to the button.
Consult Stats & Pick a Winner
And once again, once you’ve gone through the difference in conversion, you can pick a winner.
Final Thoughts
In this post, we’ve shown you how you can make use of Divi Leads to do split testing on your website that is built with the free Design Agency Layout Pack. More precisely, we’ve shown you how you can do split testing to increase the conversion rates of your website. If you have any questions or suggestions make sure you leave a comment in the comment section below!
Be sure to subscribe to our email newsletter and YouTube channel so that you never miss a big announcement, useful tip, or Divi freebie!
Featured Image by Andrii Symonenko / shutterstock.com
The post How to Set up Conversion Split Tests on The New Design Agency Layout Pack with Divi appeared first on Elegant Themes Blog.
