
Switching a background image with an animated GIF on hover can be a great way to bring life to your content while also providing a cool illustration for products or services. For example, if you are promoting the features of a particular software product, an animated GIF can help illustrate aspects of the products functionality (we do this for the products here at Elegant Themes). But, instead of showing that GIF initially, you may want to show a still screenshot of that function that is replaced with an animated version (or GIF) on hover.
In this tutorial, I’m going to show you how to create a blurb that switches a background (still) image with an animated GIF on hover. We’ll start by going over how to create a screenshot and GIF using Snagit (a screen capture software). Then we’ll go over how to implement those background images into a blurb so that they switch on hover. The actual switching of the images is extremely easy with Divi’s background hover options.
This design will help keep the design static upfront and then engage users whenever they interact with the content.
Let’s get started.
Sneak Peek
Download the GIF Background on Hover Layout for FREE
To lay your hands on the designs from this tutorial, you will first need to download it using the button below. To gain access to the download you will need to subscribe to our Divi Daily email list by using the form below. As a new subscriber, you will receive even more Divi goodness and a free Divi Layout pack every Monday! If you’re already on the list, simply enter your email address below and click download. You will not be “resubscribed” or receive extra emails.
@media only screen and ( max-width: 767px ) {.et_bloom .et_bloom_optin_1 .carrot_edge.et_bloom_form_right .et_bloom_form_content:before, .et_bloom .et_bloom_optin_1 .carrot_edge.et_bloom_form_left .et_bloom_form_content:before { border-top-color: #ffffff !important; border-left-color: transparent !important; }
}.et_bloom .et_bloom_optin_1 .et_bloom_form_content button { background-color: #f92c8b !important; } .et_bloom .et_bloom_optin_1 .et_bloom_form_content .et_bloom_fields i { color: #f92c8b !important; } .et_bloom .et_bloom_optin_1 .et_bloom_form_content .et_bloom_custom_field_radio i:before { background: #f92c8b !important; } .et_bloom .et_bloom_optin_1 .et_bloom_border_solid { border-color: #f7f9fb !important } .et_bloom .et_bloom_optin_1 .et_bloom_form_content button { background-color: #f92c8b !important; } .et_bloom .et_bloom_optin_1 .et_bloom_form_container h2, .et_bloom .et_bloom_optin_1 .et_bloom_form_container h2 span, .et_bloom .et_bloom_optin_1 .et_bloom_form_container h2 strong { font-family: “Open Sans”, Helvetica, Arial, Lucida, sans-serif; }.et_bloom .et_bloom_optin_1 .et_bloom_form_container p, .et_bloom .et_bloom_optin_1 .et_bloom_form_container p span, .et_bloom .et_bloom_optin_1 .et_bloom_form_container p strong, .et_bloom .et_bloom_optin_1 .et_bloom_form_container form input, .et_bloom .et_bloom_optin_1 .et_bloom_form_container form button span { font-family: “Open Sans”, Helvetica, Arial, Lucida, sans-serif; } p.et_bloom_popup_input { padding-bottom: 0 !important;}

Download For Free
Join the Divi Newlsetter and we will email you a copy of the ultimate Divi Landing Page Layout Pack, plus tons of other amazing and free Divi resources, tips and tricks. Follow along and you will be a Divi master in no time. If you are already subscribed simply type in your email address below and click download to access the layout pack.
You have successfully subscribed. Please check your email address to confirm your subscription and get access to free weekly Divi layout packs!
To import the layout to your page, simply extract the zip file and drag the json file into a new page with the Divi Builder active.
Let’s get to the tutorial shall we?
What You Need to Get Started
To get started, you will need the following:
- The Divi Theme installed and active
- Screen Capture Software (or a combination of tools) that will allow you to take screenshots, record screen videos and create GIFs. In this tutorial I will be using Snagit mainly because it is an all-in-one solution I use everyday for my blog posts and tutorials.
- A new page created to build from scratch on the front end (visual builder)
After that, you will have a blank canvas to start building some hover tabs in Divi.
Part 1: Creating Screenshots and GIFs
For this design, we want to create a screenshot to display as still background image for a blurb module. Then we want to create a GIF (an animated image) that brings that still background image to life with a short illustration of how the product works. The trick is to create images and GIFS that look enough alike that they have a smooth transition when switching one image with the other on hover.
Once the two images are created, we can use the still image as the initial background image. Then we can switch the background image to the gif image when hovering over the blurb module.
To create the screenshots and GIFs, I will be using Snagit. Although it isn’t a free software, it is really easy to use and it allows you to create screenshots, record your screen, and covert screen recordings into GIFs all in one place.
Creating the Screenshot Still Image
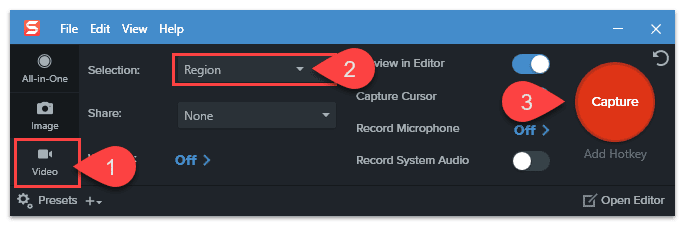
To create the screenshot, open Snagit and open the capture box. Then make sure to choose to capture an image by selecting a region of your screen. This will allow you to drag an area on your screen to be captured as an image. To initial the screen capture, click the capture button.
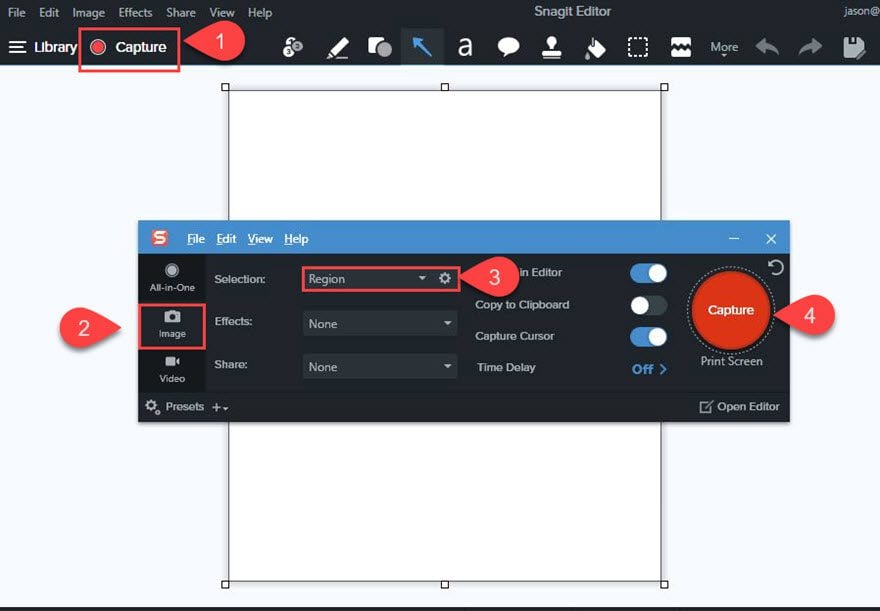
Then click and drag the capture area around the area of your screen you wish to capture as an image.
Save the image to your computer. Then open the Snagit Capture box again and choose to capture a video by selecting a region of your screen. To initial the screen capture, click the capture button.
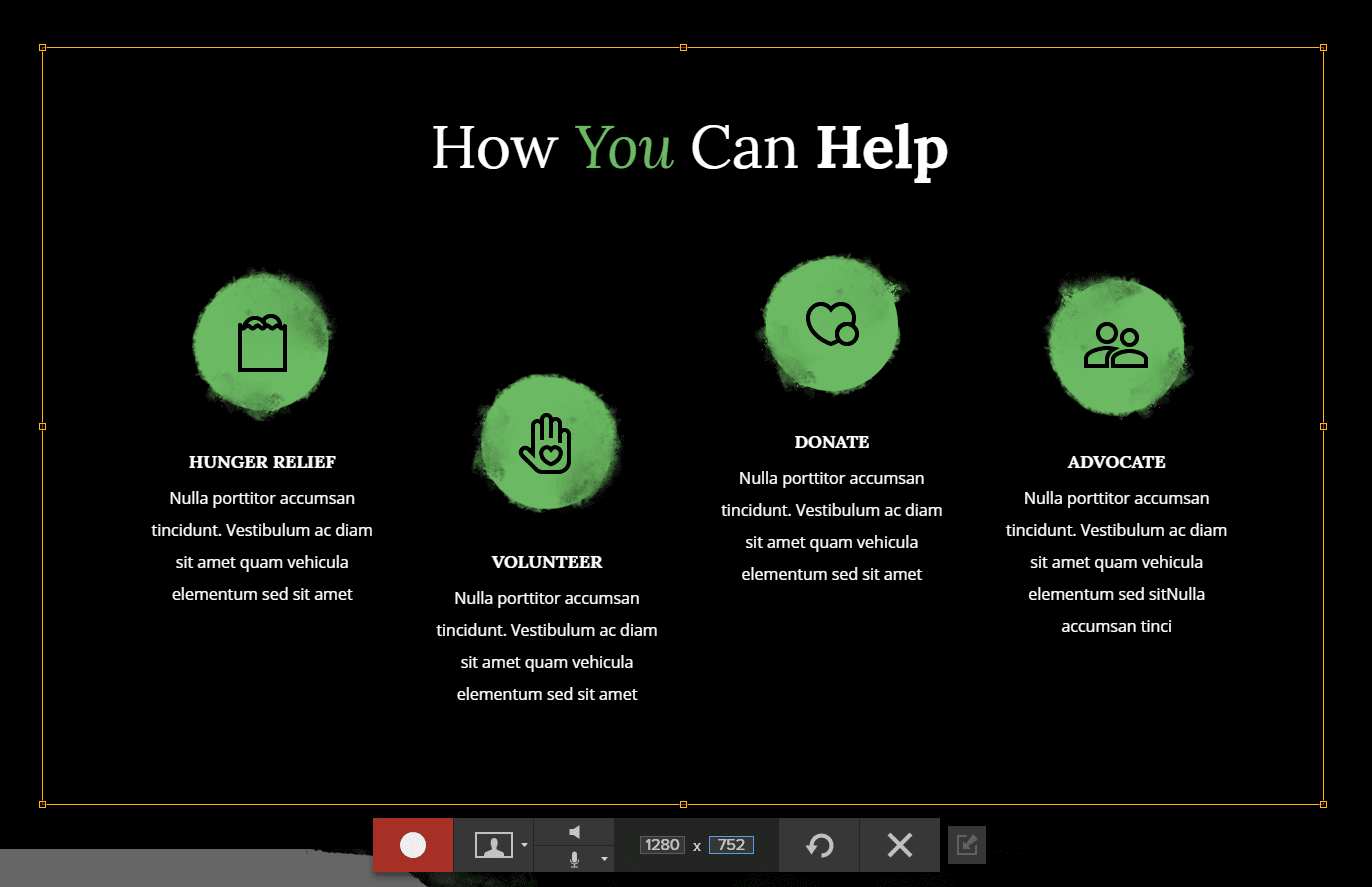
Then click and drag the capture area around the area of your screen you wish to capture and record as a video clip. To create a more seamless transition between the still image and the gif, you will want to capture the same area for the video as you did for the image (or as close as possible).

When you are ready, click the record button and conduct the demonstration you wish to record.
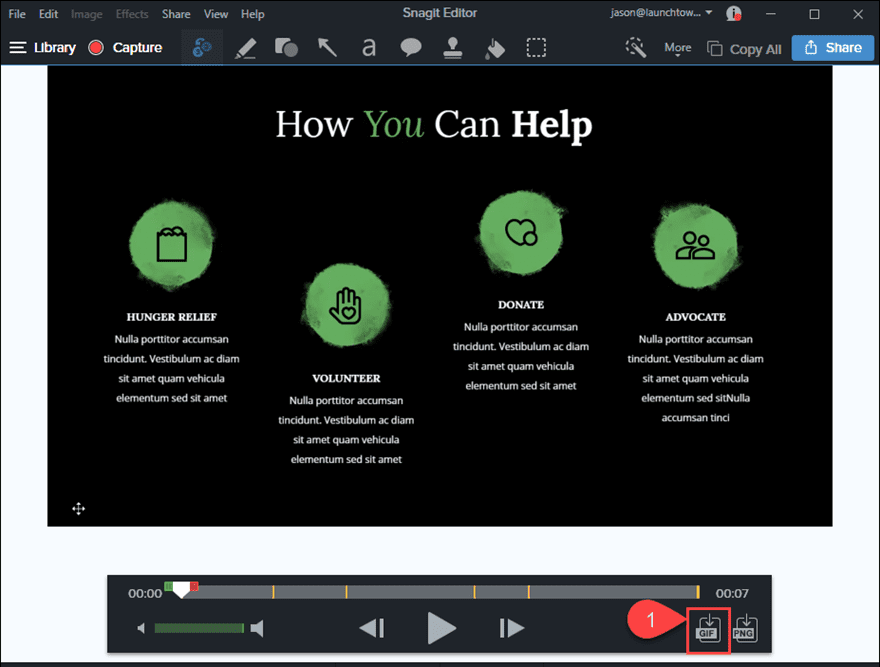
When you are done, click stop to stop recording. Then you can edit the video clip in the Snagit editor. When you are done edition, click the Gif button next to the video to create a Gif out of your video.
In the Create Gif popup, modify the output settings as needed. Make sure to enable looping so that your gif will repeat. Then click the Create button.
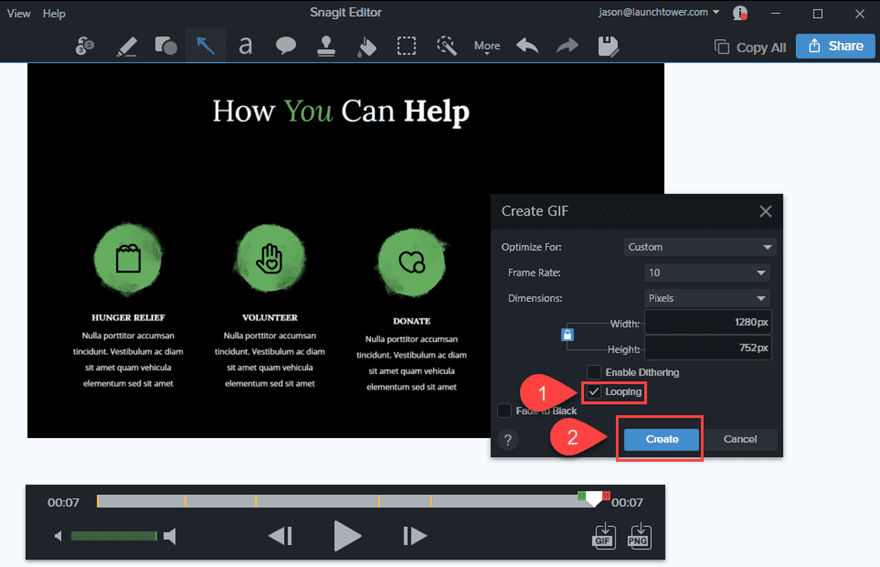
Once the gif has been created, save it to your computer.
Now you have a still image and a gif image ready to be added to your design in Divi.
Part 2: Creating a Blurb that Switches the Background Image with the Animated Gif Image on Hover
If you haven’t done so already, create a new page and deploy the Divi Builder to build on the front end. Then create a new regular section with a two column row.
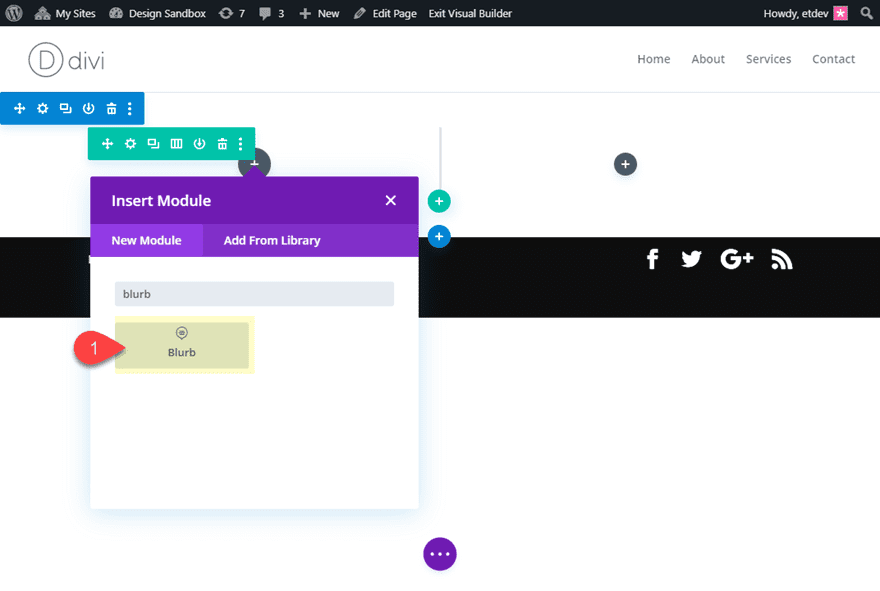
In column 1, add a blurb module.
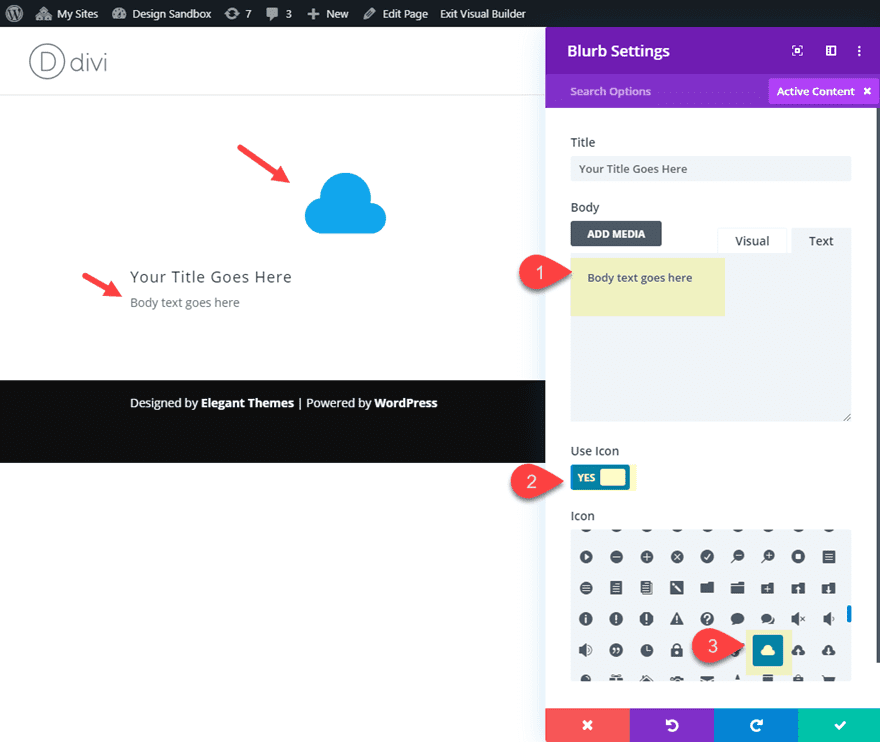
Then update the content settings as follows:
Body: “Body text goes here”
Use Icon: YES
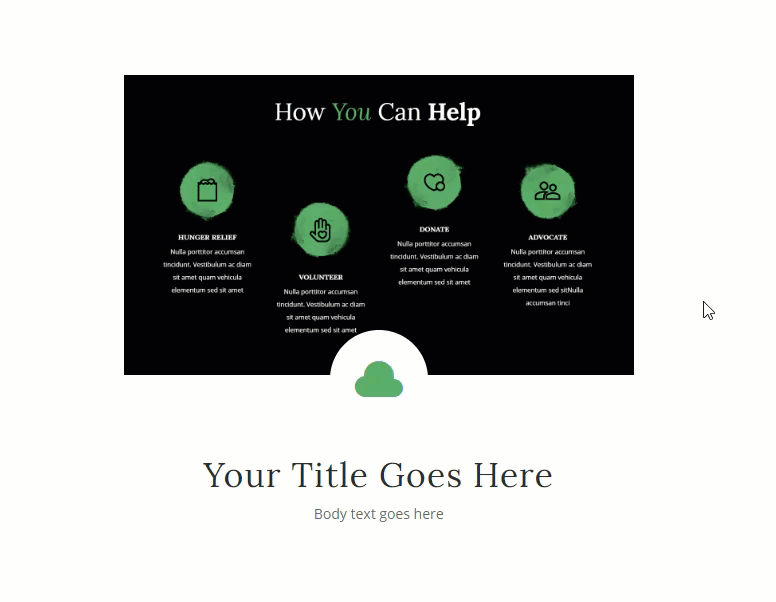
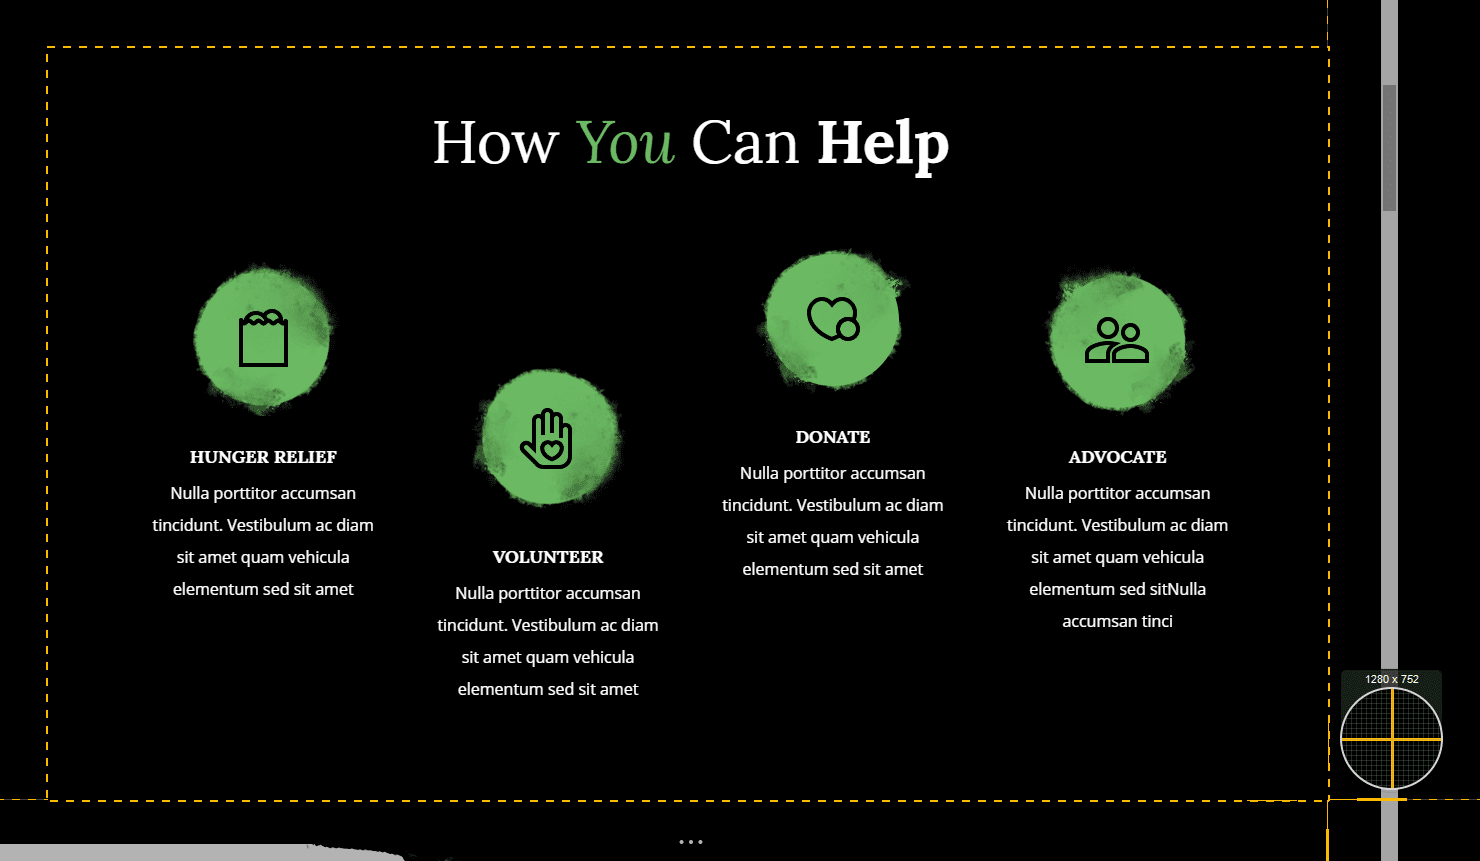
Icon: cloud (see screenshot)
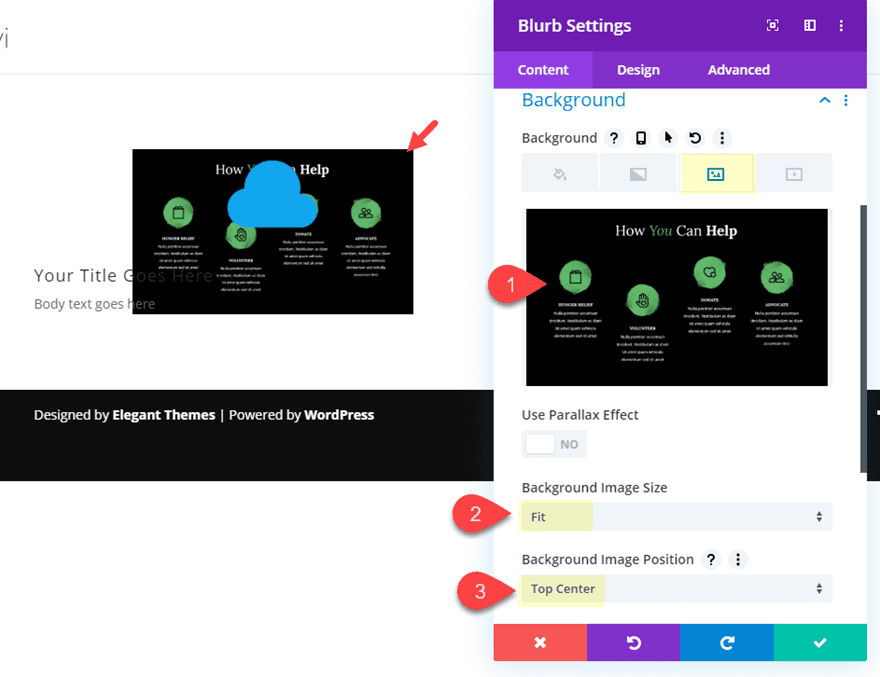
Add the Default Background Image
Next, add the default background image to the blurb as follows:
Background Image: Upload the background image (the still screenshot) you created.
Background Image Size: Fit (this will make sure the entire image stays in view)
Background Image Position: Top Center (this will keep the image at the top of the blurb)
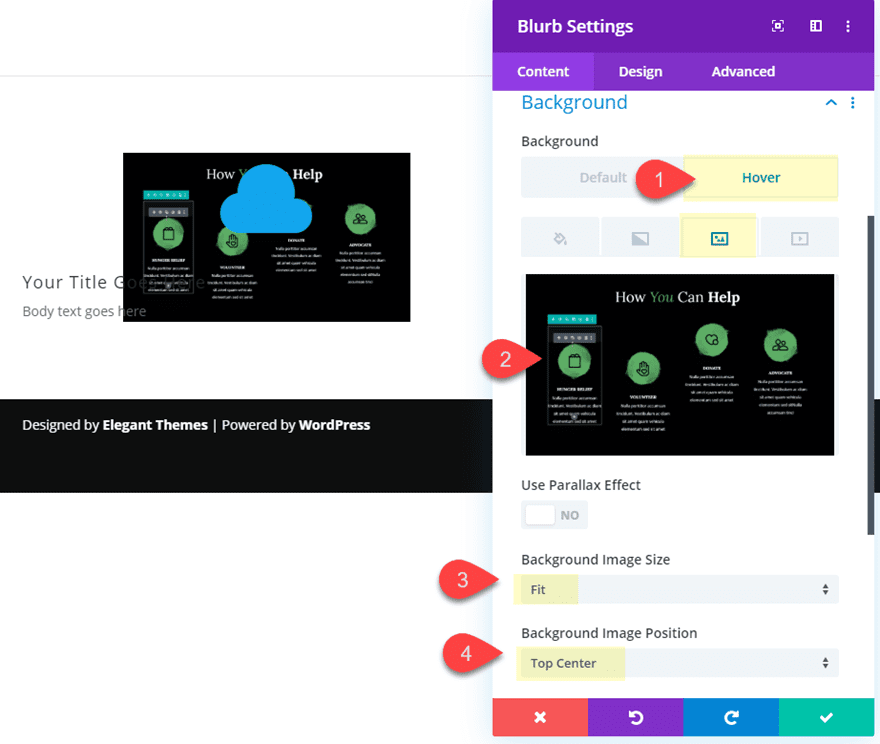
Add the Hover Background Gif Image
After you have the initial background image in place, deploy the background hover option and select the hover tab. Then add the Gif image to serve as a new background image on the hover state.
Styling the Blurb Module
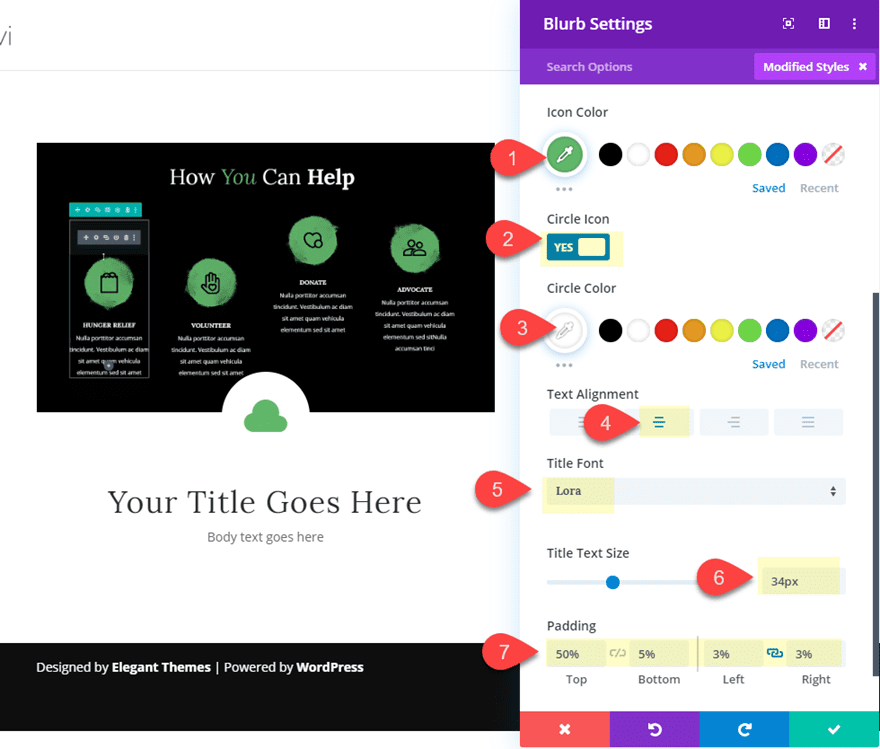
Continue to style the blurb module by updating the following design settings:
Icon Color: #6bb962
Circle Icon: YES
Circle Color: #ffffff
Text Alignment: center
Title Font: Lora
Title Text Size: 34px
Padding: 50% top, 5% bottom, 3% left, 3% right
The real key to this design is the padding. In order to get the background placed above the blurb content, you need to add about 50% of top padding. And since the background image size is set to “fit” and the position is set to “top center”, it will sit nicely above the content respond to browser widths.
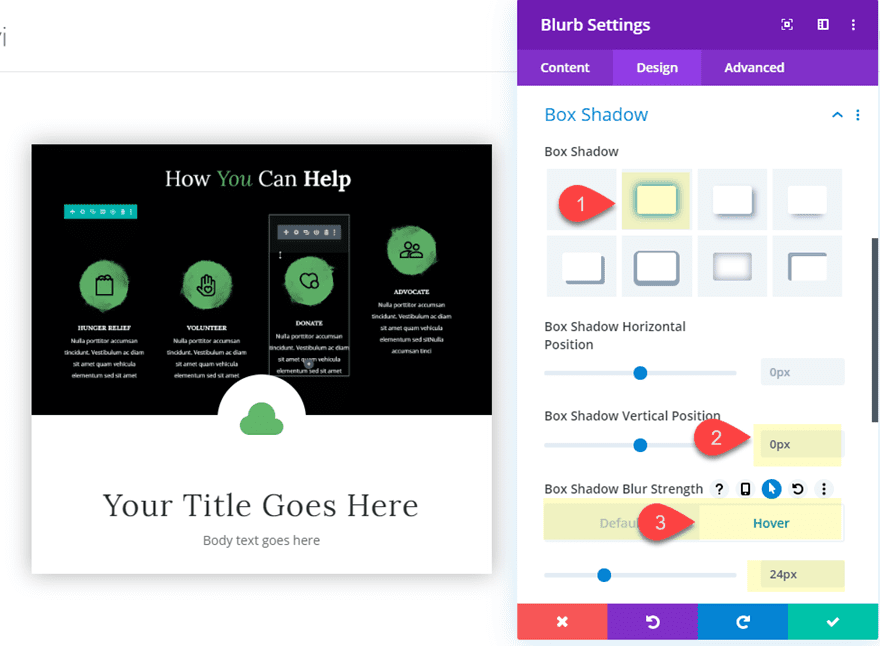
Lastly, give the blurb a box shadow on hover as follows:
Box Shadow: see screenshot
Box Shadow Vertical Position: 0px
Box Shadow Blur Strength: 0px (default), 24px (hover)
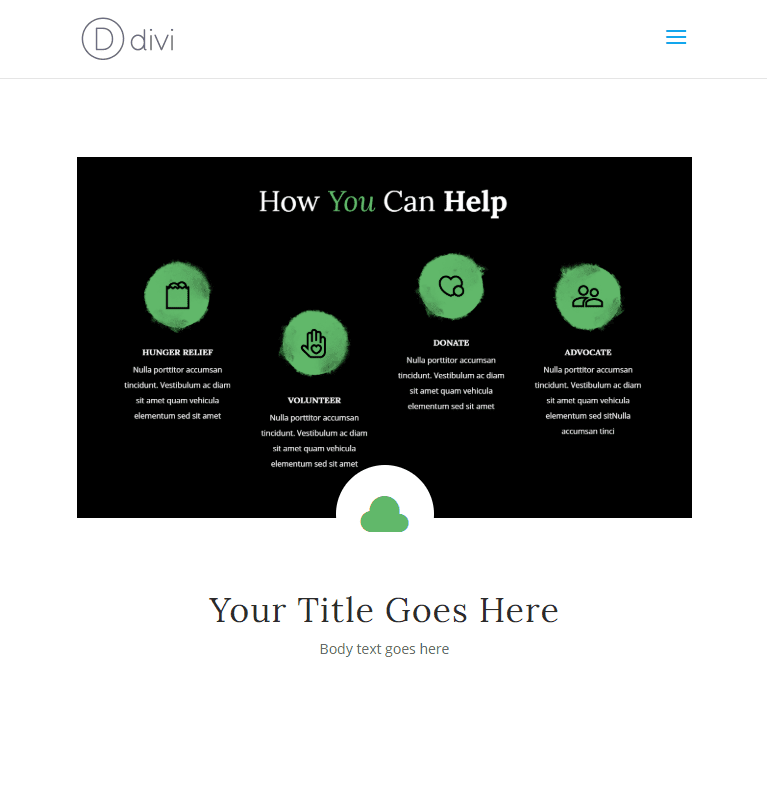
Final Result
Here is the final result.
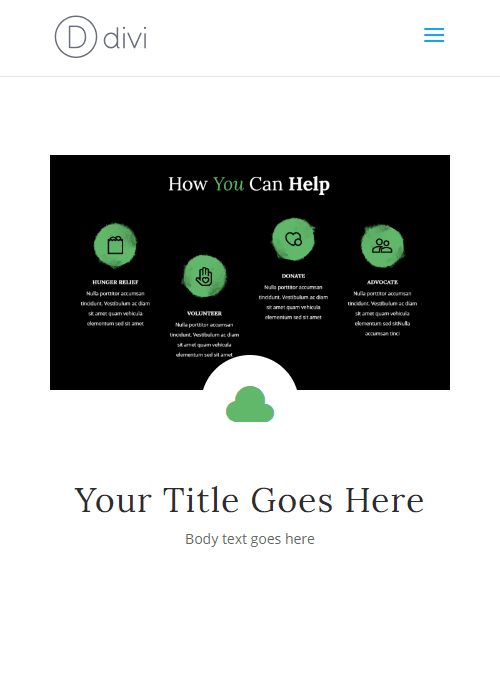
And here is the design on tablet and phone.
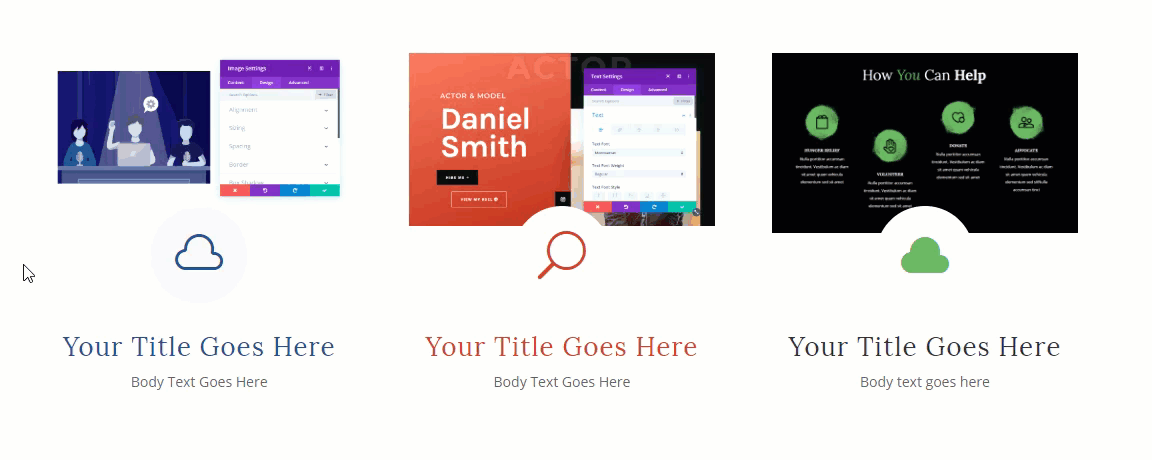
And here is what it might look like with additional blurbs with different screenshots and colors.
Final Thoughts
If you aren’t familiar with using GIFs on your website, you definitely should consider it. They can really bring your content to life and provide extremely useful illustrations for your visitors. And, with Divi’s background hover options, you can easily switch a still image with a GIF on hover. This solution can provide a less distracting design upfront that really engages the user when interacting with your content. Hope you find it useful for your next project.
I look forward to hearing from you in the comments.
Cheers!
The post How to Switch a Background Image with an Animated Gif on Hover appeared first on Elegant Themes Blog.