
Divi’s new Dynamic Content feature gives us the ability to build dynamic layouts for blog posts (and a lot more). And there are good reasons you may consider doing this. One reason is design. You can design some amazing post layouts with Divi using the visual builder, especially when you use the premade layouts available as a starting point. Another reason is convenience. Once the post layout is designed with all the dynamic content elements in place (like categories, featured images, post tags, custom fields, etc.), the process of creating and updating blog posts is greatly simplified. Other than the actual post content, all of the other post data can be updated without ever having to deploy the visual builder.
In this tutorial, I’m going to show you how to build a dynamic post layout in Divi. By starting with a premade layout, I’ll walk you through the process of adding dynamic content throughout the layout and then designing that content to match. I’ll even introduce a simple way to use custom fields as dynamic content.
Let’s get started.
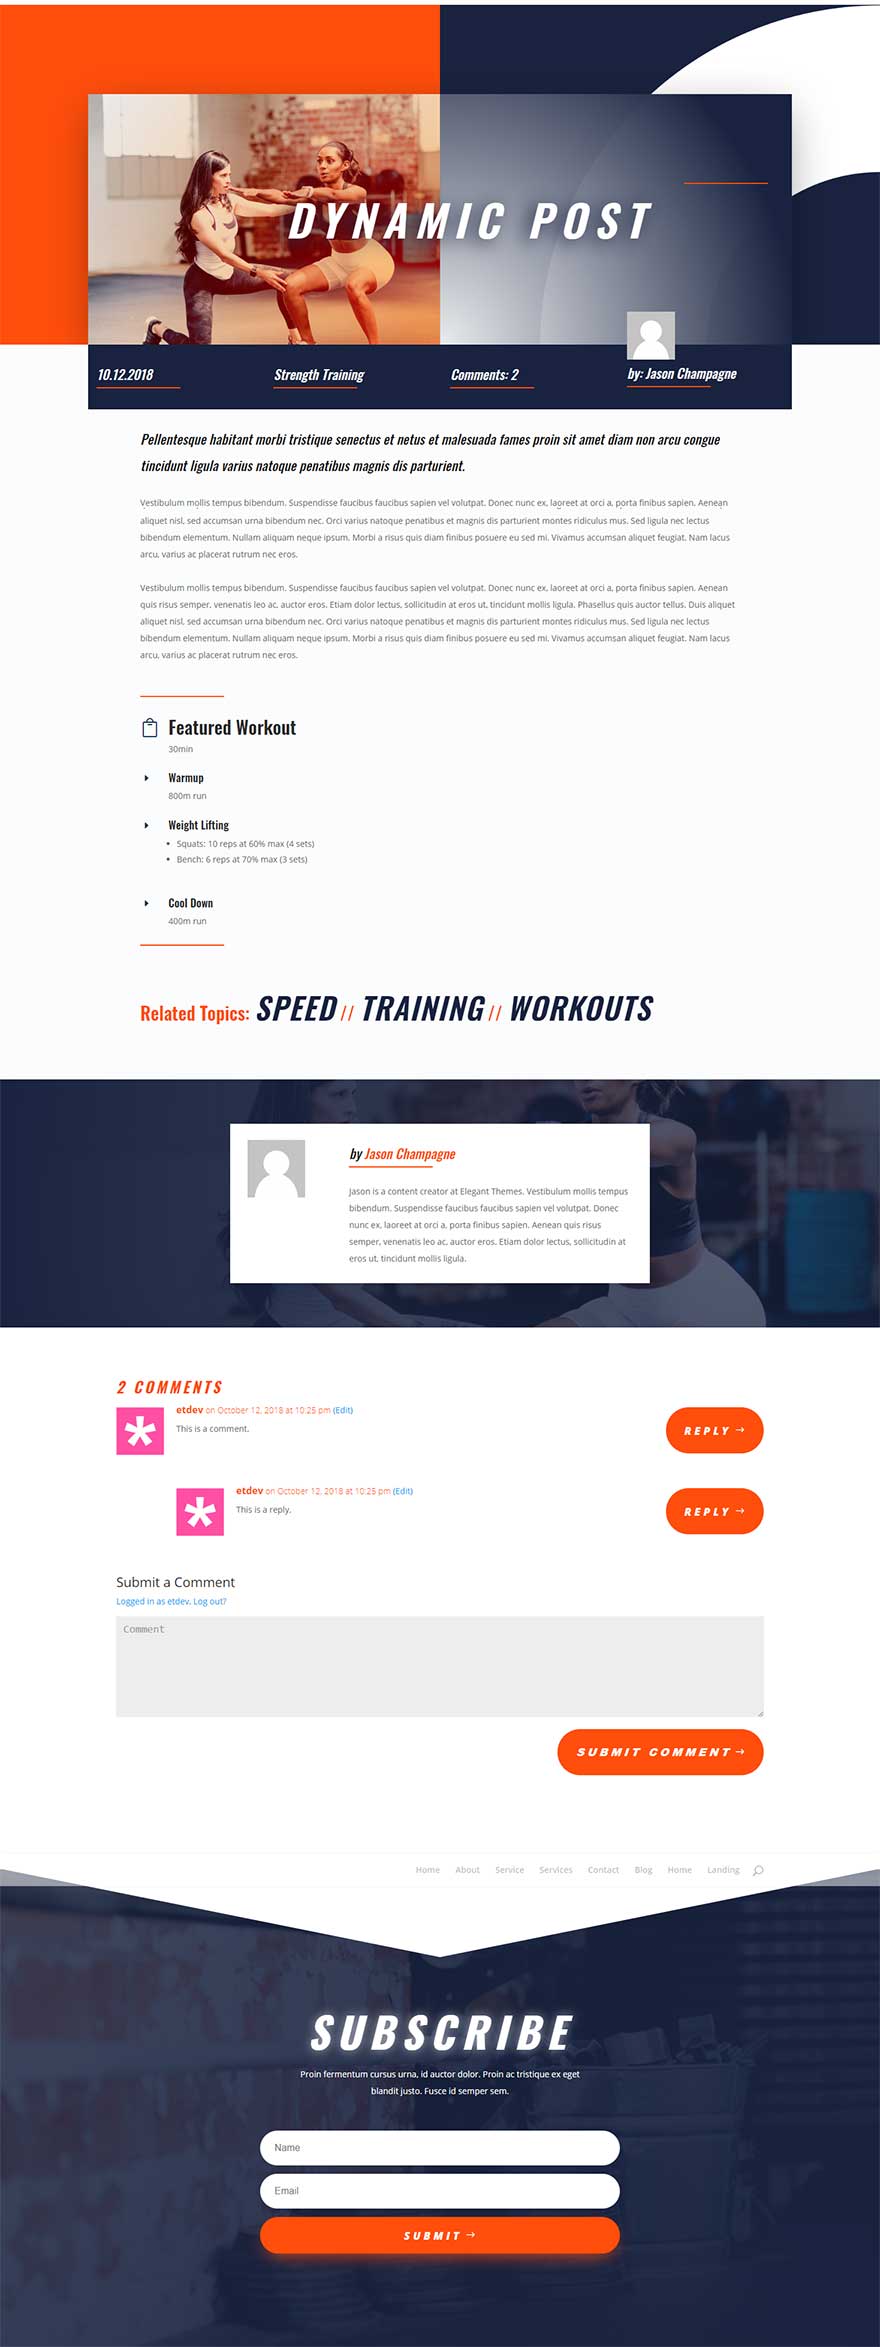
Sneak Peek
What You Need to Get Started
For this tutorial, you will need the following:
- Divi Theme
- Personal Trainer Layout Pack. This layout pack is accessible from the Divi Builder. We will be using the Personal Trainer Service Page Layout to kickstart the design of our post layout.
I will also be showing you how to take advantage of custom fields to build a featured workout section using custom post type functionality. Custom fields are built in to WordPress and do not require additional plugins or anything. So you already have what you need.
Part 1: Adding the Premade Layout to the Post
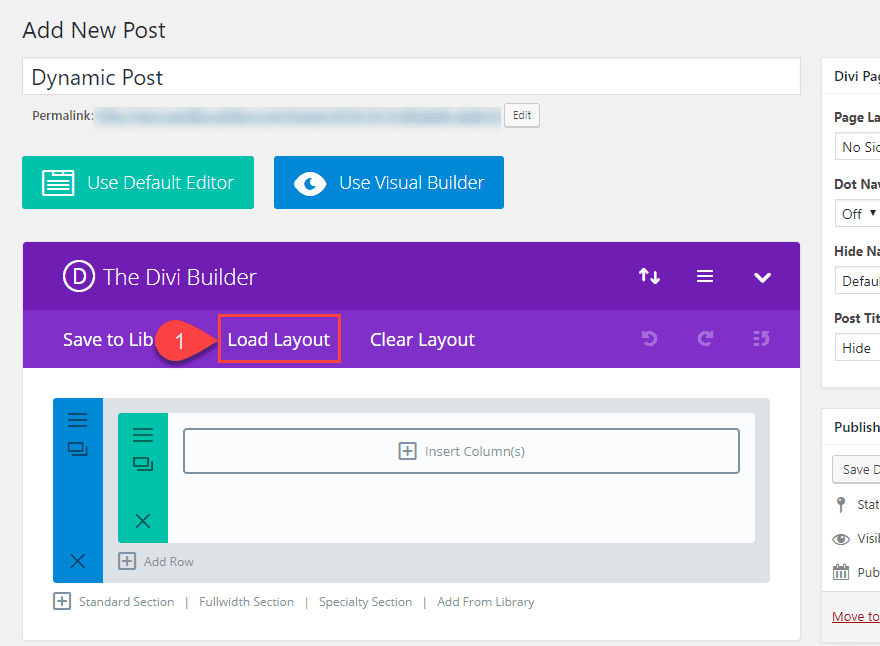
To kick things off, go ahead and create a new post (not page), give your post a title, and then click the Use Divi Builder button. Don’t deploy the visual builder yet because we first need to customize our post settings from the default WordPress editor screen.
Since we do want to add the our premade layout in order to pull in our images from the layout (we need it for our featured image). Click the Load Layout button located in the Divi Builder menu.
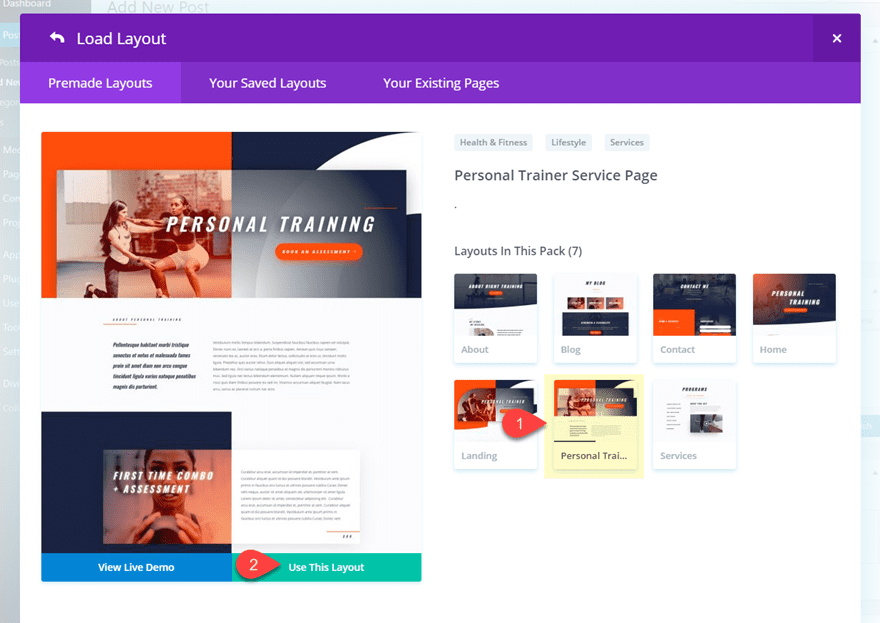
From the Load From Library popup, select the Personal Trainer Service Page Layout and deploy it to your post by clicking the “Use This Layout” button.
Then publish your post to save your settings.
Part 2: Updating Divi Page Settings, Post Meta Data, and Featured Image
Divi Page Settings
It’s important that we update the Divi page settings so that our new layout will fit the design. We also need to hide the default post title display since we will be using the post title module instead.
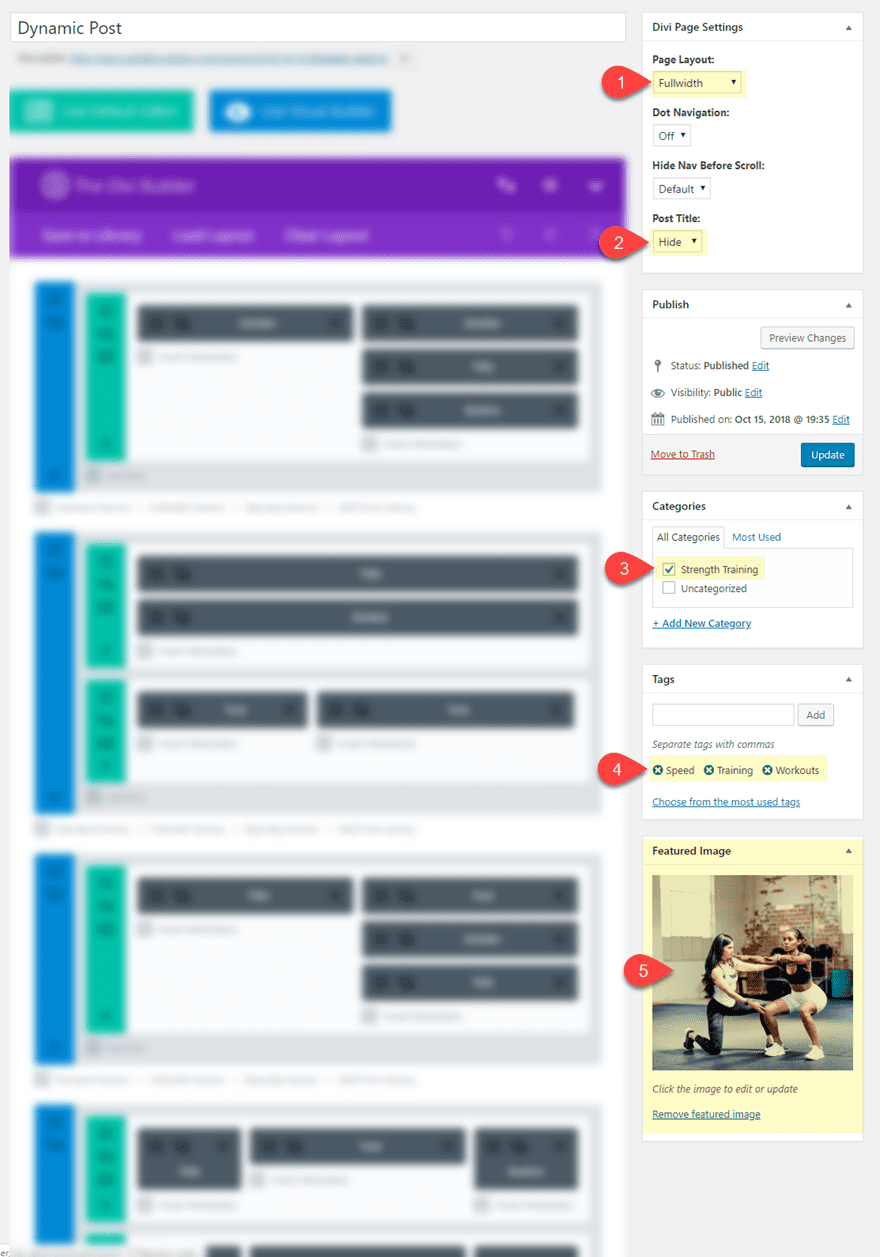
At the top right of the page, locate the Divi Page Settings box and update the following:
Page Layout: Fullwidth
Show Post Title: Hide
If you don’t see the Divi Page Settings, you probably don’t have the Divi Builder activated so make sure you do that first.
Add Categories
Under the categories box, add a new category called “Strength Training” and make sure it is the only category selected.
Add Tags
In the tags box, add the following three tags: Speed, Training, and Workouts.
Featured Image
Next, add a featured image that matches the background image used in the header of the the layout as shown in the screenshot below.
Part 3: Adding Custom Fields for the Dynamic Workout Content
Custom Fields are built in to WordPress. They allow post authors to add extra information (called meta-data) to a post in addition to the default meta-data like categories, post author, post date, etc. At a basic level, custom fields can be used to display the weather or the author’s mood when writing a post. But there are many different ways to use custom fields to create dynamic content for your website. Feel free to read more on how to add custom fields to your website. But for this use case, I think you will grasp the basic concept of custom fields by building a few for yourself.
For this example, I’m going to show you how to add a few custom fields that can be used to add dynamic content to your post. The dynamic content for this example is a featured workout. Once the custom fields are in place, all the post author would need to do is fill in the custom field values and the content will be updated (dynamically) to the post without ever having to load the Visual Builder.
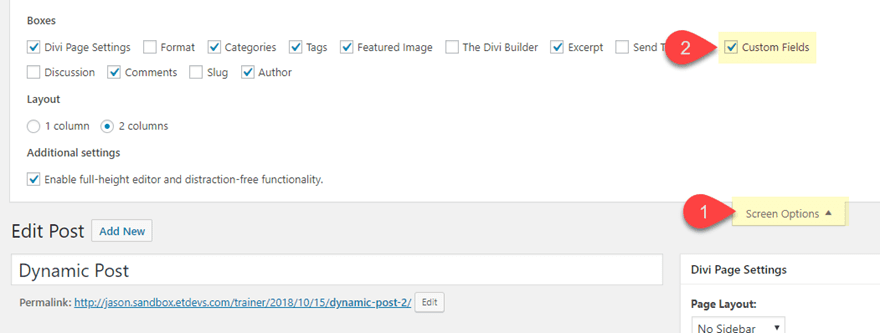
To do this, scroll down to the bottom of the post and and find the Custom Fields box. If for some reason it isn’t displayed, make sure you select it from screen options at the top of the page.
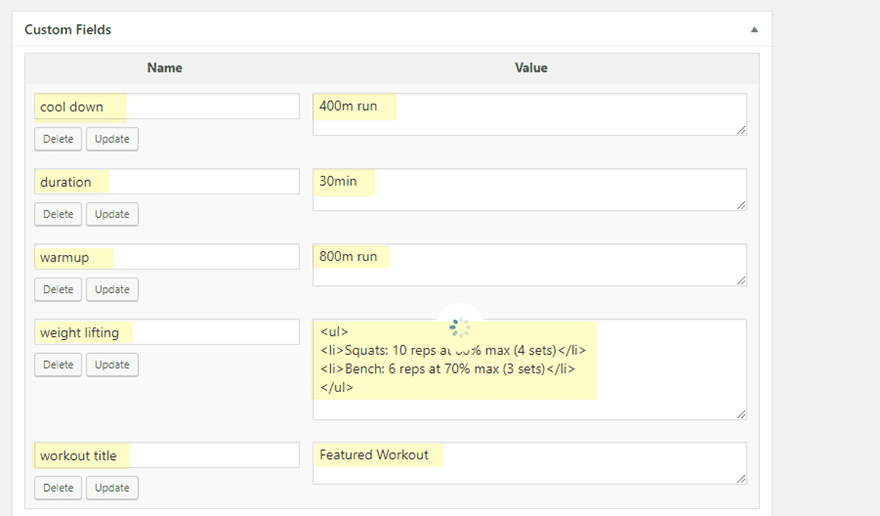
Then click the Custom Fields box dropdown (if collapsed) to add a new custom field and enter the following:
Name: workout title
Value: Featured Workout
Then click the Add Custom Field Button.

The Name is how you identify the custom field in Divi. The Value is the content that will be dynamically added to the page using Divi’s dynamic content feature (more on this later).
Continue this process to add the following custom fields to your website.
Name: warmup
Value: 800m run
Name: duration
Value: 30min
Name: weight lifting
Value:
<ul>
<li>Squats: 10 reps at 60% max (4 sets)</li>
<li>Bench: 6 reps at 70% max (3 sets)</li>
</ul>
Name: cool down
Value: 400m run
Note: These custom fields will be added to the Divi Theme and will be available on any new post you create in the future. In other words, it is not limited to this single post.
Don’t forget to update your post!
Part 4: Adding Dynamic Content to the Post Layout Using the Visual Builder
Now that we have our post settings and meta data in place, it’s time to start adding dynamic content to our post. To do this, deploy the Visual Builder.
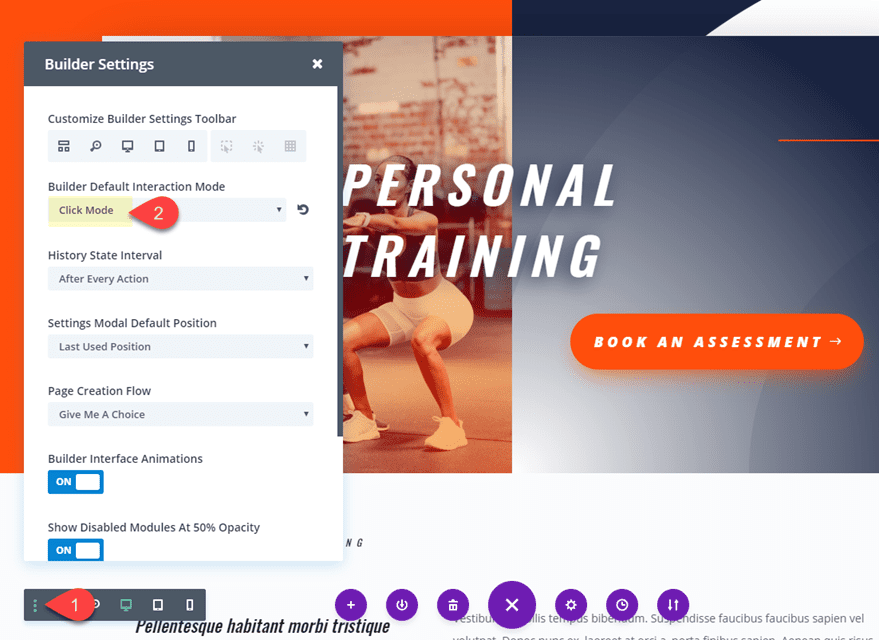
To make things a bit easier to locate and edit for this advanced layout design, open the settings menu and set the Builder Default Interaction Mode to Click Mode.
In the header section, delete the button module (we don’t need it).
Replacing the Background Image with the Featured Image Dynamic Content
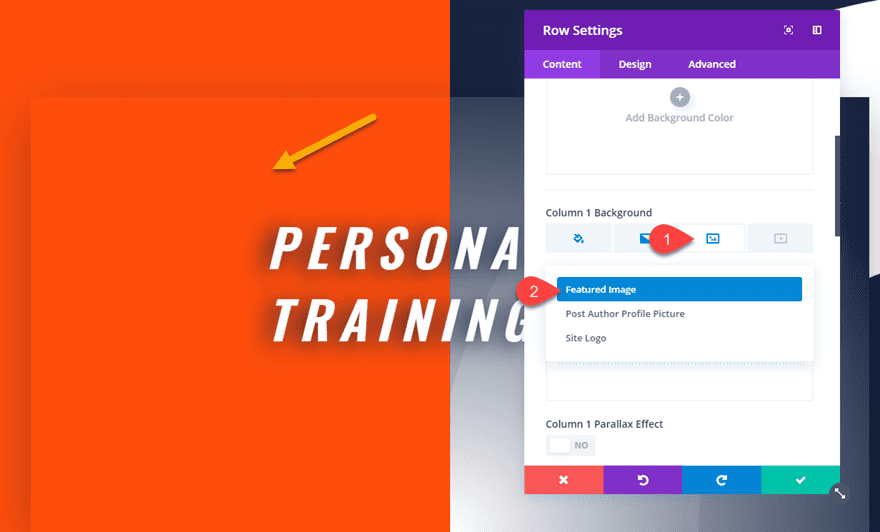
For our first piece of dynamic content, we are going to replace the background image used in the column 1 of our top header section row with the featured image used for the post. To do this, open the row settings and find the background settings for column 1 and click the background image tab. Then delete the image that is currently there and then hover over the background image preview box. You will see the dynamic content icon in the top right of the box. Click on it to open the dynamic content options. Then select the Featured Image dynamic content option from the list.
Your layout will look exactly the same since we are using the same image. The only difference is now that background image is being pulled from whatever image is set as your featured image of the post. This is the beauty of dynamic content!
Let’s continue.
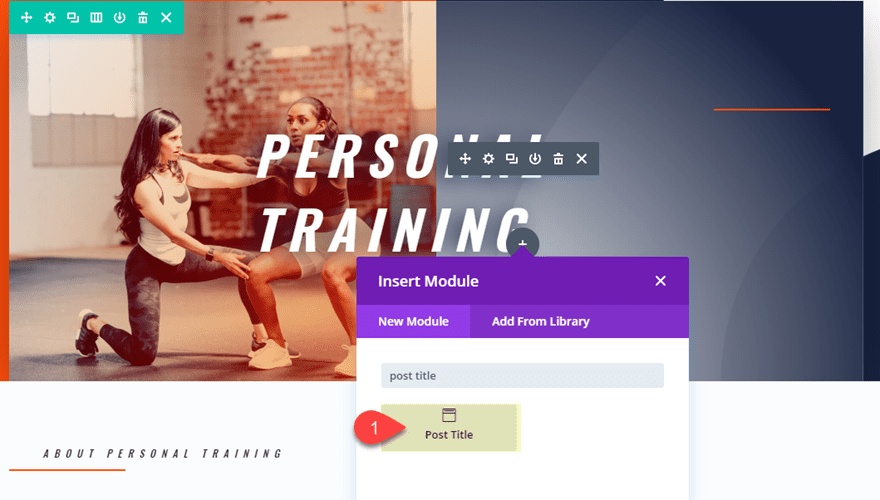
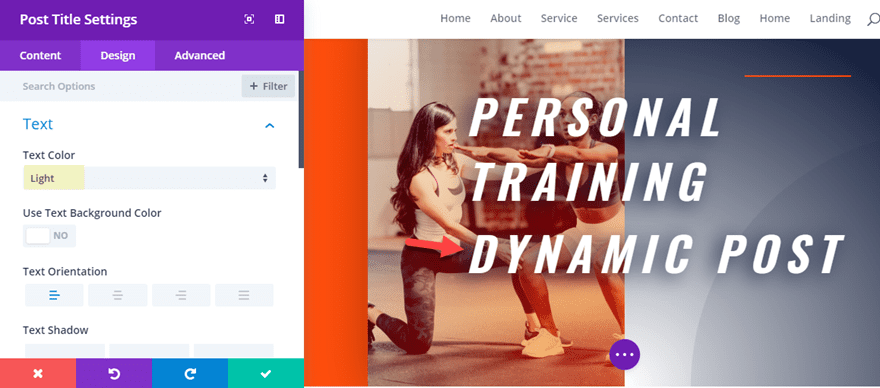
Adding the Post Title with a Post Title Module
Under the text module that currently holds the title of the page, add a Post Title module. There is also an option to use add the post title to a module using dynamic content, but since the Post Title Module works like dynamic content already and preserves the h1 heading tag for SEO, it makes perfect since to use it for your custom post layout.
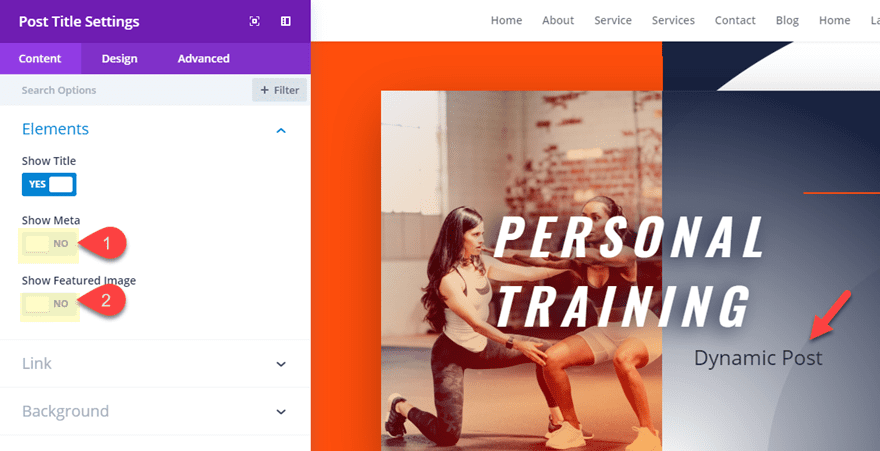
Then update the post title module settings as follows:
Show Meta: NO
Show Featured Image: NO
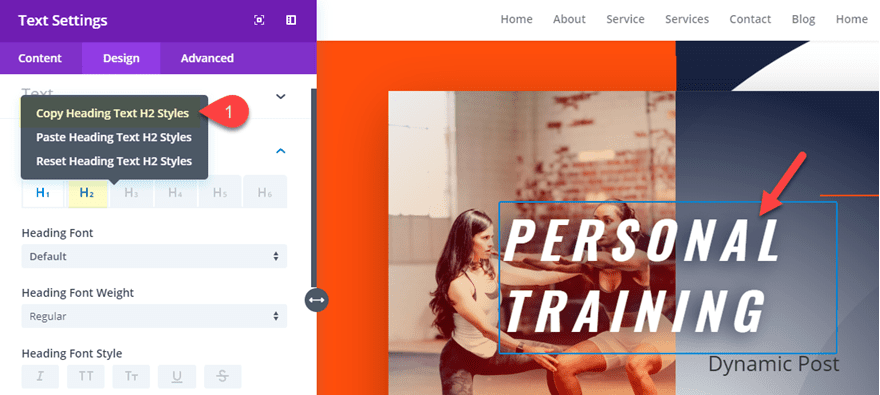
Now go to the text module above and copy the h2 heading styles by right clicking on the h2 tab and selecting the option from this list.
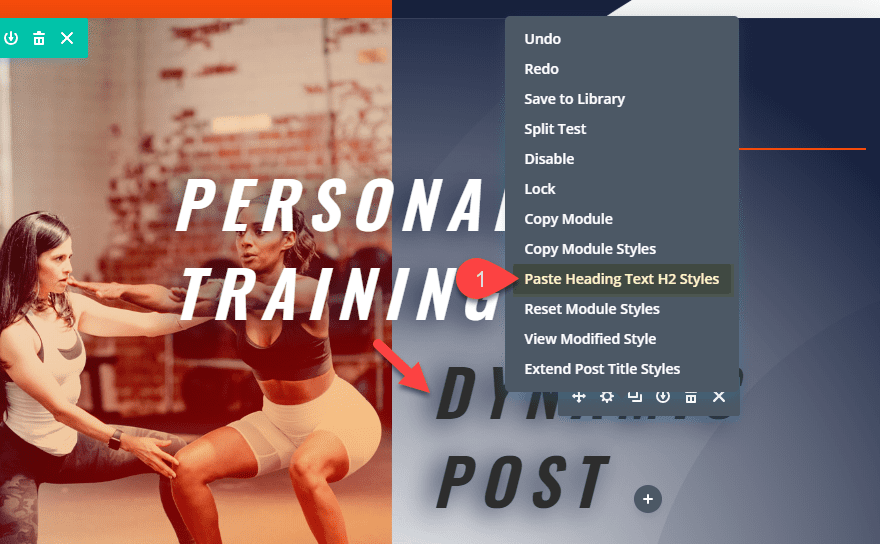
Then paste the h2 heading styles to the post title module by right clicking on the module and selecting the option from the list.
After that, go back again to the text module above and copy the spacing styles and paste them to the post title module. Then change the post title text color to light to get the white color.
Now your post title should match the design of the original layout title.
Now you can delete the text module containing the original heading.
Using Dynamic Content to Create a Row of Meta-Data
Move on to the second section of the layout. Then take out the top padding of the section by dragging it away in the visual builder or setting it to 0px in the section settings.
In the first row of the second section of the layout, you will notice a text module (it has the content “About Personal Training”) with a divider under it. This is where we are going to build our custom row of meta-data using dynamic content.
We want the size of this row to match the size of the row in the top section. To do this, open the row settings of the row in the top section and copy the sizing styles. Then paste them to the first row of the second section. Then update the row gutter with to 2. The new sizing should look like the following screenshot.
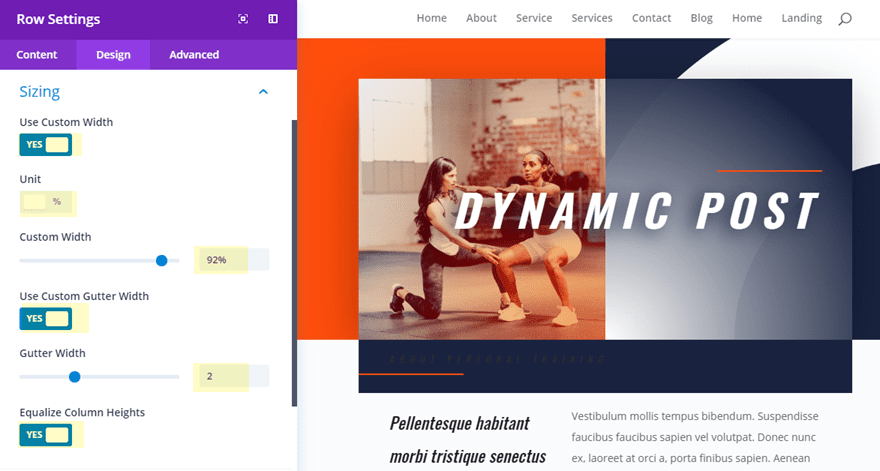
You will also need to add custom spacing as follows:
Custom Padding: 1% left, 1% Right
Then save the row settings.
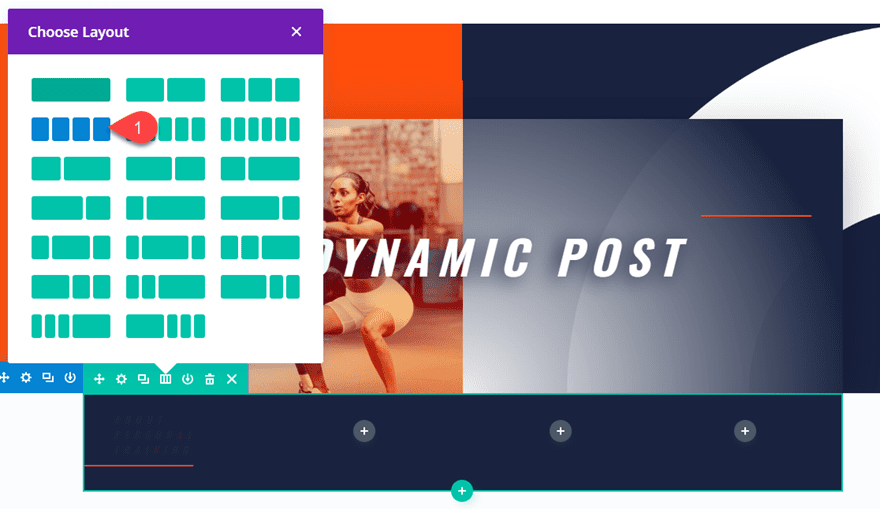
Now update the row column structure to a four column layout.
Now we are ready to add our dynamic content. To do this, open the settings of the text module now in the far left column and hover over the content box. You will see the dynamic content icon in the top right of the box. Click on it to open the dynamic content options.

Then select the option: Post Publish Date.

Then change the date format accordingly.
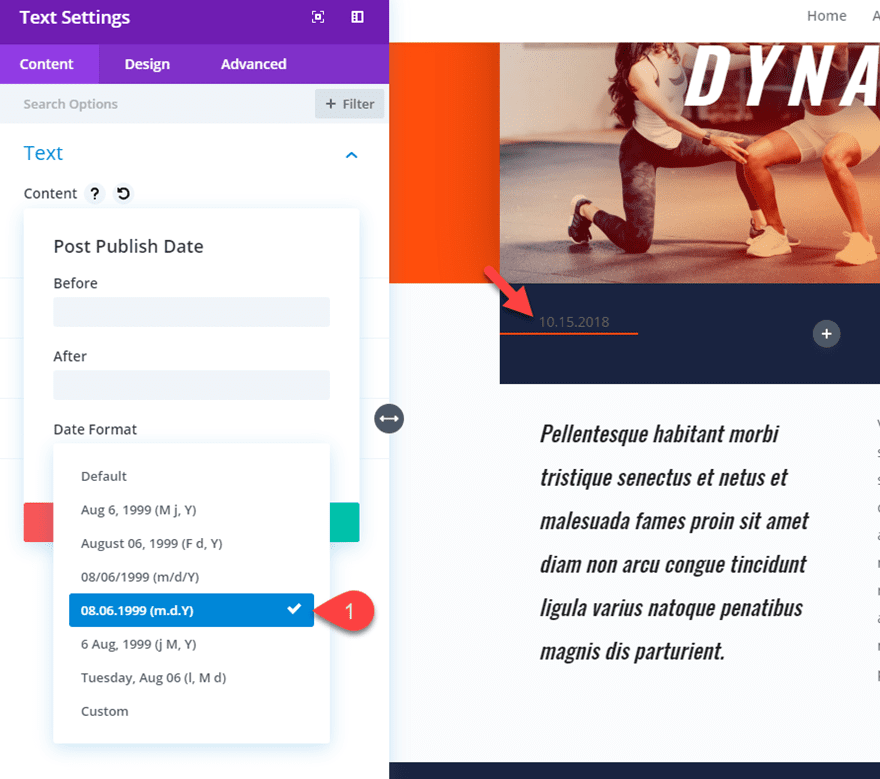
This will add the publish date of the post as dynamic content.
To style the text module with the dynamic date content, copy the module styles of the text module in the left column of the row directly below.
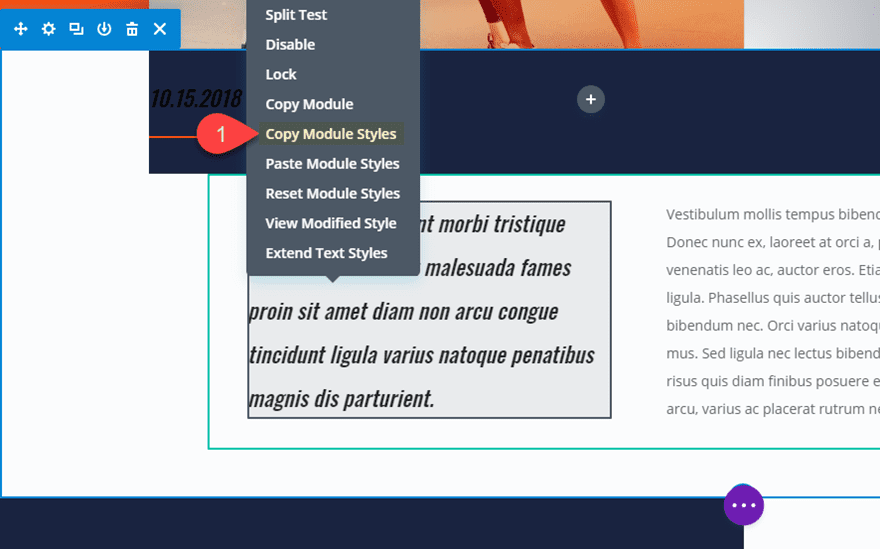
Then paste the module styles to the text module with the dynamic date content and change the text text color to white.

Next, copy the text module and the divider below it and paste it into column 2. Then change the dynamic content to Post Categories.
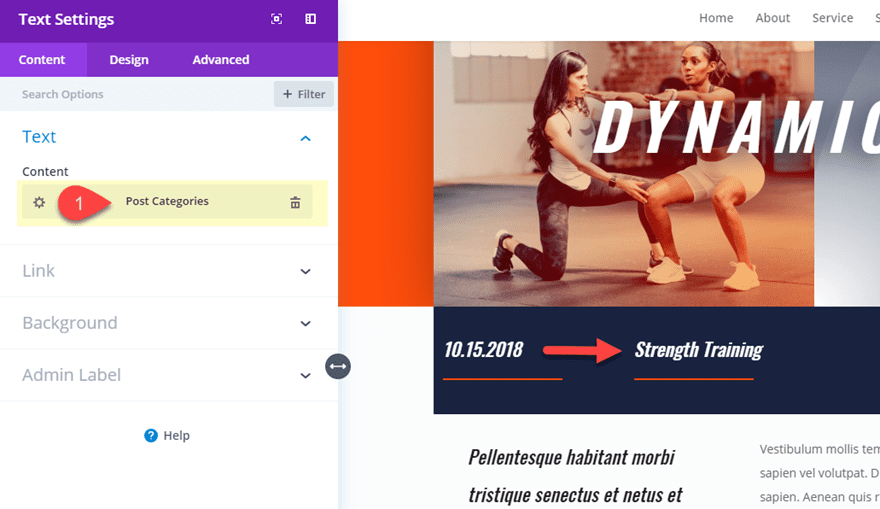
You will need to update the link text color to white to match the design of the layout.
Now copy the post categories text module with the divider over to column 3. Then change the dynamic content to Post Comment Count. In the Post Comment Count popup, enter the the following in the Before input box:
Before: Comments:
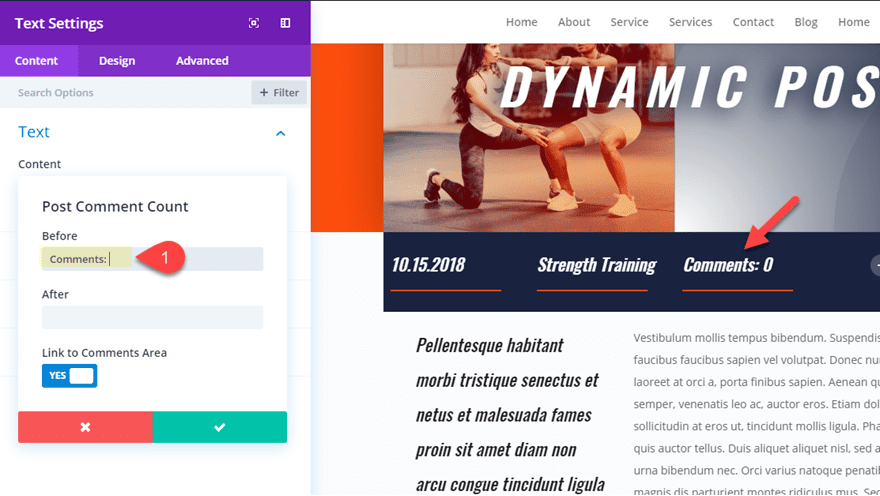
The before and after input boxes available in the dynamic content popups are a convenient option for add text before and/or after the dynamic content. This is helpful for adding labels, price symbols, and other elements when needed.
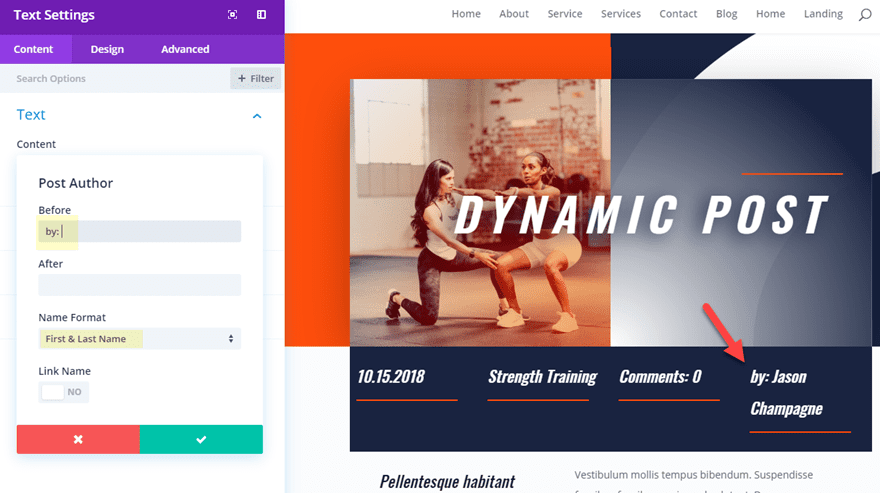
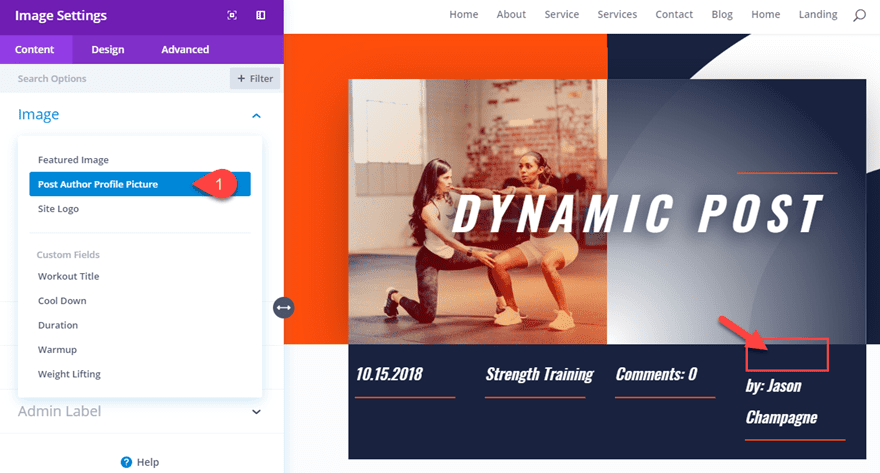
Now let’s continue adding our dynamic content. Copy the text module and divider in column 3 and paste in over to column 4. This last column is going to hold our post author thumbnail and author name. So, change the dynamic content of the text module to Post Author. In the Post Author popup, update the following:
Before: by:
Name Format: First & Last Name
Above the text module with the post author content, add a new image module. Open the image module settings and delete the default image. Just like we have been doing, click the dynamic content icon in the image preview box and add the Post Author Profile Picture as the dynamic content.
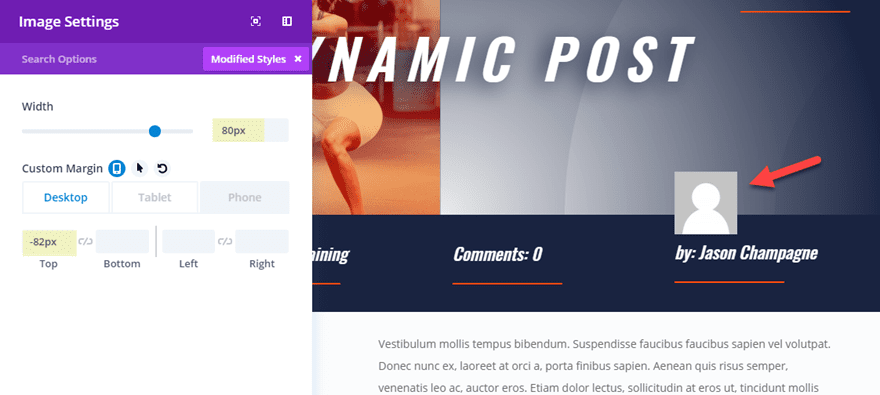
Then adjust the design settings to pull the image up and give it a custom width as follows:
Width: 80px
Custom Margin (desktop): -82px Top
Custom Margin (tablet): 0px Top
Note: The post author name is going to show the author that has been assigned to the current post. And the post author profile picture is whatever has been set for the user profile in the WordPress Dashboard under Users > Your Profile.
Part 5: Adding the Custom Fields as Dynamic Content to Add a Featured Workout to the Post
Remember how we added those custom fields earlier in the tutorial? Now we are going to use those custom fields as content for a featured workout on our post.
To add our featured workout dynamic content, first duplicate the two-column row directly below the four-column row with all of our dynamic meta-data. Then delete the modules in both columns and add a blurb module to the left column.
We are going to use blurb modules to add the dynamic content for the workout section. To start, add a new blurb module to the left column.
For the Title, add the custom field named “Workout Title” as dynamic content. Then for the blurb content, add the custom field named “Duration” as the dynamic content.
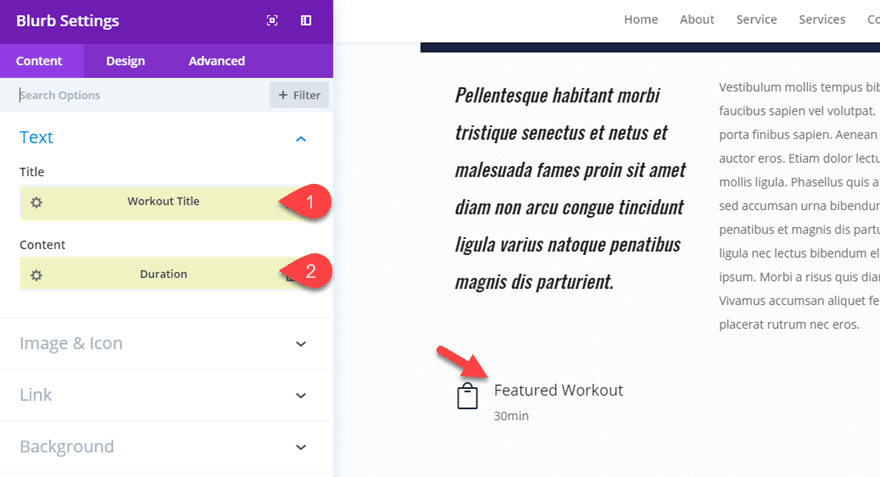
To keep things rolling, I’m not going to go over the styling for these modules in detail. But, you will need to add a blurb icon placed to the left of the title and update the design to match the layout.
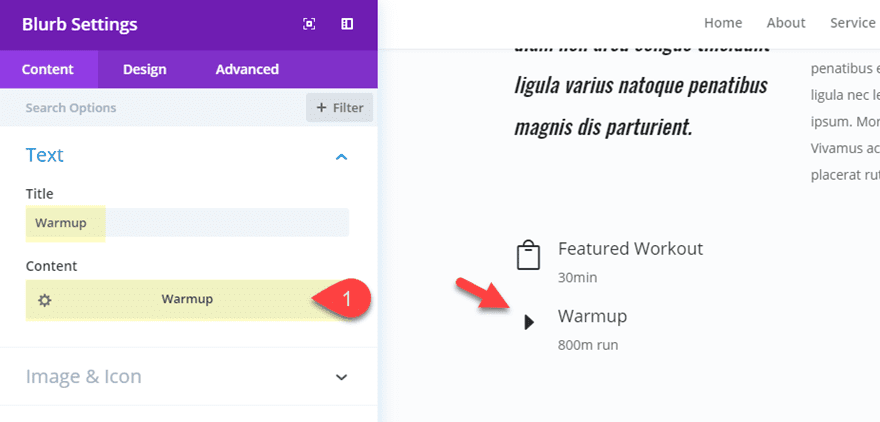
Next, add a second blurb module below. Enter the text “Warmup” as the title. And then add the custom field named “Warmup” as the dynamic content.
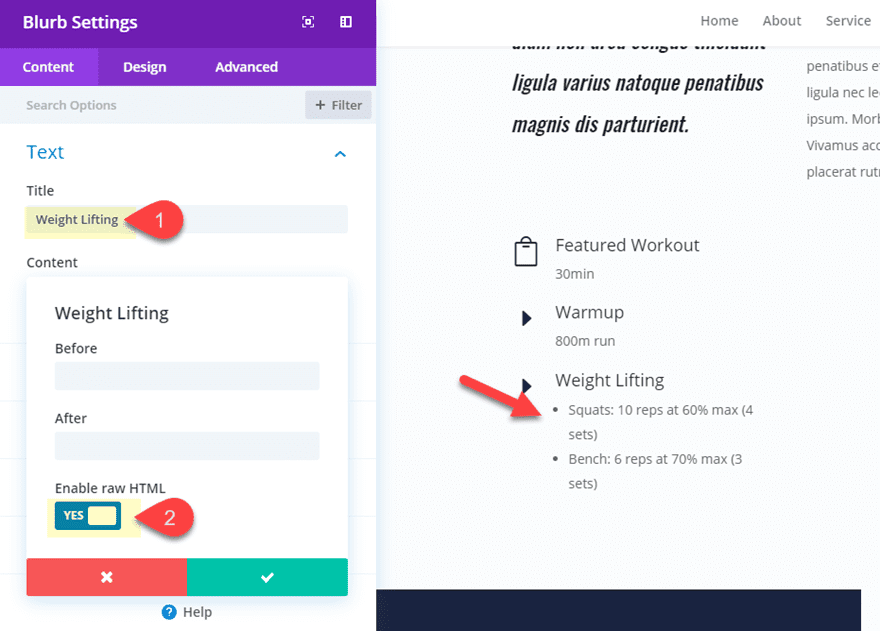
Add a third blurb module below that one, with “Weight Lifting” as the title and the custom field “Weight Lifting” as the dynamic content. Since we are using html for this custom field value, you will need to enable raw html in the weight lifting popup.
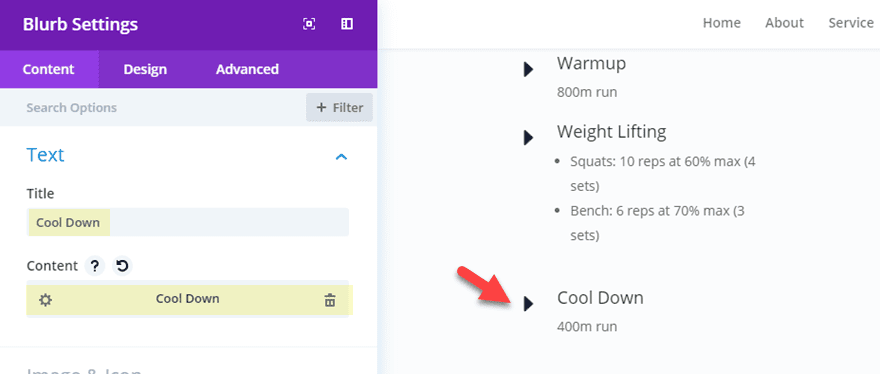
Add a final blurb module with “Cool Down” as the title and the custom field “Cool Down” as the dynamic content.
Now you have a dynamic section for adding workouts to your post!
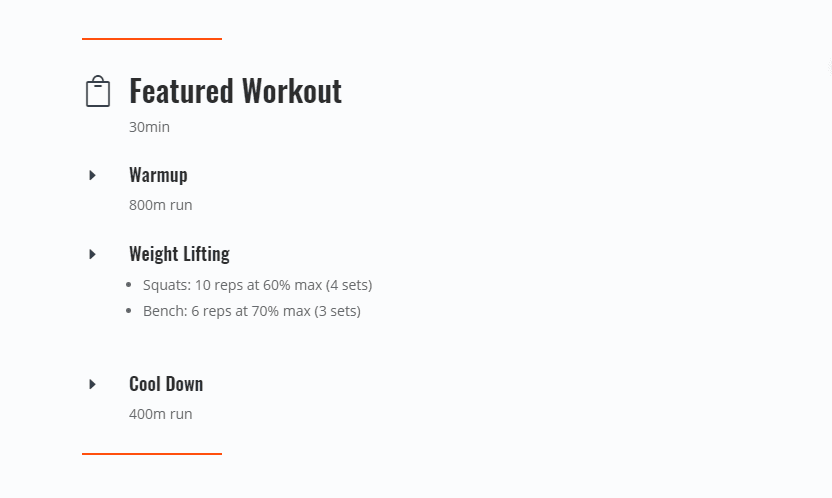
All you need to do is update the custom field values from the default page editor in WordPress and that content will be added to your post layout automatically without having to go into the Divi builder.
Part 6: Designing a “Related Topics” Section Using Post Tags Dynamic Content
You can use dynamic content to display the post tags and create a cool looking “related topics” section for your post. To do this, create a new one column row and add a text module to the row.
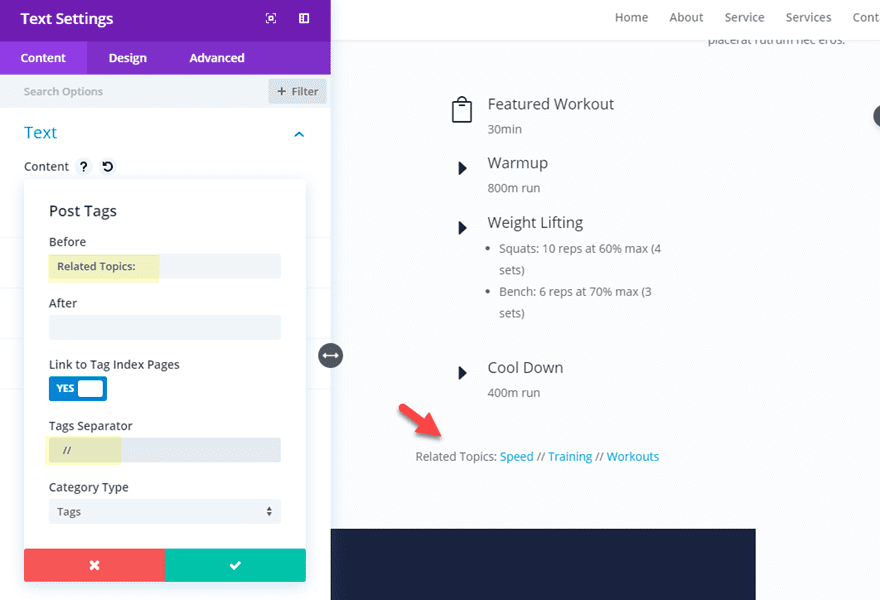
Then for the content box, add Post Tags as the dynamic content. Then update the following Post Tags options:
Before: Related Topics:
Tags Separator: //
Note: You can use just about any set of characters you want for the tags separator so feel free to experiment with different ones for creative designs.
To style the content, update the following design settings:
Text Font: Oswald
Text Font Weight: Semi bold
Text Text Color: #ff4c00
Text Text Size: 30px
Link Font: Oswald
Link Font Weight: Semi bold
Link Text Color: #262d3f
Link Text Size: 50px
Link Letter Spacing: 2px
Link Line Height: 1.6em

Here is the final design.

Part 7: Adding an Author Bio and a Comment Section
At this point you be well equipped to add dynamic content and adjust the design of your post layout with a fair amount of ease so I won’t go into much detail on these last two elements.
Adding a Author Bio Section Using Dynamic Content
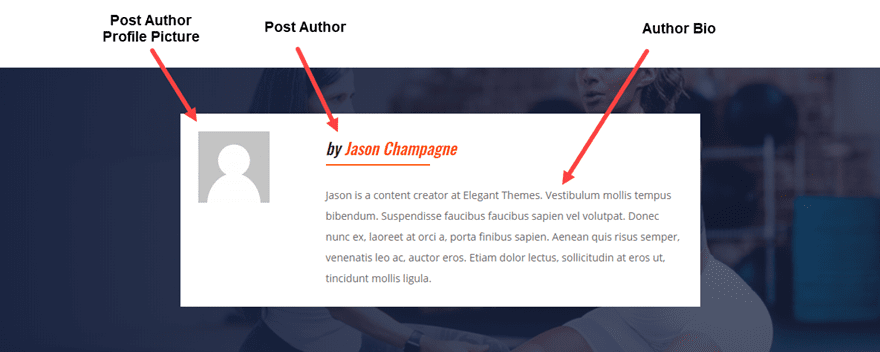
To add a author bio section at the bottom of your post content, you can use the Post Author, Post Author Profile Picture and Author Bio dynamic content. As you can see in the screenshot below, I created a 1/4 3/4 column row. Then I added the post author profile picture to the left column. In the right column, I added the post author with the author bio underneath. I also added the featured image dynamic content as the background image for the section (and a gradient overlay). Here is an example of what that would look like.
Adding a Comment Section Using the Comments Module
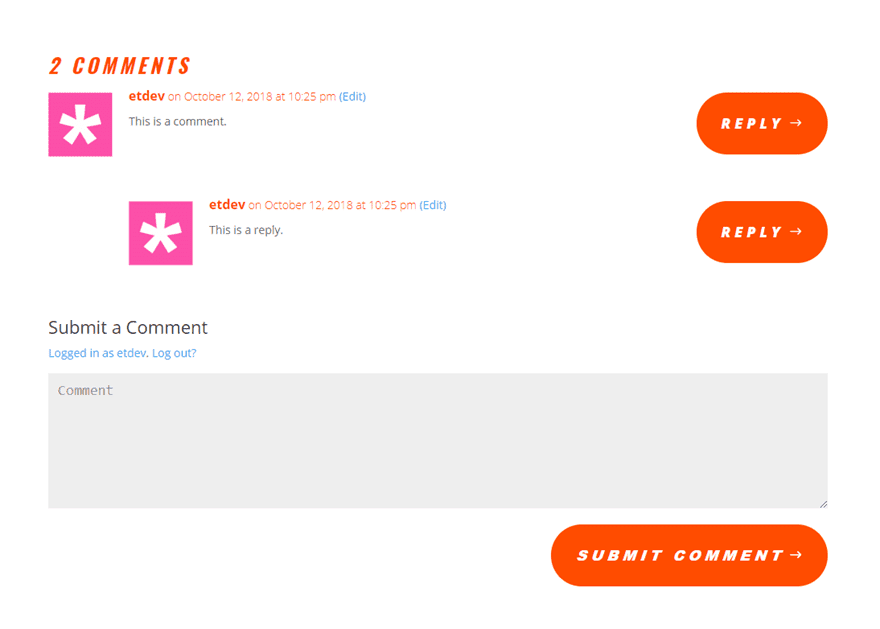
Since we are using a custom post layout, it makes since to use a comments module so that we can match the design of the comment section with the layout. Simply add the comments module to a new section row match the button styles and fonts with the current layout. Here is an example of what that would look like.
The Final Design
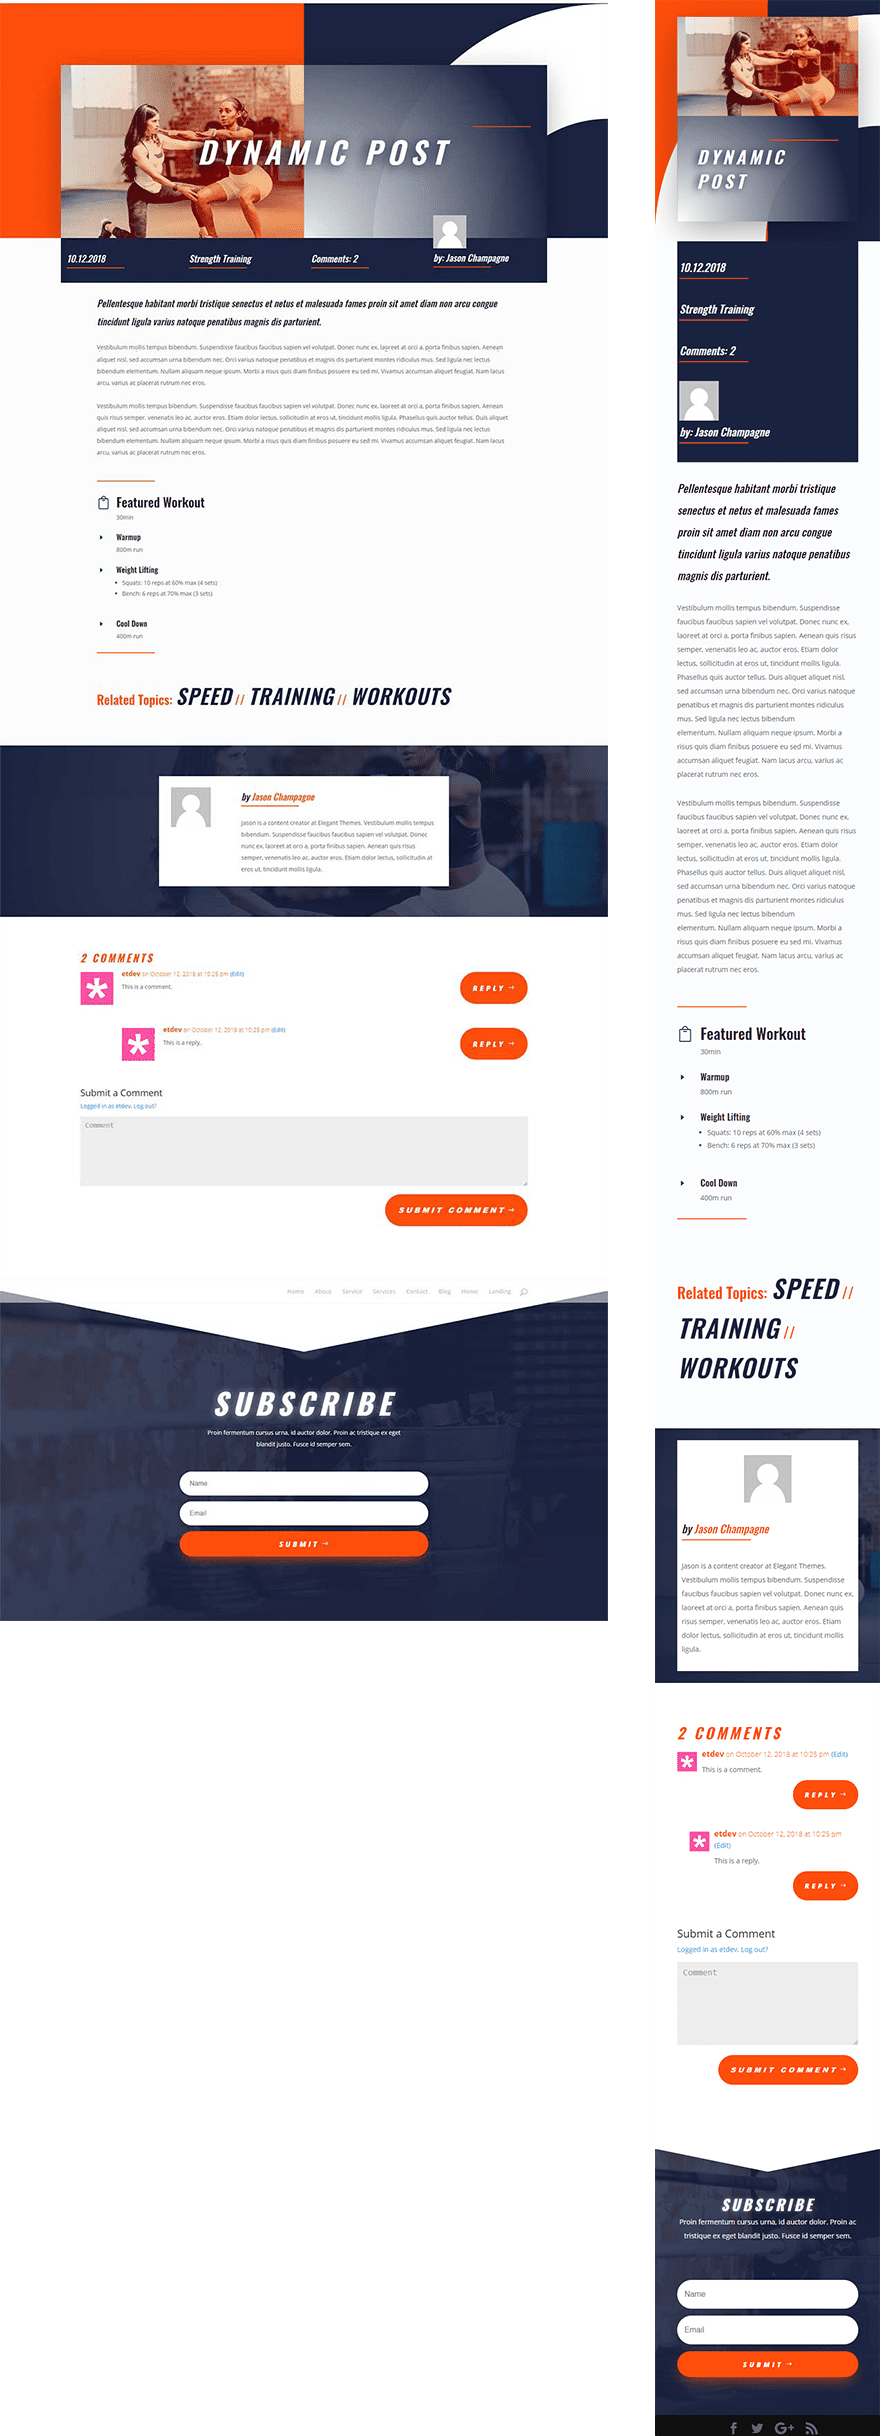
Here is the final design of the entire post once all of the design has been adjusted.
Updating Post Content and Saving the Layout for Future Posts
Since we are using the Divi Builder to create the post layout, you will still need to update the actual post content for your post using Divi modules. But with everything else now dynamic, this makes the process a whole lot easier going forward. You will need to save the post layout to your library so that when creating a new post, all you will need to do is add the saved layout to your post and update the post content.
Final Thoughts
Divi’s Dynamic Content is a powerful feature that makes adding and updating post data a whole lot easier. So if you are looking to design a custom layout for your blog posts (or other custom post types like Projects) using the Divi Builder, dynamic content is the way to go. Of course, dynamic content is not limited to posts. You can take advantage of dynamic content and custom fields throughout your entire website. I hope this post helps you understand some of the possibilities and inspires you to use dynamic content in awesome new ways.
I look forward to hearing from you in the comments.
Cheers!
The post How to Use Divi’s Dynamic Content Feature to Design a Dynamic Post Layout appeared first on Elegant Themes Blog.