If you are looking to turn your blog or WordPress website into a membership site, then Memberful may be the solution for you. It is a powerful hosted solution that will turn a regular WordPress website into a fully featured membership site.
In this article we will consider the features Memberful offers, including its ease of use, automated payments, and much more. We will then discuss how to get started with Memberful and how to use it to create a successful membership site with WordPress.
Features of Memberful
To help you decide if Memberful is the right WordPress membership plugin for your website, here are its best features…
Plans for Purchasing Memberful
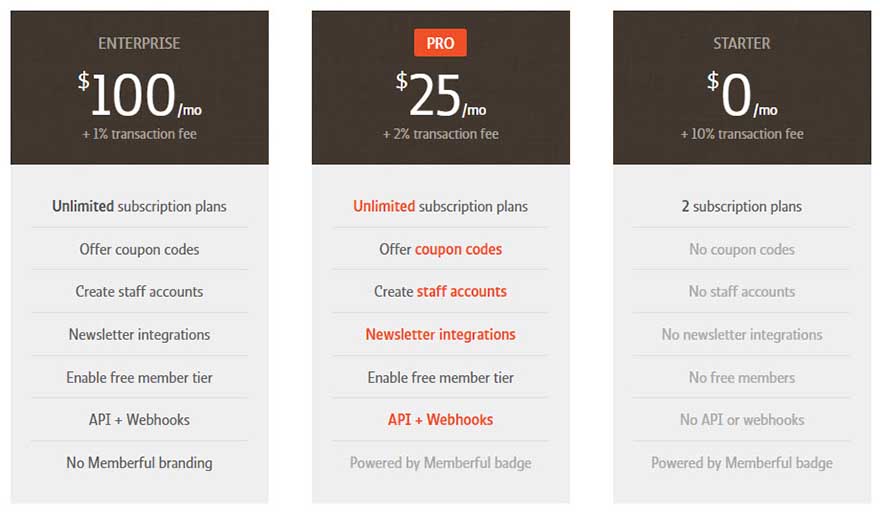
Memberful is a freemium membership tool that is available on three different payment tiers. The most basic of these plans is a free option, perfect for those just starting off in the world of membership sites. It is this free version of Memberful that we will mostly focus on today.
When you sign up with Memberful, you account will initially be in ‘test payment mode’. This will allow you to set up your membership site and try out both the free and premium features Memberful has to offer. If you choose to opt for a premium version of the solution you won’t be charged until you start accepting real payments.
Ease of Use
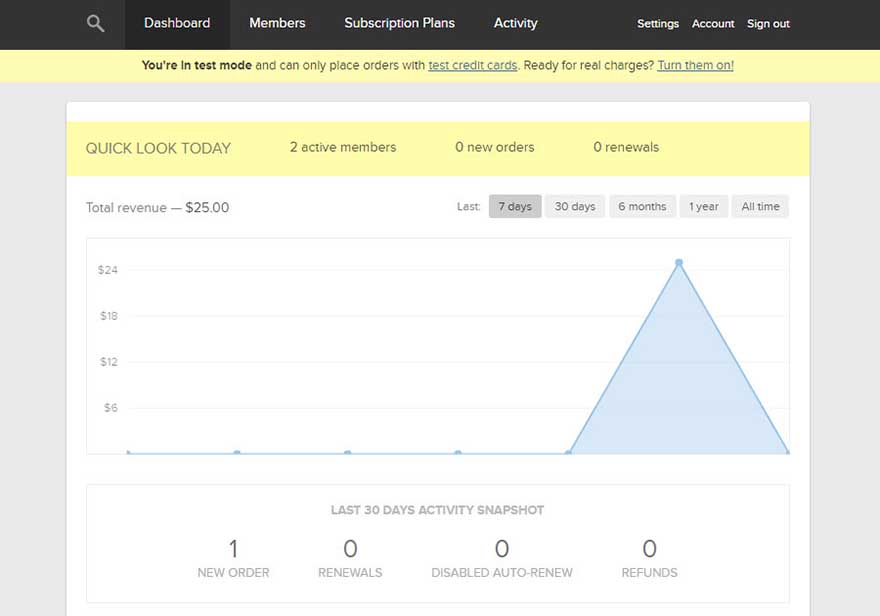
Memberful is extremely easy to setup and use. The majority of work is undertaken on the Memberful website, in your Memberful account dashboard.
Working in the Memberful dashboard, rather than your WordPress dashboard, does have its advantages. The Memberful site’s impressive user experience quickly puts you at ease and lets you smoothly customize and manage your membership site. It is from within your Memberful account you will be able to create and edit subscription plans, as well as access member information and monitor site activity once your website is up and running.
Create Custom Subscriptions

The free version of Memberful only allows you to create two different subscription plans for your membership site. There are plenty of customization options to choose from when setting up your plans, giving you control over payment schedules, pricing and more.
If you upgrade to a premium plan you can create an unlimited number of subscription plans for your audience. The premium plans also allow you to create a free subscription option, to run alongside your paid plans.
Automated Payments
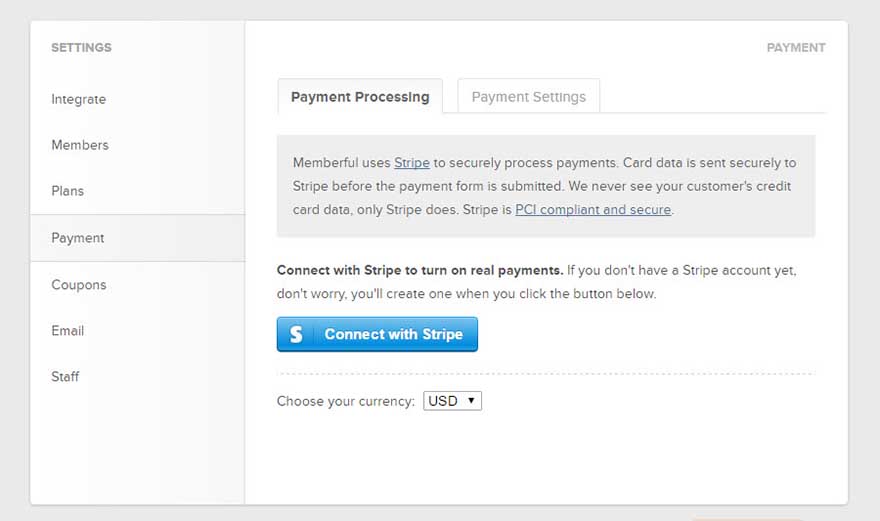
Memberful uses Stripe to process payments securely. Customers can pay with any major credit card from anywhere in the world. Stripe takes care of all the payment details, so you don’t need an SSL certificate for your site.
As part of the service, Memberful automatically takes care of recurring payments, collecting them on your behalf. It is worth noting that the free version of Memberful has a 10% transaction fee attached to it. However, this decreases dramatically to 2%, and then 1%, if you upgrade to one of the premium plans.
Select Which Pages and Posts to Gate
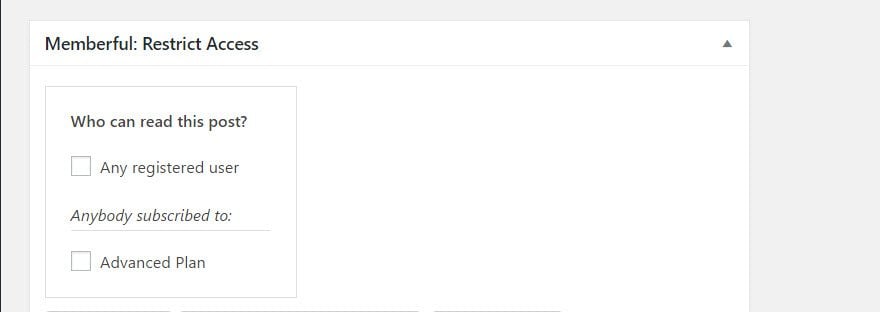
When creating your WordPress membership site, Memberful makes it easy to gate content. The plugin adds a control panel to the WordPress post and page editor screens, that makes it easy to define who can access that piece of content.

Memberful also gives you the ability to restrict access to all your posts and pages on your site, or those in specific categories. Depending on how you set up your membership site, you can give members on one tier access to different content than those on another tier.
Premium Features
If you are looking for more advanced features than the free plan offers then you may need to upgrade to one of Memberful premium plans. Here are some of the Pro plan features…
- Ability to offer Coupon Codes
- Create Staff Accounts
- Newsletter Integration with Campaign Monitor or MailChimp
- Enable Free Member Tiers
- API and Webhooks
So now we know abit about what Memberful offers, let’s have a look at how to use this solution to create a membership site with WordPress…
Install the Memberful WordPress Plugin
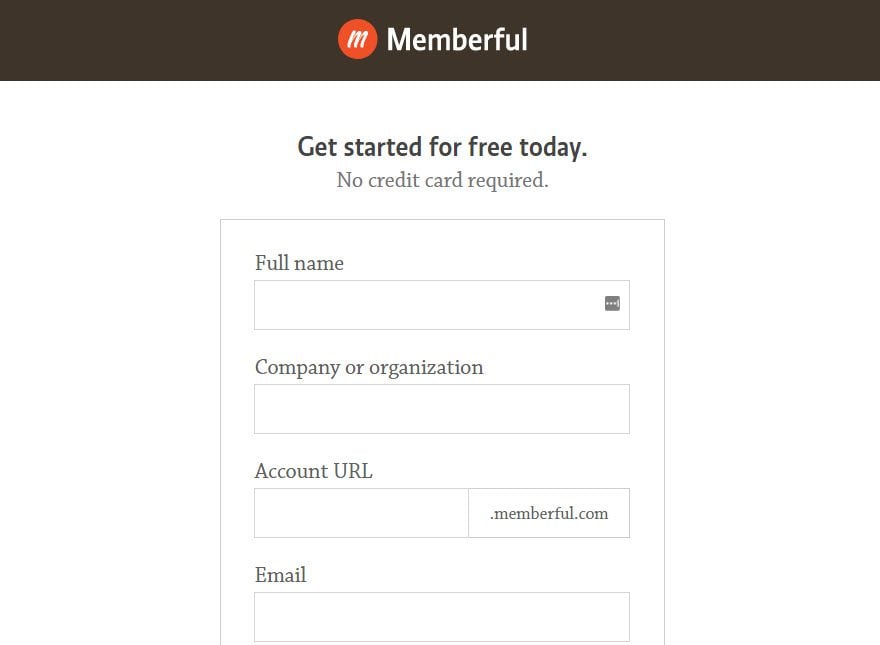
To get started with Memberful you will need to sign up to their service. This is a quick and easy process and free to do.
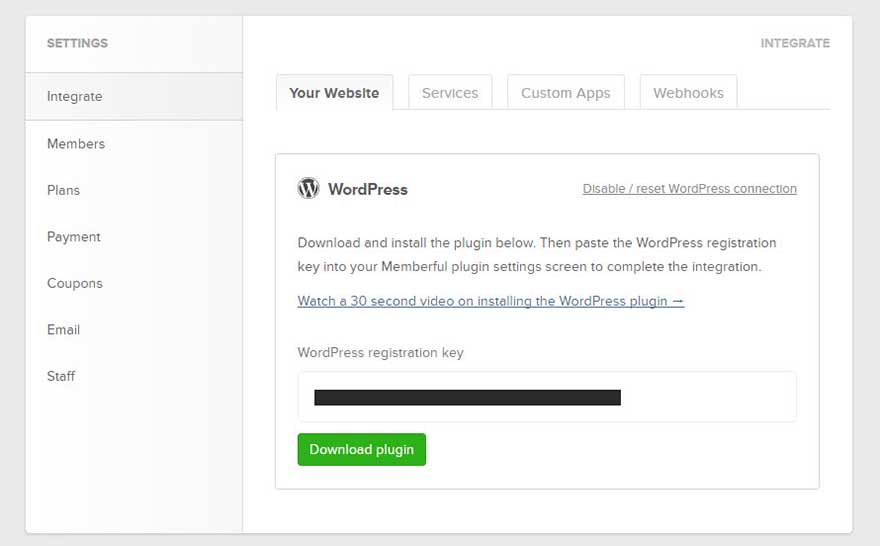
After your initial signup, Memberful will ask you to download their WordPress plugin and will provide you with a WordPress registration key.

Once you have downloaded the plugin and copied the key, log in to your WordPress website. Within your WordPress dashboard, select ‘Plugins > Add New’.
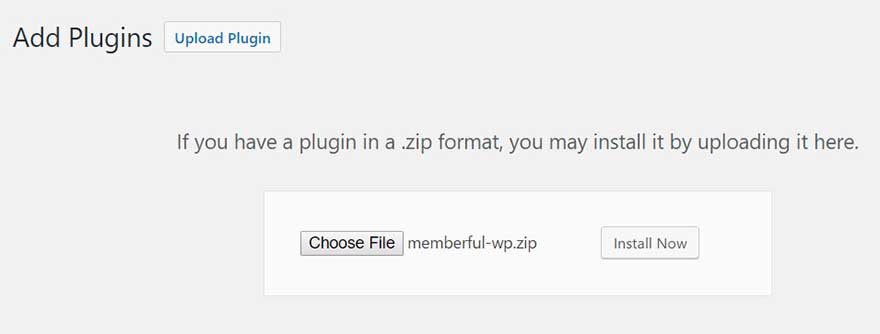
Click ‘Upload Plugin > Choose File’. From your files select ‘memberful-wp.zip’ and click ‘Install Now’.

Select ‘Activate’, then paste in your registration key and click ‘Connect to Memberful’. Memberful will now appear in your WordPress dashboard menu under ‘Settings’.
Create Subscription Plans
Once the Memberful WordPress plugin is installed and activated on your WordPress site, it is time to set up your membership site.
The first step in this process is to create the subscription plans for your WordPress website. This is not done within your WordPress dashboard, so you will now need to switch back to your account page on the Memberful website.

From within your Memberful dashboard, select the ‘Subscription Plans’ tab from the menu at the top of the page.
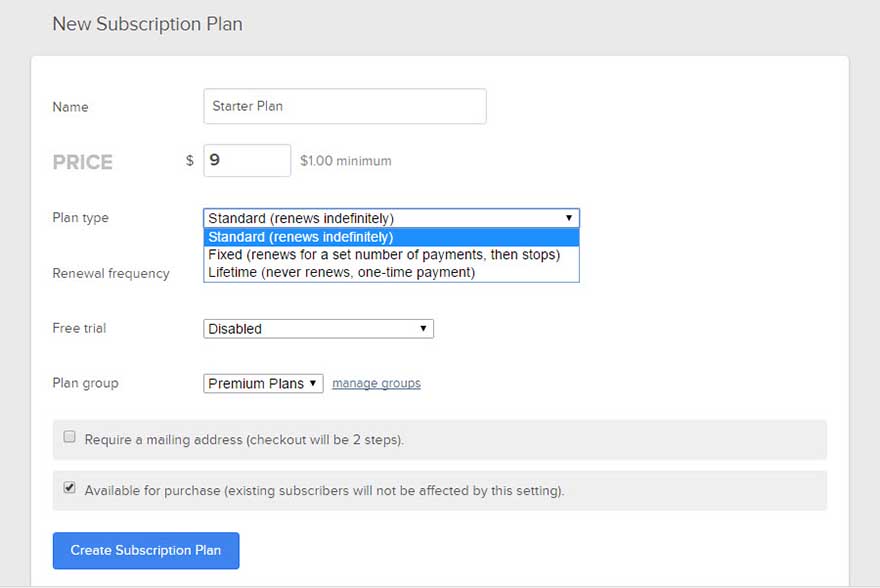
Next, select ‘New Subscription Plan’ and enter the information for your new plan. Here you can give your plan a name and price. Choose the type of plan you want to create (either recurring or one off payments), select the payment renewal frequency if appropriate, and elect whether you want to offer a free trial.
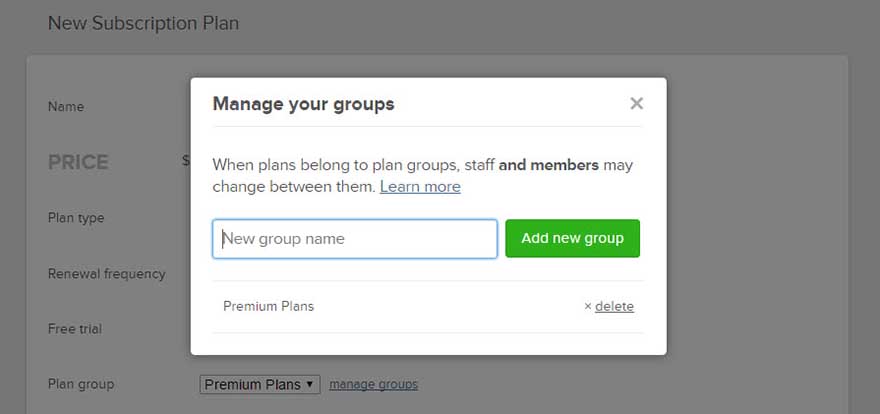
If you are going to create more than one plan, it is sensible to offer users the possibility of being able to upgrade to the higher plans. To enable this option, next to ‘Plan Group’ click on ‘Manage Groups’.
You will need to to give the group of plans that you will create a name and then select your new group as an option next to ‘Plan Groups’. This ensures that customers who purchase a plan can automatically upgrade to any other plan in this group, a good option if you are looking to generate a healthy revenue from your membership site.

When all the information has been entered, select ‘Create Subscription Plan’. Your subscription plan will now be saved and a signup link displayed. The next step is to add the signup links to your WordPress website.
Add Signup Links to your WordPress Website
There are a variety of places and ways to add your sign up link to your WordPress website. Let’s have a look at some of the options…
Display a Signup Link as a Call to Action
Under each post, display a signup link as a call to action. After reading a post, visitors will be looking for ‘what to do next’. If they like what they read, they will be in the right mind frame to subscribe to your site. So make this an easy process for them.

The easiest way to add a signup link to your website is to click on ‘Memberful’ in your WordPress post editor toolbar. This will display a drop down menu where you can select ‘Buy Subscription Plan’.
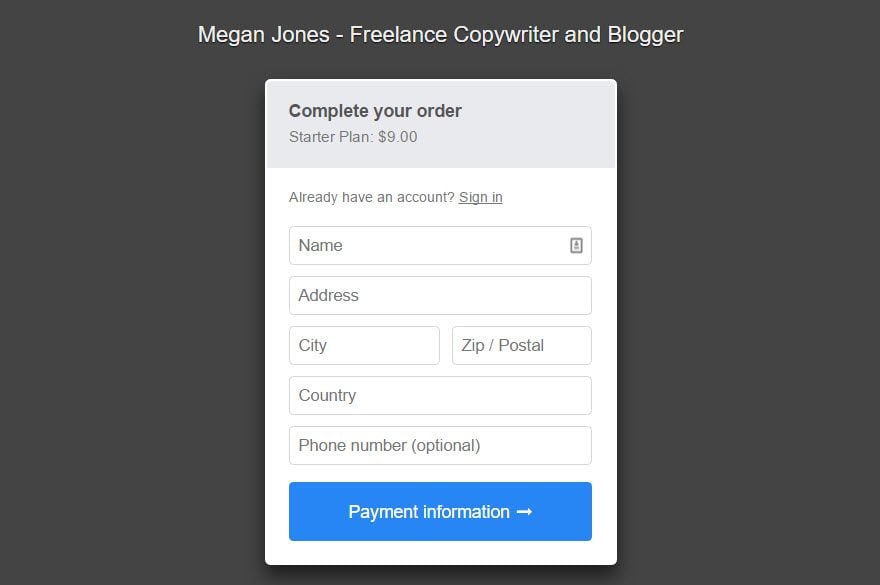
Once added, your audience will be able to click on the link, which will display a signup pop-up.
Create a Landing Page with Subscription Plans
If you looking to run a successful membership site, best practise is to create a landing page to help sell the different plans you have created.
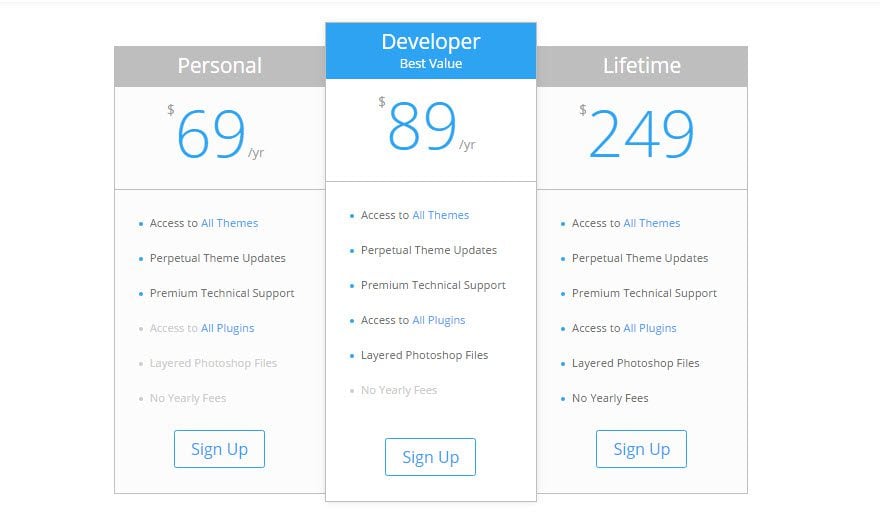
For those of you using Divi, the Divi Builder and its Pricing Table module make is easy to display your membership plans. Once your landing page is created, simply add the signup links in the same way as explained above.
Gate a Page or Post
As mentioned, Memberful makes it easy to restrict access to all your posts and pages or individual pieces of content. To gate a specific post or page, open it for editing in WordPress and choose the appropriate option from the ‘Memberful: Restricted Access’ panel.
The panel allows you to choose what content is displayed to non-members. This could be a call to action, encouraging them to sign up. Once visitors have joined up to your membership site, the content will be unlocked.
Bulk Block your Membership Site Content
The main options for bulk blocking your membership site are…
- All pages
- All posts
- All posts from a specific category or categories
- All posts and pages
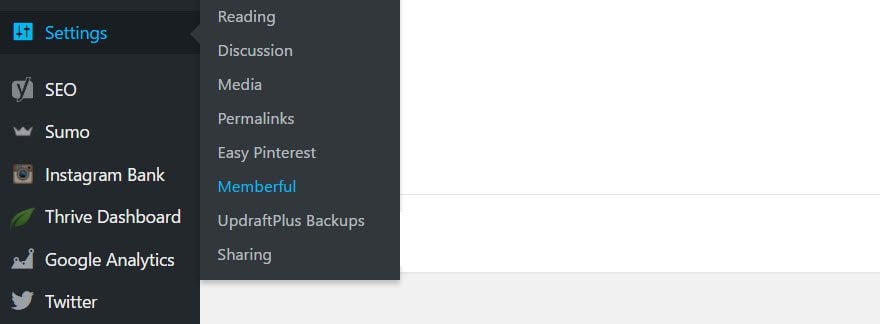
In your WordPress dashboard menu, select ‘Settings > Memberful’.
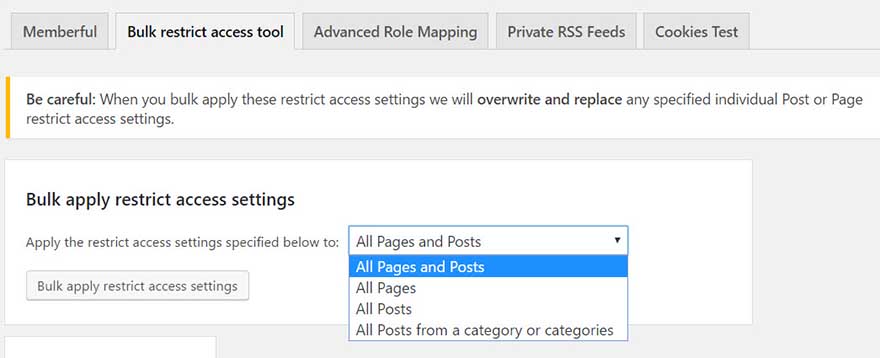
Click on the ‘Bulk Restrict Access Tool’ tab. Choose what content you want to block, then click ‘Bulk Apply Restrict Access Settings’.
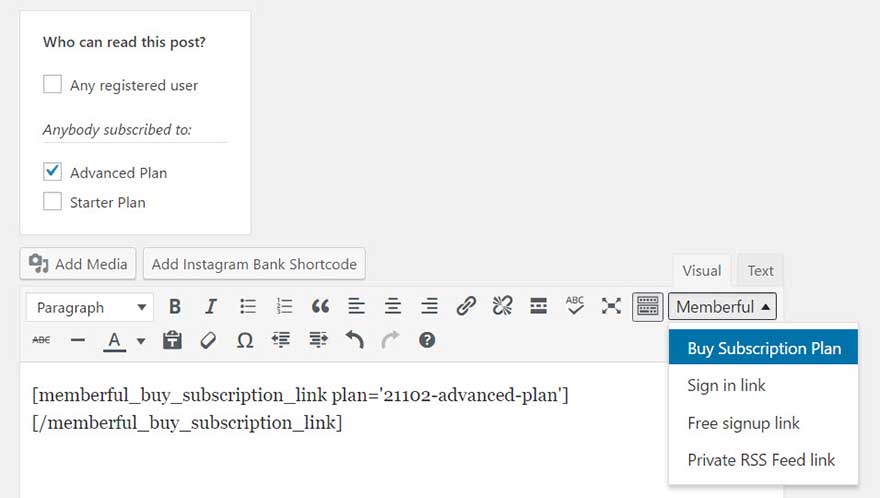
Select who can access the content and then add the signup link to the editor by copy and pasting the link from Memberful or selecting ‘Buy Subscription Plan’ from the drop down ‘Memberful’ tab.
Visitors will now be shown the membership signup link when trying to access your content. After signing up, they will be able to view your site.
Process Payments
The last step in the process is to integrate your Memberful account with Stripe. Take note that one you have integrated your Memberful account with Stripe, ‘Test Payment’ mode will cease and your subscription plans will go live.

To connect with Stripe, log into your Memberful account, and select ‘Settings > Payments’. Click on ‘Connect with Stripe’ to create a Stripe account, or connect with your current Stripe account. Your membership site should now be set up and ready to accept paid members.
Final Thoughts
Memberful is a quick and easy to use membership plugin that will allow you to turn your WordPress website into a membership site. If you are looking to test the viability of your membership site then the free Memberful plan lets you do so without investing any money, whilst still giving you the ability to upgrade to the premium features in the future.
Does Memberful sound like the best WordPress plugin for you? Please let us know in the comments below…
The post How to Use Memberful to Create a WordPress Membership Site appeared first on Elegant Themes Blog.
