
![]()
Our Biggest Discount Of Of All Time
Cyber Monday only comes once a year, and when it does, we like to do something really special. Today we are offering 25% OFF EVERYTHING, the biggest discount we have ever given. This discount has only ever been offered once before (during last year’s Black Friday and Cyber Monday sale), and it won’t be back again until next year. It wont be available for long, and once the sales have ended you will have to wait a whole year for it to come back (so don’t miss out)!
INCLUDES 6 EXCLUSIVE LAYOUT PACKS
Everyone who takes advantage of our Cyber Monday sale will also get exclusive access to 6 Cyber Monday Divi Layout Packs. These are world-class designs built by our very own Divi design team. They are the perfect way to jump-start your next Divi websites, and they are only available to Black Friday and Cyber Monday customers and current Lifetime members. Once the sale is over, these layouts won’t be available ever again!
Click Here To Purchase A New MembershipClick Here To Upgrade Your Current AccounClick Here To Renew Your Expired Account
This year, getting yourself a Cyber Monday Deal means getting a ton of free stuff too! Besides enjoying a 25% discount, everyone who buys a new Elegant Themes Membership or upgrades their existing account (or who already has a Lifetime Membership) will also receive 6 free and exclusive layout packs that are ONLY available for download during our Cyber Monday sale.
Download The Exclusive Layout Before It Disappears!
Already a Lifetime Member? You can download the pack right now, no need to partake in our Cyber Monday sale!
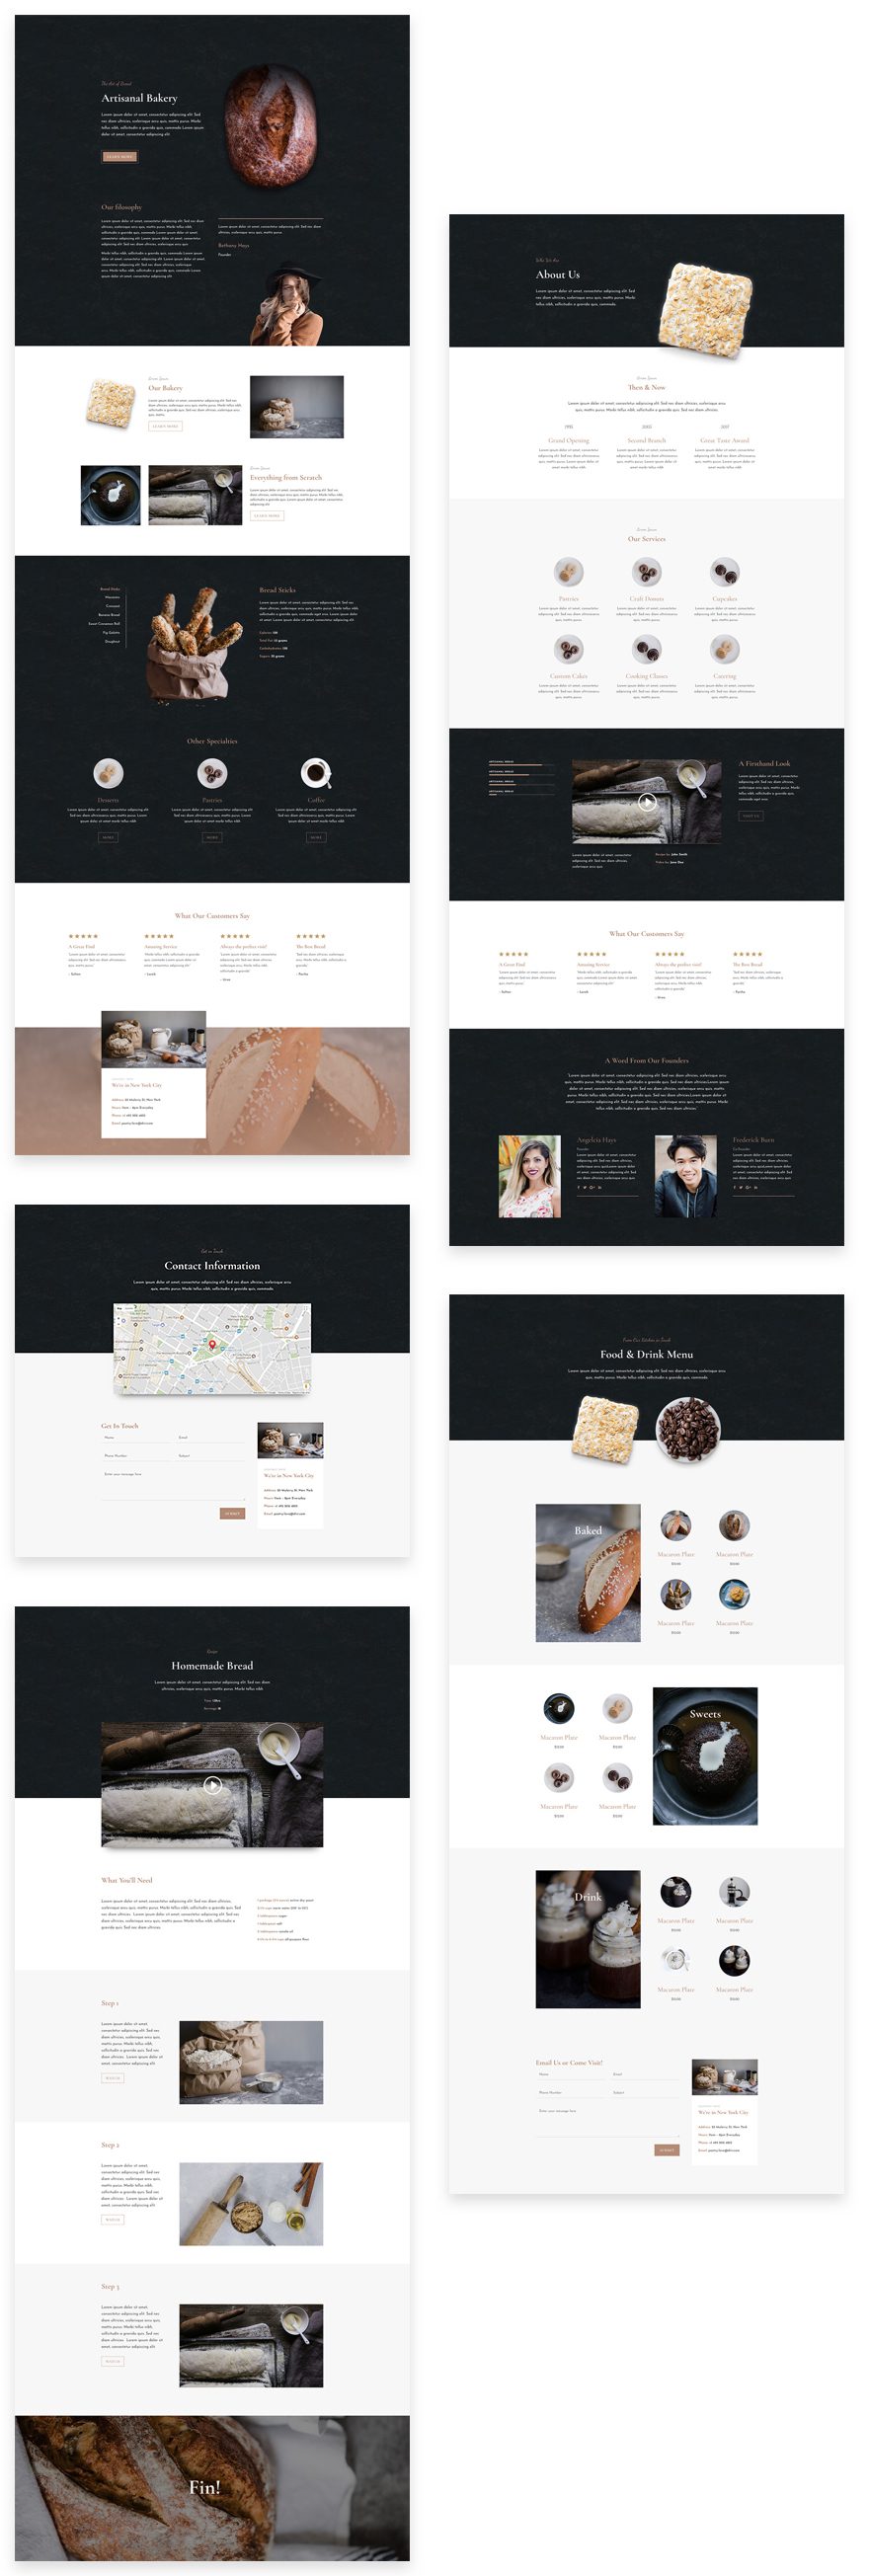
A Look Inside the Exclusive Cyber Monday Bakery Layout Pack
One of the exclusive layout packs we’re providing you with as Lifetime Members and new Cyber Monday customers is this one for Bakeries. It consists of 5 tasty pages that will make any bakery website irresistible.
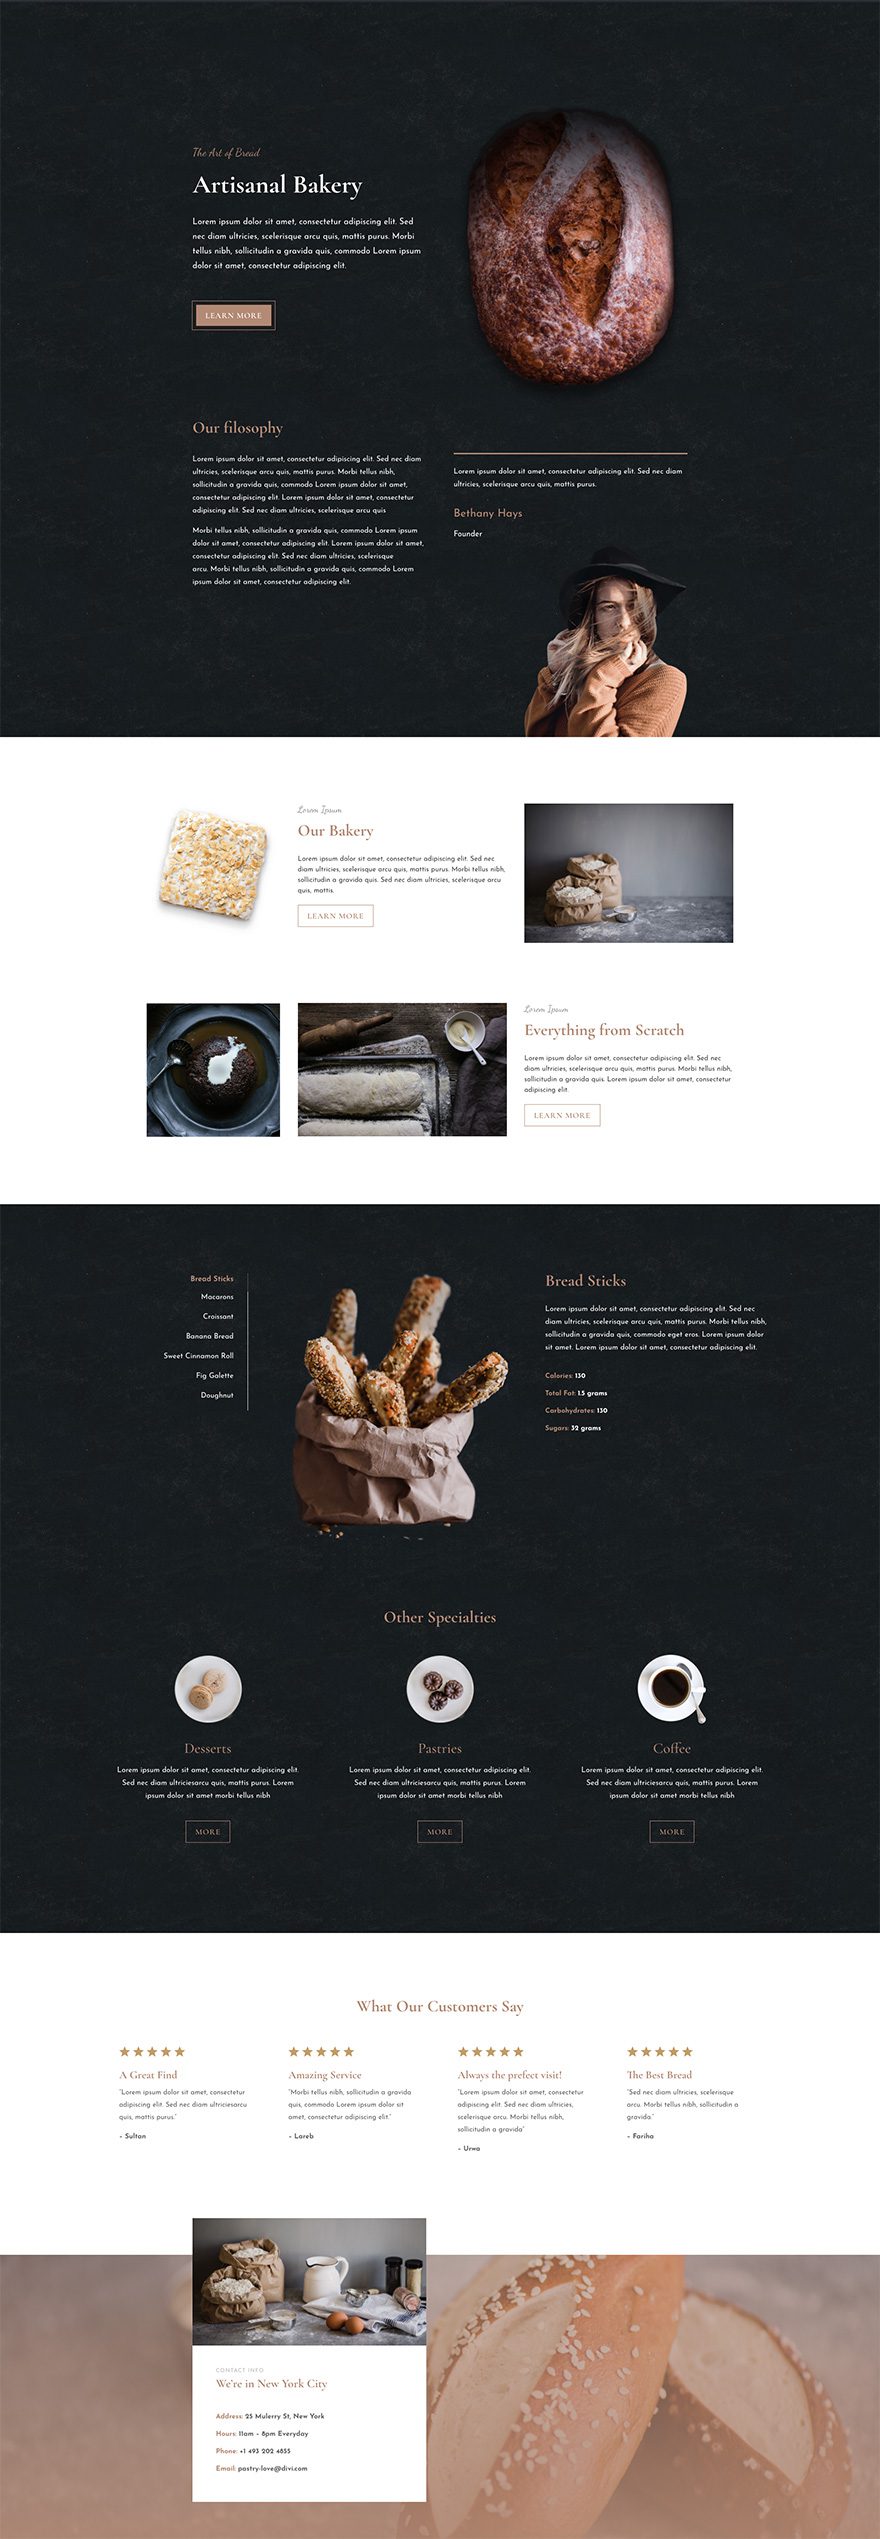
Landing Page Design
Download The Exclusive Layout Before It Disappears!
Already a Lifetime Member? You can download the pack right now, no need to partake in our Cyber Monday sale!
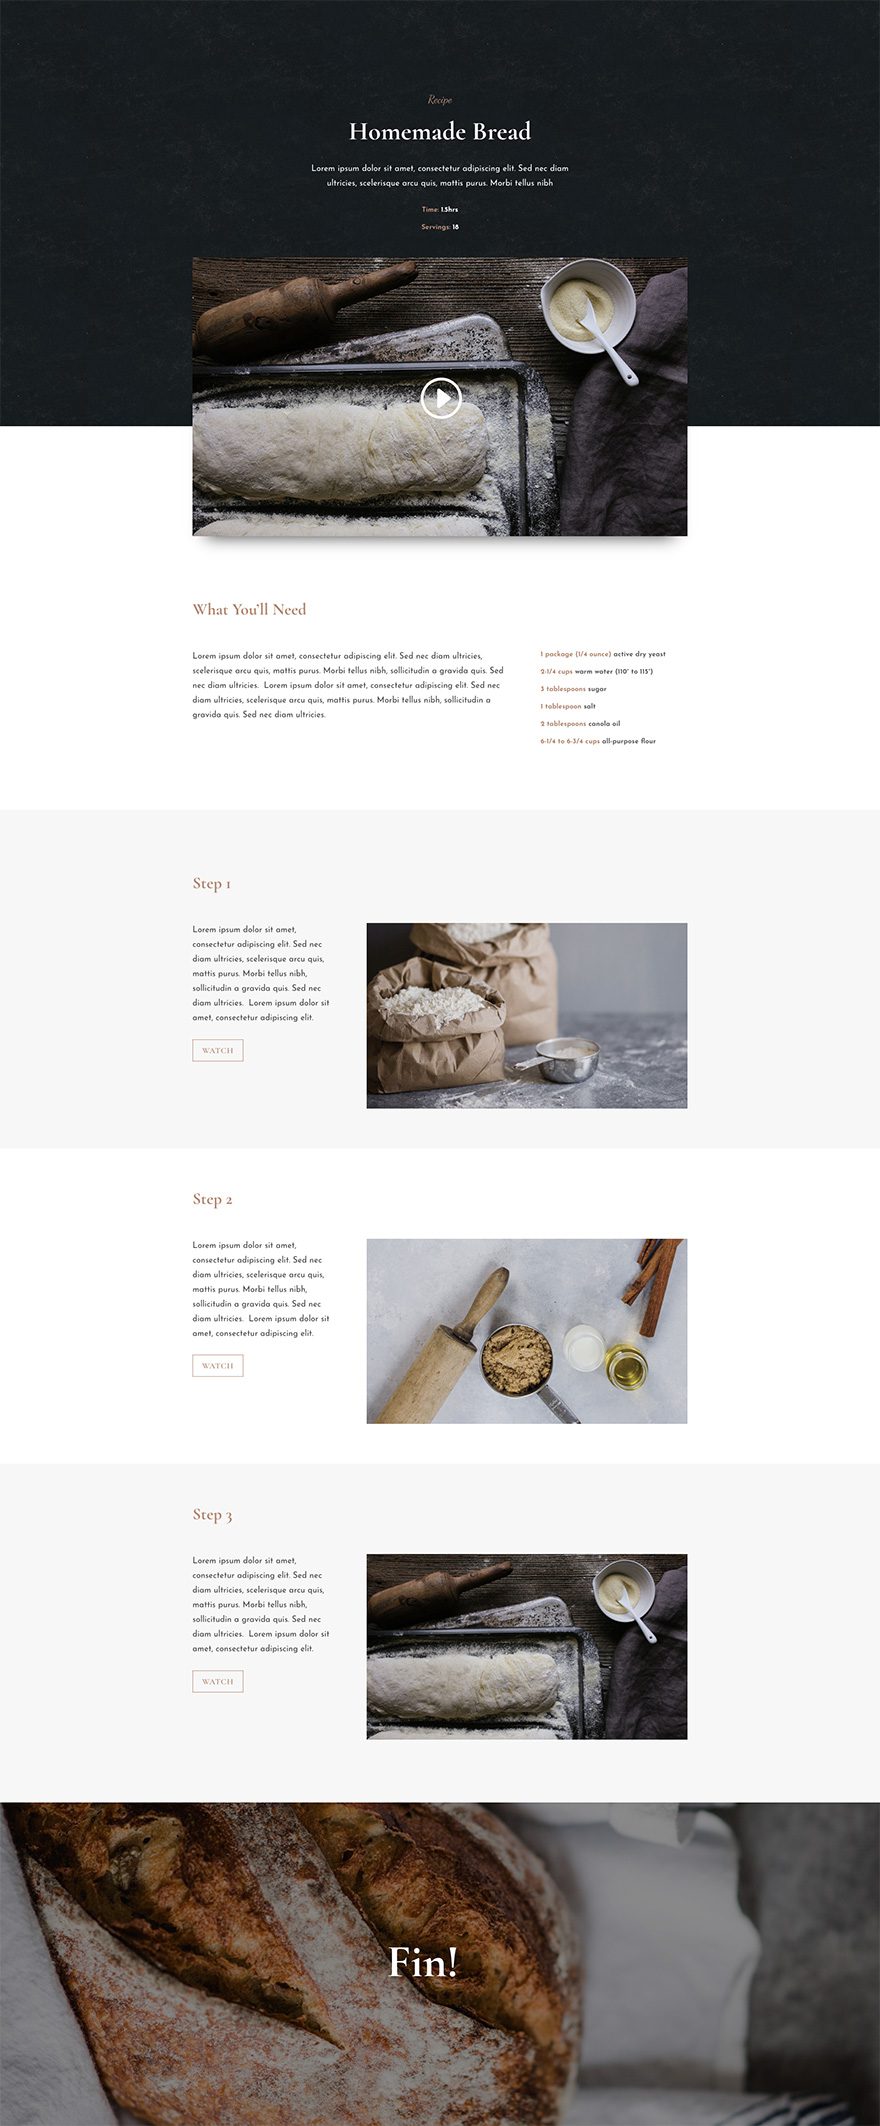
Recipe Page Design
Download The Exclusive Layout Before It Disappears!
Already a Lifetime Member? You can download the pack right now, no need to partake in our Cyber Monday sale!
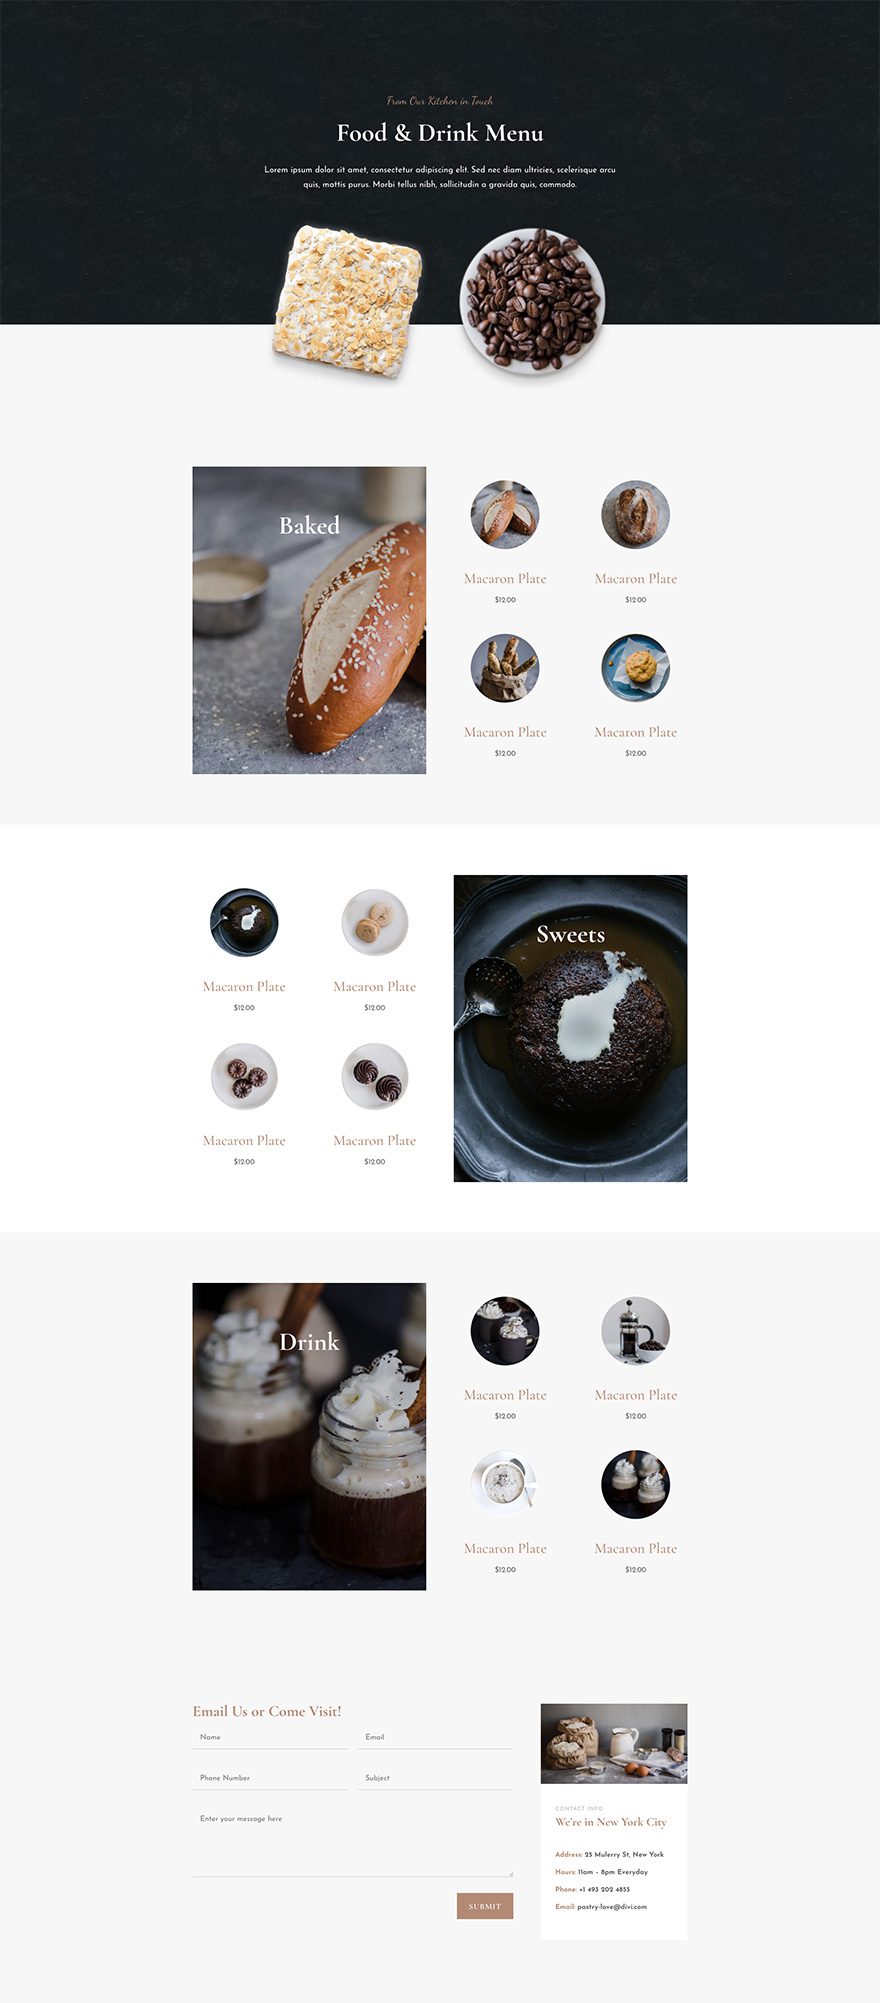
Menu Page Design
Download The Exclusive Layout Before It Disappears!
Already a Lifetime Member? You can download the pack right now, no need to partake in our Cyber Monday sale!
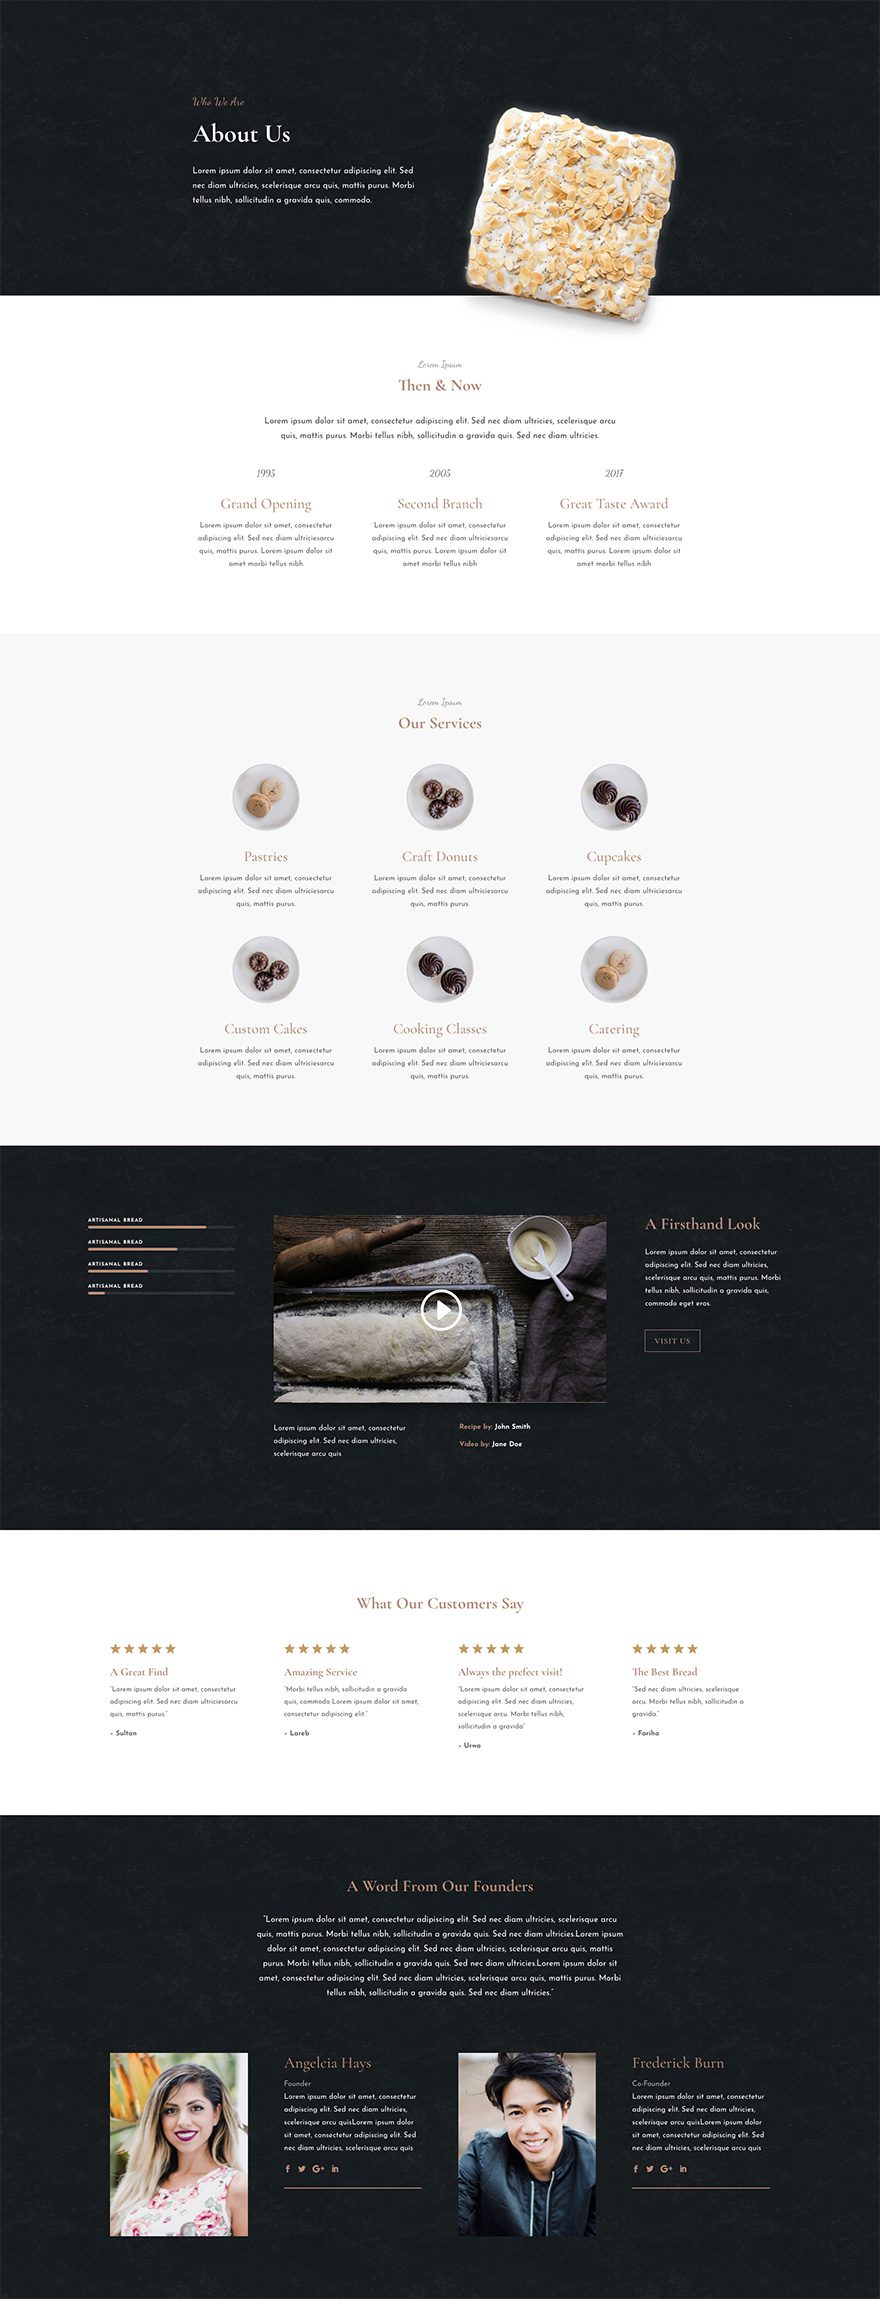
About Page Design
Download The Exclusive Layout Before It Disappears!
Already a Lifetime Member? You can download the pack right now, no need to partake in our Cyber Monday sale!
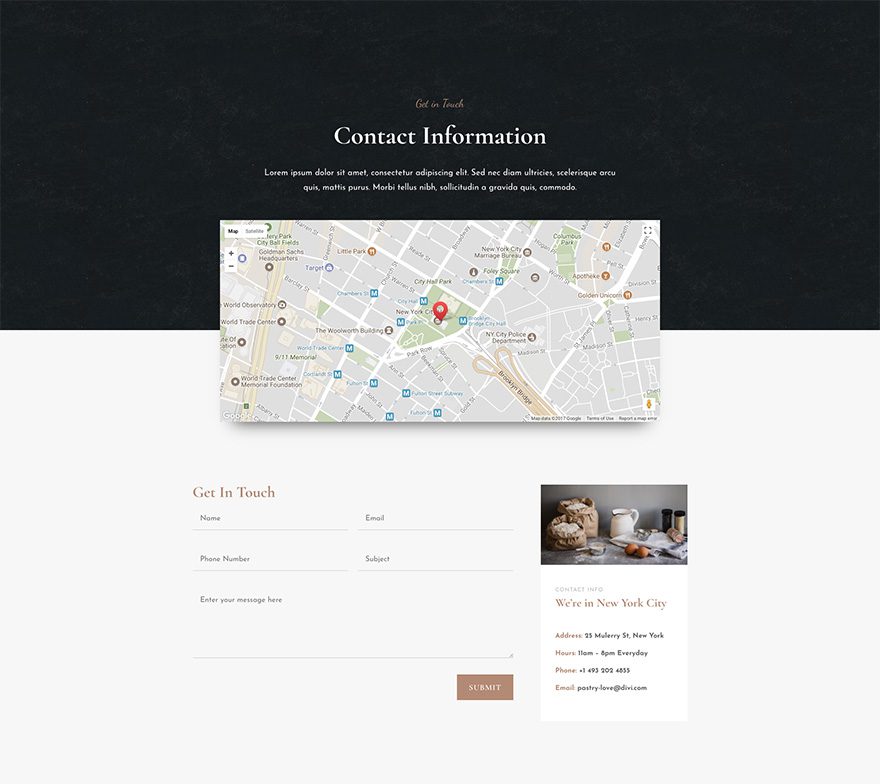
Contact Page Design
Download The Exclusive Layout Before It Disappears!
Already a Lifetime Member? You can download the pack right now, no need to partake in our Cyber Monday sale!
Get the Exclusive Cyber Monday Bakery Layout Pack
Before getting into this use case, you will need to lay your hands on the Exclusive Cyber Monday Bakery Layout Pack which you can get by becoming a new Elegant Themes Member, upgrading your existing account, or by already being a Lifetime Member with us. If you are indeed already a Lifetime Member you can log in to our members’ area and download all of our exclusive layout packs here. Everyone else will need to use the button below to buy or upgrade before they can follow along with the rest of our tutorial.
Download The Exclusive Layout Before It Disappears!
Already a Lifetime Member? You can download the pack right now, no need to partake in our Cyber Monday sale!
How to Use the Exclusive Cyber Monday Bakery Layout Pack to Create a Locations Page for Your Business
For the remainder of this post we’ll assume you’ve either taken advantage of our Cyber Monday deal or that you are already a Lifetime Member and have access to the Bakery Layout Pack.
Once you’ve downloaded the new Bakery Layout Pack from our members area you can watch the video below to see just how easy it is to set up. We would also encourage you to follow along with this tutorial to get your site ready for further customization.
Now let’s get into the use case itself.
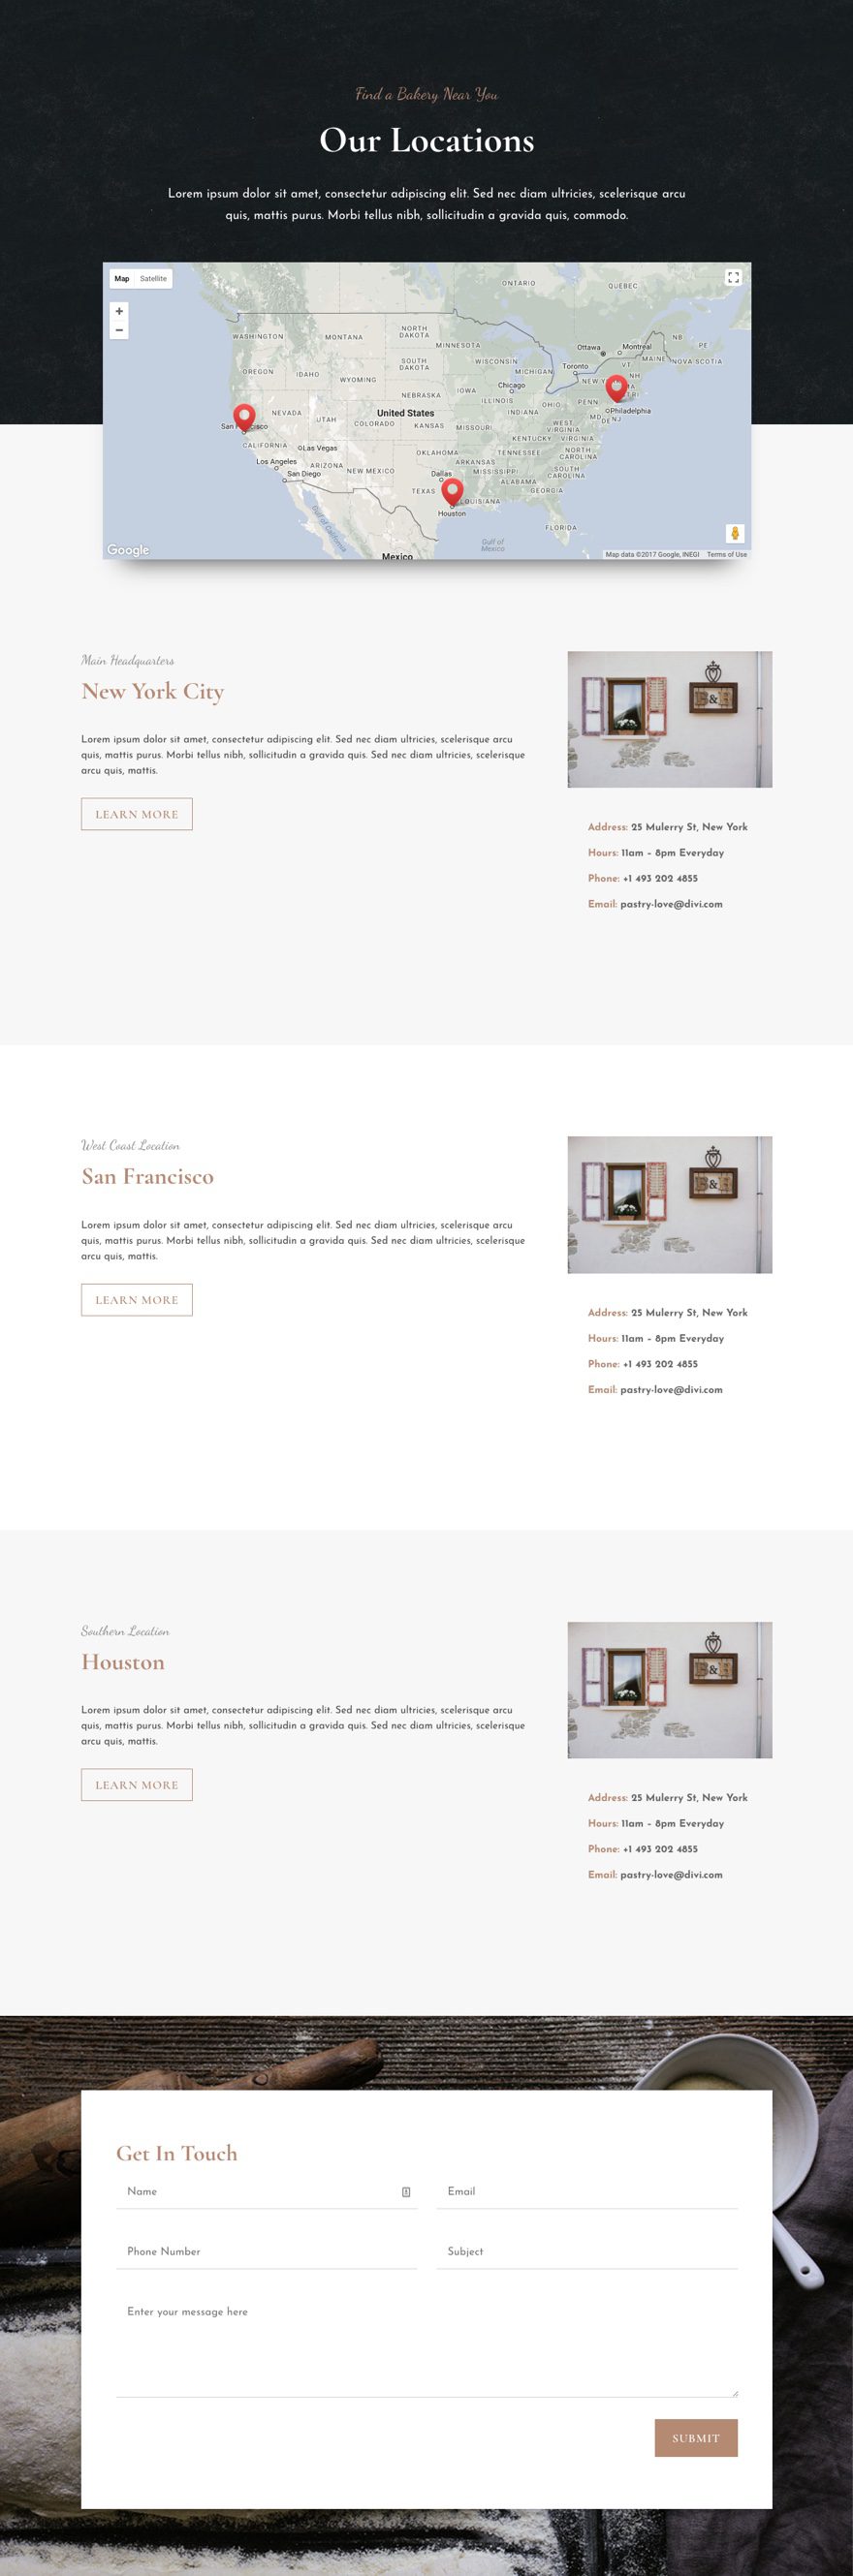
When building a website for a company with more than one location, it is important to think about the best way to communicate that information to visitors. They need to know which location is closest to them and any important info specific to that location. And, building a Locations page for website is a great start.
In this use case I’m going to show you just how crazily easy it is to build a professional locations page for your business using the Bakery Layout Pack.
Using the framework of the Bakery Contact Page Layout, I will show you how to add additional pins to your map module to reflect all locations of your business along with well organized and designed sections for displaying important information for each location. Because we can use the design elements already provided by the layout, this process is refreshing and fun (at least it is to me).
Let’s get started.
Start by Using the Contact Layout to Build your Locations Page
The Bakery Contact page layout is perfect to use as a foundation for our new Locations page. It has a map module at the top which we will use to showcase each of our company locations. Plus it has some other elements like text modules that are already designed that we can rearrange and modify as needed.
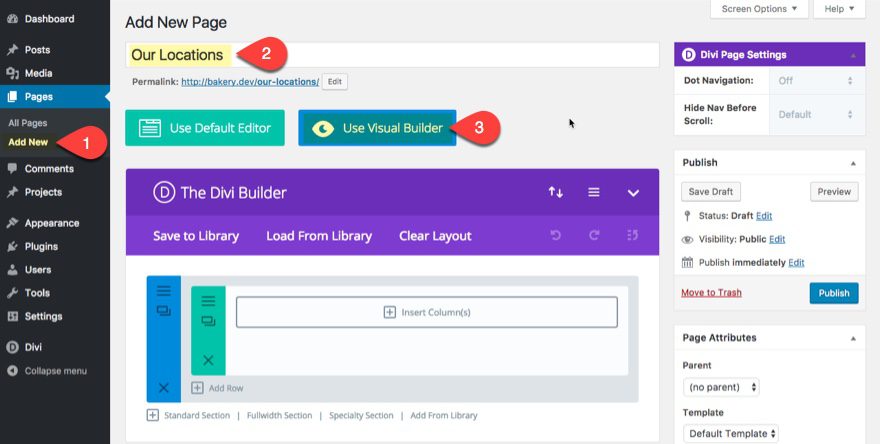
Create New Page
First, you will need to create a new page and give it a title (something like “Our Locations”) and click to use the divi Builder and then the visual builder.
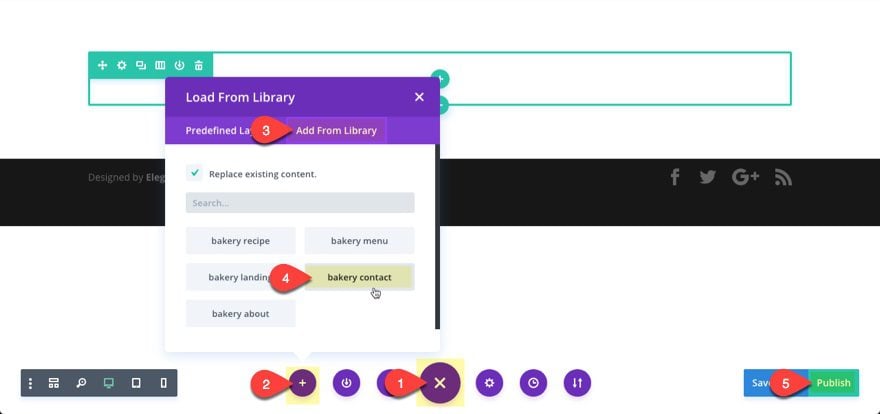
Load Bakery Contact Page Layout
At this point you should already have the page layouts uploaded to your Divi Library. Click to open the purple menu at the bottom of the page and select the “Add from Library” button with the plus icon. Select the load from library tab and then select the Bakery Contact layout from the list. The layout will immediately load on the page.
Publish.
Adding Sections for your Specific Location Information
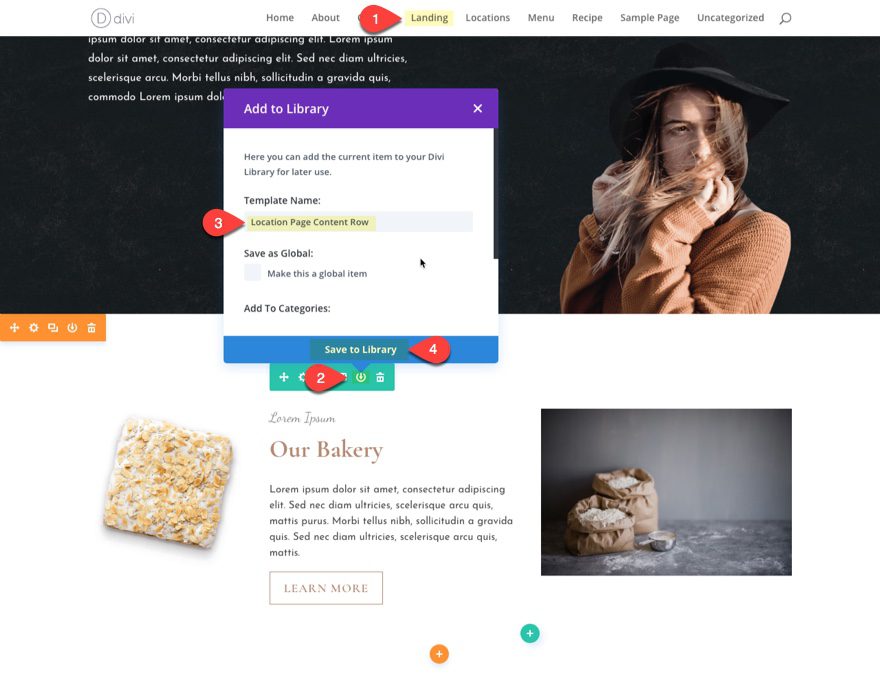
We really don’t have much of any content on the contact page to use for building additional content for our specific locations. So, let’s go to the Bakery Landing page and select the row from the second section of the page and save it to the Library.
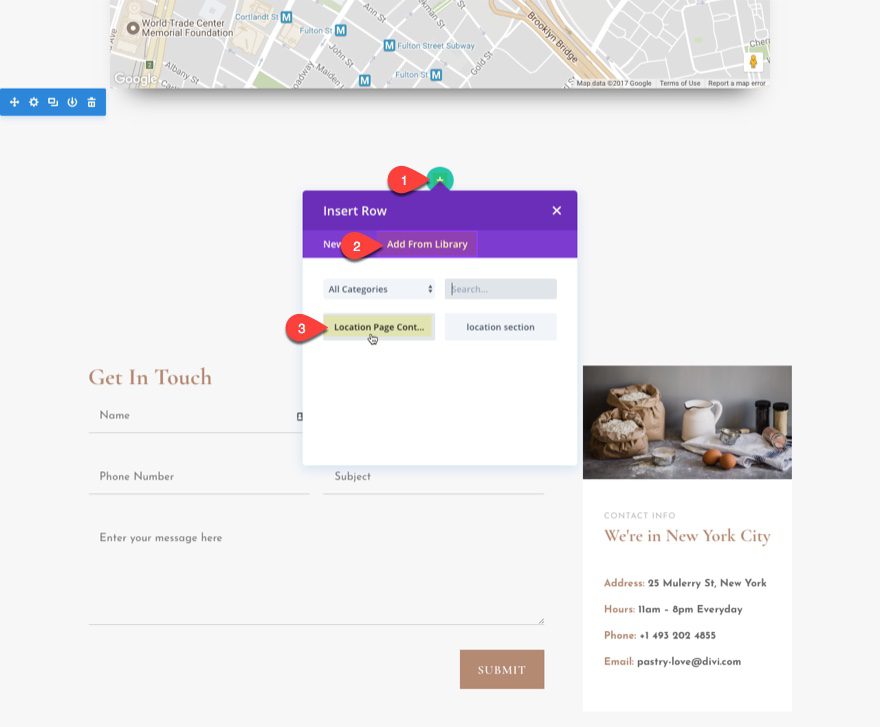
Now go back to the locations page. Duplicate the section at the bottom of the page containing the contact form (don’t delete this we will need it later). In the section directly below the map, delete the entire row from the section and add the row you saved from your library.
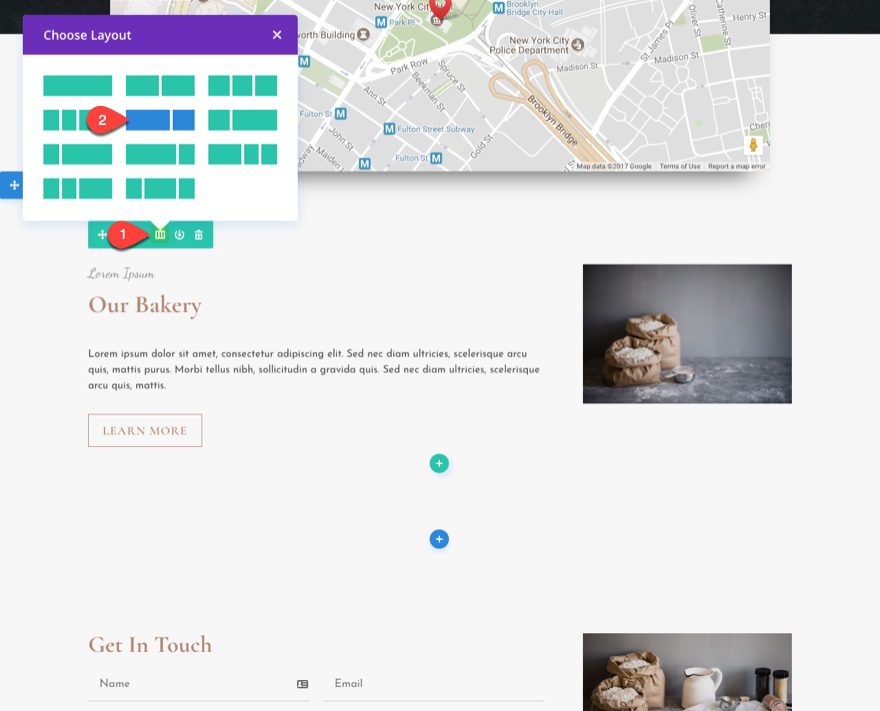
Next change the column layout of the row to a two-third one-third layout.
Locate the text module with the address content in the right column of the bottom section. Drag it under the image module in the right column of the row in the section above it.
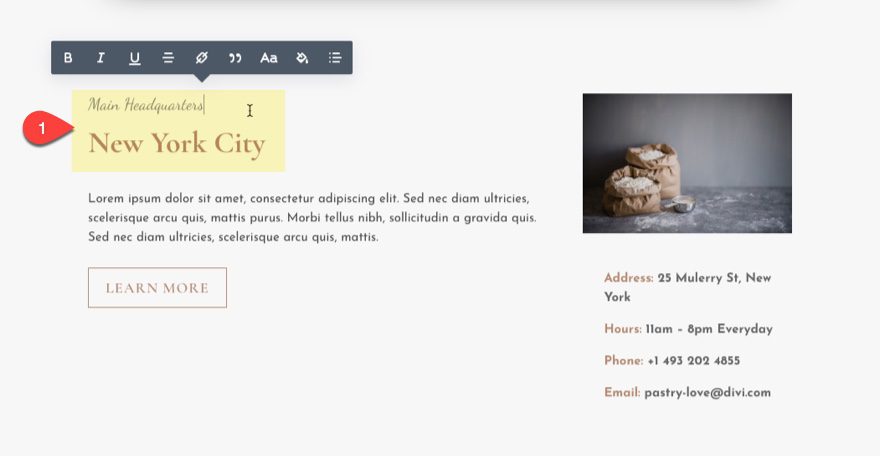
Then update the Content in the text modules in the left column to represent your specific company location. For my example I’m going to add the following:
Main Headquarters
New York City
Now update the image module in the right column to include an image of your company location.
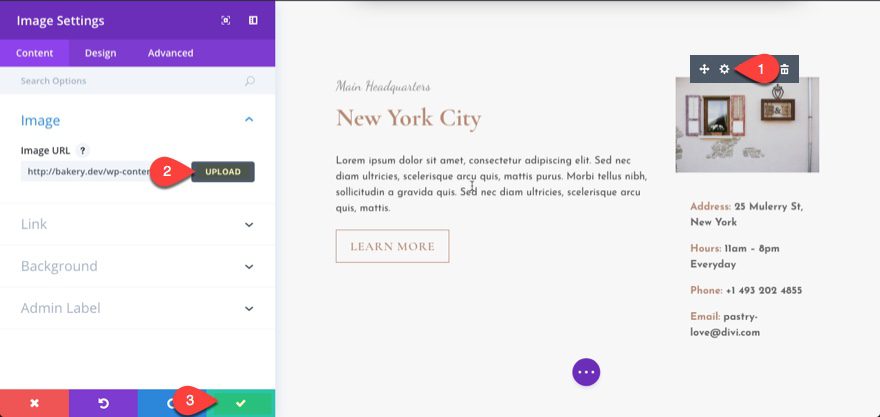
This will serve as a nice section for each of your specific location blurbs.
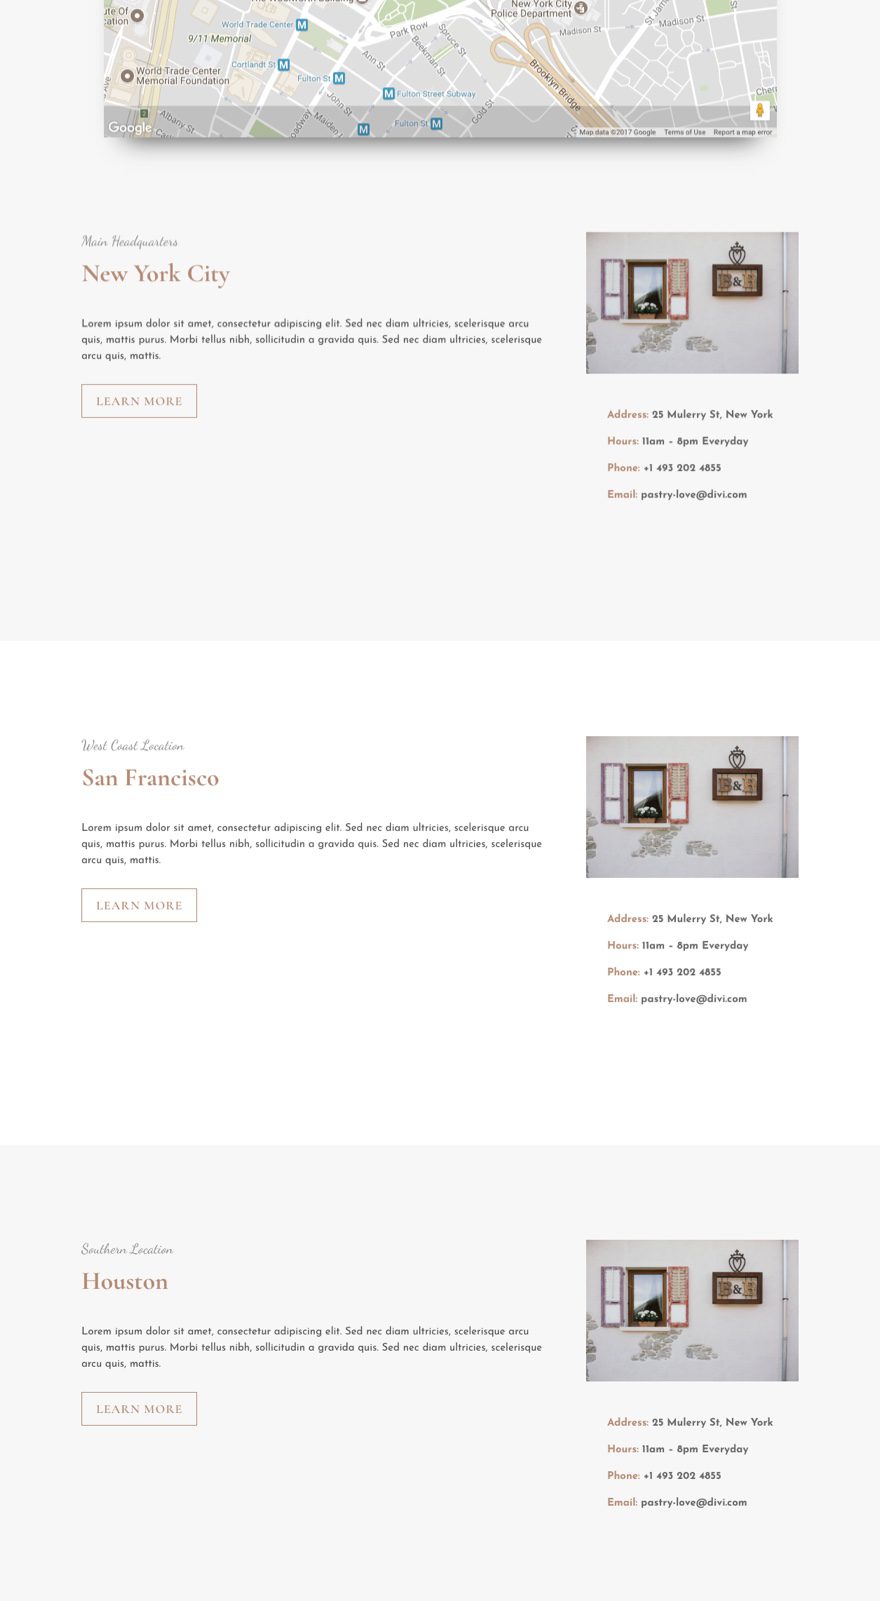
Now all you need to do is duplicate this section to add additional locations.
Duplicate this section twice so that you have a total of 3 location sections. Then change the middle location section background color to white to help divide up the sections better.
Then update the duplicated sections with location specific content. For this example, in addition to my New York location, I’m going to create a section for San Francisco and Houston as well.
Design the Contact Form Footer Section
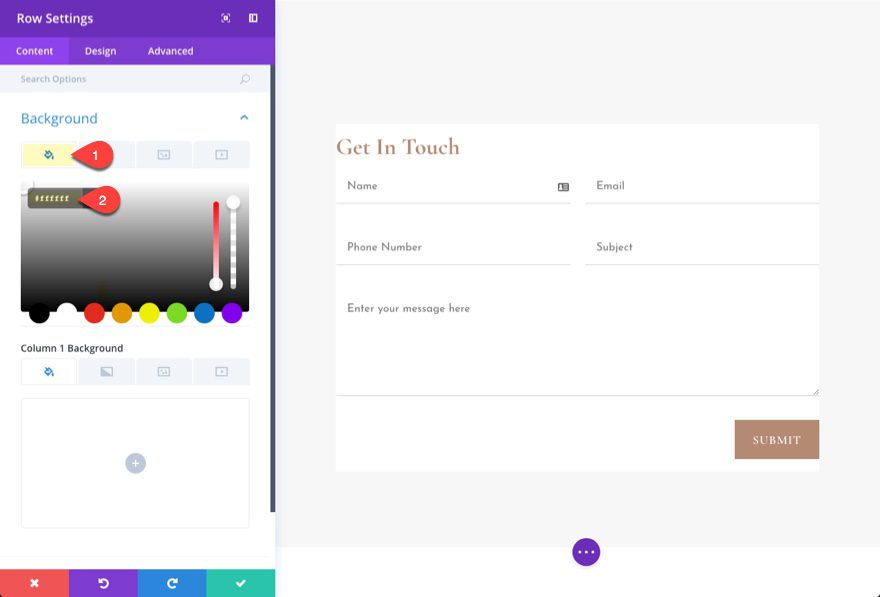
Remember that section we saved at the bottom containing our contact form. This will serve as a great footer section for our location page. All we need to do is tweak it a bit.
First Let’s delete the remaining modules in the right column. Then update the row column layout to a one column layout. Now all you should see is the contact form in a one column row.
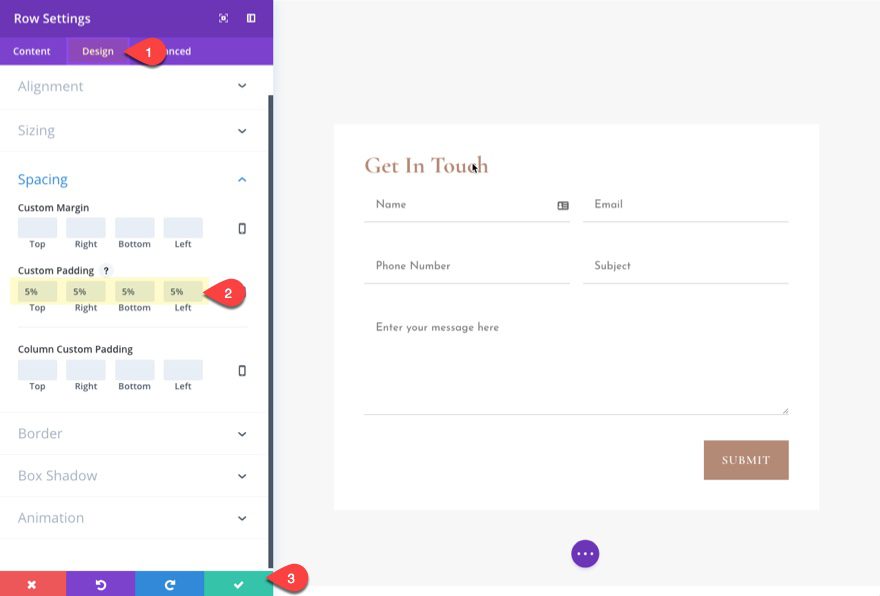
Next click to edit the row settings and update the following:
Under the content tab…
background color: #ffffff
Under the Design tab…
custom padding: 5% Top, 5% Right, 5% Bottom, 5% Left
Box shadow: [select box shadow]
Now let’s add a background image for our section. Go to the section settings and select one of the background images included in the layout.
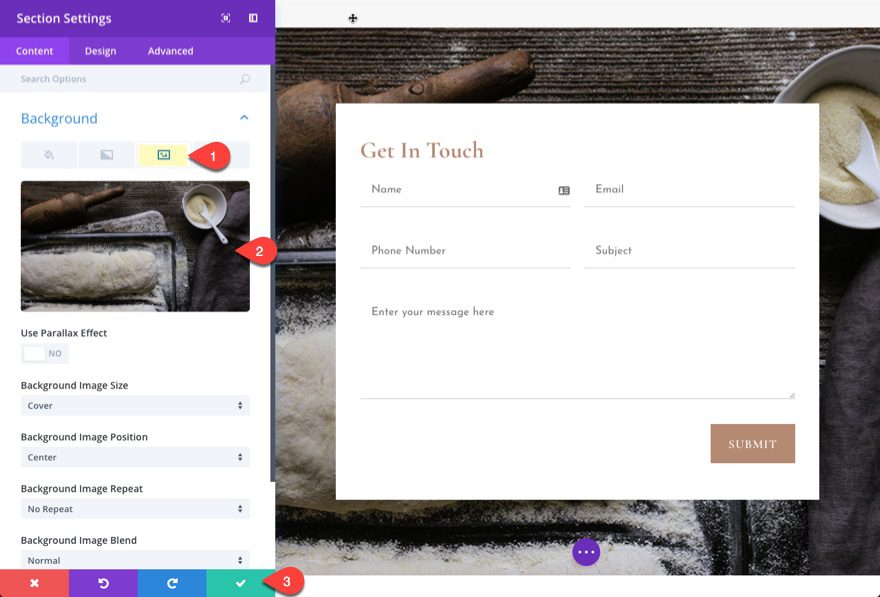
Great! Now on to the map module.
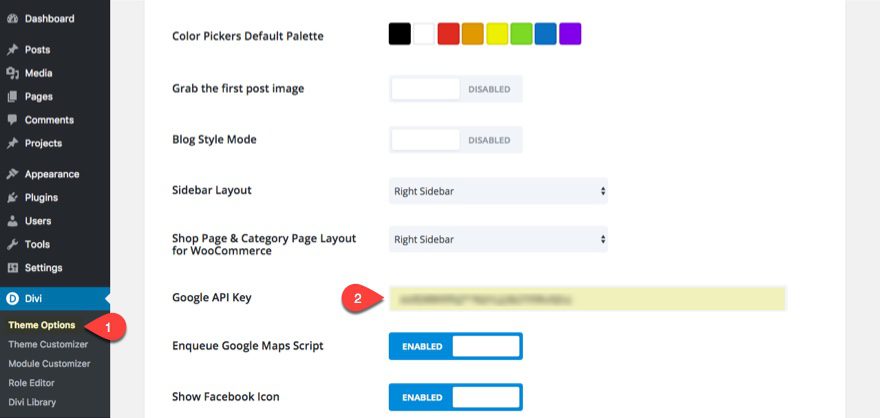
Add Your Google API Key
At this point, you will need to make sure that you create your Google API Key and then add it to the Theme Options.
Update the Map Module with New Location Pins
At this point, most of our page has been completed. All that remains are the updates to the map module at the top of the page. We need to add the new pin locations for the three sections we created in the page sections (New York City, San Francisco, and Houston).
Click to edit the Map Module and update the settings as follows:
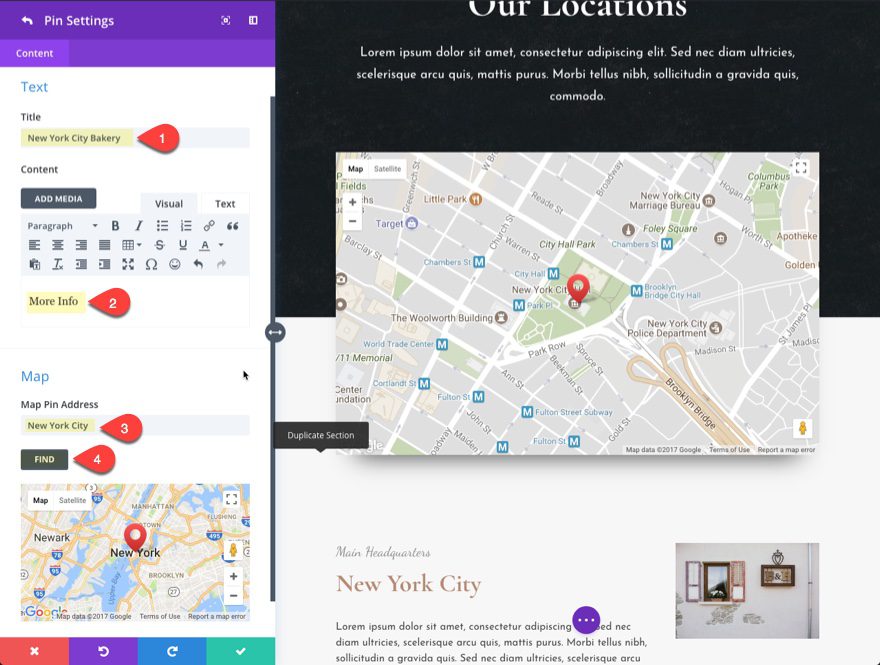
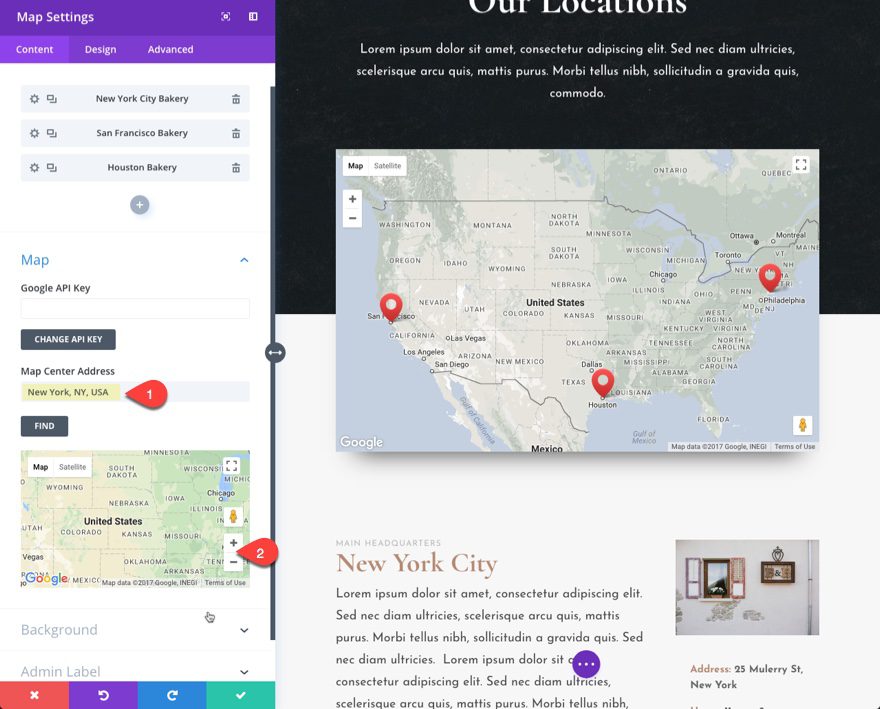
Erase the one pin showing in the module so that you start fresh. Then add a new pin and update the settings as follows:
Title: New York City Bakery
Content: More Info
Map Pin Address: New York City
Click the Find button.
Then add a new pin and update the settings as follows:
Title: San Francisco Bakery
Content: more info
Map Pin Address: San Francisco
Click the Find button.
Then add a new pin and update the settings as follows:
Title: Houston Bakery
Content: more info
Map Pin Address: Houston, TX
Click the Find button.
You can leave the map center address as New York City. But adjust the map display to zoom out far enough to be able to see all locations when the visitor first views the map.
Add Anchor Links to the Pin Content Boxes
As an additional feature you can boost the user experience by adding an anchor link inside the pin content that shows up when clicking on the pin. This anchor link will take the user down the page to the specific section of the page that showcases that location’s info.
Open the map module setting and then edit the first pin settings. Highlight the text in the content box that reads “More Info” and then click the link icon to make it a link. For the url, enter “#newyork” and click OK.
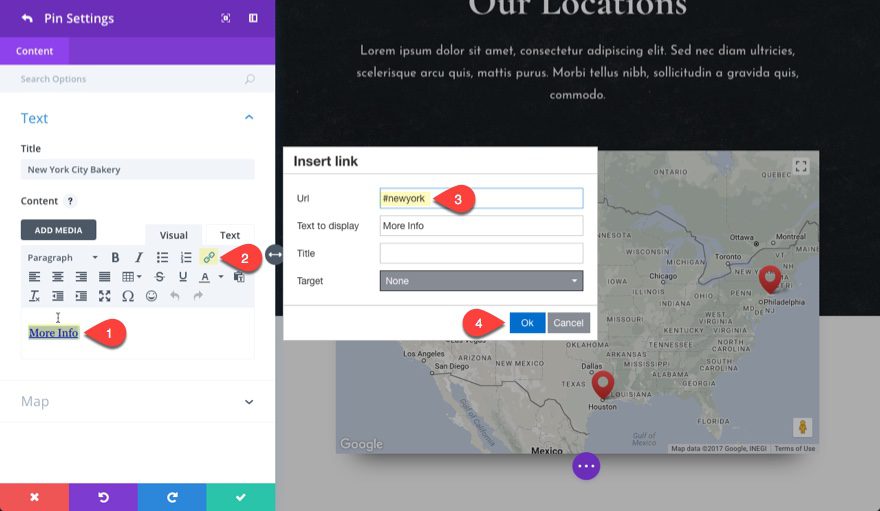
Do the same thing for the San Francisco pin (use the url “#sanfran”) and the Houston pin (use the url “#houston”).
Now all you need to do is add a custom CSS ID to each of your sections that will correspond to the link urls you just created in the pins.
For the “New York City” section, update the section settings in the Advanced tab with the CSS ID “newyork” and save your settings.
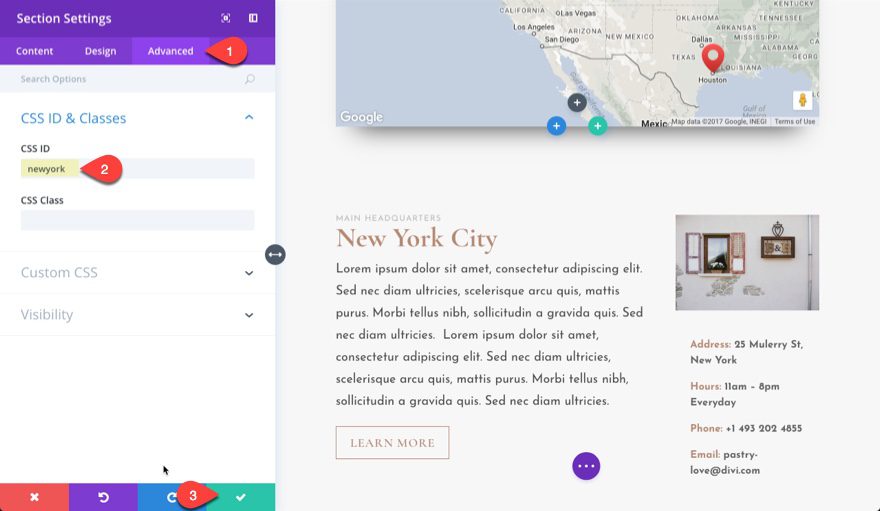
Now when the user clicks the “more info” link (with the url #newyork) in the New York pin, the page will jump down to that section.
Do the same for the San Francisco section (use the CSS ID “sanfran”) and the Houston section (use the CSS ID “houston”)
That’s it. You are all done!
![]()
Our Biggest Discount Of Of All Time
Cyber Monday only comes once a year, and when it does, we like to do something really special. Today we are offering 25% OFF EVERYTHING, the biggest discount we have ever given. This discount has only ever been offered once before (during last year’s Black Friday and Cyber Monday sale), and it won’t be back again until next year. It wont be available for long, and once the sales have ended you will have to wait a whole year for it to come back (so don’t miss out)!
INCLUDES 6 EXCLUSIVE LAYOUT PACKS
Everyone who takes advantage of our Cyber Monday sale will also get exclusive access to 6 Cyber Monday Divi Layout Packs. These are world-class designs built by our very own Divi design team. They are the perfect way to jump-start your next Divi websites, and they are only available to Black Friday and Cyber Monday customers and current Lifetime members. Once the sale is over, these layouts won’t be available ever again!
Click Here To Purchase A New MembershipClick Here To Upgrade Your Current AccounClick Here To Renew Your Expired Account
The post How to Use the Exclusive Cyber Monday Bakery Layout Pack to Create a Locations Page for Your Business appeared first on Elegant Themes Blog.