Ever wondered if you can use WordPress for project management? Nowadays, it seems like WordPress can be used for pretty much everything…so do those capabilities actually extend into project management?
Yup! With a freemium plugin called WP Project Management, you can turn WordPress into a project management tool for you and your team. And in this post, I’ll give you a quick walkthrough for how you can do just that using the free version of this plugin.
Why Put Project Management Inside WordPress?
You probably already have at least an inkling of why project management is important. It’s all in the name! That is, it helps you manage projects better so you’re more productive and effective in your work.
But there are plenty of third-party project management tools. So why use WordPress for project management? In the end, it really comes down to convenience. Even though it might only take a few seconds to switch between your WordPress dashboard and a third-party project management tool, those seconds add up over time.
Convenience is the reason that CoSchedule’s WordPress plugin has over 10,000 active installs…despite CoSchedule having a fully-functional standalone dashboard.
If you’re already using WordPress, it’s just plain nicer to have everything integrated into one package. Especially if you’re working with teammates.
For example, instead of needing to create duplicate accounts for everyone, you can just utilize the same WordPress accounts that already exist.
How to Use WordPress for Project Management With WP Project Management
WP Project Management is a freemium project management plugin that fits entirely inside your WordPress dashboard. I’ll show you how to get set up using the free version of the plugin that’s available at WordPress.org.
For lightweight project management, the free version is solid. But otherwise, you’ll probably need to pay (I’ll talk about why that is later on).
It’s also worth noting that the plugin has mixed reviews. In playing around with the free version, I didn’t encounter any issues. But there are a number of complaints in the WordPress.org support forums (though WeDevs is usually quick to address those complaints).
And finally, because WP Project Management works pretty much entirely on the backend, it should play nice with almost any theme. Just to make sure, I did all my testing using a site running on Divi.
Okay, here’s how to use it:
Add Project Categories – A Necessary First Step
Once you install the plugin, your first step should be to set up categories for your various projects. While there is a Settings tab, there’s not really anything that needs to be configured. So you can jump straight into the other stuff.
To set your categories, head to Project Manager → Categories:
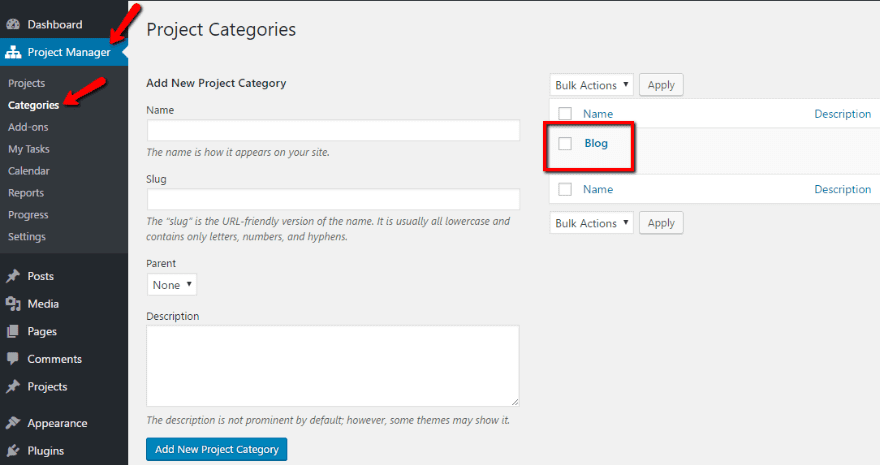
In the above example, you can see that I added a category for projects related to a “Blog.”
Add a Project – The Cool Stuff Is About to Start
Once you’ve added some categories, you’re ready to add your first project. To do that, head to Project Manager → Projects and click New Project:
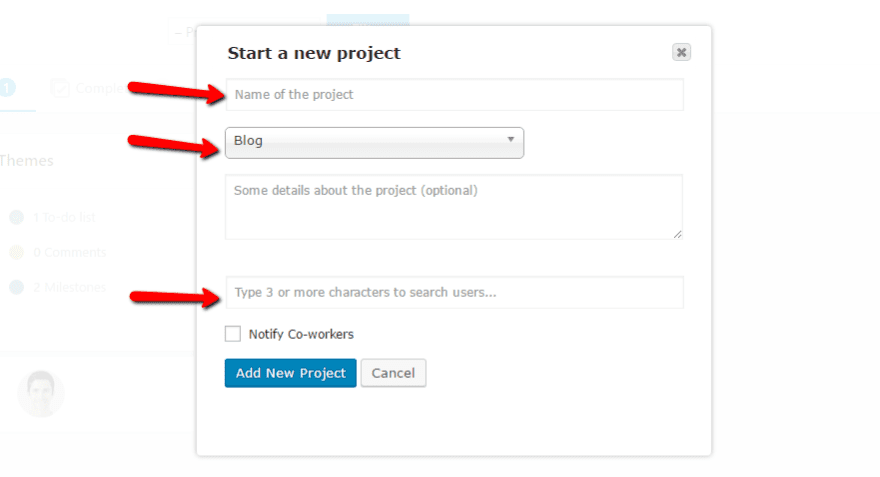
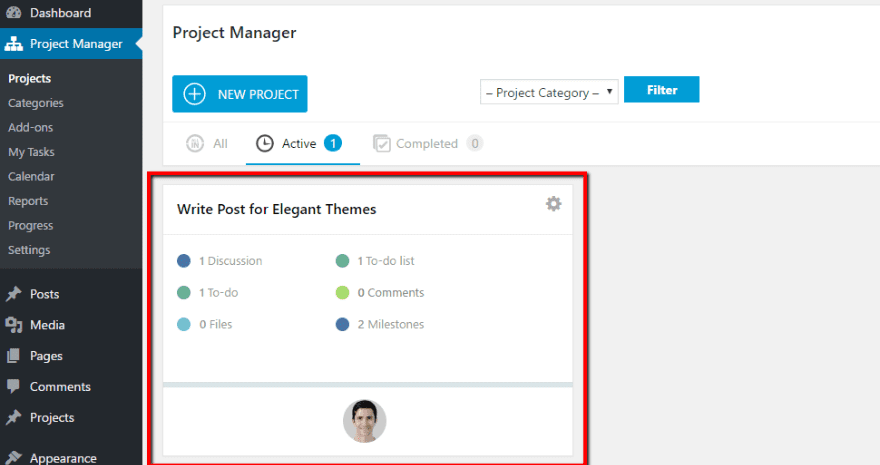
You give it a name, category, and assign it to a user (pulled from your regular WordPress users). Then, you’ll see your project in the list:
Managing Your Project – Activity Log and Discussion
Once you create your first project, things start getting cool. When you click on the project, you’ll see a quick overview of all its details, as well as a bunch of tabs at the top:
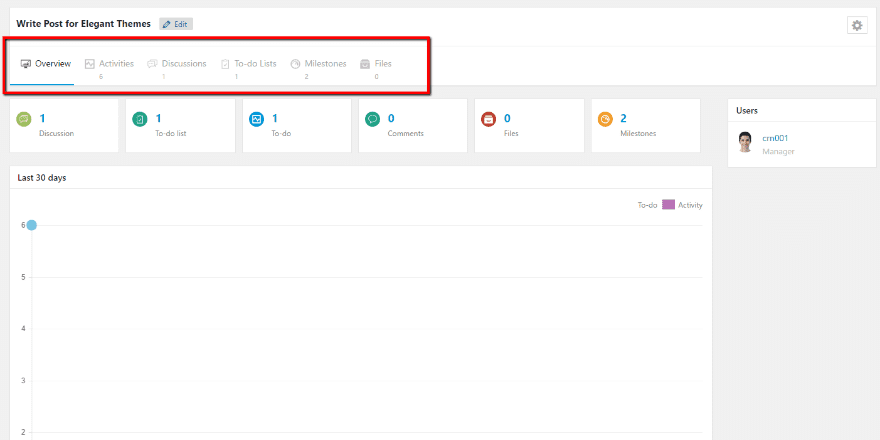
Let’s go through each tab because that’s where the project management happens.
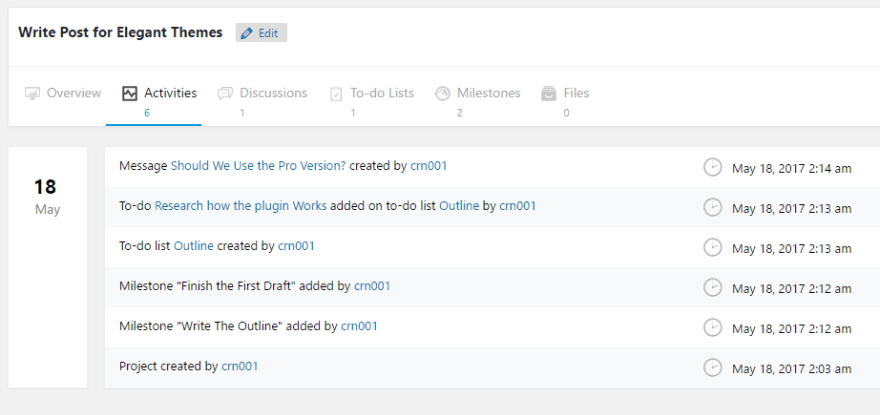
In the Activities tab, you can get a quick overview of every action that’s been taken on the project. For example – you can see some of the actions stemming from me playing around with the plugin to set up some dummy content:
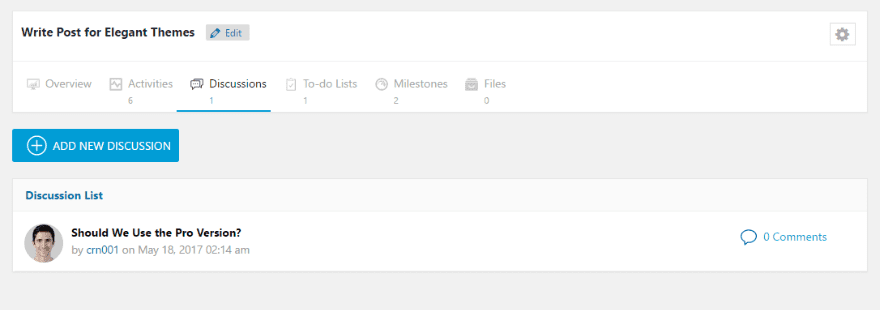
Moving over, the Discussions tab is where you can have team discussions for a specific project. It’s basically a forum inside each individual project. For example, you can see that I created a question:
If others wanted to respond, they could click on that thread and leave a comment:
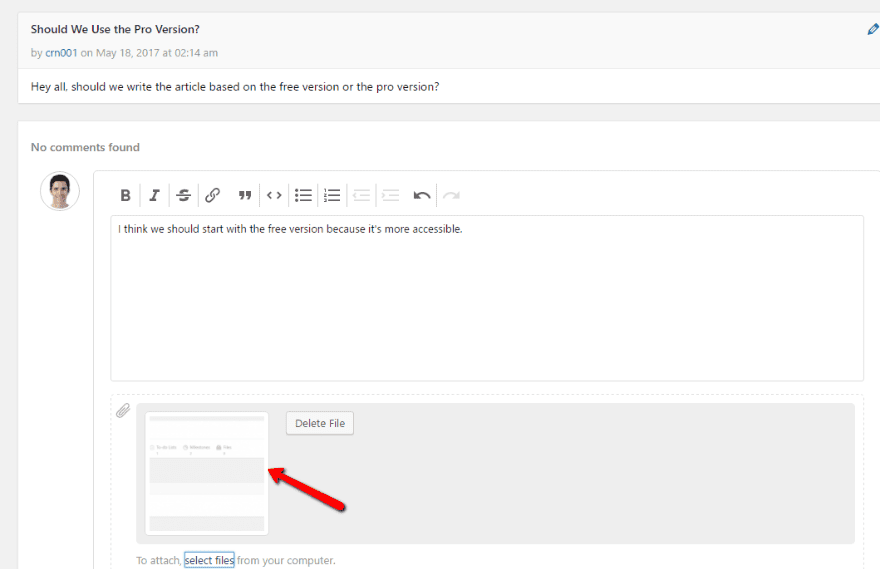
Users can even attach files to their comments.
Managing Your Project – To-Do Lists and Milestones
The next two tabs, To-do Lists and Milestones, help you add tasks and deadlines to your project.
In the To-do Lists tab, you can add as many to-do lists as necessary. Then, for each to-do list, you can add tasks and assign them to users as well as get a visual representation of how far along the to-do list is:
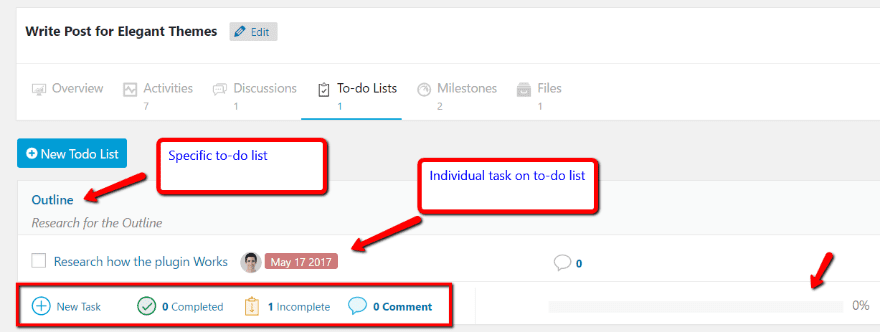
For example, if I add a second task and mark one as complete, you can see that the progress bar automatically updates:

Additionally, if you assign a task to a user, they’ll automatically get an email about the new task.
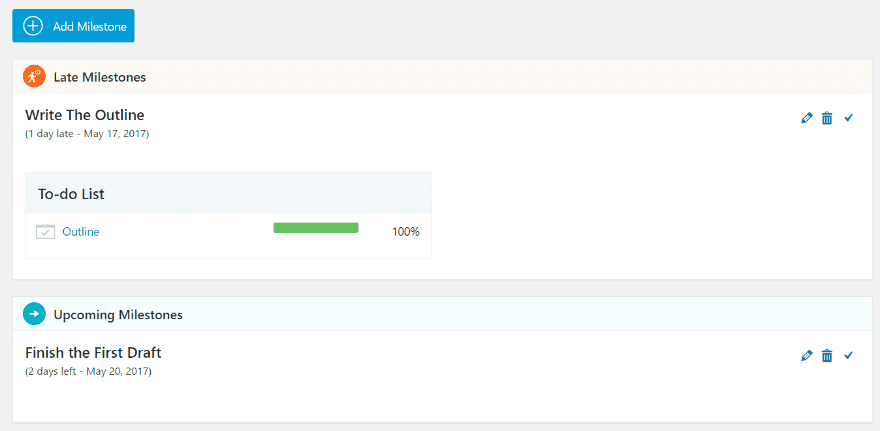
Hopping over to the Milestones tab, you can set, you guessed it, milestones. Milestones are basically major deadlines for the project. What’s neat is that you can assign to-do lists to milestones to get an idea of how close you are to being able to tick off each milestone:
Managing Your Project – Files
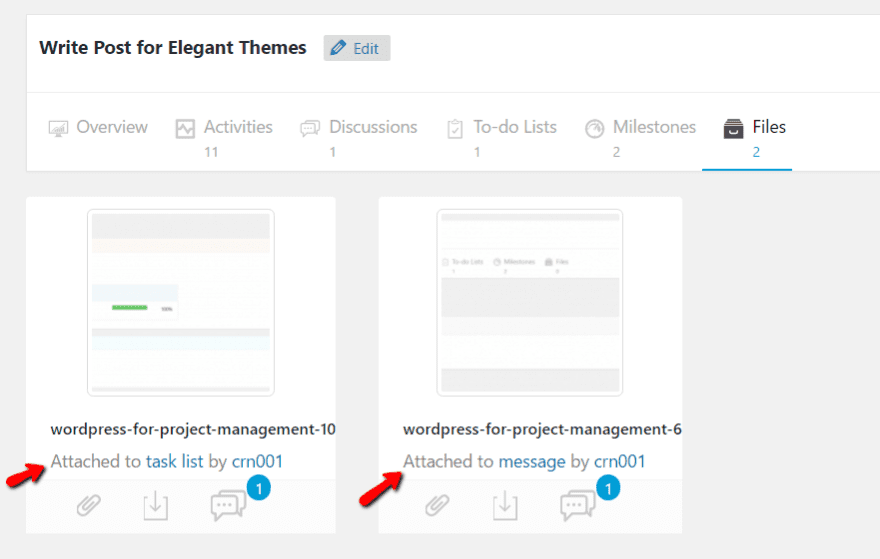
The final tab, Files, offers some pretty neat functionality. It basically collects all of the files uploaded in other parts of the interface in one spot. No matter if the file was attached as part of a Discussion thread or a To-do List, you’ll be able to find it here (as well as locate where it was originally uploaded):
Putting It All Together
As far as the free version goes, that’s pretty much the extent of the functionality. You can add as many projects as you want and, as far as managing individual projects goes, it’s still helpful.
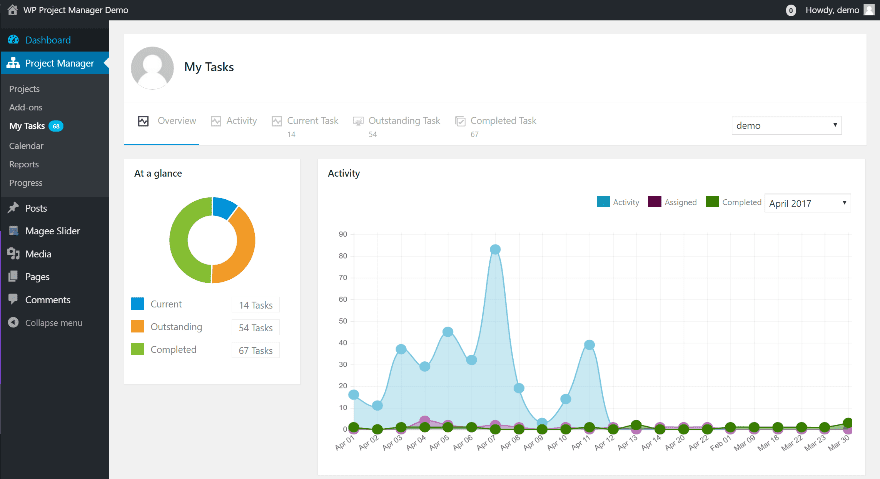
However, the free version is limited when it comes to working across multiple projects. For example, there’s no way for an individual user to view all of their assigned tasks across multiple projects in the free version.
In the free version, users can still see their assigned tasks if they specifically go to the To-do List tab. But there’s no unified dashboard like in the pro version.
Additionally, you have no calendar view and you lack detailed reporting about your productivity and project status, both of which are available in the pro version.
What All Is In The Pro Version and Add-ons?
In addition to a Pro version with enhanced functionality, WeDevs also has a ton of premium add-ons that tack on features that project managers will love. Currently, you can add on functionality like:
- Kanban boards
- Gantt charts
- Time tracking
- Invoicing
- WooCommerce integrations
- Sub-tasks
Most of the extensions cost $29 each.
In addition, as I mentioned before, the general Pro version gets you access to all types of helpful dashboards for:
- Tasks
- Calendar view
- Reports
- Progress
For example, here’s what the Tasks dashboard looks like in the pro version:
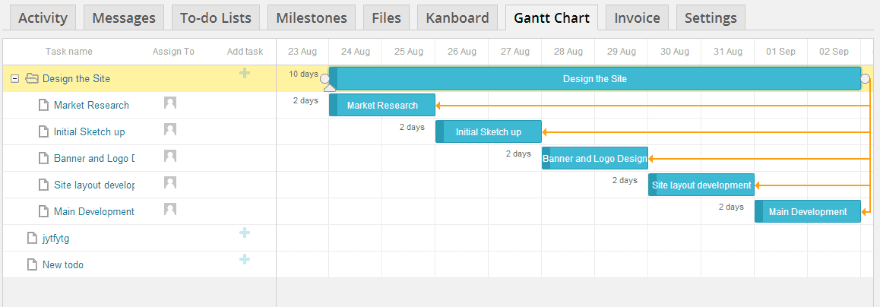
And here’s what the Gantt chart report looks like:
The pro version starts at $59 for a single site license.
Wrapping Up
WP Project Management is a neat way to use WordPress for project management. While it does have some mixed reviews, I didn’t encounter any bugs in setting up a single project and found it easy to use. My use was limited, though.
The free version is helpful for small projects, but if you want a serious project management tool, you’ll probably need to purchase the pro version and some of the associated add-ons.
Now over to you – would you ever use WordPress as your project management tool? Or do you prefer to use the third-party solutions?
Article thumbnail image by Dacian G / shutterstock.com
The post How to Use WordPress for Project Management appeared first on Elegant Themes Blog.
