
Divi’s sidebar module is an extremely useful tool for integrating custom widget areas into your design. This allows you to display any WordPress widget inside a Divi layout. In this tutorial, I’m going to show you how to create a scrollable recent posts widget area in Divi. I’ll be designing a “From our Blog” section with the recent posts widget area to the right side of a blog module. This will be perfect for showcasing a few of your most recent blog posts on a homepage or landing page.
Let’s get started!
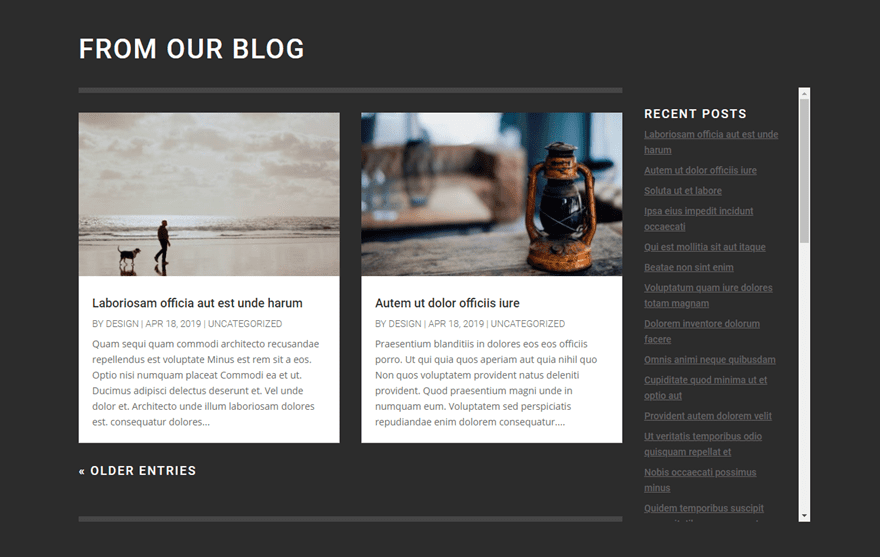
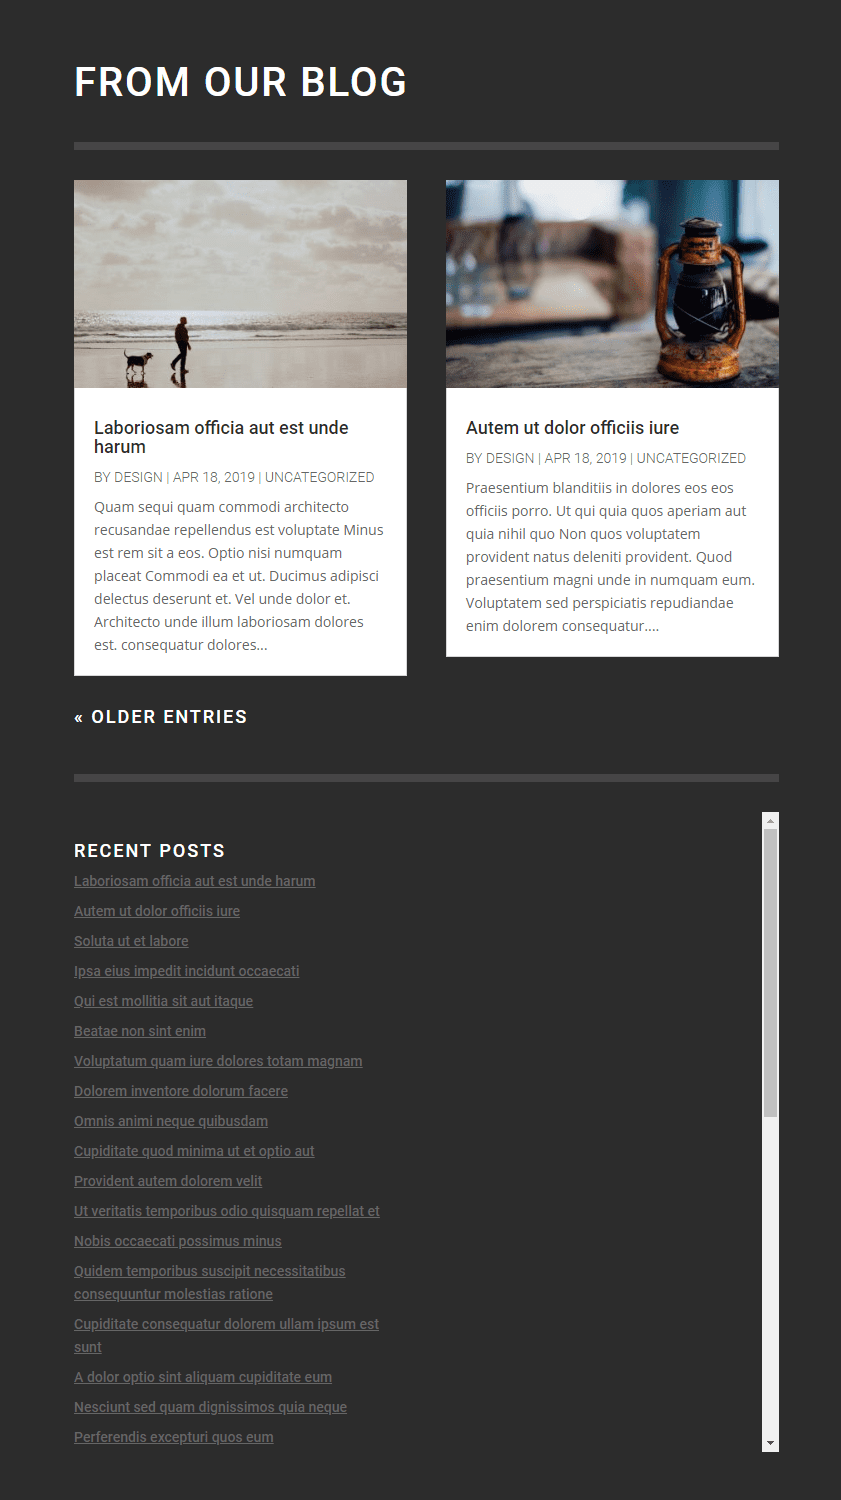
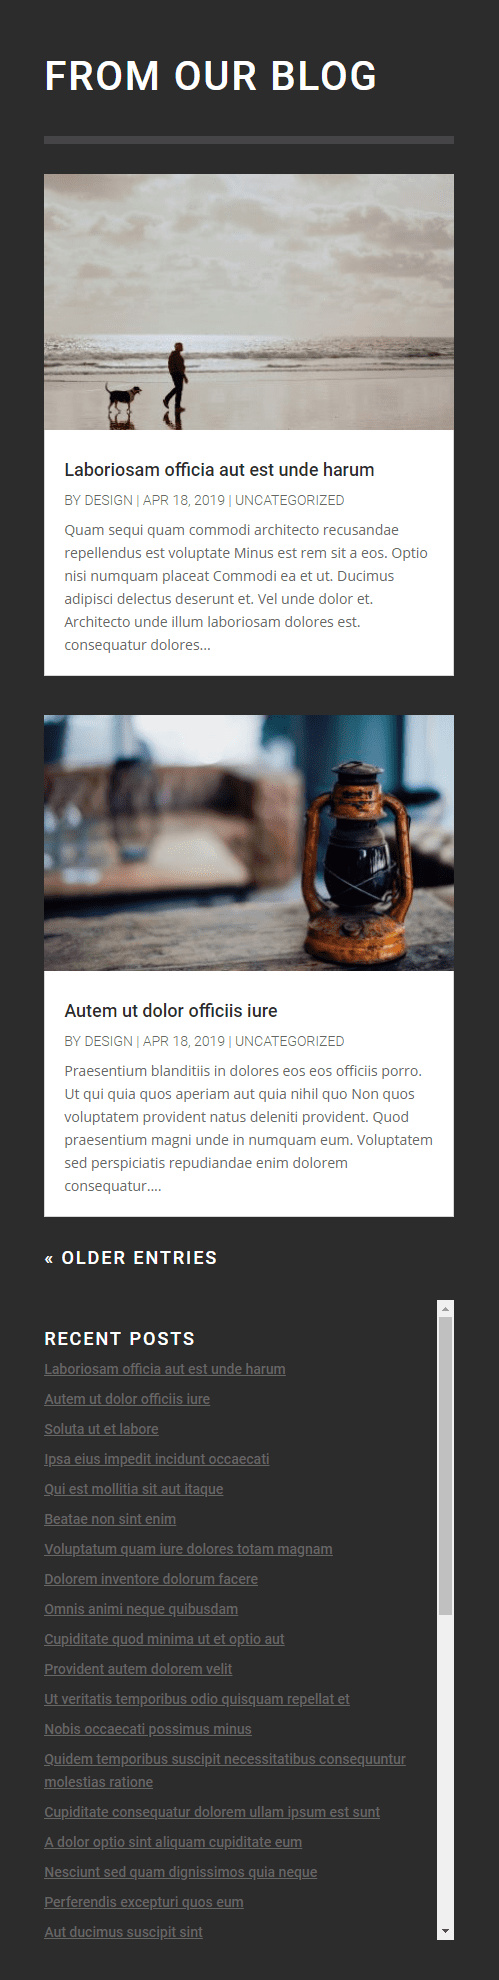
Sneak Peek
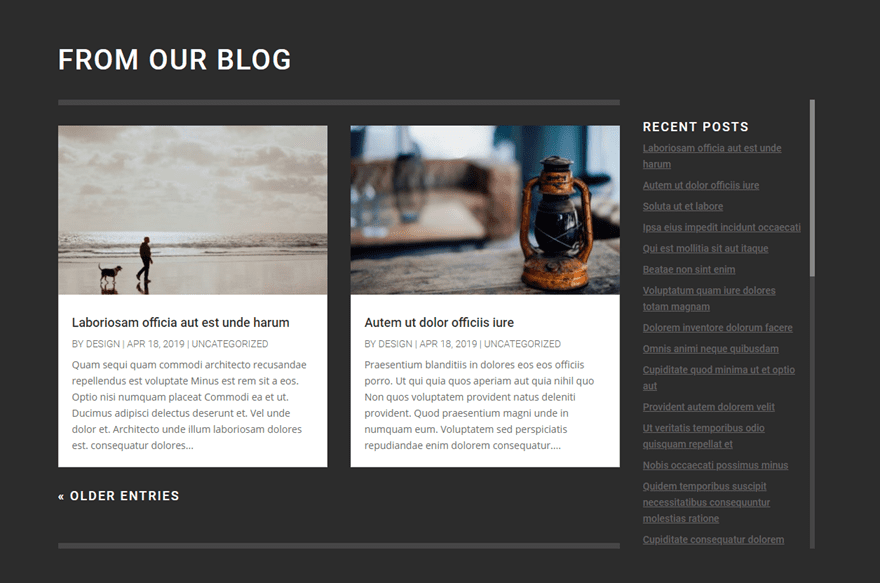
Here is a little sneak peek of the design we will build in this tutorial.

Download the Scrollable Recent Posts Layout for FREE
To lay your hands on the scrollable recent posts layout design from this tutorial, you will first need to download it using the button below. To gain access to the download you will need to subscribe to our Divi Daily email list by using the form below. As a new subscriber, you will receive even more Divi goodness and a free Divi Layout pack every Monday! If you’re already on the list, simply enter your email address below and click download. You will not be “resubscribed” or receive extra emails.
@media only screen and ( max-width: 767px ) {.et_bloom .et_bloom_optin_1 .carrot_edge.et_bloom_form_right .et_bloom_form_content:before, .et_bloom .et_bloom_optin_1 .carrot_edge.et_bloom_form_left .et_bloom_form_content:before { border-top-color: #ffffff !important; border-left-color: transparent !important; }
}.et_bloom .et_bloom_optin_1 .et_bloom_form_content button { background-color: #f92c8b !important; } .et_bloom .et_bloom_optin_1 .et_bloom_form_content .et_bloom_fields i { color: #f92c8b !important; } .et_bloom .et_bloom_optin_1 .et_bloom_form_content .et_bloom_custom_field_radio i:before { background: #f92c8b !important; } .et_bloom .et_bloom_optin_1 .et_bloom_border_solid { border-color: #f7f9fb !important } .et_bloom .et_bloom_optin_1 .et_bloom_form_content button { background-color: #f92c8b !important; } .et_bloom .et_bloom_optin_1 .et_bloom_form_container h2, .et_bloom .et_bloom_optin_1 .et_bloom_form_container h2 span, .et_bloom .et_bloom_optin_1 .et_bloom_form_container h2 strong { font-family: “Open Sans”, Helvetica, Arial, Lucida, sans-serif; }.et_bloom .et_bloom_optin_1 .et_bloom_form_container p, .et_bloom .et_bloom_optin_1 .et_bloom_form_container p span, .et_bloom .et_bloom_optin_1 .et_bloom_form_container p strong, .et_bloom .et_bloom_optin_1 .et_bloom_form_container form input, .et_bloom .et_bloom_optin_1 .et_bloom_form_container form button span { font-family: “Open Sans”, Helvetica, Arial, Lucida, sans-serif; } p.et_bloom_popup_input { padding-bottom: 0 !important;}

Download For Free
Join the Divi Newlsetter and we will email you a copy of the ultimate Divi Landing Page Layout Pack, plus tons of other amazing and free Divi resources, tips and tricks. Follow along and you will be a Divi master in no time. If you are already subscribed simply type in your email address below and click download to access the layout pack.
You have successfully subscribed. Please check your email address to confirm your subscription and get access to free weekly Divi layout packs!
To import the layout to your page, simply extract the zip file and drag the json file into the Divi Builder.
Let’s get to the tutorial shall we?
Creating the Recent Posts Widget Area
Since we are going to be adding a recent posts widget to our Divi layout, the first thing we need to do is create a new widget area (with the recent posts widget) to use with Divi’s Sidebar module.
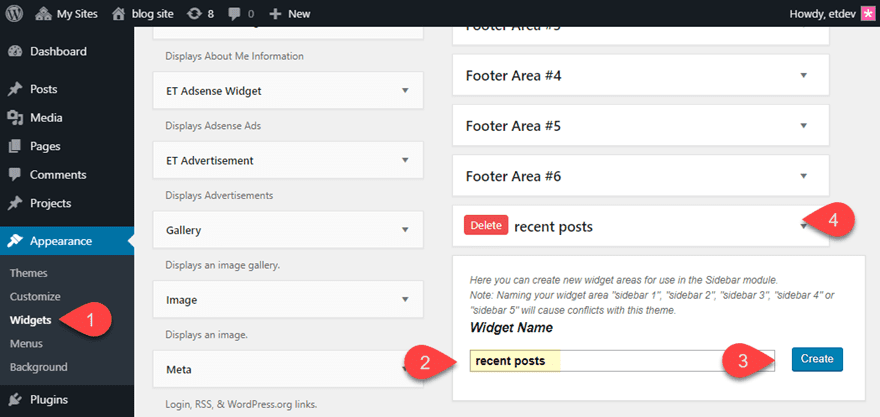
To create the recent posts widget area, navigate to Appearance > Widgets. Then create a new widget area by giving the widget area a name (call it “recent posts” if you want) and clicking the Create button. Refresh the page to see the new widget area available.
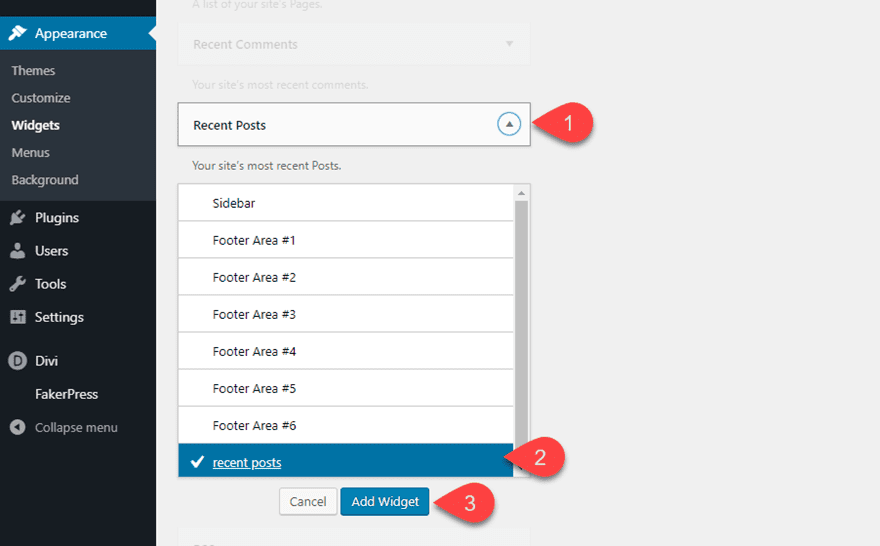
Open the toggle of the Recent Posts Widget that comes with WordPress over on the left of the page. Then choose the “recent posts” widget area from the list and click Add Widget to add the widget to the widget area.
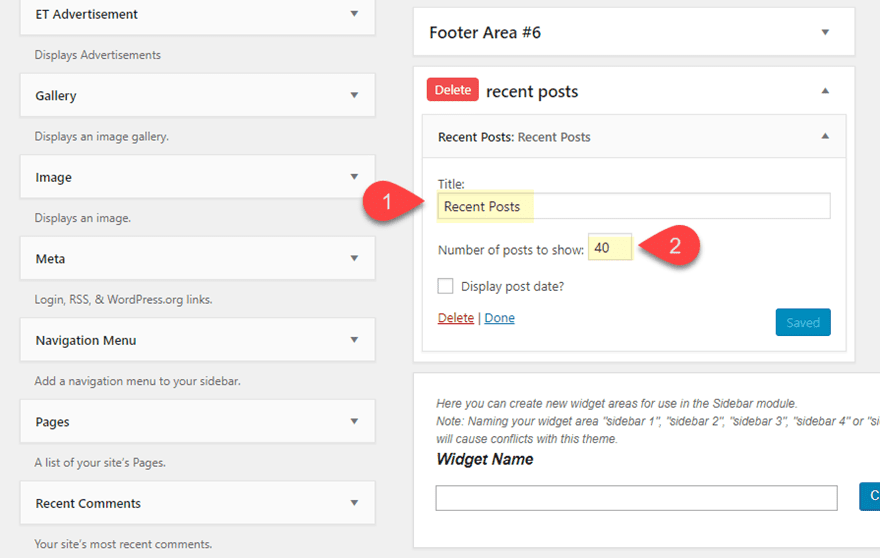
Then open the recent posts widget area and update the Recent Posts widget with a Title. Set the number of posts to show to a large number so that we will have enough posts to scroll through when our design is complete.
Now that we have our widget area in place, we can start on our Divi design.
Creating the “From Our Blog” Section with Scrollable Recent Posts Widget Area
Designing the Heading Section
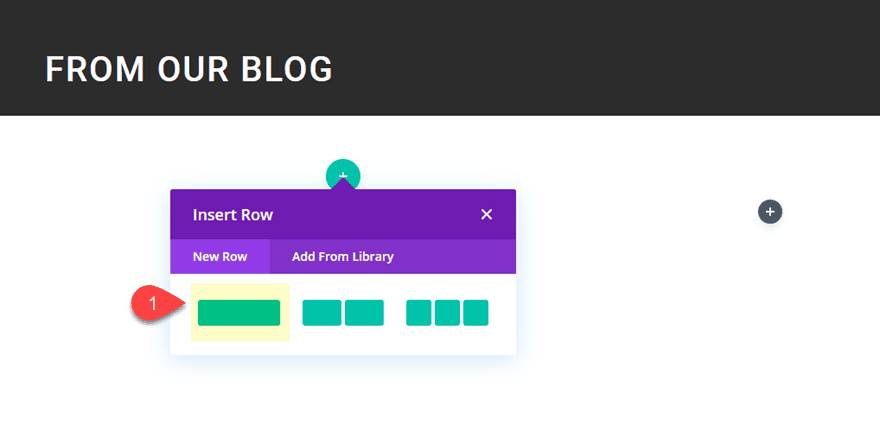
Create a new regular section with a one column row.
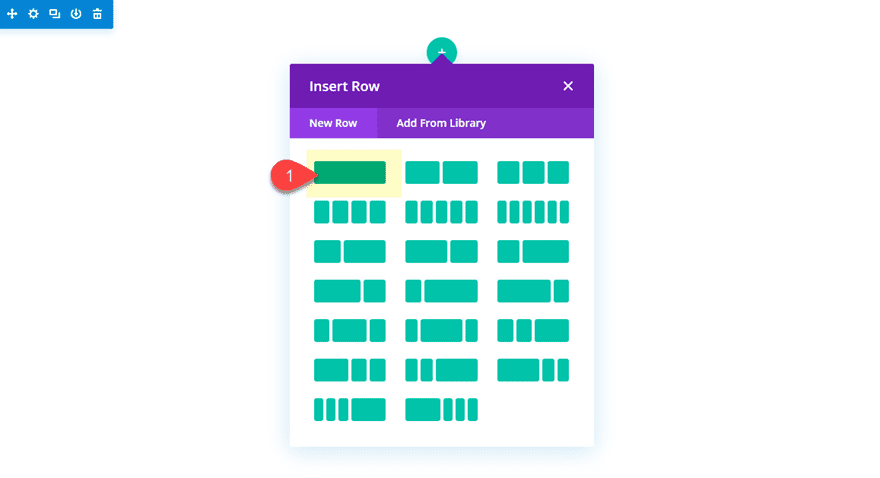
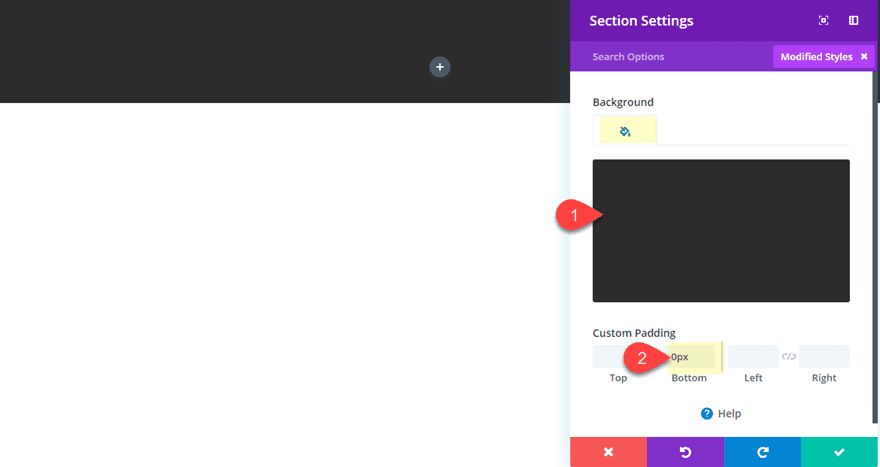
Before adding a module, update the section with the following:
Background Color: #333333
Custom Padding: 0px bottom
Then take out the bottom padding of the row as well by updating the row settings:
Custom Padding: 0px bottom
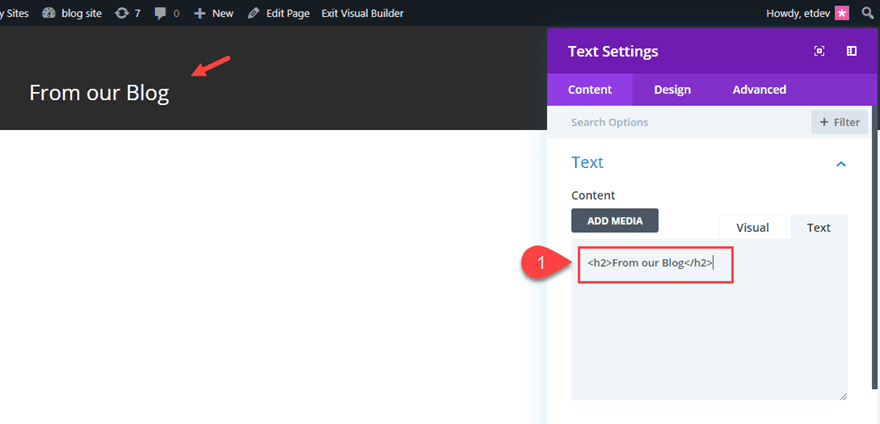
Then add a text module to the row.

Then update the following Text settings:
For the content, add the following h2 heading html:
From our Blog
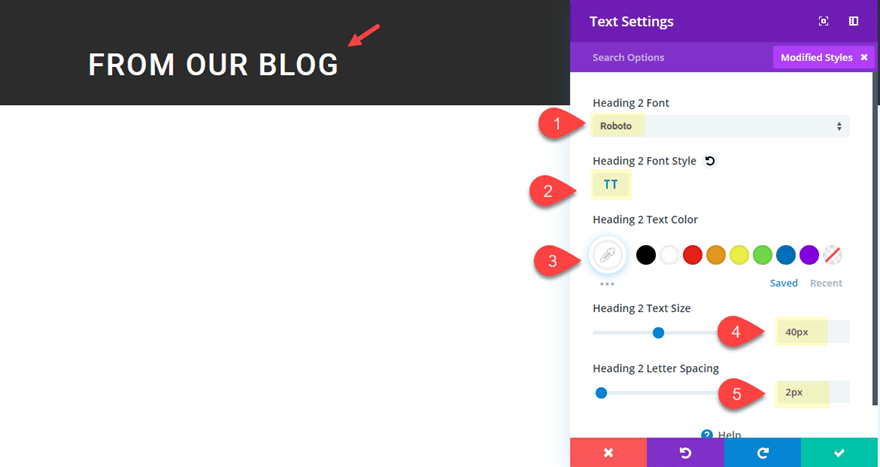
Then update the following text settings:
Heading 2 Font: Roboto
Heading 2 Font Style: TT
Heading 2 Text Color: #ffffff
Heading 2 Text Size: 40px
Heading 2 Letter Spacing: 2px
That takes care of the heading for our layout. Now it’s time to create the rest of the layout using a specialty section.
Creating the Specialty Section
Using a separate specialty section for the rest of the layout will allow us to have a dedicated sidebar to the right for our scrollable widget area. Plus, it will allow us to size and style our rows on the left side of the section separately from the sidebar area.
Go ahead and add a specialty section with a right-sidebar column layout as follows:

Then add a one column row to the section.
Before adding a module, let’s update our section and row settings.
Customizing the Section settings
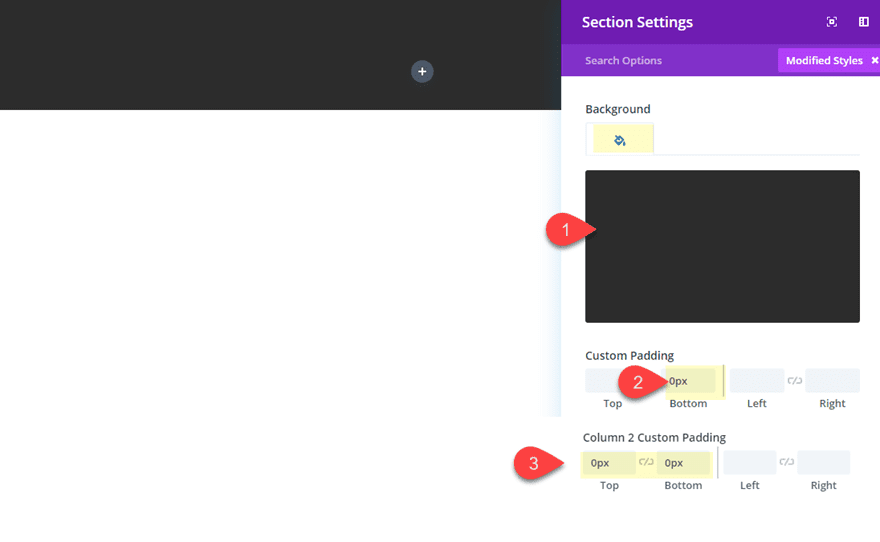
Open the settings for the specialty section and update the following:
Background Color: #333333
Gutter Width: 2
Custom Padding: 0px top
Column 2 Custom Padding: 0px top, 0px bottom
Customize the Row Settings
Next open the row settings and update the following:
Height: 640px
Top Border Width: 8px
Top Border Color: #444444
Bottom Border Width: 8px
Bottom Border Color: #444444
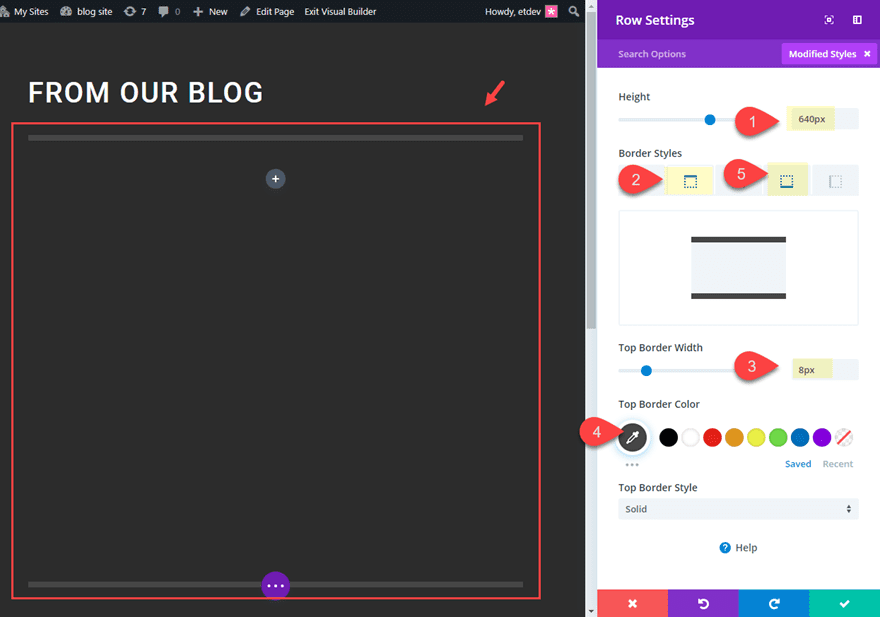
The custom 640px height is given to match the height of the scrollable recent posts widget area we will be adding to the sidebar of our specialty section. this will make sure the two will have the same height for a more aesthetically pleasing design.
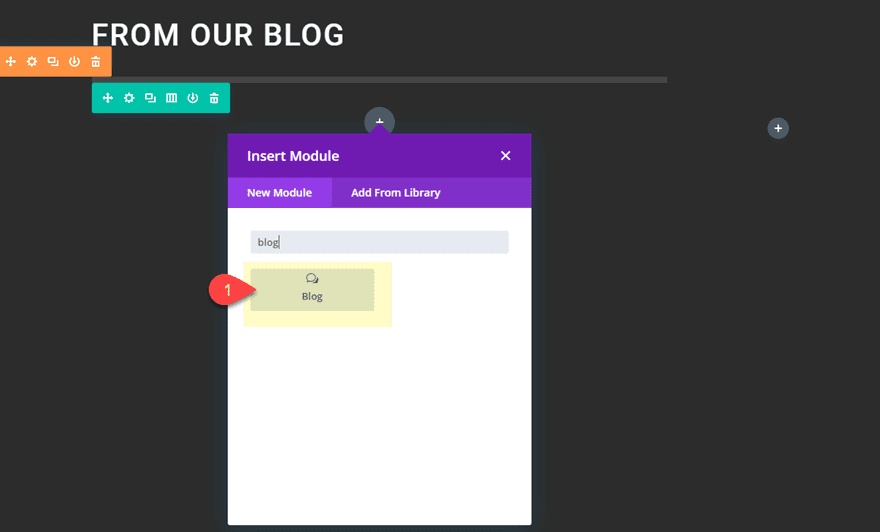
Adding the Blog Module
In the one-column row on the left, add a blog module.
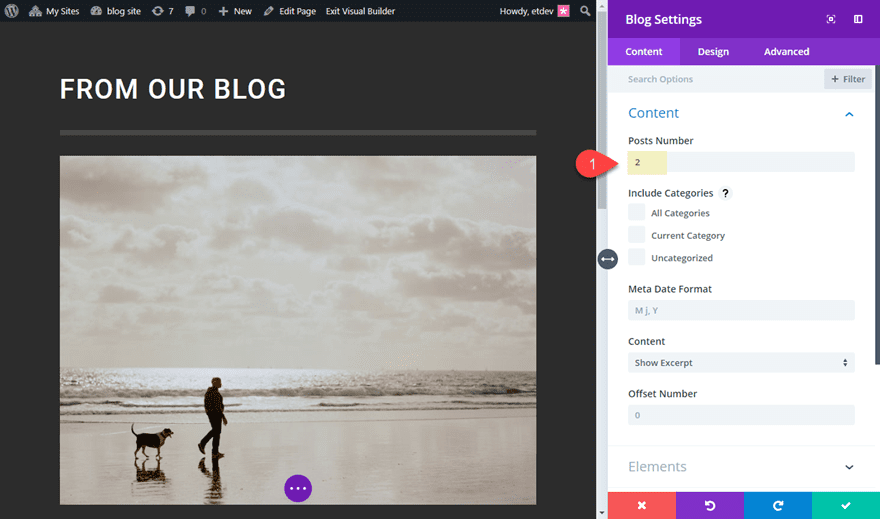
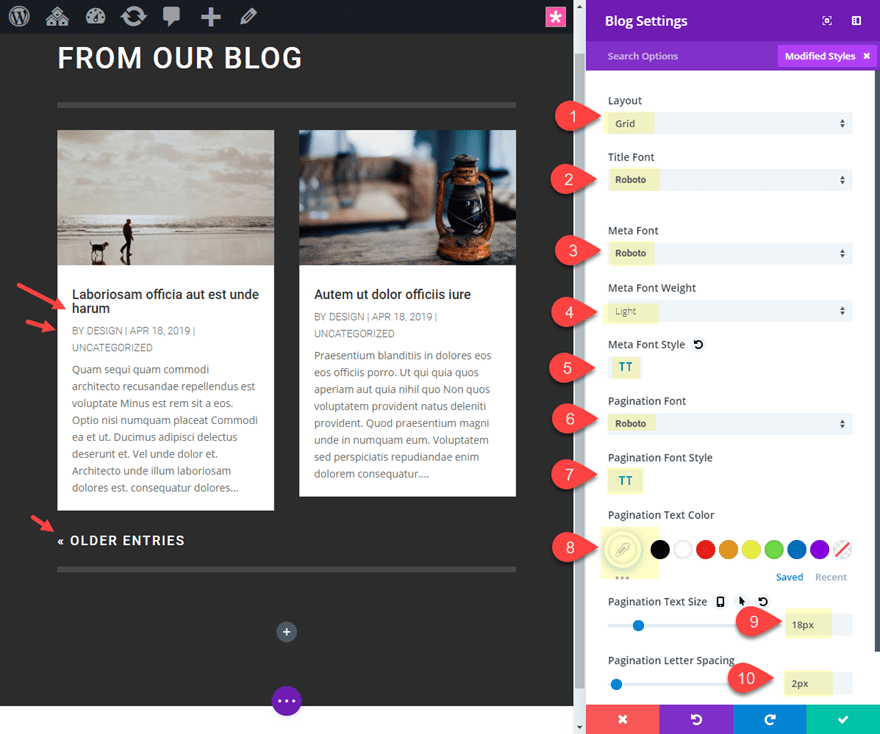
Then update the blog module settings as follows:
Posts Number: 2
Layout: Grid
Title Font: Roboto
Meta Font: Roboto
Meta Font Weight: Light
Meta Font Style: TT
Pagination Font: Roboto
Pagination Font Style: TT
Pagination Text Color: #ffffff
Pagination Text Size: 18px
Pagination Letter Spacing: 2px
Adding the Scrollable Recent Posts Widget Area
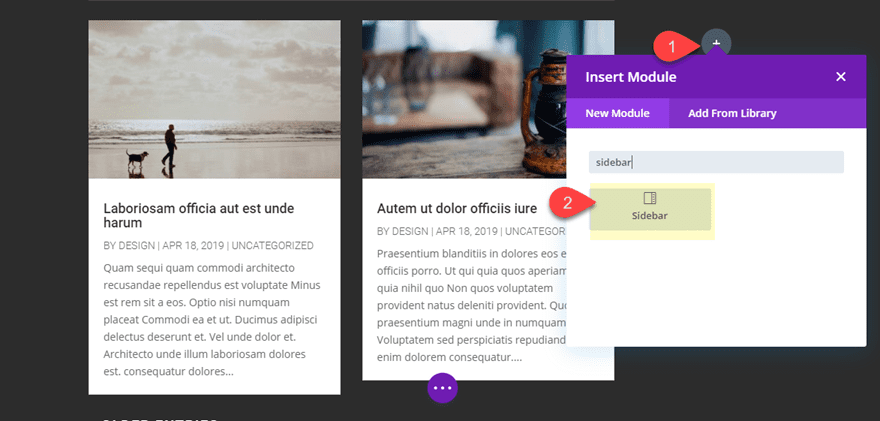
Finally, it’s time to add the scrollable recent posts to our layout. To do this, add a sidebar module to the sidebar area of the specialty section on the right.
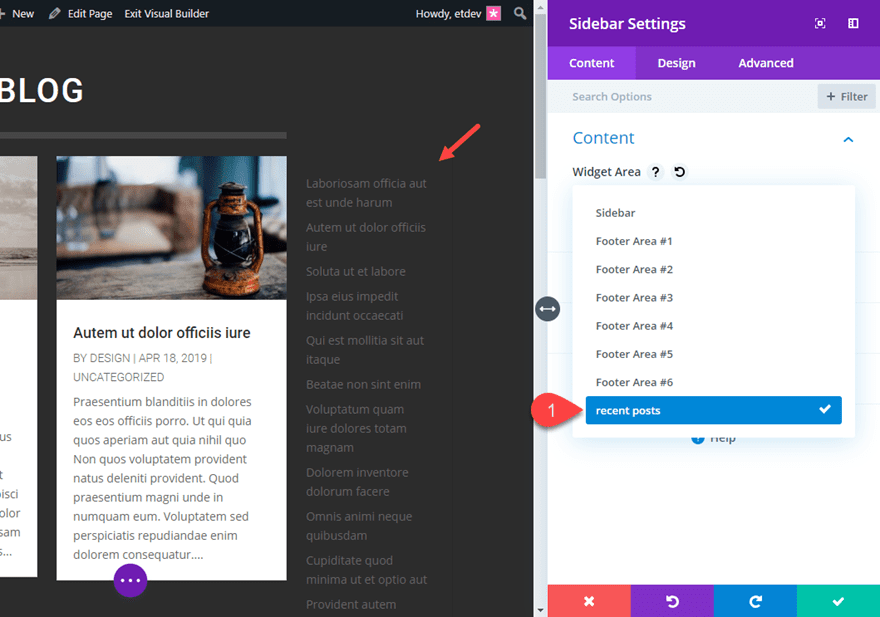
Then select the “recent posts” widget area you created earlier by selecting it from the Widget Area dropdown under the content tab.
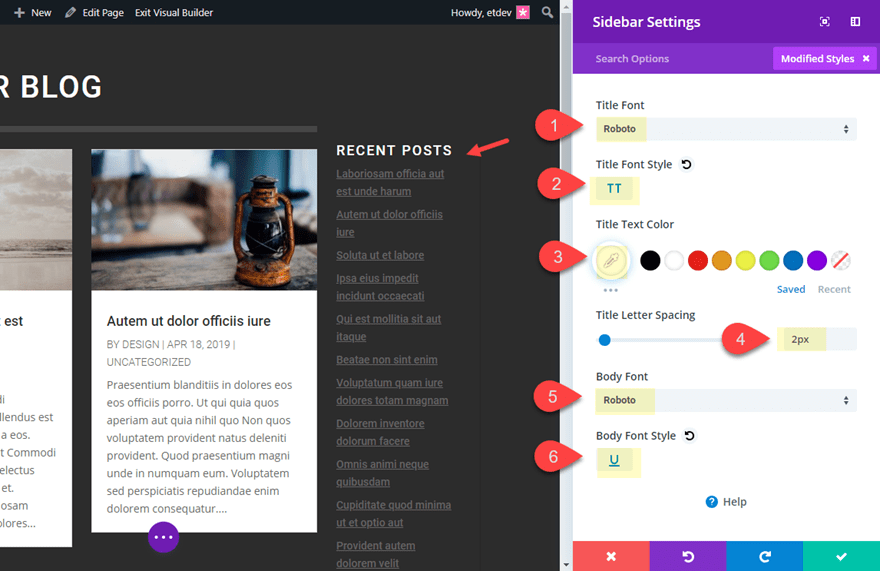
Then update the Title and Body text design as follows:
Title Font: Roboto
Title Font Style: TT
Title Text Color: #ffffff
Title Letter Spacing: 2px
Body Font: Roboto
Body Font Style: Underline
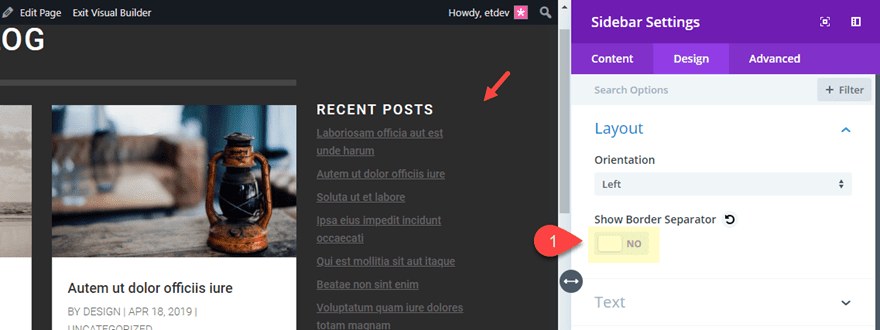
Next, hide the border separator as follows:
Show Border Separator: NO
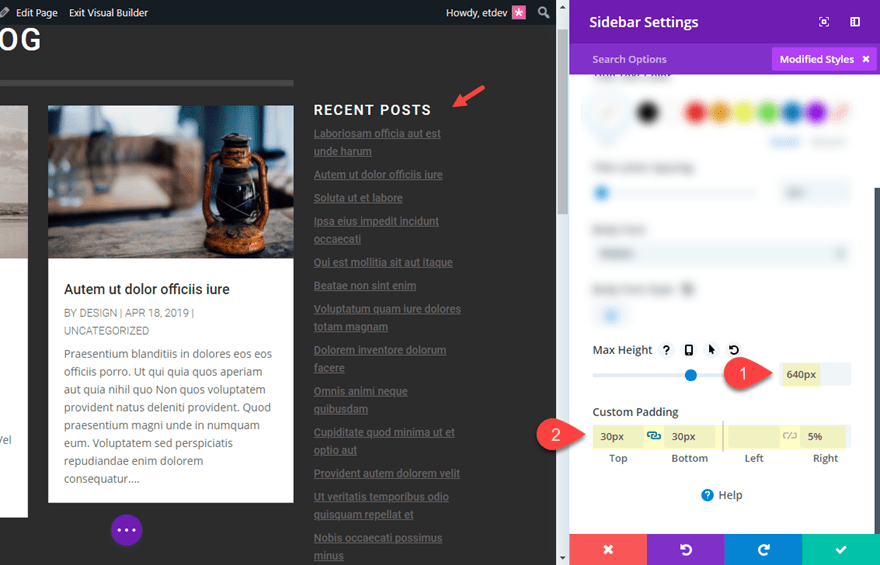
Then give the sidebar module a max height and custom padding as follows:
Max Height: 640px
Custom Padding: 30px top, 30px bottom, 5% right
The 640px max height matches the 640px custom height given to the adjacent row.
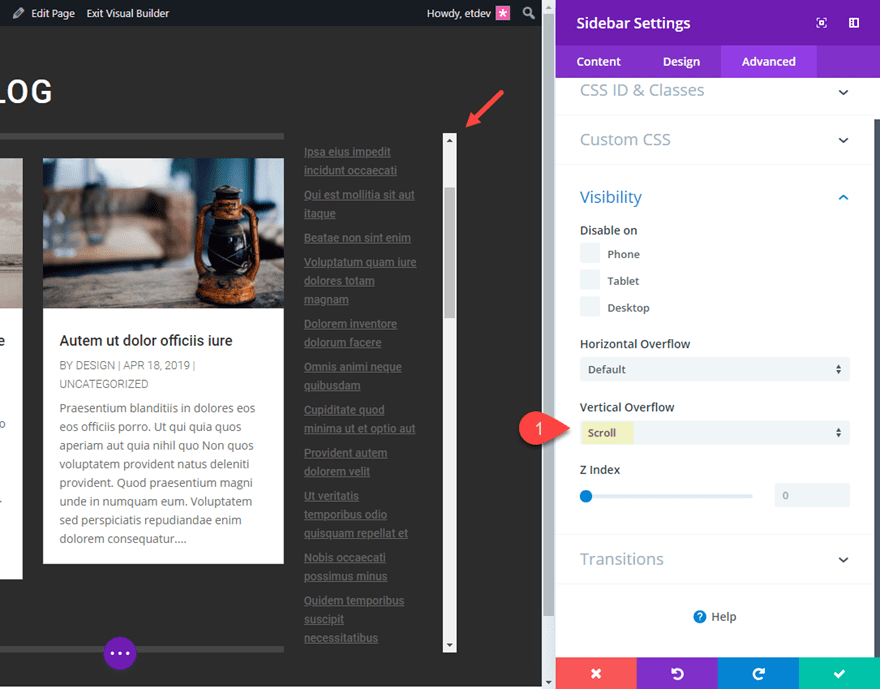
Now that we have given the sidebar module a max height of 640px, we need to set the vertical overflow to scroll in order to get our scrollable functionality. To do this, go to the Advanced tab and update the following:
Vertical Overflow: Scroll
Final Result
That’s it! Now let’s check out the final result.

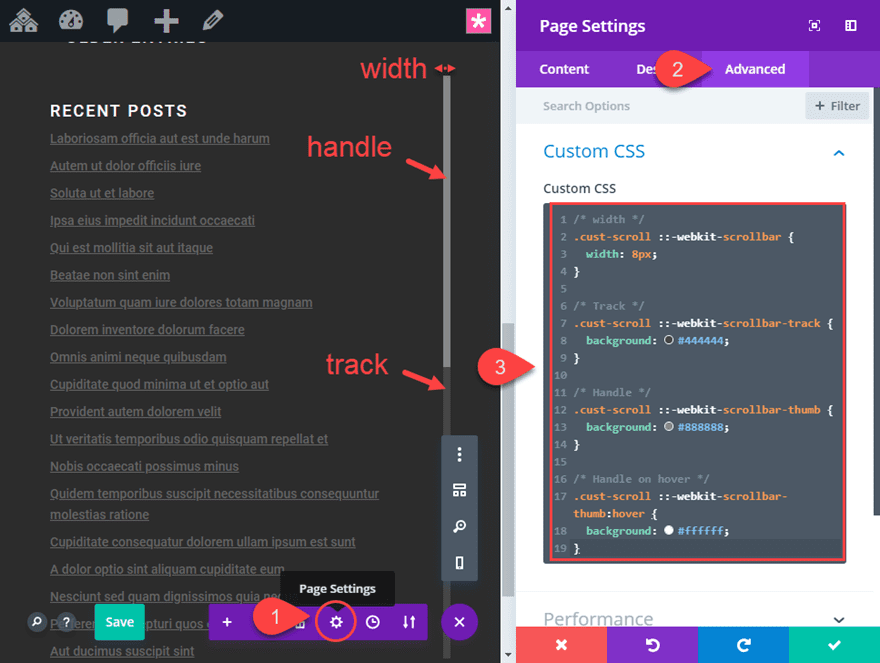
Bonus Option: Adding Custom CSS to Design Scrollbar (not supported by all browsers)
Styling a scroll bar in WordPress is kind of a pain if you want cross browser support. So in most cases, you will want to leave it to the browser’s default styles and call it a day. But if you do want to customize the scroll bar to match the design of your page, you can add some custom CSS. Unfortunately, the browser support is limited to browsers that support ::webkit prefixed CSS properties (basically just Safari and Chrome). Here’s how to do it.
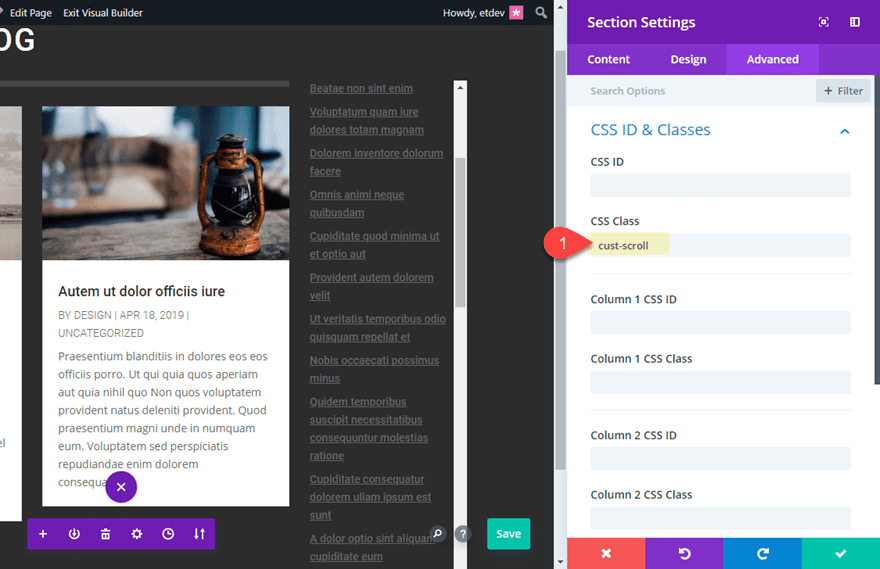
Open the settings of the specialty section and add the following CSS Class:
CSS Class: cust-scroll
Then open the page settings modal and add the following custom CSS to the page.
/* width */
.cust-scroll ::-webkit-scrollbar {
  width: 8px;
}

/* Track */
.cust-scroll ::-webkit-scrollbar-track {
  background: #444444;
}

/* Handle */
.cust-scroll ::-webkit-scrollbar-thumb {
  background: #888888;
}

/* Handle on hover */
.cust-scroll ::-webkit-scrollbar-thumb:hover {
  background: #ffffff;
}
This changes the width of the scroll bar to 8px and adjusts the colors for the track and handle. Feel free to experiment with more designs and colors on your own.
And in case you were wondering, the fallback for other browsers will be the browsers default style for scroll bars.
Final Thoughts
Adding vertical scroll to content does come in handy whenever you are wanting to give users the option to view more content in a confined space. A scrollable recent posts widget area is a great example of how vertical scroll can work really well. Of course, you can replace the sidebar module used in this tutorial with a text module and add vertical scroll to any content you want. The same customization will apply to any module.
In regards to styling the scroll bar, I’m sure there are other plugins or Javascript solutions that would give a more cross browser solution. If you know of any good ones, please feel free to share them with us.
I look forward to hearing from you in the comments below.
Cheers!
The post How to Design a Scrollable Recent Posts Widget Area in Divi appeared first on Elegant Themes Blog.